Why I love (and I mean LOVE) Container Gardening!

Leave a comment

Everyone who knows me, or has attended my container gardening hands-on workshops in the spring and summer months, is fully aware that I am nuts about container gardening. I love it. Even in winter as we stuff beautiful mixed evergreens into our pots to bring life and some color into the winter landscape – we are enjoying a form of container gardening.

Today, I am listing just some of the reasons why I love (and I mean LOVE) container gardening – and I think you should too:

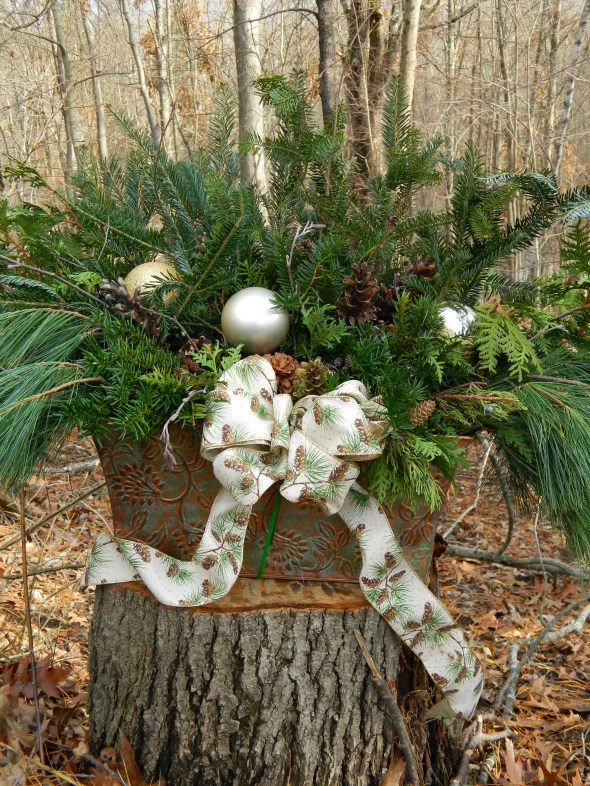
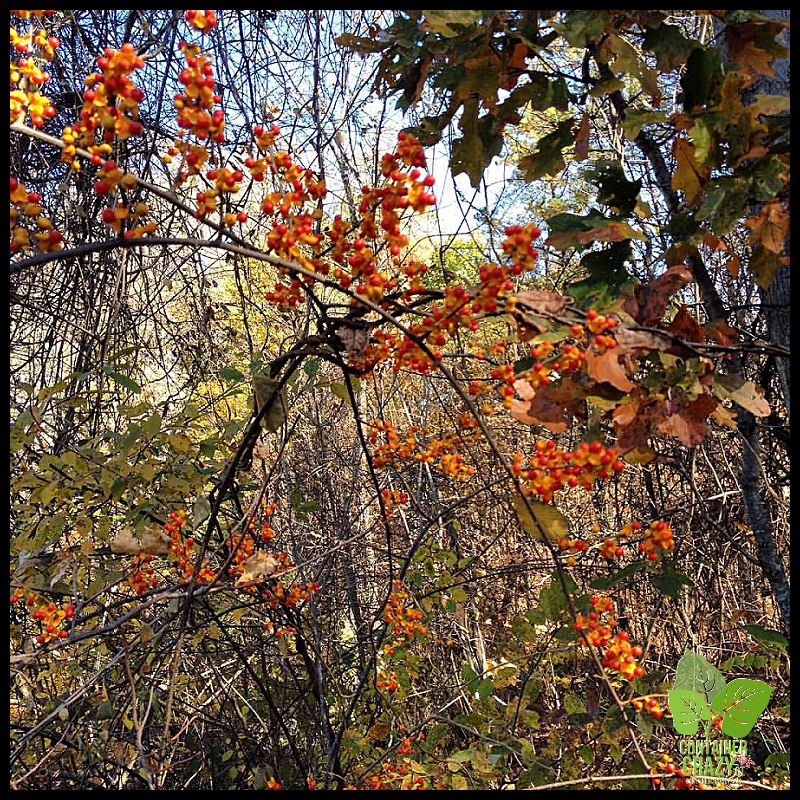
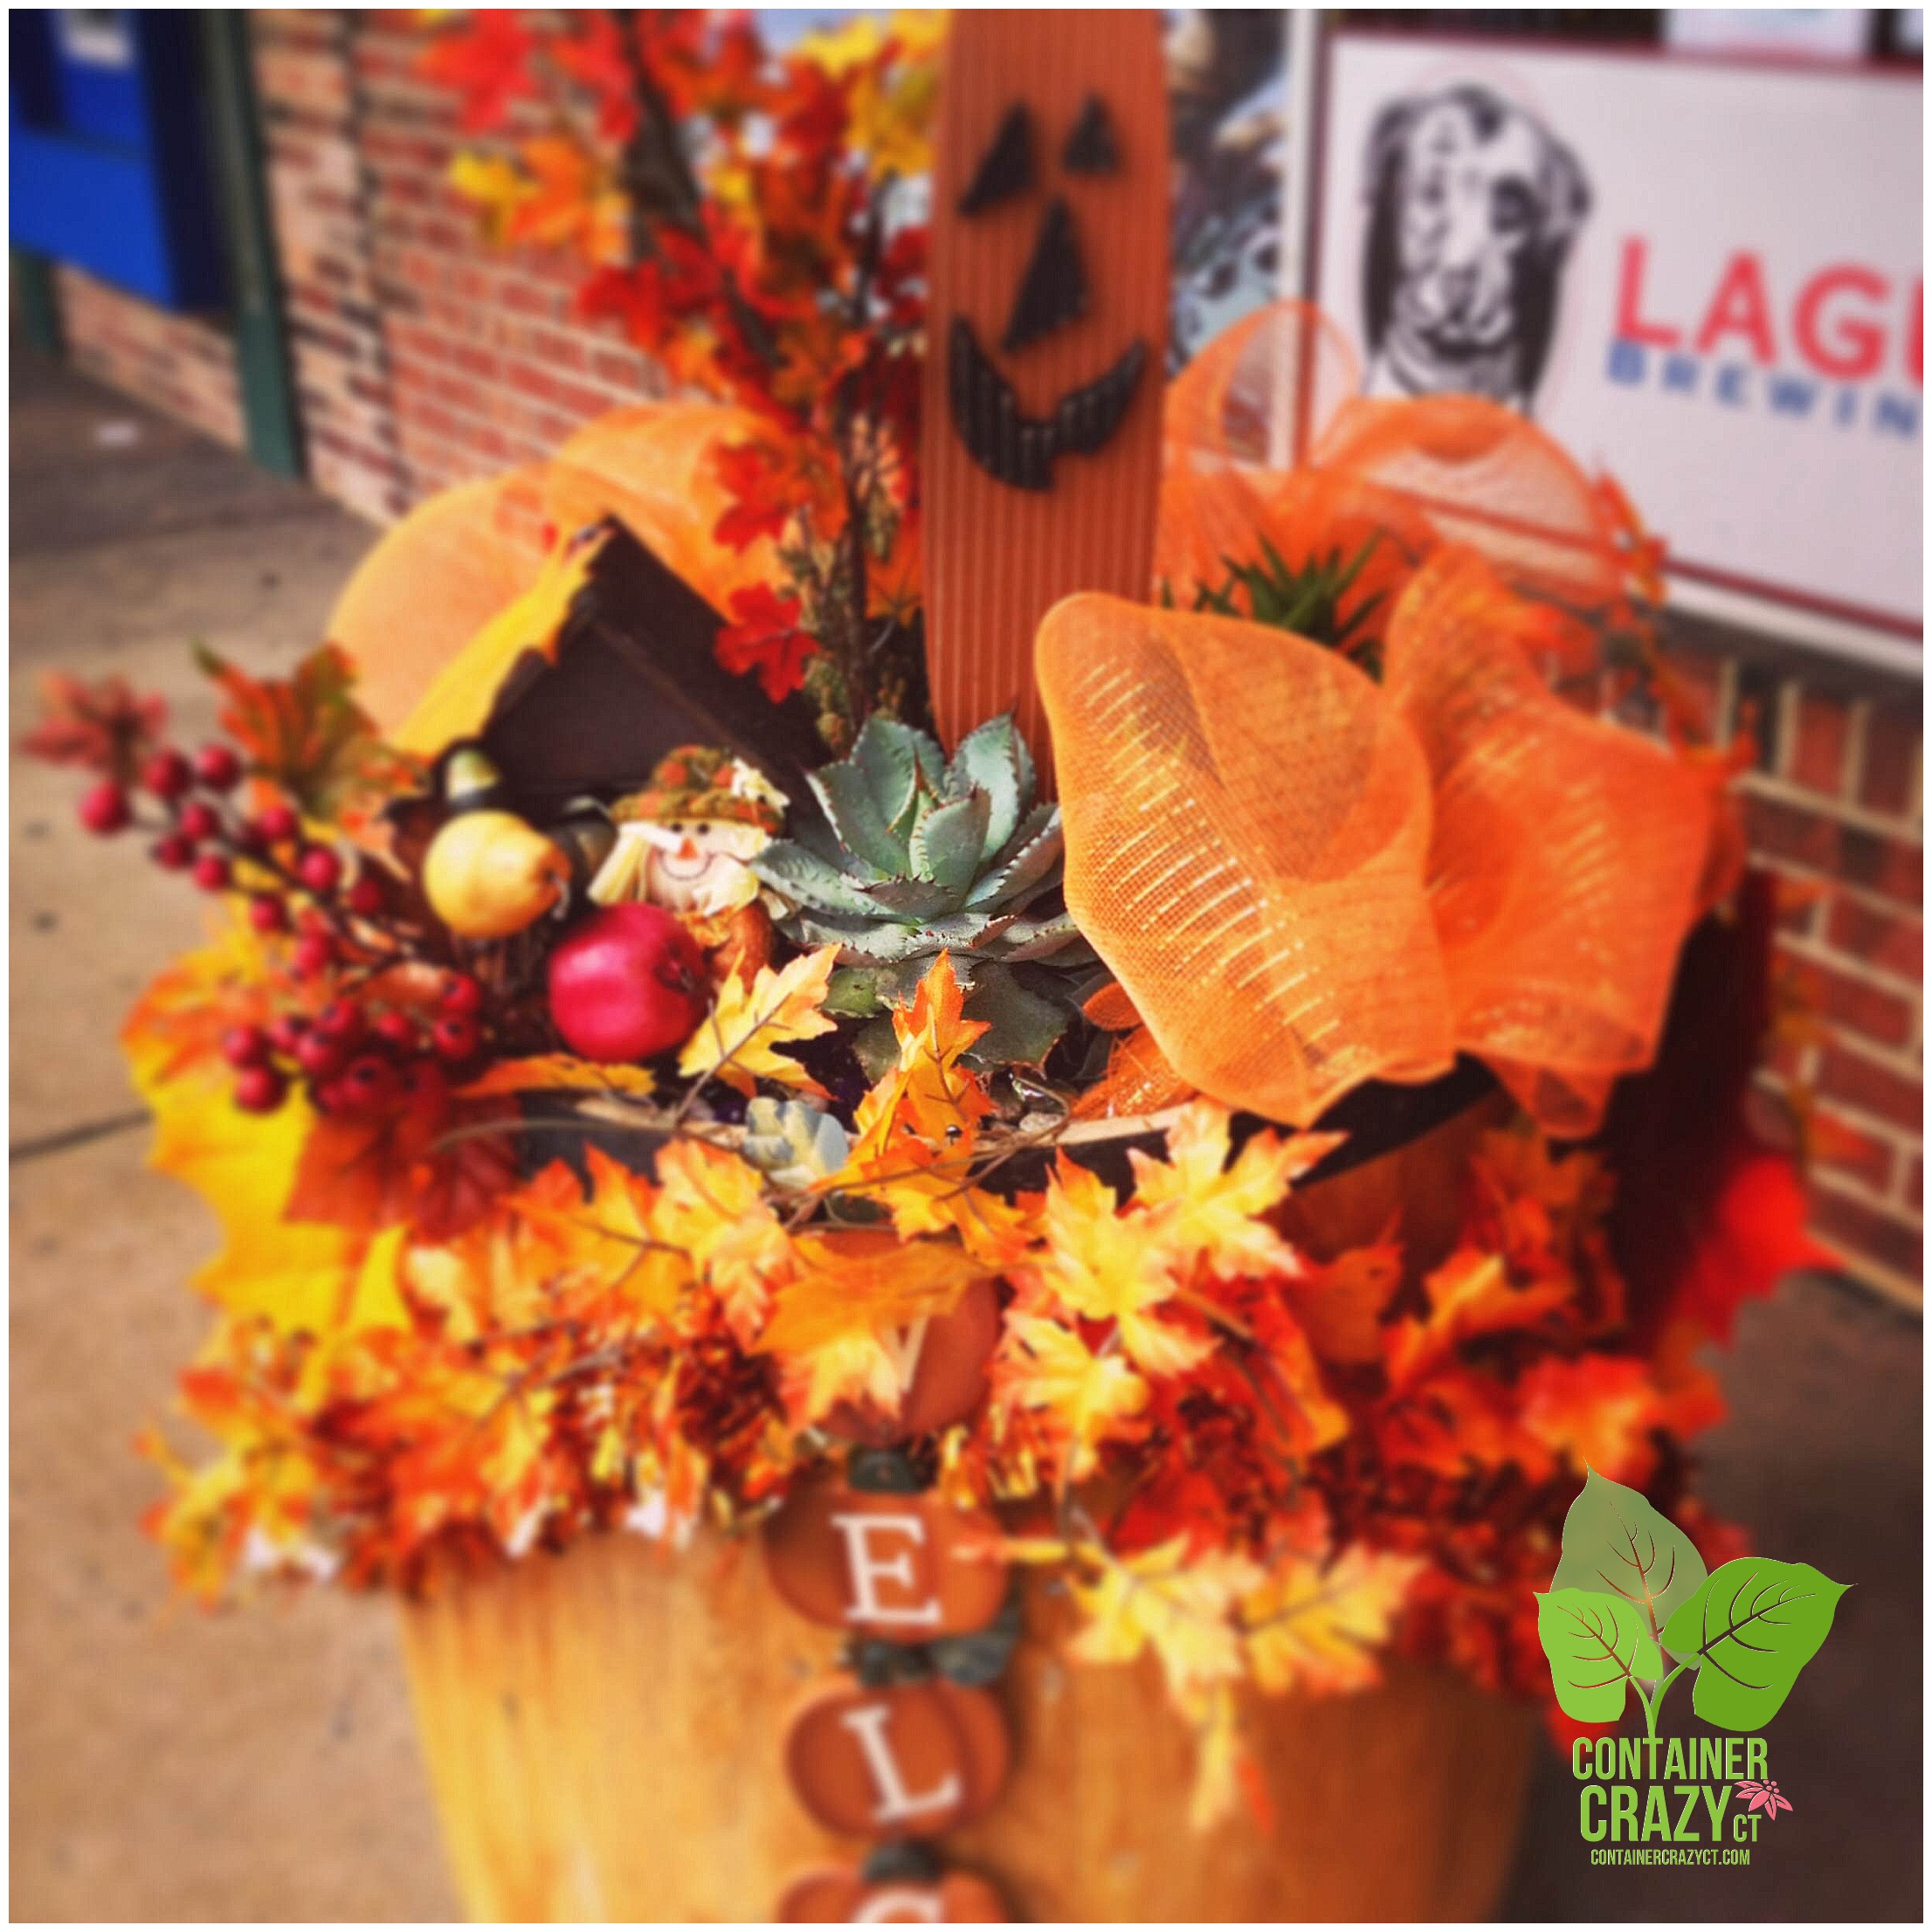
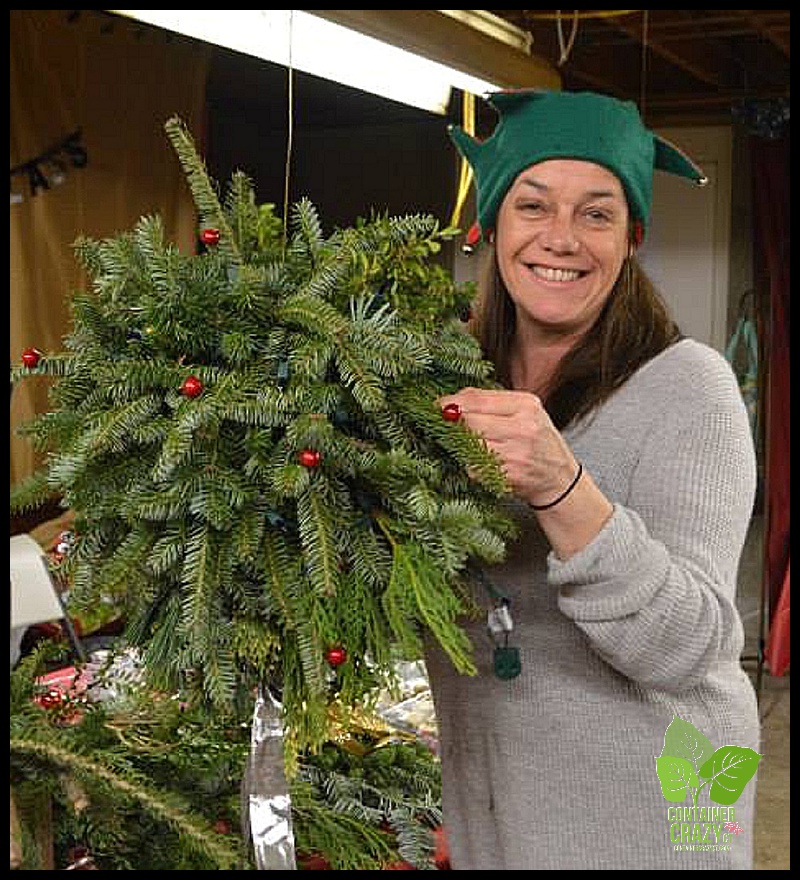
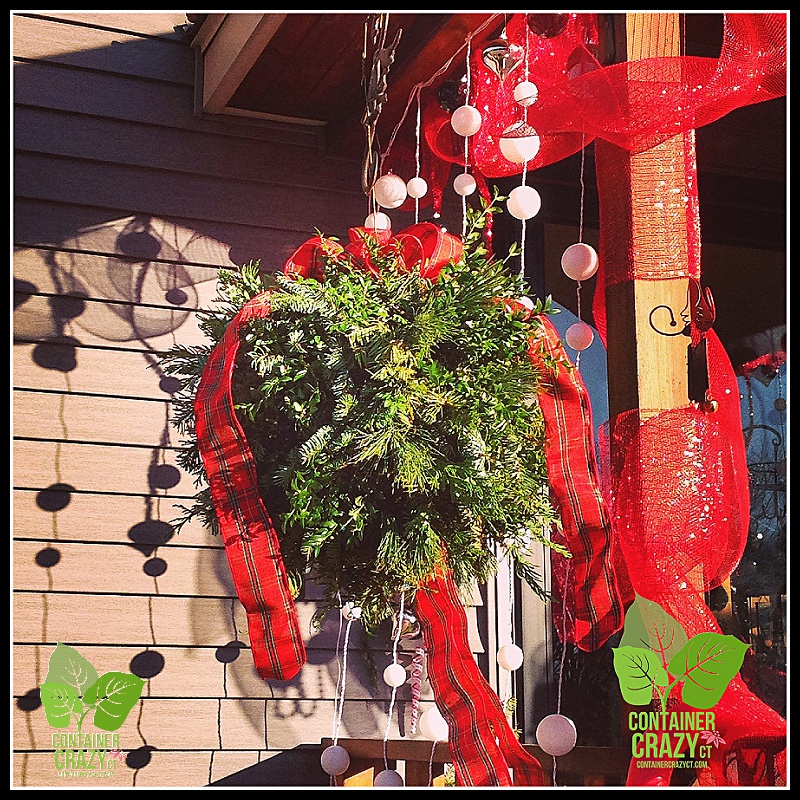
It is easy, fun, and fast – Provides instant gratification! Even in winter, stuff in some greens, add some berries, and voila – You have a beautiful container garden on your front steps to welcome your holiday guests.

Cathy T Winter Pot

A Beautiful Barrel Stuffed with Mix Greens and Decor for the Winter

Container gardening takes less space and energy than in-ground gardening does to achieve success. It is instantaneous and provides lots of color and life to your yard. Just watching the plants and its visitors is good for your health. It makes you pause to view it all.

It is okay to make mistakes – This is how you will learn about plants. Plants in pots are more forgiving. You may easily fix mistakes quickly by re-potting or re-positioning the container to suit the plants’ needs, or the decor look you are attempting to achieve outdoors.

Deer can not jump onto your deck or easily visit your patio (hopefully) to dine on your plants in the containers and patio pots, and groundhogs have a difficult time reaching them too. Nice!

Your pets enjoy them – Cats enjoy them for shade in the summer, and they like to hide behind the planted pots when observing the birds or checking out the yard from different areas.

Cathy Testa Container Gardens_0019

Cat inspects the bees buzzing into a Mandevilla bloom. Little coco bowls with succulents make nice little decor on table tops.

If you have dogs, they usually like to sit by plants in pots to rest and relax after playing in the yard. They are less likely to tromp thru big pots of plants which are up high or elevated versus a level big garden inviting them to run over it and everything in it, or dig there. Setting up a garden to be pet friendly is somewhat challenging compared to plants in containers where you can monitor your little furry friends near your entertaining spaces by you, your home, doors, and entrances. Just be sure to keep any poisonous candidates out of your pots if they are the curious eating types.

Plant caddies (trays with wheels) allows movement with a slight push of the pot anytime I want, or anytime the plant wants, to be relocated if it needs more sun or more shade, a better home to view it from, etc. That’s flexibility. You don’t even need to get your hands dirty.

It is instantaneous – which is important in today’s world. Most of us want to enjoy beauty around us without too much time if we are busy with work and other fun things. Container gardening is quick, it is not too difficult to learn the how-to’s of Five Must Do’s by Cathy T – once you know them, it is simple and gratifying – and you end up being addicted.

You may use practically “any” plant – You are not so tied to your planting zones or rules because you are enjoying your plants for the summer season, you can use tropical plants and more. Don’t limit yourself to just annuals in the summer season, there are so many choices.

Drama is created with big and bold – Think different, big, unusual, and BOLD.  We like beautiful and showy backyards – and container gardening is a great way to achieve this BOLD look. Just one big plant which grows fast in a gorgeous pot will stop you and your friends in their tracks.

Copywrite Cathy Testa Concrete Planter

A HUGE container garden with showy tropical plants extends the season into Autumn (Photo Protected by Copyright)

You may create niches by grouping or staging various pots together. Potted plants will divide or connect spaces, they frame your view. It is an “extension” of your decor of your home and using some pots creates an additional room outdoors while entertaining your friends or being solo enjoying nature. The right pot can draw you out into your landscape to escape and veg’ out – something we all need to do more of, right?

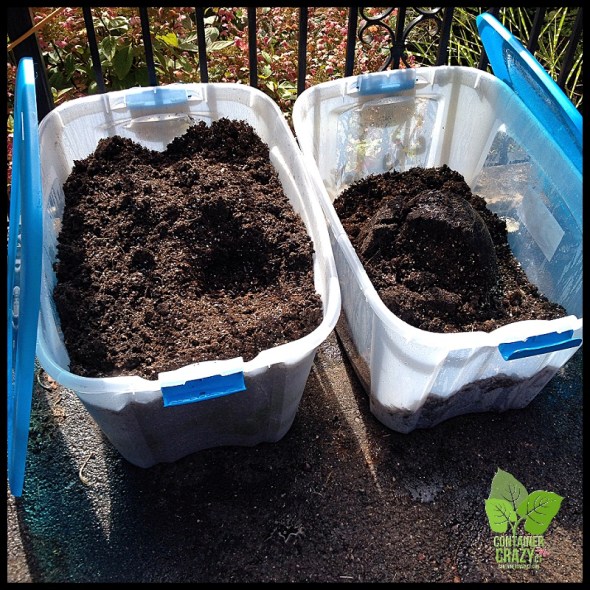
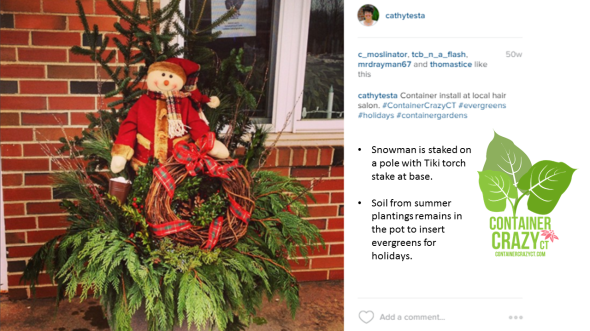
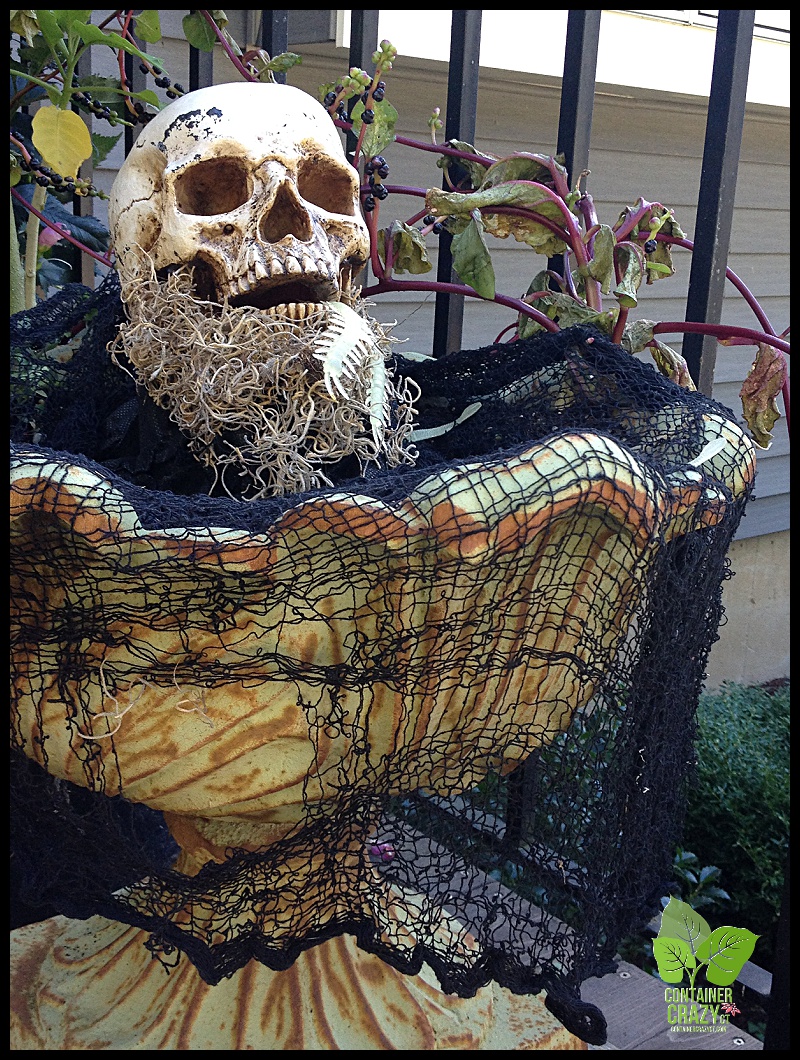
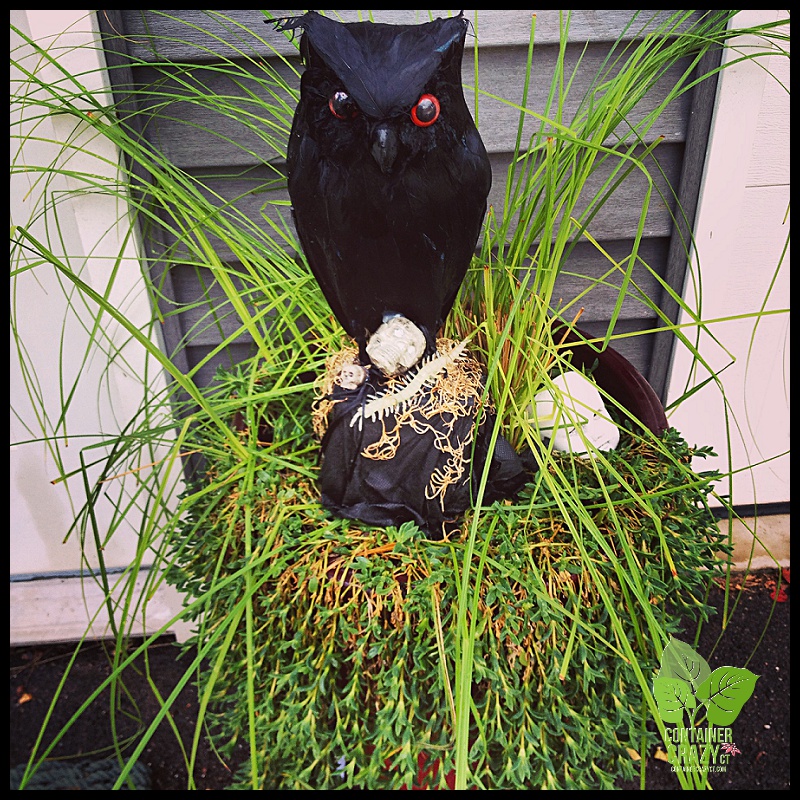
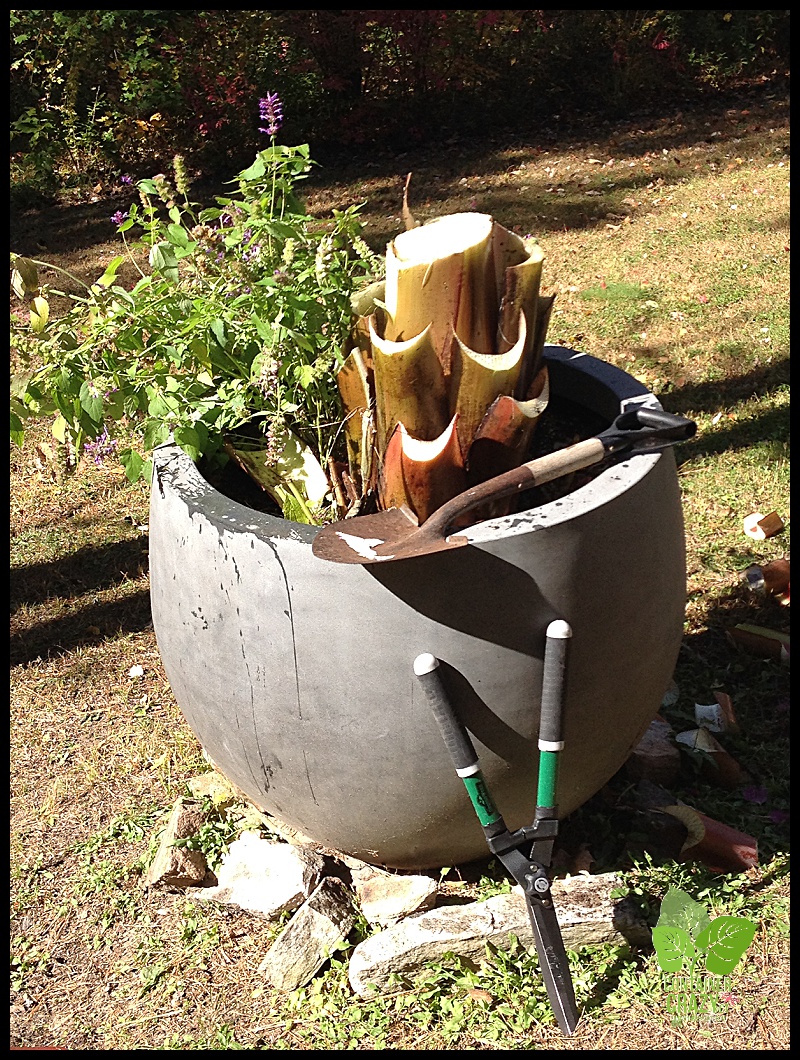
Winter container gardens with evergreens dress up your outdoor space too – two pots by an entrance with greens, berries, golden or red sticks, is a way to say enter here and enjoy the holiday party. In Autumn, you extend your outdoor spaces with plants in pots that will remain until the first frost – they give so much those potted plants.

Not many bug problems or diseases in potted plants, and if there are any, you see them right away because your patio pots (and indoor house plants in pots) are usually near you. Potted plants have a more sterile environment as well, so the incidence of pests problems are less likely. If pests occur, the containers are easy to treat or quarantine.

If it fun to observe the cute visitors to your plants – hummingbirds, hummingbird moths, butterflies, bees, or even your mother in law admiring your patio pots! It helps your important pollinators – when you see bees visiting a flower, you will hear them buzzing as they go in and out to collect their nectar. It feels good to assist our little friends; we need them so lend them a hand by planting flowering plants in pots.

Bee on Turtle Head Cathy Testa

Bees enjoy a perennial (Turtlehead) flowers in a Container Garden

It helps your health – as you sit up close and personal enjoying your patio pots in your deck chair – you tend to relax, smell the aromas which calm your senses, and you take time to breath deeply – rather than think about all the weeds you have to pull from a garden bed. The distraction of admiring your potted plants in various mixed combination is a form of meditation which is very beneficial to your balance and harmony.

It is not too physically intensive, so if you have any issues with your back or knee problems, or digging in dirt in the ground with a heavy shovel is not your idea of fun, this type of gardening is for you. You may elevate pots or position them in a way for easy harvesting of veggies, herbs, and other goodness. Right outside your door – kitchen container gardens rule.

Cathy T Containers_0012

A pot on the deck by the pool – two pots say walk here to lawn area, etc.

You can hide problem areas in your landscape, or place beautiful container gardens on your steps or patio to utilize pots as amazing focal points, or test the scale of a plant to be planted in the garden by putting a pot there first. Plants in pots are functional art – they say, “Go here, step down there, look here, and stay here to enjoy life and nature.”

Mojito Ele Ear Cathy Testa-001

The amazing colors and patterns from an elephant ear – Colocasia ‘Mojito’

Textures and/or colors to be added to the garden later are easily tried out by using plants of them in a pot in your garden first. If you are unsure what to plant in your garden, put a pot there for a while and contemplate the look and feel of the plants’ style, look, colors, etc.

Lastly, you can create containers of lush plants, strategically place them on your patio or deck, and drink a margarita – now that is my idea of gardening and reducing stress.

And let’s not forget – during the winter, you can admire all the beautiful container gardens and patio pots you have arranged and grown from last summer as you browse your own photos or ‘Pinterest Pages by Cathy T‘ and Instagram photos – This will help you get through the winter months when there is more snow on the ground than anything.

Container gardening and patio pots are part of life today for adding beauty all around. Add a rain barrel to the area near your pots in the summer to use natural resources to water them. Keep an empty big barrel by a greenhouse or garage door to fill with snow during winter, and take it inside to melt onto the soil of pots of dormant plants being sheltered for the winter.

We all will enjoy container gardening as much as I do. I hope…

Cathy Testa
http://www.ContainerCrazyCT.com
860-977-9473
containercathy@gmail.com


Anchoring Holiday Evergreens in Your Patio Pots

5 Comments

This morning I read a post about collecting evergreens for container garden decorations, and it reminded me of how I once got yelled at for taking cuttings of wild berried shrubs by a roadside. Long story short, check with homeowners, even if the property looks abandoned or vacant!

winter jun

Winter Evergreens Touched by Snow and Ice 

However, seeing the post referenced above, and considering the many times I’ve put fresh evergreen cuttings and stems into patio pots and container gardens this time of year for holiday decorations, I thought I’d share the following quick tips on the how to anchor the stems, cuttings, and branches into your pots or container gardens:

Use Last Year’s Soil

Mentioned many times at my workshops and container gardening classes, leave the soil mix in the pots when you disassemble your containers in the fall season. It makes the perfect anchor for inserting your greens in winter. It is a great way to extend the life of your soil.

ContainerGardenTakeDown_0008

Boil Some Water

If the soil mix in the pot is frozen or a bit hard from a frost the night before, pour very hot (almost boiling water if possible) into the soil or over the top. It will soften it up just enough to insert your greens. This can be a bit of a pain, but it works! This is when the soil was moist prior from rainfall or plants, but if the soil is new or dry, the opposite is needed – If you poured fresh dry mix into a pot, you will want to moisten it because it will freeze later and hold in your newly inserted evergreens and stems very well during the winter months.

Spray Foam or Florist Foam

I have not attempted this idea, but saw it last night when browsing Pinterest – and thought, ‘Hmm, perhaps useful.’ Spray foam (the type used for construction gaps and cracks in walls available in spray cans) was used in a pot to insert stems and branches. A test of this will be done – but my initial reaction was, “Will the foam come out after, so the pot may be reused again next season?”

Another technique is using green florist foam blocks in a pot as the anchor base (the type of foam used to create floral arrangements). However, I find this to be an expensive option, and reusing soil mix from the prior season works just as well.

Custom Order

Weight the Bottom

There have been cases when a very tall and narrow pot has the potential to topple over from winter winds. I happened to have some old weights from a weight set sitting in my garage, so I put a round iron disk 3 or 5 pound weight plate in the base of the pot before filling it with soil. It makes the pot very heavy, but let me tell you – it won’t budge during a winter storm. The same could be done by reusing old bricks or stones in the base, however, you will want to remove them come next season if you use the pot for plants as it may clog the drain holes, but in winter, no problem.

Snowman in Pot by Cathy T

Tiki Stakes

Attach Tiki torch stakes at the base of birch branches, thick stems, or poles and insert into the soil to attach a holiday themed decor on the top of the pole or branch. They are available in places like the big box stores, hardware stores, and online – It really helps to anchor and insert heavier items. (Note: It might be a little harder to find them in stores during the winter – get them during the summer months.)

Cathy T Winter Pot

Pot Types

And last but not least, remember not all pots can remain outside – they must be tough enough or made of material to withstand the winter conditions (e.g., cast iron, double sided pots, wood, hypertufa, tin, metal, or frost free pots). See my Page on Pot Types.

Cathy Testa
http://www.ContainerCrazyCT.com
860-977-9473
containercathy@gmail.com

Don’t forget – Container Crazy CT has Holiday Gift Cards Available!
Email us today to get your’s in time for the Holidays.

Holiday Gift Cards and New Workshops

Leave a comment

Gift Cards and New Workshops

Hello everyone,

‘Tis the Season’ to get started for your upcoming holiday fun – So, here’s a heads-up on new items and activities I am super excited to share with you today. Container Crazy CT has new workshops being offered in 2016, gift cards available for the holidays, and more.

New Gift Cards

Container Crazy CT has new “Gift Cards” available for purchase. They are redeemable towards workshops, onsite consultations, container garden gifts, or seasonal plants. Perfect for the friends and family members in your life who enjoy DIY classes, plants, gardens, containers and art fun. The card has a beautiful holiday theme cover with a colorful container garden photo.

Greet Card Gift Card

A beautiful card with container garden photo

Returning Guest Artist

Laura Sinsigallo of timefliesbylauralie is returning as a guest speaker in 2016. We had such a wonderful time learning how to make her unique and eclectic wind chimes the last time she was here and she enjoyed teaching our group. As you know, Laura Sinsigallo has many talents from paintings to cute figurines for special holidays – she is a very creative person. Her program will be in April 2016 and the special Art Work to be made in class will be announced very soon.

Laura Sinsigallo with her painting - Out guest artist in April

Laura Sinsigallo with her painting – Out guest artist in April

Floral Design – New!

Mandy Mayer of jemshorticulture.com will be our new speaker at our 2016 workshops. I am so excited to have her join our list of guest artists. She designs beautiful bouquets and floral arrangements for weddings and special events. Her business is called “JEM’s Horticulture and Floral Design” located in Stafford Springs, and you won’t want to miss this workshop. We plan to have her program offered in February 2016. Stay tuned for details.

Photo by M. Mayer, Floral Designer

Photo by M. Mayer, Floral Designer located in Stafford Springs, Connecticut.

Kissing Ball Class

The first class is full, the supplies are ordered, and the workshop space is being adorned! So excited to have NEW and REPEAT attendees coming. If you were unable to sign up for this class, mini workshops are offered during the week following the first workshop date of 12/5. And don’t forget to bring your own florist wire and decor to adorn your balls, wreaths, etc. Looking forward to seeing you!

Special Orders for Wreaths or Kissing Balls

If you would like a handmade wreath or kissing ball, please don’t hesitate to ask. And don’t forget to visit my Pinboards and Instagram pages for inspirational ideas. It’s time to get your jingle on.

See you soon,

Cathy Testa
Enhance Your Outdoor Surroundings…
860-977-9473
containercathy@gmail.com

Beware of Bittersweet in Your Autumn Decorations

4 Comments

We often don’t consider the impact of grabbing something from the woods to add to our Autumn decor this time of year, so if you weren’t aware of the potential spreading of this highly invasive plant, beware of bittersweet.

I spotted bittersweet twined around some branches in the woodlands by my home, and took a quick photo yesterday. It is not difficult to spot. The yellow and orange coloring stands out in the landscape especially as other trees begin to loose their leaves.

Bittersweet_0001

Asian bittersweet, also known as Oriental bittersweet (Celastrus orbiculatus), is a non-native plant, invasive and listed on Connecticut’s Invasive Plants list.

Chokes Off Other Plants

Bittersweet climbs by twining around trunks of trees and other branches. It can strangle its host over time. While the colorful berries are easy to spot, the leaves may have fallen from the plant by the time you spot the berries in Autumn, which is the case at my home – Thus, distinguishing this species from the American bittersweet (Celastrus scandens also used in fall decor) may be challenging. American bittersweet is said to not be as much as a problem, but it can quickly grow to 20-30 feet long or more, so you decide. Both types can and will usually attach to another plant or structure.

Leaves are Variable in Shape

Oriental or Asian bittersweet leaves are variable in shape (egg-shaped, oblong, round, tapered, etc) so distinguishing it from American bittersweet may be a little confusing upon a quick glance if you get tempted to take some for your decorations, but I would suggest using caution either way. Oriental bittersweet plant grows well in shade so you will find it embedded in woodland areas or around branches of native shrubs. Its one of those plants that will find a way to continue growing even when you tear it out by its shallow roots because every little piece left in the soil or torn pieces will grow more shoots.

Birds and Humans Move Them

Birds also carry the seeds to other locations. When the fruit on this plant splits open, you see the yellow parts on the outer parts which reveal the seeds in the center covered in orange fleshy coatings. This is nature’s way of moving it around, but humans may unknowingly move it to their yard too when they attach it to grapevine wreaths to put on the doors in the fall, or take it inside to put on the table as a centerpiece coloring. After all, it can be found for free in the wild because it is invasive and usually easily spotted. If you decide to use it in the home, be sure to dispose of it in the trash and not in your compost.

How Did It Get Here?

That’s a long story – which you may read about here: Untangling the Twisted Tale of Oriental Bittersweet by Peter Del Tredici. You may wonder how it gets to your yard – and one way is by not knowing it can spread in the pieces you take away from the woodlands. This is one of the cases where using fake plants is better.

Cathy Testa
http://www.ContainerCrazyCT.com
containercathy@gmail.com


Ways to Decorate Containers for Autumn and Halloween

1 Comment

Wait – Don’t put your container gardens and patio pots away too fast – They may be used in Autumn to serve as a place to add fall and Halloween decor for the month of October.

Autumn Installation for Store-Front

Autumn Installation for Store-Front

In the photo above, mesh ribbon, fake leaves, and various decor were used to fill the top of these barrels. Handy tools to get this done: Staple gun, wooden stakes, and creativity!

Kissing Balls_0021

This cast iron urn is wonderful because it can stay outside year round. In the fall, I took out the plants, left the soil, and added the black fabric webbing and a skull. The skull is attached to a square piece of Styrofoam by some heavy duty glue. First, a piece of black landscape fabric was used over the foam to hide the white of the Styrofoam block, then I glued the skull on top, added moss pieces and glow-in-the-dark worms. To insert it into the pot, use some larger type wooden skewers and push them into soil, then into the base of the square foam – simple and fun. And don’t forget, leave the soil in there when you disassemble this decor because it will be used to hold the winter evergreens when it is time to dress it up for the holidays in December.

Kissing Balls_0020

The plant on the side (vines) is from a climbing spinach plant which worked out nicely because it has black berries still clinging on – so it worked well with the black fabric webbing.

Kissing Balls_0015

Kissing Balls_0019

A spooky baby head is tucked under a Carex grass. Picked up this “baby” at a antique fair of all places. Knew I’d find a use for it.

Kissing Balls_0018

The Carex grass is perfect because it was flopping anyhow as Autumn arrived, and the Delosperma below, hanging over the pot, is still tough outside right now. So. I added a cool Owl using the same technique noted above: Square Styrofoam block, black landscape fabric over the block, glued the decor on and staked the owl with wooden skewers into the soil.

Kissing Balls_0007

Kissing Balls_0006

Kissing Balls_0017

On my Mum-mmy pot, I added some plastic creepy hands found in a Halloween shop – all I did was use heavy duty wooden skewers in each finger and pressed it into the soil.

Kissing Balls_0011

My Castor Bean plant got hit by frost and all the foliage was toppled over, so I decided to remove all the side branches, foliage and kept the main stem and branches on the plant, which I then covered with the fake white webbing found in Halloween shops this time of year.

Kissing Balls_0014

Kissing Balls_0013

After Halloween is over, I will chop the whole plant down, and save the soil in this big pot for stuffing with evergreens for the December holiday season.

Kissing Balls_0012

This is a photo of the spiny seed pods of the Castor Bean plant which I’m saving to use for next year’s plants – For more about this plant and its spooky features, read this post:

CASTOR BEAN POST

Kissing Balls_0010

A week before, I dismantled my big black pot – which kind of looks like a witches kettle, and removed the big red banana plant for overwintering. Well, I could not leave the pot un-decorated.

Kissing Balls_0008

Kissing Balls_0009

I took old stalks of perennials and glued mini skeleton hands on the top and tore some black landscape fabric to add, then just inserted them into the soil. The witches broom was added to keep you thinking – what else will be added to her witches brew?

After fooling around with all this Halloween fun, I got serious and planted 50 tulip bulbs into my big cement planter and enjoyed the rest of the warm day. Remember, your container gardens and patio pots can be maximized during special holidays before they are moved inside for the winter season.

Cathy Testa

← Back

Thank you for your response. ✨

How to Make Kissing Balls for the Upcoming Holidays

Leave a comment

Container Crazy CT offers several classes and workshops year-round where Nature with Art are combined.

There are several classes offered every season, such as the annual Container Gardening Workshop in May and a Kissing Ball and Holiday Creations Workshop in December.

And this weekend is the Storing Tropical Plants Demo where steps will be demonstrated on how to overwinter plants such as Canna, Elephant Ears, Angel’s Trumpets, and banana plants.

During the months between the spring and winter, special guests artists are invited to hold various hands-on style classes with the the mission to educate, share, and create – and most importantly, have fun with friends.

On the drop down menu under the “Nature with Art Class Programs” from the top of this blog, you will find descriptions for each workshop scheduled in 2015 and upcoming in 2016.

Starting Early – Kissing Ball Workshop Dates

We realize that many of us don’t like to start thinking about Christmas or the Holidays until at least early November, but when you have workshops to setup, some things need to be ordered in October so we are ready when December arrives to make our wonderful holiday creations. This is why places like Hobby Lobby are stuffed with Christmas crafts already, where you may find decor to add to your kissing ball or wreath at the workshop.

Kissing Balls_0004

KISSING BALL & HOLIDAY CREATIONS WORKSHOPS

The December upcoming hands-on workshops have been scheduled. Seats are limited for the first big workshop date of December 5th, so register early. We gather to make beautiful holiday creations with a mix of fresh evergreens and socialize. It is a fun day and a great way to make your own kissing ball just in time to place it on your porch or hang it in a hallway.

Kissing Balls_0003

See How It’s Done

Kissing Balls Shown on TV by Cathy T. See how they are really fun to make and require a bit of time, but they are beautiful and unique when hand-made with your special touches – and the fresh evergreens smell wonderful – not to mention, when you hang them outdoors, the birds like to perch on them – so pretty when snow is falling upon the kissing balls. You can find steps on how to make Kissing Balls on the web, or watch the video linked above, but when you gather with a group – it makes the whole process extra special because you are with a large group of enthusiastic attendees, the mechanics and amazing greens are here for you, and you learn from Cathy T and attendees with their own unique ideas, such as adding lights to the balls. If you live in East Windsor or surrounding towns in Connecticut, come on down and join us – we have attendees all the way from New Haven joining us annually.

Kissing Balls_0005

Open Studio Days and Mini Session

Additionally, there are other opportunities to craft away and make beautiful round kissing balls with a wide mix of evergreens to adorn your home indoors and out. An Open Studio week is offered where you may schedule your own appointment to make an evergreen creation at a time convenient for you. Lastly, we have a Mini Session on December 12th. We also make square or round wreaths, candle centerpieces, and mail box swags at these workshops – you pick the one you want to make.

How to Register

All you need to do is fill out the Contact Form. Cost is $30-$45 (+ sales tax) based on item you select to make, and pre-payment is required. Once you sign-up here, you will receive the 2015 price list and details with instructions. Location of the workshops is East Windsor, Connecticut.

Kissing Balls_0001

CALENDAR OF WORKSHOPS

For a handy view by month, click on the CALENDAR menu.

An Attendee Listens to Cathy T's Instructions at the KB Workshop

An Attendee Listens to Cathy T’s Instructions at the KB Workshop

ARTISTS ARE INVITED TO TEACH

Artists are invited to teach and a page shows the Featured Artists for the upcoming season. If you are an artist utilizing any aspect of plants, nature, or the environment in your designs and would like to introduce your product along with DIY instructions for Container Crazy CT’s attendees, please contact her at 860-977-9473 or containercathy@gmail.com to arrange a date and discuss your ideas.  All classes are taught by professionals and artisans with years of experience to share with the interested attendees.

We hope you will join us.

Cathy Testa
ContainerCrazyCT
860-977-9473
containercathy@gmail.com

← Back

Thank you for your response. ✨

Watering your Container Gardens and Patio Pots on Very Hot Days

4 Comments

During my Container Garden Workshops, held in May every season, I go over watering tips. It is a science and an art – and folks get a little concerned about how to water. One of the best tips is to stick your finger into the soil a few inches down or up to your knuckle, and if it is moist AND the plants look fine, you are probably okay. If the soil is dry and it’s a very hot summer day, it is time to water.

However, we are now in the month of August, and the soil in your patio pots may be a little harder/firmer, the plants may have consumed the soil mass somewhat, and this month can be one of the hottest points of the season, thus our watering routine becomes a little trickier.

To make your plants last well into autumn, it is important to remember to water appropriately when we experience “very hot days” that are well into the 90’s – such as the past two days we just experienced.

Here are 10 tips for those types of hot days at the end of the season:

Join the Early Birds – Get up early to water, if possible. As soon as it is light enough outside to see (providing you are an early riser like the birds) – water your plants before the sun fully rises. On hot days, like we just had which were up to 90 degrees outside, as soon as the sun was above the tree tops, it got hot quickly. So out I went in my PJs to water. There are so many woods around my property, the neighbors did not get frightened, thankfully. If you are able to do the watering routine early, it will keep you cool, plus watering in the morning is usually best for the plants too. It enables the plants to take up what they need before the soil moisture evaporates as the day warms up.

Skip the Heavy Watering Can – Attach a watering wand to your garden hose and drag it to your container garden locations. It is way easier than using a watering can which requires constant refilling and carrying. Also, while you are at it, if you have any extra watering cans or water bottles, place them near your pots and fill them with water at the same time for the next day’s watering to save a step or water on the fly. Another good choice is installing a rain barrel on your deck or patio to capitalize on rain water harvesting to use for watering your plants. I like to recycle the big cat litter jugs as containers to hold water when I need to water container gardens not reachable by the garden hose. They are large and easily washed out before the first use.

Fill watering cans or recycled jugs and set aside to have next day for watering on the fly

Fill watering cans or recycled jugs and set aside to have next day for watering on the fly

Relocate the Plants to Shade – I actually did this on Tuesday; I moved a couple of my big pots to a shadier location because it was that hot out. It helps with water loss from the soil and the shade will cool the leaves of the plants. Use a hand-truck if you have one to do the moving of the pot in order to avoid injury to yourself. It may be a pain to consider moving your pots, but in my case, it was worth it for one or two.

Use Your Eyes – Look for any plants which are potentially distressed, as in weeping, leaning over, or have leaves which are dropping or wilting. They may be experiencing drought or lack of moisture in the soil. Treat those plants like 911 candidates. When we have high heat like this – go water them first because when moisture in the soil has reached a point where it cannot meet a plant’s need, the plant may die. In these situations, the plants cannot easily recover from their water loss. In the trade, this is known as a ‘permanent wilting point’.

Dip in the Pool – Not the plants but YOU if possible. Okay, perhaps this a luxury because you may not have a pool or the time before heading to work, but if you have a lot of patio pots and container gardens, make sure to take a break to cool yourself off too if you start to sweat profusely out there – I know I did even early on Tuesday morning. Make sure you are hydrated first, or take a break by going inside if you get too hot after visiting all your plants.

Capitalize on Patio Umbrellas – Open a few up if you have them near your patio pots to cast some shade above them. Even the most heat and sun loving plants will appreciate this on hot days like we’ve just had. Especially if it is very sunny out too. While most sun loving plants can take it – if we have a super heat wave, the shade of the umbrellas doesn’t hurt for a day or two.

Snip Off Scorched Leaves – If you have some leaves with dry brown brittle areas, or leaf scorch on the edges, use your “clean” sharp pruners and snip them off. No sense in having a plant expend energy on a bad looking leaf with damage. Plus, around this time of year, August, many plants may look a little tattered anyways, so do some cleanup if you can at the same time as watering.

Water Your Feet – If the sun is so hot, the surface of the deck or paved area where you may have placed some of your patio pots and container gardens is too hot to handle barefoot, water your feet as you walk around – it may not help the plants but it will help you stay cool and feels good. Kind of like your own watering treat!

Direct water to soil, not on foliage of plants

Direct water to soil, not on foliage of plants

Water the Soil, not the Leaves – One of the most important tips is to direct your watering wand or watering can to the soil, not the leaves. Sometimes if the hot sun hits a leaf surface with water droplets sitting upon them, it can magnify the situation and cause brown spots on your leaves from burning/magnification. Also, water sitting on leaves on humid days can lead to fungal problems or diseases. Showering the tops of your plants will not get the moisture penetrated into the soil mass where it is most needed.

Gazing Ball Cracked, Watch Out for Hot Days and Cool Water on Glass Decor

Gazing Ball Cracked, Watch Out for Hot Days and Cool Water on Glass Decor

Watch Out for Glass Décor – A gazing ball cracked in one of my container gardens when the cool water hit the hot glass surface on a very hot day while watering recently, and it, unfortunately, cracked. This was a first for me so maybe a bit of caution there for any glass décor on an extremely hot sunny days in your patio pots and container gardens.

A cart filled with tops of summer plants after the summer season is over

A cart filled with tops of summer plants after the summer season is over

By the way, if the soil is shrinking away from the sides of your pots – you may be under watering in general; the soil is too dry, or if you are watering a pot which has held the plants for several years (as done with many house plants), maybe it is time to re-pot it with new fresh potting mix soil for potted plants.

Old Potting Soil Is Hard to Rewet

Potting mixes cannot hold moisture well after several years and are difficult to get moist (rehydrate) again over time. If you see crust on the top of your soil, this is usually a sign it is time for an updated soil environment for the plants. The soil has become like an unusable sponge that just won’t retain water anymore, it is exhausted. Take the time to repot it – you will be impressed with the results.

Yellowing Leaves on the Bottom of the Plant Can Be From Ovewatering

Conversely, if the bottom leaves of your plants are turning yellow, this can be a sign of over watering. Overwatering is not better, there needs to be a balance. And if your plants are in a shady cool location, they may require less watering routines, such as every other day instead of every day for those in hot sunny locations. And of course, the type of pot can make a difference in rate of evaporation (e.g., clay is very porous and dries out faster, black pots heat up faster in the sun, glazed pots can get hot too, etc.)

Watering Draining From the Bottom for Hanging Baskets

Many references will say to water your pots until the water drains from the bottom, but I don’t agree on this necessarily for really BIG pots (approximately 25” or over in diameter with about a 2 ft. depth or deeper.) Big pots hold a lot of soil mass, it won’t drain from the bottom immediately as you are watering, like you would see with a hanging basket.

When watering your hanging baskets, watering until it drains from the bottom is needed because they dry out fast. For really big pots, you want sufficient moisture but drowning them is not the answer.

Allow the Soil to Dry Somewhat Between Watering – Let it Breathe

Also, another important note is you should allow the soil to dry between watering routines. There needs to be a balance because the plant’s roots need both water and oxygen. If the soil is constantly wet all day long, this can lead to problems, even root rot over time. Think wet feet in sneakers, not a good situation. Good soil mix specifically for container gardens and patio pots helps to provided the balance in the root area from the start of the season, which is one of the “Cathy T’s 5 MUST DO’s for Success“.

Bottom line, there is a ‘yin and yang’ to watering plants, but you will get it sooner or later – and more of this is covered every year in my workshops because it is something of utmost importance to my attendees and the plants in their beautiful container gardens.

As the fall approaches when the days start to cool and are shorter, the watering routine is reduced and eventually subsides. You won’t need to water every day as you have been doing in the summer months. Things will calm down and soon it will be the time to take down your container gardens.

Storing Tropical Plants Demo in October

By the way, my demo day on how to take down plants for winter storage is posted under the “Nature with Art Class Programs” on this blog’s menu bar. It will be held Saturday, October 17th, at 10:30 am to 11:30 am in the Broad Brook section of East Windsor, CT. You may sign up via the links above where you will find the “contact form” or by visiting my business Facebook page. Private sessions at your home are available also. The session is listed under the EVENTS. Just click to sign up.

Thank you,

Cathy Testa
960-977-9473
containercathy@gmail.com

P.S. Watch out for spiders – They seem to be hanging around quite a bit lately!

Spider Hanging Around on Faucet

Spider Hanging Around on Faucet

The “Don’t Do This” List for when you Plant your Container Gardens and Patio Pots

8 Comments

During my container garden workshops, I’ve seen some things attendees will do as they start to assemble their container gardens and pots. It is not intentional on their part. They are so excited to get started selecting plants and putting them into their container gardens after my talk that they will move quickly and do some little things I try to catch them on before they continue. It reminds me of things they should not be doing because it can harm the plants or make the container look unbalanced.

So, I decided to create this list – and will share it at my future workshops too. Here are the things you should not do as you put together your container gardens and patio pots.

#1) Do not fill the pot to the rim with soil mix.

Filling the pot with soil mix up to the rim of the container will cause the soil to spill out when watering, or the water might roll off the top somewhat. There should be about a 2-3” space from the top of rim to the top of soil line. If the water is not flowing well into the soil, it will not permeate down to reach the plants’ roots, plus it looks a little odd to have the plants sitting at the very top of the pot. Aesthetically, they are better placed a few inches down. Additionally, the base of the plants are somewhat protected if they are not exposed at the very top – reducing things like toppling over due to wind, etc.

#2) Do not press down hard on the soil after you have inserted the plants into the container.

Out of habit or belief the plants should be pressed firmly into the soil, I’ve seen attendees do this at my workshops. They will push down on the soil, sometimes very hard, after they inserted the plant into the pot. This is not a good idea because you are compressing the soil which may reduce the air pockets required for oxygen in the soil to be used by the plant’s roots. Unless the plant is very top heavy or was root bound (thus a little weighty on the bottom), avoid pressing down hard on the top of the soil after planting. If you need to press, do so lightly and gently. You don’t want to smash the roots or crush the base of the plant by pushing down hard onto the soil.

Dont Do Photos for Blog Post3

#3) Do not grab the plant by the leaves and tug it from the starter pot.

When you take the plant out of its growing pot to put it into your container garden, use one hand to place over the soil at the stem base, and the other hand to turn it over carefully so it slides out of the growing pot. Try to not pull or tug at the plant by its leaves or stems. If the plant has been growing in the pot for a while, it may not slide out easily. Squeeze the growing pot a little to loosen it up or roll it gently on a table. Conversely, if the plant has been recently potted up in its growing pot, the soil may fall away from the root ball as you take it out because the roots have not grown into the new soil yet. Be careful to not damage the plant or its root system as you remove it to put in your container garden. If the plant is extremely root bound, and it is impossible to remove it from the starter pot, cut the pot at the bottom about 1” from the base to remove the closed end of the pot, and then push the plant’s root ball and soil through to remove it. A Hori-Hori garden knife or a razor knife works well for the cut.

Dont Do Photos for Blog Post 2

#4) Do not put a plant with circling roots directly into the container garden.

When roots are tightly circling around the root ball, this is referred to as girdling. The plant has been in the growing pot for a while, and the roots have nowhere to go except to encircle the root ball as it hits the sides of the inner pot. Do not put plants with tightly bound girdled roots directly into your container garden without first detangling the roots by hand if possible. If the roots are so tightly bound (really tight like they are hard to pull away or tease apart), you may use a clean sharp knife or pruners to cut them apart by cutting here and there. The roots need to be released, so to speak, to move freely and easily into the new fresh soil of your container garden.

Dont Do Photos for Blog Post

#5) Do not put the plants into bone dry potting mix.

When you container garden, you should lightly moisten the soil mix before you put your plants into your container garden or patio pot. Otherwise, the moisture in the starter pot will be drawn into the dry soil in the container garden thus taking it away from the plant’s roots. If the soil mix is dry, use your watering wand to moisten it – the key is to moisten, though – not to waterlog the soil, or turn it into mush. Just wet it a bit and then take your hands and mix it around lightly so the moisture is distributed. This will help the plants to adjust easily from their growing pot to their new beautiful soil environment.

Dont Do Photos for Blog Post4

#6) Do not put dry plants into the container garden without giving it a drink first.

It is a good habit to water your plants in their growing pots before putting them into your container garden or patio pots – preferably the night before, or the morning of, or at least a ½ to 1 hour before you assemble your container garden if its soil is “bone dry” in the growing pot. Another tip – be sure to water everything in after you finished assembling your container garden – but the key is, again – don’t over water. You want everything to settle into its new environment in a well-balanced slightly moist but not waterlogged state. Do not walk away before doing this final step. And direct the water at the soil line, not on the foliage if possible, with your watering wand or watering can.

#7) Do not put your plants in full harsh sun right away.

If your plants were grown in a greenhouse and not transitioned to the outdoors yet, you need to “harden-off” your plants. This term means to move the plants, or better yet, ‘transition’ the plants into the great outdoor sunlight carefully – otherwise, they may burn. Be sure to harden them off first if grown in a greenhouse by placing them in shade to part shade for a day or two. In many cases, hardening off is not required if the plants you purchased were already outside at the nursery. You will know if your plants were not hardened off first when you see the leaves turn white if you put them directly into sun – as is the case with houseplants or plants you overwintered inside, they must be hardened off first as well when you move them outside.

Dont Do Photos for Blog Post5

And finally, another tip – when I plant my container gardens, I tend to make pockets in the soil mix to insert each plant. In other words, I don’t fill the pot half way with soil (like I’ve seen done), place or position all the plants, and then backfill around the roots. I personally believe the pocket method makes the plants more comfortable and allows the roots to make easy contact with the new soil in the container. But that’s being a little picky perhaps – all I know is this method has worked for me for years.

To see photos of the above “Don’t Do’s”, please visit my Instagram feed or Pinterest boards where I show examples, or better yet, take one of my workshops in the future to learn and see hands-on more tips by ContainerCrazyCT.

Thank you,

Cathy Testa
860-977-9473 (cell)
containercathy@gmail.com

NATURE INSPIRED WHIMSICAL ART – BUTTERFLIES, CHICKENS, AND DUCKS!

2 Comments

Do you enjoy art inspired by nature and animals?

Are you local to the East Windsor/Broad Brook, CT area?

Then swing on by to see some wonderful art pieces by my FEATURED ARTIST on Saturday, April 25th, 1-3 pm.

Laura Sinsigallo of Time Flies by Lauralie

Laura creates mixed media paintings and hanging art. Her inspiration comes from nature and animals.

All of her pieces are whimsical and colorful – and fun.

We can’t wait to have the opportunity to see and purchase some of her wonderful pieces on Saturday following our class on Making Eclectic Wind Chimes.

***

ARTIST SHOWCASE HOURS

Saturday, April 25th, 2015
1:00 to 3:00 pm
Broad Brook, CT (text 860-977-9473 for the address)

***

This is a Great Opportunity to Shop for Mother’s Day

Hanging Art

Hanging Art

Here is a sampling of what you can expect to see.

This is oh So Cute!  I just love them all – don’t you???

Oh too cute!

Oh too cute!

This painting reminds me of an experience I had just last week while traveling – a butterfly was boppin’ around the tops of tall tropical foliage and flowers – and the music could be heard in my mind as I watched it fly around.

Butterflies!

Butterflies!

Adorable is the word I use to describe these two handcrafted whimsical dolls…

Adorable

Adorable

Hello Ducky!

Hello Ducky!

Winter may be over – but I still requested items “from every season or holiday” – It is a great time to stock up for gifts next year – or add to existing collections – of which, snowmen are my fav in winter!

For Every Season

For Every Season

Snowmen Whimsical Dolls

Snowmen Whimsical Doll

Gnome

Gnome Mixed Media Paintings

For the address to the ARTIST SHOWCASE on Saturday, April 25th, 1-3 pm:

TEXT: 860-977-9473

or email containercathy@gmail.com today!

Fun Flowers

Fun Flowers

For more about our Featured Artist, Laura Sinsigallo of Time Flies by Lauralie:

Visit Swiftwaters Artisan Cooperative in Willimantic, CT

Visit Windowbox Boutique in Stafford Springs, CT

And don’t miss the chance to visit us on Saturday in at Container Crazy CT’s in Broad Brook, CT.

Cathy Testa
(860) 977-9473 (text for address)
containercathy@gmail.com

Cathy Testa of ContainerCrazyCT Blog

Cathy Testa of ContainerCrazyCT Blog

ContainerCrazyCT Visits the Boston Flower and Garden Show 2015

Leave a comment

Here are some highlights of the Boston Flower and Garden Show this year. I thoroughly enjoyed attending with a good friend, Rhonda. She invited me along and I am thankful we attended. The show was a little less packed this year in regards to displays and vendors – and it was not a surprise to learn why – apparently the huge amounts of snow fall in Boston this winter prevented some landscapers to load up supplies, like large boulders to frame displays, because all was buried under mounds of snow. We can’t blame them – it has been a rough winter especially for Boston folks.

Attending a flower show in a city like Boston is much fun, especially if you are able to spend an overnight by the Boston Waterfront, which we did. The hotel I like is the Renaissance Boston Waterfront Hotel located at 606 Congress Street. It is only about a block? away from the flower show’s location at the Seaport World Trade Center. We found our stay there very enjoyable. Staff and valet guys were friendly and helpful, the restaurant in the hotel served a wonderful breakfast, and you are literally minutes from over 18+ restaurants.

Renaissance Boston Waterfront Hotel - Seconds from the Show!

Renaissance Boston Waterfront Hotel – Seconds from the Show!

RESTAURANT RECOMMENDATIONS

My favorites so far from my visits to this show this year and the past are:

Rosa Meixcano, 155 Seaport Blvd – directly across the street (a bit to the right) when you exit the Seaport World Trade Center – amazing! Yumm. (rosamexicano.com)

Legal – Harborside, 270 Northern Avenue – take a right out of the hotel, take your first right, and cross the street – amazing seafood – truly! And if you want to go for dinner, make reservations ahead.

And we also tried Salvatore’s at 225 Northern Avenue for a night cap and appetizer. We sat at the bar, had a nice meal, and lots of activity was going on there on a Friday evening. It is truly convenient as well from the hotel noted above.

THINGS TO DO AT THE SHOW

Every year is different, but my kudos go to Cass Flowers & School of Floral Design. They offered mini-workshops all day at the show, and when my friend, Rhonda, suggested we sign up for the session on making fascinators, I didn’t hesitate to reply, “Yes!”

Cathy T and Rhonda Striking a Pose

Cathy T and Rhonda Striking a Pose at the Boston Flower & Garden Show 2015

I didn’t know of the term “Fascinators” until that moment – what fun it was making these and even more fun wearing them all weekend. Every where we went at the show and when dining out in the area restaurants, we wore them – and all we got in return was big smiles from people who saw us. I picked up the special florist glue used to make these at their booth because I definitely want to give these a try again, and perhaps offer a workshop on making fascinators as part of my “Nature with Art Class Programs” – Thank you Cass for hosting this event at the show.

Scene from Rosa Mexicano at 155 Seaport Blvd, Boston, MA

Scene from Rosa Mexicano at 155 Seaport Blvd, Boston, MA

The reason we decided to hit up Rosa Mexicano’s for our last meal before returning home was due to a vendor, selling lamps with leaf imprints on them at the show, recommending this place to us, and it was the perfect cap to a great weekend with a great friend.

SOME FAVORITE FINDS

Hudson Valley Seed Library – Love their artist created seed packaging! (www.seedlibrary.org)

Of Earth and Ocean – Handcrafted jewelry from Wellfleet studio on Cape Cod

Best Bees – Beekeeping Services – Rhonda attended their talk on bee keeping – she is going to do it!!

Nature’s Creations – Jewelry for the seasons, made from real leaves and cast (www.leafpin.com)

Rachel Paxton – Really pretty bird art and more (www.rachelpaxton.com)

Pink Cloud – I got a iPhone holder and thermometer – cat, dog, colorful themes – birds – check them out (www.pinkcloud.com)

Wooden Expression – Gorgeous Copper Roof Birdhouses out of North Attleboro, MA (www.woodenexpressions.com)

Green Mountain Glass – Crystal hangers for windows (I got 3!)

By Green Mountain Glass

By Green Mountain Glass

Sunny Window – Soaps and Lavender products (www.sunnywindow.com)

And of course…

Cass School of Floral Design, 531 Mt. Auburn Street, Watertown, MA 02472 (www.cassflowers.com)

The Boston Flower & Garden Show is held annually. This year’s theme was “Season of Enchantment” and it is held at the Seaport World Trade Center in early or mid March. For more information, visit http://www.BostonFlowerShow.com.

Cathy Testa