My Take on Self-Watering Pots

11 Comments

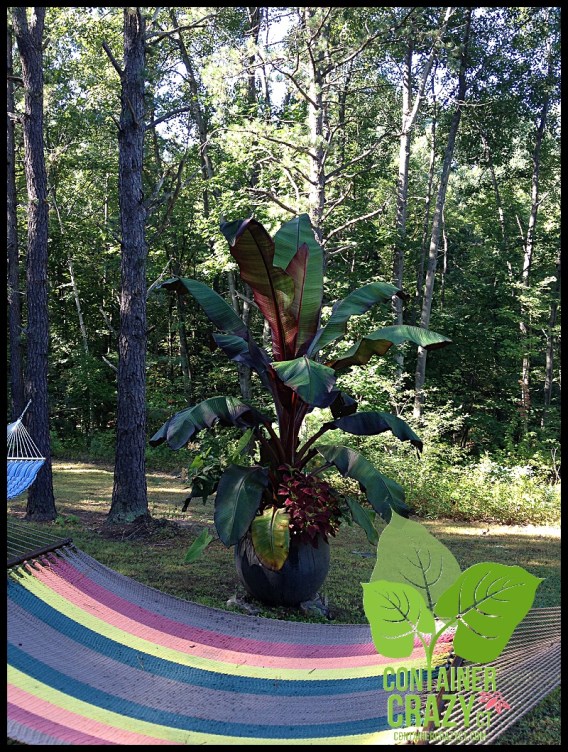
I have often made the comment during my container gardening workshops and demonstrations that if you don’t like to water, leave this presentation immediately. I actually love to water my container gardens and patio pots. Yes, a bit nuts to hear by some folks, but to me it is relaxing. It allows me to take a moment to enjoy the plants’ features and feel the sun on my shoulders. Not only do I like the whole watering routine, I also realize the importance of water to the plants’ internal functions and growth processes.

Water is the primary component used during photosynthesis when water is split into hydrogen and oxygen by the energy of the sun. Water is also used to transport nutrients, cool the plant, expand its cells, and maintain turgor pressure. And YOU, my container gardening workshop attendees and gardening friends, are the person that will provide water to the soil so our plants’ roots can take up the elements so essential for all this beauty to begin and grow in your container gardens in the summer. Without your watering process, a plant in a container garden and patio pot cannot internally manufacture its own food – a function that only plants can perform on this earth. Sound like a big responsibility? If it is too big for you…well, there are some options.

As shown at my annual May Container Gardening Workshops, there are some tricks used to “reduce” watering routines for your pots needs, but there has also been self-watering pots out there on the market for some time now for people who, UNLIKE me, despise having to water their plants in the summer months. Or, they may not have much time to “relax, enjoy the plants’ features, and feel the environment” due to their busy workday schedules – after all – it does take some time to water container gardens – but its worth it, isn’t it?

As one attendee told me after the summer season was over, watering her plants on her deck felt like a part-time job – but she surely enjoyed the big, lush plants which grew large in her pots all summer. To enjoy your container gardens as focal points throughout your outdoor surroundings is a mental boost to your day. Watering may just force you to stop and take it all in after your work day. It can be a forced relaxation moment in some ways. Now, back to the self-watering pots…

What are Self-Watering Pots?

Self-watering containers and pots have a reservoir of water in the base of the pot. A disk or platform partition is inserted into the pot about 1/3 of the way down with the soil resting above the disk. A fill tube allows you to top off the water as needed which goes below that disk in the base of the pot. Sound easy, huh? Yet, I have to admit, I am not a big fan of self-watering pots, partly because – as I mentioned – I enjoy watering plants, and because there is something about the water ‘not draining’ freely from self-watering pots through the bottom, and through the soil, which disturbs me. After all, do you like the feeling of damp feet when you are wearing shoes that don’t quite breathe correctly?

I don’t think plant roots like that feeling either (damp feet) which can occur with “some” self-watering pots. The theory is the disk prevents the roots from penetrating into the water reservoir below the disk, but in my curious mind, I wonder. I’ve seen roots creep where they want to go – nature finds a way, but again – I have not researched this like a scientist – it is just my intuition that the roots may try to go below that disk and hit pure water, and stop growing.

What happens when things are too wet? We humans may develop a foot fungus and stinky feet, and run to the drug store to get athlete’s foot powder. But plants, well, in containers and patio pots, their little roots aren’t going to be able to leave to get powder or more air. They are trapped. This is very unlike roots of plants growing in the ground where they can travel, plus they also have a larger mass of soil to help out the situation. Thus, my concerns about self-watering pots continue to ponder me. Here are some of my concerns:

Salt Build-up

Salts – Fertilizers are basically salts (in chemical form, as I remember my professor emphasizing in class). When applied near water, salts will move gradually towards the area where it was applied. This dilutes the fertilizer and distributes it. If tender roots are close to the fertilizer when too much fertilizer is applied, water is ‘drawn from the roots,’ and nearby soil (water in the roots and water in the soil moves). Plants can dehydrate when we apply too much fertilizer because of reverse osmosis where the water will move out of the plant’s roots, and this is why we use caution to apply fertilizers in the garden and pots in correct amounts, at the right time, etc.

In containers, salts can sometimes be a problem if they don’t leach out of the pot and end up building up in the pot (which doesn’t happen if you follow Container Crazy CT’s 5 Must Do’s for Container Gardening). You need to use good soilless mix with proper pore space, have drain holes in the base of your pots, and not over apply fertilizers.

Water should drain through the soil. It just makes sense. Also, it is a good practice and healthier for the plants, if you allow the soil to dry out a bit between watering applications so the soil has a chance to breath. Keeping the soil constantly wet is not good (unless it is a bog plant or native to a wet habitat or environment). Just like soggy shoes would bother our feet after a long walk in the woods, so will roots be bothered by overly wet soil for a long period of time.

A note on Winter Watering

In the winter, by the way, watering container gardens which you have moved inside as a houseplant is greatly reduced because the plant’s growth usually slows down if you place the pot in a sunny but cooler temperature inside the house. And those pots which you put in your unheated basement to go dormant are watered only when the soil goes dry – water very sparingly, as discussed in my “Storing Tender Tropical Plants” demonstration last weekend. Winter watering is greatly reduced in most cases.

Too Much Rain

Too Much Rain

Rain Falls

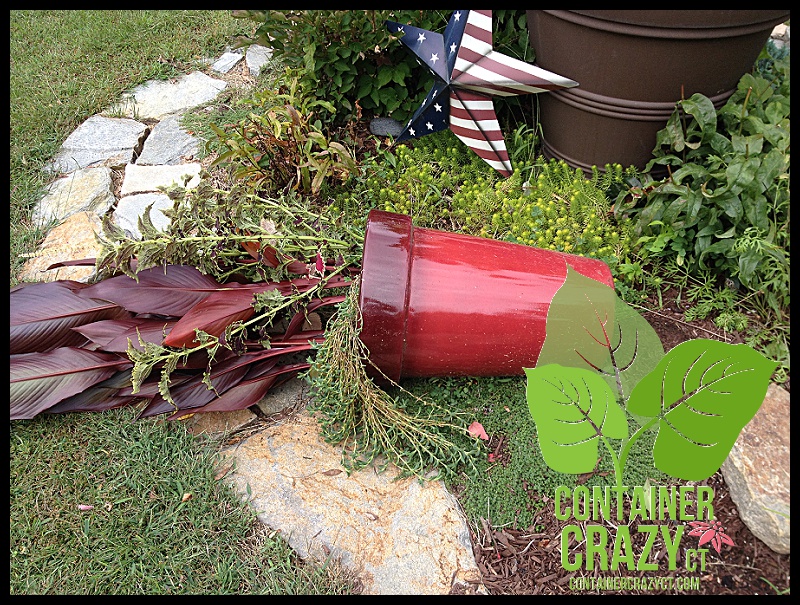
Rain – If you have self-watering pots outside in the summer, without a plug which enables drainage, and you get lots and lots of rain, the pot actually starts to form a pond on the surface of the soil because the excess water has no place to go. It goes up as the soil gets waterlogged. Now your plants are floating in a muck as the water rises to the top, and you’re not too happy either because you have to go outside in your muck boots and rain coat to relieve the plant by removing the plug in the weep hole in the side or bottom of the pot so the water under the disk may drain out. You may even have to tip the pot to the side to drain out more excess water. When we drink too much, what happens to us? We get messy too. We topple over or lean; the same thing happens with plants. They’ll wilt and eventually – if they drink too much – well, you know what happens there. They die or suffer such a bad hangover, they don’t quite recover, start to get diseases, rot, etc. One alternative solution, other than calling a rehab center, is to use plants that drink responsibly. Those which don’t require too many libations – as we discuss when we talk about drought tolerant plants, or just face it – water our plants ourselves to control and maintain an appropriate balance of watering applications.

Oxygen to Breath

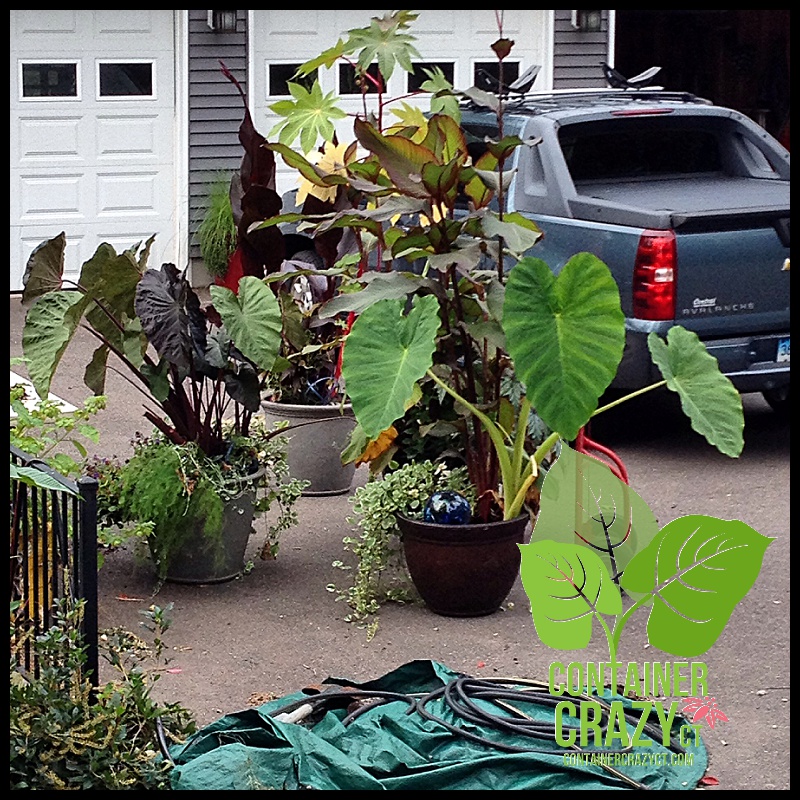
Oxygen – Plant roots need oxygen to take up water. A perfect soil gives plant roots oxygen for respiration, pore structure, nutrients, and even distribution of water. When water is sitting in the base of a pot and the roots hit pure water, they will not grow there due to lack of oxygen. This reduces the root mass for the plants above to thrive. I like to give my plants what I refer to as a ‘full spa treatment’ by providing a good, if not great amount of soil volume by using large pots – something I go over in my Container Garden Workshops every May. They will be happy and thrive, grow large and lush, and full in BIG pots. Also, remember self-watering pots have a disk in the bottom. This reduces the amount of soil allowed in the pot above the disk because it is partitioned off. In small pots, the soil volume can be cut in half as compared to big pots. This greatly reduces space for the roots to grow and roots are important – very important to successful growth of your plants above the soil. It also causes a perched water table situation – an area roots seldom penetrate where root problems start due to lack of air, oxygen, etc – I try to explain the perched water table in my workshops as best I can to my attendees so they understand how small pots reduce the impact and vigor of plants. After they hear what I have to say on the subject, they go out and get that big pot – and let me tell you, they are impressed with their results.

The Fill Tube

In self-watering pots, there is a fill tube attached, and I don’t like it. Call me picky, but this is another reasons why I feel a bit leery about self-watering devices because there is no “spa” once the growing spaces are reduced – and we all know, everyone, even plants, enjoy a good spa environment. The fill tube is cumbersome basically. It is like a straw. I’m not going to fill a little straw to water my plants, ugh.

Drainage is Key

Drainage – As water enters your pot from your watering wand or rainfall, it moves through pore spaces in the soil and between soil particle’s tiny spaces. As it enters, it pushes air out. If air is not replaced over a long period of time, the plant roots will lack oxygen needed to thrive. Some water is used by the plant, and some will drain out through the mandatory drain holes in the bottom of your pots. It is one of Container Crazy CT’s 5 Must Do’s – drainage holes. If there are no drain holes, as with self-watering pots, some air is not replaced, in my humble opinion and experience. Too much water is not a good thing, nor is too little watering – it is a balancing act. Excess water causes the roots to suffocate because the pore spaces are filled with water. Basically drainage holes plus your commitment to watering correctly provides a balance. Some self-watering pots have “weeping holes” to help alleviate potential water build up as noted above. I suspect this “draining issue” is why the weeping holes were added to self-watering pots in the first place. Are they self-sufficient now? I don’t know – I need to keep researching, but I do know that I don’t want to take a plug out of a pot every time it rains – I only like to uncork wine bottles. Now, I see maintenance, watching if the soil gets too wet, and maybe I’m just anal. So, I’ll stick to just watering it myself.

Watering container gardens correctly and using the right soil-less potting mixes has provided me with the ultimate success in growing lush, bold, and beautiful container garden plants. In fact, I don’t always fertilize my containers and they are spectacular. My theory is: a) I water them, b) I use big containers with drain holes for large soil mass, and c) I use the right soilless mix, and of course, d) I love them (maybe a little too much).

Gravel at the Base of a Pot?

I remember thinking that putting gravel in the base of a pot for drainage was not really a good idea because it gets all clogged up eventually with little debris or bits of soil going into it over time, water then doesn’t drain there, roots don’t grow into that area because it gets too wet. Soon enough science later backed up this suspicion by announcing the old practice of putting gravel in the base of pots is not really beneficial. It can impede drainage. Roots won’t grow into that wet area at the base of the pot, thus it reduces the full spa treatment. So, take this as just my opinion on self-watering pots, and if I change my mind – I will update my findings here on this blog. I am sure someone will argue the point with me – and I fully admit I need to know more – but I also have heard some folks say they like self-watering pots, but I haven’t seen their plants though either. Are they healthy, lush, and thriving?

Planter with succulents by Cathy T

Planter with succulents by Cathy T

We all Need to Drink Responsibly

Lastly, there are always the options of using plants that drink responsibly such as succulents, some herbs, ornamental grasses, some shrubs like Junipers, or cacti. Drought tolerant plants require less watering, which not only saves you watering time, but helps the environment by reducing water usage – which is big today – no one likes waste. And if you are not a fan of dessert scenes or rock gardens, add things like soil moist to your potting mix, which is discussed in Container Crazy CT’s annual May workshops as well. Rain barrels may be placed on your deck too to obtain free water for watering your patio pots. You may focus on shade tolerant plants that require less water routines versus the hot, sun-loving types. And shade cloths can be used on extremely hot days in your greenhouses or growing rooms, or patio umbrellas on your deck during the hottest sunniest days of summer to cast some shade over plants to reduce watering needs. But I say, if you love beautiful plants in container gardens – then love watering them too.

Cathy Testa
containercathy@gmail.com
860-977-9473

To hear more about pot types, see this page: Container Garden Pot Types.

What Should I Do with My Container Gardens and Patio Pots right now?

1 Comment

You – like me – probably thought you better move in some of your deck pots as a result of the gusty winds and cooler temperatures hitting us right now.

I decided to spontaneously text my brother and nephew yesterday –> “Want to make a quick $20 bucks? I need some help moving my big pots from the deck.”

He immediately responded with, “How about right now?”

Well, long story short – It was a blessing they happened to be free at that very moment for about 30-40 minutes. They came right over. I quickly got my garden gloves on and moved some debris from an ornamental grass I had left lying on the ground in the way.

As soon as they arrived, Ross and Joe started picking up some of the medium sized pots in their arms and walked them to an indoor location for me.

I was washed over with relief as I watched them walk down my deck stairs with the pots hovering over the shoulders and my big plants bobbin’ over their heads.

When Joe picked up the Agave in my urn, I kept repeating – “BE CAREFUL, it is a weapon and the spines on the tips could take your eyes out.”

When showing Ross one of my prized plants – I pointed out a stem while indicating it is easily damaged. “I really don’t want it to break,” I said. He was super careful.

“Don’t drop the pots hard when you put them down – This can cause the pot to crack especially for pots that are thinner resin pots.” Another statement I was saying quickly because these two young guys were moving fast.

Ross asked several questions along the way. “Wow, what is this purple plant?” he asked.

“That is Persian Shield, and it is called, Strobilanthes,” I replied.

Strobilanthes (Persian Shield) is a purple plant - the color is fading due to cooler temps.

Strobilanthes (Persian Shield) is a purple plant – the color is fading due to cooler temps.

Ross then started taking photos with his phone before he picked up the next pot.

Tall pot toppled over already from gusty winds.

Tall pot toppled over already from gusty winds.

After all was moved into an enclosed growing space or onto my driveway for ease of taking them apart later, the guys wanted to pose by my big red banana plant in the backyard. This plant will be part of my overwintering demo in two weeks (and may be published in a catalog. More on that later.).

What To Do with Your Pots Right Now

Some of your tropical plants in container gardens and patio pots (banana plants, Canna, elephant ears) are still safe out there however. The temperatures are in the 40’s to 50’s degree range, and with the 30-35 mile hour winds, it will feel like we are hovering in the mid to lower 50’s. It will feel cold but we are not getting frost.

The gusty winds will tear leaves of big banana plants probably and the cooler temps will make some of the leaves start to turn yellow. Plus, all the cold rain will cause dampness around your plants. This will make your pots heavier as the soil gets soaked.

Some of your tall pots may fall over from the winds. My tall red pots with towering Canna plants already did – so if you are concerned with breakage of pots or plants, move those to a sheltered location.

Even though, I am offering a session on October 17th to demonstrate how I store the root bases of red banana plants, and how to store Canna rhizomes and elephant ear corms (bulbs), I’m shooting off some tips right now quickly.

Ross and Joe with the Stemmed Plant in Center

Ross and Joe with the Stemmed Plant in Center

Tip # 1:

Get help – if possible. The best part of my 3 amigo’s spontaneously helping me yesterday is they refused payment when they were done. I almost cried. I suggested some cocktail treats – and they responded with, “Yah, let’s go to Broad Brook Brewery soon.” If you can’t get help, use a handtruck to move heavy pots – and take your time. Try not to rush, bend those knees, etc. If a friend is helping you, please remind them to be careful to not rush – this results in hurting your back or straining something when moving heavy pots.

Coleus 'Dipt in Wine' is stunning still, taking cuttings of the tips with stem and leaves will save them.

Coleus ‘Dipt in Wine’ is stunning still, taking cuttings of the tips with stem and leaves will save them if you don’t have a growing location inside.

Tip #2:

Coleus – If you have some in pots, take some tip cuttings and put in water in a cup or vase. This is a way to save a bit of the plant. It will root eventually and you may pot it up in a small house plant pot to keep over the winter.

Agave in Urn - Watch those spines by your head, Joe!!

Agave in Urn – Watch those spines by your head, Joe!!

Tip #3:

For succulents – as I have said in the past, move them inside the house. They will get wet now for sure – and it can rot the tender foliage because the temperatures have dropped down. Get them inside the warmth by a window and let the soil dry out.

By garage, will be taken apart this month at my session.

By garage, will be taken apart this month at my session.

Tip #4:

Move your big pots into a garage if you don’t have time to tend to them right now. They won’t get totally soaked by the rain if you plan to dissemble them later this month.

Alocasia was moved inside, see the leaves turning color - they want to stay warm.

Alocasia was moved inside, see the leaves turning color – they want to stay warm.

Tip #5:

Leave the pots right where they are outside. It is colder out but not a frost situation yet. The plants will change color and look a bit off, but if you are planning to chop the foliage down to remove the underground parts from the soil for storing over the winter, then it is okay if the foliage gets a bit of cold damage. However, if you want to take it in as a house plant, I say do it now.

Fern and Colocasia (Elephant Ear) moved inside.

Fern and Colocasia (Elephant Ear) moved inside.

Reminder: I’m primarily speaking about Canna, Banana plants, and Elephant Ears for this post for those in container gardens in my CT Zone (Broad Brook/East Windsor). The cold temps will signal the plants that dormancy time is coming. If you want to keep any of these as inside house plants – moving them in now is a good time to do so because the foliage will get damaged a bit from the cold and winds. We may see warmer days again, but the plants won’t get as stressed if moved inside. If you want to store the root bases, storage organs, corms, bulbs, or rhizomes, it is okay if the plants get hit by frost later this month. (Angel Trumpet (Brugmansia) plants should not be hit by frost.)

The big red banana plant (Ensete) to be part of demo day.

The big red banana plant (Ensete) to be part of demo day.

That’s all for now. If I think of anything else later, I will add it on. If you have questions about a specific plant, just fill out this contact form below.

Thank you,

Cathy Testa
860-977-9473
containercathy@gmail.com

Earlier photo of the big red banana plant (Ensete genus)

Earlier photo of the big red banana plant (Ensete)


There’s some cool historic stuff at the Farmers Market in East Windsor, CT

Leave a comment

The East Windsor Farmers’ Market is fairly new but its being held in a place which is not. Located at the Connecticut Trolley Museum, the market tents circle around the front lawn area of the museum grounds. The CT Trolley Museum is a showcase of historical exhibits showing how electric trolleys evolved and visitors enjoy a display of various trolleys in their main building.

Father’s Day is Opening Day

This weekend, Fathers get a free ride on the trolleys in honor of Father’s Day on June 21st. The old trolleys travel down a wooded street starting from the main parking lot area of the grounds for a few miles distance, and many of the trolleys are open-aired which makes for a fun breezy ride while you hear about the trolley museum’s history.

BackTrax Band at the Market

BackTrax Band at the Market

Opening Day Features BackTrax Band

On the opening market day which is this Sunday, June 21st, the BackTrax Band will be playing. Most of the band members are from the East Windsor area and they started playing together in late 1990’s.  They practice in a local family owned barn on a farm in town and move into the bars or venues like the markets to play for anyone interested in enjoying classic rock, country, and oldies.  So while you shop the market and browse the trolley museums features, you will hear some great music.

Great Seats to Eat, Listen, Relax

Great Seats to Eat, Listen, Relax

There are plenty of picnic tables at the market as well, so why not pack a lunch – or better yet – get lunch right there. This year’s market will feature many new foods – homemade pies, veggie samplings, and even some great hot dogs or Thai food. It is a nice place to enjoy some quality time with family and support your local enthusiasts.

Cathy T last year at the market featured succulent plants

Cathy T last year at the market featured succulent plants

Free Container Gardening Talk on June 28th

Another bonus, on the second weekend of the market, which is June 28th, I will be offering a free container gardening talk at noon. Look for me near the picnic tables.

My talk will cover a quick explanation of perennials and tropical plants, along with edibles, which all work in container gardens and why you should use them – These plants offer many benefits. Plus, we will go over the steps for success with container gardening and other tidbits you may not realize which will help or harm your patio pot and container gardens’ overall appearance and health, along with some design techniques and the right soil mix to use to control the growth of your creations.

A great place to walk your dog is at the market!

A great place to walk your dog is at the market!

Lately, I’ve been getting various bug questions about container gardens – there are reasons why some insects maybe showing up in your patio pots from time to time – and ways you can manage them or prevent them from happening again. I will share insight on this as well.

Usually by this time of year, many people have finished potting up their deck pots but this season’s weather has resulted in a somewhat slow start up – Our nights have been cooler and days not as hot for the start of summer – some container plants are slow to get going, thus, this visit is a great chance to get any last minute plants you may want to assemble in time for the July 4th celebrations. I will have various plants available or you may attend just to hear my talk, which I hope you do.

Address of the Trolley Museum is 58 North Road (Rt. 140).

Address of the Trolley Museum is 58 North Road (Rt. 140).

Whatever the reason for your visit to the market – to hear music, gets some fresh locally grown food, take a trolley ride, or hear some tips on container gardening – we hope you, especially those of you local to our town, will come support the market by attending and purchasing locally grown produce from the East Windsor market vendors.

Note: The market hours are 11 am to 2 pm.

Looking forward to see you there.

Cathy Testa
http://www.ContainerCrazyCT.com
860-977-9473
containercathy@gmail.com


The “Don’t Do This” List for when you Plant your Container Gardens and Patio Pots

8 Comments

During my container garden workshops, I’ve seen some things attendees will do as they start to assemble their container gardens and pots. It is not intentional on their part. They are so excited to get started selecting plants and putting them into their container gardens after my talk that they will move quickly and do some little things I try to catch them on before they continue. It reminds me of things they should not be doing because it can harm the plants or make the container look unbalanced.

So, I decided to create this list – and will share it at my future workshops too. Here are the things you should not do as you put together your container gardens and patio pots.

#1) Do not fill the pot to the rim with soil mix.

Filling the pot with soil mix up to the rim of the container will cause the soil to spill out when watering, or the water might roll off the top somewhat. There should be about a 2-3” space from the top of rim to the top of soil line. If the water is not flowing well into the soil, it will not permeate down to reach the plants’ roots, plus it looks a little odd to have the plants sitting at the very top of the pot. Aesthetically, they are better placed a few inches down. Additionally, the base of the plants are somewhat protected if they are not exposed at the very top – reducing things like toppling over due to wind, etc.

#2) Do not press down hard on the soil after you have inserted the plants into the container.

Out of habit or belief the plants should be pressed firmly into the soil, I’ve seen attendees do this at my workshops. They will push down on the soil, sometimes very hard, after they inserted the plant into the pot. This is not a good idea because you are compressing the soil which may reduce the air pockets required for oxygen in the soil to be used by the plant’s roots. Unless the plant is very top heavy or was root bound (thus a little weighty on the bottom), avoid pressing down hard on the top of the soil after planting. If you need to press, do so lightly and gently. You don’t want to smash the roots or crush the base of the plant by pushing down hard onto the soil.

Dont Do Photos for Blog Post3

#3) Do not grab the plant by the leaves and tug it from the starter pot.

When you take the plant out of its growing pot to put it into your container garden, use one hand to place over the soil at the stem base, and the other hand to turn it over carefully so it slides out of the growing pot. Try to not pull or tug at the plant by its leaves or stems. If the plant has been growing in the pot for a while, it may not slide out easily. Squeeze the growing pot a little to loosen it up or roll it gently on a table. Conversely, if the plant has been recently potted up in its growing pot, the soil may fall away from the root ball as you take it out because the roots have not grown into the new soil yet. Be careful to not damage the plant or its root system as you remove it to put in your container garden. If the plant is extremely root bound, and it is impossible to remove it from the starter pot, cut the pot at the bottom about 1” from the base to remove the closed end of the pot, and then push the plant’s root ball and soil through to remove it. A Hori-Hori garden knife or a razor knife works well for the cut.

Dont Do Photos for Blog Post 2

#4) Do not put a plant with circling roots directly into the container garden.

When roots are tightly circling around the root ball, this is referred to as girdling. The plant has been in the growing pot for a while, and the roots have nowhere to go except to encircle the root ball as it hits the sides of the inner pot. Do not put plants with tightly bound girdled roots directly into your container garden without first detangling the roots by hand if possible. If the roots are so tightly bound (really tight like they are hard to pull away or tease apart), you may use a clean sharp knife or pruners to cut them apart by cutting here and there. The roots need to be released, so to speak, to move freely and easily into the new fresh soil of your container garden.

Dont Do Photos for Blog Post

#5) Do not put the plants into bone dry potting mix.

When you container garden, you should lightly moisten the soil mix before you put your plants into your container garden or patio pot. Otherwise, the moisture in the starter pot will be drawn into the dry soil in the container garden thus taking it away from the plant’s roots. If the soil mix is dry, use your watering wand to moisten it – the key is to moisten, though – not to waterlog the soil, or turn it into mush. Just wet it a bit and then take your hands and mix it around lightly so the moisture is distributed. This will help the plants to adjust easily from their growing pot to their new beautiful soil environment.

Dont Do Photos for Blog Post4

#6) Do not put dry plants into the container garden without giving it a drink first.

It is a good habit to water your plants in their growing pots before putting them into your container garden or patio pots – preferably the night before, or the morning of, or at least a ½ to 1 hour before you assemble your container garden if its soil is “bone dry” in the growing pot. Another tip – be sure to water everything in after you finished assembling your container garden – but the key is, again – don’t over water. You want everything to settle into its new environment in a well-balanced slightly moist but not waterlogged state. Do not walk away before doing this final step. And direct the water at the soil line, not on the foliage if possible, with your watering wand or watering can.

#7) Do not put your plants in full harsh sun right away.

If your plants were grown in a greenhouse and not transitioned to the outdoors yet, you need to “harden-off” your plants. This term means to move the plants, or better yet, ‘transition’ the plants into the great outdoor sunlight carefully – otherwise, they may burn. Be sure to harden them off first if grown in a greenhouse by placing them in shade to part shade for a day or two. In many cases, hardening off is not required if the plants you purchased were already outside at the nursery. You will know if your plants were not hardened off first when you see the leaves turn white if you put them directly into sun – as is the case with houseplants or plants you overwintered inside, they must be hardened off first as well when you move them outside.

Dont Do Photos for Blog Post5

And finally, another tip – when I plant my container gardens, I tend to make pockets in the soil mix to insert each plant. In other words, I don’t fill the pot half way with soil (like I’ve seen done), place or position all the plants, and then backfill around the roots. I personally believe the pocket method makes the plants more comfortable and allows the roots to make easy contact with the new soil in the container. But that’s being a little picky perhaps – all I know is this method has worked for me for years.

To see photos of the above “Don’t Do’s”, please visit my Instagram feed or Pinterest boards where I show examples, or better yet, take one of my workshops in the future to learn and see hands-on more tips by ContainerCrazyCT.

Thank you,

Cathy Testa
860-977-9473 (cell)
containercathy@gmail.com

Why Attend a Container Gardening Workshop about Perennials?

2 Comments

Cathy Testa of Container Crazy CT located in Broad Brook offers a service that brings the plants and education directly to you in one spot on the day of her classes and workshops. The workshops are convenient – You don’t have to travel from store to store to get a great selection of plants – and you get Cathy T’s advice and knowledge as you pick and choose the plants you want to pot up at the workshop.

What makes this class different is a lot of effort goes into getting everything ready for just for you – think of Cathy T’s workshops as a personalized class service for you. She hand selects the plants from local reputable growers based on experience of prior use, her classroom is a place you can get dirty and not worry about it or need to clean up after, and it is fun!

You also get to chance to meet other plant and garden people local to your area, make new friends, and enjoy a day with no true work on your part.  Just think, you show up, plant, learn, and take home your patio pots – there is no need to put away that heavy soil, sweep up the floor, or deal with empty trays to recycle.

Purple Power

Delosperma (Ice Plant) cascades over the rim of this pot – A beautiful perennial with drought tolerance and lots of blooms; it is a wonderful filler and spiller in container gardens – and it returns!

What are the best perennials to use in container gardens?

Maybe you haven’t considered using perennials in pots, maybe you don’t know what they are, or maybe you have. One thing is for sure, Cathy T has used various perennials in container gardens and patio pots over the years due to her experience as a local professional container designer – and she will tell you which have worked and which haven’t – some return easily, some are a little trickier, but either way, she will share with her knowledge of powerful perennials at this class.

Perennials offer lots of design benefits from being truly architectural in pots to providing continuous or cycle of blooms. They can be powerful in container gardens, and you will hear about each one available during the Container Gardening Workshop in May and how to capitalize on their features. Tropical plants are part of the workshops too. There are ways to reuse perennials and tropical plants in patio pots again and again. You will learn how to grow them, store them, and over winter them for use every year which is covered during the Container Garden Workshops in May.

Flamingo Pink

Justicia carnea with pink blooms in a container garden – Attracts hummingbirds and as tropical plant in our CT Zone – It is very showy along side Coleus annual and a hardy shrub above.

Ever have trouble getting help when it’s busy?

Getting attention and help on your perennial questions is sometimes difficult to obtain when you visit a busy garden center as the doors swing open for spring, especially this year – after our snowy winter and slow warm up of spring, everyone is anxious to get going. By attending Container Crazy CT’s personalized workshop, you get help and attention in a setting that is not over crowded or too busy. It is not everyone that is willing to share their background story on plants or what is going on in the industry – but Cathy T often does at her workshops and classes. Get the inside scoop by signing up for the workshop – and you will learn from the other attendees in class as well because many of them have their own experiences with plants or they may be new attending for the first time and want to learn what you have tried, even as a beginner, or if you are more seasoned – either way, it is an open forum at the classes.

Examples of things you will learn at this class:

  • Specific details about each perennial and tropical available at the workshops
  • How to plant perennials in the appropriate soil in pots
  • Design and color tips to choose showy combinations with perennials and tropicals
  • Cathy T’s Five Must Do’s for Success with Container Gardening
  • Ways to overwinter key perennials and tropical plants
  • How to capitalize on troublemaker perennials and make them stars in pots
  • What to know about growing perennials and tropical plants

 PERENNIAL PLANT PICTURES

  • Visit ContainerCrazyCT’s special Pinboard highlighting the selected perennials and tropical plants which will be available at ContainerCrazyCT’s May Container Garden Workshops on May 16th and May 23rd. This will give you a preview and some amazing inspiration!

Three Ways to Sign Up:

  1. Complete the Contact Form below
  2. Visit ContainerCrazyCT’s Events Page
  3. Email containercathy@gmail.com

Cost: $15 per person plus the cost of plants selected at the workshop (sales tax applicable). You only need to send your registration payment, bring the pots of your choice, and enjoy! Sign-up before the seats are filled, space is limited.

We hope you will join us!

Cathy Testa

More details may be found here:

MAY CLASS (BIG CONTAINER GARDEN WORKSHOPS)

CONTAINER GARDEN WORKSHOP INTRODUCTION

MAY WORKSHOP IN THREE WEEKS (PRIOR POST)

Cathy Testa Summer 2014

Cathy Testa Summer 2014