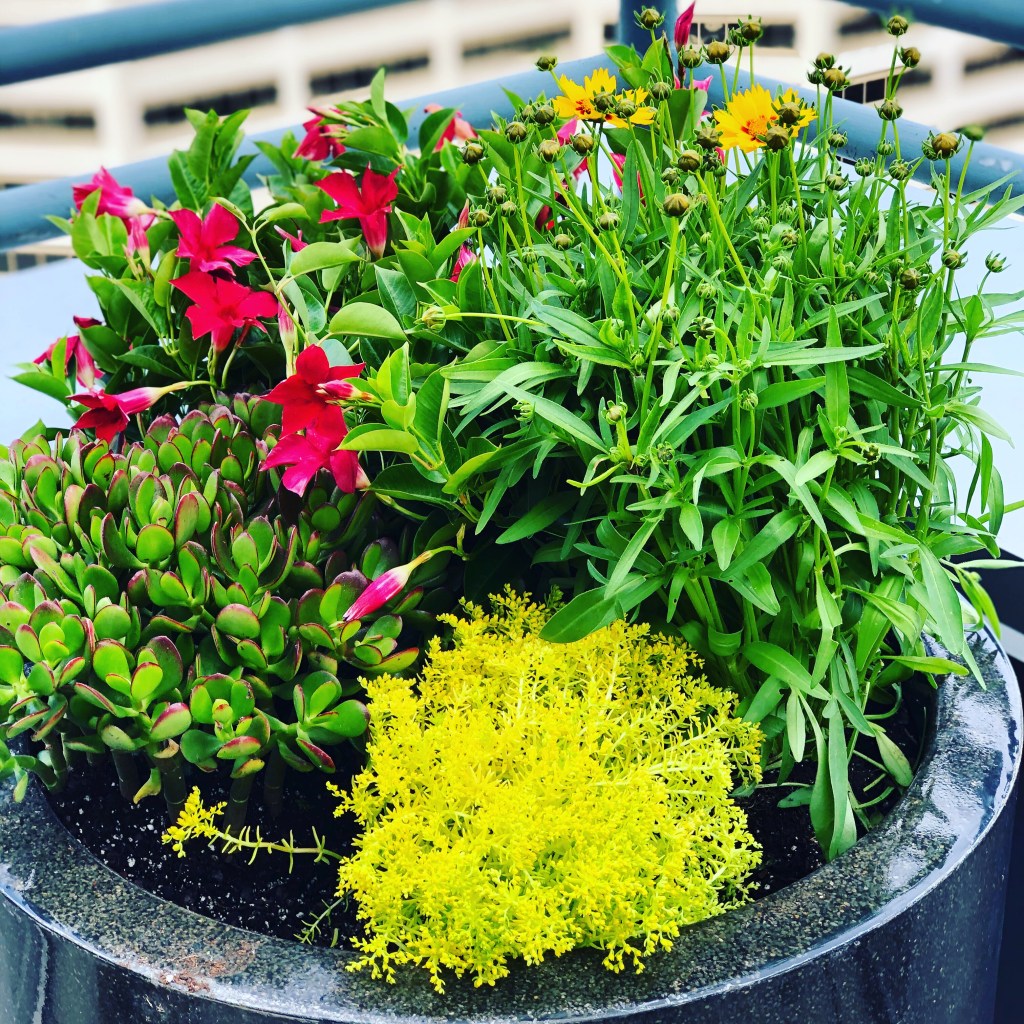
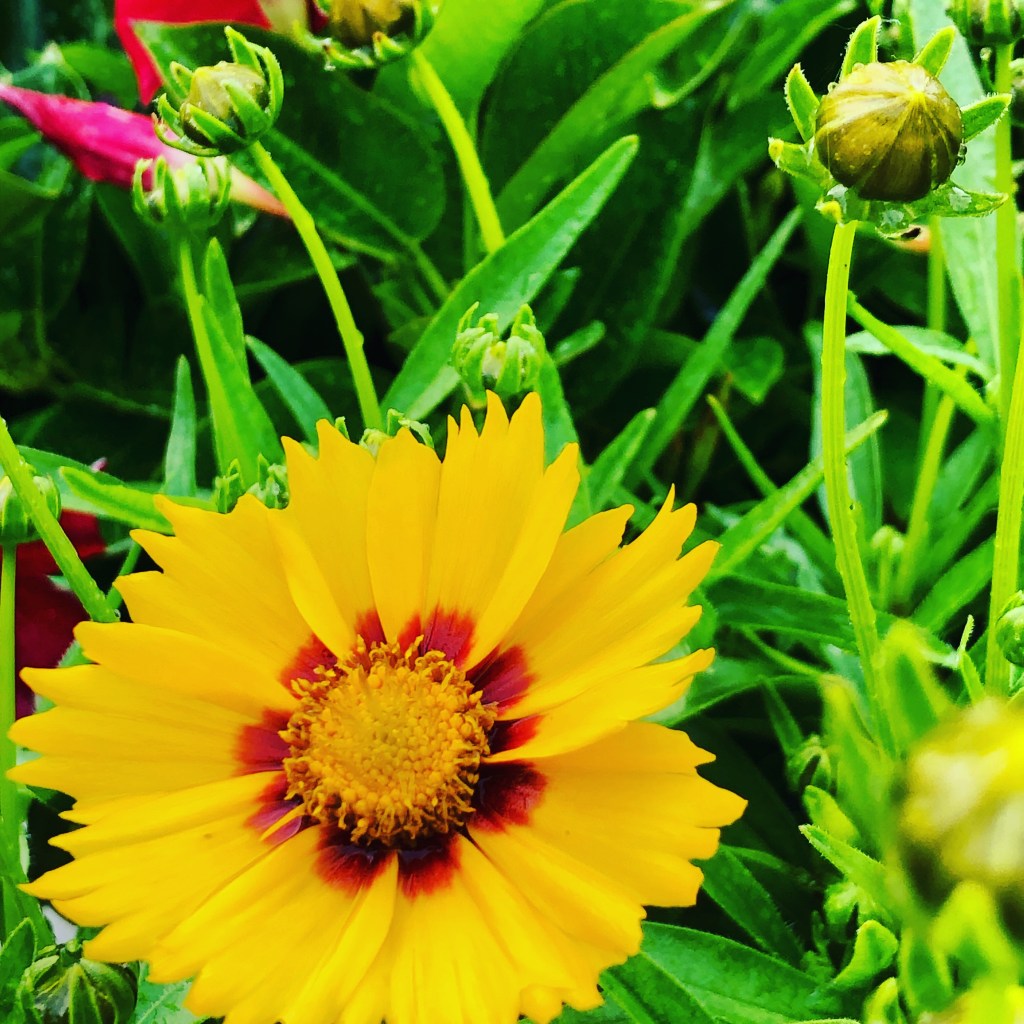
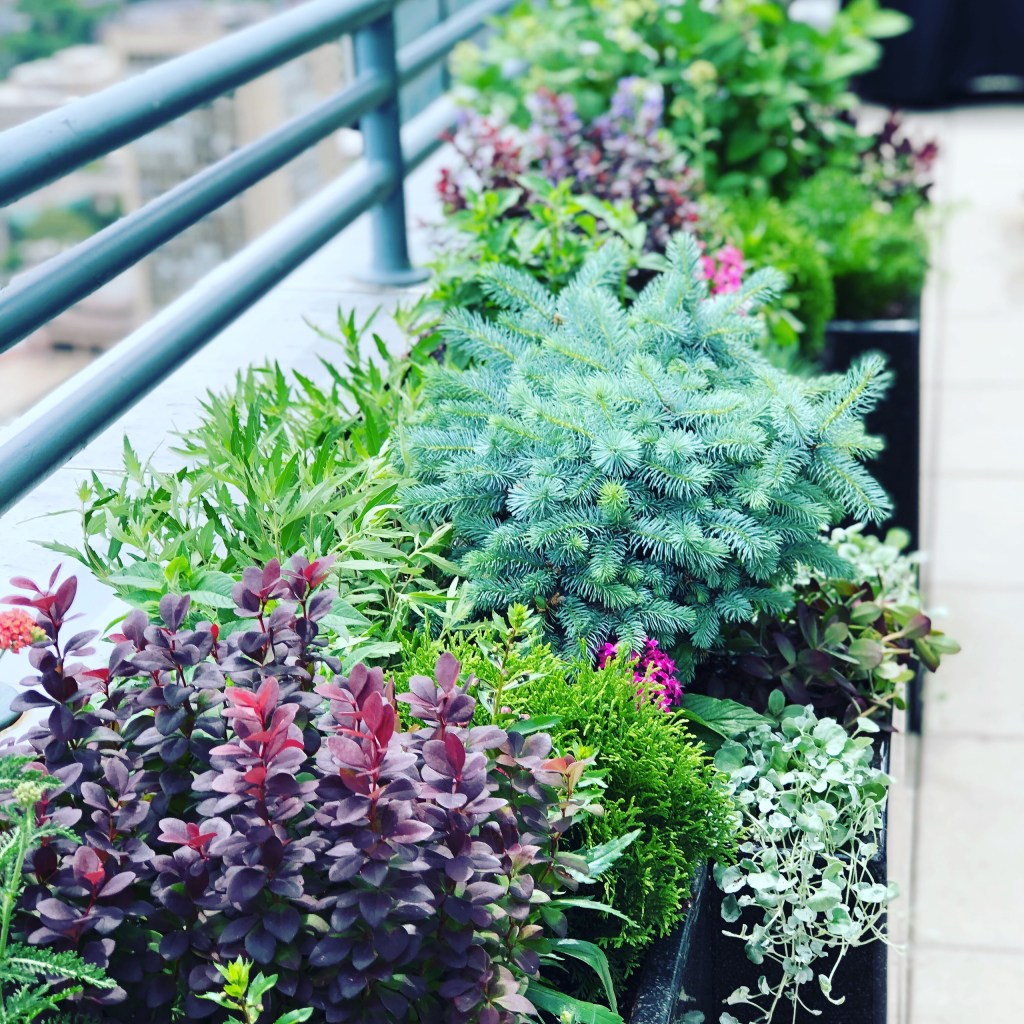
These are photos of vivid reds and yellow blooms in large patio pots showcased on a high-rise balcony. As you can see, the yellows and reds of the flowers on these plants stand out. They are also very drought tolerant. And full sun lovers.
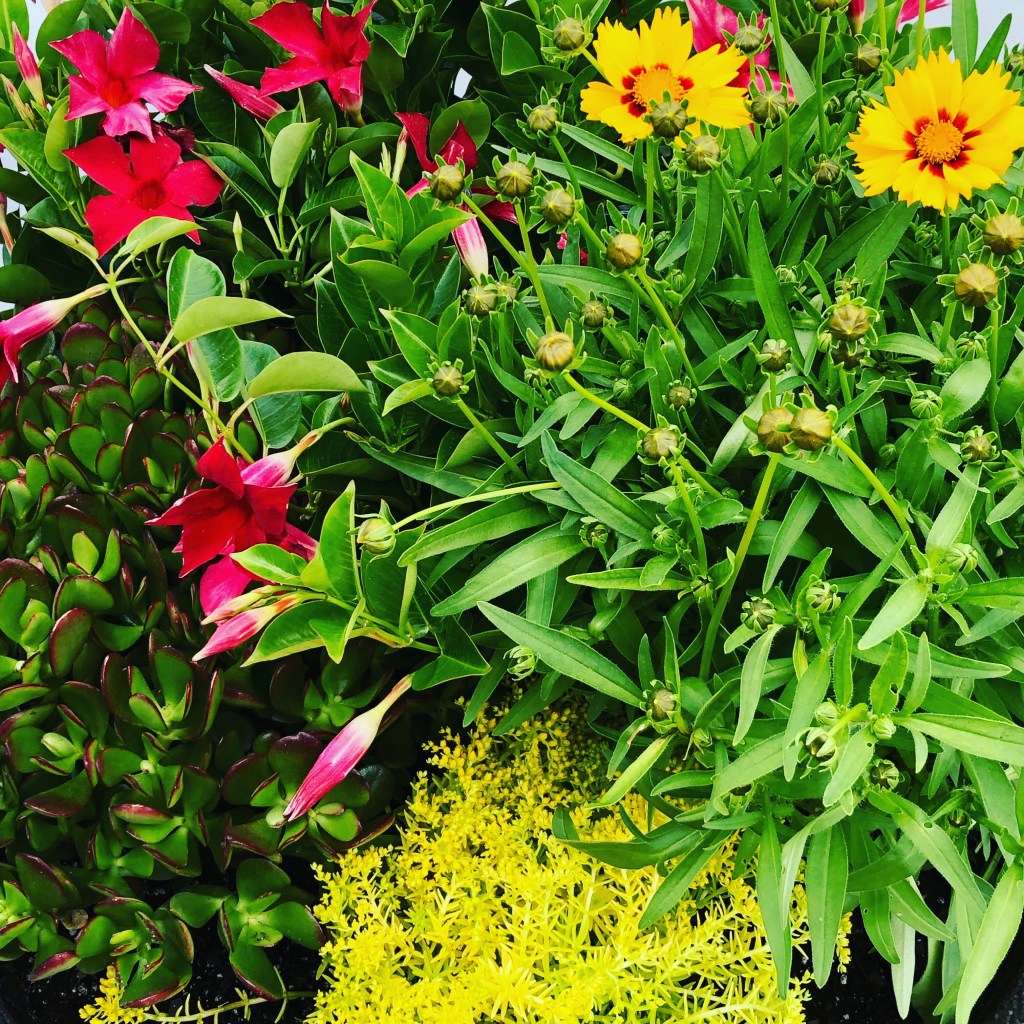
I planted this combination on a high-rise balcony many years ago. The conditions up there were brutal in the summers at times. It was very sunny and hot for the first half of the day. The second part of the day was shaded due to the height of the building’s walls and the sun’s movement. But it also was extremely windy at times, and as hot as a very hot beach summer day. Notice in the next photo how much the blooms opened up.
The pots shown here were quite large. Plenty of quality potting soil was used. Some soil moist was added to help manage moisture levels. I also added slow-release fertilizer into the soil. But it was key to find plants which would survive the high-rise conditions. They must get water too. It was imperative to find plants with strong abilities to survive in the sun, wind, and heat. These plants did this well. These also did not need lots of clean up. The faded flowers of the Coreopsis are easy clipped off (deadheaded) if needed. All the other plants held onto the flowers in this combination.
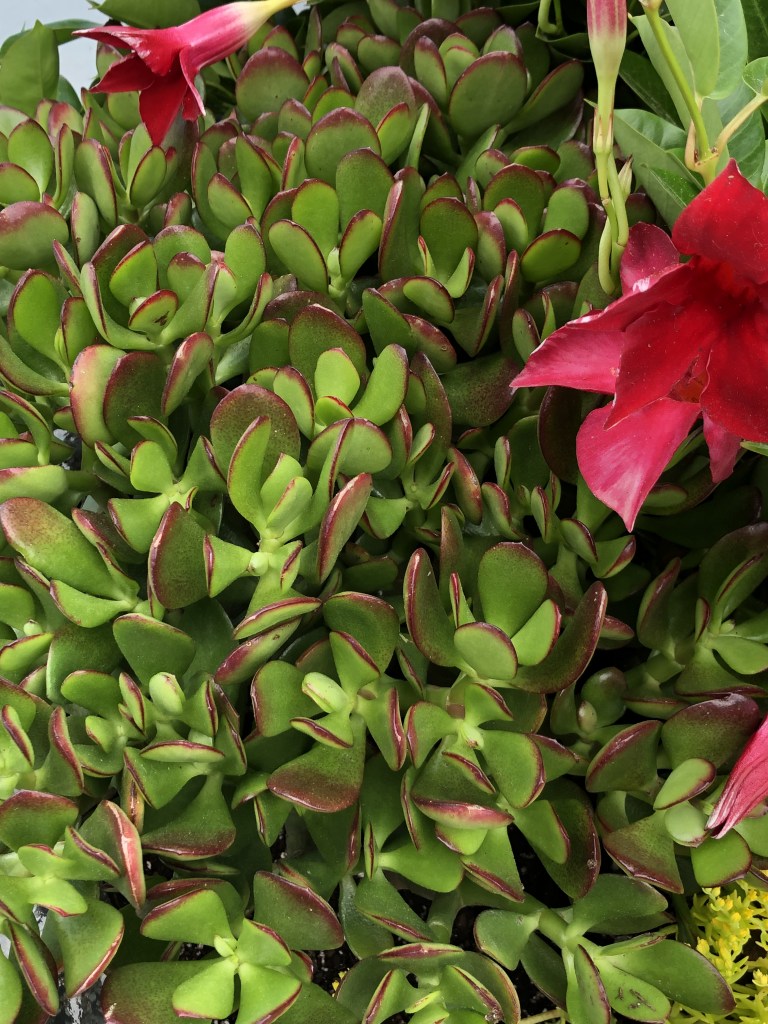
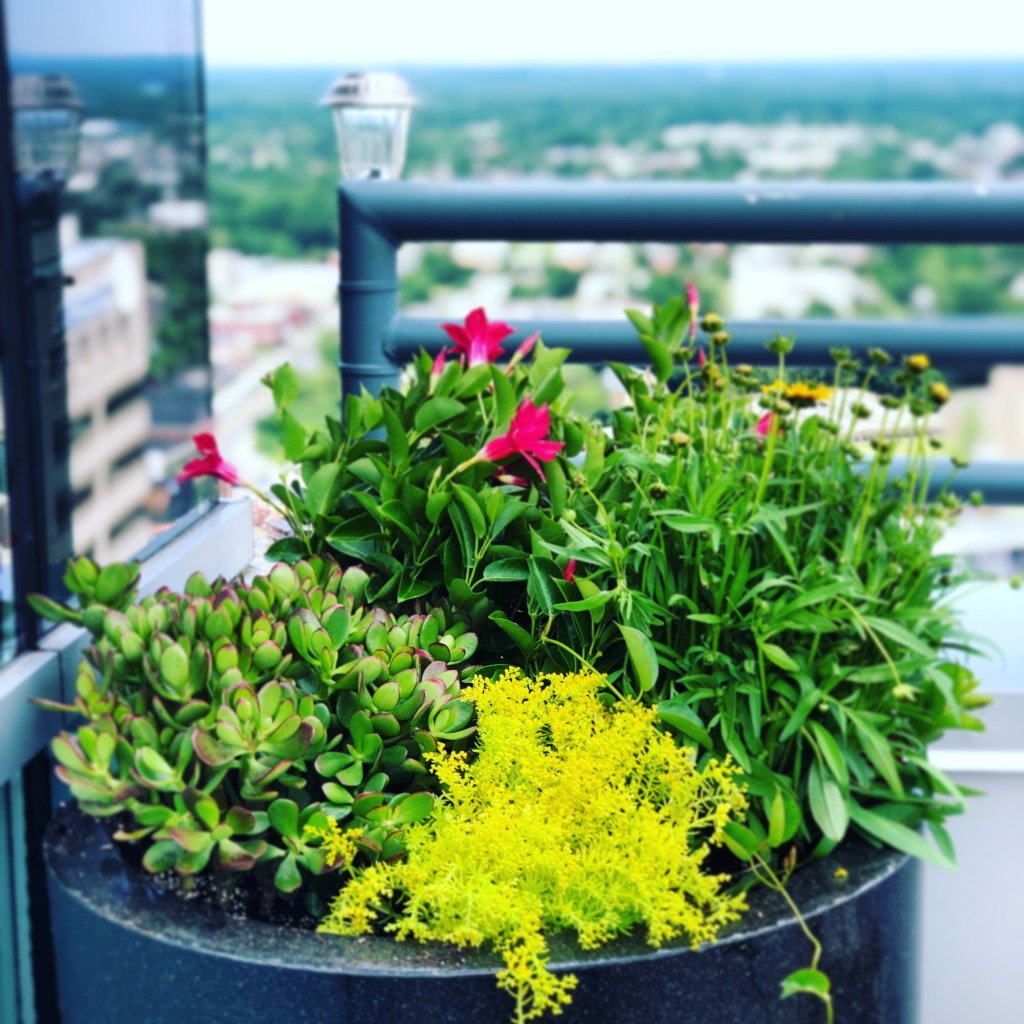
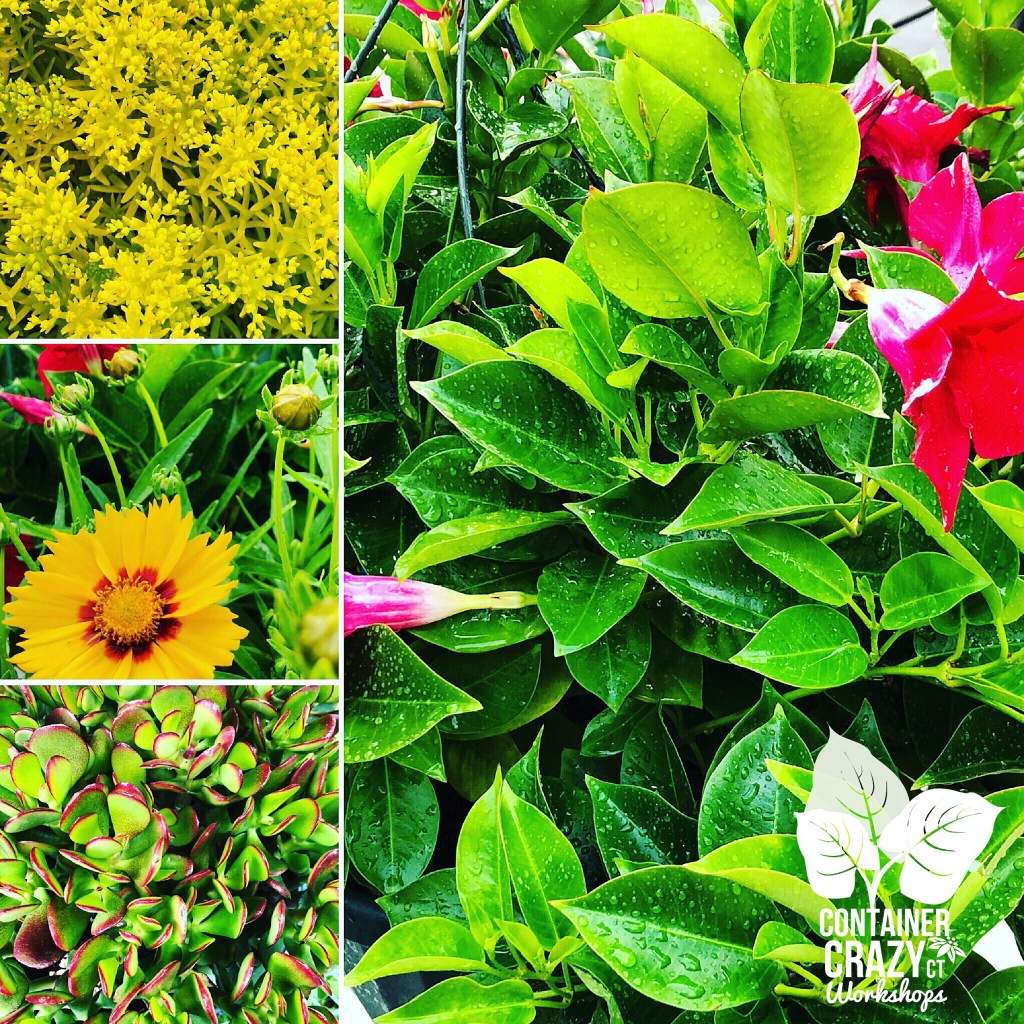
As the summer progressed, the plants became full and offered super bright colors seen from afar. This was good. The view from the balcony owners’ large living room allowed them to see the reds and yellows. I also focus on different textures too. You can see the fine texture of the yellow Sedum. The larger oval leaves of the red edged Jade plant are also visible. Yes, a Jade (as in a houseplant). I never overlooked using houseplant candidates as well as perennials and tropical plants. Just like in a garden, textures add the drama and flow needed to please the admiring eye. I often held up plants next to each other. I did this to look them over and see if they seemed to work together. I was just like that with my eyes. I would figure out if they played well together visually. I also needed to know the plants’ overall habits and culture needs.
This is a Jade. It was a rather large plant. I loved the red edges. The red color only intensified in the patio pots with the full sun conditions. There was lots of warmth and heat on sunny days. These were able to withstand drought like conditions. I always emphasized that the owners should water every day. Plants need water. The soils dry out rather quickly up there on the top of a building in the city. And the owners were fantastic. They did water the plants as often as possible. They got an A+ on that as it wasn’t always easy, there were no faucets or hoses outside. All water was carried from the inside to the outside in buckets! When it rained, that was a bonus.
The yellow plant in the front is a Sedum. It is called, Lemon Ball Stonecrop Sedum. A perennial. Talk about an intensely bright yellow! Really pops. It was perfect for the front of the patio pot, tucked in nicely. That plant in this combination was a little more delicate. But, its vivid yellow was unbeatable.
And a must on everyone’s list is flowers which bloom most of the summer. I added these Coreopsis because of their beautiful yellow coloring with red centers. They also handled the drought conditions quite well. This one is called, ‘Baby Seed’ Tickseed Coreopsis. These are butterfly magnets and work well in rock gardens too. It was always a treat to see a bee or two. I enjoyed seeing a bee come by up there when I put flowers into the customer’s containers. Way up there. I think it was 26 floors high, or was it 28? I can’t remember, but it was up high. If you couldn’t handle heights, you would not be capable of work up there on their open balcony. It didn’t bother me to look over the railing to the city streets below. It was a unique planting experience and a great learning one too due to the high-rise location.
And there are of course the Mandevillas or Dipladenias. Big pretty blooms. Red on these and a vine-like habit. This one did not vine as much as others, but it was a staple for my balcony garden working days. They tolerate the winds, hold onto the flowers despite winds strong enough to move heavy furniture on the balcony. Furniture which had to be chained down appropriately always. Tropical plants they are.
Experiencing working on a high-rise balcony was one of my ultimate pleasures of having my former small plant related business. I only felt disappointed that they (the penthouse owner’s) did not discover me sooner. I wish I had worked up there when I was younger. I would have been able to handle more of the physical aspects. I was a solo worker. It was sometimes a challenge to figure out how to get all the soil bags, plants, and more up there. Because I am organized, I found ways to maximize my trips up the service elevator. I used wagons and a hand truck. I used the appropriate boxes and bins. I did it and I loved every minute of being up there. Well, maybe on those super-hot days, not so much. But I loved the plants and expansive balcony views enough to keep on working up there. It was an honor.
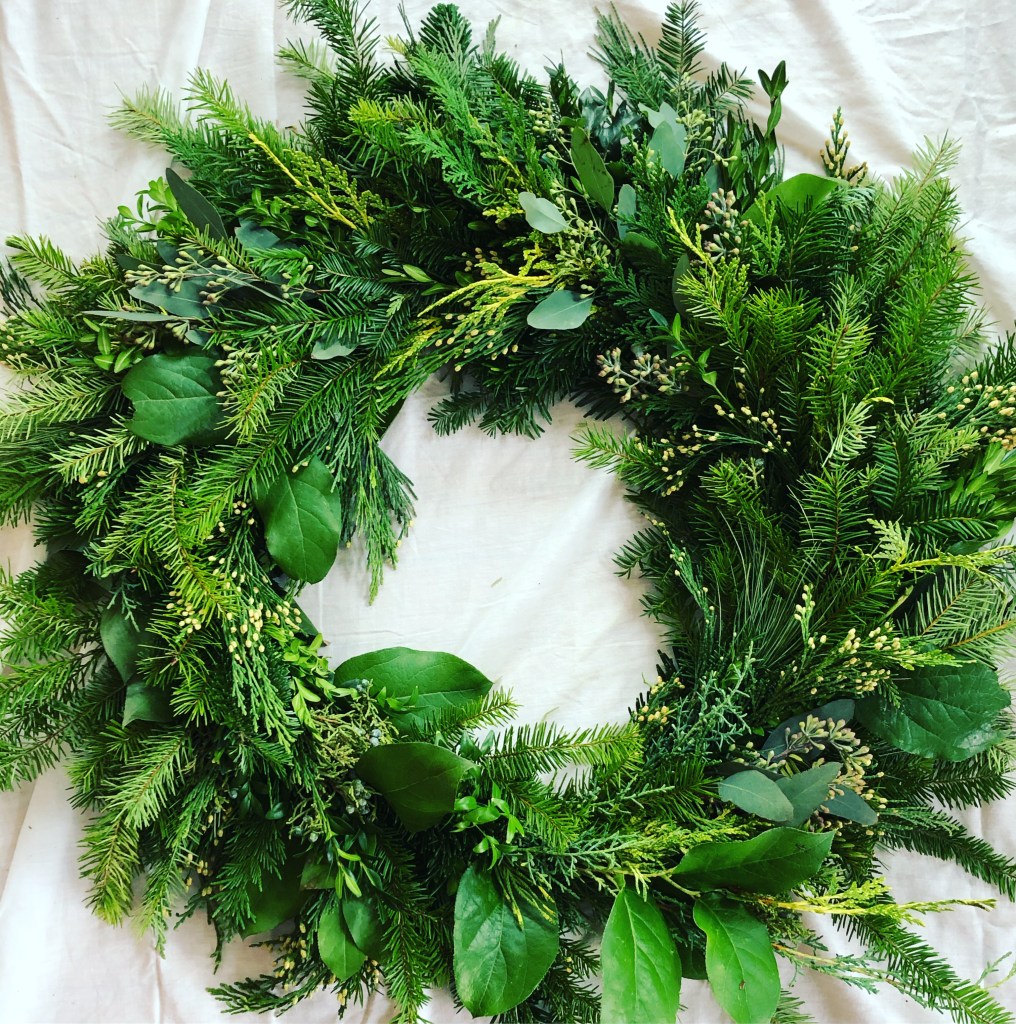
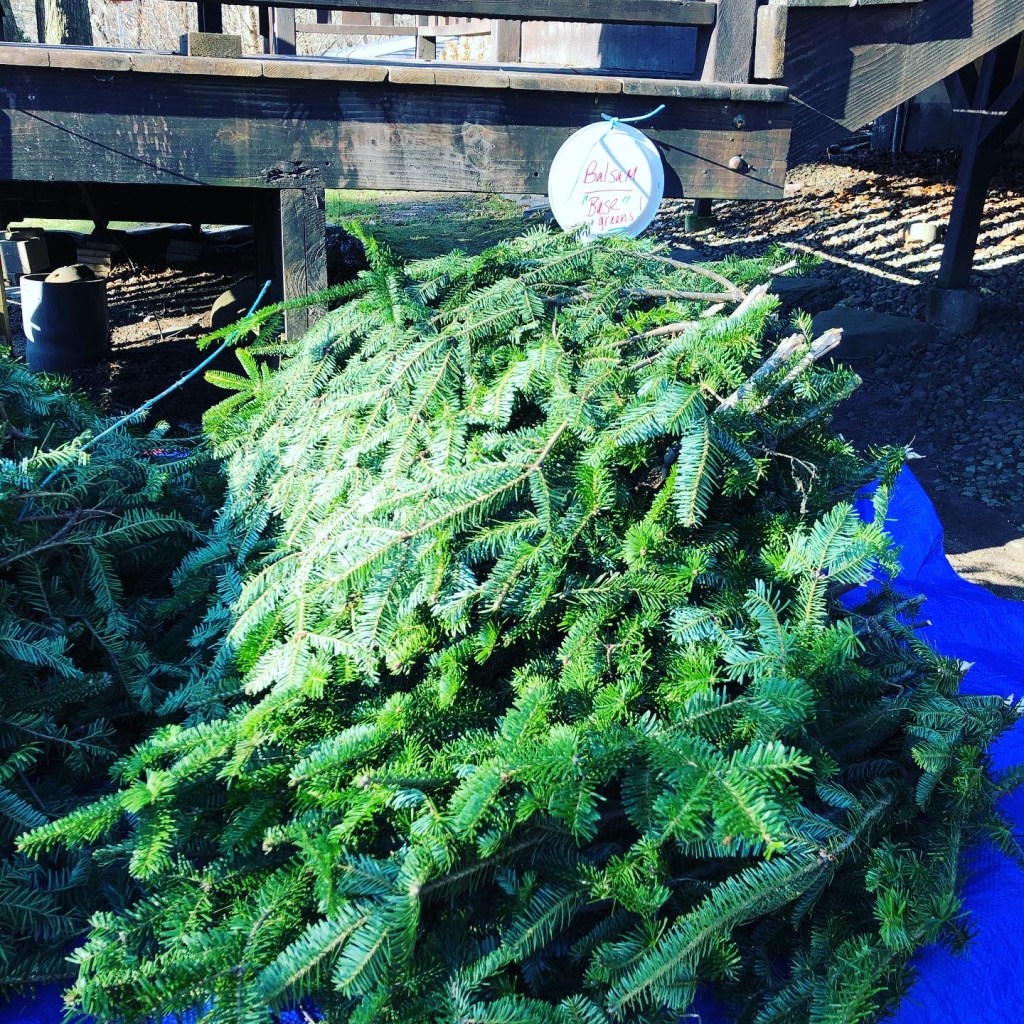
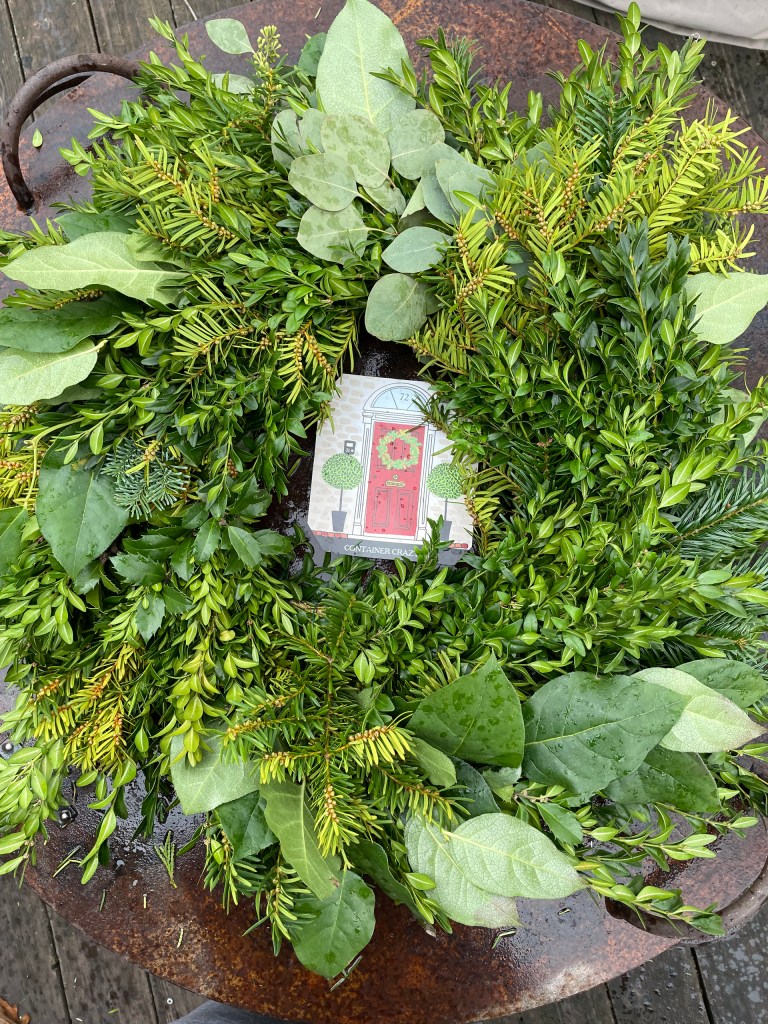
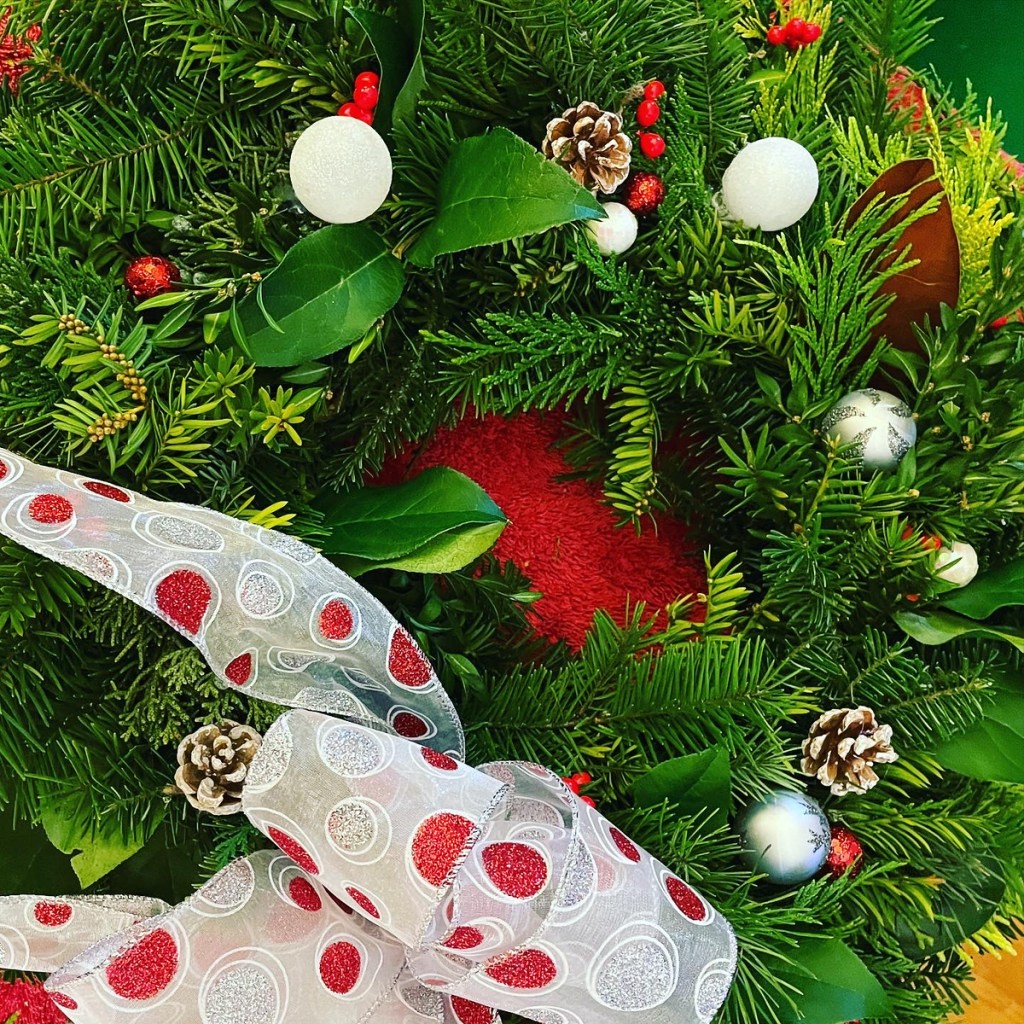
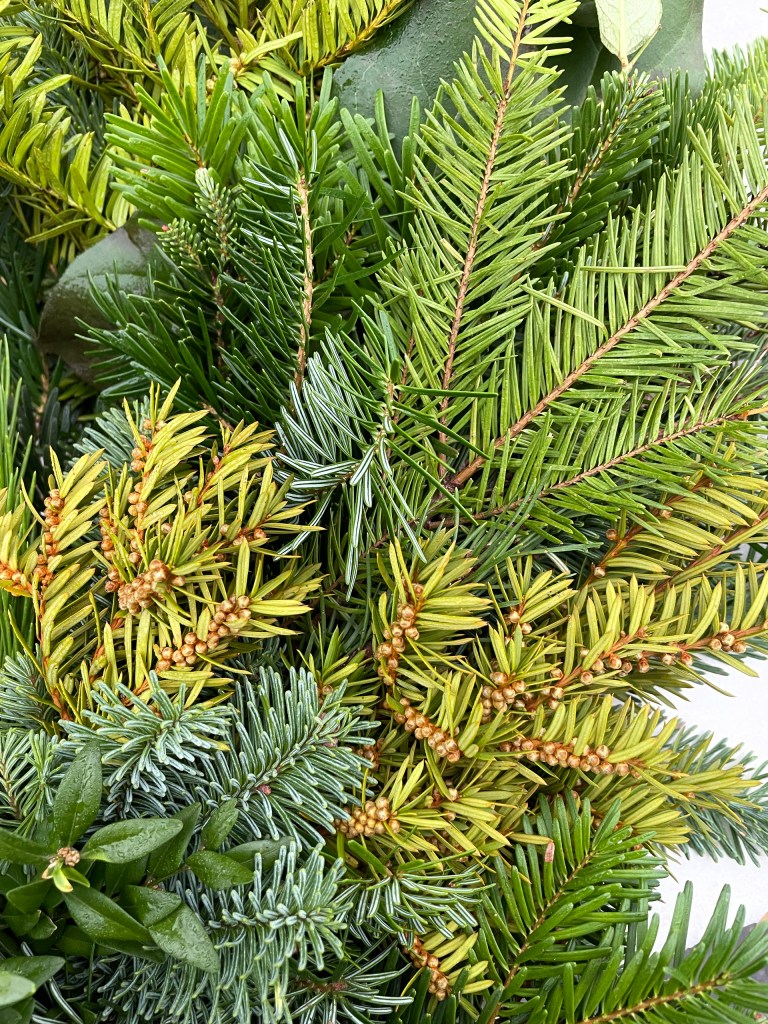
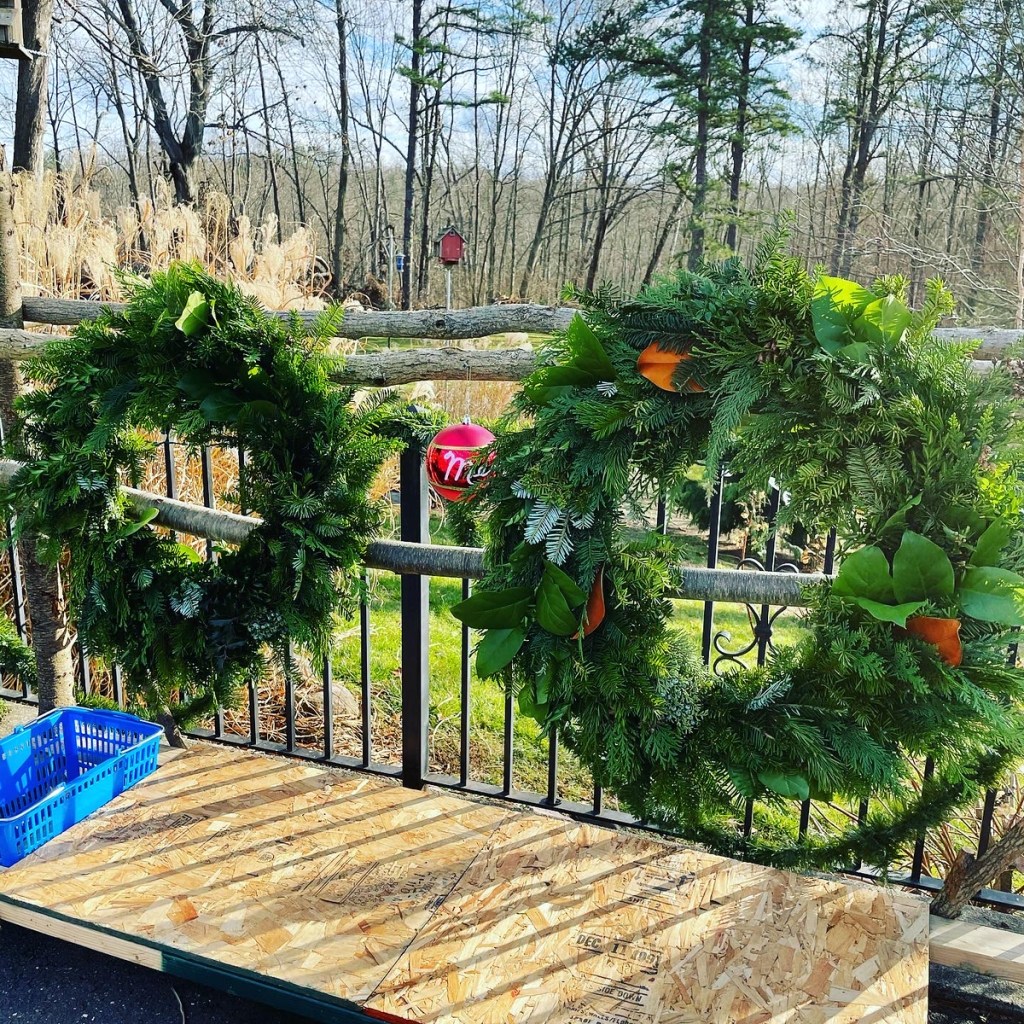
When I held holiday wreath making workshops, I referred to greens that are primarily used in the wreaths, as “base greens.” I felt that these greens are your standards and used for much of the filler material. Another term I created was, “premium greens.” Those were the more pricy and floral quality greens used to create accents in your wreaths or holiday kissing balls.
A mixed greens wreath with base and premium greens
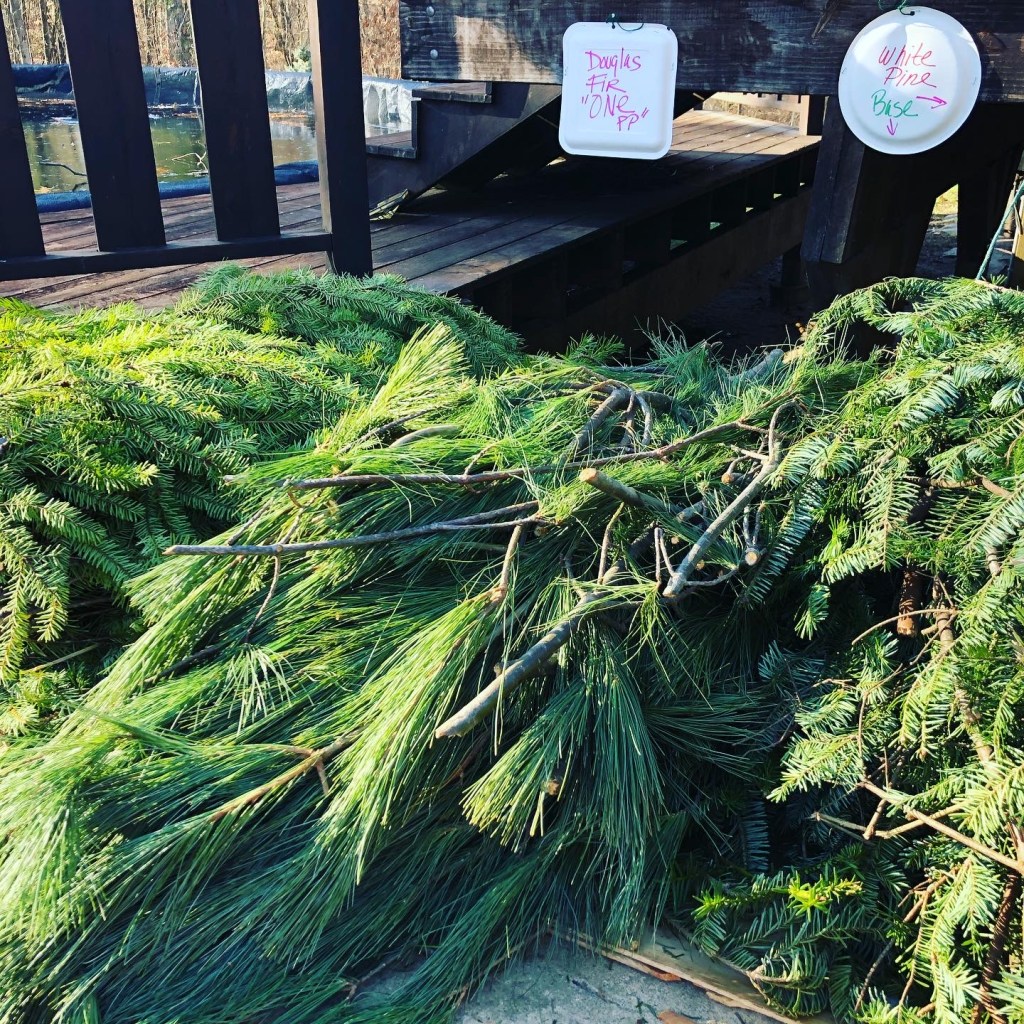
The base greens were usually Balsam, Douglas fir, yew and pine. So far in my series of recent posts here on Container Crazy CT’s blog, I have covered yew, holly, salal lemon leaf, and boxwood. Of these, I considered the boxwood, lemon leaf and holly more along the premiums. Yew makes an excellent base which I also covered in a prior post.
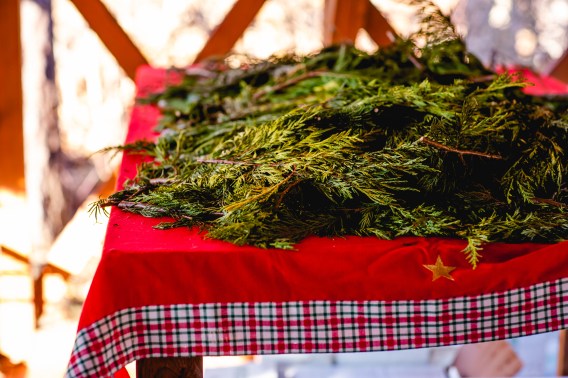
Base Balsam Greens on a Big Outdoor Table
When you make a holiday kissing ball, you need a lot of greens. Having the base greens in supply made that happen. It is also true for fresh greenery holiday wreaths. The base greens are the bulk, and the premium greens are the decor and special touches. It takes a combination of these to make a beautiful creation for the holidays. The base greens were typically the less expensive greens while the premium greens were pricier. And a lot of places do not make wreaths with premium greens, sticking with the balsam only or balsam wreaths with some special touches, like adding holly or pine.
Base Greens on a Table
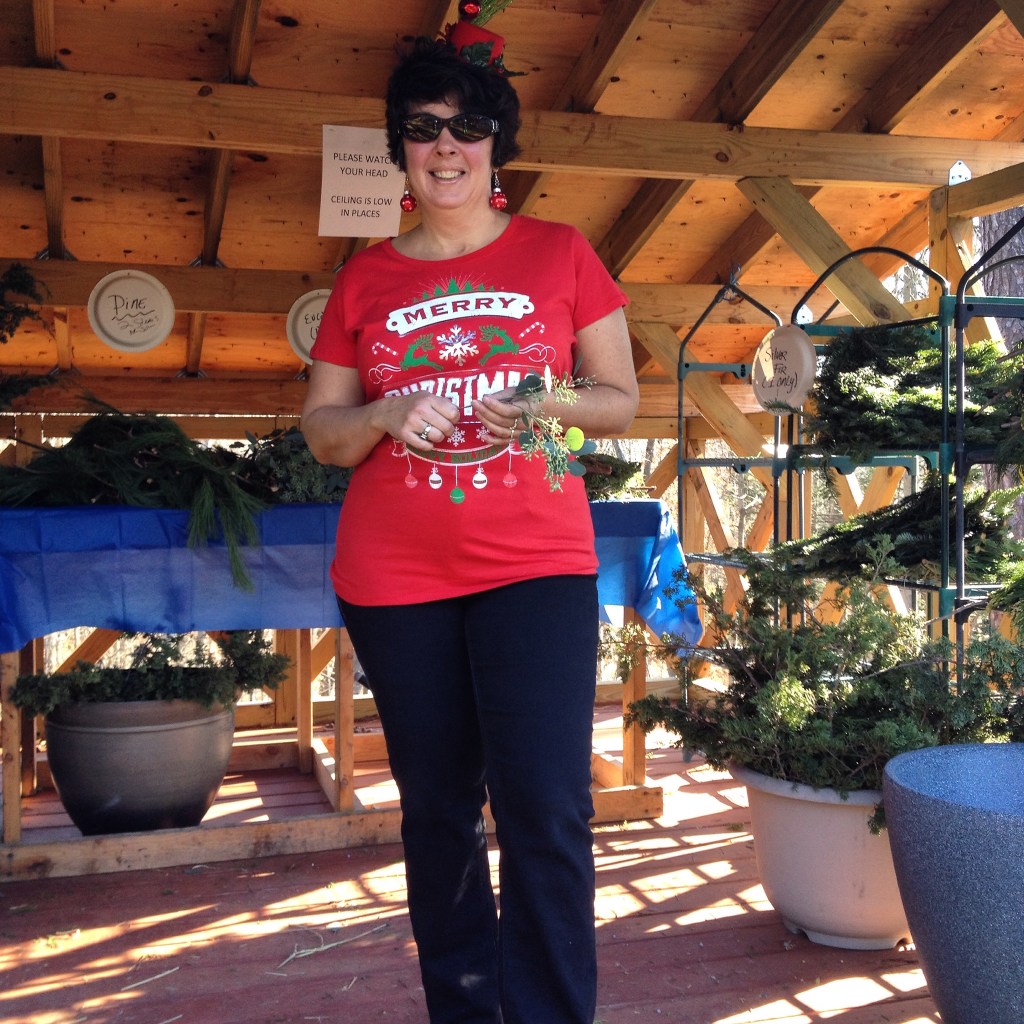
At first, when I held my wreath making workshops, I let everyone go hog holiday wild with grabbing greens from large outdoor tables. Some of the tables and shelves were in a wooden outdoor shed and other greens were piled on a table. I would monitor if the base greens were running out and restock as needed during the workshop. Steve helped me with this task as well. In the beginning, I had to see if my estimates worked. No one handed me this information so I always had a bit of panic that I could run out but fortunately, we usually had plenty.
Me between two piles of base greens
That was part of the fun, but one year, an attendee took a ton of the premium greens, and one type of the premiums were no longer out there on the tables for others. This made me consider how I had to portion things out a bit more the following season, so it was fair to all attendees. I even had a friend help me to make sure attendees would take what was allotted per person. She stood there reminding everyone of that as they came out to get their greens. We began to affectionately refer to her as the “greens police.”
Various Greens on a table in the Greens Shed
For me to portion everything out for 35 to 40 attendee’s prior was just too much work, so I really liked just putting all the greens out for everyone to enjoy. Over time, I learned which greens held up the best and which could dry out faster. Some of that was nature’s choice. Depending on the climate and weather of the region where greens are obtained from, some items may have not been available or in the best condition. This is the nature of working with plants in general. No guarantees. I also didn’t want to dry out the greens by precutting big branches of the balsam or other bases, which typically came in big bundles, so fresh cuts are best to help retain the moisture. The attendees brought their own pruners and would cut to the sizes needed as they worked to make their wreaths or kissing balls. There was no way I could do that work before hand, plus I think it is part of the process and as you cut your branches, it smells so good too. The aroma of all the greens would permeate our workshop room.
Base Greens
Also, portioning everything out, would be required probably the night before and I never set up the greens the night before, because I didn’t want to expose them to the elements such a wind out in the greens shed. My husband, Steve, and I would get up very early the morning of the workshops and move all the greens to a staging outdoor open shed. It was usually cold, our hands froze, but I am so lucky he was as cheerful as me in doing this process. He hooked up his trailer to his old tractor, loaded up the stock I felt we needed, and I would work fast to get all setup before everyone arrived. I was also excited too – because it was fun, but it was also a timing thing that required coordination. I used paper plates to make signs so the attendees would know which greens the base bulk were to use, and which were premium greens. There was a set amount each person was to take. I used tables and shelves, along with bins and buckets to put everything out in time.
Steve and Cathy – 2019 – The last workshop we held, and we made it a celebration! Ironically, this was the year before Covid arrived too.
I think one of the best compliments was when a friend recounted attending one of my first wreath making workshops, and she said to me that when she walked out to the greens shed area, it was like a manger with the wooden structure and all the beautiful greens lined out. I decorated the structure somewhat. It was festive and got everyone into the holiday spirit. I used to say, this is my holiday. Also, my husband gave up that wooden structure for us – the attendees of my workshops. He had built it hold his firewood, but he allowed us lots of space to use it as the greens shed. That was very generous of him.
Large Mixed Greens Wreath
It was the perfect outdoor structure to setup all the individual greens for the attendees to take. We worked indoors to make our wreaths, but our greens supply was outdoors. Some years it was cold, other years, it was actually warm! One year, we wore t-shirts and didn’t even need to cover up with hats or scarves. But overall, it was always a good day with decent weather conditions, I lucked out on that. I worried about snowstorms creating a problem for my workshop sessions, but those never happened or were the type of big winter snowstorm to not stop a bunch of enthusiastic happy ladies ready to join their family and friends at my wreath making workshops.
Cathy T (me!) the year we wore t-shirts at my Wreath Making Workshop!
Steve and I would always finish up setting up only minutes before the first attendees would arrive, then the fun would begin! This was a holiday tradition we held for 15 years. I do miss it and I’m sure my former attendees do as well. But, alas, the time had come to move on. In the meantime, I started making some holiday ribbon wreaths this year, quite spontaneously and that has been fun, but it will never be like making a fresh wreath or holiday kissing ball, but it sure is a great substitute! At least for this season.
Stay tuned as I go over things to know about using more base greens next in my series of posts!
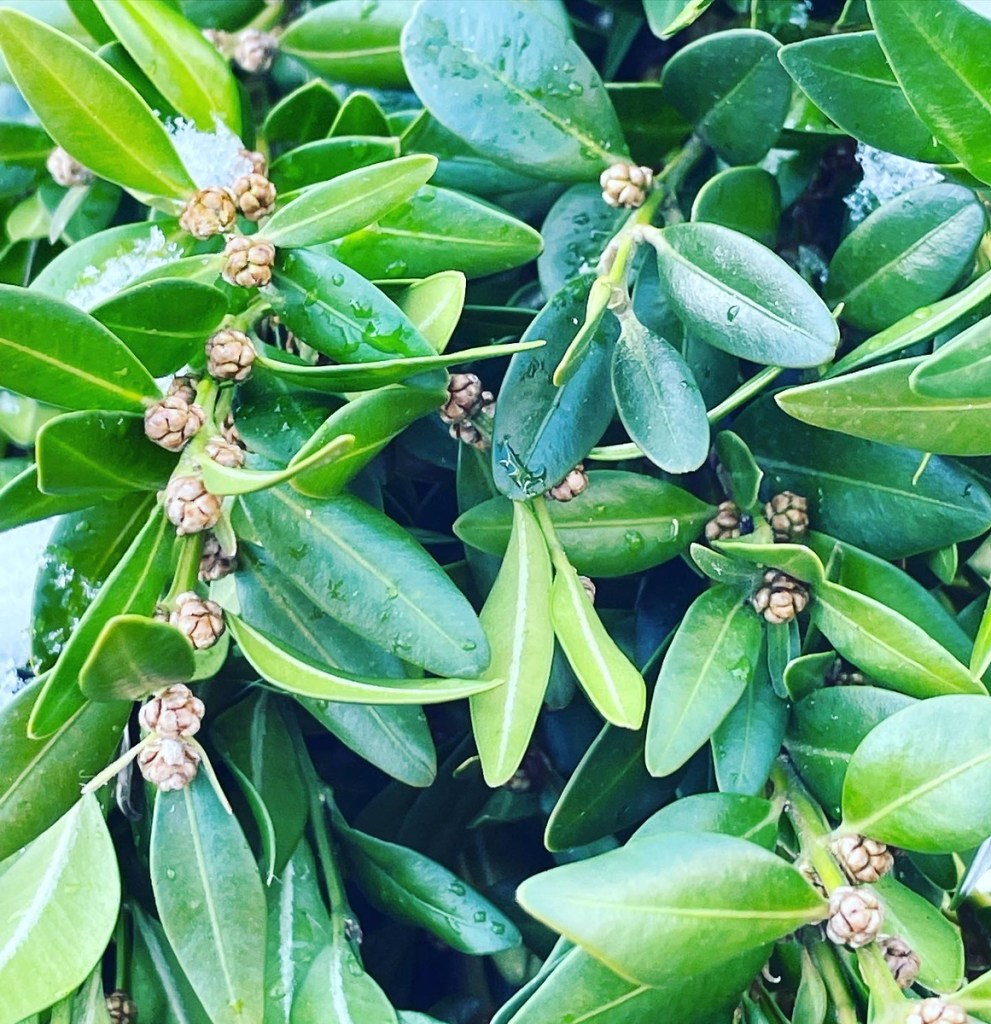
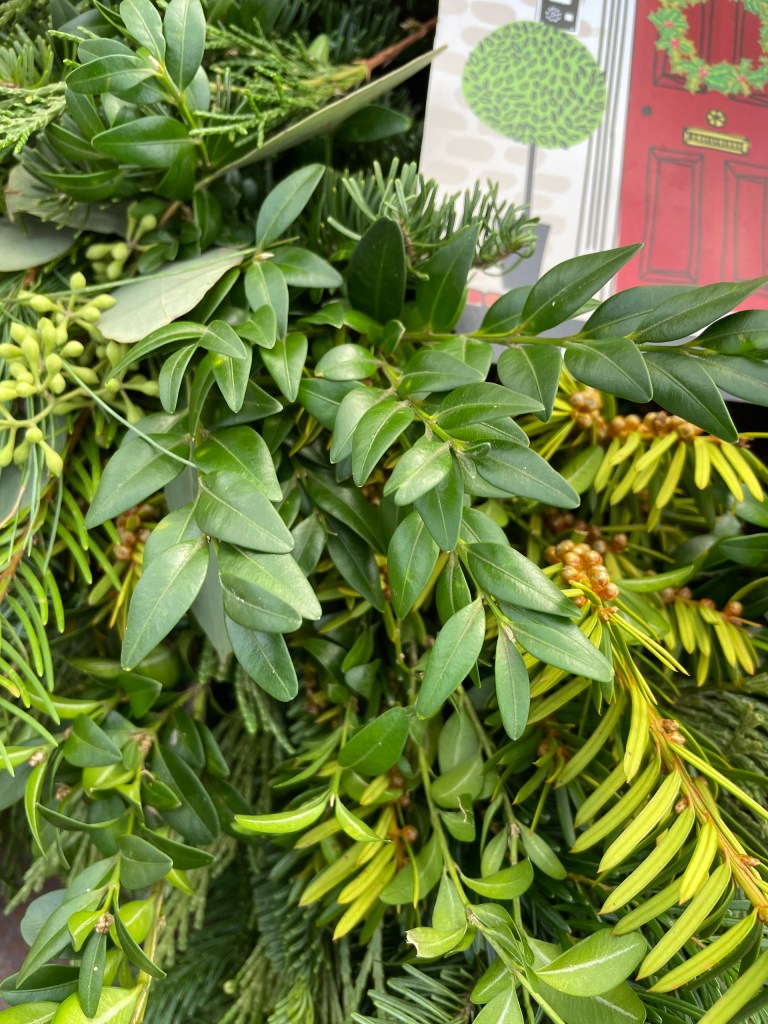
Do you know what the word Buxus is? It is the genus name for boxwood. It’s one of the easier botanical names to remember. Anyhow, boxwood evergreen shrubs have rounded or obovate shaped leaves, on slender green stems. It is a dense evergreen shrub used in landscapes and commonly available at nurseries. It is also a greenery available from floral suppliers or retail locations at nurseries during the winter to make festive arrangements such as fresh greens wreaths and holiday kissing balls.
As with most evergreen shrubs, there are many varieties or cultivars available of boxwood. Some have more narrow leaves and others have oblong leaves. For example, common boxwood (Buxus sempervirens) has elliptic or ovate to oblong leaves. Because I am a plant person, I notice the differences in the leaf shapes on boxwoods more so probably than a typical person. The leaves are small and glossy on both sides of the leaves usually, and in arrangements for the holidays, the leaves retain their dark green glossy color very well. Boxwood greens add a nice textural and color element.
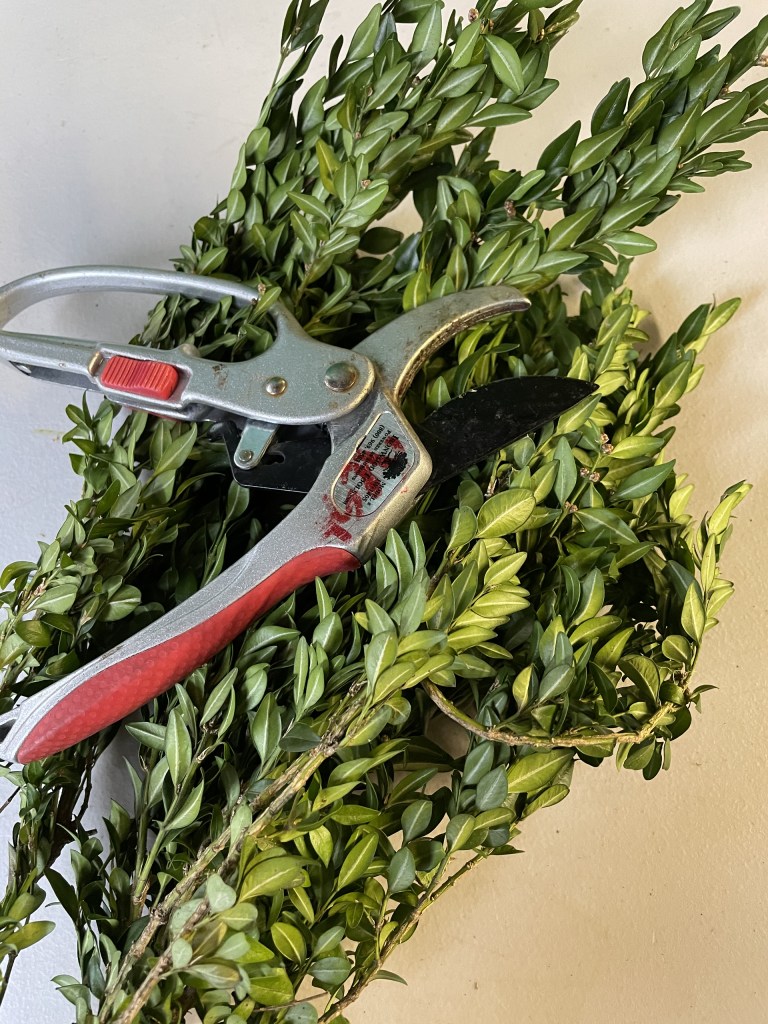
I’ve written about the benefits of using boxwood in wreath making before on this blog. For example, there is no sap to contend with as with balsam. After a while, your hands get very sticky when making many fresh holiday wreaths, so that can be a benefit. Also, the boxwood bunches or stems are light weight. I liked using them to make boxwood only holiday kissing balls because of this feature, as other kissing balls would get terribly heavy when I did a mix of greens to create them.
As far as a quality green, I like boxwood on the greens list. It tends to give a classy look to a wreath or kissing ball. Used alone or with a mix of other greenery, it works very well. In my mind, it is a nice benefit or not sure of the word, but a higher-end type of greenery to use and if you can afford it, I say do it!
A holiday kissing ball made with boxwood greens only.
Wreath by Cathy T with Boxwood and Magnolia Leaves
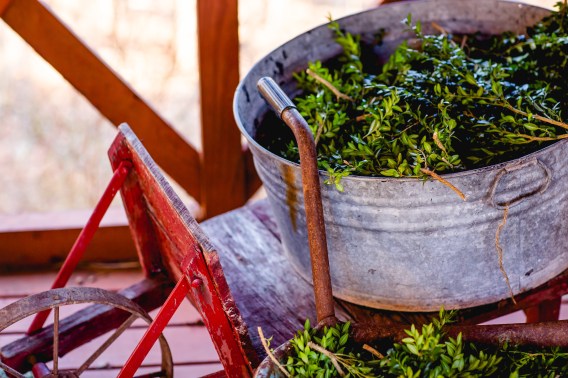
Boxwood ready for a workshop
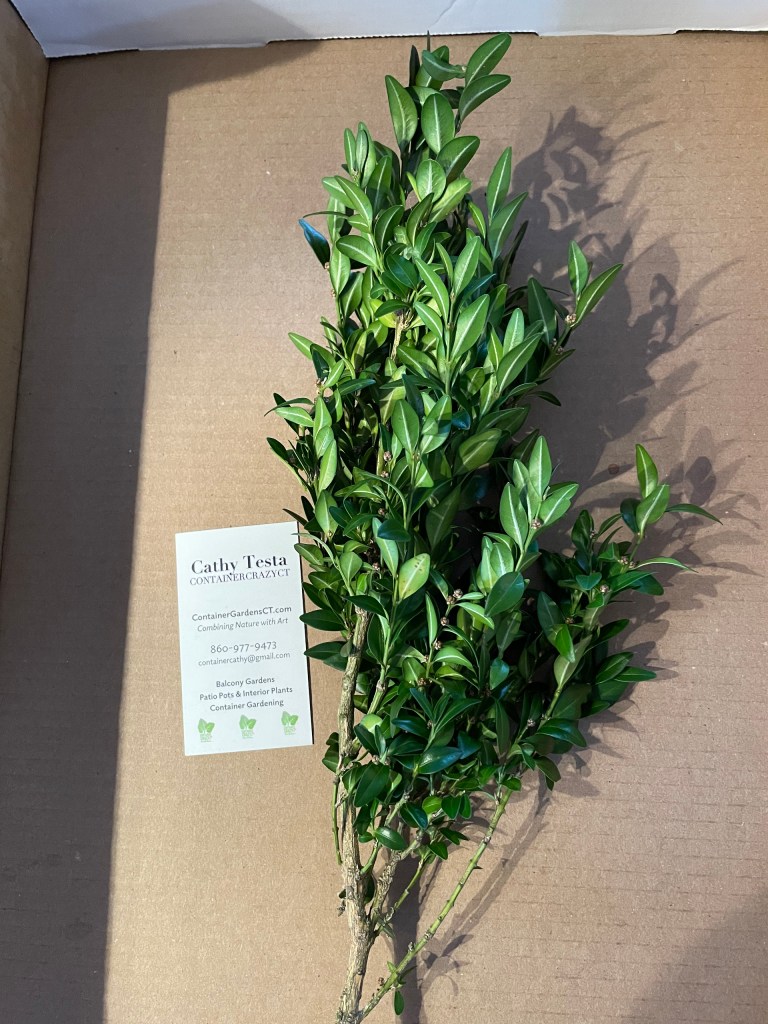
Typically, the boxwood I would order was packed in boxes or burlap bags, and they were always fresh and good looking. To keep them hydrated, if I felt they needed it, I would take a bucket or bin like the one shown above, fill it with water and drop the boxwood tips and stems into the water to soak them for a bit. Then I would shake off the excess water after they had a good soaking (maybe about 15 minutes or so). I would shake the bunch and then lay them on beach towels to somewhat drain.
As mentioned in my prior posts, the greens need to be kept cold. In the florist trade, it indicates the boxwood greens should be in a cooler at a temperature between 36 degrees F to 41 degrees F. Anyhow, I kept them in the waxed coated boxes or the burlap bags in an unheated garage. However, if I soaked them in water to rehydrate, sometimes I would just place them in a bin after the excess water was removed. Again, rehydrating them was not often needed.
Boxwood on a Wreath by C Testa (with Lemon Leaf shown also)
Another nice aspect about using boxwood is the stems are very sturdy. I would recut the stem ends to a bit of a point to insert into kissing balls center ball foam easily. BTW, you may also rehydrate boxwood before use by recutting the stem ends and inserting them into vases of water, but I usually did not do that or need to. As noted above, if there was a need to rehydrate them, I’d do the soak method in water in a tub for a bit then dry them out a bit so they would not be repacked soaking wet. Outdoor weather like snow or sleet did not bother the look of the greens either once they were in a wreath outside.
For a couple years, I offered boxwood in my box of greens mixes. These boxes of greens were for people who wanted to make their own wreaths at home. Included were many other fresh greens such as balsam or Douglas fir, Salal lemon Leaf (prior post), yew, silver fir, berried juniper, holly, and more. I never harvested boxwood from my own shrubs or others, but these shrubs are common in the landscapes, so if you happen to have a big enough shrub stash of them, they can be harvested from to add to your holiday wreaths. Typically pruning boxwood is done in the spring but taking some minor cuttings for your arrangements is usually harmless for winter decorations.
Of all the greens I would order, boxwood was usually the highest price on the list. Therefore, I did treat it as a quality green to use with a mix of greens, but if I had some left over or someone wanted a boxwood only wreath or kissing ball, I would charge accordingly. The price was worth it because boxwood is an elegant green that makes your arrangements look classy, in my opinion.
Wreath made by C. Testa with a mix of greenery. Boxwood accents shown.
Wreath by C Testa with Yew, Lemon Leaf and Boxwood
Boxwood Only Wreath by C Testa
Another nice aspect of using boxwood is it was a faster assembly as shown above on this wreath with only boxwood. It would take a lot less time than bunching various greens together.
Boxwood Only Holiday Kissing Ball
Snips and tips of boxwood greens are nice in vases or other holiday decorations. For example, if you wanted to make a snow scene in a glass bowl, the cuttings can be used in there and last a long time with no odd scent. And as mentioned good color retention. I really can’t think of any downfalls of using it. I would rate it higher as a good quality type of green to use and hopefully you will have the opportunity to do so in your own holiday arrangements!
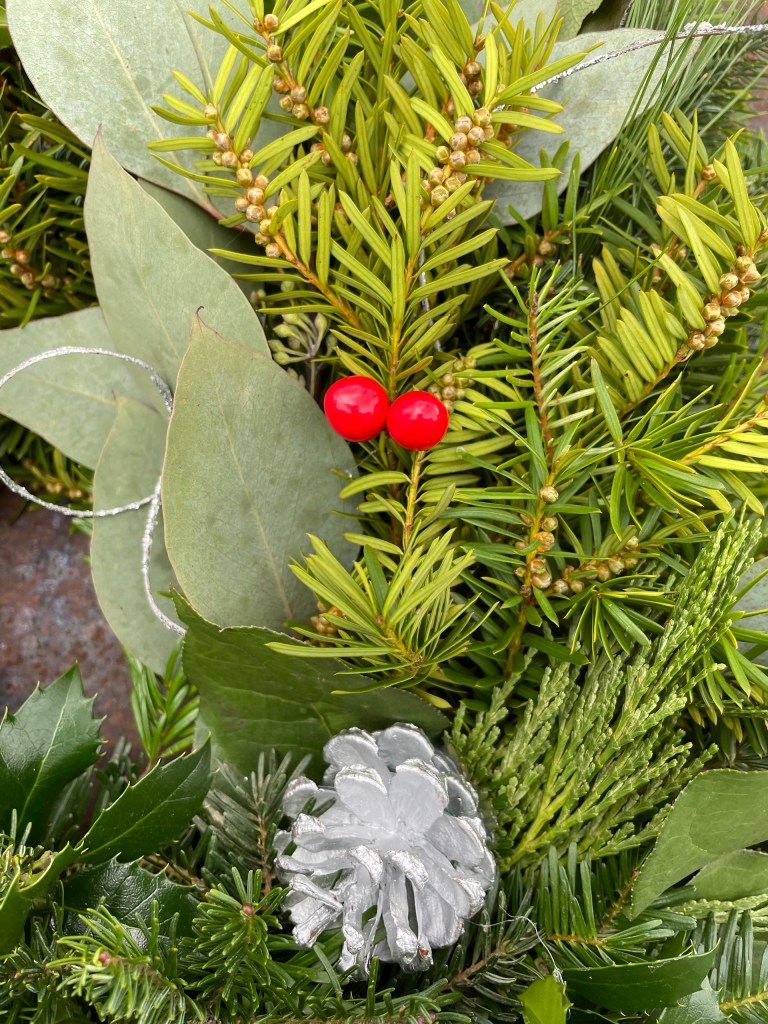
Yew (Taxus) is a needled evergreen shrub or tree used in landscapes. It is not really sought after these days, but when my parents were young, it seemed everyone used yew shrubs as foundation plants or as hedge plantings for property boundaries. They have a slow to medium growth rate and don’t experience many insect problems. They keep their dark green needle color year-round and can take moist sandy soils, but the soil must be well-drained. Locations suited for them are shade or sun. So as a shrub in the landscape, they are versatile. However, they were not often used in wreath making. Until I started to do so when I thought about how well they retained their green needles. From a distance, they almost look like balsam fir needles, and they mix well with other types of greens when making holiday wreaths.
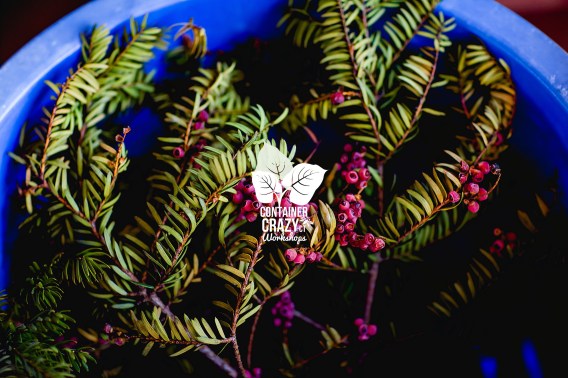
Fleshy red arils over the hard small seeds
My Dad has a stand of yew trees on his property behind his house. They’ve been there so long; they are about 20 or so feet high. If I were to guess, they are probably 60 years old, but I am not sure! Some of the branches are thick enough to require a handsaw or chain saw to cut down. For the most part, I obtained my various holiday fresh greens for wreath making from a supplier, but I also noticed my dad’s yew trees were huge and offered a nice filler type greenery for wreath making. One year, I asked him, “Hey Dad, may I take some cuttings from your old yew trees for my wreath making workshops?”
He was sure to respond yes, and Mom didn’t mind either. My Dad has a thing for cutting down trees, although we did not cut the yew trees down, we just cut big limbs or branches every year for my wreath traditions. He’d meet me there as I drove my truck down his farm dirt road which runs behind his house and park it near the yews. The trees may have been shrubs at one time, but now they were full grown trees and very healthy. The towered up high and were full of green needles.
Opening the trunk bed of my pick-up truck, I’d always be sure to watch my footing because usually the road near these yew trees is either muddy, mucky or frozen, depending on the weather. He loved cutting down branches for me and I would point to this or that one as a good candidate because it would be a full branch of dark green needles. I was always excited to get these green harvest goodies from his big three yew trees on his farm. It excited me because I felt yew would make an excellent filler in wreaths and kissing balls. These greens served as a back-up green for me too. It also felt like a Christmasy tradition doing this process every late November or early December.
We kind of kept our tradition of the harvesting from his yew trees a secret. LOL. Mom knew of course, and so did my brother who lives there, but pretty much it was our little secret of harvesting yew for my wreaths. The needles of these evergreen trees and shrubs are a little glossy, short, there is no sticky sap to deal with, and I could gather quite a lot for my uses. As he would start his chainsaw, I would have my pruners or loopers ready to clip off anything undesirable. I’d load up the good full branches into my truck bed after he’d toss them on the ground. He had his job and I had mine. The truck bed would be completely full most times until I was satisfied I had enough. I always feared running out of greens at my wreath making workshops for the holidays, so this was also serving as a wonderful back up of dark fresh greens. Sometimes I’d even piled some branches into the back seat of my truck in addition to the truck bed.
Yews didn’t seem to be a popular green for holidays however, and I don’t think suppliers even offered them as a greens option or variety for wreath making. In the old days, my parent’s days, yews were planted in the landscapes quite a lot. I think for my generation, yews seemed to be out of favor and a bit old fashioned, but these evergreen trees or shrubs don’t really have many problems. No big insect issues, no smell, but they do have toxic properties from what I read in my reference books and online. You may think the berries (actually seeds covered with red fleshy material) are toxic, but I believe it is the seeds within the fleshy red fruit that are a problem, that’s if you or an animal eats them. (Other interesting tid-bits I read about yews is a chemical from them was used to treat ovarian cancer and that Robin Hood used the branches to make bows and arrows – Interesting!) But perhaps the toxic principles are why they were not harvested as a green to use in wreaths.
I think years ago, they may have been used a lot in landscapes around commercial buildings, as hedges, or whatever because other than some pruning, they were maintenance free. If you look at some older type buildings, you may spot old yew shrubs, likely at huge overgrown sizes, somewhere near them, or maybe in a parking lot areas on the middle islands, etc. But today, I just don’t see them very often at homeowner’s properties, and if they are there, it was planted many years ago.
As for the stand of yew shrubs my dad has, they grew so tall, they were more like trees and those trees gave me a nice gift every season. The gift of the greens but also the gift of being with my dad, just the two of us, chatting between cuttings and the sound of his chainsaw. We didn’t stay out there long because it was typically cold out. Once I felt satisfied I had enough, we’d put the tools away. He’d quietly walk away back to the house down his backyard dirt road, and I’d drive off to my house to prep them for the wreath making and workshops. When I got back home, it was just plain fun for me to put these in bins. It made me happy. I am not sure how to explain that – the whole process felt good – because it became a holiday tradition of sorts. We all love holiday traditions.
As it turned out, this harvesting and cutting ritual actually helped his old yew trees to produce more foliage each year. I was fearing that someday we would take too many cuttings of it, and it would eventually look bare, but that wasn’t the case. Yew shrubs and trees can be pruned severely and frequently. Some people shear the yew shrubs into shapes, things like that. You will notice in the photos above, some of the cone shapes by the needles are a golden color, while other times, the pink, red fleshy material was around the seeds (on the female cones).
As far as wreath making goes, yews offered what I called a filler. Sometimes you need a lot of greens to create a full wreath (and you need even more to create a holiday kissing ball) and having this needled type of dark green evergreen filler from my dad’s trees, rather than purchasing more of another filler greens such as balsam and boxwood, helped reduce some expenses for me. It also served as a backup green. I always feared I’d run out at the workshops, and this was a good stock of filler. They hold onto their needles very well and last a very long time. As I’ve noted in prior posts, what makes a beautiful wreath is a mix of greens because you get various textures of green colors and yew also has a lighter underside color to the needles. Can you see the yew in the photos above? The yew helped to fill it in as with all the other greens we had on hand to use.
It is possible people don’t like to use them in their landscapes because they are toxic. My handy reference book indicates the foliage, bark, or seeds, are toxic to people and to all classes of livestock. The fleshy red berries (known as arils) are not poisonous, but the seeds inside which are very small are from what I know. This was interesting to read because my dad’s yew trees are on his farm! He had cows for years, but they were not in the backyard area where these trees stand by the road which leads further back to where the cows roamed the property by the river and in the fields. I wonder now if my dad knew this toxic issue about his yew trees and will have to tell him when I see him this week. He did not have any yew shrubs in the fields where the cows were, so that’s a good thing. I also read they are “not” toxic to deer – go figure! We all know deer like to roam evergreens and have at them in some landscapes.
Undersides shown above on Yew stems next to Lemon Leaf (on far left)
I also liked using some of the taller yew branches to insert into large planters with the other mix of greens when creating holiday decor. The branches with reddish to brown bark are firm and strong, so it was useful for that aspect, serving as a center tall thriller. These yew greens experienced no problems if they get wet or frozen. I realized that yew was just overlooked but very useful. Yew has a nice dark green color with a bit lighter green on the underside of the needles and they had a nice fine texture too. They were not difficult to work with.
There are tons of cultivars of yew shrubs and trees. They have or had many purposes from foundation plantings to topiaries, even bonsai. They do not have serious diseases or insect issues from what I know. And lastly, these greens held up very nicely before and even after use. I would put them in a huge bin with the stem or limb cut ends facing down in the bins and fill the bottom part of the bins with water to keep them hydrated, and again, as noted in my prior post, I put them in the cold garage. The needles “never fell off” even after the workshops were long over and weeks went by. When I had some left over, there wasn’t a needle on the cement floor of the garage. Even if the water in my big bin froze, it did not negatively impact the stock I had collected. Later, I would put the left-over branches in the woods for the deer to have should they find them.
One year, I dressed up in my holiday gear wearing a red Santa hat and red festive jacket and recorded a video of me showing all of the green types I had for the upcoming workshops, and I talked about yews. I noted that not many people use yew greens in their wreaths, but I do. Later, I saw a nursery person showing off yew too. I thought, “Did she see my video and then gather some up too?” Perhaps! Why not so long as you know about the toxicity part.
One thing is for certain, I will miss this annual harvesting tradition with my dad. I’m not doing my wreath workshops anymore and not making greenery wreaths for the first time in 15 years. While we worked to gather up these greens, we’d have quick chats after the chainsaw stopped and I always cherished these quick chats, but it was also cold out usually and we’d feel it. Then we’d decide we were done chatting in the cold. It is something I just felt was a nice experience just for us. I didn’t even take a picture of us out there – which I think I should have. If you should decide to use some yew, please let me know your thoughts.
I thought it would be fun and helpful to go over some of the successes and fails of creating a holiday scene on a high-rise balcony. Unlike the typical home scenarios, fresh greens cannot be literally stuck into soil in a planter. Usually that is all takes hold greenery very well in a pot to dress it up, however, this would not work on a high rise due to the strong winds. The winds are strong enough to blow off heavy furniture. Furniture had to be bolted down or locked down literally with cables. I had to get creative with the mechanics to ensure all the holiday decorations would remain in place within the greenery of the planters and wreaths.
Not only did I have to think through how to secure everything up there on a high-rise exposed to all the winter elements, but I also had to consider how to get it all up there without damaging items. Luckily, my hubby became my winter assistant. I would spend weeks ahead picking out decor items, creating fresh large wreaths, estimating greenery needed for all the planters, and organizing all in boxes so we could work efficiently out in the cold during the installations.
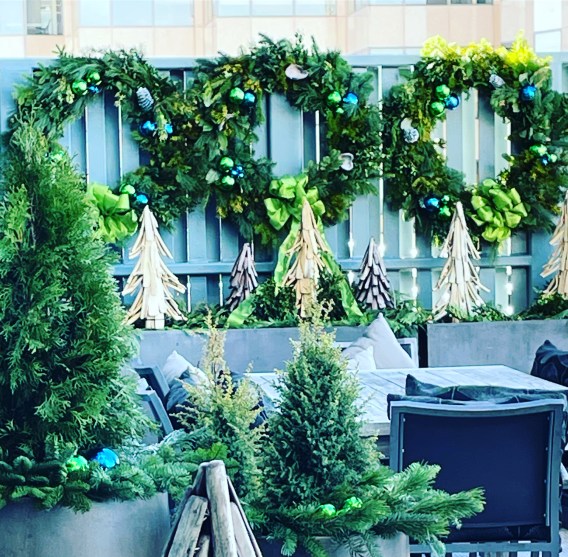
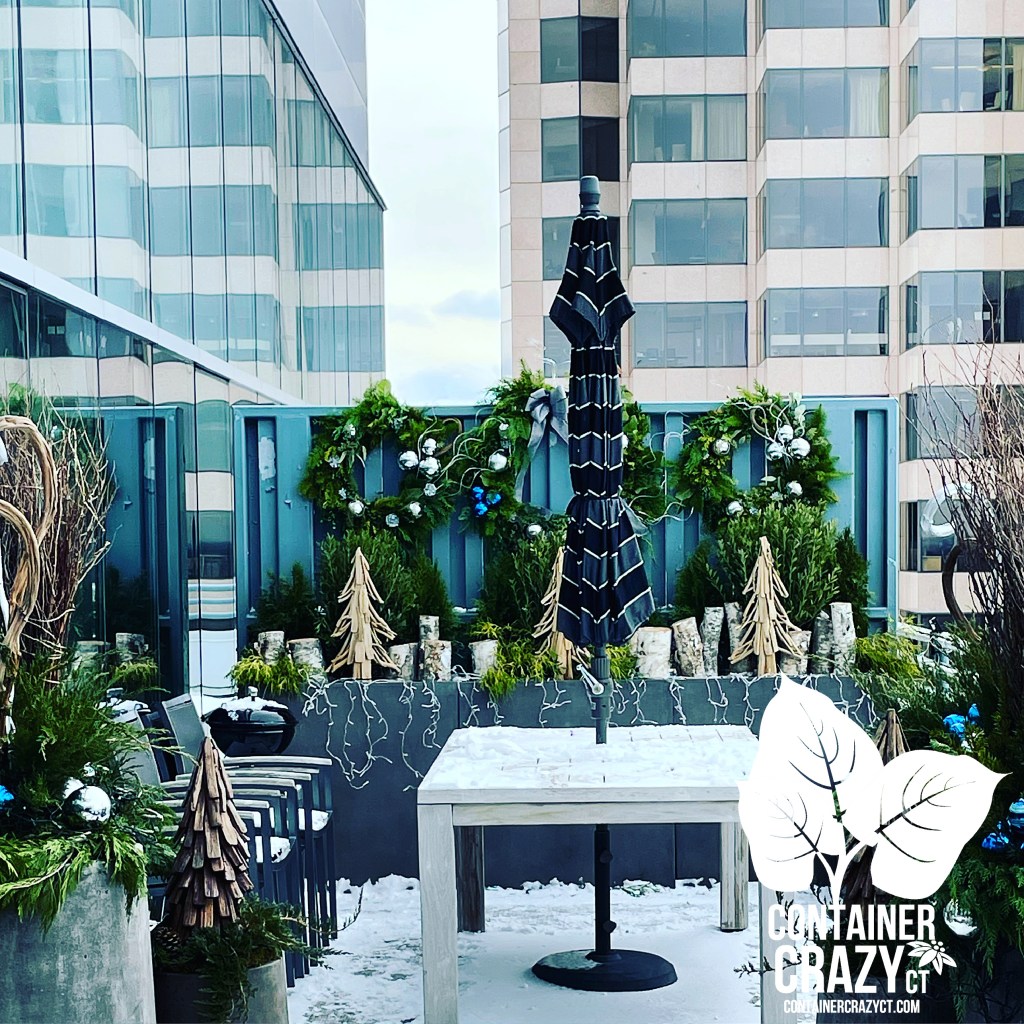
Each year, I created a new color theme for these clients, and this particular year, it was blues and silvers. Believe or not, those very thin curly silver sticks stayed in place fairly well, they did not fade and keep their glittery charm, but I didn’t just shove them in there, I secured them with heavy-duty florist wire too. Same with the silver pinecones. Wire did the trick, and it wasn’t too difficult to secure those two items in the greenery on the wreaths.
However, the ball ornaments, well those were tricky. First, they have to be shatter proof ornaments (fortunately, commonly available). I started with trying to glue them to wooden dowels but that didn’t hold too well because glue can crack in the cold. Later I realized, these have to be wired thru the actual ornament. So, for each one, I used a heat-type soldering gun tool to make a small hole on each side of each ornament (by each side of where the ornament typically has a round hook), and then threaded thick florist wire through each ornament. That worked. You can sometimes find ornaments with the wires securely attached but even still, the wind was so brutal at times, I needed to make sure the ornaments would not fly away outside. I looked into obtaining a very large and long sewing needle to help with the threading of the wire thru the two holes. The needle helped greatly to get the wires thru the two holes and then attach it to the frame on the back through the greenery.
One year, I used these thicker curved stick things – what are they called? I can’t remember! I’d have to look up my notes, but when I spotted them, I thought how cool! These could be used natural or painted silver. So, using spray paint, I sprayed some silver to match this theme and left some natural brown. I thought they were so cool and could be put into planters on the balcony an upright element.
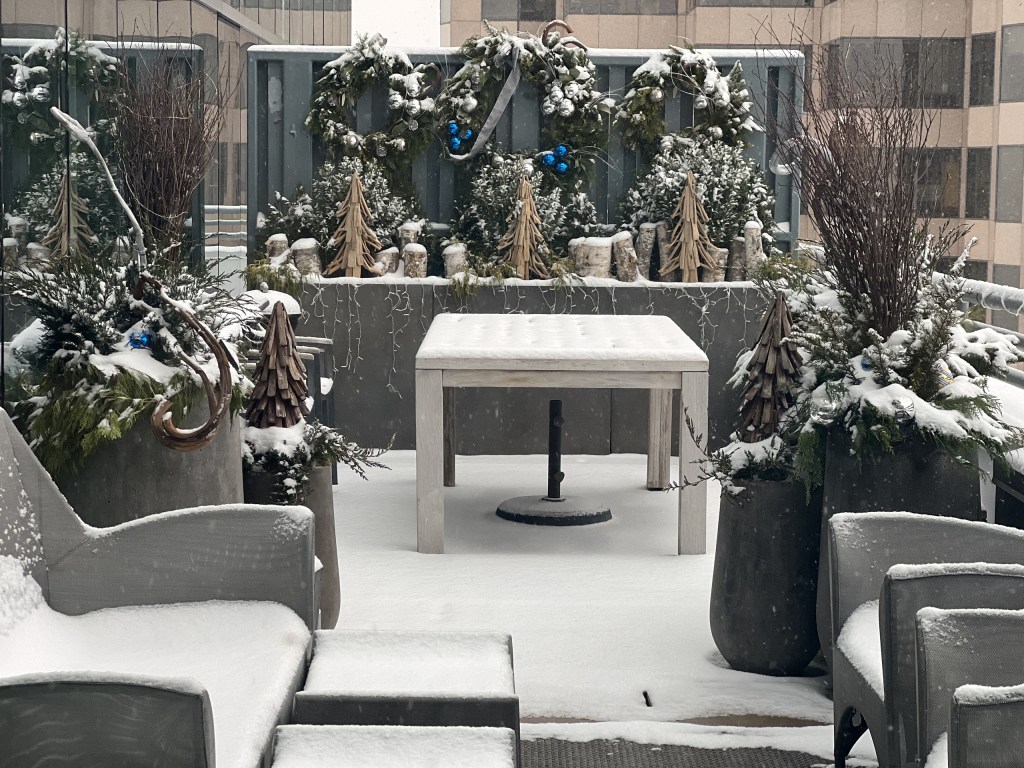
However, later, after the winter season was over, I discovered when these got wet from the snow, they totally flop over! If you look to the left, by the outdoor chair, you will see those curly sticks flopped right over. The moisture penetrated the curvy sticks and made them just flop over. So this natural element was a fail, unfortunately.
When the snow covered these installations of holiday features, it added a magical feel to the high-rise during the winter months. They can see all of it thru large windows. It is surely better than looking at just nothing. I know the clients loved it because they told me so every year. And when we started adding some solar powered lights – wow, so pretty at night. The lights worked perfectly so long as they had a sunny day prior to charge them. There is no power out there, so it was fun to add some twinkle to all.
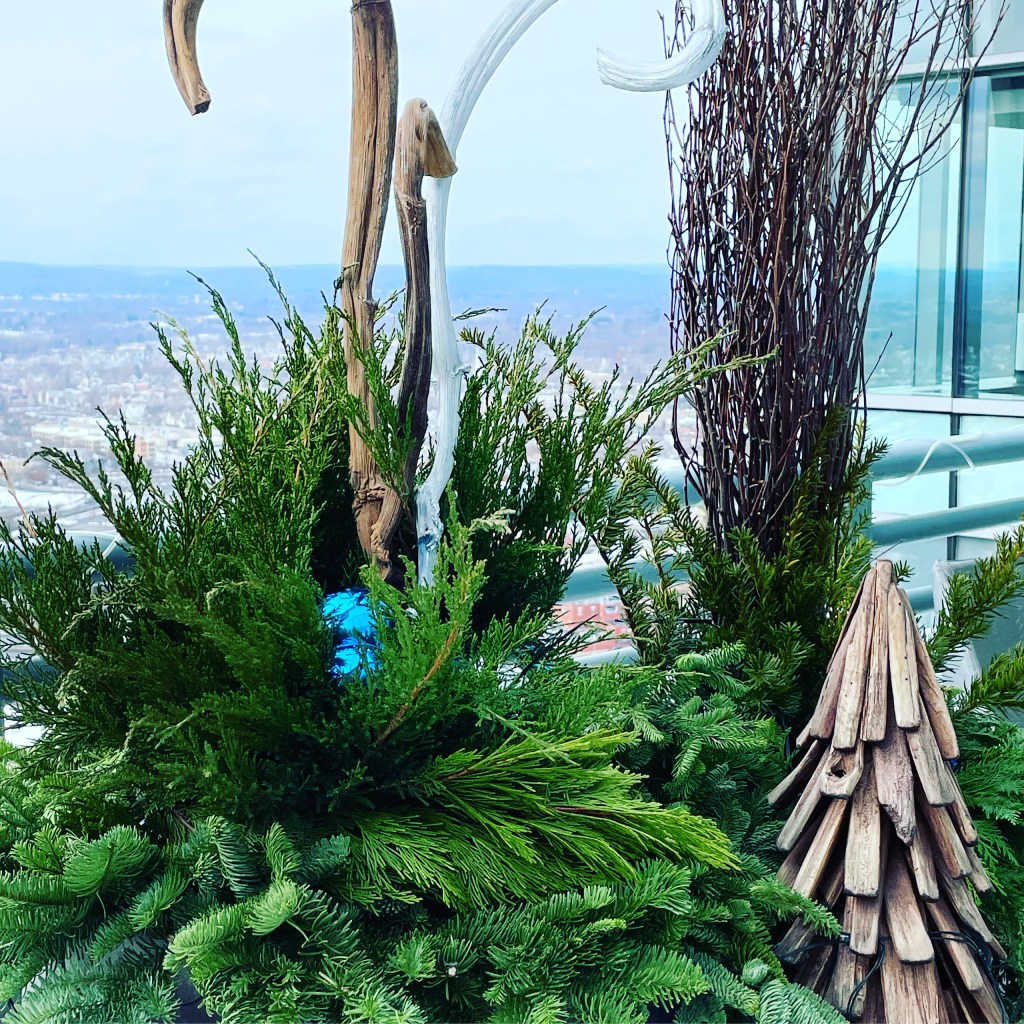
One year, I thought, you know I’m going to collect some birch and use those. Well, it took a while for me to think of using rebar (like the rebar used in foundations). It worked so great. The rebar is super strong, can be pushed or hammered into hard soil (most times, the soil was somewhat frozen in the planters) and the birch is natural and can take the outdoor elements! So, this was a theme that season, of birch, silvers, and blues.
Steve, that Elf Helper of mine, cut the rebar to my desired lengths, and we inserted them into the base of the birch pieces. They were heavy at first as the birch logs were not totally cured or dried out – so imagine we took these up and carried them in to use on the balcony. I really liked how these worked out, and if desired, could be reused the next season. Once they were pushed into the soil, it was very secure.
As a side bar, another big thing to think about on a balcony is the weight of everything. There are limits and so there is not only the total securing of items from elements, but the weight and of course, the look! Fortunately, these clients loved natural looks of things and so do I. BTW, we did not end up reusing these as we did a different theme the following Christmas.
Here’s a photo of the Birch logs before a big snow fall. They were very secure and with the lights at night, pretty! You can see the wreaths there and those are very large wreaths I made. Steve would step up on the planters to install them and my heart skipped a beat every time. We tried to use super big zip ties or cable ties to secure the larger wreaths but sometimes those snapped from the cold, so we ended up using thick wire. Steve had his technique down. I could not have done this part without him. And he is actually afraid of heights, so he never looked to the right at the view 38 floors below. Fortunately, the heights never bothered me up there – I loved the whole scene every time I was doing installations. To see the skyline, hear a hawk go by, and just the overall feel of the scene above and beyond was inspirational.
I so wished those thicker curly sticks had worked though – I really liked the natural feel of them as it adds a bit of height to the fresh greens I installed below. Wooden drift like decor trees worked out well – they can hold up to the outdoor various winter elements and I would secure them using rebar. As I did with the twig bundles you see near the wooden tree in this photo. Remember though, it was never as simple as just stick things into soil, like I would do with these types of decorations on the ground level at my home or elsewhere. Everything really needs to hold super well or risk damage or flying away. I would envy those installers of holiday pots and decor as they just stood there sticking stuff in the soft soil on Instagram feeds, because I couldn’t do it that way.
Pinecones weren’t too tricky to wire on. Greens were wired on greatly to secure them also. The steps I took to make items for a balcony that high up were more involved and required the hours prior. After making several wreaths for this winter job, I would place them up on tables in my garage and admire my work. Then go wash my hands that reached dry state from all the greens, gloves, and working in the cold, you name it. I loved every single minute, however. My passion for the greens and creating drove that part! Passion drove me to do it all.
One year, I had this idea of using round shapes and putting lights on them. I had acquired old antique rings and used those in the center with some wooden wavy white sticks and the dripping down solar lights. This was a year prior I think of the install above. Notice the wreaths are smaller. I started to realize the bigger wreaths were a better look overall. This theme was silver, white, natural, and magnolia leaves were used as well. Along with the shrubs and added greenery. I secured the three round wire rings with bent u-shaped rebar which was pounded in and the wiring of them together side by side helped as well.
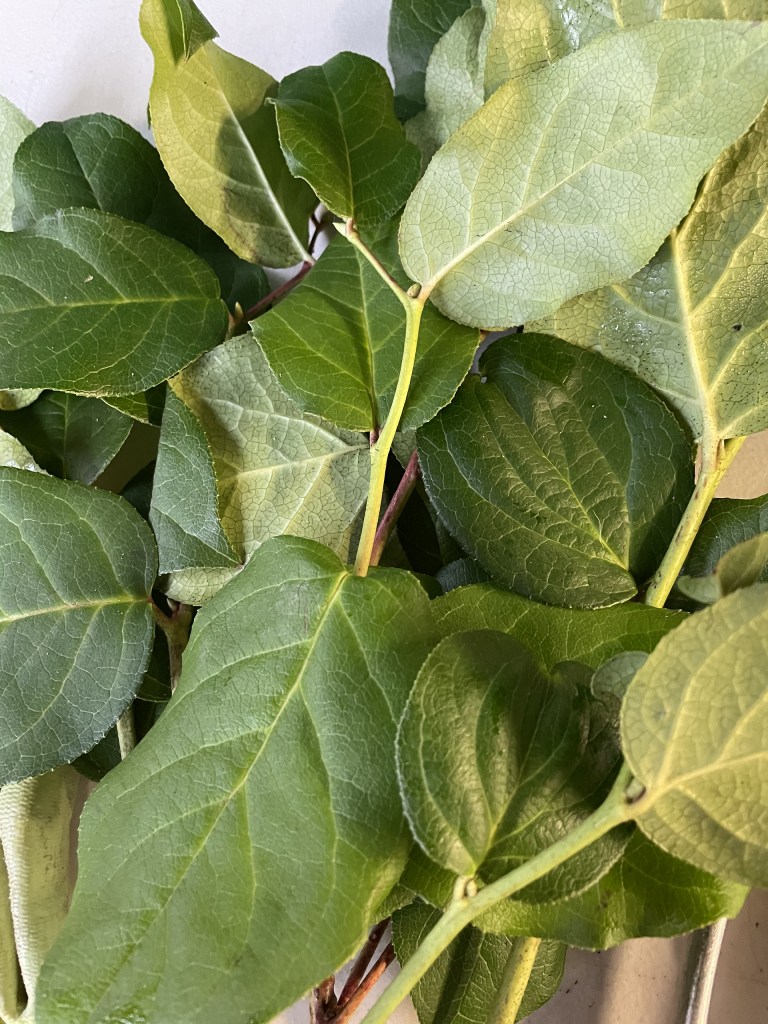
This image above is at my house where I was in the midst of creating the wreaths – here they are without decor yet. I liked using magnolia leaves, but they were a bit pricey. I started to use lemon leaf (photo below) more so. Lemon leaf held up very well along with the mix of fresh greens such as balsam, fir, pine, and many more types of greenery. Each was hand-made by me, and I like the full fluffy look to wreaths.
In this photo of my Elf Helper with the wreath I made, the theme was green, cobalt blues, silvers and keeping it simple. Simple is good cause of all the wiring and securing required. Anything natural, from the natural world worked well. In this photo, you can see those silver open shell-like pods. What are they called? I don’t know but I scored those one year and I literally burned a hole thru them to secure the wire, they were hard like wood. I wasn’t the best bow maker, but I have a technique that worked well enough. Fortunately, the bows did well on the high-rise, with long tails to blow in the wind. They stayed in place and added a little touch of the theme’s color.
I wanted more of those driftwood brown trees used here, but I could not locate any more, and was able to acquire the off-white ones. Those worked really well. They can take the elements, don’t fade, and look nice. This particular year, we left center shrubs in from the fall in tall planters around the balcony perimeters, and I got smart with creating what I called “pot toppers” with various fresh greens and heavy-duty wreath frames, which I had to pull over the shrub. You cannot imagine what my “Crazy Cathy T” mind came up with! I was like, how do I get these over the shrubs without damaging the shrubs? Lots of measuring and then I used a pillowcase. Funny, huh? I put a pillowcase over the shrub and then pulled the pot topper over it to place on the rim of the tall planters. It worked really well. And the pot toppers stayed in place.
So many considerations took place on mostly how to make sure things don’t fly away. Each year, I came up with new ideas, out of the box thinking, and creativity. I hope the wiring of the ornaments and rebar will help you if you have a high-rise opportunity and want to decorate it for the holidays.
Thank you for visiting,
Cathy Testa of Container Crazy CT I live in the Broad Brook section of East Windsor, CT.
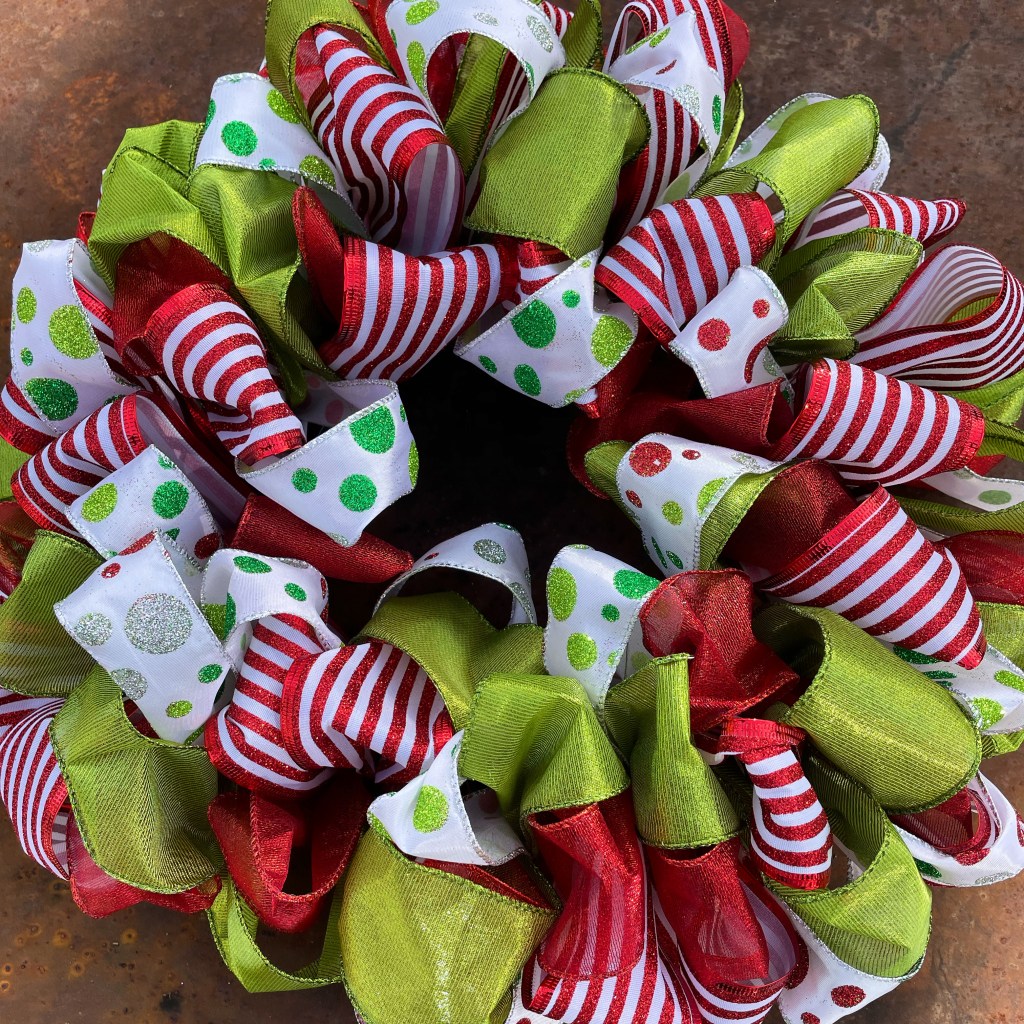
FYI, this year I am not making my greenery wreaths, but I have been creating ribbon wreaths as noted in the prior post. Here’s a photo of one I created below recently for a customer!
Back in 2019, I received a voicemail from a gentleman, and he was looking for a gardener for his balcony. I immediately felt a certain tone in his voice. Something about the phrases he used and his professional manner in his voicemail to me made me feel this would be a call worth returning. And, my friends, it was.
It led to quite the adventure of planting not only one but two high rise balconies for five years, located on the very top floor of a building in Hartford, CT. It’s a good thing I do not fear heights, because if you did, you would not be able to look over the railing at the scenes far below. It can make a person with a fear of heights queasy.
There’s something special about working in a high-rise urban situation. The background city sounds are constant, but they are not the typical sounds I hear at my home, which is filled with birds and maybe a slight sound of road traffic. On a high-rise, you hear sirens, distant constant highway background noises, an occasional high-flying hawk, and air sounds. I liked that. It is not overpowering, just there and didn’t bother me. In fact, because I have tinnitus, I rather liked the background city sounds. It drowned out my tinnitus and also the enjoyment of working in this special place, made me not focus on tinnitus either! Plus, the views were enough to not even think about the background noises.
I also liked how you are up there overlooking the world, and no one knows you are. It is a really neat and inspiring situation. One time, when working on their planters, two helicopters flew right near there, as if a pair flying together. I thought, can they see me here, and I even wondered if it was the president. I had read he visited an area in CT that day.
And after a few rounds of plantings, I started to see bees. Usually, a solo one or two. One time, the client heard a tree frog in the planters. They could not locate it, but they were amazed, and so was I! He either hitched a ride on one of my nursery pots, or could it be possible he climbed up that high?! The balconies are 38 floors up! I always liked pressing that PH button in the elevators, I have to admit.
I thought, gee, I so wish I landed this opportunity when I was younger. I was very excited to work for these clients and their balcony gardening projects, and yes, it was all very large planters the full length of the balconies. Fortunately, they referred me to another couple in the same building, so had two wonderful sets of clients and wonderful planting scenarios.
Probably the best part of it all was the upmost appreciation for my planting work and craft by these clients. I was told often that I was an artist. Can you imagine how that felt? It was wonderful and meaningful to me. And their flexibility, as they fully understood this planting situation is unique and has special challenges. They were always, always polite and understanding because things unexpected can happen on a high-rise situation with plants. I knew it would be challenging yet extremely fun and rewarding for a plant person. Plus, I liked their style. Both had their own unique style, and it was fun to think about how to best meet their needs in that regard as well.
Working on a high rise has many challenges. Try – no water sources outside. Extreme winds that will shred plants. Cold temperatures when I did winter installs. And in the summer, extreme heat. I had a lot to learn and research. And, not to mention, going up and down constantly in an elevator. I am lucky I am a thinker about organization because you have to organize all to be efficient in those situations. And I got to witness how plants respond differently in a high-rise balcony situation in planters, pots, and spaces. Plant colors are different when experiencing extreme heat, they grew to amazing large sizes in some cases, which blew me away. I would plant a small herb and it would reach the size of a shrub by the end of summer. It would shock me sometimes, like wow, they love this sunshine and heat! I read somewhere you could not grow tomatoes on a high-rise, NOT! You sure can and they were wonderful.
I thought it would be a great idea to talk about the plants which worked well in these situations and what didn’t work so well on a high-rise. And write about my high-rise balcony gardening adventures. I actually had trouble finding good books on balcony gardening. I could write one of my own I guess, but I choose to use my blog, here on Container Crazy CT, to write about scenarios I encountered in a series of posts.
It begins today!
Sneak Peak of a Row of Big Square Planters
A tapestry of succulents in long square planters – Loved how this came out in year one!
I’m not sure exactly where to start but these two images above are sneak peeks of two of the many planters. The first is client number 1 and after much thought and questions, I ended up putting together a mini garden and I loved how the deep plums accentuated it. And for the other photos, it was a mix of succulents. Some grew two to three sizes larger in one summer. It was amazing. I will write about these and many other planting arrangements as I do my series of posts upcoming!
More later!
Cathy Testa Container Crazy CT Date of post: 9/12/2023 Location of Photos: Hartford, CT My Location: Broad Brook, CT
As we age, things with our bodies change and some things are out of our control. I recently found out I have an eye condition which could potentially lead to loss of vision in the center of one eye. Today I go see a specialist. I really dread this appointment because I envision a needle coming my way. But then I tell myself, stop obsessing and all will be fine.
But this had led me to think about what if I did lose my vision. What if I couldn’t see my plants, all the amazing flower colors, and the beauty of what plants bring to my eyes, and my heart?
Being a “what-iffer” is not a good thing and maybe my eye issue won’t be severe and allow me to be free of vision problems for several more years. I won’t know till after today’s assessment, or perhaps for a few years, who knows.
My Mom lost partial vision in one of her eyes many years ago too. I remember going to the doctor’s appointment with her and the process they explained for a surgery at that time involved lying face down for several weeks at home after the surgery for the recovery process. It was an insane scenario to me. I remember thinking how anyone can lay face down for that long? She didn’t do the surgery back then.
She managed a very long time with partial vision in her eye, but today, as she is more in her elder years, she cannot drive due to her vision issues. She used to crochet a lot but said she cannot do that anymore, and that she can’t even read the newspaper now.
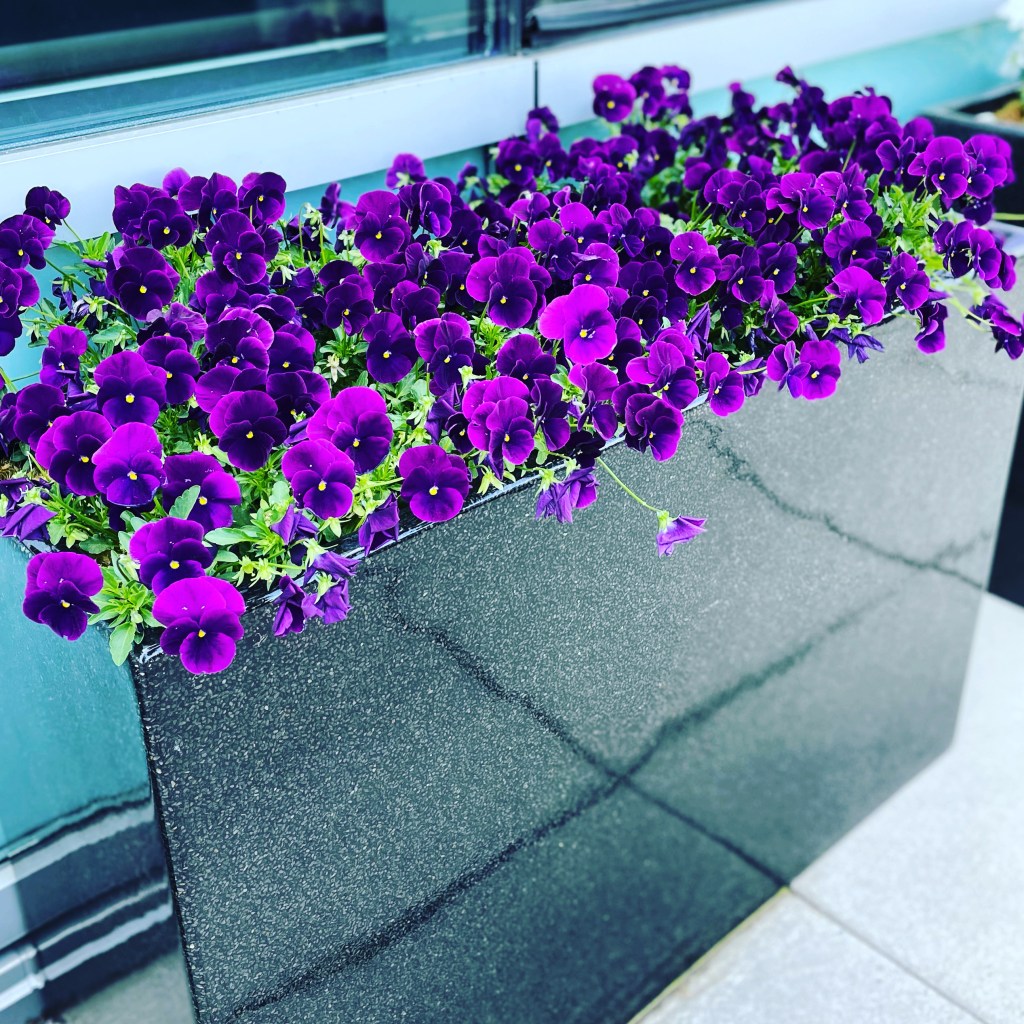
I often browse my plant photos and it really brings me a feeling of good vibes. I love colors, I love looking at the colors of flowers. Even simple Pansies are amazing when you really look at the flowers, and think, how on earth could God, Nature, whomever is responsible for these colorful wonders do such an amazing job. It is such a gift to us. Truly. Just look at these purple Pansies in the photo below. The outer edges are a lighter purple than the centers. The color is two toned! Nature does that!
If you think about the colors of the world, so many come from plants, flowers, fruits, and of course, the sea, ocean, sky, etc. Colors paint our world. Can you imagine a world without flower colors? I cannot. I am always amazed at the beauty of gardens and plants. And color patterns of birds and more.
Recently, I started playing around with needle felting and I really enjoy it. I started to think, what if I couldn’t do this if I was vision impaired. What would I do to replace this creative therapy.
Could I envision plants and their amazing colors in my mind. I guess if someone said, oh this photo of your planter with x-y-z has this and that, I think I could envision it. I could see it in my mind, hopefully.
Again, I’m not in the gloom and doom phase – don’t get me wrong, just it got me thinking about it. Certain scents can bring you back to a moment in time. I remember the scent of sugar canes in Hawaii. I will never forget that – and if I smelled it right now, it would zoom me back to that moment.
Our senses are all part of the equation.
In a jewelry class I took this winter, a woman moaned a bit and the instructor asked if she was, okay? She replied that her darn arthritis was bothering her hands. I guessed she was probably the same age as me. I thought to myself, we all have our struggles as we age. For me it is my eyes, for her it is her hands. I have heard how painful arthritis can be.
I suppose you just have to adjust and deal. Heck, my hearing is already having issues. I joke with my husband that there should be a special form of sign language for people who start to lose hearing in their later years. He said, there is, it is called sign language. I always told him; we will learn and use sign language if we ever lose our hearing.
Anyhow, until any of those days come, I will try to “focus” (no pun intended) on enjoying colors even more than I already have. I will enjoy listening to the tree frogs, birds, crickets even more than I already have, and try not to think about those what-ifs!
To see photos of some beautiful flower colors, visit my SmugMug Gallery of Flowers.
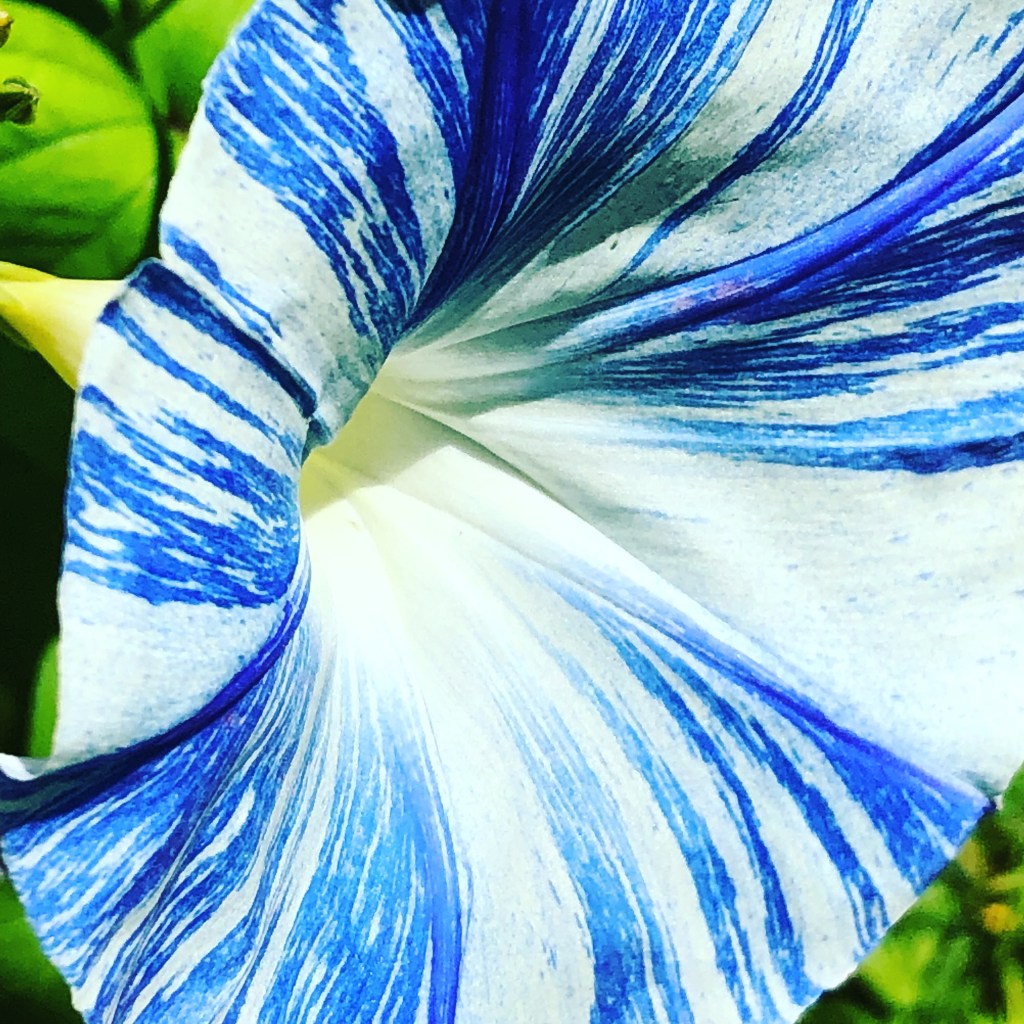
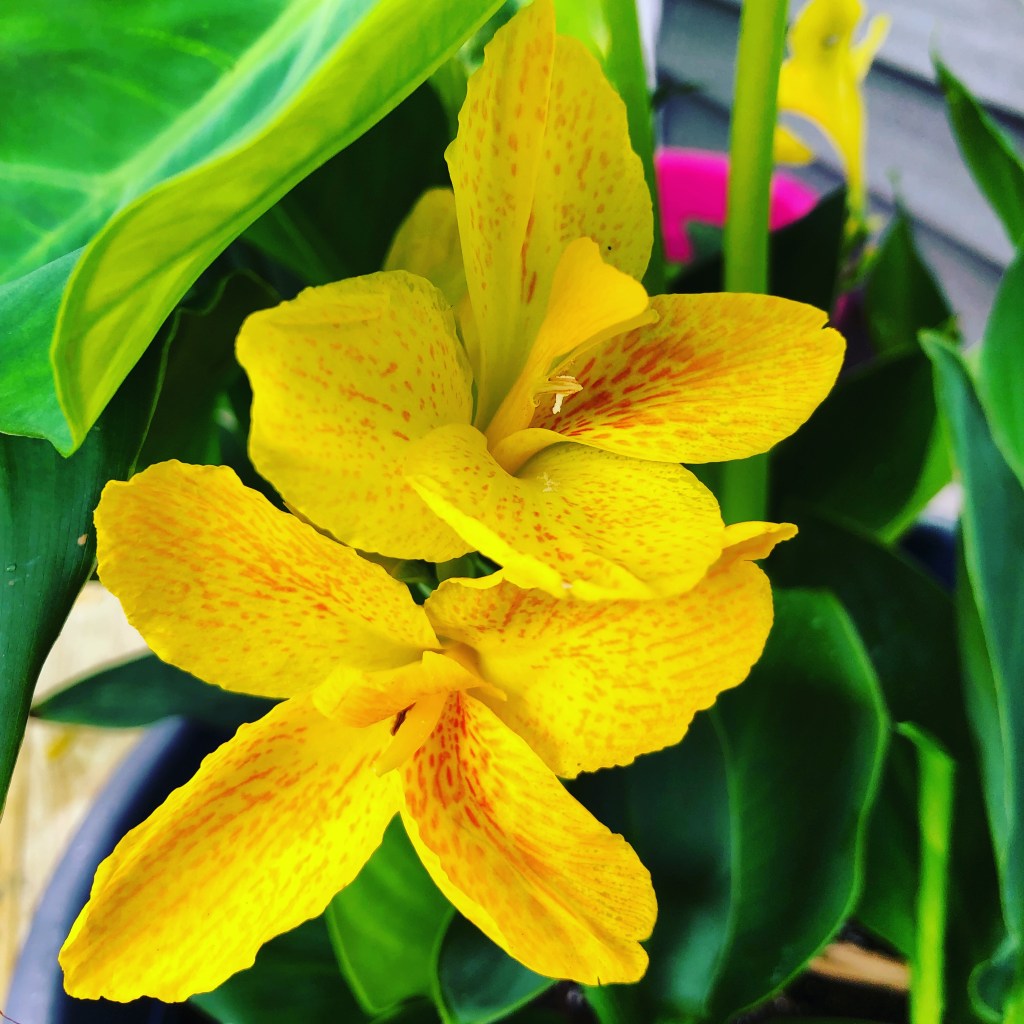
Photos above:
Blue and White pinwheel morning glories. Grown from seed one year. Absolutely stunning and fun.
Yellow blooms with red speck of Canna Lily. Love growing Canna Lilies and using them as big tropical thrillers in my container gardens every year.
Deep red Canna Lily blooms with purple flowering annual behind it. I think the purple is annual salvias. I love how this spontaneous photo I took came out. Truly – does it not bring joy to your eyes, and then your heart? It does for me!
Almost all photos on my blog are photos I took with my iPhone. Yes, it’s an obsession!
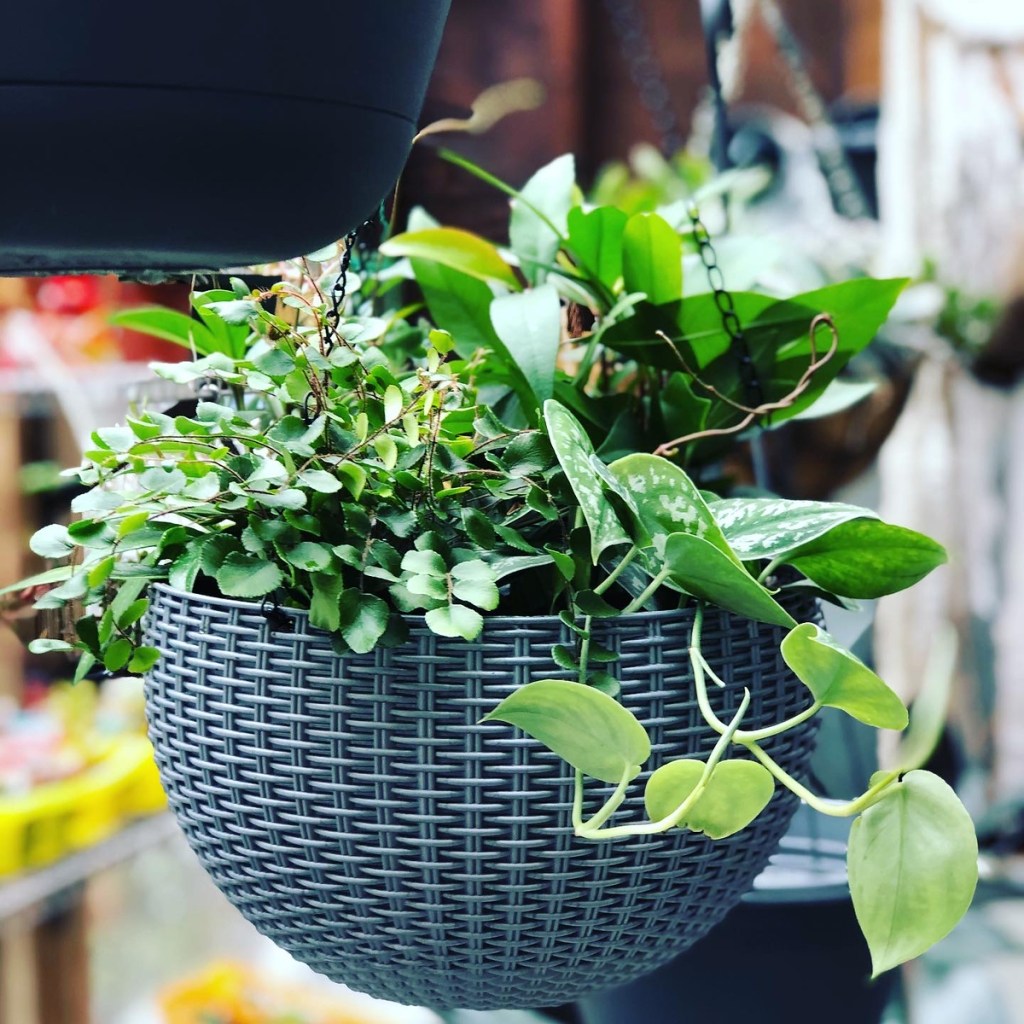
I’ve purchased various ferns many times over the years, some for outdoor shade garden growing such as the Maidenhair Fern, and some as fillers in my container gardens, such as the adorable small round leaved Button Fern. I love Maidenhair Ferns for their delicate stems and unique growing style, and I liked Button Ferns for their contrasting bright green color against the darker tones of other plants in mixed container arrangements. I also have rather enjoyed Staghorn Ferns, grown on boards or other hanging structures, for their unique display. I also love using various smaller ferns in hanging baskets mixed with other green foliaged houseplants, as shown in my gallery on Smugmug. However, typical Boston Ferns were not on my personal fav’s list, until last year.
Photos above (left to right): Gray hanger with mixed houseplants and a button fern; Outdoor Barrel planter with rubber tree and button fern; Hanging basket top view with button fern and other houseplants.
Typical Boston Fern
I purchased a typical Boston looking fern on a whim as I was entering a grocery store when I saw a bulk of them recently delivered and sitting outdoors at the front of the store. (Tip: Look them over – Do they look healthy? Was it a recent delivery? Or are they stressed? Also remember to look under the leaves, or in this case, under the fronds to see of any rot or insects (look for white fuzzy looking spots which could be mealy bugs), or in the case of ferns, don’t panic with ferns if you see brown symmetrical dots on the undersides of the fronds – those are naturally occurring spores on “some types” of ferns and are not insects! However, overall, these looked great at that moment of spotting them.)
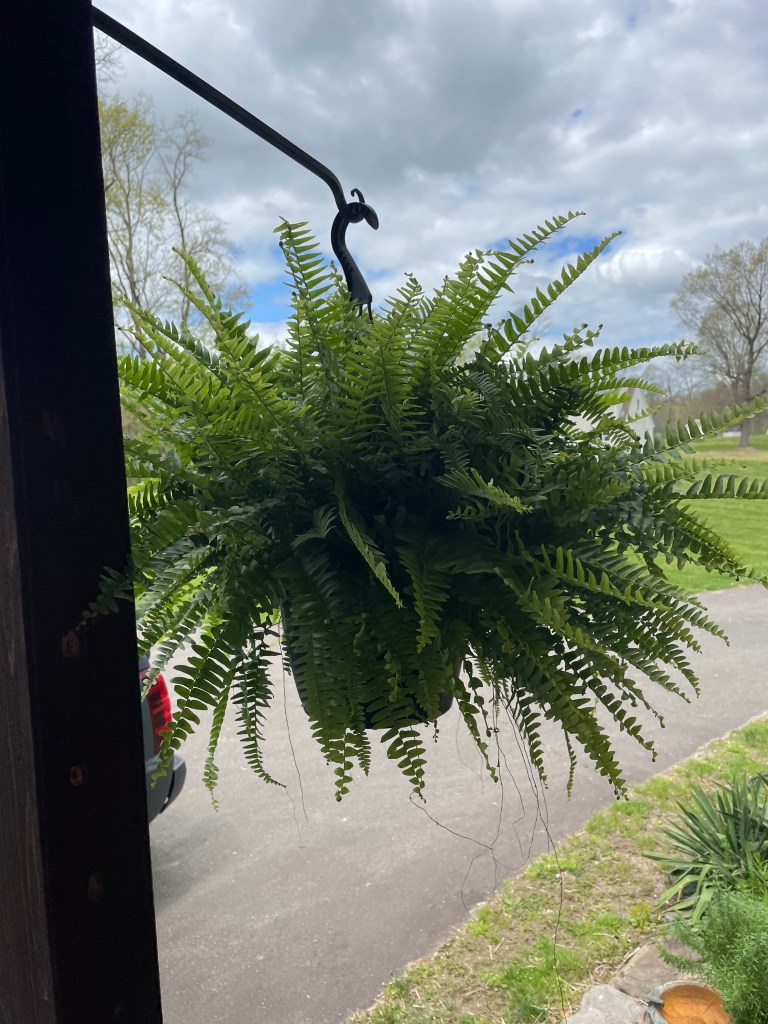
Jumbo Boston Fern
Looking closely at the label in this photo, it indicates it is a Jumbo Boston Fern. I didn’t realize that until later as this fern grew rather large in one summer season. The reason I thought I should get one is because I had read that someone overwintered them easily in a low-temp greenhouse so I thought this is a good candidate for overwintering, similar to my Agaves, which don’t mind some lower temps for a few months and can ride it out till summertime in my low temp greenhouse (Note: I live in Connecticut Zone 6b).
Boston Ferns (Nephrolepis exaltata) are a commonly known plant and people typically display them in hanging baskets inside the home or on porches in the summer. Because ferns like humidity, they can be tricky to keep healthy over the winter inside a home, but so far, the one I purchased last season which is hanging in my low-temp greenhouse, is looking pretty good and well, “hanging in there” for the time being.
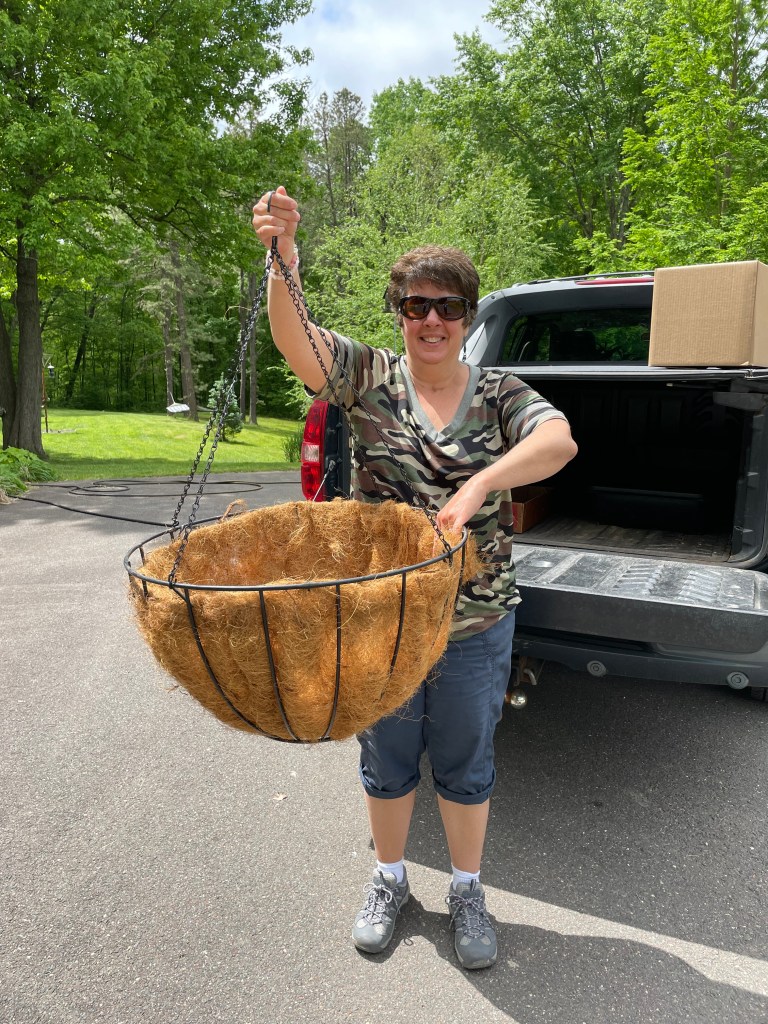
Location
I decided last year I would hang it from a big maple tree in my backyard when I scored this super big hanger at a nursery. Using standard potting mix and adding some balanced slow-release fertilizer in the potting mix, I planted it and cranked it up via a cable system my husband installed for birdfeeders from the tree’s branches. We hadn’t been using it for feeders anymore due to pesty squirrels, so now it was the perfect set-up for my new Jumbo Boston Fern.
Because ferns prefer filtered light, and many come from a natural habitat of shady forests or trees in moisture loving places, growing under a tree was a good location. Plus, it was so large, along with the hanger, it was enjoyable to view this big hanger and plant from my deck. At one point, a bird tried to create a home on the side of the planter, creating an entrance in the moss, but soon the bird realized this was not going to work because of the watering. I felt badly but I figured he or she would get the message and move on which he or she did.
During the winter, the location of this fern has been inside my low-temp greenhouse. Fortunately, the hanging baskets hanger and chain is strong enough to support it – it grew two-three times the size of the original plant by the end of the summer.
Grew Fast and Larger
The plant grew from a standard hanging basket size to a monster size. I had forgotten it was labeled as a “Jumbo” Boston fern so true to its name, it got jumbo size for sure. It is so heavy I feared the hanger would not support it in the greenhouse, but my trusty husband assured me it was fine. I also read that ferns have shallow, fibrous roots that fill the surface of containers quickly, so pots should be as wide as they are deep (which is the case with the big hanger I scored – I think it is about 2 ft wide on the top and it is certainly large in the bottom. It has plenty of growing space and by the end of the summer, it almost filled this big hanger.).
Wateringand Moisture
To water it as it hung from the tree was not too difficult. I would just take my hose from the deck and point a strong spray of water to it and do that at least once a month. Boston ferns like constant light moisture and I enjoyed watering it as needed. I could have added some peat moss to the potting mix, but I felt that may make the whole thing too heavy, so I only used regular potting mix (as noted earlier). During this winter, as it hangs in my low-temp winter greenhouse, I have been careful not to water it too often because I don’t want it to rot. I have not misted it but one day, when the sun was out and the greenhouse was very warm for a winter day, I showered it with water from the hose, wetting the fronds, inside the greenhouse knowing it would enjoy a mist of showering moisture which would dry by end of the day due to it being a sunny day. I would not have done that on a cloudy winter’s day. Otherwise, I have watered it only occasionally in the greenhouse, and water spills out the bottom draining well. Note that these ferns can be messy indoors, dropping or shedding bits of the drier fronds, and plus watering it makes a big spill so in the greenhouse, that hasn’t been an issue for now. I will have to clean up shedding from the floor before spring, so it doesn’t create other problems in the greenhouse but otherwise, it has been fine. Some common places to hang this type of fern indoors may be a bathroom which is usually cooler and has some humidity but again, hangers can make a mess when watering, etc.
TemperatureInside and Out
I read the temperature preference of Boston ferns is below 60 degrees F at night indoors and during the day about 70 degrees F indoors. In the summer, they adapt to a range of temperatures of 80-85 degrees F during daytime outdoors. My winter greenhouse is kept at about 50 degrees F and so far, it has adapted well. Note though however we have had a mild winter so far. Some of the fronds have dropped a bit of dry pieces, but otherwise it is showing signs of life and is staying healthy. I will have to watch out for when temps ramp up in the greenhouse when spring arrives so I do not burn the leaves and may have to move it to a shadier spot (maybe under a shade cloth in the greenhouse, or under a protected shelf) before transitioning it outdoors in late May or early June. Right now, it is hanging fairly close to the ceiling, and I realize this may be too hot when we gain more sun in the springtime. Again, references indicate most ferns grow best in normal or cool room temperatures (difference of about 10 degrees F between day and night mimics the conditions they experience in the wild). Dry heat, which occurs in homes during the winter, is not preferred by ferns.
Fertilizer and Propagation
References in some of my garden books indicate that Boston ferns should be fed every two weeks with a balanced house plant food mixed at half the normal strength. I did not do any feeding of that nature last year, but we will see how it does this year, and perhaps will do so. I don’t believe in over feeding plants and try to determine their needs based on conditions, experience, and growth. Also, from what I read, divisions of the plant from the parent clump may be done in springtime so I will look to see if I can divide it then as needed.
Growing your own tomatoes is one of the most rewarding things you can do if you love the flavor of fresh tomatoes. Each bite brings joy – seriously.
But where do you start?
Well, probably the first things are you need the seeds, and of course the growing supplies, but you also need to have an understanding of timing – when to start your seeds so they are ready in time for planting outdoors after frost periods in spring – so for us in CT, to make it simple, outside safe planting is late May (usually Memorial Day). Note: Areas of CT have different scenarios but in general, Memorial Day is usually when it is warm enough and induces great starts of your tomato plants.
I was trying to think of when I started my own journey of growing tomato plants from seed. I think it was spurred when I saw seed packets with artful packaging that I decided to buy some of those packets and get started studying and researching on the steps involved to grow them. I did lots of reaching online, got books, you name it.
I don’t think learning all the aspects of seed growing is necessarily difficult, but it does take some time to learn all the nuisances around seed growing. Like, for example, if you start sowing indoors too early, you will have plants too big and realize you can’t move them outside yet because it is too cold in early spring, then you are struggling with how to care for them inside. If you start too late, your plants may not produce tomatoes in time during the summer and you would be disappointed.
If you search this blog site, you can find more details about my process. Here are some links below.
Note: February is a good time to plan, because some tomato seeds are started in March.
I probably have more posts about seed growing on this site, just type the word “seeds” in the search bar, and they should pop up. Or you may want to type in the word tomatoes.
I do all of my growing of the starter plants (grown from seed) in large grow bags, large patio pots, etc. But we do want a “real garden” of the ground here someday, which will be a big job because it will need to be fenced in. We have a river behind our house, and it attracts lots of wild animals, etc. I love container gardening and have been very successful growing tomatoes in pots – they just should be large enough pots and watered and placed in sunny areas, and oh yah, have drainage!
This year 2023 – some things are changing:
I have decided I am not going to grow my tomato plants – for those of you who buy them from me – read that again, I am NOT going to grow them. It has to do with the fact that I have a trip planned right when it is the most important time to monitor the tomato starter plants. Someone said, hire someone. Well, not going to happen. LOL. First, I’m too small to hire anyone really. It would be too expensive, and second, my babies (the tomato starts) need ME. And I would probably stress about it and not enjoy my trip. Things like watering, inspecting, checking for any critters, opening the greenhouse doors on good days, rotating, all of that takes time and I usually visit my plants twice a day when I grow from seed at the time I’ll be traveling.
So anyhow, I was browsing some photos of my tomatoes (the fruit) from last season, which made my mouth water, and caused me to want to share the photos so you have an idea of the seed packets I have in stock at this time. Should you be interested in buying seed packets, you know where to find me (referring mostly to locals who buy my plants typically). If someone wanted a bunch of packets mailed, ask and I’ll let you know. I also will give you additional information, like planting tips and guides.
Say hello to Goldie.
I grew this one for the first-time last year (2022) and wow, wow, wow. Goldie heirlooms have amazing flavor. Some who bought plants from me said it was the BEST one ever. It is an heirloom. Sweet flavor, melt in your mouth flavor. Because a squirrel or two discovered my plants on my deck in my pots, I did pick some early and let them ripen on my kitchen counter and that was totally fine. They know when they are ripe and take bites! So, a lot of times, I started to just pick them before they were completely Golden.
You can see in this photo of me holding one, it is not completely golden color yet. Heirlooms are cool, they have the odd shapes, and they are tasty.
Note in the background of the photo above are Long Island Cheese Pumpkins – I grew those for the first time this year with the help of my cousin who put some plants in her community garden. Mine were in pots. It has a shape perfect for my Succulent Topped Pumpkin arrangements in the autumn season, but they are also grown to eat in pies and soups. They must be direct sown or started early.
I have seed packets available for both – the Goldies and the Pumpkins noted above.
Fox Cherry Tomatoes above – These I have been growing for a few years. They are bigger cherries, noted for being able to easily put on a skewer to grill. Also, a popular favorite by folks, plus cherry tomatoes grow easily and produce tons of fruit. For beginners, try cherry tomatoes.
In this above photo, you see the Fox Cherry tomatoes next to some of the Goldie heirloom tomatoes as I picked them. And also in this yellow bowl is a Cherokee Purple Tomato. Also, a wonderful heirloom and early producer. Purple-hued, very nice coloring and as yummy as the best of them.
In the background, you can see some of the Ground Cherries (papery husk) which I also grew on my deck in a huge grow bag, wow, those lasted into the fall. They are a snacking one for me. I was grabbing a handful and eating away as I walked away. Those have a very pineapple like flavor. A chipmunk discovered my ground cherries and I let him have a ball with that, as there were plenty on the plant. Ground cherries tasted like a non-guilty candy snack to me. Interesting flavor and sprawls out as it grows.
Green Zebra – This one no one seemed interested in. I can see why – tomatoes with green and yellow patterns, but to me that is the fun of growing – trying new varieties! Just like vacations, I like to adventure to new places and see new things – same with my tomatoes, I guess. This one has a tangy like flavor and I love mixing colors and flavors so it was very cool one to try.
Tiny Tim Tomato – These fits small pots easily and are grape-like sized fruit, but last year, they grew larger fruit at times. We had a drought type year, and my plants went nutso producing fruit on my Tiny Tim pots in patio pots that were probably 10-12″ in diameter. I put the pots on high back chairs, so the squirrels or chipmunk did not bother them. Look at the clusters on these plants! They were filled big time last season. This one says to start early too on the packet.
Paul Robeson Tomato – I will have to locate the photos of this one but I also have packets available of Paul Robeson tomato seeds, they have a beefsteak size with amazing flavor and the fruit resists cracking. The color is orange to purple.
Bumble Bee Mix Cherry Tomato – I also have seed packets for these and will find a photo later to post. They are striped with yellow, purple hues, orange. Same size as Fox Cherry. Prolific producers as well.
For more information on the seed packets, just email or text me (see numbers below).
Also, remember, February is getting ready and then March is starting to sow “some” varieties, others start later.
Going to the Flower Show in Hartford this year? It starts on 2/23/23 which is next week, Thursday. That’s also a good time to get seeds or information packets – sometimes they hand out little seed starting charts for free. There will be plenty of growing supplies there to check out as well. Have fun if you go!
Thank you for visiting.
Cathy Testa Blogger, Plant Lover 860-977-9473 DMs on Facebook under handle of “Container Crazy CT” Texts on number above. Also, on Instagram under the handle of “Container Crazy CT” Feel free to email me if you want – I’m old fashioned and still use emails! LOL.
My holiday creations and wreaths are usually featured on my other blog site, WorkshopsCT.com, but I got in the mood to review some past creations and thinking about what will be the new creations for this upcoming holiday season.
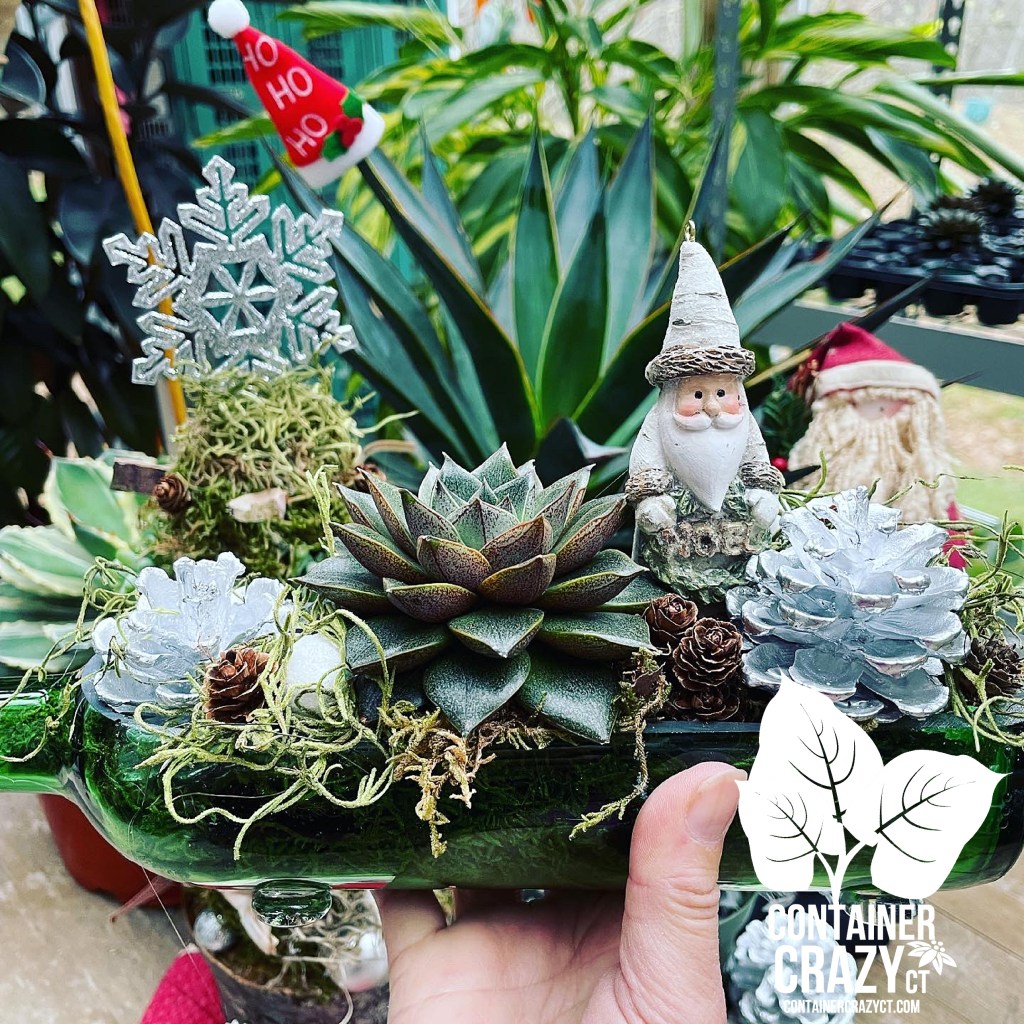
Last year was the year of the half-wine bottles as an adorable, easy-care, and fun holiday gift. I made these with soil, a beautiful succulent, and holiday bling. So fun. They sold quickly and I was happy to create them.
Silver pine cones with Mr. Santa in white was the theme which developed. I called them “Grab-N-Go!” gifts last season.
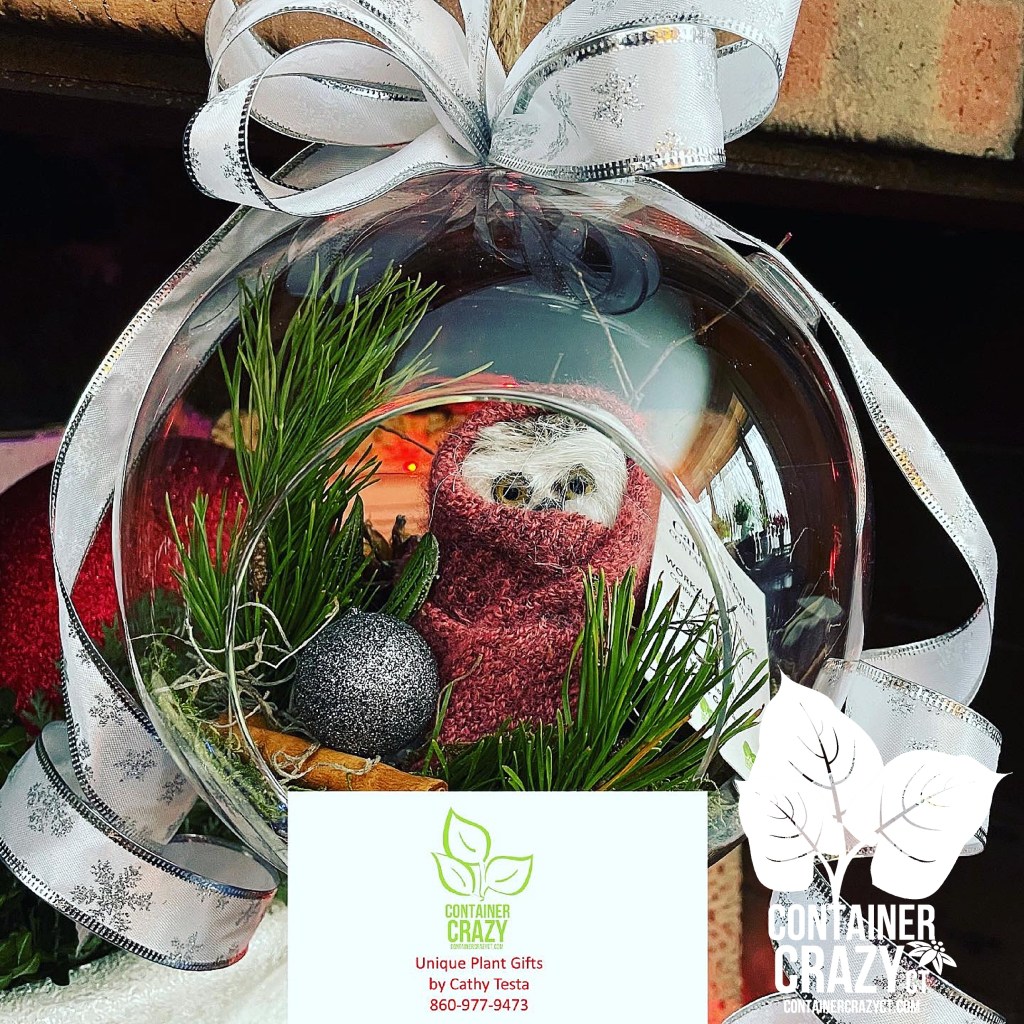
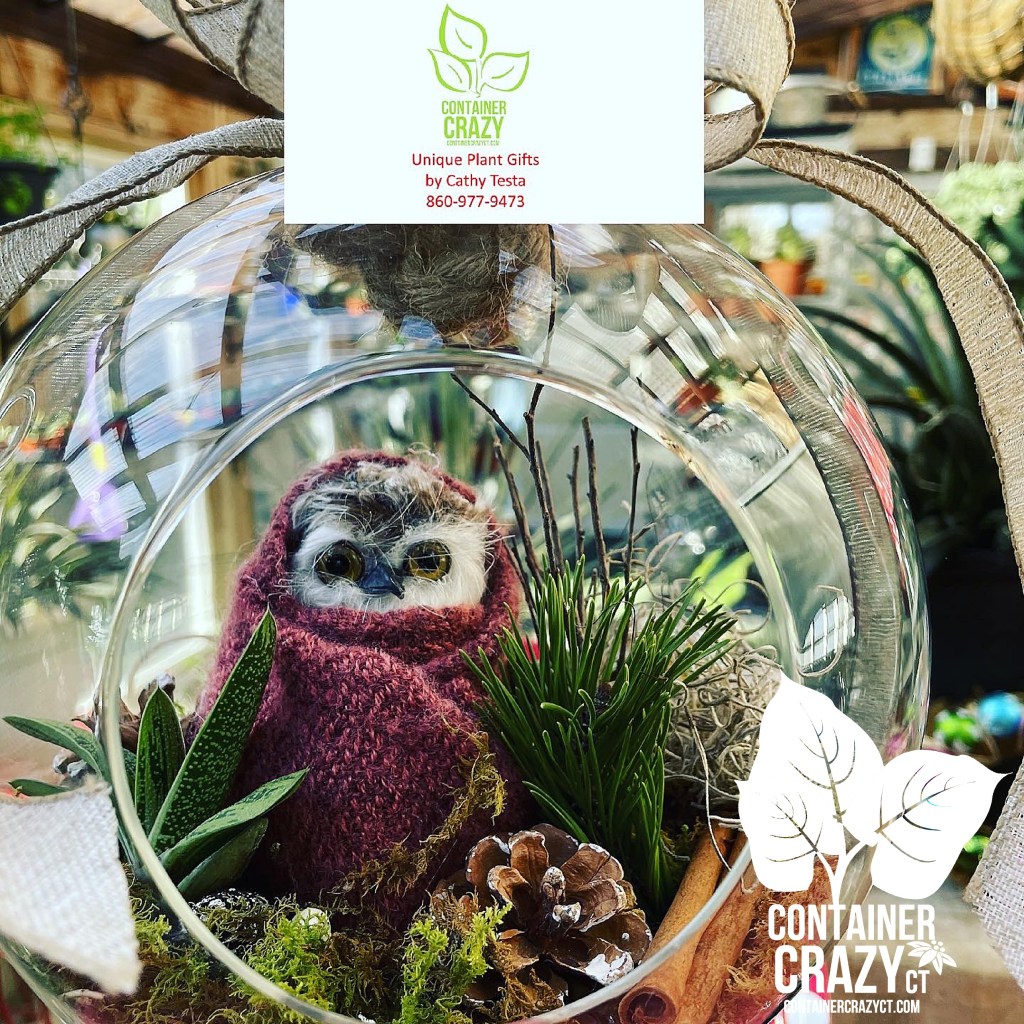
Then was the year where I became obsessed with the Rockefeller owl, the little owl discovered in the tree put up in Rockefeller center in NYC. I thought so much about that little adorable owl, and it just hit me to create these larger globes and bubble bowls with the owl as my inspiration.
I purchased an ornament and coffee cup from the organization who saved and rehabilitated the owl and it just was some kind of thing with me where I couldn’t stop thinking about how cute that owl was, and the fact, the owl survived stuck in that wrapped huge tree heading to the city for display!
I ended up making quite of few of these as people ordered them. Each little owl was wrapped in a very soft material I acquired to match the photos of the real owl. I put decor, mini succulents, and some evergreen tips in each. So fun to make. Loved this so much. And it was just one of those “organic” ideas that popped into my head.
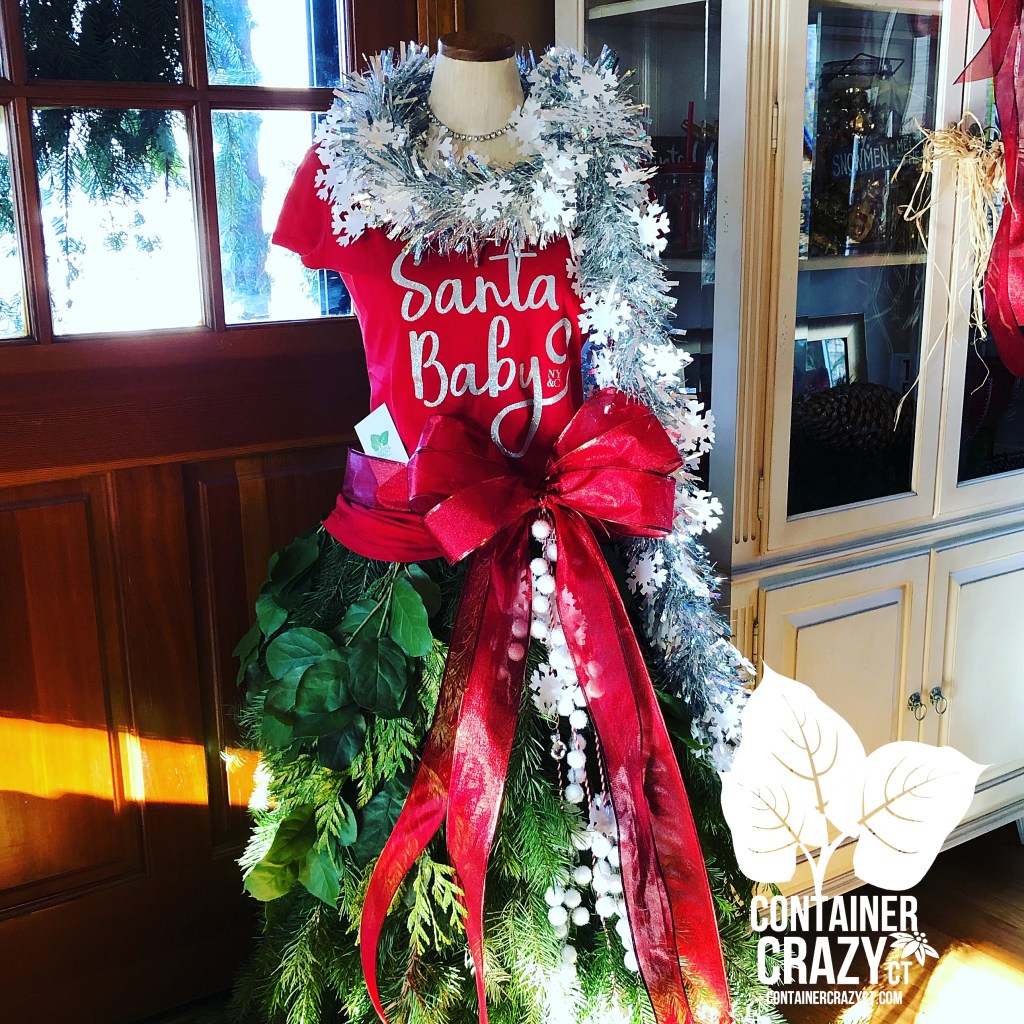
Several years ago, I made one of those holiday themed mannequin skirts with fresh greens during the holidays. It was a test, and I cannot claim credit for this idea. I started seeing them on Instagram feeds, and after I finished making custom wreaths for orders, I decided to give this a try!
It was a little tricky to make. I used chicken wire underneath to work with and loved how it came out but I thought you sure would need a nice location to display it and keep it fresh, and how would one transport this? – it would have to be made on-site, and it was time consuming as well. I loved it though. I almost purchased a bunch of those mannequin clothing display stands from a warehouse once, but then I stopped myself, because I didn’t think I’d really get many orders for these. So this was just a first trial test.
These moss holiday balls with mini tapered candles were from last season. Aren’t they just adorable. Could you see them lined up on a table for a holiday fancy dinner? Little things like this make perfect hostess gifts too and are nice used in groupings with other decor you may have on hand.
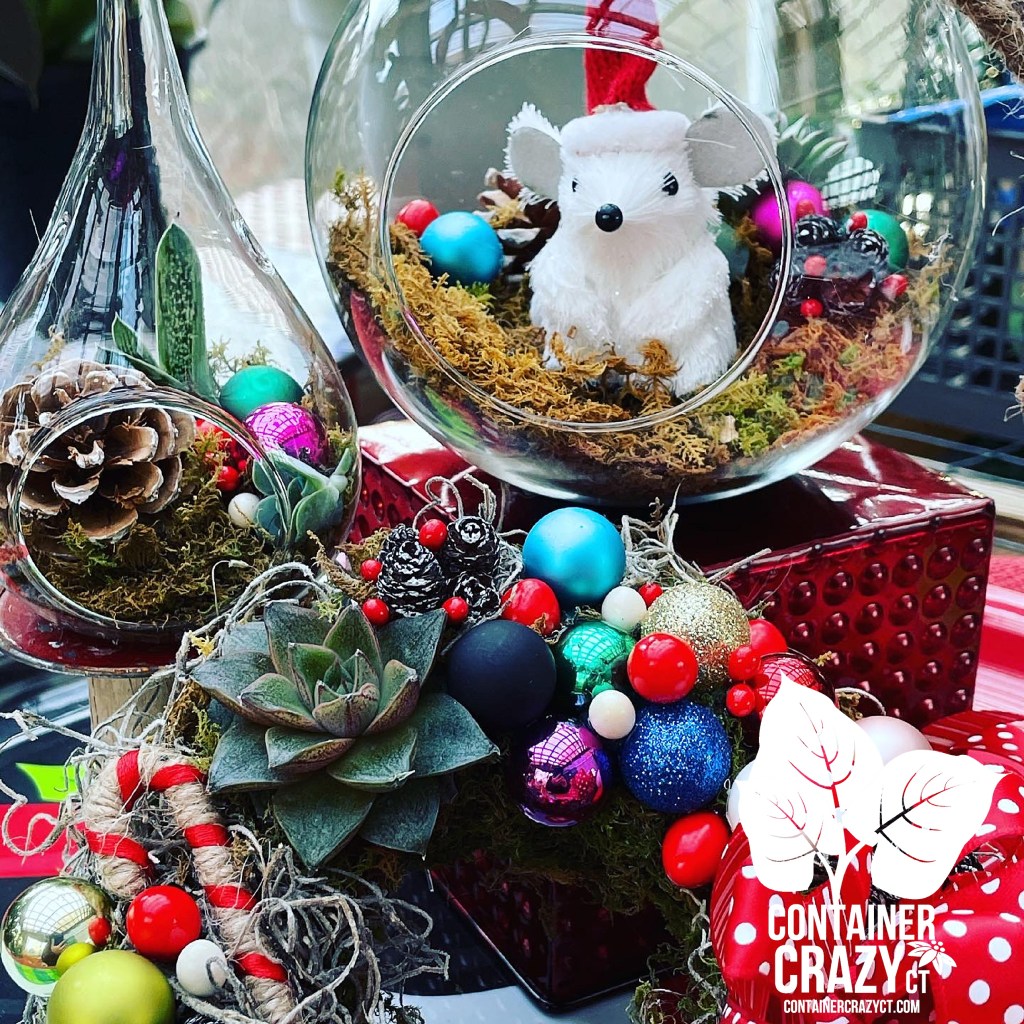
I’ve made other glass hanging votives with matching mini baubles wreaths shown below. The creative juices will start to flow at times. This one was so cute because the mouse was so cute with his little red Santa hat. How could anyone resist him?!
I called this one the “Ho-Ho-Ho” globe – what really made it was the perfect bow on the bottom. And the ribbon on the top. A friend ordered a set of these for her best girlfriends – which I think is super sweet.
Every year, a spontaneous gift related idea for the holidays pops into my head – those are the best, the ones that just arrive in your mind for whatever reason. It could be a unique little animal I saw somewhere, or whatever. Those are the fun, spontaneous, unique ones for me to make. I don’t know yet what will spur a new idea for this Holiday but I am planning to go look at some inspirations. Maybe something new will come to me – we will see.
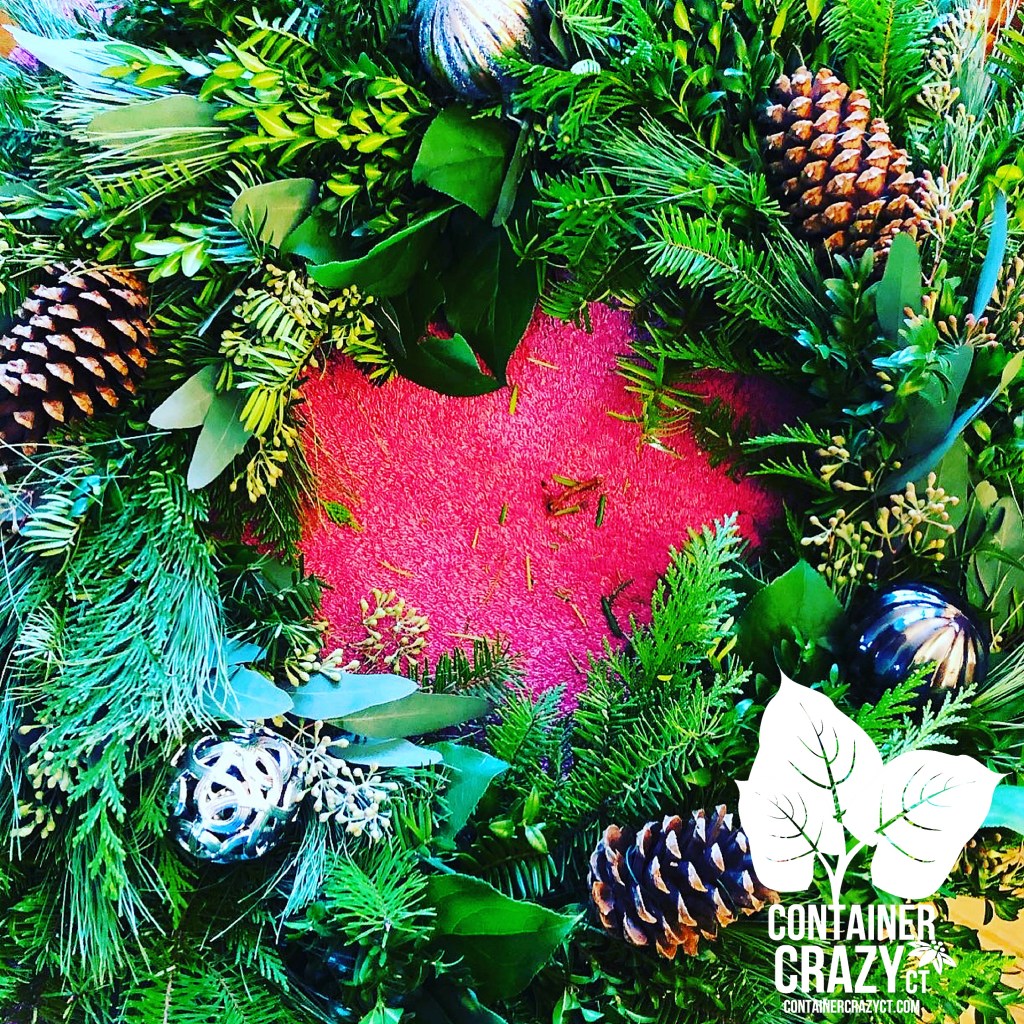
And of course, there are my custom made wreaths. I like to make them full and fluffy – that is just my style, with a nice mix of greens. I will be taking custom orders again this year which are picked up from my home base location.
My kissing balls take a really long time to make and use up a lot of greens, but I’m always happy with the result. They are rather large too. Here I am holding one up which is good arm exercise. My husband is always so helpful with taking my photos for me so I can show others what the kissing balls look like – this was one before being decorated.
Here’s an example of a rather large and full and fluffy wreath I made. I love the white snowy background.
And another, made for a customer, with a bow with cute red, white, and silver colors.
And here he is, my willing hubby, always helping me to take photos and sometimes to install the larger wreaths at sights.
And here is what I called, or should say my customer called, a Winter Wonderland! It was freezing out the day we put this all together but somehow my love of holiday greens kept me working away until my fingers needed thawing.
A few wreaths laid out on a table before installing them. I’m so lucky we built a larger garage when we built it many moons ago because it comes in handy for setting up and laying out all my materials while I work.
Well, today is a beautiful, sunny autumn day, but I started to think about the holidays ahead and that got me into these photos. I’m looking forward to a weekend of autumn right now however, and I’m sure you are too!
Cathy Testa Container Gardener Plant Gift Creator Plant Enthusiast 860-977-9473 Located in Broad Brook, Connecticut containercathy@gmail.com