Self-Watering Pots Rock on a High Rise

Leave a comment

Self-watering pots, those with a reservoir area at the base of the pot to hold water for the roots, were not high on my list in regard to usefulness. I had tried them at home on my deck outside and I found that I didn’t like them for several reasons, such as, they tend to get overwatered when it rains and stay in a flooded state (unless you use the drain plug to release the overload of water), they don’t allow air to circulate well when waterlogged, and things like that. In fact, several years ago, I actually wrote a post about how I just didn’t like self-watering pots. I felt they were not good for plants! See that prior post below:

Post above from 2015. Wow, times have changed.

Boy, did I change my mind when I experienced using self-watering pots on a high-rise balcony. On the high-rise balcony, which I tended to for five years for clients’ plants in various pots and some self-watering pots, the environment is so different, I guess you could say, the environment has big weather extremes. And because one of those extremes is intense heat and strong sun, the self-watering pots (they were actually long planter boxes) did not stay flooded after a rain fall for long. The sun and heat dried them out much faster than self-watering pots I used at my home at ground level or on my deck.

A big environmental or climate consideration on a high-rise balcony for the plants was the extreme heat and full-on sun (as I refer to it – sun that is full on and intense). On some days, in the middle of fall, or even winter, it was like being on the beach up there on a balcony so high up if the sun was out. On hot summer days, I would have to make sure I worked on the balcony during the period of day when the sun passed by and there was shade from the buildings so I wouldn’t roast, but that was not often doable. Let’s just say, it gets very hot at times, almost unbearable, so plants which tolerate drought and heat were critical as well. To clarify, this was 38 floors up on the top of a building in a city exposed to all elements from sun, wind, etc.

Because of the environmental extremes such as sun (and wind), trying to keep the soil moist for the plants was more of a job for my clients. They would have to carry water out from inside their penthouse. By hand, with buckets! There was no outside water source, so my big fear was will they water enough? And they did fortunately. Otherwise, the plants would be toast from the extreme sun and heat.

However, with self-watering pots, some of that was solved. My clients actually had two long planters that were self-watering pots before I came onto the scene. When they pointed them out to me, I didn’t say much because I always felt those planters were problematic (as noted above in my prior post from many years ago), and I believed in watering plants in pots yourself. But I was the fool in this case, because I learned quickly, those self-watering planters were winners on a high-rise. So, for those who may be doing some urban gardening, take a look at self-watering pots. They may be very helpful to use if you have plants that require moisture and also if you have intense sun (and wind) on your open balcony up high.

Let me explain why. If the rain fall was abundant, the fact that the sun was so strong and hot after at times, the soil would dry out. The water would not stay in there and flood the planters, like they did at my home after a rain fall. It would be the same exact weather at my house and theirs but due to being up so high, the planter would not stay waterlogged. Waterlogged soil will rot the roots or kill them. It was working out, especially for herbs. Herbs can take dry soils usually, but they do need moisture at times. I started to fall in love with their long self-watering planters.

I learned lots of lessons by working on a high-rise thru experience. I also have knowledge on plants and which were tolerant of conditions, drought tolerant, loved heat and full sun, but I still had lots to learn and plants to test out. In the case of self-watering pots, I discovered that they rock on a high-rise balcony.

The self-watering planters did need to be stored for the winter, however, which I offered as part of my services. I would wash them well, store them and return them in the spring with fresh soil and fertilizer. It was working out and they still have those planters today – those were a very good idea, and an excellent investment.

Pots and planters have special considerations on a high-rise which is another thing I will write about, and I had to find solutions. I’m kind of an out-of-the box thinker – AT TIMES … so I got really creative when during the first year there, which I will write more about later. Weight for example is a big factor. Again, it is not like pots near the ground, there were weather considerations all the time.

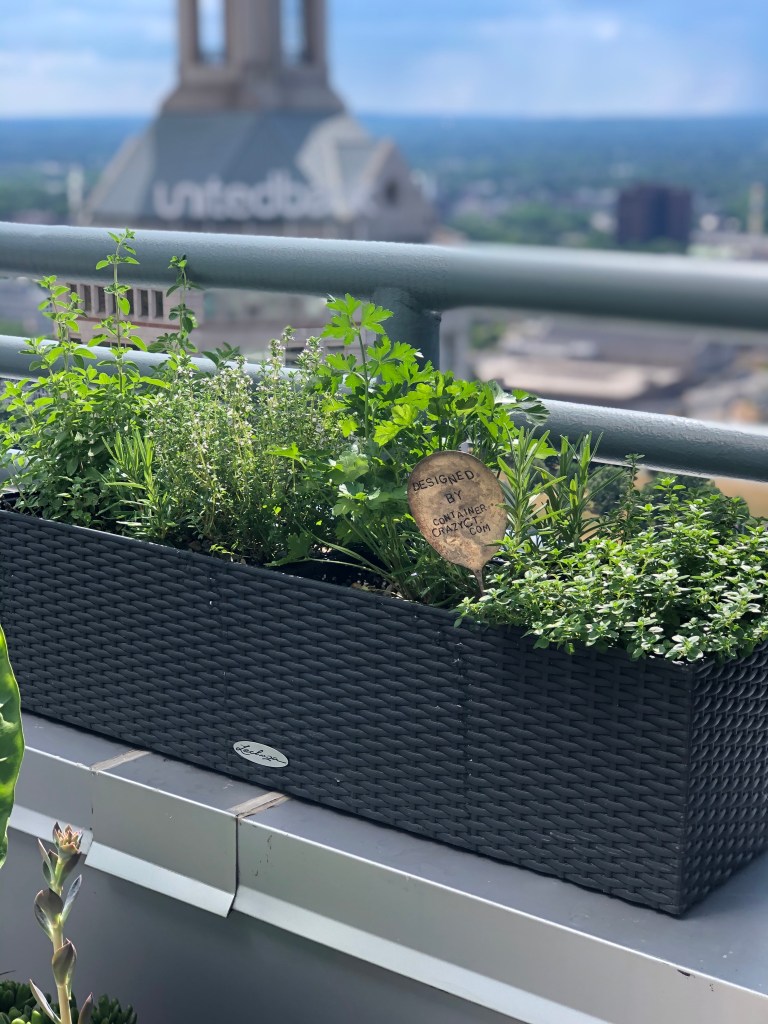
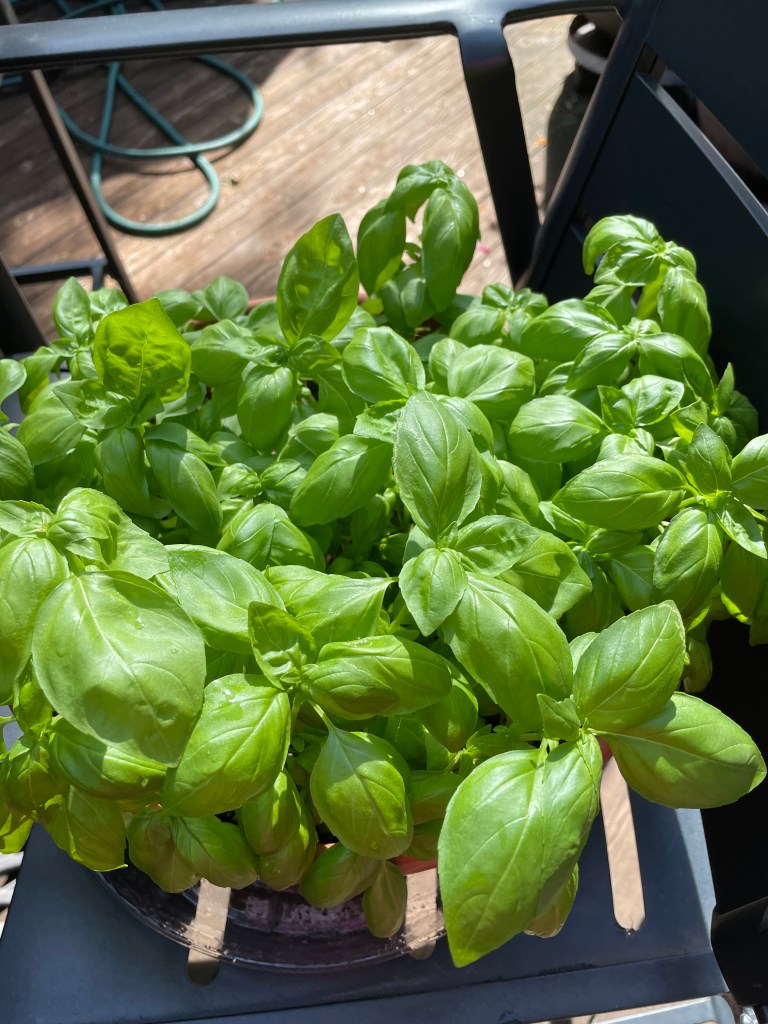
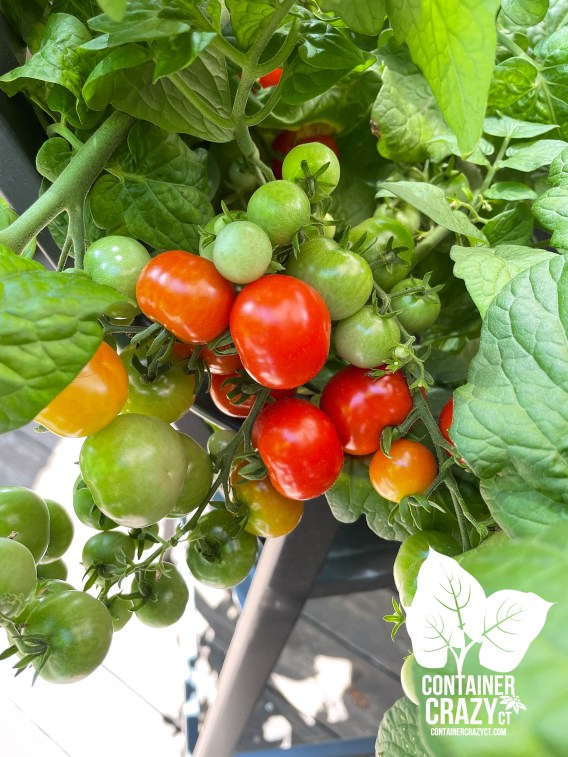
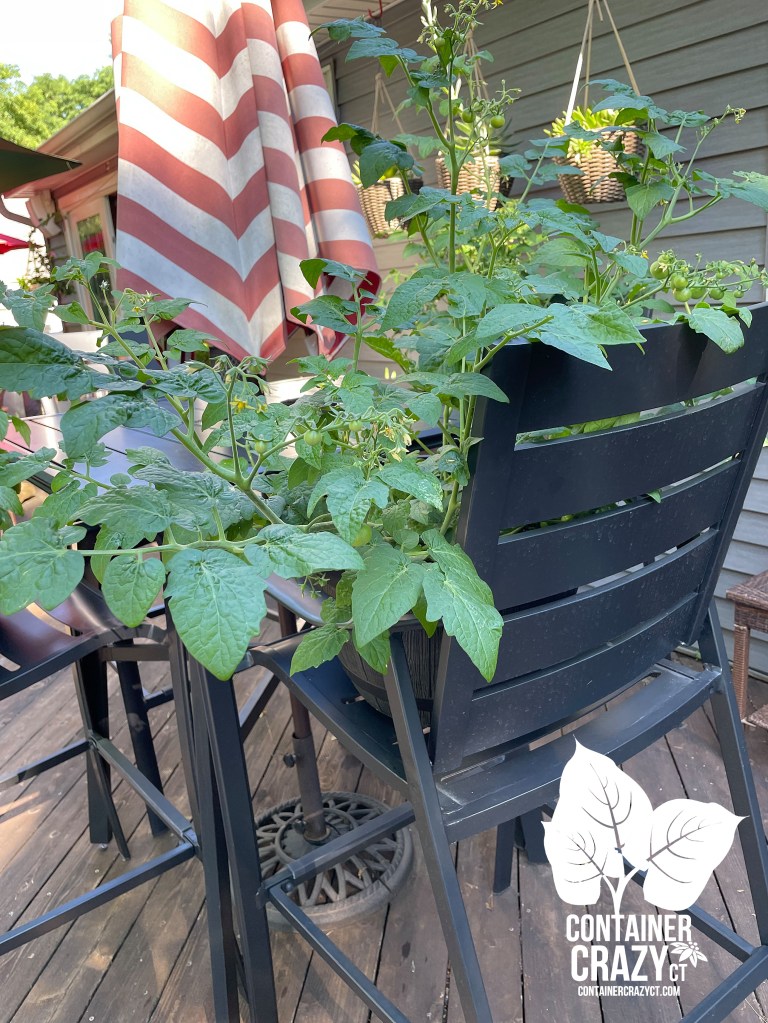
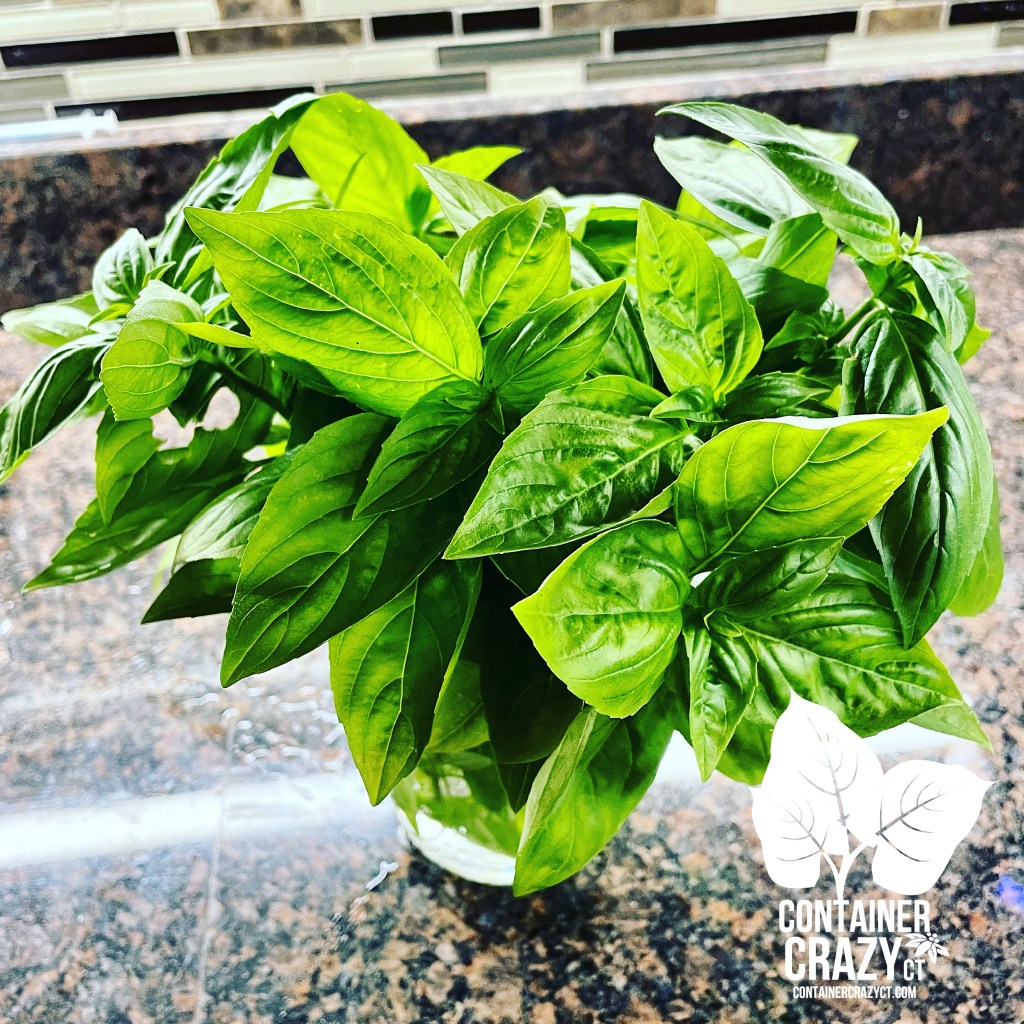
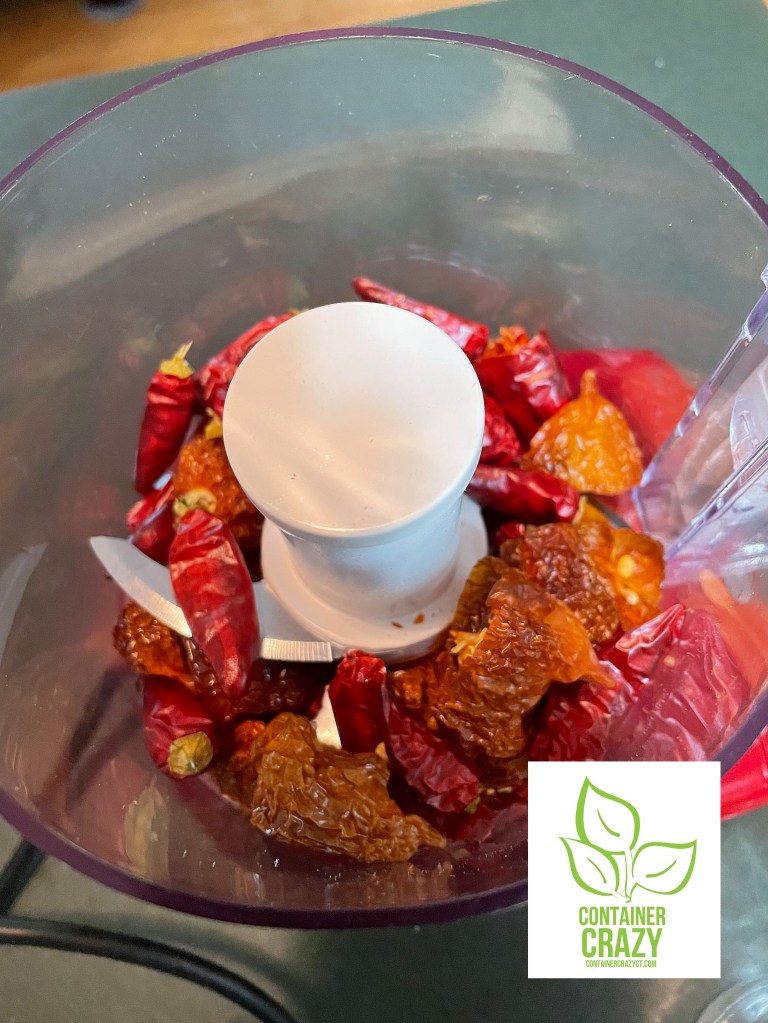
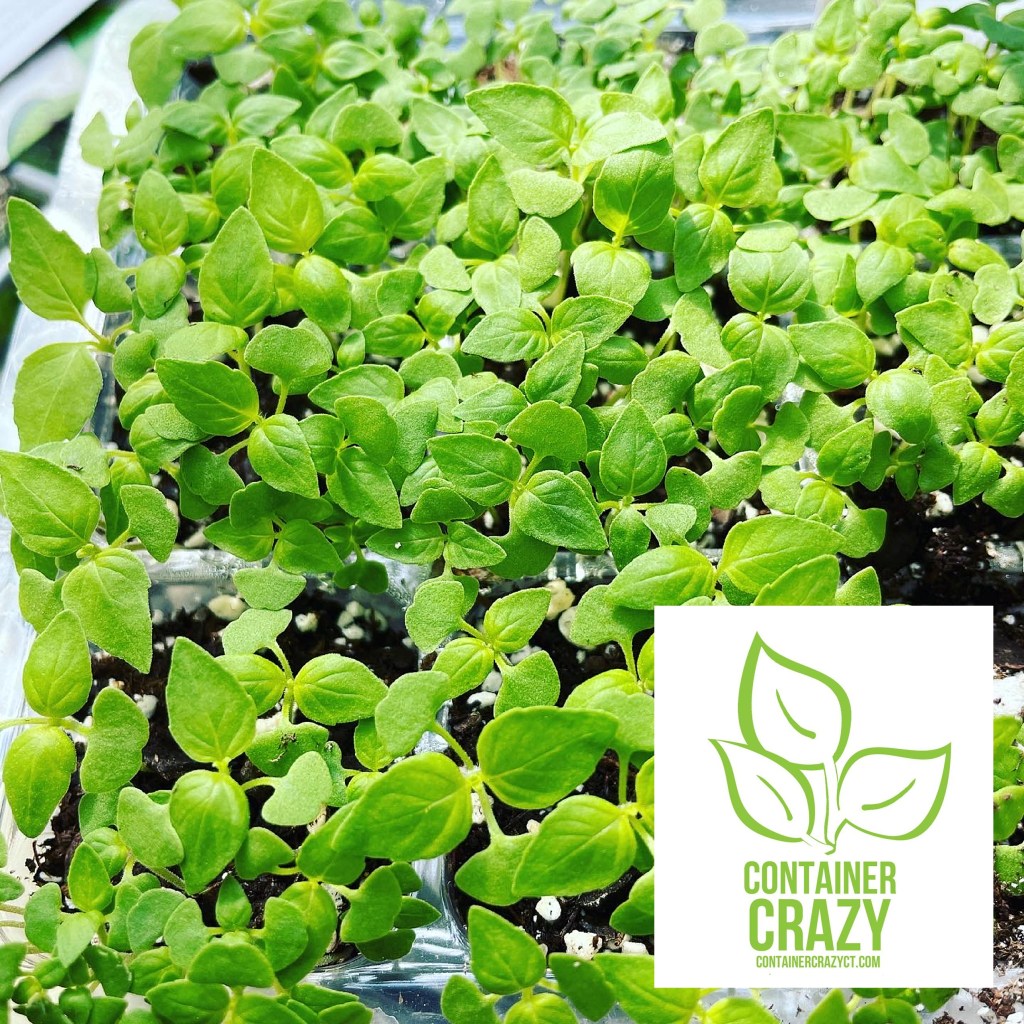
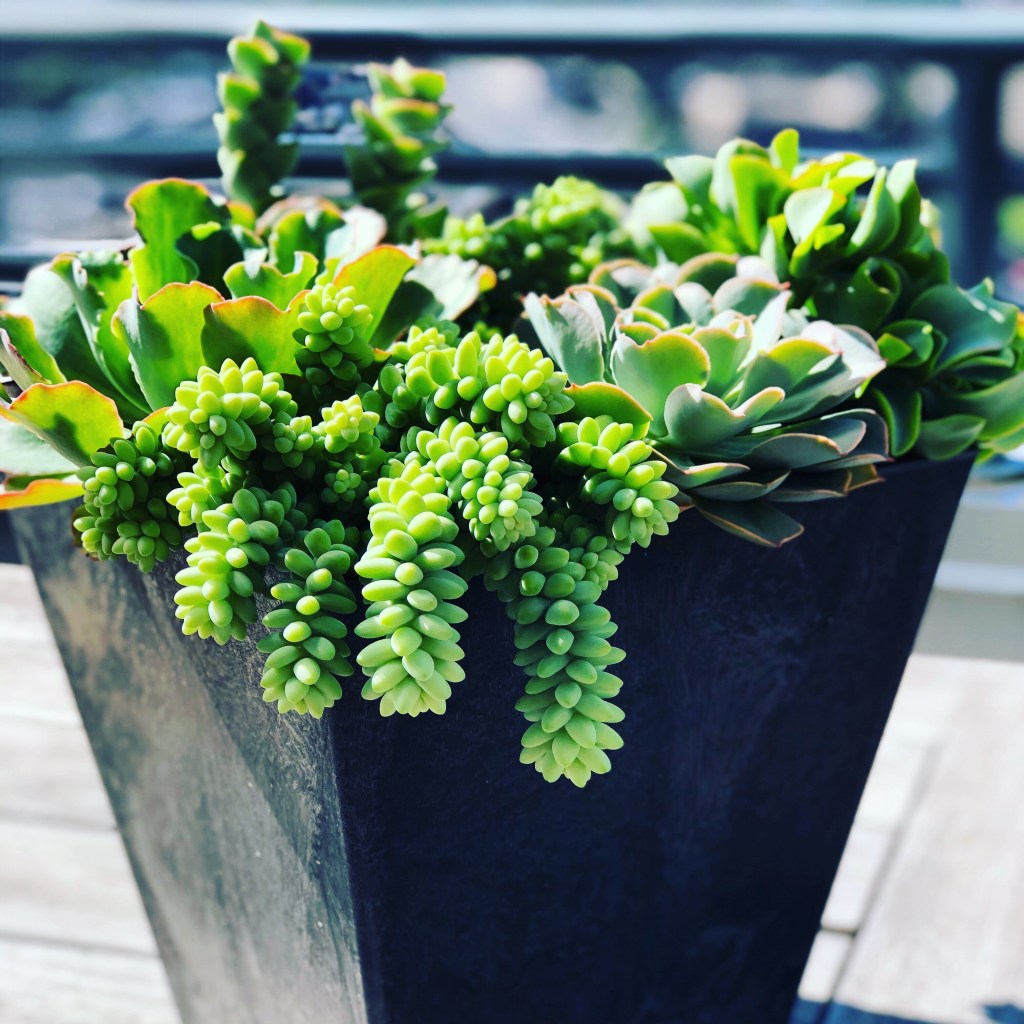
Plants that I felt did very well in their self-watering long planters were herbs. I did try smaller compact type of patio cherry tomato plants one year, but they kind of fell over from the winds, so that did not work where the long self-watering planters were positioned near the railing. However, herbs did very well in these. Some herbs in general can take dry soils – herbs like rosemary, for example. Later, I ended up acquiring some tabletop pots which were also self-watering and started to use them with succulents on their high rise as well. Those worked out well also. Succulents do not like soggy soils, so when it rained so much that it flooded the pots, it was fine because the sun and heat would dry them out fairly quickly. Or you can drain them if need be. It was just working out so much better than I would have thought.

A couple things I did was I added some small pea gravel in the base where the reservoir holds the water to weigh down the planters. As noted above, due to extreme winds on a high-rise, I was concerned the planter was not heavy enough. I also used standard potting mix with slow-release fertilizer. And sometimes, I top-dressed the top of the soil with either pea gravel, mulch, or moss, however, it was not really needed but I liked that “finished off” look to add some style to planters.

Here are some photos. I know I have more, but it takes a while to locate them. When I find them, I will add to the next post. I rather enjoyed taking them the planters to my greenhouse to clean for the winter and replant in the greenhouse to deliver in each spring. I felt they were kind of Zen. The herbs would grow three times the size at their balcony – I know I have photos of that but will have to share them when located! It always amazed me how much the plants grew when I would return for a fall change out. Balconies are wonderful places to have a full blow herb garden if you have enough sun, which this place did.

Self-Watering Long Planters with Various Herbs
Self-Watering Tabletop Planter with Succulents Above

Thank you for visiting,

Cathy Testa
Container Crazy CT
Blogger in East Windsor, CT

One more photo below!

Camping and Plants – Acadia National Park

Leave a comment

Camping is a new adventure for me and my hubby, Steve. We decided to buy a small camper last year. It was quite spontaneous, somewhat. We got a bit tired of the airline scene and thought, we could give this a try.

Steve really was all for it – but I panicked a little after he signed the dotted line and thought, is camping for me? Well, long story short – I absolutely love it. You are surrounded by nature, you are forced to relax and chill, and it is a fun adventure each time we try a new place. As one of his friends said, “Camping is just plain fun.” And it is and has been so far.

It got me thinking about plants too. On our most recent journey, to the Acadia National Park area, I saw plants here and there and welp, I decided to blog today on what I spotted.

Acadia National Park

Steve was the one who picked the Acadia location. Because I knew there are lots of nature things to do there, from hiking to kayaking, I wanted to make sure we could find hiking trails and know where to go, so I picked up a book by Hilary Nangle about the Acadia National Park area and it was quite helpful. She provides maps, tips and locations for hiking and kayaking, eating, etc. She divided the book into chapters about Mount Desert Island, Schoodic Peninsula, Blue Hill Peninsula, Deer Isle, Ellsworth and Trenton and more towns.

Our first little camper! You can see my basil on the table brought from home for my cooking.

Trenton, Maine

Trenton is where we stayed at a place called Wild Acadia Camping Resort. It is near towns like Ellsworth and Bar Harbor, and we liked the location. Originally, we picked this location because it has a kid’s zone, but we are kid-less, so it was more around the thought that my younger sister might meet us there with her kids. But that didn’t happen this go around, anyhow, we did like this little campground. One of the best amenities was a new barn they have complete with wonderful bathrooms, showers (coin operated), laundry and even a sink area for doing dishes for the campers. I thought it was just beautiful. They did have flowers barrels outside but stupid me, I didn’t take a photo, but it was several barrels of petunias out front.

Barn with showers and bathrooms

Every morning a crew cleaned this new barn, and I was very impressed with it – we got lucky! I had no idea this was there, and it is new. So are two new cabins they were in the process of building. They also have tents sites and RV sites. Some more in the wooded area in the far back than others. The kids’ zone is in the front entrance areas. I liked that our site was in the back by the barn.

Anyhow, that was our home base and we enjoyed it. Unfortunately, it was cool, misty weather the whole week with rain, but it was never a downpour or total rainy day. We had breaks of sun one day, and we were never rained out of sitting by a fire at the campsite, thankfully!

Planter outside of a Store in Ellsworth

Ellsworth and Bar Harbor, ME

One day we met up with my sister, Lisa and her husband to have BBQ at a place called Mainely Meat BBQ at 15 Knox Road in Bar Harbor. It was very good and had an excellent vibe with a brewery next door. That was fun and after we decided to go to Ellsworth and do a little quaint store shopping. As Lisa and I walked store fronts, I spotted this planter above with a Coleus (with the bright lime green edges around wine-colored centers), Sweet Potatoe Vine (with the dark chocolate color), and a trailing fuzzy foliage plant (having a brain fart on the name at the moment – I’ll update!). I paused to take two photos. What a lovely combination, I thought! I loved how all three plants intermingled well together. And whomever was watering and caring for it was doing a nice job – all was very healthy. We shopped the stores here and I really liked several of them, from cool clothing to artsy finds. Worth a stop on a rainy day.

Update: The trailing silver fuzzy plant in the combination above is called: Helichrysum petiolare ‘Silver’

Roses along a shore path behind Bar Harbor Shops

Bar Harbor Area

My husband and I walked the Bar Harbor area as well on another slightly rainy day. There are several shops and restaurants. Down one side street off Main Street is a larger parking place, so we parked there and took a walkway shore path along the back that is lovely. We packed some snacks and a blanket, so we sat there admiring the views and watching boats for a while. Beach roses scented the area for us. We watched sea kayakers go by, there is a town pier to checkout, and a really nice Inn facing the water along the shore path. In the old days, we would stay in an Inn like that – but these days we are campers! LOL. And of course, there are shops and pubs. The shops had lots and lots of t-shirts and sweatshirts. Lots of trinket shops whereas Ellsworth had more artsy shops, at least I thought so.

Not Cimicifuga Plant! This is a Black Lace Elderberry!

Along the road to the parking area, where we started our walk the shore path, was a very impressive Elderberry plant. In my prior post, I mis-identified it as Cimcifuga. Their foliage is similar, and I was super tired when I wrote my blog post yesterday, ooops! I realized my error this morning. Either way, it was one of those that I knew the plant, but my brain fog made me forget the name at the time and later. Must be getting old! LOL.

Crabapple Tree at Lamoine State Park Beach

Lamoine State Park and Beach were not that far from our camping place, so one day, I said, let’s go look at it – maybe it is a nice place to camp next time we come out this way. They charge $6 per person to enter the area beach area, and because it was rainy or wet like weather, the place was pretty much void of people. There were a couple of people fishing and a few just kind of looking at the views like we did from the beach. It has a big vast ocean view, and I noticed this tree as we stood at the beach. I believe it is a crabapple. Anyhow, the beach area is not huge, and neither was the parking, so I can imagine when sunny and busy, it may be tricky to get a spot there. It has a boat launch too. There was also the state park with campsites area, however, we were not allowed to go there so we could not see how it was set up. Apparently, the state park area is 55-acres. I was disappointed to not be able to drive thru to see how it was setup.

My homegrown basil
Yummy pasta creation with Gorgonzola Sauce

After several days of grilling food, we really had a hankering for some pasta by our fire at the campsite. I had purchased some Gorgonzola Cream Sauce from Difiore’s in Ellington and made up this quick recipe with my basil, of course. I cooked the small sized brussel sprouts in a little bit of olive oil and tossed them around for a while. The were frozen in a bag, and then I added the yummy sauce, some white wine, and angel-hair pasta that was pre-boiled, and wow, I have to say, it was just delicious! Maybe it was that sauce and the fact it was like a cool fall wet day; we gobbled it up!

Lively Lobsters!

We also had lobsters, of course, while in Maine – and found this place from the book I referenced above. Wow, it did not disappoint. Nothing like fresh lobsters while viewing views of the pier and ocean, and boats. This place was 12 miles from our campsite location and worth the drive. It is called Beal’s Lobster Pier at 182 Clark Road, Southwest Harbor area.

We did tons and tons of other activities, from walks to browsing areas. Two favs of the week were the drive to Schoodic Point and Peninsula of Acadia National Park. And hiking Ocean Path starting at Otter Cliffs on the one sunny day we had. Those were amazing sights to see. We did not eat and only sit by campfires but the weather prevented us from some hikes and kayak plans. There’s always next time!

I hope to take more photos on the next camping adventure and continue sharing it with you. I think it will become a new hobby for me.

Thanks for visiting!

Cathy Testa
http://www.ContainerCrazyCT.com
Located in Broad Brook, CT
Date of this post: 7/10/2023
Location of Camping: Trenton, Maine

Growing Your Own Tomatoes and How to Start

Leave a comment

Growing your own tomatoes is one of the most rewarding things you can do if you love the flavor of fresh tomatoes. Each bite brings joy – seriously.

But where do you start?

Well, probably the first things are you need the seeds, and of course the growing supplies, but you also need to have an understanding of timing – when to start your seeds so they are ready in time for planting outdoors after frost periods in spring – so for us in CT, to make it simple, outside safe planting is late May (usually Memorial Day). Note: Areas of CT have different scenarios but in general, Memorial Day is usually when it is warm enough and induces great starts of your tomato plants.

I was trying to think of when I started my own journey of growing tomato plants from seed. I think it was spurred when I saw seed packets with artful packaging that I decided to buy some of those packets and get started studying and researching on the steps involved to grow them. I did lots of reaching online, got books, you name it.

I don’t think learning all the aspects of seed growing is necessarily difficult, but it does take some time to learn all the nuisances around seed growing. Like, for example, if you start sowing indoors too early, you will have plants too big and realize you can’t move them outside yet because it is too cold in early spring, then you are struggling with how to care for them inside. If you start too late, your plants may not produce tomatoes in time during the summer and you would be disappointed.

If you search this blog site, you can find more details about my process. Here are some links below.

Note: February is a good time to plan, because some tomato seeds are started in March.

When To Sow Seeds: https://containercrazyct.com/2021/01/29/when-to-sow-seeds/

How Many Seeds Per Packet: https://containercrazyct.com/2021/01/26/how-many-seeds-per-packet/

Easy Seeds to Sow are Lettuce Seeds: https://containercrazyct.com/2021/02/18/easy-seeds-to-sow-are-lettuce-seeds/

Seeds Arrived on Time: https://containercrazyct.com/2021/01/20/seeds-arrived-on-time/

All You Need to Know About Starting Seeds: https://containercrazyct.com/2021/01/15/all-you-need-to-know-about-starting-seeds-indoors/

Planning Ahead is Required If you Wish to Grow from Seed: https://containercrazyct.com/2019/02/21/planning-ahead-is-required-if-you-want-to-start-plants-from-seeds/

Tomato Seedling Stages: https://containercrazyct.com/2021/02/15/tomato-seedling-stages/

I probably have more posts about seed growing on this site, just type the word “seeds” in the search bar, and they should pop up. Or you may want to type in the word tomatoes.

I do all of my growing of the starter plants (grown from seed) in large grow bags, large patio pots, etc. But we do want a “real garden” of the ground here someday, which will be a big job because it will need to be fenced in. We have a river behind our house, and it attracts lots of wild animals, etc. I love container gardening and have been very successful growing tomatoes in pots – they just should be large enough pots and watered and placed in sunny areas, and oh yah, have drainage!

This year 2023 – some things are changing:

I have decided I am not going to grow my tomato plants – for those of you who buy them from me – read that again, I am NOT going to grow them. It has to do with the fact that I have a trip planned right when it is the most important time to monitor the tomato starter plants. Someone said, hire someone. Well, not going to happen. LOL. First, I’m too small to hire anyone really. It would be too expensive, and second, my babies (the tomato starts) need ME. And I would probably stress about it and not enjoy my trip. Things like watering, inspecting, checking for any critters, opening the greenhouse doors on good days, rotating, all of that takes time and I usually visit my plants twice a day when I grow from seed at the time I’ll be traveling.

So anyhow, I was browsing some photos of my tomatoes (the fruit) from last season, which made my mouth water, and caused me to want to share the photos so you have an idea of the seed packets I have in stock at this time. Should you be interested in buying seed packets, you know where to find me (referring mostly to locals who buy my plants typically). If someone wanted a bunch of packets mailed, ask and I’ll let you know. I also will give you additional information, like planting tips and guides.

Say hello to Goldie.

I grew this one for the first-time last year (2022) and wow, wow, wow. Goldie heirlooms have amazing flavor. Some who bought plants from me said it was the BEST one ever. It is an heirloom. Sweet flavor, melt in your mouth flavor. Because a squirrel or two discovered my plants on my deck in my pots, I did pick some early and let them ripen on my kitchen counter and that was totally fine. They know when they are ripe and take bites! So, a lot of times, I started to just pick them before they were completely Golden.

You can see in this photo of me holding one, it is not completely golden color yet. Heirlooms are cool, they have the odd shapes, and they are tasty.

Note in the background of the photo above are Long Island Cheese Pumpkins – I grew those for the first time this year with the help of my cousin who put some plants in her community garden. Mine were in pots. It has a shape perfect for my Succulent Topped Pumpkin arrangements in the autumn season, but they are also grown to eat in pies and soups. They must be direct sown or started early.

I have seed packets available for both – the Goldies and the Pumpkins noted above.

Fox Cherry Tomatoes above – These I have been growing for a few years. They are bigger cherries, noted for being able to easily put on a skewer to grill. Also, a popular favorite by folks, plus cherry tomatoes grow easily and produce tons of fruit. For beginners, try cherry tomatoes.

In this above photo, you see the Fox Cherry tomatoes next to some of the Goldie heirloom tomatoes as I picked them. And also in this yellow bowl is a Cherokee Purple Tomato. Also, a wonderful heirloom and early producer. Purple-hued, very nice coloring and as yummy as the best of them.

In the background, you can see some of the Ground Cherries (papery husk) which I also grew on my deck in a huge grow bag, wow, those lasted into the fall. They are a snacking one for me. I was grabbing a handful and eating away as I walked away. Those have a very pineapple like flavor. A chipmunk discovered my ground cherries and I let him have a ball with that, as there were plenty on the plant. Ground cherries tasted like a non-guilty candy snack to me. Interesting flavor and sprawls out as it grows.

Green Zebra – This one no one seemed interested in. I can see why – tomatoes with green and yellow patterns, but to me that is the fun of growing – trying new varieties! Just like vacations, I like to adventure to new places and see new things – same with my tomatoes, I guess. This one has a tangy like flavor and I love mixing colors and flavors so it was very cool one to try.

Tiny Tim Tomato – These fits small pots easily and are grape-like sized fruit, but last year, they grew larger fruit at times. We had a drought type year, and my plants went nutso producing fruit on my Tiny Tim pots in patio pots that were probably 10-12″ in diameter. I put the pots on high back chairs, so the squirrels or chipmunk did not bother them. Look at the clusters on these plants! They were filled big time last season. This one says to start early too on the packet.

Paul Robeson Tomato – I will have to locate the photos of this one but I also have packets available of Paul Robeson tomato seeds, they have a beefsteak size with amazing flavor and the fruit resists cracking. The color is orange to purple.

Bumble Bee Mix Cherry Tomato – I also have seed packets for these and will find a photo later to post. They are striped with yellow, purple hues, orange. Same size as Fox Cherry. Prolific producers as well.

For more information on the seed packets, just email or text me (see numbers below).

Also, remember, February is getting ready and then March is starting to sow “some” varieties, others start later.

Going to the Flower Show in Hartford this year? It starts on 2/23/23 which is next week, Thursday. That’s also a good time to get seeds or information packets – sometimes they hand out little seed starting charts for free. There will be plenty of growing supplies there to check out as well. Have fun if you go!

Thank you for visiting.

Cathy Testa
Blogger, Plant Lover
860-977-9473
DMs on Facebook under handle of “Container Crazy CT”
Texts on number above.
Also, on Instagram under the handle of “Container Crazy CT”
Feel free to email me if you want – I’m old fashioned and still use emails! LOL.

See my other websites too:

www.WorkshopsCT.com
www.ContainerGardensCT.com

Tiny Tim Tomato – Not so Tiny!

6 Comments

Tiny Tim Tomato are a perfect sized plant for smaller containers, window baskets, hanging baskets, and patio pots. The plant has a dwarfing habit and I planted mine in patio pots which are 11″ deep and 14″ diameter on the top. The plant stays smaller and so do the fruits, but this year, many of the Tiny Tim fruits reached almost the size of my Fox Cherry tomatoes. Tiny Tims are about the size of a regular marble or maybe one of those bigger marbles you played with as a kid. Remember those?

Pot Size: 11″ Deep and 14″ diameter on top of the pot (Drain holes in base)

I ended up putting the 3 patio pots I planted with Tiny Tim’s on high top chairs. We find the chairs someone uncomfortable for ourselves, but they were the perfect fit for our Tiny Tim pots! They branched out and I would drape the stems and branches over the back of the chairs and onto the adjacent table. The squirrels and chipmunks never jumped up there either which was really nice. I was sure they would try but they did not fortunately. The fruit stays on the hanging clusters well and didn’t drop off.

Clusters like grapes!

I was super impressed with the abundant clusters of fruit which formed on the plants this season. It’s been a hot dry season, but I watered the pots daily with a good soaking. The sweet-to-tart fruits are ready earlier in the season than my other tomatoes, and grew to the 1″ fruit size or bigger size this year, due to the weather pleasing these plants. It probably helped that they were set on high back chairs to allow for perfect drainage and air circulation below the plants and pots. No major issues were encountered. They were the perfect dining guests all summer and still are now.

Tiny Tim Tomato Plants

In this above photo, the patio umbrella is closed but I typically kept it open. During rain storms, I made sure it was open so the plants were somewhat protected. Another bonus of having these 3 pots situated on the high-back chairs is it was easy to reach the plant to harvest the tiny tomatoes and water daily. It is a great plant when you don’t have much room outdoors, or have room to spare on a table. The seed packet indicates it does better in pots than in gardens of the ground.

Fruit Ripened Beautifully

The fruiting clusters ripened beautifully and are still ripening many fruits right now as I type this on 8/26/2022. The flavor to me is more on the tart side than sweet. I find Fox Cherry tomato fruit to be much sweeter for example, but we still enjoyed these. They are the perfect appetizer size on small crackers with cheese, or mixed with other yummy summer goodness. One day, I tossed them with fresh avocado, shredded mozzarella cheese, fresh basil leaves, pasta, and crushed black pepper.

I also planted Tiny Tim tomato plants, which I started from seed as well, into long rectangular planters at a high rise balcony site (think typical large window box sizes). My client’s told me the fruit has thrived all season. The planter is a self-watering type but the plants are high above on a high rise with exposure to lots of the elements and with a dry year at that – and the plants did well. I’m happy I chose them this season to try. I have photos of the balcony plants, but I have to find them in my iphone, which is overloaded with photos at the moment!

Various Sizes

In this photo above, you can really see the sizes. I have grown these before and the fruit was much smaller, but again, our tropical heat probably helped them to grow larger. I used a typical potting mix with added slow release fertilizer. I don’t recall ever applying liquid fertilizer later – they have been doing just fine all along. These would be the perfect candidate for small children to grow in pots – they are adorable plants.

Sitting Upon the Patio Table

Tiny Tim Tomato are sown 3-9 weeks before your last frost and transplanted after frost, and these may just last until mid-September. We will see. Another side bar: They probably will hold up well to the stormy afternoon weather being predicted for today. They are compact and probably, hopefully, won’t topple over. I’ll be sure to harvest all the ripened bright red fruit today before the storms arrive.

Have a good weekend,

Cathy Testa
Blogger Today!
http://www.WorkshopsCT.com
http://www.ContainerGardensCT.com
http://www.ContainerCrazyCT.com

Holding the Tiny Tims – They aren’t so tiny this year!

Green Zebra Tomato – Toss them with Cilantro for an Amazing Treat

Leave a comment

Green Zebra: Tangy flavor; green color to green and yellow striped colors as they ripen, medium sized round fruit (about the size of a tennis ball), and a good long yielder. Indeterminate so it grew to about 7 feet tall and keeps branching out further. My plant on my deck still has fruit hanging on it as of this date, August 25, 2022.

Planted with: Professional potting mix by SunGro with “Espoma Tomato-Tone with Calcium added” to soil upon planting (Tomato-tone is a dry fertilizer powder mixed into the soil; comes in a bag) and I also fertilized the plant later in the summer, maybe once or twice with Espoma tomato food (liquid feed) with a 1-3-1 NPK ratio (comes in a bottle and mixed with water) as needed.

Cherry tomato on the left. The GREEN ZEBRA ON RIGHT IN FABRIC GROW BAG at the start of the planting.

Planted in: A black fabric grow bag (I believe it is the 15 or 20 gallon size) and placed on the east end of my deck facing south, bag located against the house. The plant has reached the gutters and expanded so much, it looks like a Christmas tree from the inside of my house by the end of August. I kind of get a chuckle when looking at it right now.

The Green Zebra plant is way over to the right of the chair in this photo by the door which is barely visible!

Taking Notes: When I planted my tomato plants here, I made notes of the potting soil used and fertilizer upon planting as noted above. In my other planters, I added compost to the base of the pot and mixed it in somewhat, but I did not add compost to the Green Zebra fabric grow bag components. The Green Zebra fruit never got the dreaded blossom end rot, and another bonus – it did not get munched on by squirrels or chipmunks, which I’m guessing maybe because they are green and not red, thus less visible to them as a sneaky snack. Lastly, as noted, it is still holding some fruit while my other tomatoes like the Cherokee Purple and Goldies are done fruiting now.

Fruit is ready to eat at this stage of coloring

When to pick it: For the folks who bought the Green Zebra plants from me in spring time, a couple texted me to ask when they should pick them? I responded with, “The packet says when soft to the touch,” but what I found is the flavor was better when I saw the yellow stripe coloring within the green color of the fruit.

Clusters of the Green Zebra tomatoes on the plant 2022

Pruning: The packet also indicates to prune it to have no more than 3 main branches for a healthy harvest, but I pruned it just to reduce the size a bit and started to attach twine to light fixtures and other things on the deck and would take branches and train them along the twine. It looks rather messy and silly, but that is how I roll. I like it – it adds a jungle affect to my deck and this is fine with me. I was happy the plant experienced no major issues, no blossom end rot on the fruit, no bites from critters, and no blemishes or blight on the leaves.

Color before it starts to get some yellow tones

Size of Fruit: I did expect in my mind to have bigger fruit but most of them didn’t grow larger than a tennis ball. Maybe one or two about the size of a baseball. All smoothed skins, soft to the touch when nearing ready to pick, no blemishes, and rather interesting patterns made it a fun one to try. I like putting tomato slices on pretty plates and adding slices of mozzarella or other red tomatoes. This makes a colorful appetizer! Oh, and many of the fruit produced in clusters too on the Green Zebra plant. They start off looking a bit like cherry tomato clusters but grow much larger than cherry tomato fruit.

Comparing to other tomatoes (At first, I was picking the Green Zebras too early).

Its Unique Flavor: Now, for the true test! The flavor. My husband will eat any tomatoes of any kind. He loves tomatoes. And he slices, gobbles, and grabs as many as he can and approved of the taste of the Green Zebra. (He also asked me one day why they weren’t turning red yet so I reminded him these are green new ones I was trying out this year for the first time.).

As for myself, I did think it was “tangy” and I just wasn’t sure how to use them other than adding them in for a beautiful color affect with cheeses and or with red tomatoes, but then one day, I decided to toss them with chopped up fresh cilantro and a couple small cherry red tomatoes, and OMG! That is when I decided these are a keeper on my list. The flavor with the cilantro was very delicious. And by this point, the tomatoes were the juiciest too. Some people don’t like the flavor of cilantro but I absolutely love cilantro and this was the best taste to me with these tangy juicy tomatoes. Perfect as a salsa too or to put on taco’s on taco night!

Green Zebra Tomatoes with Chopped Fresh Cilantro and a few small red cherry tomatoes.

I probably won’t take down this plant for another few weeks but I’m starting to feel like I need to say good-bye to the other indeterminate plants with no more blooms or fruit. My cherry tomatoes are still producing and turning red right now and I’ll write about those later. Hope you are still enjoying your Green Zebras too if you got some from me!

Cathy Testa
Container Crazy CT
Blogging today
Other websites:

http://www.WorkshopsCT.com

http://www.ContainerGardensCT.com

Also on Instagram and Facebook under Container Crazy CT

Located in East Windsor, CT

Tomato Seed Sowing and Planning

Leave a comment
Tomato Plants 2021
Tomato Pots Deck 2021

These photos motivate me to sow and grow again in 2022. I know we experienced some rough wet summer weather (as noted in my prior post) last year, but photos are what prompt me to grow again. Let’s hope we have a good growing season this year!

Goldie Tomato – an Heirloom

Nothing pleases me more than when a person who purchased a starter plant from me sends or texts me a photo as they start their harvest, such as in this photo above, sent by Shannon. Doesn’t that plate of fresh Goldie tomatoes make your mouth water?! I am planning to grow these golden delicious heirlooms again in 2022.

I also add a new tomato or two to my sowing and growing list for each season and will be providing that list to my regulars or post it on www.WorkshopsCT.com soon.

Paul Robeson Tomato – 2021

This photo of a tomato, with a bit of a purple hue, sliced up on a white plate was taken by me last summer. It is the Paul Robeson tomato with orange, green, and purple hues. It produces large sized fruit and the fruit resists cracking. I plan to sow some of these seeds as well this year. Another keeper on my list. And I pray for better weather so I can eat more of these this summer!

Basil 2021

An an absolute must to repeat sowing again are the basils. OMG, how can one have a fresh home-grown tomato sliced up on a plate without fresh basil leaves? I can smell it now – almost!

So in January, as I write this, on 1/13/2022, I have decided on which I will sow again and have ordered my new varieties for sowing. Check! Seed ordering done!

Cathy Testa
Zone 6b Connecticut
Container Crazy CT
WorkshopsCT
Container Gardens CT

Turning on the Lights

Leave a comment

On winter days like today, with soft white fresh snow falling, many of us start daydreaming about the seeds we will sow in a few months, and perhaps start planning out our key sowing dates, as well as ordering various supplies for starting our seeds.

Starting Seeds Indoors

Starting seeds indoors is something I’ve been doing for a few years now for warm season vegetables (tomatoes, hot peppers, and some herbs), and every year, I like to try new varieties or heirlooms. I’ve been successful with using my greenhouse to grow my seeds indoors, along with using appropriate supplies and soil mixes, and providing care (watering, monitoring, etc.) without the use of grow lights, however, this year, I think I’m ready to take the plunge and experiment with supplemental lighting.

Types of Lights

This post will not explain what you need, what type of lights you should get, or any of that, because I will be in the midst of researching and starting with just testing out one system of lights above some trays of seeds in a couple months in my greenhouse, however, I can tell you why I feel I should turn on the lights over my trays of seedlings for the first time this year.

Because it will improve the results – I think…

With a greenhouse, you have lots of advantages, such as space, heat, and “natural” sunlight. However, many winter days are cloudy and cold, with not much sunlight at all in the months of February and March (March is usually about when I start my warm season vegetable seeds). Cloudy days limit growing progress, but it won’t stop progress. I have been able to grow my seedlings fairly well but it does slow things down not having sufficient sunlight every day.

Heating Mats, Nursery Pots, Soil Mixes, and Labels…

I thought, because I’ve invested so much already by investing in using the heat mats for seedling trays and everything else, not to mention the cost to heat a greenhouse, why keep on spending? But, in the world of gardening, you always seem to be getting another item to improve your growing processes. I decided I would purchase one of the fluorescent lights sets to hang over the trays during germination and help the plants once they start to grow. My thought is I will only use the lights when the days are cloudy. On sunny days, I’ll allow the sun to warm up the greenhouse and provide the natural sunlight for the plants.

Seeing Lights in Greenhouses

I remember walking into a very large nursery up north once, and they had lights all hanging above, and thinking, hmmm, they use supplemental lights. From what I’ve been reading, the lights should be placed about 3-6″ above the seedling trays once they germinate, but you have to watch you don’t burn anything when you move them this close to the trays. I will be doing so and monitoring how the plants look. There are signs to pay attention to if the lights are too close, which I will know, because I’m accustom to monitoring plants.

Baskets of Herbs I Grew without Supplemental Lights

Are Lights Needed to Succeed?

Some people will argue that you most definitely need artificial supplemental lights to succeed with growing seedlings indoors, but I’ve always argued that is not 100% true. I’ll let you know what I think after my first season trial with supplemental lights for my seedlings. But, I have done it without supplemental lights for years, so you can do it, but using the lights will improve the seedlings health overall. I’ve used heat mats to help keep the soil warm in the greenhouse, and adding lights may give the seedlings an extra boost. It may take them from normal to champion status. Kind of like training an athlete. Improving each time.

Types of Lights

There are fancier and more modern light options out there beyond the fluorescent types, but I’ve decided I will take baby steps this year. I want simplicity, ease of hanging them, plug in style to an outlet, and give the lights a try. I’ve just ordered the system, and some more nursery pots because I know I’ll go thru them light crazy. Then I decided I need more labels, and the supplies list begins!

Light to Germinate

Most of the seeds I grow require light to germinate (some seeds require darkness), and they need light to grow well once they have germinated in order to grow strongly. Using a greenhouse really helps of course, and/or using the fluorescent lights will improve the results – but if you use both a greenhouse and supplemental lights – it should be awesome, I hope. As long as all other factors are done appropriately along the way, such as using good seedling mix, accurate timing of starting seeds before the frost dates, and monitoring. I usually check my seedlings every day once they germinate.

Plants Produce Their Own Food

Plants use light to produce their own food. If light is not available after they germinate, they are slower growing, they may be stretchy looking from reaching for sunlight, but once natural sunlight is provided on sunny days, if they experienced a day or two of clouds, they tend to rebound very quickly in a greenhouse setting. Plus a greenhouse gets very warm on sunny days! Once I use the new supplemental lights on the cloudy days, I should see them be stronger than ever before. Stay tuned as I share my progress.

Cathy Testa
containercathy at gmail.com
Broad Brook, CT
Zone 6b Area

Making Crushed Red Hot Pepper Flakes

2 Comments

One way to extend your summer harvest of hot peppers is to make hot pepper flakes. I will say this prior to writing my process, I am not an expert in this process and just tried it out this season, and did the same process with yellow hot peppers a couple years ago, and it worked out well.

Serranos

I grew several types of hot pepper plants this season in containers and patio pots, all started from seed: Serranos (above photo), Matchbox (red pointy ends; grows on small compact plants), Habaneros (small yellow ones), and others like Ancho Poblanos (not shown in these photos).

Place on a cookie sheet

Ignore the big round ones (Cherry Bombs – too hot for us! And a bit more difficult to dry using this oven this method).

Dried in the oven

I don’t have an air fryer and wondered how that would work for drying out hot peppers, but anyhow, all I do is line them out on the cookie sheet, put them in the oven at a low temperature (175 degrees) and let them sit ALL day in there. I will check them occasionally, maybe shake the cookie sheet to toss them around, and just wait. The house will have a unique cooking smell.

Drying in the Oven at a Low Temp

It will take all day or maybe even out that night and put back in the next day for a few more hours to dry them out. I will cut some in half mid-way thru the drying process. Be very careful as the oils will get on your finger tips. Then if you touch your face, you will get a burning sensation.

Mini Grinder

Pick out all the peppers that are completely dry from your cookie sheet after it has cooled, and put them into a mini food processor grinder and pulse away. It is that easy. (Remove stems prior – again, you may want to wear gloves as the oils easily get onto your hands.)

Do not use any that are mushy

Note: Do not put any peppers in the processor that are still soft and not completely dry because they will just mold in the jar later. (For example, the big round ones, called Cherry Bombs, were just too mushy so I left those out.)

Grinded

After pulsing the mini grinder, wow, look at this beautiful color of very hot pepper flakes. I put my nose over the mix and it gagged me – not kidding. The scents were that powerful. I won’t be able to use these myself, but my husband will though. He shakes it on his soups and other meals during the winter. One jar is enough for the winter, but I’m sure he’d use more if I made more.

Ready for winter recipes

Use a Shaker Style Jar with holes in the lid

It is best to use a jar with a lid that has the open holes to shake and also, I will leave the open area open for a few days and toss these around to help the air circulation. It is important to not have any moist flakes in this – or it will just mold later. So when you dry them in the oven, be sure to not use any that are soft and not fully dried.

Growing Hot Peppers

I want to learn more about growing hot peppers because making these flakes is actually fun. There are probably better ways to dry them out – but everyone usually has an oven so this is a method I tried and it works out – for my husband. I can’t eat these – they are too hot for me.

Great Container Garden Plants

It was easy to grow various hot peppers in container gardens and patio pots. They are pretty much carefree. They like a very sunny location and do well in potting mix soils with regular watering as needed. Most of them turned to their specific ripe colors around the end of August and some still ripening in September (in my areas of Connecticut; Zone 6b). The plants can stay out till our fall frost which happens around mid to late October.

Starting from Seed Indoors

Starting them is an early start in March (about 8-10 weeks before our spring frost (referred to as a last frost). The seeds require a warm spot (80 degrees is ideal) so be sure to use seed heating mats and place in a warm location to grow them from seeds. They are transplanted into container gardens and patio pots 3 weeks after spring frost has passed.

Care

Basically, only thing you need is a good watering routine and perhaps some small thin stakes as some of my plants got rather tall (the serrano and habaneros). The other, Matchbox hot pepper, stays compact and is perfect for smaller pots. They are pretty too – covered in bright red vivid peppers. I find they do not get affected by insects or wild animals (like squirrels).

Uses

Think spicy Shrimp Fra Diavolo. I love making it in the winter months. It is also wonderful shaked into soups, stews, on top pasta dishes, and in chili recipes. If you can handle the hot spricy flavors and heat, it is wonderful.

Starter Plants

Because the seeds need good warmth (as noted above), they can be a little more demanding for starting from seeds, but I will try again next season. I have starter plants available in May so look me up if local and interested in the spring time.

Thank you for visiting,

Cathy Testa
Container Gardener
Container Garden Installer – for hire!
Hot pepper grower
Today’s date: 9/22/2021
Week’s weather: Rain rest of week, mid-70’s day
860-977-9473
containercathy@gmail.com

Is it time to consider moving plants indoors?

3 Comments

This morning, I noticed a question pop up on one of my plant posts asking when I move my tropical plants indoors? And when do I start to store my Canna Lily rhizomes?

I have written a few times about my overwintering plants processes on this blog website.

To search for the posts, use the “red box” on the right side of the blog site, under the banner picture on top, to enter search words such as:

Overwintering
Overwintering Plants
Canna Lily
Ensete
Red Banana Plant
Bringing Plants Indoors
3 Signs it is Time to Move your Plants in
Elephant Ears
Colocasia
Alocasia

Typing any of those key words should lead you to some of my past blog articles about my process.

Basically, tomorrow is the first day of September, and we still have plenty of time to enjoy our gorgeous plants outdoors on our patios, decks, and special places. I usually start to consider doing some of my outdoor work to move plants indoors around September 15th (for houseplants primarily).

If you have a busy schedule like mine in fall, or you wish to get a head start on your outdoor patios, you could potentially start moving in plants by mid-September. Some of these tips are outlined in the articles on my blog, as noted above. However, many plants may wait until early October. It depends on the type, the temps, and the condition of the plants. I basically have these types: succulents, agaves, canna lily, elephant ears, mandevilla, herbs, cacti, jades, houseplants, red banana plants, castor beans, and…, did I miss any?

I think, in my area of Connecticut (Zone 6), I usually begin around September 15th. I may start to harvest seeds which are ready (ripe) on some of my tropical plants, such as my Canna Lily plants. Look for dry papery pods on the plants and find the round hard seeds within them. Store them appropriately in cool dark places. I use old prescription pill bottles to store my harvested seeds.

I may start to inspect some of my outdoor houseplants (ZZ Plant, Jades, Mother In Law tongue plants, etc.) and spray them for insects (if needed) and/or wash the outside of the patio pots with dish soap water before I move them inside my house, one by one, over time. I usually like to move plants inside the home when the soil has had a chance to dry out too. I do not like moving them in when the soil is soaking wet – that only invites insects and other problems due to the lack of air circulation in the home compared to outdoors, and perhaps you have cool temps in your home due to air conditioning running. The soil may remain too wet indoors if the soil is soaked when you move them into a home.

Your herbs may be booming still, or perhaps they look ratty tatty and it is time to harvest the last of them. It is really dependent upon the conditions at your home and the exposure they get. My herbs are little on the sad side, but I’m gathering them up as much as I can when I cook each dinner every evening. They will stay a while longer on my deck. I could let them just go to blah, and throw the whole root ball out with plants later. No rush on the herbs right now. Again, all of my plants are in patio pots and large container gardens. They are not in the earth (gardens of the ground), so this process is plants in pots.

And my hot peppers are booming at this time (8/31/2021), so I take those in and freeze some or use them up in salsa’s, tomato sauces, etc. Yesterday, my husband accidentally chopped up one of my ripened to orange colored Jalapeños in his work salad. Good thing he can take hot spicy food! Our tomatoes are fading now and I probably will start cleaning up those big pots to get a head-start on my outdoor deck work.

I usually like to start moving my succulents into my greenhouse before any cold snaps and extremely wet conditions. This could start anywhere from 9/25 on. Last year, we actually had a firm hard frost on Halloween weekend, but we also got some quick cold frosty like temps over night before Halloween, on certain nights towards the end of October, before Halloween. I do not like my succulents to be soaking wet and cold before moving them in. Again, for the reasons noted above. Same with my agaves. The thing is with global warming and all our weather changes, it seems to be slightly different every year. I think frosts came earlier the year before.

Older photo but a succulent like this I may move in sooner than later.

Many large and showy tropical plants (like my Ensete, canna lily, and elephant ears) may be touched by frost on the foliage “if you are storing the underground tubers, rhizomes, corms” or whatever you want to call the underground storage organ from these plants.” But some of the work is just easier if done before frosts because the soil is not cold yet, and damp. I usually leave my showy tropical plants out in my big patio pots till early October. However, this year, I plan to be out of town the last week of September, which really makes me have to think ahead. Anyhow, they are fine to stay out if you want to do so. Or fine to start earlier towards end of September or early October to get a head start. If you don’t need a head start, just watch the weather for frosts in October. Also, if you are moving the whole plant intact, not cutting it down, leaving it in the pot – you must move it in before frost for any tropical plants like the canna lily, elephant ears, mandevillas, and banana plants, etc.

Another thing I might do early is start taking some cuttings of various succulent plants to propagate. It can take a long time to get those started, so I may take some healthy cuttings now. I inspect them for any insects first, make sure it is a healthy plant to propagate from, and follow my usual process for that at this time of year as well. I do not use damaged or unhealthy plants for any cuttings I may take. It just invites problems.

And lastly, I still have not cleaned all my spring and summer empty stock piled nursery pots! ACK! I started it a month or so ago and have some cleaned and piled nicely organized in my greenhouse – but the darn humidity really got to me this year. I just lost my motivation to tackle the rest of big pile of pots I need to clean and store for reuse every season. I still have to work on that. I try to do that now because it is more work for me in the spring when I start all over again.

So anyhow, one last big tip – always note on your wall calendar when your area of CT received light frosts and the hard frost of autumn so that the following season, you may recall when you did what. Watch the weather and think ahead so you are not caught rushing. And refer to this blog site for prior tips. I’ve posted for many years my processes and have shown videos too. You may find some of my prior videos of when I took down some of my big tropical plants on my Facebook page under Container Crazy CT.

Thank you for visiting my plant blog again!

Cathy Testa
860-977-9473
Located in the Broad Brook section of East Windsor, CT
Dated: 8/30/2021
Weather today: Cloudy, 66 degrees F at 7:32 am, into the 80’s today.
Observation: Hummingbirds are visiting my feeders a great deal this week, and some bees too.
Wed-Thursday: Lots of rain (A-GAIN!!)
Rest of month: 75 days, 57 nights (per my weather app)
In Bloom: My canna lilies, my mandevillas – they look amazing and still showy!
Looking large and lush: My Alocasias and My Ensete – huge leaves right now.
Pods on my Datura, Canna Lily for some, and Castor Bean plants (starting not ripe yet)


Sacred Basil and How it Grows

2 Comments

Last year, I sowed some sacred basil seeds for the first time. It is also known as Tulsi or Holy basil. Latin name: Ocimum tenuiflorum (Ocimum sanctum). I thought it would be an interesting plant to offer my clients for their herb gardens. However, I discovered not too many people of my circle of plant lovers were familiar with Tulsi basil. And neither was I.

Fast Grower

What I discovered is it is a fast grower from seed. It wasn’t long before it would fill my pots or cell trays when I started them from seed. It also has an unusual fragrance, even when it is small and just sprouting from the soil in my seedling trays. The seed producer describes it as, “Pretty, heavenly-scented basil used in teas and Ayurveda.” The seed must be sown early indoors or may be directly sown into gardens.

Attracts Beneficial Insects

I did grow some on a balcony garden last season and it grew lovely and lush in a large pot. I also grew some in my containers at home around a couple tomato plants. Wow, I was stunned at how beautiful, large, and lush the plants grew. I also grew some in big pots on my driveway, and every single time I went by those plants while they were blooming, bees were visiting them constantly. I thought, hmmm, this is a good pollinator attractor. Also, herbs tend to attract beneficial insects, which also helps your garden. The blooms last a long time and the plant stands firm, upright, bushy, and full. I thought if I could I would line my driveway with them and let the bees go crazy enjoying those blooms.

Long-Lasting Blooms

The blooms remind me of catmint, a soft blue. I can’t find the darn photo of when it was lush and full on my driveway, but let me assure you, it grows tall and bushy. If you look up the plant online, you will see it in gardens and find many people describing it’s benefits as a tea. It is similar in growth to regular basil but it grows much faster, as I witnessed in my own pots. It has a strong flavor and scent. You may add it to your water but chewing it directly, I read at least on one site per my research, should not be done. It is that strong.

Dried for teas

Tulsi basil can be dried and saved for months. Something I wanted to do – but did I? No, cause I was too busy tending to plants. LOL. But bottom line, if not for teas, I think it makes a splendid container plant, garden plant (perhaps on a border), and is easy to grow. If you want a full, lush, tall plant in a container, this is the one. I think it was about 1.5 feet tall, if I remember correctly. And I could envision it as a big stand or as a border along a walkway, just covered with bees. It is a long-lasting plant as well, all the way into the fall, it performed wonderfully.

Summer growers

Basils are grown outdoors in hot weather and struggle if it is still cool spring outdoors. You should wait till all chances of frost have passed and when the temps are right for basils. Don’t rush this one outdoors in early spring. They prefer well-drained soils and full sun, and a little shade is okay too. I always plant various basils in my herb planters on my deck every year. I can’t tell you the amount of times I snip from it. It is heaven. Why not mix up your selection of basils and add Tulsi basil to it?

Health benefits

See the links posted below of the various health benefits and research about this plant. The last link has information on how to make the tea.

Well, that is my Tulsi talk for the day! I still have some seed packets available if interested, please let me know. Also, if you know of a really good site that shows how to use, prepare, and store this type of basil, I’d love to hear about it. I can not find much about it in my current herbal books in my home office.

Have a great day,

Cathy Testa
860-977-9473
containercathy@gmail.com
Broad Brook, CT
Zone 6b
Always Learning, Always Loving Plants

Here’s a few links to more articles about Tulsi basil for your reference:

https://www.healthline.com/health/food-nutrition/basil-benefits#brain-benefits

https://www.ncbi.nlm.nih.gov/pmc/articles/PMC4296439/

https://www.webmd.com/vitamins/ai/ingredientmono-1101/holy-basil

https://food.ndtv.com/food-drinks/5-reasons-why-you-should-sip-on-tulsi-tea-holy-basil-everyday-1806434