Top Nine

Leave a comment

When watching talk shows the other day, I realized so much was being shown regarding the “Top Nine” app used to generate the top nine photos in a grid format from Instagram feeds and it perked my curiosity.

I caved and did it – and here it is:

Top Nine 2019 by C Testa Copywrite_0002

Apparently, this is not an “Instagram” thing but a separate app but using Instagram – and it became popular and a bit of a trend. We may all assume the reason why? Because your curiosity kills the cat – you have to know – Gee, what is my top nine (most liked or most engaged photos of the year) per some app? Well, mine are above.

To be honest, it surprised me which were selected. How do they determine which photos are selected? I guess it is based on likes, shares, and engagement? Not sure, and I don’t have the right mind after the holiday hoop-la to research that aspect right now, but I did find it interesting and a bit of fun to use the app to find out.

My Photo Grid Explanation:

From left to right (starting from the top row), I thought it would be entertaining to say what I think of each of these photos which were generated by the Top Nine app.

The Jade Plant (Crassulas) – Ah, this is one plant I became involved with in 2019. Meaning, I propagated it (made cuttings and grew new plants) from it quite a bit. It is rather easy actually. I also used this plant in some of my install jobs in various containers. And offered them in my succulents workshops. But what would make it a top photo is the fact that I feel I can grow them myself and they are healthy and happy! Maybe people enjoyed the photo due to the Indigo Blue Background which is a popular color right now I heard.

The Beach Shot – That was a vacation my husband and I took last year in Naples, Florida. I wanted to make sure we’d go see the sunset which I had read about being wonderful on this beach, and we joined many other people that day doing the same. I guess that is a good photo, right? And it WAS a great afternoon waiting for the sun to set.

The Yellow Peppers – Grown from seed, hot and tasty. I love these yellow long banana shaped peppers, which I wrote about in my seedlings topics on this blog and for the workshop which I offered on seed starting last year too. So, yes, I agree on this photo. The peppers were easy to grow, abundant, and we ground them up after drying them in the oven to make hot pepper flakes of the yellow variety. They did not go wasted. My husband loves hot peppers and he shook those flakes on his various meals many times. We went thru two jars of the hot pepper flakes. Great for chili recipes too.

The Blue Pots – Ah, yes. I was on the hunt for a client, trying to find pots. I kind of knew these weren’t the right ones. I had put them on the floor and took a photo. You will see my hiking boots there as I looked down in the photo. But for some reason, this photo was popular with people on Instagram. However, it was not quite the right fit and I later found a better style and color for my clients’ needs. But that was a journey on a day of hunting for just the right patio pots. Pinch me – I love that type of work.

The Flyer in the Window – My workshop flyer was posted in a local package store’s window. I always appreciate when they share my flyers about my workshops. I guess that day, it was noticed quite a bit and thus, another top nine. I would say these clients are tops too. They have hired me for years to install their store-front pots. I do think the flyers look great in their store’s windows. Thank you!

The Cacti Cans – I pounded small drain holes in the bottom of soup cans with a hammer and nail last year and inserted a cactus in each. No drill required which I loved. And I even hand-stamped the sides of some of the cans with words and added chains to some to hang the cans. They are adorable. However, in the rain, one thing I forgot about is the cans start to rust. I did’t like the rusty look. That day a flower was blooming on one, as you can see, and it was adorable, so I snapped a photo.

The Burro Tail Sedum – I obtained a stock of these from a grower to provide in my succulent related workshops last year. Everyone loves these plants, which drip down into long tails as they grow over time. They work well in hanging baskets – which was a topic I offered last year too. These plants are great fillers in arrangements and easy to grow, drought tolerant and long living.  I still have some growing in my hanging baskets in the greenhouse now. I can see why a popular photo – and those who got them in my workshops surely loved them. Thanks to my amazing grower, I obtained a nice stock of them last year.

A Photo of Me – From many years ago. What I like about this photo is that my red head planter, the little red table with red chairs, and the red blooms of the Canna Lily plants in the background were all happening. I spray painted that little round table and the chairs red. It was a freebie find on the side of the road one day. My sister was annoyed cause it was on her street when I found it as I was leaving her house. She joked that was supposed to be her free find. 

The Cherry Tomato Leaf – This is all about my obsession with plants. I love taking close up shots of plants and their structures. It was also probably popular cause we all dream of eating fresh tomatoes. The photo was taken in March or early April, and the handwriting on the label is not mine – it is of an attendee’s who came to my workshop on seed starting last year. That will be my first project, setting up the Seed Starting Workshop for 2020. I can’t resist doing it – it was very rewarding. Seats will be limited because the plants are kept in my greenhouse until they are ready to be planted outdoors. Unless, of course, I got a bigger greenhouse.

By the way, this is what CNN has to say about the Top Nine app and trend. You may want to read their article before you try it!

Have a good start to your first week in 2020.

Best regards,

Cathy Testa
Container Crazy CT
860-977-9473
containercathy@gmail.com

Other Cathy T sites:

www.WORKSHOPSCT.com
www.ContainerGardensCT.com


8 Days Till Christmas

Leave a comment

Is it 8 days till Christmas? Or…8 days till Christmas Eve?

Guess that depends on how you count the days!

For me, I was on a 15 day of a cold – coughing and feeling quite run down. I remember one day, when having a moment to pause, I felt suddenly exhausted. But, I got through it all: The KB Celebration this month, the KB Workshops, and the Holiday Custom Orders, the client installs, but we still have 8 days, and I’m sure many of you are running around finalizing your holiday plans from gift shopping to food shopping.

Gift Certificates or Hostess Gifts

I still have those 8 days for any last minute requests – Need a Gift Certificate to next year’s workshops? I have them in stock. Just reach out. Need a small plant related holiday gift – ask. I have some cute items I make by order, and I don’t even post any photos of them – they are too unique. Great as hostess gifts or for table decor.

What is KB? You may ask…

KB, as most of you know, is my short-cut name for Kissing Balls. I held all workshops of where everyone makes their KBs, along with wreaths and candle centerpieces, except one session, because I just was too sick AND lost my voice. I didn’t want to spread my germs to the private group either – and I will make it up to them next year somehow. Thankfully, they were very understanding. But the workshops held were super fun and festive. I posted lots of photos on my Facebook and Instagram Pages. Everyone’s creations were well-done.

KB Celebration 2019 by C Testa Copywrite_0004

Attendee to our KB Celebration 

2020 Planning

Next year – OMG, I took out my first 2020 calendar and started to jot dates down based on last year’s happenings. The season will most likely start with my “Seed Starting Sessions” and Seed Starting Presentations. That can start up as early as February for me. I will start preparing the game plans, outlines, seed calendars, and handouts in February, probably around the same time of doing taxes (ack!) but then the classes (or sessions) on seed starting will most likely be around March 14, March 21st, and even March 28th – but these dates are all tentative. Will keep you updated in early 2020.

tomatoe 2018_0002

I need to review other activity first – but I think those dates above are my targets. In April, there is a part two to my Seed Starting Sessions – called, Seed Monitoring. I think I will follow the same format at last year. I really enjoyed the whole Seed Starting (for tomatoes and peppers primarily) offerings. It was one of my most rewarding workshops. Why? Because it was continuous. I got to see how everyone’s starter plants did over the summer, see their harvest, and it was really a good feeling to see how happy everyone was. Who doesn’t love their own homegrown fresh tomato, right?

May’s Topic

Then, in May, should I do the Succulent Hanging Baskets again? Should I offer a new topic? I may poll my attendees or maybe I will come up with something new. I’ve been focused on succulents the past few years. Maybe it is time to return to perennials, tropical plants, or even houseplants? TBD on all of that. But, if I did offer a workshop on container gardening or patio pots, it would most likely fall around May 9th and May 16th in 2020. I do have some new ideas brewing. Stay tuned.

Good Photo Kim with Hanger

Summer Months

The summer months are usually quiet in regards to workshops, but my container installs keep me busy during the height of the watering and flowering season, no worries there, but I usually don’t offer any big workshops mid-summer. People are usually on vacation! Even so, the time moves so quickly every summer. In fact, I keep so busy watering my own container gardens at home that I promise myself EVERY year to not plant as many containers and patio pots at my own home, but what do I do? I always plant tons cause the plant passion grabs me. But grabbing that hose was hard on my arms last year. I got tennis elbow in not one, but both arms. I think it was from the hose dragging all summer long. Of course, I usually have various types of plants for sale during this time as well.

Autumn

Fall arrives very quickly after summer, and we move in the Succulent Topped Pumpkins workshops, which I always feel is a keeper. Will I offer it again? I think so. If yes, I’m looking at the dates of Oct 3rd and Oct 10th. All TBD at the moment. Just scanning the 2020 calendar today for the first time. But if you want to pencil them in….

Custom Pumpkins by C Testa Copywrite_0006

Holiday Workshops

OK, so the big question is – will the Holiday Workshops continue in 2020? I think so on those too. I am toying with the idea of more dates and smaller groups – but I don’t know – it is so popular and I feel like everyone relies on me now to kick off the holiday season with this fabulous and festive workshop. I will have to just wait till I get closer to decide. My tentative dates noted are December 5th and December 12th for now.

End of Year

As I reflect on 2019, I am so thankful for the workshops attendees of 2019 and of past years, and thankful for new clients who found me this year. For the garden talks and presentations at garden clubs and local farmers markets too – great groups this year. I’m also thankful for the inspiration, creativity, and fun we had through it all. It was a very busy year, and I think I said that last year, but this year was busier. In fact, they say it takes 5 years for a business to take off – I disagree – for me it was 10 years of practice, trial, and persistence. My 10th year has been the busiest.

I hope the 2020 year will bring lots of the same fun and maybe a little more controlled hectic schedule. When I finally decide on the exact 2020 workshop dates, I will be sure to post it to keep you updated.

Have a good pre-week before Christmas you all.

Stay Healthy. Stay Happy.

Cathy Testa
860-977-9473
containercathy@gmail.com
Container Crazy CT
http://www.WORKSHOPSCT.com
http://www.ContainerGardensCT.com

KB Celebration 2019 by C Testa Copywrite_0003

Cathy T with Hubby Steve 2019

Overwintering Plants 2019

3 Comments

Hi all,

I spent a good deal of this past weekend overwintering my tropical plants from patio pots and container gardens, with the help of my husband, Steve.

First, I walked around our yard with Steve and asked, “If you can move this or that – it would help me a great deal?” He was very happy to do so.

As he worked on “this or that,” which consisted of various pots with Canna lilies and such, I worked on taking apart some plants from a couple large and tall patio pots on my deck and disassembling my large tropical garden filled with a elephant ears, perennials, and a huge red banana plant (Ensete). I posted photos and videos of the process on my Container Crazy CT Facebook page.

The weather was fantastic both Saturday and Sunday, which helped a great deal, but it was cold out – I needed to wear warm gloves. We had two “light frosts” this month so far (one on the 20th and one prior in the month) but we still haven’t had a hard frost which would kill and blacken the foliage of my tropical plants that I was focused upon.

When I say tropical plants, I’m referring to the red banana plants, canna lilies, elephant ears, and mandevillas – plants which will not tolerate the frost here in CT.

I document my storing process every year usually so if you need information on it, use the red search bar on this site (right-hand side of the screen, scroll down to locate) and enter ‘red banana plant,’ or ‘overwintering’, or ‘ensete’, ‘canna’, etc – and you should be able to locate the prior detailed articles I have posted.

Overwintering 2019 by C Testa Copywrite_0002

This year, I planted Upright Jumbo Elephant Ears (Alocasia macrorrhiza) in two new pots I acquired. The tall pots are about 5 feet tall or maybe a little less, and are very nice, BUT the spiller plants in the pots grew so well, they actually hid the beautiful pots.

By the way, the spillers were Alternanthera ‘Plum Dandy’ and Plectranthus coleoides ‘White Surf.’ Both were amazing. I especially love the plum color of the Alternanthera, and the Plectranthus (with green leaves serrated with white edges), both of which are always great spiller performers in container gardens. They can take full sun and part sun. And both are vigorous growers as annual plants here in our CT zones.

The tubers of the upright elephant ears were shipped to me in early April and I planted them in nursery starter pots, first in my greenhouse and then moved them out to my new patio pots later after all chances of spring frost, usually around the same time we plant out our tomato and pepper plants (around Memorial Day in late May).

I had visions of these upright elephant ears growing super huge and tall, but they didn’t reach the 6 to 8 feet height described by the producer of the tubers. However, they reached about 3 ft high in the first year – I expect it to be taller next season. And I will probably start them in the nursery pots sooner in the greenhouse to get the growth going earlier, which helps get that big show I was looking for.

Overwintering 2019 by C Testa Copywrite_0005

Removed Leaves

The leaves were on average about 20″ long, but what impressed me the most about this variety were the clumps they formed. One tuber shot up about 15 stalks per tuber, or tubers, which reproduce on the side, as they grow in summer. As seen here:

Overwintering 2019 by C Testa Copywrite_0007

Original Tuber on Left (new growth on right)

The original tuber is on the left. When it arrived in the mail in April, it had a dry papery brown covering and was big and solid. As you can see on the right, it grew another plant after I planted them in the patio pots outdoors, and this is what I love about tubers from tropical plants – you get more plants at the end of the season to replant next spring. In fact, as seen here, I got LOTS of new plants for next year:

Overwintering 2019 by C Testa Copywrite_0006

There are 12 stalks in this photo – all from one original tuber. After I removed them from the big patio pots, I cut the stalks down to about 4-5″ from the base of the tuber area (root end) and I will store these in a cool, dark, dry place (my basement which is unheated but it does not freeze there).

You may cut back all the foliage before or after frost before you dig up and store the tubers. I prefer doing it before frost because it is less messy. After frost, the foliage turns black and mushy.

After I dig out the tubers from the patio pots, I usually lay them out for 2 days in the sun to dry a bit. After that, they get placed in plastic rubber maid type boxes (low height containers) with peat moss covering them and a lid on the box. I sometimes drill small pin holes in the lid to allow some air exchange in the boxes/containers. Again, all of this is documented in detail in prior posts on this site too. Do not store them in too deep of containers or boxes as this increases the chances of rot. And I also recommend you only lightly cover them with the peat.

Overwintering 2019 by C Testa Copywrite_0003

Pots empty and ready to cover for winter

When I posted this process with videos last weekend, a few people asked some questions – one of which was, “Do you keep the soil in these pots for next year?”

Traditionally, I do not keep soil in patio pots after a year’s use – UNLESS they are really big pots like these. Potting mixes lose their ability to retain water well in smaller to medium sized pots after a year or two’s use.

I am a big believer in using the best potting mix possible – fresh every year in your containers, and to use reputable sources. I really need to do a long post on potting mixes – one of these days soon.

But for really big pots, I do keep the soil mix in there for a couple years. Sometimes with smaller patio pots, I use the “old” soil as filler only in the base of big pots. Or it goes to compost areas or garden areas as filler at the end of the season. To me it is so worth it to have quality potting mix for your plants because they thrive and put on a wonderful show of growth when you do.

I put these two big heavy patio pots on trays with wheels so we could push them to a more sheltered location on my deck and I will cover each of them with thick tarps. I sometimes put a board over the top of the openings and then cover it. This seems to work well with my bigger pots in my yard – none of them have ever cracked, thankfully.

These upright elephant ears made me happy despite not getting super tall. The sun rose behind them every morning and lit up the leaves. I enjoyed looking at them from my bedroom sliders. These plants could be over-wintered as a houseplant IF you owned a a large home, but alas, I do not, but I would if I could. However, what I love about these is how you may store the tubers in a compact way to reuse them again and again every season. And it may look like lots of work or effort, but it was relatively quick to get it done. It doesn’t take too much muscle strength to get them dug out of pots either, as compared to the ground, where the roots extend further into ground soils.

You may also allow these plants to go dormant and store them in their growing container or pots but that also means having the space to do so. When I started these in the spring, the original tubers were planted about 4″ deep in my nursery starter pots. It was the waiting game that was difficult – waiting to see how they would grow, but when they did, many weeks of viewing was enjoyed in summer till almost the end of October. Tropical plants last well beyond annuals in most cases. Another reason I continue to enjoy them.

Also, these plants very rarely get insect problems. The upright elephant ears’ leaves are slick, shiny, glossy, and dark green. They’d make great candidates for making leaf bird baths the hypertufa style way! But who has time for that? I have to get ready for my holiday workshops now – and speaking of – I have to mention them:

KB 2019 by C Testa Copywrite_0010

Holiday Workshops – December 7, 2019 – For Beginners and Advanced Attendees

Registrations ARE happening now for my December 7th, 2019 holiday workshop and if you are interested, I encourage you to sign-up early. The start time is 11 am to whenever you like, we have fun in these workshops making kissing balls, wreaths, or candle centerpieces with beautiful fresh greens. For as long as I can offer them, you should be taking these workshops – cause, I dare say, they are wonderful! Will I ever loose steam to do them, like I do all these pots in fall? Hmm, only time can tell. Hint: Don’t Miss Out! Sign-up now!

Overwintering 2019 by C Testa Copywrite_0004

Red Banana Plant Stumps (Ensete)

Lastly, I also took down my two big red banana plants in other big pots in my yard. Here’s a photo of the stumps (technically pseudo stems) that get stored in BIG plastic bins, of course. I posted some time lapse videos of the process on my page noted above as well. Like the tubers of the upright elephant ears, I let them sit out in the sun to dry and drain because these big stumps hold excess water. I also clean the soil off the roots with a soft brush. Today, they will be laid to rest for the winter in the big bins in my basement.

Cathy Testa
Container Crazy CT
www.WORKSHOPSCT.com
www.ContainerGardensCT.com
http://www.ContainerCrazyCT.com
Located in Broad Brook, CT (East Windsor)
860-977-9473 (texts welcome)
containercathy@gmail.com


Succulent Pumpkins – This Saturday, 10/5

Leave a comment

Flyer Succ Pump This Sat

Last weekend, I held a Mini Succulent Pumpkin session at the Ellington Farmers Market and it was so much fun. Moms and their kids participated and the whole process is rewarding. To see the smiling faces of the kids walking away with their little pumpkin in hand was too adorable.

But, this weekend, it all about making Succulent Pumpkins of any size. Large, small, many mini sizes – it is up to the attendees. I am offering my first workshop of the Autumn season this Saturday, 10/5/19 from 10 am to Noon. Attendees bring their own pumpkins! Why? Because everyone has their own style and color preferences, and there are so many to choose from out there from local farmers and other places. I don’t much believe in offering workshops that are cookie cutter where everyone makes the same exact thing – people are so creative when they get into creating their centerpiece and this makes it all the more exciting. You have choices at my workshops.

By the way, lots of people assume the pumpkins are cut open – and they are not – this would rot the pumpkin – so come learn the how to’s here at my workshop on Saturday. The process is explained in detail, we teach you how to care for the succulents, and even how to continue them on after the pumpkin decorating season is over later in the year.

There is still time to sign up. Just either visit my www.WORKSHOPSCT.com site or text me at 860-977-9473 if interested. We have some seats available. You pay a registration fee which includes the mechanics and instruction, but you must bring your own pumpkin and glue gun with glue sticks. We have some other misc glue available for attendees to use but the glue guns work best.

Also, here at Container Crazy CT’s in Broad Brook, I have the succulents of many styles and sizes waiting for you to pick from. You buy the succulents at the workshop and thus, you can make a huge pumpkin or many smalls – whatever you desire. That is the fun of it – if you ask me. I work hard to provide quality succulents and care for them for especially for my workshop attendees. They are fresh and happy succulents. They are waiting for you.

In addition, we are going to have a Propagation Station where you learn the steps on how to make succulent babies. And complete, detailed handouts are provided. We also will have some light autumn snacks. Hope you will consider attending as there are only 2 offerings of this workshop this month! The first one is only 4 days away.

And after the workshop, a few months later, attendees are invited to a free Facebook live where we show you what to do with your centerpiece after the autumn season is over to keep your succulents growing till spring time.

Thank you, Cathy Testa of Container Crazy CT

containercathy@gmail.com
860-977-9473
http://www.WORKSHOPSCT.com


Workshop Dates Updated

Leave a comment

To learn about the latest Container Crazy CT’s upcoming workshops, please visit www.WORKSHOPSCT.com.

We have posted our annual “Succulent Topped Pumpkin Workshops” dates in October and also noted the dates of the 10th annual Kissing Ball and Wreath Making Workshops.

A Succulents Pumpkin C Testa Copywrite_0002

Pre-registrations for the Succulent Topped Pumpkin Workshops are open as of today. Visit the page above to find all details, register and join us! We are offering two Saturday dates in early October.

A Succulents 2019 C Testa Copywrite_0010

Dish Garden for the Raffle next Wed, 8/21, 4-6 pm @ Joe’s!

I also have a few other events coming up, one of which is NEXT week, on August 21st, 2019 at Joe’s Fine Wine and Spirits in East Windsor, CT. Come try some wine at their Wine Tasting and Sip while learning about my succulents from 4-6 pm! A succulent dish garden (above photo) AND bottle of wine will be raffled off that evening – free to attend all. Would love to see you all there – even if you have only a bit of time to swing in.

BBPOTS Container Crazy CT_0007

The KB & Wreath Making Workshops for 2019 are a special celebration year – it is my 10th year offering this annual workshop. The Celebration Date, which will be by invite only, is scheduled on November 30, 2019. This will be for the regulars who’ve been here every year! The 2nd workshop date is December 7, 2019 for the Advance and Beginner Workshop. Take your pen and calendars out (or your iPhones) and note the dates now. More details will be provided in early September on the KB events – stay tuned. It will be a fun and busy holiday season and it is just a tad bit early to think about winter, but now is the time to note the dates if you are interested.

Thank you,

Cathy Testa
860-977-9473
containercathy@gmail.com


Next Workshop: Mom and Me Offer!

Leave a comment

Pop on over to WORKSHOPSCT.com to read about this weekend’s Succulent Hanging Basket Workshop on May 11th, Saturday, 1-3 pm, Broad Brook, CT. We are making a special offer in honor of Mother’s Day! Check it out while seats last. Pre-registration is required.

Mom and Me Flyer

And don’t forget – we still have beautiful Mother’s Day cards as GIFT CERTIFICATES. I will be available all week if you decide to pop by to get one and surprise your Mom! They may be redeemed for the dollar value selected for workshops or for plants or plant gift purchases.

Mday front and envelope

Additionally, I will be making special LARGE hanging globes as Mother’s Day gifts all this week and posting them on my Insta feed and Facebook business page. Stay tuned!

Thank you,

Cathy Testa
860-977-9473
containercathy@gmail.com

SUCC HANGERS C Testa Copywrite_0004

Cathy T’s 5 Must Do’s for Successful Container Gardening and Patio Pots

8 Comments

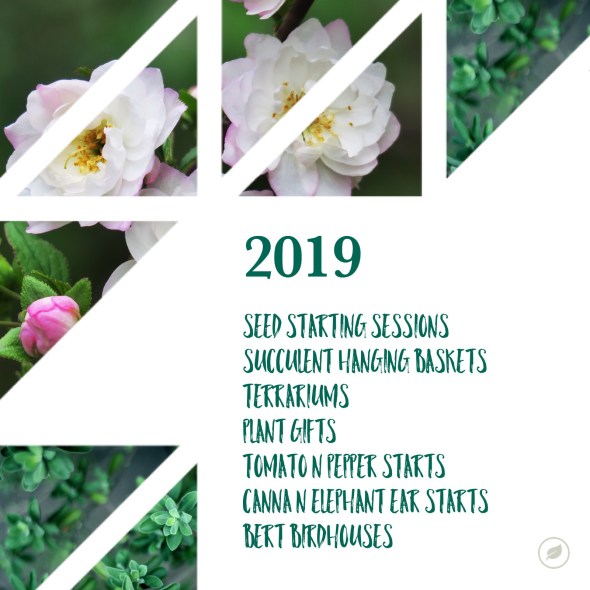
Several years ago, I came up with what I called, “The 5 Must Do’s for Successful Container Gardening” to help attendees of my workshops succeed with their patio pots and container gardens in the summer. Most of what was written then still holds true today, but some things have changed. I am going to update my “5 Must Do’s” in a series of articles on this blog. To get started, here’s a review with some 2019 updates:

For Successful Container Gardening

  1. Provide additional drainage holes in the base of your pots Still True! And still a number one rule!

  2. Use soilless potting mix specifically formulated for container gardening – Yes, but there are soooo many more choices today – it is sometimes overwhelming to know which bag of mix to select. How do you know which to pick? I will go over this in an upcoming article here on this blog.

  3. Add slow release fertilizer to the soil upon planting – Still a trusted method for me but there are many other choices today of various fertilizers. This is a topic to be updated with more suggestions.

  4. Water your plants on a routine schedule – There is no doubt – this follows rule no. 1 in regards to importance. However, some plants are more drought tolerant than others – so if you are bad about watering, I am going to make suggestions for you on your plant choices. And a ‘routine schedule’ is probably not the best wording – it is really all about how the soil is looking in regards to a balance of moisture and air – we will go into details!

  5. Use big pots to increase your growing power – Guess what? I’ve changed my mind on some of thisI still adore HUGE tropical plants and mixes of annuals or perennials in big pots – but some plants actually prefer smaller pots and I will be offering a blog update on this number 5 rule as to why. Using big pots is not always a rule, and is optional…

Let’s get started:

It may seem straight forward or common sense to do the five items listed above, but many people skip some of these steps when they assemble their container gardens and patio pots because they are either in a hurry, want to avoid spending extra money, or they don’t understand the negative impacts to the plants’ overall health and appearance when they don’t follow The 5 Must Do’s listed above. But, do these 5 important steps and you will achieve successful container gardening status every time.

Image courtesy of FreeDigitalImages.net/Simon Howden/Zirconicusso

Image courtesy of FreeDigitalImages.net/Simon Howden/Zirconicusso

DRAINAGE – Must #1

Most pots on the market today have only one small drain hole in the base (or none at all) – and this is not sufficient.  If the soil in the pot remains too wet, the plants’ roots will not get the oxygen it needs. And oxygen is required, along with carbon and hydrogen, for plants to grow. Having constant wet soil in the base of a pot is similar to walking around in wet sneakers. While it may be tolerated for a short period, if air is not provided soon, rot or death may set in. Everything above the pot is depending on what is going below in the soil, so Must #1, providing additional drainage, will allow for the free movement of water throughout the soil profile which is extremely important because as those spaces filled with water are vacated, air can replace them for the plants’ roots to use oxygen.

Without sufficient drainage, your plants will not perform as well which leads to failure.  It is a step you should not forgo or skip, and must do in order to achieve beautiful plants in your container gardens and patio pots.  Once you see the difference in your plants health, you will find adding drain holes so valuable, you will never skip this step again. And, although specific potting mixes have ingredients to help create pore spaces for air, adding more drain holes to the base of your pots only enhances the soil environment for your plants.  It leads to ultimate success because the roots are thriving in a healthy soil environment which is well-drained and balanced.

So get your power drill out and use a drill bit to create holes about the size of a quarter (coin) in the base of the pots. Be sure to drill at least 5 or 6 holes evenly spaced apart (one in the center and a few around the diameter).  If the pot cannot be drilled (e.g., ceramic or clay), make sure it has at least one drain hole already built into the base by the manufacturer, or reserve that pot for plastic plants or water gardening.  Do not use pots with no drainage capability. This always leads to poor results, trust me (except if you are creating a water pot garden).

2019 Update:

One of my biggest frustrations with the market place is they still continue to offer pots with no drain holes. What are they thinking? Plants require drainage! I have posted this comment on Instagram – “Hey, pot makers – Please make pots with sufficient drain holes please!”

If they did this, we would not have to drill them ourselves and it would help sell their pots because the plants would do better in them. It is not to say I haven’t seen some with drain holes in some stores, but it is progressing slowly and not common. I wish they would offer more with them already pre-drilled for us. (Hint to pottery makers, same for those wonderful pots you make – make some with a drain hole please.)

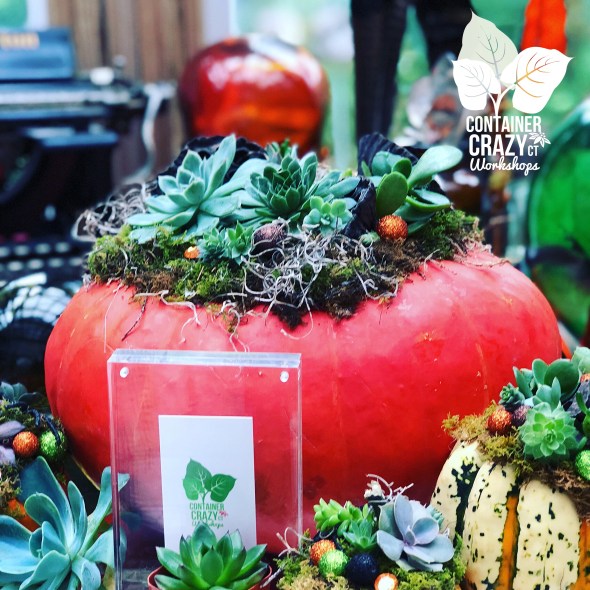
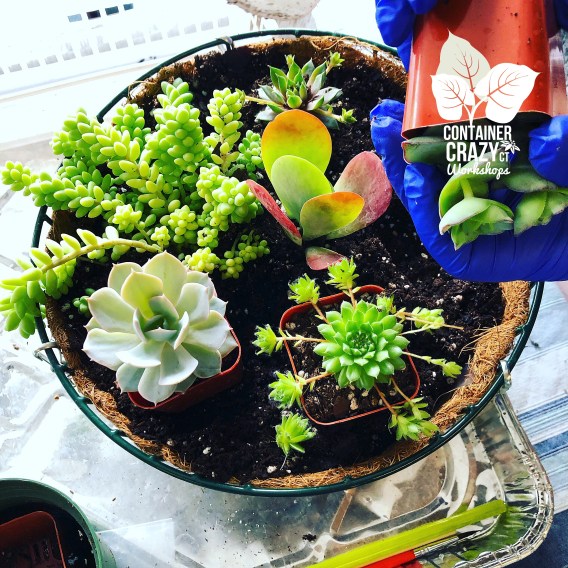
In my container gardening workshops, I have held up grower pots – the ones you buy your plants in – to my audience. I tell everyone, take a look at the bottom – what do you see? SEVERAL, I mean SEVERAL all around drain holes. Growers know what they are doing. It is a good example to show how important drainage holes are in your pots – this holds true for growing seeds in seedling cell trays as well. Or when you put a succulent in a pot – many times, you will see pots for succulents with no drain holes – succulents can be an exception to the drainage rule due to their ability to go without water for weeks at a time, but you have to monitor your watering carefully with succulents in pots with no drain holes. That is a whole other topic to explain, which I hope to do soon, and will in my Succulent Hanging Baskets Workshops in May, where we will be designing them with an amazing array of succulents of all kinds. But that is for a session/class, and for now, we want to focus on the drainage needs of container gardens and patio pots in general.

Over-watering is a leading cause of plant issues for people who are new to container gardening and plants. When you over water and the soil stays too wet in a pot, well, as mentioned above, the roots will rot. But other issues surface when there is too much moisture.

One, for example, is you may get fungus gnats showing up – they need moisture in the soil to thrive. This is especially common in houseplants where people have them in pots inside their home. And sometimes, you may even see mold on your soil when it is too moist. Moisture (with a lack of air circulation) may cause big problems in your soil. Too much moisture in your seedling pots leads to damping off. Water is a requirement for plants to grow but if over done without proper drainage, it leads to issues at times.

Balancing the air and moisture in your container gardens and patio pots or home pots of any size is critical. And soon, I will write a blog post to expand upon the air and moisture of pots as part of the 5 Must Do’s series updates I plan to post here on this blog, Container Crazy CT over the course of the next few months. In the meantime, be sure to add drain holes to plastic pots or buy pots with holes in them already for the best success with your plants.

Image courtesy of FreeDigitalImages.net/Zirconicusso/Criminalatt

Image courtesy of FreeDigitalImages.net/Zirconicusso/Criminalatt

SOILLESS POTTING MIX – Must #2

Soil (dirt) from the ground cannot be used as a substitute for potting mix when planting up your patio pots and container gardens.  Must #2 is you must use soilless mix specifically formulated for container gardening. I know what you are thinking, if plants can grow in the ground, why can I just dig up some dirt and use that in my pots?  Well, for starters, soil from the ground becomes very compact in container gardens.  Plus, with container gardening, you have to water more often resulting in the ground soil (dirt) becoming even more compact and dense in the pot as it compresses down in limited space.  Young new roots cannot grow through this and cannot get the oxygen or water they need.

To prove this point, I put ground soil (dirt) into a mason jar and soil from potting mix into another mason jar.  The weight difference between the two jars was substantial.  The dirt jar weighed about two pounds and was very heavy.  The mason jar containing potting mix was light as a feather.  Imagine roots trying to penetrate the heavy compacted poor soil, plus it won’t contain the balanced nutrients or air spaces for the roots to thrive and survive.  Roots are just as important as the top part of the plant – if not more important. Everything below the soil impacts the results above the soil.

Additionally, soil from the ground (dirt) can harbor soil borne pathogens, insects, and weed seeds – and you don’t want those in your container gardens.  The ground soil may be too hard (clay) or too porous (sand). Soil in container gardens must have good pore structure for root growth, water holding for even distribution, and oxygen for the roots, and of course, nutrients for the plants to grow healthy and strong.  Soil from the ground will not give these must needed elements to plants in container gardens. And trying to find the ideal ground soil that has all of these factors is a big chore, if not impossible.

Bottom line:  Do not use Dirt.  Dirt is a four-letter word in the world of container gardening.

Most potting mixes on the market contain a combination of bark, wood fiber, coir (a by-product of coconut husks) or peat, vermiculite, perlite, and maybe some compost.  The little white non-symmetrical round things you see in the soil is called perlite.  These provide pore (air) spaces in the soil required for roots to grow.  Other ingredients mentioned help with water retention (peat moss, coir), drainage (pine bark, perlite, rice hulls), and nutrients (compost). You want a balanced soil that can hold 25% air, 25% water, and the rest, 50%, is organic matter.  Plants must have the appropriate pore space, water holding capacity, and nutrients to grow.  This is especially critical in container gardens because roots are confined, cannot extend out to find its needs elsewhere, and they depend on their current environment and “you” to grow well.

When planting up your container gardens and patio pots, go out there and invest in a couple bags of potting mix specifically formulated for container gardening.  The good news is there are many types available today, and by the way, none of the potting mixes used for container gardening contain any real soil (dirt) at all.  Now you know why, it is should no longer be a surprise to hear this.  Once you start using potting mix, you will be pleased to see how well your plants are growing and thriving.  There are tricks to extend your potting mix life, but that is another topic to be posted later.

2019 Update:

Now that you know you should NOT use “dirt” in your container gardens or patio pots, the big question is which potting mix should I buy? It is OVERWHELMING because today, the market place has many types to choose from – and you stand there looking at all the bags scratching your head thinking, which is the “right” one? I want to succeed, and I read Cathy T’s 5 Must Do’s, but I’m now afraid to pick the wrong one.

I will be posting about my favorites, but one big tip is inspect the bags. Picking up a bag of soilless potting mix (and by the way, it is not labeled soilless, that is just a term used, it is usually labeled as “potting mix”) is similar to picking out produce in the grocery store. Look at the bag’s condition, especially if you are shopping at a low-end type store. Is the bag torn, heavy, wet and a mess? Hmmm, that is like a banana or avocado about to rot, in my opinion. It could have been an older bag, and the soil in there may be even worn out – unable to take up moisture. Be careful with “deals.”

Check the weight of the potting mix bag. Is it light and airy feeling? GOOD! Is it rock hard, wet and very heavy, hmmm, not so good. That is not to say it is bad because some bags are out in the cold early in the season, and may be thawing out – but I always go for the ones that look fresh and are in good condition. The weight of the bag gives you clues.

Go to a reputable nursery, see where their soil is placed outdoors – businesses who put their bags of potting mix under cover – with a roof top of sorts – are a winner in my book. Or if they are a popular and reputable nursery, they have lots of FRESH soil bags put out there early in spring especially. They also have staff available to answer any questions you may have if you find there are lots of choices. Be observant. You can tell who is on top of their game, if you just pay attention.

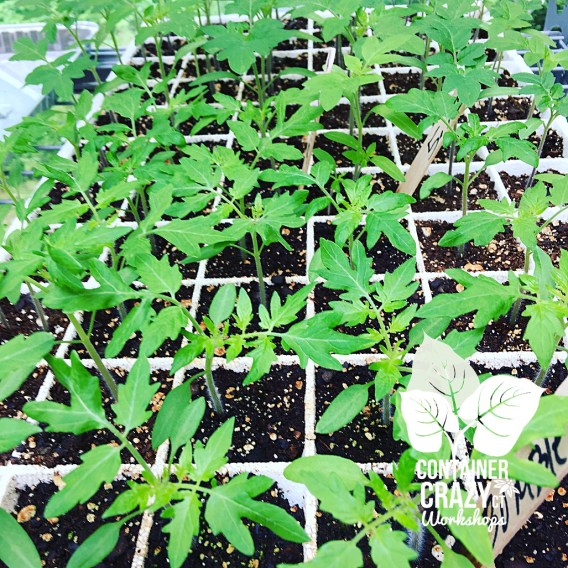
As for the big box stores, some of the mixes are good, but some I am weary of. I will be writing more about the products I like and I share all of that in my May container gardening workshops in detail. Heck, we even test soils in some of my sessions, like I did recently with “seedling mixes” in my recent Seed Starting Session. Horticulture and growing plants is a science and an art. You may have a mix you have found to be wonderful, or maybe you have been using a mix causing problems which are not YOUR fault – it is the mix (and you didn’t know it). We go over all of this in my workshops and sessions. Making your own mix is another option which I plan to go over as well, but some mixes are so excellent and it just saves time to get the pre-made mixes.

Lastly, the type of plants matter. Cactus, succulents, and houseplants have different soil needs compared to tropical plants, annuals, and perennials growing in mixed container gardens. For example, succulents and cacti appreciate more drainage and air space in the mix.

And lastly, I saw a new product on the market recently to help refresh older mixes in your pots – which I will be testing this year myself to see what I think. Heck, there are signs of people growing plants in no mix at all now – using special beads or growing in water. The learning never ends. I always test out new processes first before offering my take on them.

Image courtesy of FreeDigitalImages.net/Marin

Image courtesy of FreeDigitalImages.net/Marin

SLOW-RELEASE FERTILIZER – Must #3

Once you have your drainage holes and soilless potting mix in your pot, you want to add slow release fertilizer to the soil to obtain optimum growth.  Slow release fertilizer will provide small amounts of nutrients to the plants’ roots over a specific period of time.  While some potting mixes come pre-charged with fertilizer (meaning they add the fertilizer in the mix as an ingredient), it may not be substantial enough to keep your plants fed throughout your container gardening season.  Add some when you get started, and don’t have to think about it again unless you are dealing with a high demanding plant or you didn’t follow the rest of The 5 Must Do’s.

Many slow-release fertilizers on the market are available in a granular form which is easy to apply.  The little round balls you see in the granular fertilizer bottles or bags are called prills.  Each contains a balanced release of NPK (Nitrogen, Phosphorus and Potassium – the three macro-nutrients needed most by plants).  Nitrogen promotes leaf, stem, and above ground growth.  Phosphorous promotes rooting, flowering, and fruiting.  And potassium helps with disease prevention and cold tolerance.  If you put too much of any, you can burn the plants or even kill them.  However, the nutrients in the prills of slow-release fertilizers will slowly leak out into the soil as water vapor is absorbed into the prill through its coating.  It dissolves the fertilizer inside to feed your plants during your container gardening growing season – which is typically 3 to 4 months in Connecticut, from May to September. As the soil temperature warms (during the summer months when you want your plants to thrive the most and when they need more nutrients during their most active growth period), the nutrients are released even more when the prills’ coating expands as a reaction to the warmth in the soil.  Think of the slow-release fertilizer feeding as a well-balanced diet for your plants to stay healthy and beautiful.  It will be handled for you in a controlled manner.

Add the slow release fertilizer upon planting your container gardens to ensure a continuous feeding routine.  Do this one simple step, and you will be amazed at the results.  And it also eliminates the needs to add water soluble fertilizer as a supplement later in the season, especially, as I said, if you follow all five of The 5 Must Do’s.

2019 Update:

One of the biggest ongoing trends or change in gardening is the love of organics, and this is a good thing. Some slow release fertilizer are synthetic while others are organic based. I go over these in my workshops and their differences, but I still think slow-release fertilizer of either type work very well and are EASY to apply and you don’t end up burning your plants. I still use the trusted brands of slow-release fertilizers I’ve always loved and always add slow released fertilizer to almost all my container gardens and patio pots. It just works. Again, some mixes come pre-charged with starter fertilizer but adding the slow-release prills gives the plants a balanced diet over the course of 3-4 months and now many last 5-10 months! The coating size of the prills varies and this is what makes it last longer than others – look at the bottle’s instructions and follow accordingly.

However, I’m on several plant related Facebook groups where there are tons of questions asked, and many times, the subject of fertilizers come up. Wow, the brands some people show and have used, I have never seen before (because the members of these groups are from all over the world). Again, almost like the potting mix choices, it is confusing at times, which should I use? Which is safe? How do I use it? When do I use it? We go over specifics in my workshops based on the plant types.

I read once a nursery owner saying, everyone has different methods of gardening – and this is true – some go into it blindly however, and the 5 Must Do’s are here to get you started, but what I’d like to do is dive into the fertilizer topic more as part of my series of the 5 Must Do’s.

Also, I always always tell my attendees, if you follow the 5 Must Do’s – you don’t have to fertilize as often. I believe over-fertilization advice is given at times. If you have a healthy growing environment with the soilless potting mix and drainage, you are off to a good start and may not need much supplemental fertilizing as the season progresses in summer.

Image courtesy of FreeDigitalImages.net/Scottchan/Simon Howden

Image courtesy of FreeDigitalImages.net/Scottchan/Simon Howden

WATERING – Must #4

Forget container gardening if you are not willing to water your plants in container gardens and patio pots.  Must #4 is all about giving your plants watering love and it must be done on some kind of routine basis and based on the plant type and your environmental conditions (sun, shade, inside, outside, summer, winter, etc), but it must not be skipped or completely forgotten.  Watering in the morning is helpful because the plants take up the moisture during the day while photosynthesis takes place.  If you can’t do it then, please do it when you get home after work.  A plant will remain strong as long as the movement of water through the soil is in balance.  And you are that balance.  Without watering, your plants are doomed. If they don’t get water, there is no growth, and stomates in the leaves will close up to prevent further water loss to protect themselves.  Then, the plant will wilt and it certainly won’t flourish.  If no watering occurs for an extended period of time, the plant may reach a permanent wilting point and never recover.  And you don’t want that after you invested in buying beautiful plants from the nursery or from Cathy T (me!) to enjoy and show off at your home.

If you are not sure if the plants in your container gardens needs water, look at the plants – Are they wilting? Do they look thirsty?  Or insert your finger into the soil at a two to three inches depth.  Does it feel damp or sufficiently moist? It may be okay.  But you absolutely cannot forgo watering your container gardens.  Even if it rains occasionally, or you used drought tolerant plants, you must pay attention to them and their needs in regards to watering.  Observe the plants’ overall health, get familiar with their watering needs, and pay attention.  Climate in your area, the type of material from which the pot is made, and location will dictate some of the timing of your watering routine, but it is not the only factors you should pay attention to.  Basically YOU need to pay attention to watering.

Some people think they can douse their container garden plants with lots of water all at once, walk away, and forget about it for a week or more.  This does not work.  The soil needs periods where it dries out a bit between watering too. It should drain (Must #1) and have some breathing room (Must #2).  You don’t want to overdo it either, where the soil remains too wet. Wilt can be a result of over-watering as well as under watering.

Watering is one of the more difficult of The 5 Must Do’s to master because every plant and container type is different. And because people’s habits are different.  And the weather and exposure will affect how much or how little water your plants will need. There are some tricks to help reducing your watering routine, but that is another post for another time.  Bottom line, you MUST WATER your plants or they will die.  Plants need water to live.  In fact, every living thing on this earth needs water.  We need water. Without it – we all die. If you will not water, you should not do container gardening. In my opinion, not watering your plants is like committing plant murder.

2019 Update:

As I read my information above on watering (written several years ago), I think, yes, this is all still true in 2019. Watering, I think has been my biggest challenge to convey to attendees – is there a simple rule when it comes to watering? The answer is no. But – there is an observation factor involved in watering. You need to think about the soil. When you last watered, and all of that above. You really should NOT just think, “Hmmm, I’ll water every Friday and put one gallon in that big pot.” It really doesn’t work that way, there is a BALANCING act involved. But then, we don’t want to complicate watering, do we? The key point is that you must accept you need to water your container gardens, especially as we venture into summer, or you will not succeed, and your plants will suffer and look unhappy. I guess you could say, well, watering is like doing your physical exercise, you need to keep it consistent to have the plants and you do their best.

There have been times I wanted to do a watering type demonstration – using a shot glass, coffee cup, beer mug or wine glass, and milk jug to show the amount of water to be used based on the size of the pot and the plant type. Maybe I will get around to demonstrating this – but think of this: shot glass (succ), coffee up or wine glass (houseplant), beer mug (hanging basket), and milk jug or jugs (big veggie pots) – get the idea? But it also has to do with how moist the soil is, and did you let it dry somewhat to give some of that air space between waterings, and the type of plant. And yes of course, where your pot is situated. Outdoors in full sun, inside on a window sill, or in the shade. All are factors.

Ensete Red Banana_0001

BIG POTS – Must #5

People fear buying big pots, probably due to concerns with cost, placement, and moving them.  But big pots and container gardens make a big statement!  They capture your attention, create a focal point worth noticing, elevate the arrangement of your showy healthy plants, and ultimately reduce the compaction problems of small pots – so movement of water in the soil is enhanced. Big pots also provide good anchorage of your large plants, hold more inches of water, don’t drain out as fast which helps to reducing Must #4 (but not eliminating that must), and enables you to grow larger, showier plants – leading to more bang for the buck.  Go for supersized if you can.

However, with that said, big pots is listed last on The 5 Must Do’s list because it is not mandatory for success, but using them will elevate you to a higher level of container gardening.  My recommendation is you should invest in at least one big pot.  Just one. I believe you will never regret it.  It makes a tremendous difference to the plants’ performance when you give the roots a large mass to grow in.  Also, as noted above, using big pots make a big statement in your outdoor environment.  So why not make your container gardening show magnificent for the season?

There are some tricks to helping with the amount of soilless potting mix you have to use to fill up a big pot, but that is for another post. Big pots may be a little challenging to move or fill, but place them in the right spot before you get started, and go back to Must #1 through Must #4 to get them in the best shape ever, and then wow yourself, your family, and your guests as they visit you to see your amazing and stunning container gardens.  You will feel a huge admiration for your efforts, a new appreciation for the world of container gardening because you followed The 5 Must Do’s, and your plants will love you for it too.

2019 Update:

Okay – Okay – I know – maybe not as big as my cement planter shown above in the photo – that is one monster pot! And I love it to this day for showing off my amazing tropical plants grown every year from overwintering tubers, rhizomes, and corms, etc. However, what I meant when I wrote the above is when we did many of my May workshops with a mix of tropical plants (banana, canna lily, elephants ears), and big pots really made the show spectacular. In those days, I would recommend attendees bring a pot about 22″ in diameter and at least as deep for those types of mixed container gardens. Boy, did we ever have fun getting those big pots into their vehicles when they left the day of the workshops.

But, alas, times have changed. Succulents grew in popularity and still are very popular – that trend continues. My joke on that is succulent growers must be dancing in their boots about the passion of succulents these days. They are wildly popular, and guess what – most succulents do not need BIG pots. In fact, they have such shallow root systems, they do just fine in wider and less deep of pots.

And house plants for that matter should not be moved up into a bigger pot too quickly. Their roots tend to grow slower and thus if you move them up into too big of a pot, the roots may rot – because they are not taking up that moisture as quickly, and the soil could remain too damp, so it is recommended to move houseplants into one size up higher pots when they become root bound or over grown, etc.

But when it comes to vegetables, like tomato and pepper plants, well, big pots are recommended and needed, and I talked about this in my seed sessions recently – we went over types and size of plastic pots and fabric grow bags for growing some veggies. Some require the number #5 rule of big pots. But herbs, well, they are fine in smaller pots and in hanging baskets, etc. And radishes or carrot require different size pots too. Lettuces do well in window boxes. You get the idea.

Thus, plant types dictate the pot sizes, so the #5 rule is really optional and based on plant types you are using to make your beautiful container gardens for the season. It is not really a hard rule.

As I provide this Quick Update to my 5 Must Do’s, I remembered, I had a rule no. 6 to add. Now, for the life if me, I’m sitting here thinking, what the heck was the number 6 rule that I wanted to add? I know it will come to me. In the meantime, hopefully, these quick reminders of the 5 Must Do’s are helpful along with my quick 2019 updates as we get closer to the outdoor planting, decorating, and growing season. As noted above, I plan to do a series in detail of several updates on these topics.

The Five Must Do’s are all about achieving successful container gardens and patio pots.  Do all of them, and you will be happy, if not overjoyed, with your amazing results – I guarantee it.

In fact, as a 2019 update, I want to note that I’m amazed by the progress of my attendees’ patio pot creations since they have become fans of my workshops – their results are so good now – they follow the 5 Must Do’s and continue to learn right along with me. I’m very appreciative of the experiences we have had and continue to have learning about the love of container gardening.

Written and Updated by Cathy Testa
Owner of Cathy T’s Landscape Designs and Container Crazy CT
Location: Broad Brook, CT
www.WORKSHOPSCT.com
860-977-9473
containercathy@gmail.com

First Day of Spring is Tomorrow

Leave a comment

And I can feel it!

Yesterday, there was a bird in a tree singing a unique sound I am not accustomed to hearing and I thought, “This is a sign – spring is just about here!”

We all know, in fact, March 20th (tomorrow) is the first day of spring.

I took out brand new pruning tools after hearing that bird sign and began cutting back a large ornamental grass which I did not get to before winter hit. I cut each stem or bundles of stems by hand with hand pruners (but did you know? They can be burned back, haven’t tried that technique yet).

Also, I decided to pull down the dried up moon flower vines from a birdhouse pole. I didn’t get to that either last fall, but it turned out the birds loved using the dried up vines this winter. They used it to hide behind when they would perch on the birdhouse or use the birdhouse as protection during a winter storm.

Then, I even attempted to prune a panicle hydrangea that has grown to a massive size the past few years. It is so large in fact, I didn’t finish and will do that today. As I was cutting individual branches, I recalled seeing a beautiful butterfly visiting its flowers last summer. This variety of hydrangea can be cut back in late winter or early spring, so I figured it was safe enough to start although I usually wait a little bit more – but that sun and the bird – well, it got me motivated.

And, of course, I spent time in the greenhouse (all before this activity). Always a priority on a sunny day when possible. I was reviewing materials for Saturday, I potted up a little pinch pot I made recently with baby succulents and mini rabbit decor – it came out so cute, but most of my time in there was spent rehearsing, reloading water into my big water bin (used in winter months), and watering the canna lily, elephant ear plants and stock of succulents, and more potted up plants.

I will be doing a bit of all of this today and tomorrow while the weather is nice and then in a few days more will be my first seed starting session with the people who have already signed-up.

THIS SATURDAY: Seed Starting Sessions

I’m still reviewing all I want to cover in my Saturday Seed Starting Sessions – THIS SATURDAY, March 23rd at 10 am and 1 pm. (See WORKSHOPSCT.com for details.)

My weather app is showing some yucky weather on Thursday and Friday (either a bit of rain or a bit of snow – or maybe Mother Nature will change her mind). Spring will do that – appear and give us a little taste but we are not “quite” there yet, but I’m very hopeful that Saturday will be a nice day (partly sunny predicted so far) because that will make the greenhouse seed starting sessions comfortable and cozy. There are seats available. Contact me if interested.

So, this post in general is a quickie.

I wanted to update my side bar on this blog with workshops coming up and add the 2019 Gardening Trends list, which I will expand upon in another post later.

For now, I don’t want to waste this beautiful sunny day. I plan to move some chairs into the greenhouse and other supplies needed for Saturday, and oh also, another session has been added on Tuesday at 3 pm (March 26th). I could squeeze in a couple more attendees if you are interested.

Again, all of the details are on WORKSHOPSCT.com.

And as for other upcoming activity, I’m thinking of holding a terrariums workshop in April, then follows the Hanging Basket Workshops in May, and plant sales of starter plants available by appointment towards the end of May.

List of Upcoming Events

Until then, enjoy this sunshine and longer days coming. It is time to pick up the branches, debris, and clean up the beds as much as you can, take your pots out to clean on a nice day, and think about seed starting, which you don’t want to start too early either.

And the birds of course – don’t forget I have birdhouses for sale, made by Bert, my father. All hand made and painted with various images (bunnies, dragonfly, butterflies, and flowers). I noticed last year, the birds started moving into our birdhouses on March 10th.

Thanks,

Cathy Testa
72 Harrington Road
Broad Brook, Connecticut
860-977-9473
http://www.WORKSHOPSCT.com
containercathy@gmail.com

And the Sowing Begins…

Leave a comment

Good Friday Morning Everyone,

I’ve been a busy beaver in the greenhouse lately. I’ve potted up some of my Canna Lily rhizomes (about 30 to be exact) and Elephant Ear corms (bulb-like structures) in starter pots and have sown some seeds to get growing. Some started germinating this week.

And another activity has been cleaning and rearranging the growing spaces in my greenhouse so I can fit the planned attendees for my upcoming Seed Starting Sessions in two weeks.

I decided to add a new date – a weeknight at 3 pm on Tuesday, March 26th, for those who can’t make Saturday’s session. All the details are on WorkshopsCT.com.

Over New Date Added

These seed starting sessions are small groups and it is the first year I’m offering this as a hands-on learning workshop. Each attendee will learn everything I know to date about growing from seeds. There are so many little things to be aware of. You would think it is just as easy as plopping a seed into soil but there are at least 5 important things you need to know to succeed. We will go over these at the workshops and you will plant your own tray of 32 seeds!

I also enjoy very much picking out unique varieties to grow. There is something amazing about the odd shape of an heirloom tomato and the interesting shapes of crinkly hot peppers, in addition to the plethora of amazing flavors of both.  These are the goals of the types of plants we will sow at my seed starting sessions. The focus being on warm season vegetable, specifically tomato and pepper plants.

It is important, if you are new to sowing seeds on your own, to start with a limited palate of choices – narrow down your plant types and practice growing them. It is very easy to get carried away and next thing you know, you have more starter plants than you know what to do with! Although giving some away to family and friends is truly rewarding.

In my seed starting sessions, I plan to go over how to plan your sowing dates on the calendar and why it is important, to review why I select the types of seeds I do – and how you should go about selecting your own seeds. We will discuss what the various terms mean and why they are important (e.g., open pollinated, hybrids, and heirlooms ). And of course, we will go over soil types, how to water, and potential mistakes people make when sowing seeds. Then the best part is they will germinate in my greenhouse or you may take your tray home to oversee. When ready to be planted outdoors, you will be ready with a nice variety of plants you grew yourself.

Over Photo Seed Starting

In addition, we will go over how to store seed and what mixes to use and why. And then of course, review what causes things to fail. If you have tried to grow seeds and had issues, this is a place to learn more, and these sessions are for beginners. Practice makes perfect in the seed sowing world. It is not always full proof but know what and how to sow really increases your chances of success.

Dates of the Sessions

The dates are March 23rd, Saturday (2 sessions available, 10 am or 1 pm) and March 26th, Tuesday (1 session available at 3 pm). In April, we have a monitoring session and you will be required to pick up your trays in late April or sooner if you wish. Registration and payment required in advance. See WorkshopsCT.com for details and links.

What interests you in growing your
own plants from seed?

  • I want a variety (more choices) and know that buying transplants won’t offer special unique types of plants available by seed sources.
  • I want to feel reassured it is grown organically and is free of GMO issues.
  • I want to save some money (buying transplants is more expensive and I can get many plants from seed sowing instead).
  • Because I know the seedling will be monitored in the greenhouse and I don’t have the space at home.
  • I have a hobby greenhouse or wish to get one, and want to learn what may be needed.
  • Because I attempted growing them before and failed, and I’m not sure why.
  • Because growing from seeds is satisfying and the rewards of fresh food are great.
  • Other:

Maybe you want to grow plants from seeds because you want to teach the value of fresh food to your children or future generations. Perhaps you are a new homeowner and want to start a small garden. There are countless reasons why.

Or perhaps you are a plant addict like me, and you just can’t stop yourself from having more plants in your surroundings. Just the act of sowing seeds is therapeutic and takes you away from the technology induced anxiety of social media.

Whatever the reason, I hope you sign up soon.

Thank you,

Cathy Testa
860-977-9473
containercathy@gmail.com
http://www.WORKSHOPSCT.com
http://www.ContainerCrazyCT.om
Location is Broad Brook (East Windsor), Connecticut
Planting Zone: 6a

Open Seed Session Poster

Planning Ahead is required if you Want to Start Plants from Seeds

1 Comment

Before going into why growing plants from seed is extremely rewarding, fun, and even spiritual, let’s discuss why planning ahead is so important.

Planning Steps

First – You need to consider our climate and planting zone because you can’t move new, tender seedlings outdoors until it is safe for them to grow. In order to plan for this appropriately, you really need to prepare a plan of when to start your seeds. Your very first step is finding out what your last spring frost date is for your planting area and then work (count) backwards on your calendar. How many weeks you need to count back from the last frost date depends on the type of seeds you are planning to sow.

Second – You need to make a calendar or chart to plan out each variety of seed you plan to sow. Making a calendar is important because if you start seeds too early, the seedlings or starter plants will be ready before it is safe to move and grow them outdoors. Starter plants (seedlings) waiting inside will start to grow too large and this will cause growing issues which may result in unsuccessful plants when planted outdoors. And the opposite will happen if you start seeds too late, you will end up not having them ready in time for the outdoor growing phase and the plant’s fruits will mature too late to harvest them.

Third – Seeds sown need to be transitioned from cell trays to larger pots, and then transitioned during a hardening off stage – all before they are transplanted into your gardens or container gardens outdoors. If all three of these steps above are not thought out in regards to timing, you could waste some valuable and enjoyable growing time of your treasured starter plants, and not to mention waste soil, water, and other resources.

While it is not as complicated as it may seem, it is a bit of a process to plan these steps out if you want to increase your chances of success. It requires some pre-planning and organizing.

The good news is, after some seasons of practice, trial and error, and success, you start to master the process and develop some of your own successful methods and routines which you acquire along the way. Truly rewarding, and a bit addicting.

So where do you begin if you are a beginner?

There are many seed planning charts out there, websites, planting apps, and helpful resources to determine all of this planning and calendaring information, but in my opinion, it is not as easy as a “click” and marking the date on your calendars.

You want to plan ahead AND make a schedule. And now (late-Feb) is about the time to do this planning effort, if not sooner. It takes a bit of thinking, organizing, and considerations.

Even thinking about how many plants you are able to grow based on your layout of containers or patio pots and/or garden space at your home is necessary. And thinking about what types of vegetables you want to grow and why – do you enjoy them for cooking, slicing, snacking, sauteing, or even grinding for flakes to use in recipes? All of these aspects should at least be pondered upon during your planning process in order to avoid some pitfalls or disappointments.

Thankfully, my upcoming “Seed Starting Sessions” are here to guide you.

I have already done much of the “planning and calendaring” legwork for my upcoming seed starting sessions in March and April. In these sessions, we will go over how to do the planning so you will be prepared when you go do this on your own next season, and we will plant various tomato and pepper seeds in large trays to grow in my greenhouse.

You will learn about the how to’s of sowing, about various soil mixes, appropriate tools and how to maintain them, and potential problems you may encounter. You will learn all of this while attending these sessions in my greenhouse, so we will go over some information on what to consider in a hobby greenhouse growing environment as well – which is a bonus.

In April, you will revisit your seedlings, see your progress, and make any necessary adjustments. Or if you wish, you may take your trays home to watch the germination and growing process while you maintain all steps there. It is up to you!

Seed selection is always key in regards to timing.

Even before the planning and calendar phases, the fun phase of selecting seeds is another important step. Starting plants from seed gives you the wonderful option of growing unique and favorable varieties based on your style and tastes. Often these unique varieties are not found in local garden centers.

If you want to sow something out of the ordinary, selecting seed ahead is important and should be planned ahead, which I have done for my upcoming seed starting sessions.

I use a trusted, reputable, and well-orchestrated seed company. We will be sowing cherry tomato seeds as well as seeds of various large tomato varieties. We have hot peppers and sweet peppers on the list. Each I hand-picked due to various traits – such as, they are reliable, easy, produce a large harvest, and yummy.

Some varieties chosen are ideal for snacking and others perfect for enhancing flavors of sauces. Some are large slicers for sandwiches and others are decorative in pots when they flower too – after all – container gardening is always key on my list.

Other varieties selected grow well in hanging baskets and some in large pots. One really special seed variety I have chosen produces 3 lb. fruit – imagine that?! And most importantly, all the seeds are certified organic, heirlooms, and/or open pollinated.

Lastly, there will be other seed types to mix into the planting trays for herbs, salads, or flowers. You will have some flexibility of choices in your large seed tray to sow and grow.

Dates of the Seed Sessions are March 23 (Part I) and April 13 (Part II):

In regards to planning ahead, now is also the time to sign up and get on the sessions list. Seeds are so fun to grow – you learn the process and are able to grow many varieties and many plants.

Some of your new seedlings you could pass along to your children or grandchildren to grow in their kid’s garden, and some you may want to give away as gifts, but I bet your bottom dollar, many you won’t be able to part with after you learn about the great aspects of growing plants from seed and value that you grew them yourself, not to mention the taste! Fresh is best – we all know homegrown tomatoes are out of this world compared to store bought – you would be nuts not to agree!

Growing plants from seeds takes some time and considerations on where you will grow them, and as started above, proper planning – but it also saves you money because you can grow so many more for the price of one transplant from a garden center. And because most of the legwork, materials, and tools are being prepared right now for my upcoming seed starting sessions, it will save you time and the need to go get materials, seeds, and tools on your own. And the materials are reusable.

And not to mention, by attending, you are gaining valuable space to put out your seed trays with heating mats to warm the soils, and natural sunlight of a greenhouse for their growing environment. If you rather take your trays home to keep them going, that is an option. We hope you will consider joining us and plan ahead.

To learn more, visit www.WORKSHOPSCT.com, and feel free to ask any questions in advance.

Cathy Testa
860-977-9473
containercathy@gmail.com
https://www.instagram.com/containercrazyct/
Location: Broad Brook, CT