

Hello Visitors,
As noted yesterday, I am beginning to disassemble, dismantle, and take apart my container gardens and patio pots.
As I do, I will share with you the photos and steps in the event you can not attend my demo on Oct 17th, Saturday.
Yesterday, I took apart one pot of Canna plants. I selected the tall red one, figuring it would be easy to show you what I do.
Canna plants may be kept in the pot and stored inside, but today’s post shows you how to store the rhizomes.
Rhizomes
Rhizomes are the storage organs which are swollen stems under the soil that usually grow horizontally, below the soil about 6-8″ from the top of the soil line in the pot.
Mature rhizomes may be cut into sections to produce more plants, but you don’t need to do that step now. Just remove them from the soil and store them in peat moss.
Other Overwintering Options
Option #2: If you have a nice sun room in your home, you have the option of continuing to grow your Canna in the pot. However, I find if you keep your Canna plants in the same container for several years in a row, they start to get crowded and tend to not bloom or flourish as much.
Option #3: A third option is to leave the Canna plants in the pot and move it to an unheated basement where it remains cool all winter, but not below freezing. The plant will go dormant and may be revived the following spring after spring frost. In this case, however, you will need to watch for insects and water it sparingly so the soil does not go completely dry during the winter.
Canna Rhizome Removal
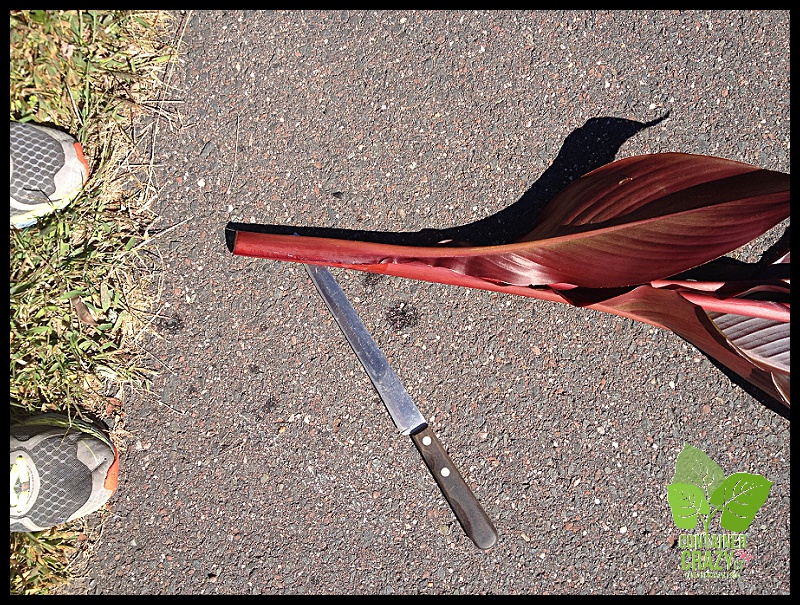
Tools: Clean pruners, loppers, or if you are not a full time gardener with various garden tools, use a long kitchen knife (like one you would use to cut bread).
When: You may wait until the Canna plants get hit by our fall frost later in October, and many references will say wait until it gets hit by frost. However, I’ve stored rhizomes in fall before frost and all works out fine as well.

Canna Australia in a Tall Red Pot
Cleaning: Using sharp, clean tools is important to prevent pests and diseases from being transmitted to your plants or storage organs (rhizomes). It is also a good practice to wear gloves and wash your hands as you work, and wash your pots when you are done dismantling everything.
The Steps
Step One: Cut the stalks at the base, leave a little 5-6″ stub if you want. Most important – make a CLEAN cut. Do not tear, pull, tug or make a jagged like cut – the cleaner cut the better. If the stems are thin, pruners work. If not, I like using loppers for a clean cut. If you use a kitchen knife, remember to make the slice/cut as clean as possible.

Clean Cut at Base
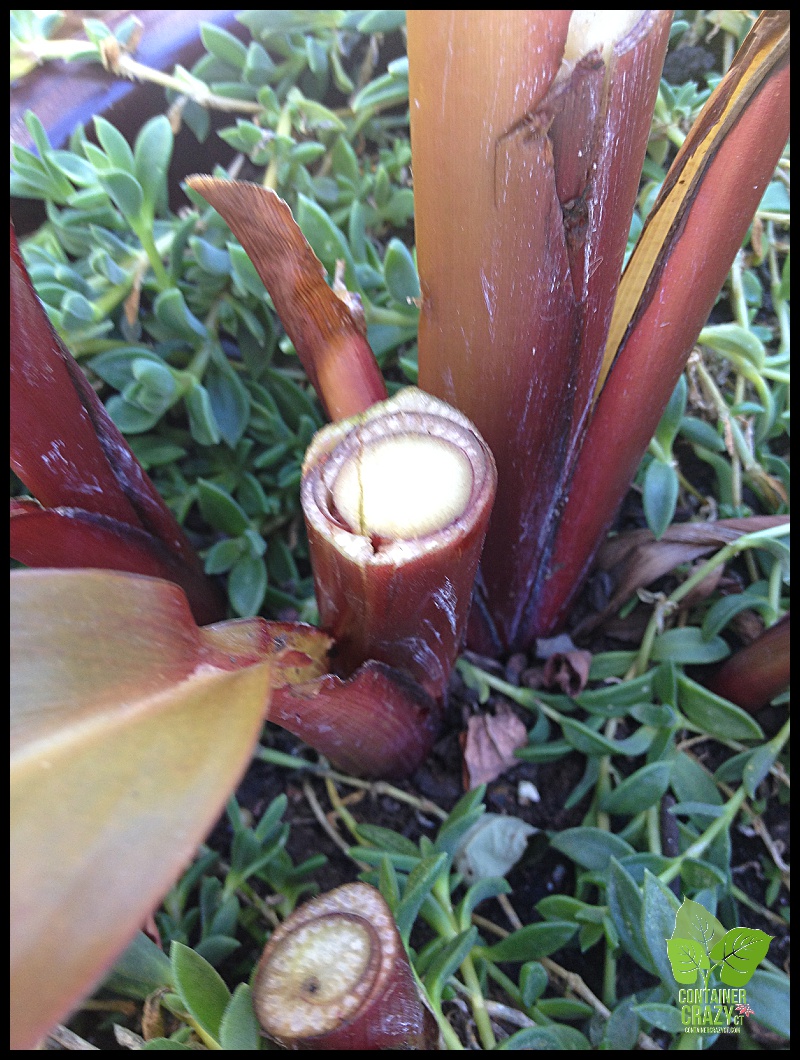
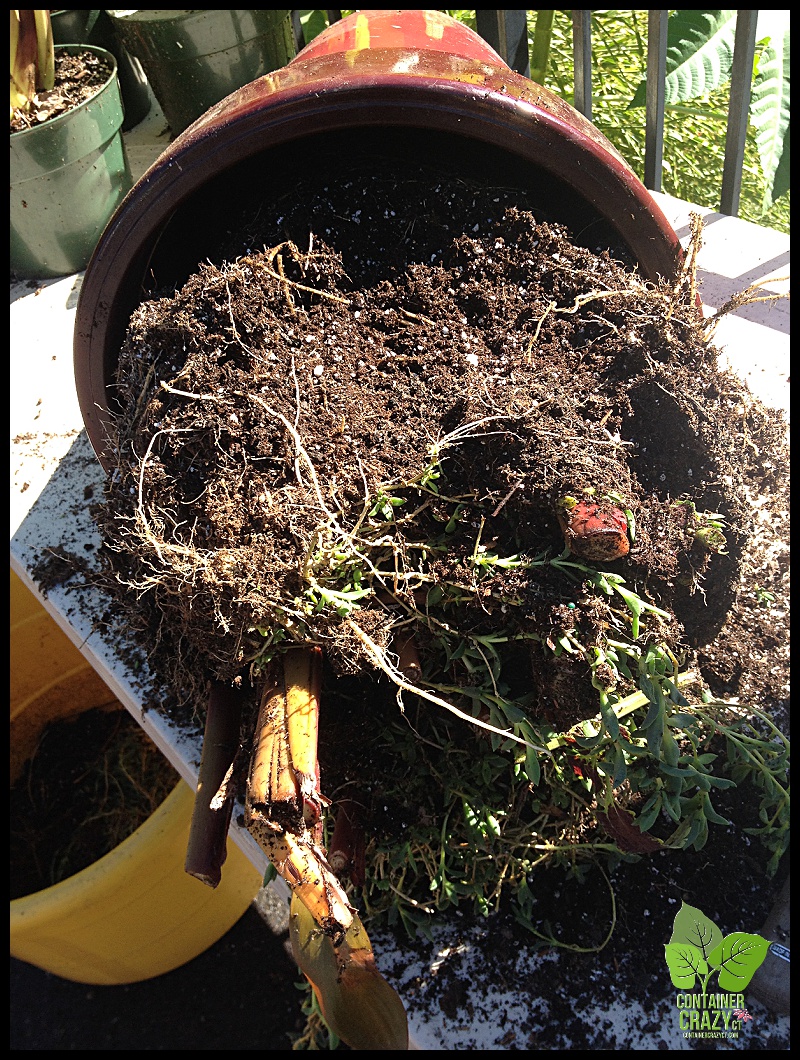
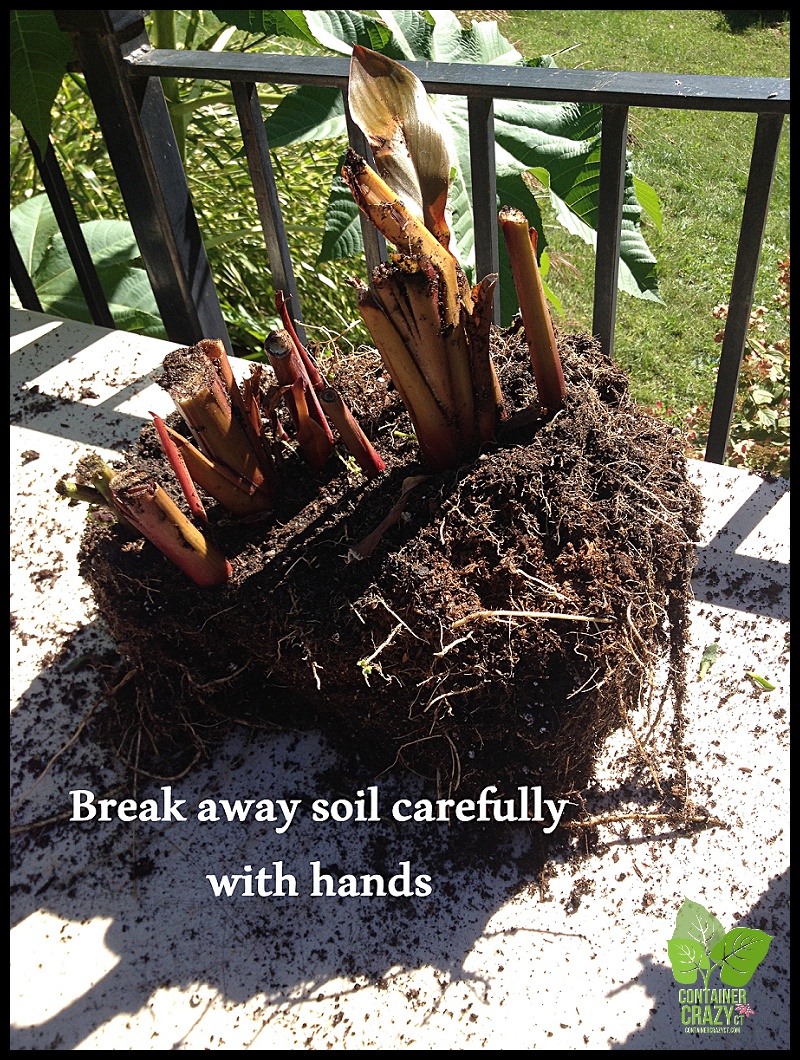
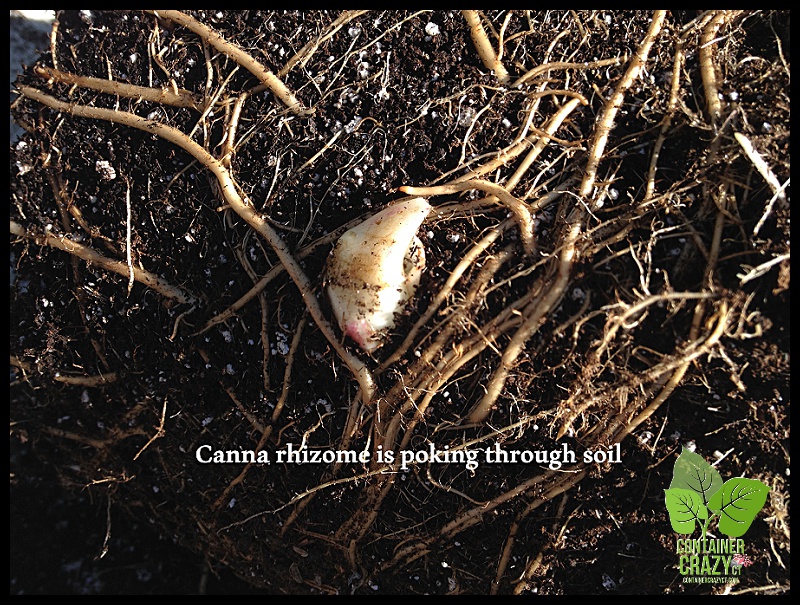
Step Two: Remove other plants in the pot and save as needed or toss. Then remove the root ball. Usually, if the pot does not have a edge on the top rim, it slides out just by turning it over or rolling it on a table (unfortunately, for this red pot, I had to work at removing some soil inside to get it out).

You can see a rhizome poking out of the soil here in this photo above. This can help to locate where they are but you will not always see this in every case.
Step Three: Cut off (slice off) the bottom half of the soil mass. Be careful to not cut the rhizomes which should be about 6-8″ from the top of the soil line.

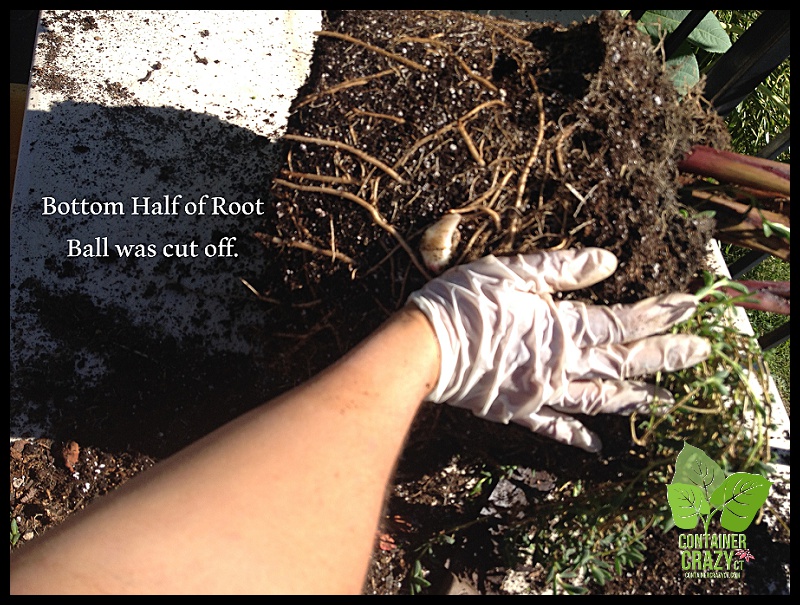
Step Four: I placed my hand to show about the distance from the top of the soil to where the rhizomes are in the soil. Start to remove the soil away from the rhizomes using your hands or tools. If you use tools, try to not damage the rhizomes accidentally — but if you do – don’t panic. Rhizomes are often cut into sections for propagation, it won’t kill them if you break one by accident.
Step Five: Pull the stems a bit apart, they may break away freely, meaning the rhizomes will separate. Take one stem in one hand, and another in the other hand and pull them away from each other, you will see how they break away. Then clean off as much as the soil as you can. You may use a garden hose to wash them off with sprays of water, but I don’t always do this because then the rhizomes get super wet. In this case, I did to show you how they looked.
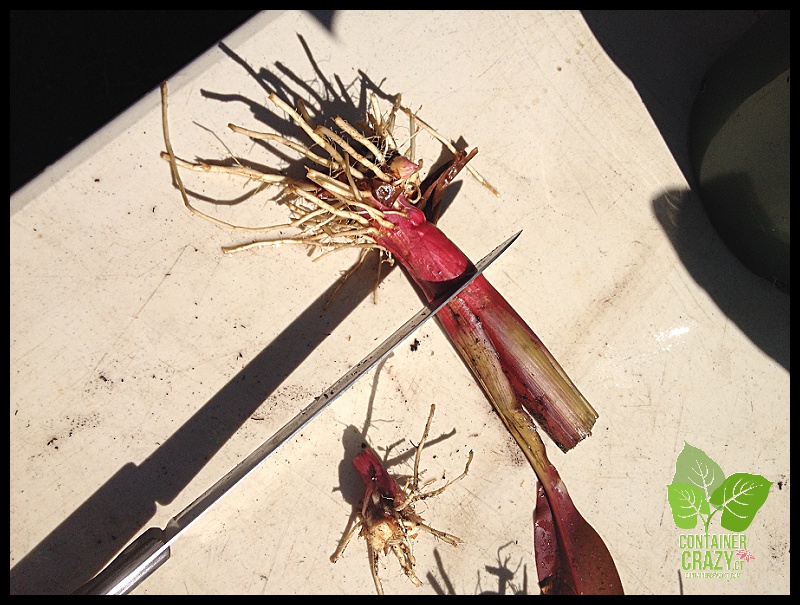
Step Six: Trim off the stem stalks. I do this because any fleshy material stored has the potential to rot in the box of peat moss. I even trim the roots if they are super long with sharp pruners. Then let them air dry a bit (couple hours).
The last step is putting them in a container (box) with peat which I will show in tomorrow’s post.

In this particular case, the rhizomes were on the small side, but that doesn’t matter. Each piece you save is another new plant for next year.
Crocosmia (perennial)
This summer, I put a Croscosmia perennial in a blue pot. The hummingbirds adored this plant’s blooms. It was amazing to see them zip by every day. So, you have choices with perennials too on what to do with them if you grew them in your container gardens and patio pots.
They may be removed now and put into the ground to have in your garden or if you have a garage, some perennials will come back if you store the whole pot with the un-removed plant over the winter in the garage.
You may also bury pots with perennials in the ground, but I don’t like that idea because the pot will get dirty and probably worn out more – but this is an option. This information was noted on the container garden workshop handouts in May as well (for those attendees reading this information).
Before I cut back all the foliage from the Crocosmia perennial, which was tattered by the end of the summer, I collected the seeds from this plant for next season. They may be scattered in your garden or stored for next season.
I put seeds in prescription bottles. Its a great way to recycle the bottles and the label is available – with a quick sharpie marker, I write the plant’s name and date, and store the seeds in a cool, dark place until next spring.
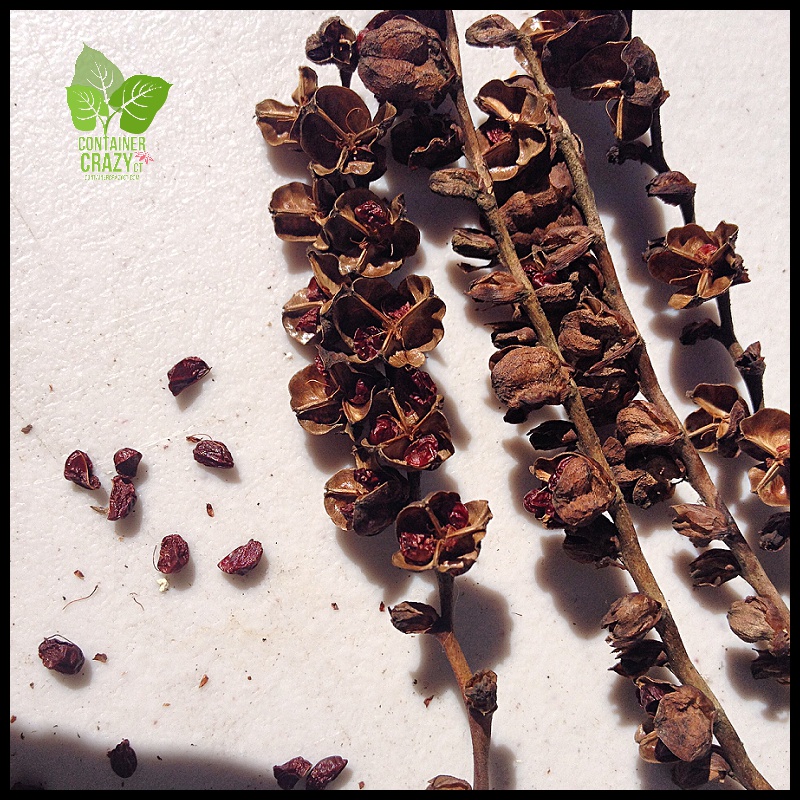

The seeds are stored in pill bottles as shown above.

The root ball was removed from the blue pot. I decided to plant it in my big cement planter after doing a bunch of cutting back of the existing perennials in the cement planter, which also has some huge castor beans growing.
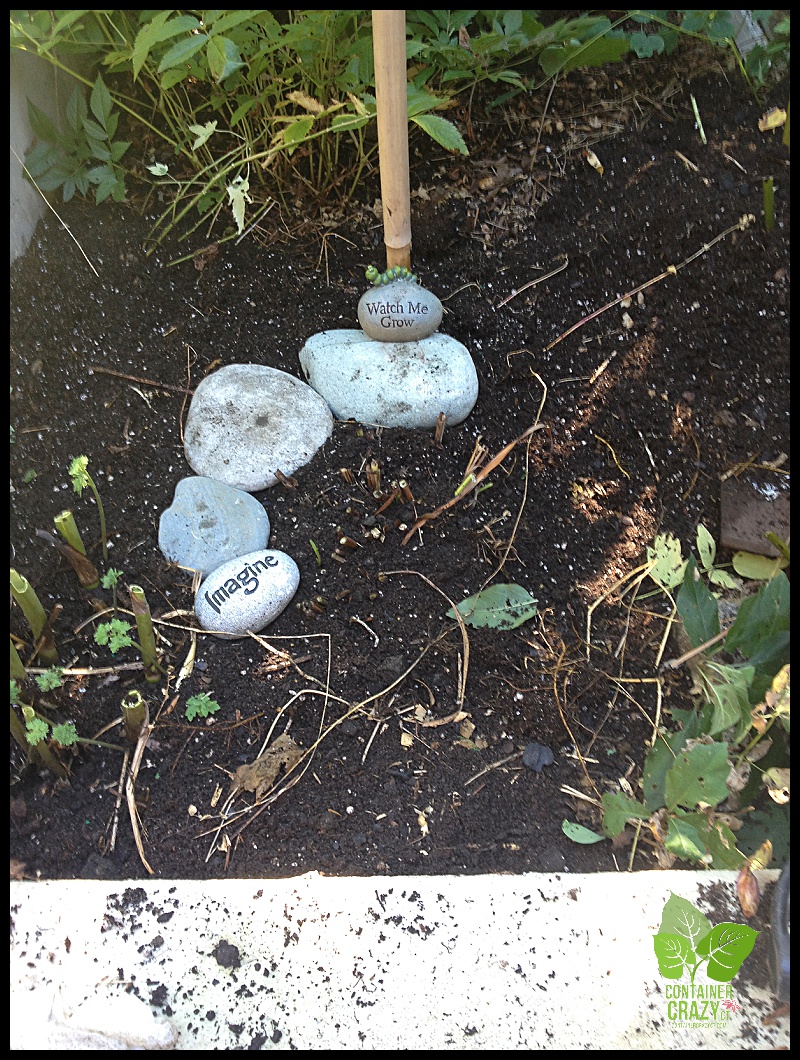
Then I put some stones around the Crocosmia to help me remember I moved it there. Even if I don’t keep it in this spot permanently, it is now saved for next season.

Crocosmia Blooms from a Prior Season
I love my big cement planter because the soil is so healthy and easy to work in, and dig in. Yesterday, I noticed some worm castings in the soil. This is what they look like below. It a sign the little critters in the soil are doing a great job of keeping the soil healthy. Worms increase air and water movement in the soil and help break down organic matter when they eat, leaving these worm castings behind which help the plant’s growth.

Worm Castings in Soil
As noted in yesterday’s post, I sometimes put old soil balls/masses from dismantled containers into “big” pots or into gardens as a filler in the base – this is one example. The soil in this big cement planter is from former container gardens, and the worms moved in quickly. The soil is rich now.


Begonia from Tubers (see yesterday’s post!)
By the way, yesterday I wrote about storing tubers from tuberous Begonias. Here’s a photo of the plant from this summer (see above) which I found this morning in my files.
Note: The details about appropriate storing temperature, methods, and specifics by type of plant for overwintering various plants will be covered in the demo session on October 17th. If I were to write all the details here, this would be a very long post – and I’m wordy enough! But this shows you the basics. It is fairly easy to overwinter plants but there are other tips to be learned.
Keep tuned in – more tomorrow…
Cathy Testa
860-977-9473
containercathy@gmail.com

You are a god send Cathy! Love it!
Thank you Nancy. To know it helps others is a great feeling – and please share my blog with others interested. Cathy T
Thank you – So nice to hear – keep tuning in for more tips! Cathy T
Very well done Cathy, done in great detail! Thanks a lot! Craig
Thank you Craig. I hope every little bit helps! Visit again soon! Cathy T.
Thank you – I’m glad it is useful and helpful to everyone! Cathy T.
Thanks you Cathy, very informative. My Cannas are in pots and still setting new blooms ( Sept 26, 2019) However I live in Calgary, Alberta with a very unpredictable climate. Our forecast for this weekend is for – 8C overnight. Can I keep my Cannas indoors for a while and put them out again in October if we get a few warm days? Or should I uproot them now and put them to bed for a long winter sleep? Our spring does not start until then end of May
My cannas are still blooming too in Connecticut but I tend to get an early start at storing them because a) I’m busy and b) cause I like to get them in before we get rain during the cold days of fall. Canna can get hit by frost (all the foliage) will turn black and you cut off the tops and store only the rhizomes (under the soil), OR if you want to move the plant in the house – you may do so if you have room. However, I would recommend you do it before soil gets wet and cold, and yes, you could put it out on warm above freezing temps. Bugs tend to move into wet cold soils why I do that. I don’t know what -8C is for F? If your Canna are in pots – they are easier to dig out versus Canna in ground. They grow very deep roots and it can be a job to dig them out. Hope this helps!! Cathy T.
Thank you for the fast reply and advise Cathy
I am going to take my Canas in today. The latest forecast is for -8C ( 17 F) to hit overnight within the next 2 days…. :-(…… better save than sorry!
But what do you with your cannas in containers where the winters are very mild and very short?
Since I don’t have that situation, I’m not sure. Perhaps check with a local nursery in your area.
In reply to Rose’s question. I took my plants indoors in late September. They finished blooming by the end of October. They are still in pots in front of my west facing kitchen windows. Even with the days of shorter daylight nd reduced watering they are still doing well. I intend to keep them in their pots as long as possible.. Since our Calgary winters are long I will not be able to put them outside until mid May. If they do start to show signs of dying back I will remove them from their pots and store the tubers. In May I will let you guys know how my experiment went . If the winters are short in Rose’s region I am sure the plants can be overwintered in pots.
I live in FLA with a pretty constant temperature. I purchased a pot of early spring Calla Lillies (pink) in December for my terrace and have enjoyed them immensely until two things occurred in late April: The flowers turned dark purple and green, their ovaries swelled to an immense size while their leaf tips began browning and curling & the leaves themselves lost their red color markings. Second, the full direct sun I enjoy on my terrace from late August through early April had left me, not to return until August. Although the weather is keeping tie plant upright (it’s 93 degrees today on April 24!). I’d like to give it a rest until at least early September when the sun comes back. How do I go about doing this? I had this issue last year, but I just threw out the poor plant and spent $8 on a new one in December. This year I’d like to try and save the bulbs and replant them.
Hi Sherri, I have to admit, I don’t have much experience with the Calla Lilies and you are in a much warmer zone than I so I am not sure if what you witnessed was the natural progression of the plant’s life cycle. It is possible it was ready to die back especially since you mentioned the ovaries swelling, perhaps leading to seed formations. You may want to consult a local grower of Calla Lillies in your area.
Hi Sherri, I haven’t done much with Calla Lilies and by your description (the ovaries swelling) it seems the plant was going thru a natural progression of maturing (going to seed), etc. Then the change in temps and exposure perhaps caused some stress to the plants. Calla Lilies out here in CT are kind of a houseplant or temporary summer plants. I haven’t attempted to overwinter those yet. Sorry I can not offer more advise. You may want to ask someone where you got them, local reputable nursery. Cathy T.
I cut down my canna lilies , they are in barrels, stored them in my basement. Cool and dry , but now some of them have started to grow, they have sprouted some green foliage. What do I do now?
Usually when this happens, I just let them be. Watch for any insects and just clean up as needed. When you bring them back out in spring after all chances of frost, they will bounce back.
I truly love planting, thanks for sharing these great post!
Thank you Diana! I’m so glad it is helpful to you. I am starting my overwintering processes this month and will be posting more as I work on various types of plants in my Connecticut location.