Seedlings and Transplanting

Leave a comment

I started to transplant seedlings from my seed tray into small pots yesterday. It was a very sunny warm day and a pleasant time to work on this, but it did take me half the day to complete, and I cut back on the amount of seeds I have sown as compared to last year.

Seedling Tray as of 4/11/22

Most instructions or reference books will indicate to transplant once the first true leaves have developed. Above is a photo of the stage at which I transplanted them yesterday. Usually, I wait a bit longer for those two top true leaves (above the cotyledons) to be a bit larger, but I had time to work on this and will be away from my greenhouse for the next few days. It will be sunny for a day or so and the temps will rise so putting them into bigger pots will help to reduce moisture loss or chances of soil dry out while I am not here to attend to moisture monitoring. (Tip: Water your seedling tray so the soil is moist before removing the seedling to transplant into a pot.)

Into Potting Mix

I used 5-6″ round pots and added fresh slightly pre-moistened potting mix (not seedling mix) and I used a clean golden knife to make a hole to insert the seedling into. I’m probably over cautious and handle all with care as to not damage the small seedlings. The golden knife was from a utensils set I received as a gift over 30 years ago – yes, as a wedding gift. The funny thing is I never really liked the gold color so I stored the set – and now they are used as gardening tools for me in the greenhouse. I can’t remember who gave that set to me. They would be surprised to know I’m using them this way today.

Seedling Size as of 4/11/22

I make a nice pocket to insert the seedling into the round pot. I do not fertilize at all at this point. The seedlings’ roots are still very fine and tender. I tend to not fertilize at all until a month later. Some recommendations will say to start fertilizing with half-strength with soluble plant food. I don’t do this at this stage. They will be able to stay in these pots for a 2-3 weeks, I think. I’ll keep you posted as I go along. It really depends on the amount of sunshine we get for growth results. (Tip: Remember, it still can snow in April – it did on 4/16/21).

On a table

I put some of them on a table set in the middle of my greenhouse and others on table racks. (Note: I do not recommend leaving on the glass like I did above, it is better to have air circulation below the pot as well as above, in my opinion. But sometimes I run out of space.) These are Cherokee Heirlooms above. Again, I usually wait till the seedlings are a bit larger but I had the time to do the work yesterday, so I got it started.

Fox Cherry Tomatoes

I also have quite a few Fox Cherry (yummy!!) tomatoes potted up (transplanted) as well. They are looking nice. I’m sure when we get more sunny weather, these will pop up rather quickly in growth. (Tip: If a seed shell is still stuck to the tip of a leaf, use a spray bottle to mist some water lightly on the seed, and it will remove easily.)

Liking the Look of My Foxes!

You can use seedling mix if you wanted to, but I tend to use potting mix at this stage. I handle them carefully, not pulling by the leaves but gently inserting the golden knife into the seedling tray cells and pushing up the root area as I remove them to put in the black pots. Sometimes I will bury the tomato plant just a little deeper. The stem has tiny hairs that turn into roots, but it is not necessary to do this (plant deeper) if you don’t want to. If your seedlings are leggy and stretchy however, this can be helpful.

Goldie Heirlooms

I sowed these for the first time last year, the Goldies! See photo below. We had too much rain last year when they were outside, but I am hopeful this year will be better for these babies. I am careful to not over water them right now, because they are so tiny and tender right now, I don’t want any rot to set in at the base of the stem. Good air circulation on hot days in the greenhouse is helpful. If the sun is out and the temps rise quickly, vent the doors, and turn on a light fan. It is important to not make the soil soaking wet, and checking them often. At least I do.

Last year’s Goldie!

Well, just a short post for today. We are getting rain all morning, up to 1 pm, then will be sun this afternoon, some of tomorrow will be sunny too. Bring on that sunshine. My new little tomato starts need them.

Remember, if you are local and interested in some of my tomato starter plants in mid-May, get on my list. I am not growing as many as last year, due to trying to conserve expenses (pots, soil, etc).

Thanks,

Cathy Testa
Zone 6b, CT
Broad Brook/East Windsor, CT
containercathy at gmail.com
860-977-9473
www.WorkshopsCT.com (products)
www.ContainerGardensCT.com (container designer)
http://www.ContainerCrazyCT.com (blog)

Cherokee on a Plant in 2021

My Tomato Journey to Blossom End Rot

5 Comments

I was going to write that my tomato journey started when I fell in love with the colorful art work depicted on seed packets, but that is not true.

It really started as a result of my father. He grew lots of tomato plants. He was known among our relatives of having the best, juiciest tomatoes in town. If you were invited to have some of his extra tomatoes, you were very lucky indeed.

My mother would have to can them into mason jars using her own method of boiling the jars in super-hot water and sealing them after stewing the tomatoes over the stove in a big pot. She didn’t put them through sieves to separate out seeds. She didn’t use a pressure cooker. She would can tomatoes for hours in a hot kitchen. But dang, were those the best darn canned mason jars of goodness ever.

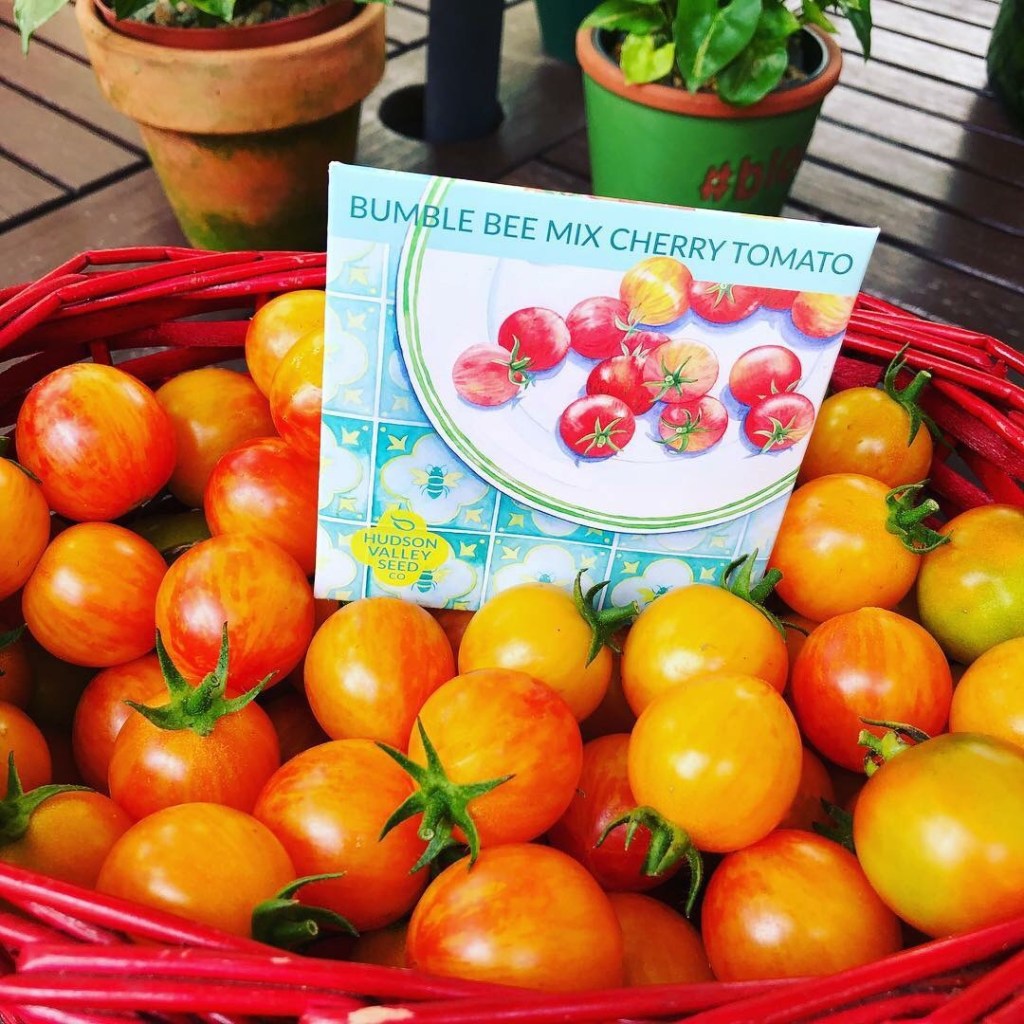
So my tomato journey started with tasting them and witnessing my father growing them at my family home but it was sparked again in my own home when I saw seed packets at a flower show by Hudson Valley Seed Company. I immediately fell in love with how beautiful the seed packets were and are. They are designed by commissioned artists and each packet represents the goodness inside. It is an artistic depiction about the vegetable plant, seed, and variety. The art tells a story and this is what captivated me.

Basil by C Testa Copywrite_0001

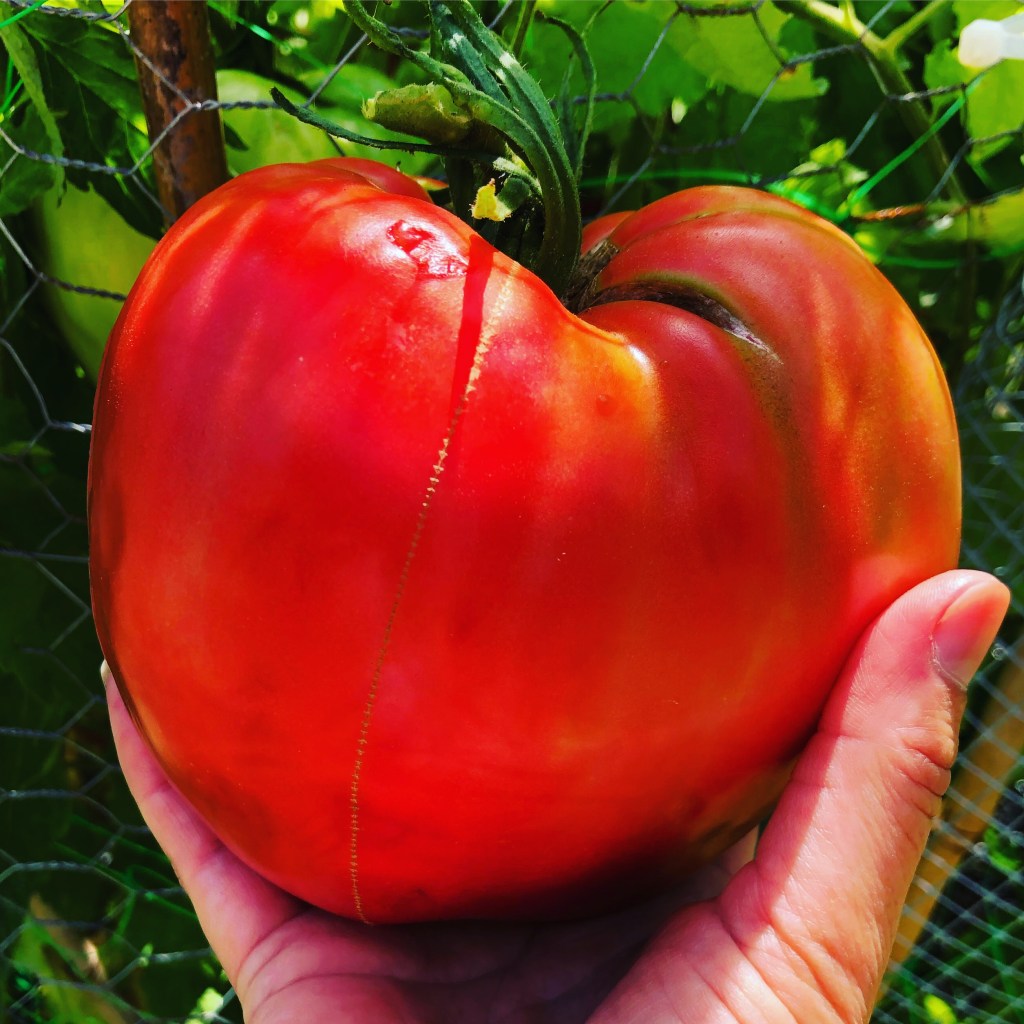
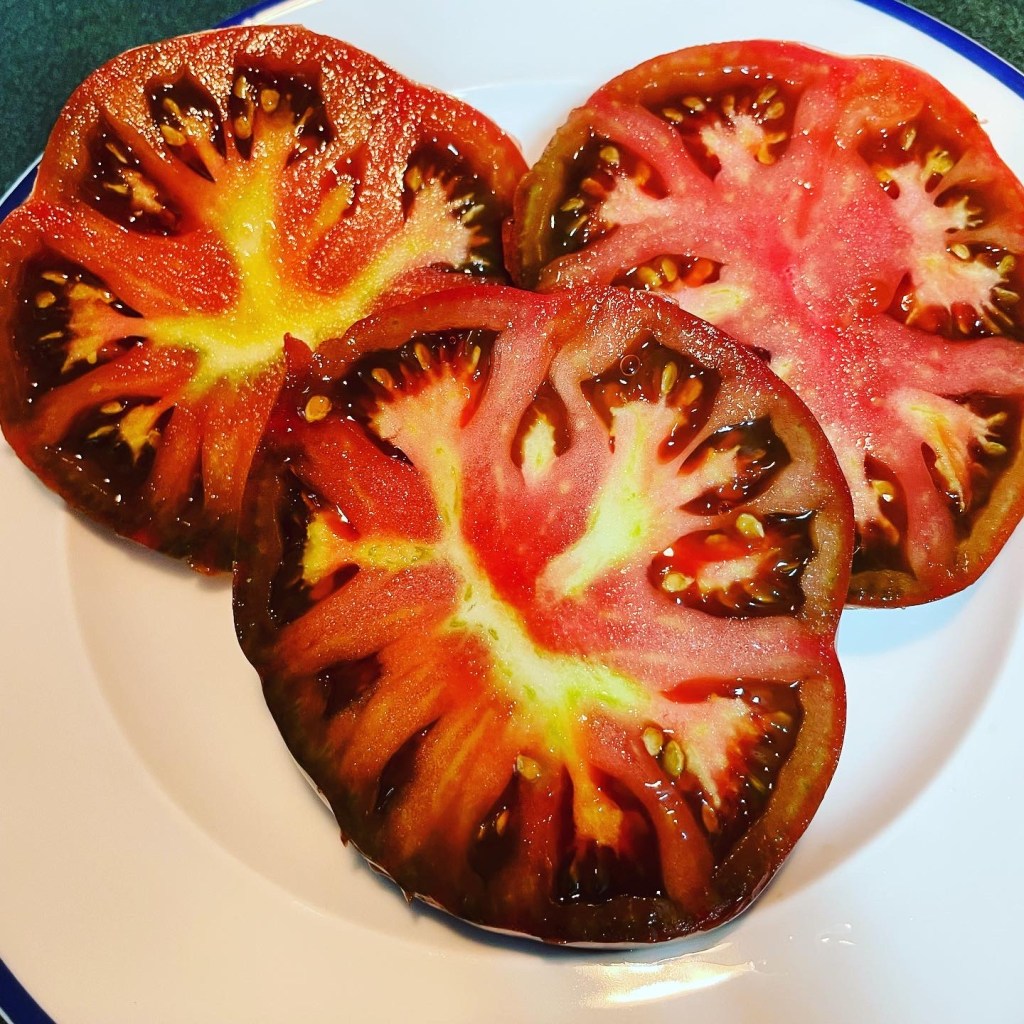
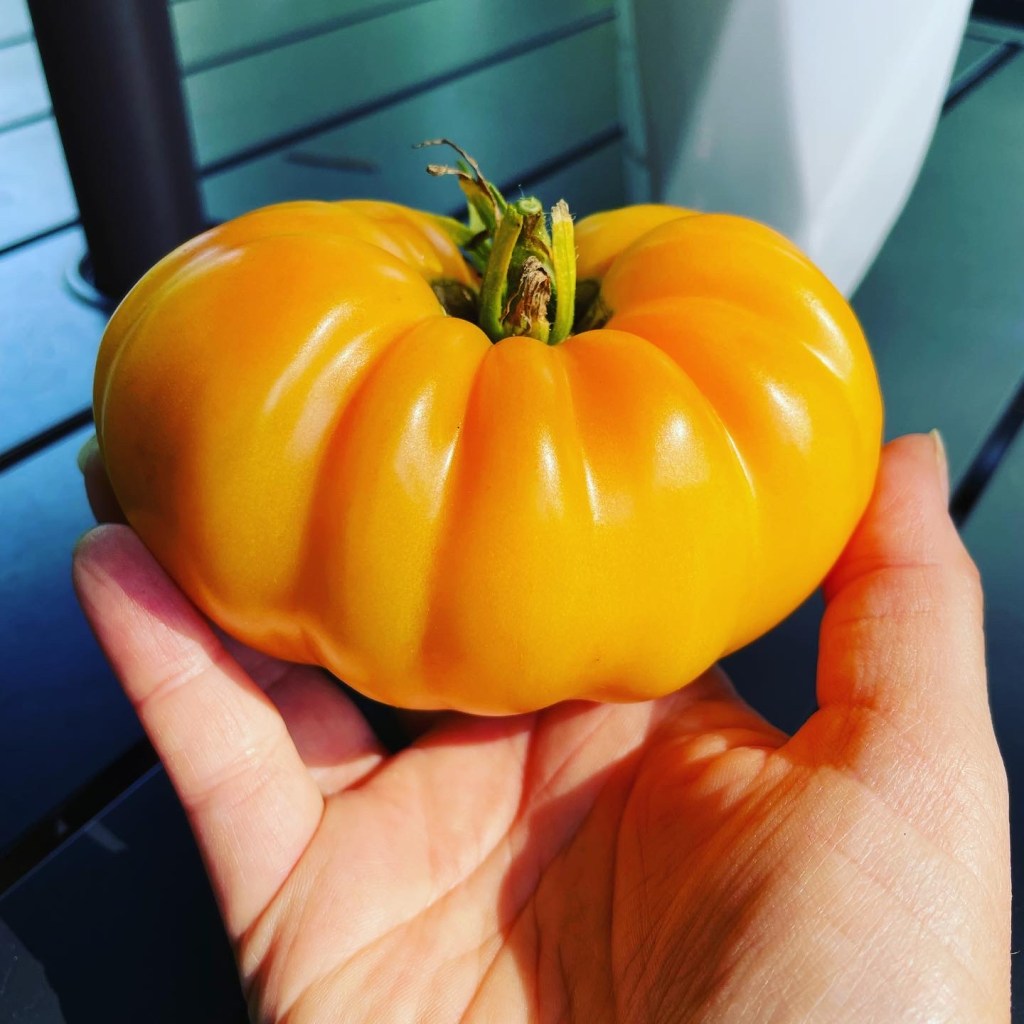
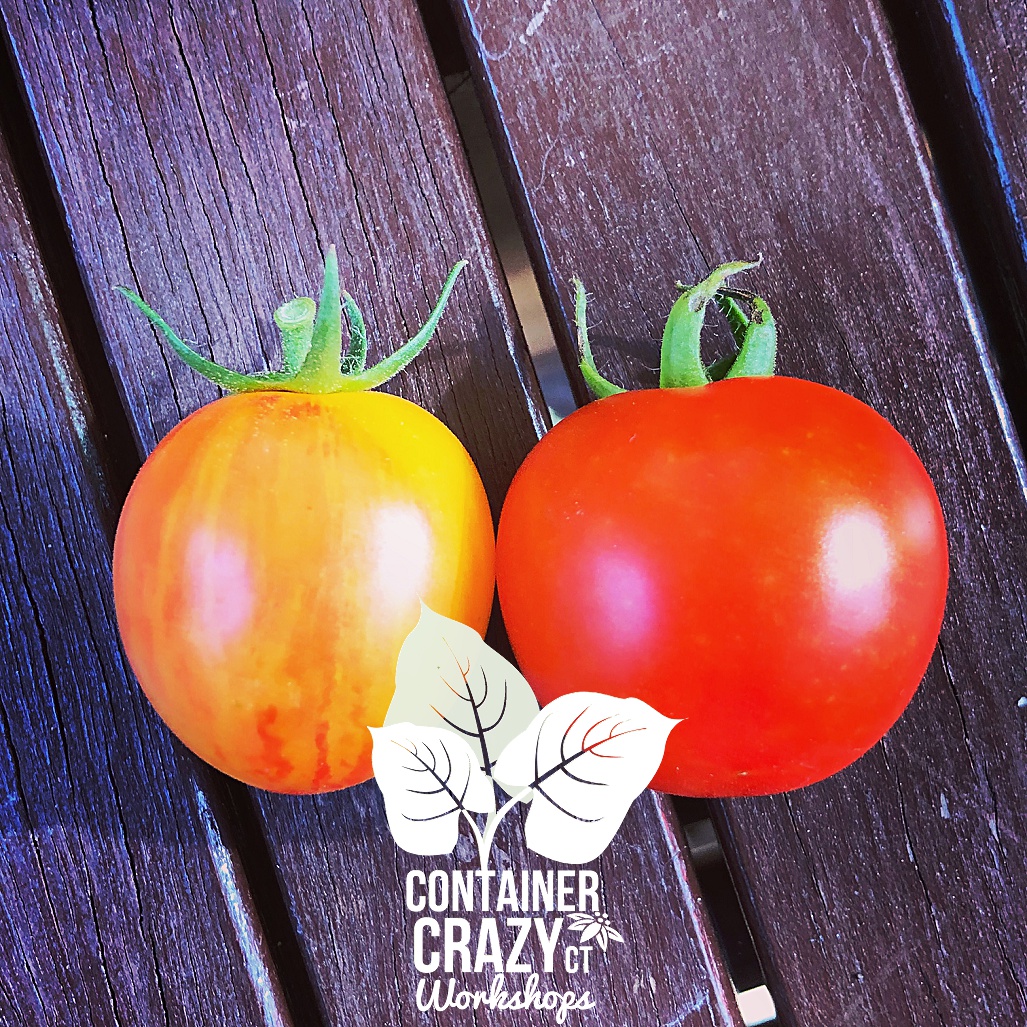
This particular seed company also has cool varieties of tomatoes and other veggie plants, and herbs, etc. Not your typical “big boy” tomatoes as my dad would grow. They have purple tomatoes, tall tomatoes, and gigantic tomatoes, with cool names. It intrigued me. When I saw the Oxheart tomatoes, which grow 3 pound fruit, my eyes bugged out. Or the Mikado heirlooms with broad pink beef-stakes and exceptional flavor, I had to try them. The list goes on. It grew from there.

Blossom end rot by C Testa Copywrite_0002

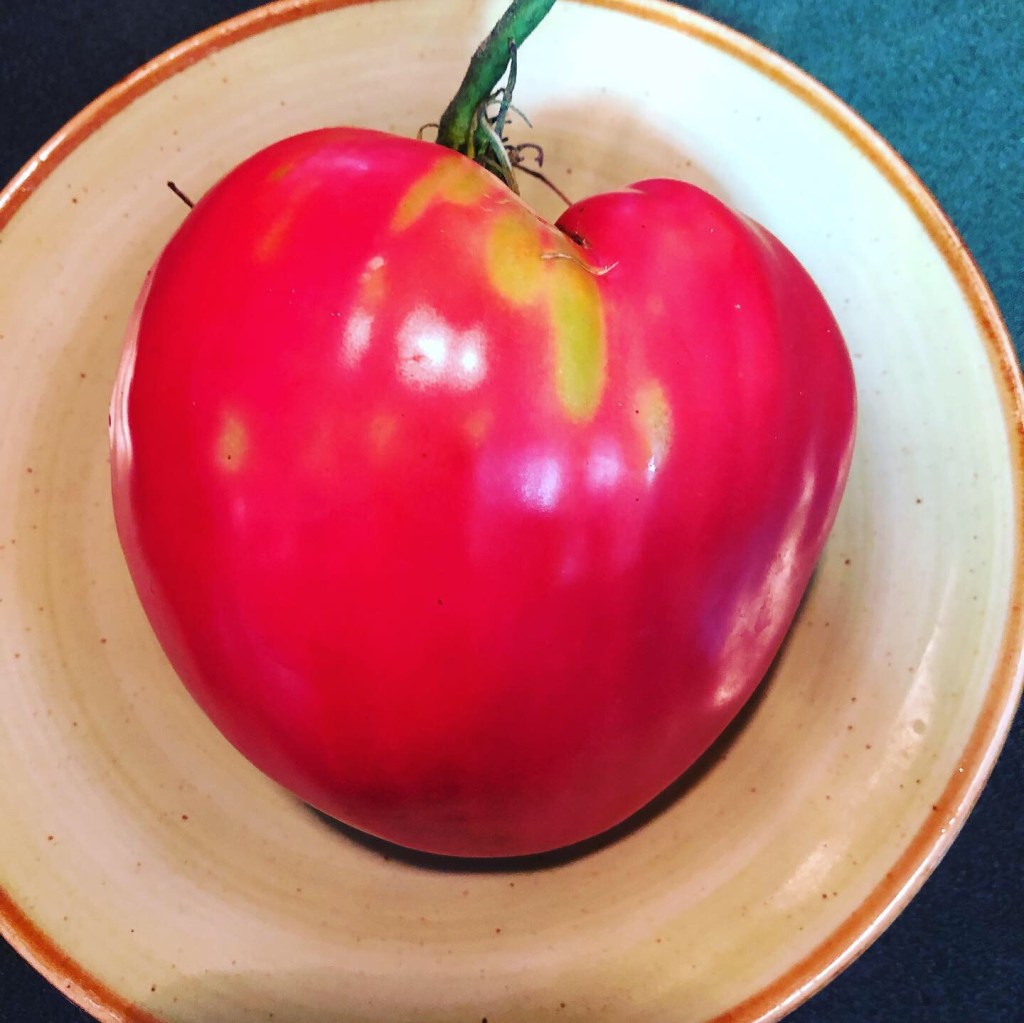
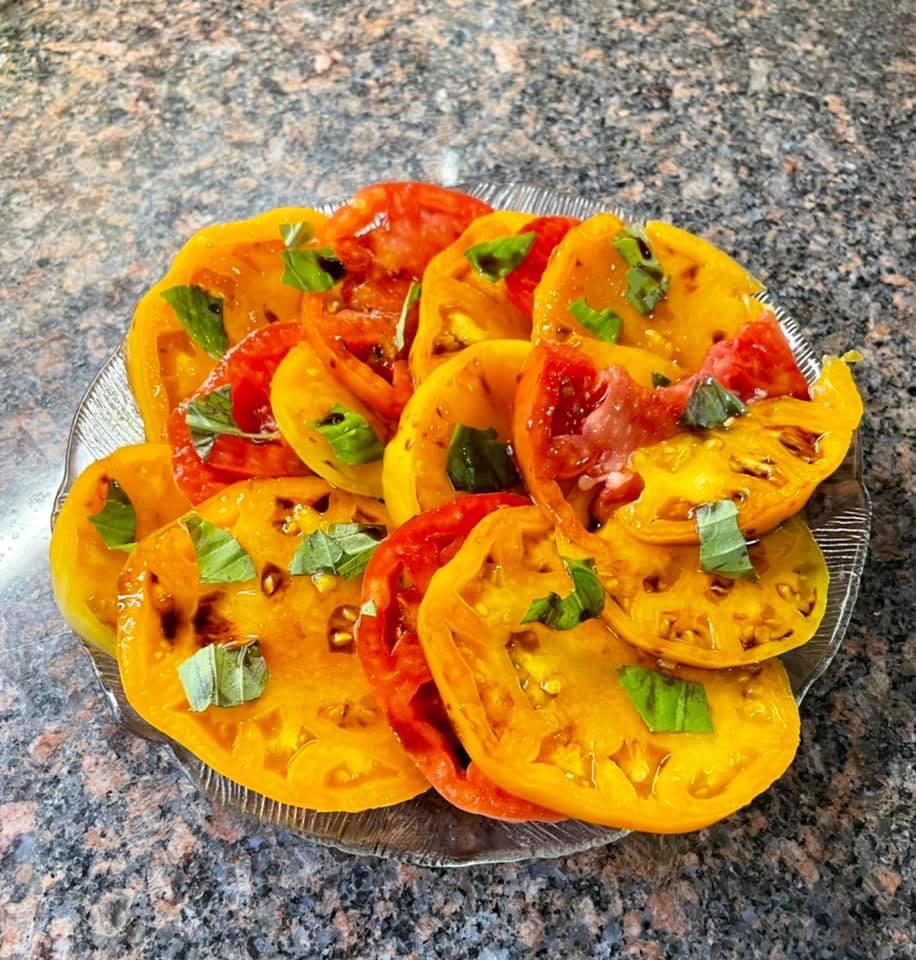
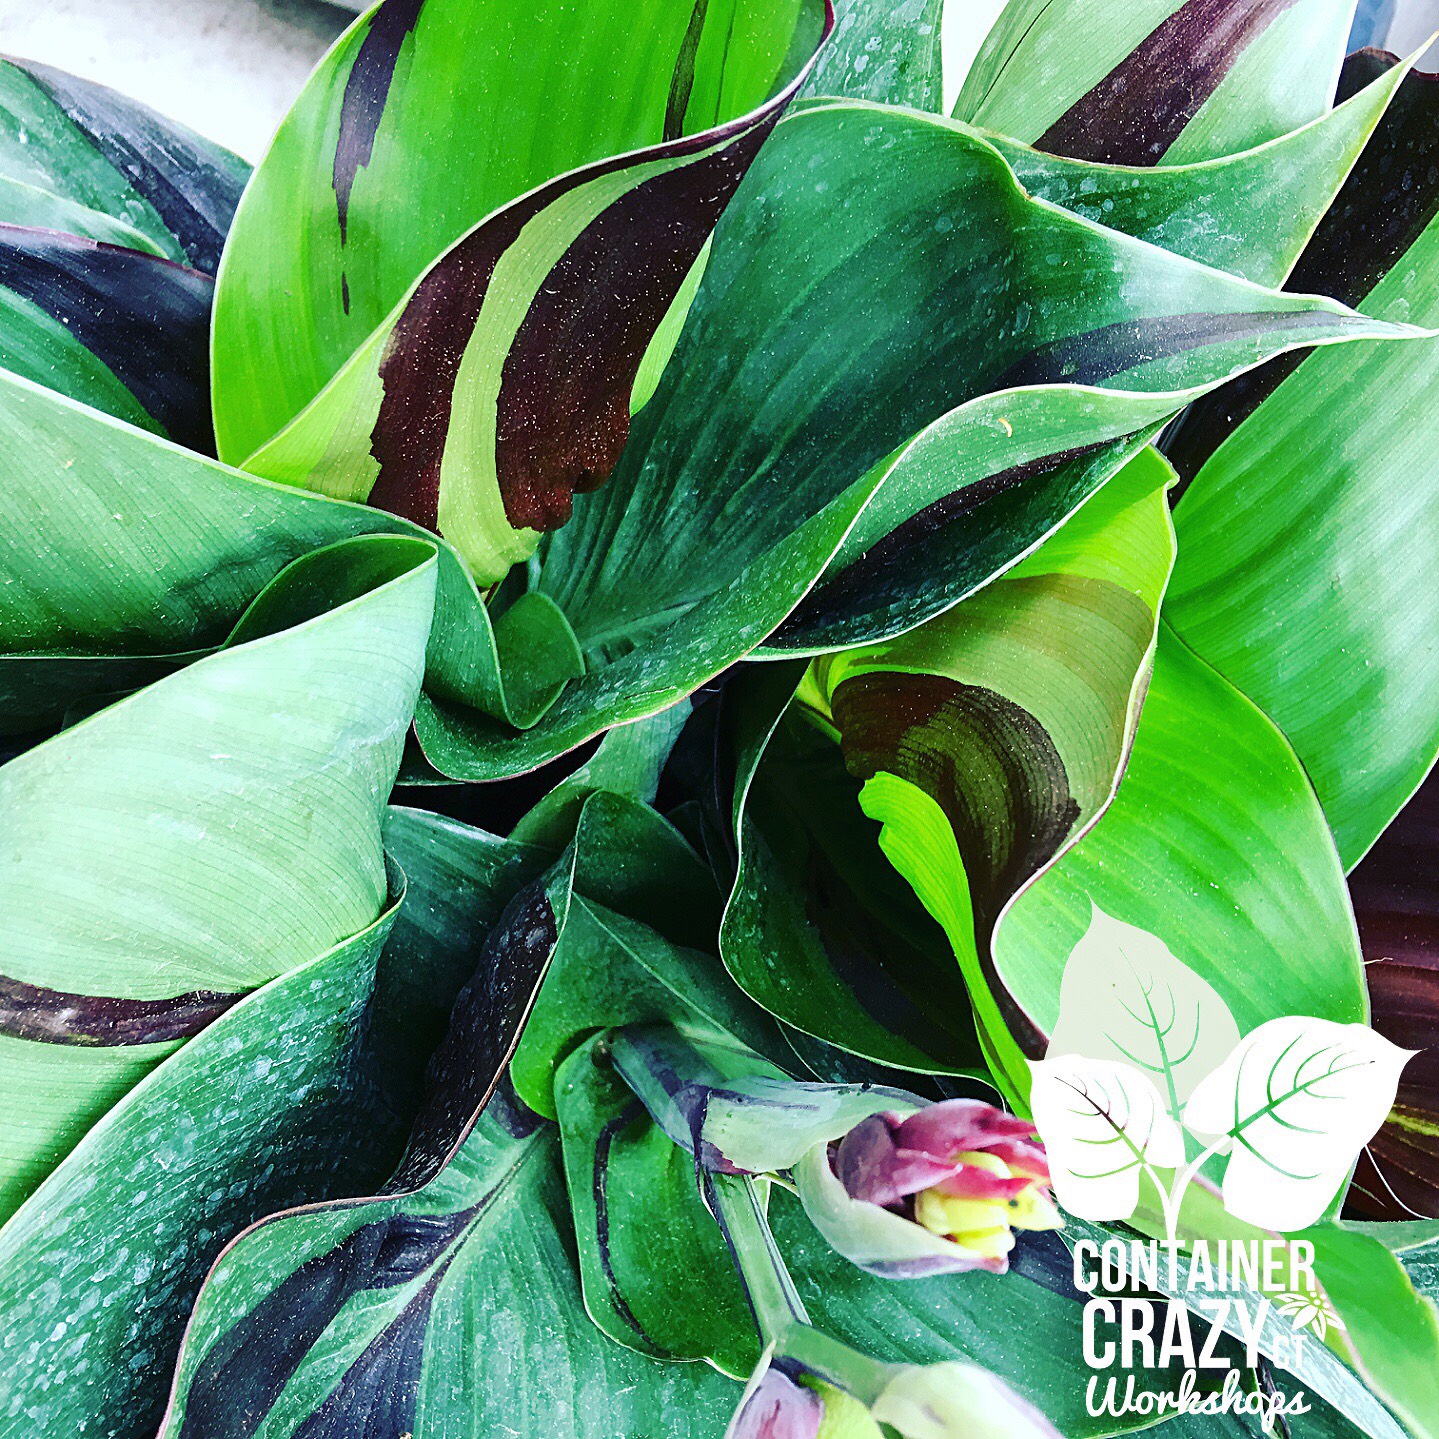
Mikado heirloom with Thai basil

No one taught me how to ‘sow’ tomato seeds or how to plan them out based on frost dates and timing. Not even my Dad. He was the type of gardening Dad, at least from my perspective of the 6 kids in my family, who did not explain the whole tomato growing thing at all. He just had us tag along or maybe we just visited him to watch while he was gardening. And sometimes he would ask us to do a tiny chore, like carry this basket of tomatoes to the house, etc.

It was all learning by unaware observing back then, when I was a kid at my family home. Unaware because I don’t recall purposely observing, just observing. Just being there, and also of course, remembering the flavors of his amazing tomatoes at my family home when young and until the day I moved out in my 20’s. Now I enjoy my own tomatoes grown in pots.

My Dad had an old rickety greenhouse he built himself. It was on wheels. I don’t remember him pulling it around with a tractor, but I do remember stepping up into it to see what he was doing during the gardening seasons. I remember the smell of dirt in there too. And of course him doing whatever in there, tending to seedlings or whatever it was.

His hand built greenhouse was made with old foundation forms (if my memory is correct), and it had two sides with boxed like tables filled with dirt (or whatever he was using for soil mix) and tomato starts which he started from seed. Some of his own seed and his traditional favorites. There was one space down the middle to walk back and forth which only one person could walk at a time because it was narrow. It was small but sufficient for his seed starting needs. At least by my observation. At least that is how I remembered it.

They say that most people who garden or have a love of plants, it comes from the fact an elder or parent or someone showed gardening during childhood or at home, etc. It comes from example. Or growing up with it. Being surrounded by it. I believe it.

My Mom would complain though, saying in her French accent, “I’m tired of canning tomatoes.” There would always be a wicker lined basket on the entrance back steps filled with fresh tomatoes waiting to be canned, or to be picked up by someone invited by my Dad to come get some. And some were always stacked in baskets in the house, or in various buckets, right by where we hung our coats, near the kitchen entrance.

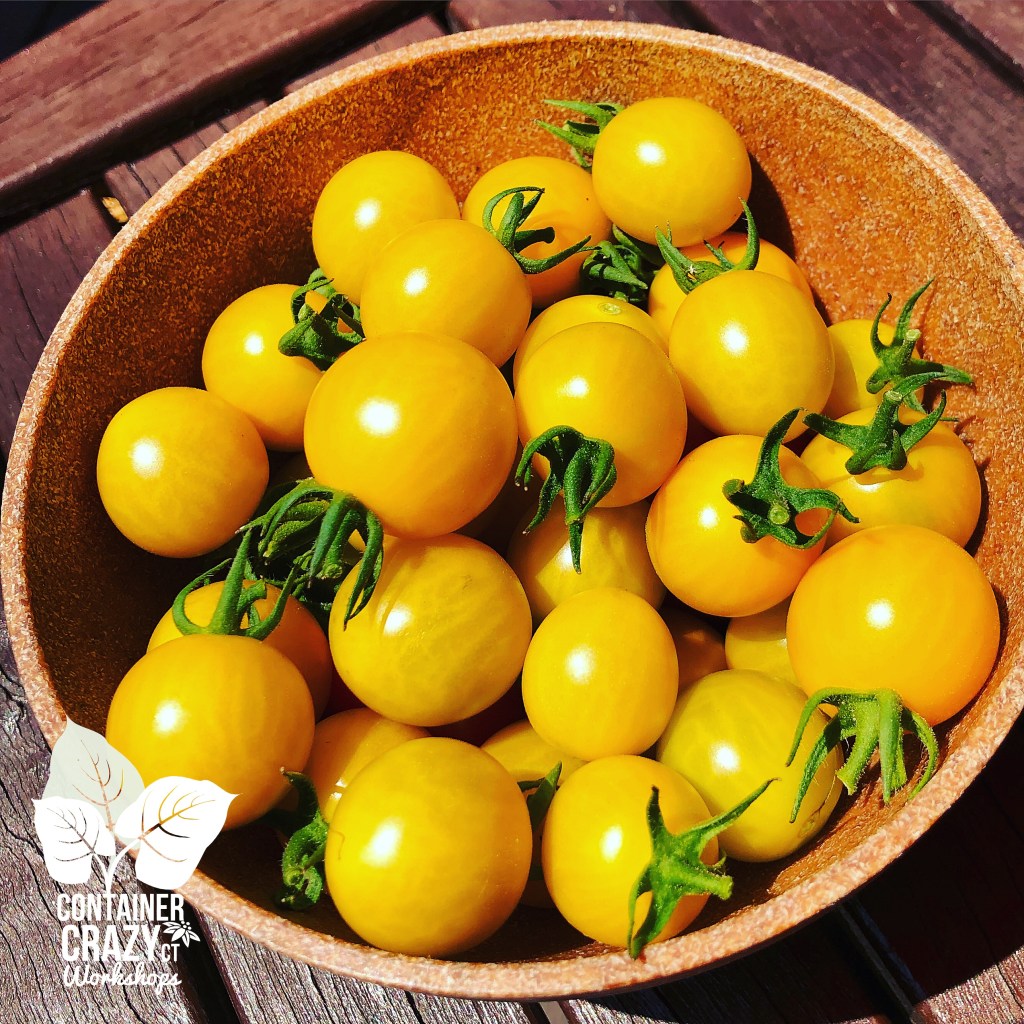
If you ever had this scenario, you know what that smells like. Fresh tomatoes sitting there just waiting to be devoured or “canned.” Piles and piles of them in baskets. An abundance of tomatoes. All fresh, ripened, and soft ready to eat. Some of them dripping from being at that almost over ripe stage.

At my home today, I grow only a few tomato plants. Maybe 8 plants or so each year in pots or fabric grow bags. At first, I think I bought tomato starts, but then I started sowing my own after having fun selecting seed packets from the Hudson Valley Seed company’s catalog or at the flower show where they have a vendor booth.

This is the funny part. When my Dad comes over, he doesn’t even go LOOK at my giant tomato plants growing on my driveway. Maybe he secretly thinks I’m nuts for even growing them in pots instead of in the ground. Whatever the reason, he doesn’t seem to be the bit curious of what types I have. This does not bother me. It makes me chuckle.

Heirloom Tom C Testa Copywrite_0002

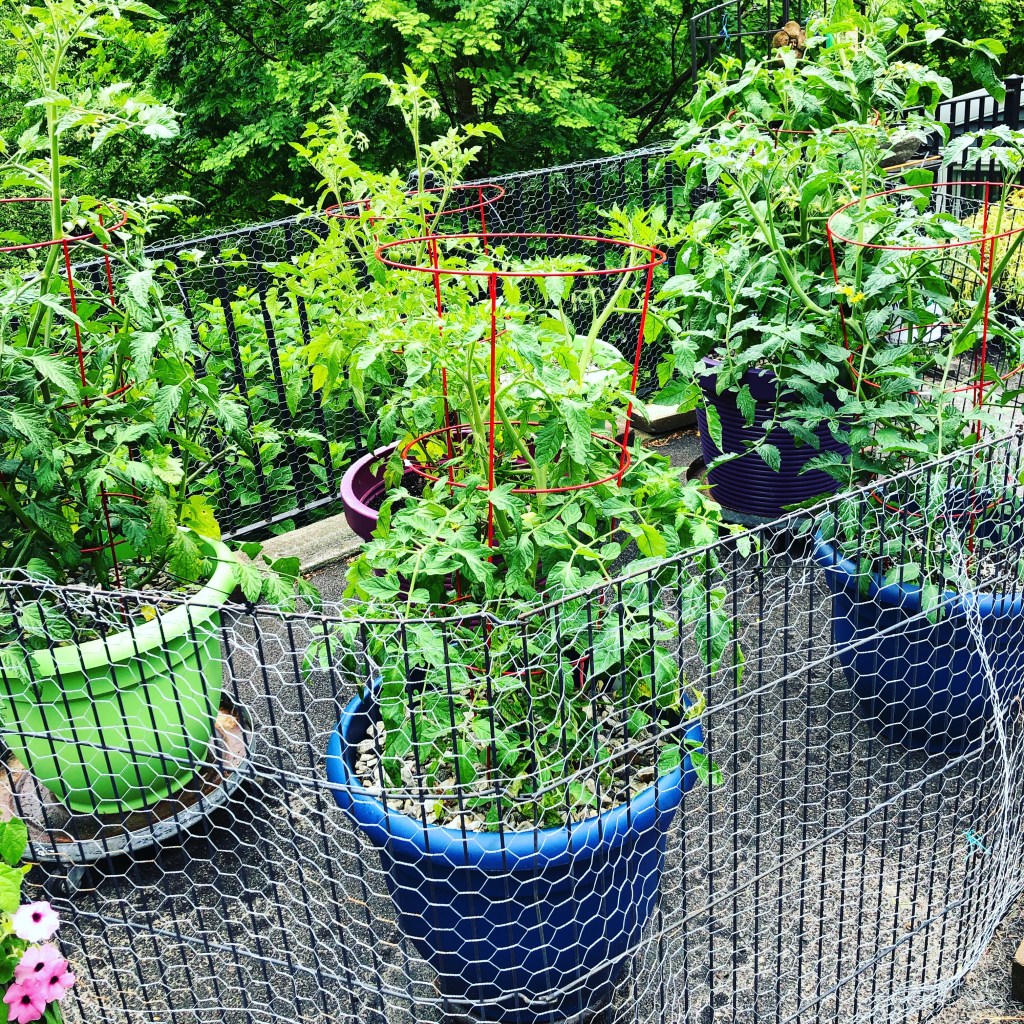
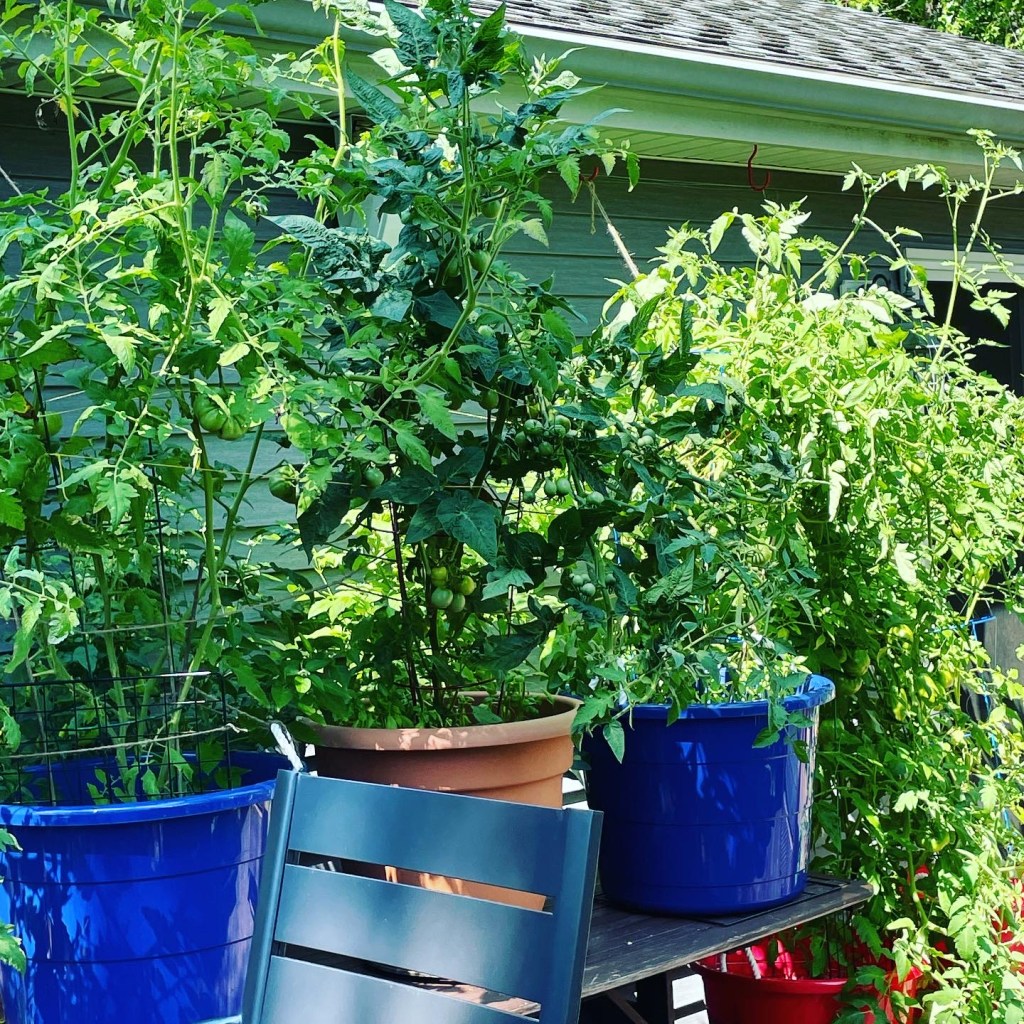
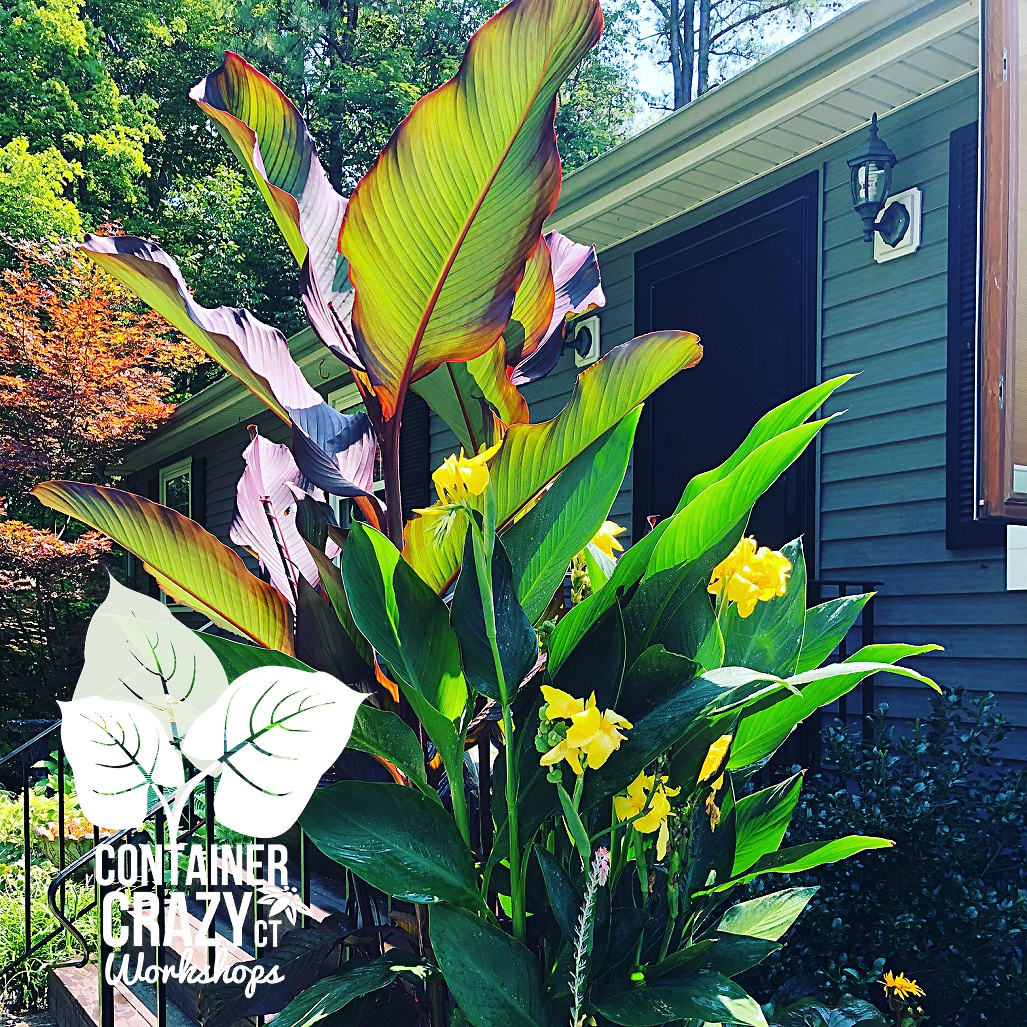
Tomatoes on my Driveway

However, he has shown me his method of suckering the tomato plants, which I asked him about before, but I tend to not prune my plants even after he showed me how. I let them go wild and allow them to spread up and down and all around. This can lead to a messy look, but it is my style, and I like it. And I read somewhere, this method produces more tomatoes actually versus pruned plants, but pruned plants may have better air circulation and are tidy, etc.

Lining up tomato pots along my driveway’s wrought iron railing which runs east to west is one of the first places I grew my tomato plants. And that first year, wow, my tomato plants were absolutely amazing, and perfect. I don’t remember any major bug issues, the chipmunks didn’t take bites out of them, and my husband devoured many every time he got out of his car from work. Beginner’s luck perhaps.

Blossom end rot by C Testa Copywrite_0003

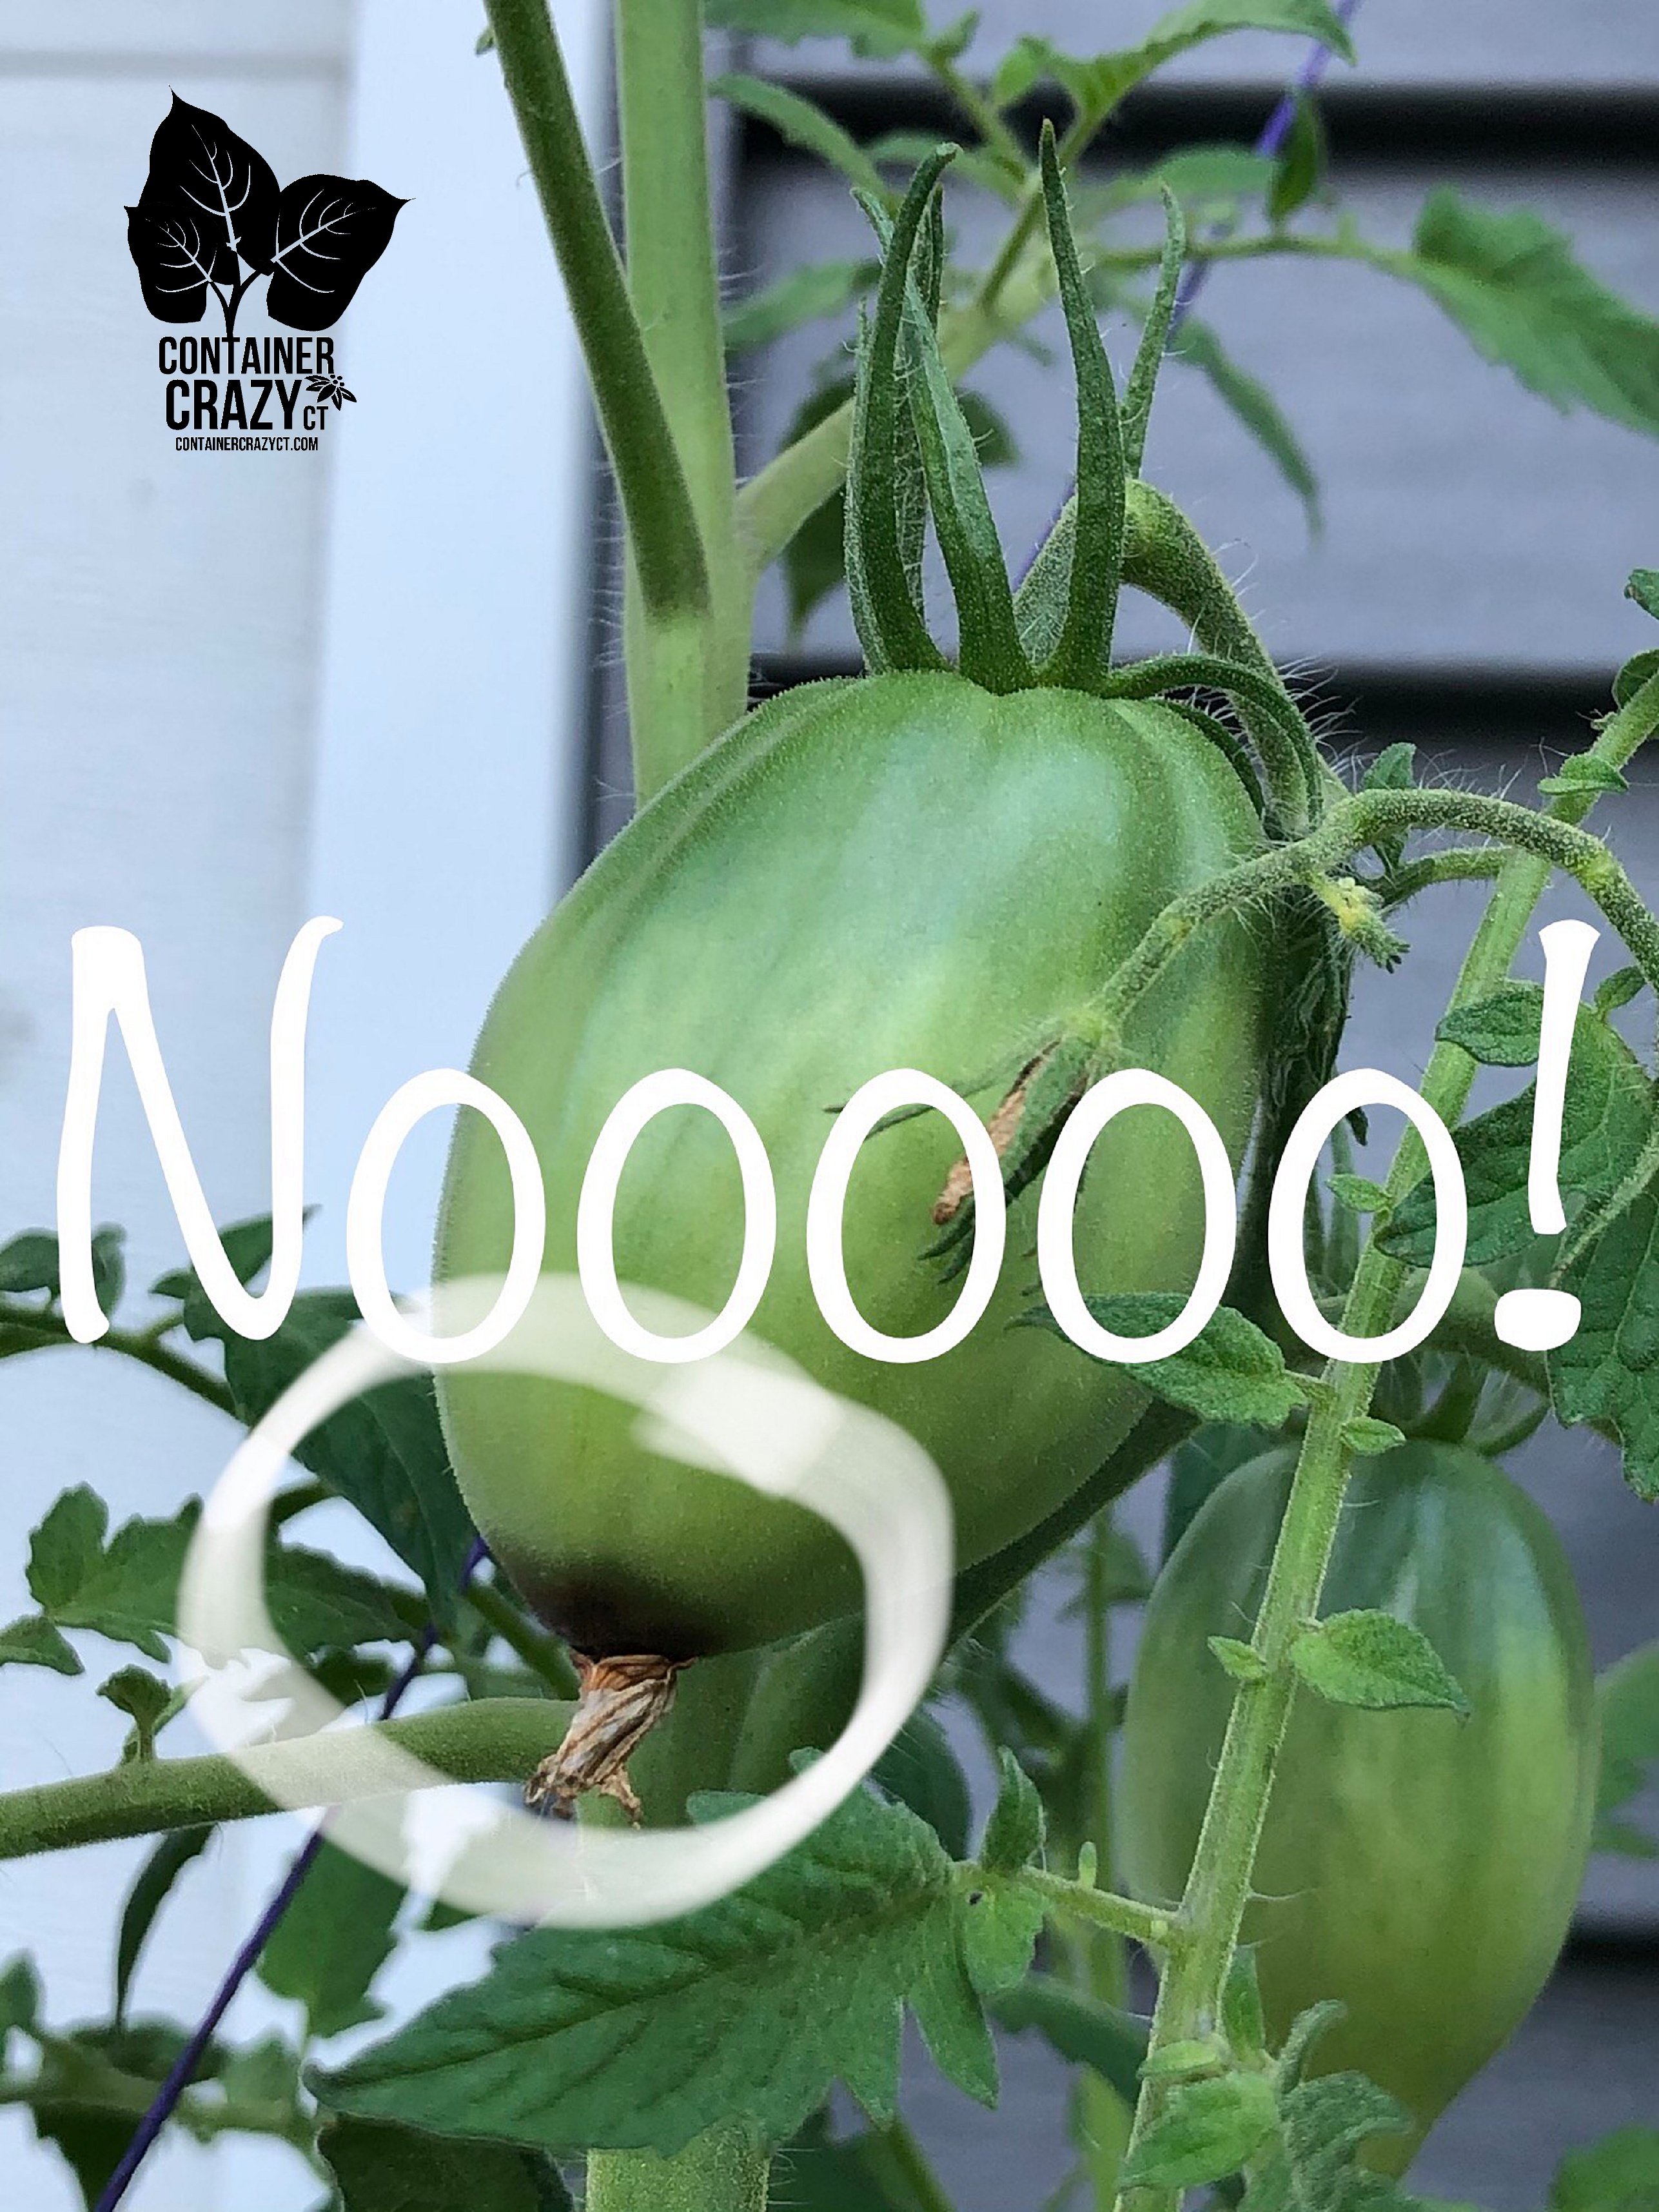
Now, fast forward to this year, after several seasons of growing tomato plants in pots. I guess this is probably several years of doing the driveway method of potting up tomato plants I grew myself from seed. Sometimes, I put them in pots on my side yard, some on the deck, and sometimes on the driveway or in-front of the garage. And each year, I have encountered a wild animal issue or a small bug problem, all easily fixed, but this year, my journey challenged me once more. This year, well, some of my plants got the dreaded blossom-end-rot. Nooooo!

But not all of them got this ailment. No chipmunks though this year (figures!), but they were there last year taking bites of my gorgeous ready to pick tomatoes. It is always something. It is like gardening will never ever cease to challenge you and make you require patience.

Back to the dreaded blossom-end-rot. Ugh. When I pulled those off with this symptom last week, which were green yet rotted at the bottoms, and threw them into my side yard like baseballs, I wanted to scream.

Yet, screaming is something you learn to suppress if you love plants and growing them. Because let me tell you, I could write a book on the, “I should scream moments!”

Suppression was learned through the challenges of gardening. In fact, suppressing your anger and frustration becomes an art form when dealing with plant challenges every year.

But the good part, the part that makes one continue trying, is passion and many, many successes too. There are lots of good stories to counter the bad. However, the bad stories are frustrating because of the time and effort involved, especially when it comes to growing tomatoes.

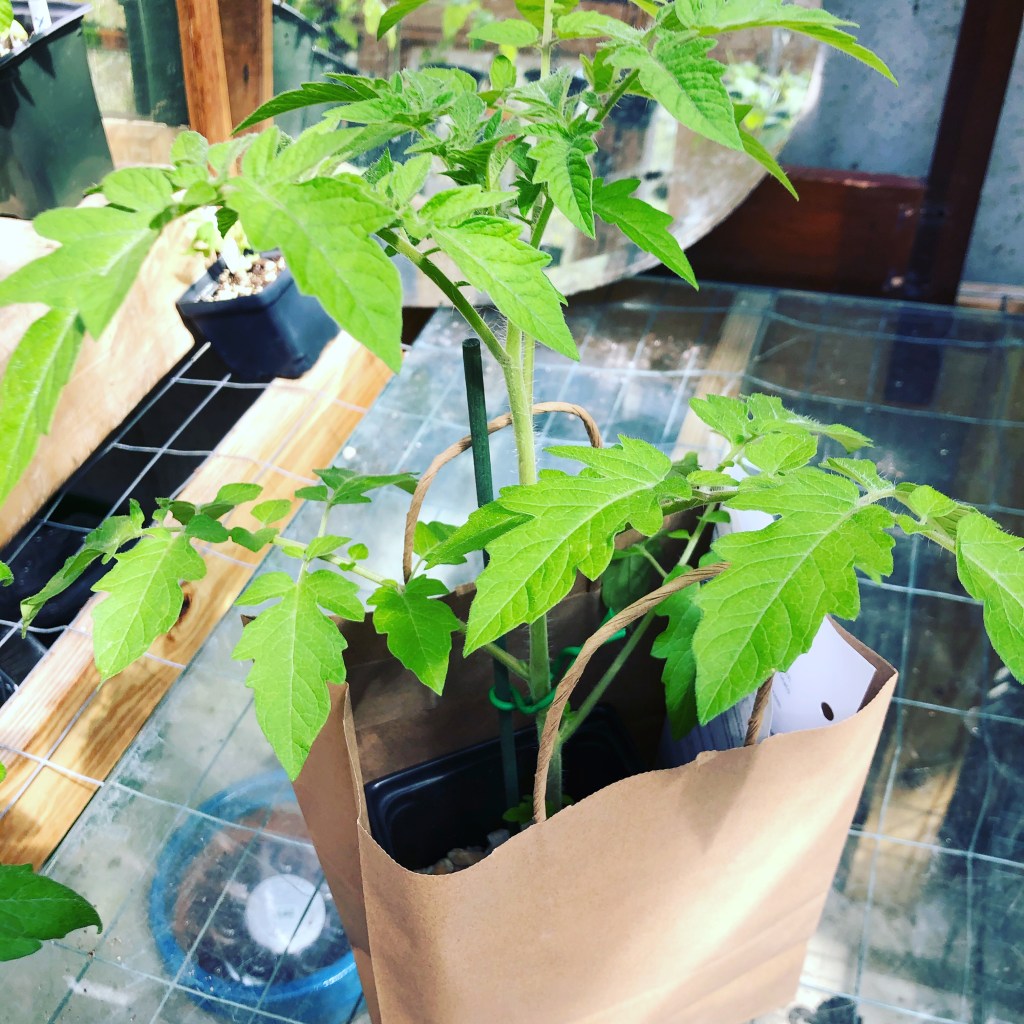
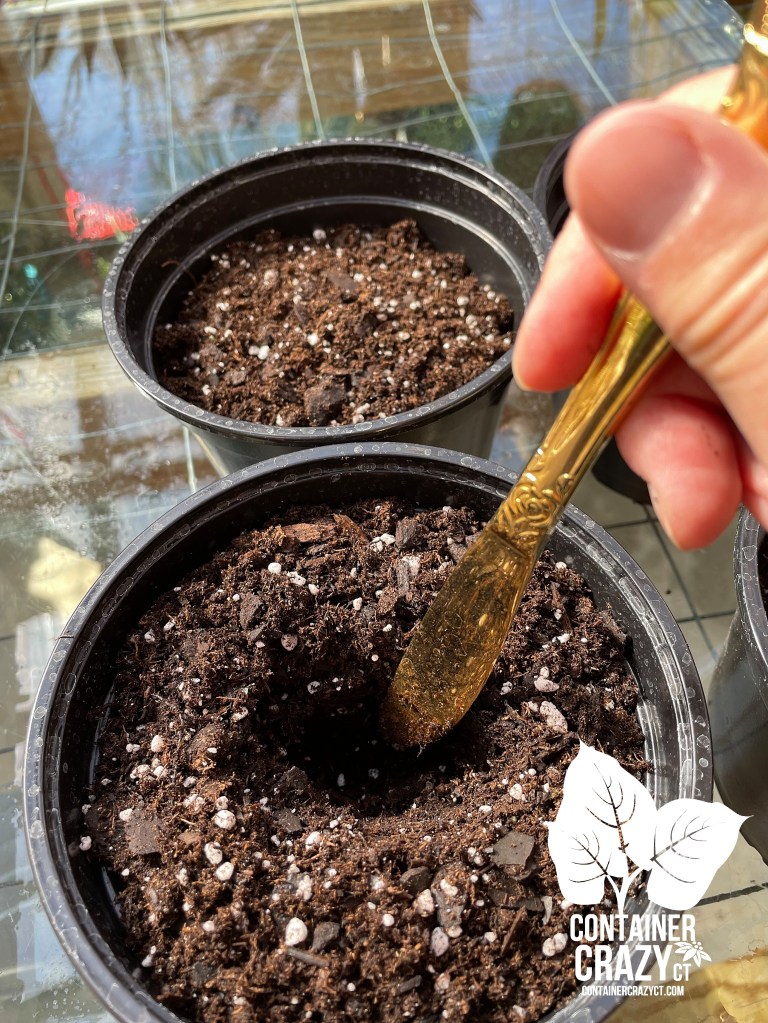
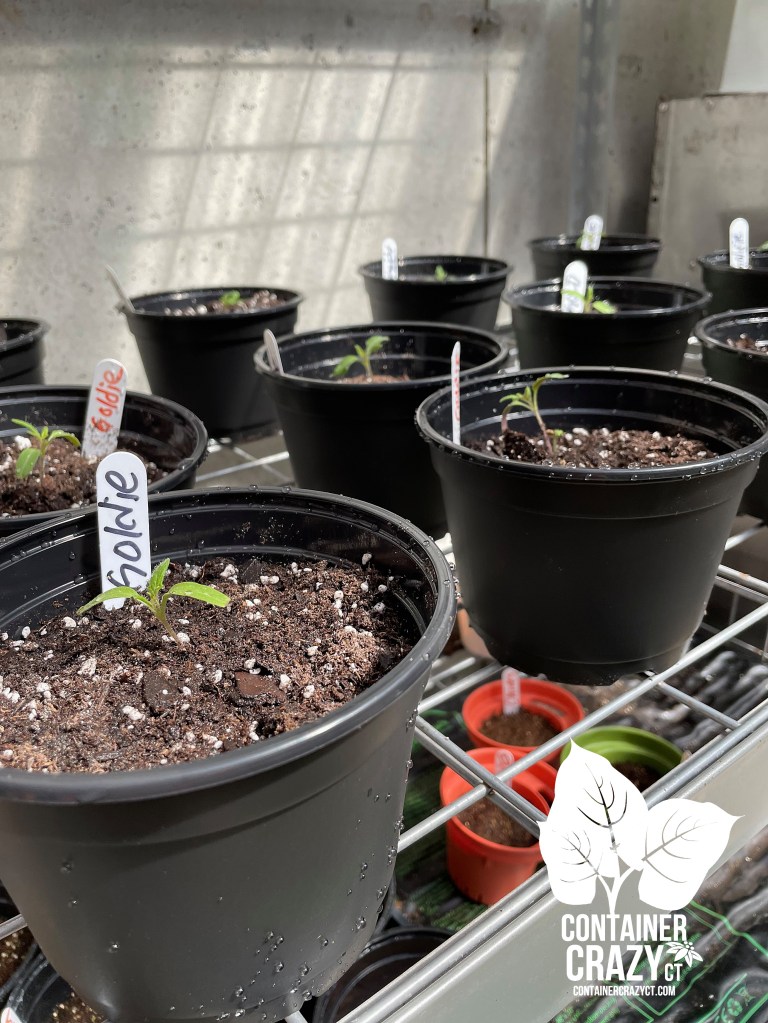
Of course, starting tomato plants requires starting the seed indoors. And you must plan ahead at least six to eight weeks before they will be placed outdoors to harden them off. Some of the interesting tomato varieties I chose require ten weeks ahead. It takes time. Lots of time before you start reaping the rewards of ripened fruits in the summer months. You sometimes start in March. Now it is July!

Seedlings early in the growing process are moved into larger pots. My typical preferred larger pot size is a 5” square. From then, they are nurtured, inspected, watered, and watched for weeks before they are moved outdoors after all danger of frost has past.

Then you have to eventually plant them appropriately, selecting a full sun location with at least six to eight hours of sun every day, with the correct potting mixes, compost, and large enough pots or fabric grow bags, as is in my case. And most importantly, watering correctly, evenly and adding fertilizer as needed at the right time.

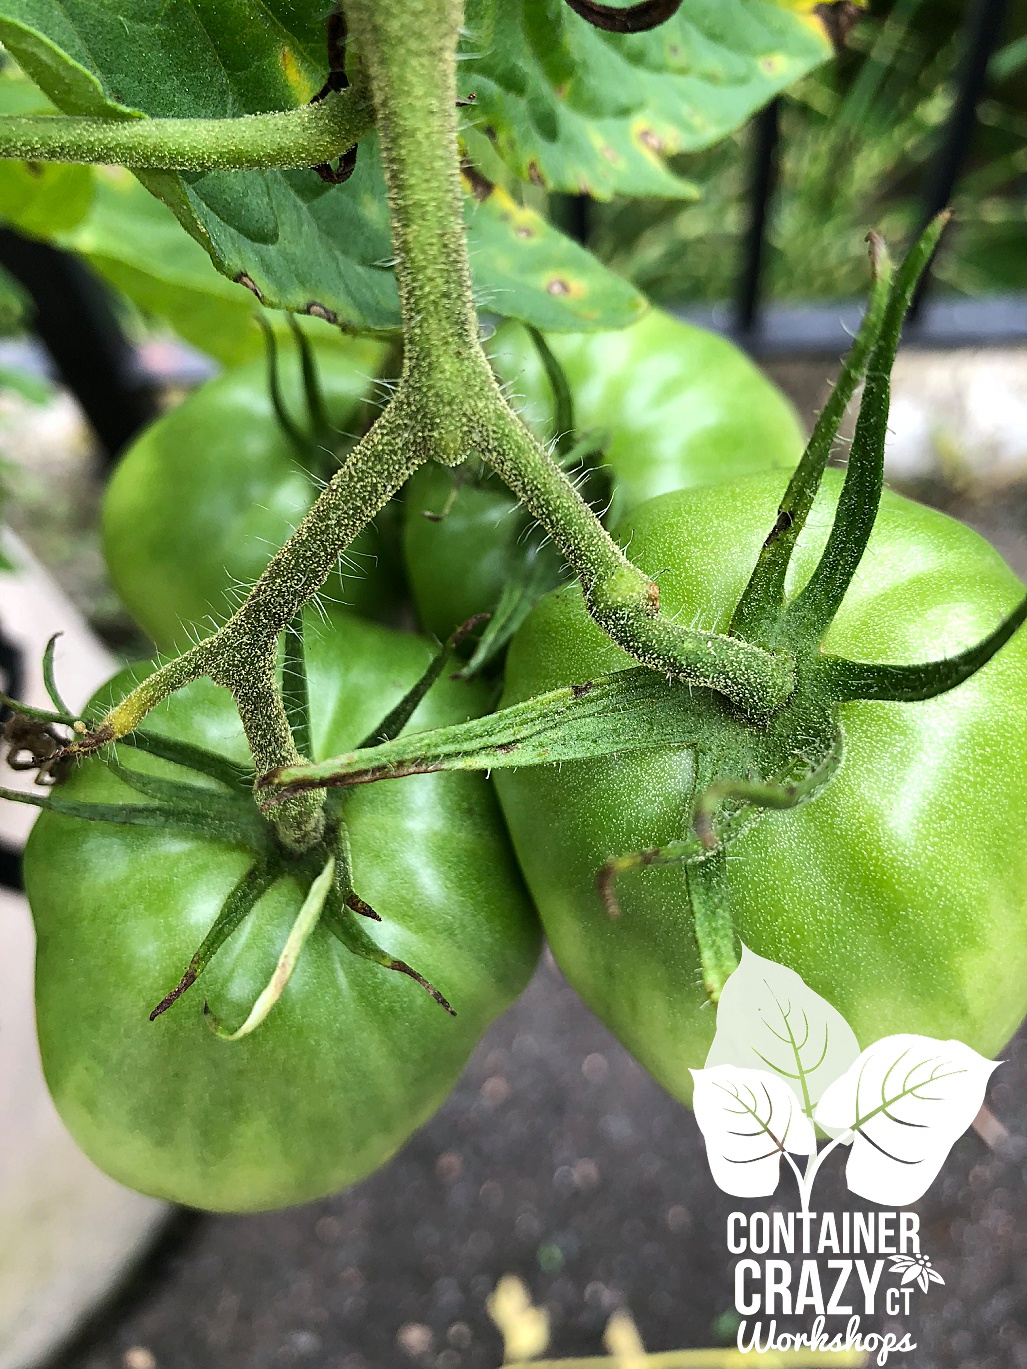
All was growing and going splendidly, until one day recently, looking UP at my jungle of tomato plants on the deck from ground level, I saw a black spot on the bottom of a hanging tomato fruit. I thought, “Are my eyes playing tricks on me? Should I get my binoculars?” It is such a jungle up there so I was not sure I would be able to see it from the other side up above on my deck thru the many full stems of the plants all lined up together. Remember, I did not prune so some of the fruit growing were hidden.

Blossom end rot by C Testa Copywrite_0001

By it was not my poor eye vision! Oh, Please God, No! Not blossom-end-rot, but it was. Ugh. I saw it, I knew it, and now I had to acknowledge it – it happened to me, to the tomatoes I’ve been dying to bite into after all this time from starting seed to this very day.

Others told me within the same week, they had blossom-end-rot on some of their tomatoes too. I thought oh well, maybe they didn’t water evenly, maybe they didn’t use the right soil mix, maybe it was just bad luck, but then I saw it…here, on mine.

The first sign of it was a sunken, brownish hard area starting at the blossom end of the fruit. It was a dry brown area but then turns a bit softer black, and it grows and spreads up, like an ugly zit you remembered from high school, or I hate to say it, a very bad black toe nail fungus. It is THAT ugly. The ones on my plant on the driveway started with a black blotch but the ones on my deck started with a dry brown blotch. Ugh, either way, it is a blotch I didn’t want to see. And like toe fungus, is a challenge to treat.

Insert a “Big Sigh” sound here. And then, I remembered my professor in college talking about it – and I distinctly remember him saying, it is from lack of the ability of the plant to take up calcium due to watering inconsistencies. And that calcium may be in the soil but the water uptake is an issue – it getting to the fruit while it is developing.

Hmm, the condition is caused by “poor calcium uptake” is what I read as well, when I discovered it this year, and started reading various books I have on hand about tomatoe growing (one way I learn). And it read, it has to do with an “UNEVEN supply of water.” It may be from under-watering or over-watering.

Maybe I got too “water happy this year?” I was kind of watering a lot – maybe too much. What was I thinking? Or was it this crazy weather? I want to blame the weather too. We did have some weird spurts of hot weather, and to me it seemed the fruit grew fast, really fast – then the blossom-end-rot showed up. Hmmm??? It is probably all combined factors.

Oh well. Deep breaths: suppress, suppress that anger. Serenity now, I thought. Don’t try to beat yourself up. You are not a gardening God. You are only human. That is how gardening keeps you “grounded.” Tee-hee. And keeps you learning and trying.

They will tell you to mulch plants and to deeply and evenly water in some reference tomato gardening books. Then in another reference book, the next sentence in the solution section was…here it comes…it starts with the words…“NEXT SEASON, ensure the soil is fertile, with adequate calcium levels, and plant blossom-end-rot resistant cultivars.”

NEXT season!? Ack! I want my tomatoes to be perfect THIS season.

Also, recommended is taking off the bad tomatoes and tossing them. However, I also read you could end up with some non-affected fruit later, which did happen on one of my plants on the deck, at least it appears so for now, but the two tomato plants on my driveway – all of the fruit, which are all green and small, have it, the blossom-end-rot. Every single one. My poor heirloom Mikado, all of them have this dreaded issue.

Ho-Hum.

Bum, bum, bum.

Solving tomato problems requires that element of patience in gardening. I have yet to go buy a product to try to solve blossom-end-rot, and part of me doesn’t want to. I am almost at that point of giving up. But a switch in my mood could alter that easily. There are products to help from sprays to fertilizers with extra calcium.

And next time I see my Dad, I will ask him about how he dealt with blossom-end-rot, as I’m sure he had that challenge at some point in his tomato journey too. And maybe I will need to ask him if he has any extra tomatoes this year.

Update since this was posted:

Hi again all,

I decided to buy a product called “Rot-Stop” to help with my tomato blossom end rot issue. It comes in a ready to use spray bottle and helps correct the calcium deficiencies. It is applied to the foliage.

As I read the instructions on the spray bottle, a comment stood out: “This disorder often appears after a period of rapid growth followed by dry conditions, or in periods of heavy rain that caused calcium to leach from the soil.

What did I write in several paragraphs above? I wrote that I wanted to blame the weather. I had a sense of a rapid growth on my plants and then we had heat, and a heat wave. I noticed lots of tomatoes growing and all looked great, then we got hit by extreme heat.

Thus, in the end, this disordered is caused by a few things or a combination of factors: calcium deficiency (maybe in the soil or lack of movement due to inconsistent watering routines), aggravated by maybe too much nitrogen fertilizer (did you apply too much if you had this issue too on your tomatoes?), and dry conditions or even heavy rains leaching calcium.

That is the challenge with gardening, but we don’t want to give up that is for sure. The taste of fresh tomatoes is too worth it. Next year we may not have any of these issues at all and I never had this issue before. I say, don’t ever give up!

Cathy Testa
Container Crazy CT
860-977-9473
CT Zone 6b

Heirloom Tom C Testa Copywrite_0002

This was last year – to prevent chipmunks visiting!

Heat and Humidity Great for Tropicals, but Not So Good for Tomatoes!

5 Comments

Tropical Cont Gardens Cathy T_0003

This is a big pot at the front of my home exploding right now with tall Canna lilies.

Who doesn’t like Canna lily plants, right?

They are easy to grow, get big and lush, and may be overwintered by storing their rhizomes (tubers), which must be dug up after the tops of the plants are blacked by frost – or just before frost.

Growing them in big pots makes it easier to pull them out by October, thus, why I am going to show the process in early September so you may learn it if desired. (See dates below on that if interested.)

They also thrive in the heat, humidity, and rain, which we are getting all week. None of these weather conditions are harming their attitudes at all – they love it.

tomatoe 2018_0002

My tomato plants, however, are a different story right now.

They started off great, but a fat chipmunk has damaged some of the lower specimens, and well, that is the ugly side of gardening.

To see a tomato half eaten on the ground is discouraging, but it forces us to shrug our shoulders, cry, or become determined to try a new technique to combat the critters. Because in the end, it is worth it to bite into a fresh, juicy, flavorful home grown tomato.

On top of the chipmunk problem – the foliage on my tomato plants started to look bad just recently. I should share a photo here, but why depress myself more?

I think it is Septoria leaf spot. The leaves developed small, dark spots and it started from the bottom parts, and eventually got on many of the leaves throughout the plant.

This type of problem, the leaf spots, occurs more commonly, from what I’ve read, during heat and humidity, and lack of air circulation contributes to the issue as well.

Yesterday, I took pruners out and cut all the damaged foliage off. It took some time, but I just couldn’t stand looking at the terrible foliage.

Fortunately, it does not affect the tomato fruit. Thank God!

Next year will be a new strategy. That is the name of the game, keep trying, don’t give up.

Mikado Tomato Plants

By the way, in the photo above, that is a Mikado tomato. It is an heirloom and I grew plants from seed in April.

I transplanted them into 15-gallon fabric grow bags around Memorial day (which was the first time trying grow bags – more on that later).

They mature by August – as in now, and are indeterminate (keeps growing taller).

I should have given the plants more air circulation by spacing them out more – next season, they will be put in different places too.

Yesterday, I took that photo (above) of one Mikado tomato that is nearly perfect.

Then, I begged the gardening Gods to not allow it to get attacked by a critter, crack, or whatever. I’m scared to go look this am – as I decided to not quite pick it yet. Being hopeful.

vegetables 2018 cathy T_0004

Of course, tomatoes like sun, warmth, and as much good air flow as can be provided. I think I did well with the sun, warmth, but my mistake was not spacing them out enough. They grew very large and needed more space – so lesson learned.

tomatoe 2018_0003

Yesterday, while out pruning the nasty damaged foliage from the leaf spot (noted above), I spotted this cluster of tomatoes on another plant, called Stone Ridge (Solanum lycopersicum).

Stone Ridge Tomato Plants

As stated on the seed packet, they are dense, bottom heavy, and have sweet fruit – so true based on my experience so far.

vegetables 2018 cathy T_0005

What I found with this type is the cracking seemed to happen more on the tops (like they are that heavy and dense enough to weigh them down) but no matter, they are freaking delicious – and they are SWEET tasting.

The Stone Ridge tomato plants have weird various shapes to their fruit.

Some are pear-like (above) and some are just goofy and flatter or fatter. I like viewing the stages of them. When you touch them or hold them, they are heavy.

They must be started earlier from seed, which I did in late March.

As far as the tomato plants go, the Fox Cherry Tomato is my absolute favorite. And apparently is for my fat chipmunk freeloader too.

Fox Cherry Tomato Plants

The shape and size are just perfect for skewers, or cutting in half, because they are more like two bite-sized than one-bite sized. They are plump and perfect. And the plants are vigorous growers. Staking, twining, and supports are needed but worth it.

vegetables 2018 cathy T_0002

Every day, I go out and grab many and put them in little farmers market baskets (used for raspberries or strawberries which I saved) and set them on the kitchen island.

And every morning, my husband takes a bag full to eat as snacks at work. That is the most rewarding part of it – how much he loves them.

Usually the heat and humidity is good for tomato plants, but it can help to introduce some problems, such as leaf blights, like the Septoria leaf spot, I believe was the problem on mine this month.

vegetables 2018 cathy T_0001

I won’t let it stop me though – just keep improving the process next year.

In the photo above, there is the Bumble Bee Mix cherry tomato next to the Fox cherry tomato, to compare.

Bumble Bee Mix Cherry Tomato Plants

These are fun to grow as well. The have a unique striped patterns, are mild sweet, and smaller than the Fox variety.

They turn various colors,  either yellow, purple, or just mixed. Sometimes it is hard to know if they are ready, but I still love them.

Both the Fox and Bumble Bee will be on my growing list again in 2019.

tomatoe 2018_0001

Another plant I grew this year is called, Matchbox Pepper (Capsicum annuum), and I LOVE these for the ease of growing and plant size.

Matchbox Pepper Plants

Why are they so great?

Because they are absolutely perfect for hanging baskets.

The peppers are tiny (and supposed to be spicy but we haven’t tasted one yet – probably will this weekend as they are reddening now), and they are decorative.

vegetables 2018 cathy T_0003

But the fact this plant stays compact makes them just wonderful in hanging baskets.

They, like some of the tomato plants, had to be started early inside. They mature 75 days from transplant. They just started to turn red last week.

Now, I just have to learn how to dry these hot peppers, or make some chili this weekend.

And another bonus about pepper plants is that critters tend to stay away from the hot ones. And the fact the plant is in a hanging basket keeps them up high and potentially away from critters looking for a tasty treat.

Upcoming Workshops

tropical cont garden 2018_0008

If you want to learn my process on how I overwinter my tropical plants by storing root bases, tubers, rhizomes, corms, etc, the dates have been published on WORKSHOPSCT.com for early September.

I am scheduling it early so people may prepare ahead of frosts. Sign up is requested for headcount but it is a simple ‘pay at the door’ setup for this session.

I’m in love with the big foliage of the tropical plants (canna, elephants ears, and red banana plants) which, as I noted, is flourishing in this heat, humidity, and rainfall.

Tropical Cont Gardens Cathy T_0005

Another bonus about tropical plants is they remain gorgeous all the way into October, and tomatoes for that matter sometimes continue into early October as well.

Well, that’s all for today – I have to get busy again.

I’ll let you know if that juicy Mikado tomato made it – and if yes, it is my lunch today.

Cathy Testa
Container Crazy CT
Location: Broad Brook, CT
www.WORKSHOPSCT.com
860-977-9473
containercathy@gmail.com

Tropical Cont Gardens Cathy T_0002

April is Warming Up Slowly

Leave a comment

Good Morning Friends,

As you know, if you live in Connecticut, it is taking a bit longer for April to warm up this season, but that hasn’t stopped me from potting up my canna rhizomes and getting my precious seeds in seedling trays.

I thought now is a good time to provide some quick updates on happenings with Cathy T as we kick off the spring season and look forward to summer.

April 2018 Cathy Testa CCC Copywrite_0003

Visit Container Crazy CT’s Page to View

First up, this week is a free Facebook Live on Wednesday, April 11th, 10:30 am Eastern to show my micro-greens growing process in a 20-30 minute demonstration. Following the demo, if you are interested in a starter kit to give this a try, please contact me (form below) or just text my telephone noted below as well.

Note: This will be the only free showing this year – don’t miss it if you like to eat healthy and nutritious micro-greens which are delicious – all year, and very nice in summer too, when we have fresh tomatoes to go with your homegrown and fresh micro-greens.

April 2018 Cathy Testa CCC Copywrite_0004

Seeds for sale and Starting seeds

I’ve been planting up seeds like crazy this month – cherry tomatoes and big tomatoes (shown above) as well as basil, moon flowers, edamame, peppers, lettuce, etc. Some will be for me for my container gardens at home to enjoy, and others are for friends requesting I grow some for them. If you are in need of some seeds, and are local, hurry up to contact me – I have plenty of wonderful varieties above. And remember, some seeds grow well in patio pots (radish, kale, lettuces, herbs). I have some growing right now – wonderful to have at your finger tips.

Note: Seed packets make amazing gifts – put a mini succulent with it – and voila.

April 2018 Cathy Testa CCC Copywrite_0005

Canna in a 5″ Square Pot

My winter stored rhizomes, tubers, and corms are starting to wake up from hibernation. I am planting up Canna lily, Elephant Ears, and getting my prized big red banana plants out into pots to give them an early start. I’ve offered to “hold” the canna and elephant ears for anyone interested. They should be ready by end of May or a bit earlier for your container gardens.

Note: Limited supply and based on success – or not – I hope all will go well, and will keep those who have asked to “reserve” one posted on the progress. They will start in the 5″ pots shown above and potted up as needed. Prices are based on pot and plant sizes. Details will be emailed to you if you wish to have one held for you.

April 2018 Cathy Testa CCC Copywrite_0001

Cacti are Blooming

It is so nice to see this vivid yellow in the greenhouse – my cacti are blooming. This was a cacti garden made last Halloween for fun and I’m enjoying the colors.

IMG_2850

With Succulents

Heads Up — If Interested! I’m holding my first terrariums workshop at the Granby Senior Center on May 9th. It will be with succulents and cacti. It is a daytime session at 1 pm on a Wednesday. Please contact the center to sign up. See their newsletter (last page) to see the complete details and price.

IMG_2924

Note: We need a minimum of 8 attendees to hold the terrariums session at the Granby Senior Center, and the sign-up cut off date is April 20th. Please signup soon if want in.

IMG_2952

Succulent Hanging Basket (Birds Not Included)

This succulent hanging basket is on reserve for a client. I would be happy to make more now and keep them growing so they are ready for you by end of May to put outdoors when it is warm enough. Holler if you want in.

IMG_2927

Canna Cleopatra

This canna rocked my world last year. The foliage is mixed dark tones and green plus the flowers bloom both red and orange blooms on the same flower bud. I am growing some of these too. Again, supplies are limited, so if you think you want me to reserve you one, contact me below.

Note: Must pick up your Canna by May 25th in Broad Brook, CT. Supplies limited.

Lastly, hopefully my regulars saw that I will not be offering a May Container Workshop this season. However, I will have beautiful succulents in stock starting in early May – and I also will be offering Terrarium Kits with 10″ bubble bowls, all the interior components, and the plants. Just ask if you have any interest and hope to see you soon.

Thank you,

Cathy Testa
Container Crazy CT
860-977-9473
containercathy@gmail.com
www.WORKSHOPSCT.com
http://www.CONTAINERCRAZYCT.com
Location: Broad Brook, CT