Tomato Seedling Stages

1 Comment

One of the rewards of taking so many photos of my plants is being able to look back on them when I am getting ready to write another blog post. I was thinking about showing some photos of what my tomato seedlings looked like in various stages and in different seedling trays or pots.

Bumble Bee Cherry Mix Tomato on the left

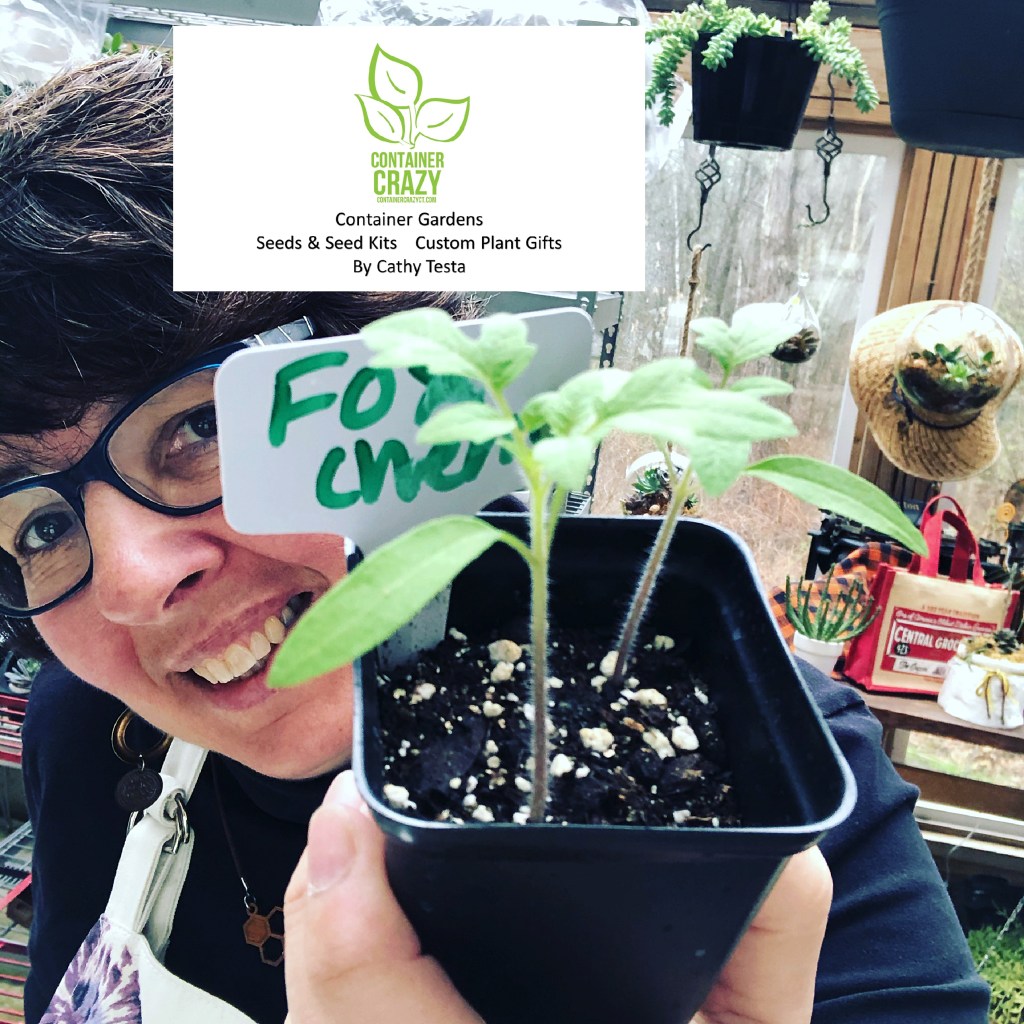
These two tomato plants certainly look healthy. They are in 5″ square plastic black pots. I actually got the pots many years ago and they held perennials at the time, but I kept them because I liked the size and shape. I clean them with mild soapy water every year and store them to reuse. It is important to wash any re-used pots as they may create disease problems the following year. Often recommended is sterilizing them by soaking the pots and/or trays in a 10 percent solution of household bleach and water. Soak them for a few hours, rinse well, and let air dry. I do this the prior year because washing pots is easier when warm outdoors than in winter when we start seeds in March. The 5″ square pots are the perfect size for growing my baby seedlings “after I prick the plants out of their prior seedling trays” when I transplant them from the seedling flat trays into these square pots. Eventually, when they reach a decent size as shown above in the 5″ square pots, I will move them up into one-gallon pots after they’ve been growing in these 5″ square pots for a while if necessary.

Bumble Bee Cherry

By the way, the Bumble Bee Mix Cherry tomato is a favorite. It has multi-colored fruit (striped) and are sweet flavored. I start them early indoors in seedling trays and keep them growing till they are ready to harden off. I have seed packets available of this type again this year. The two plants shown above are the bumble bee type.

Outdoors late May hardening off the plants

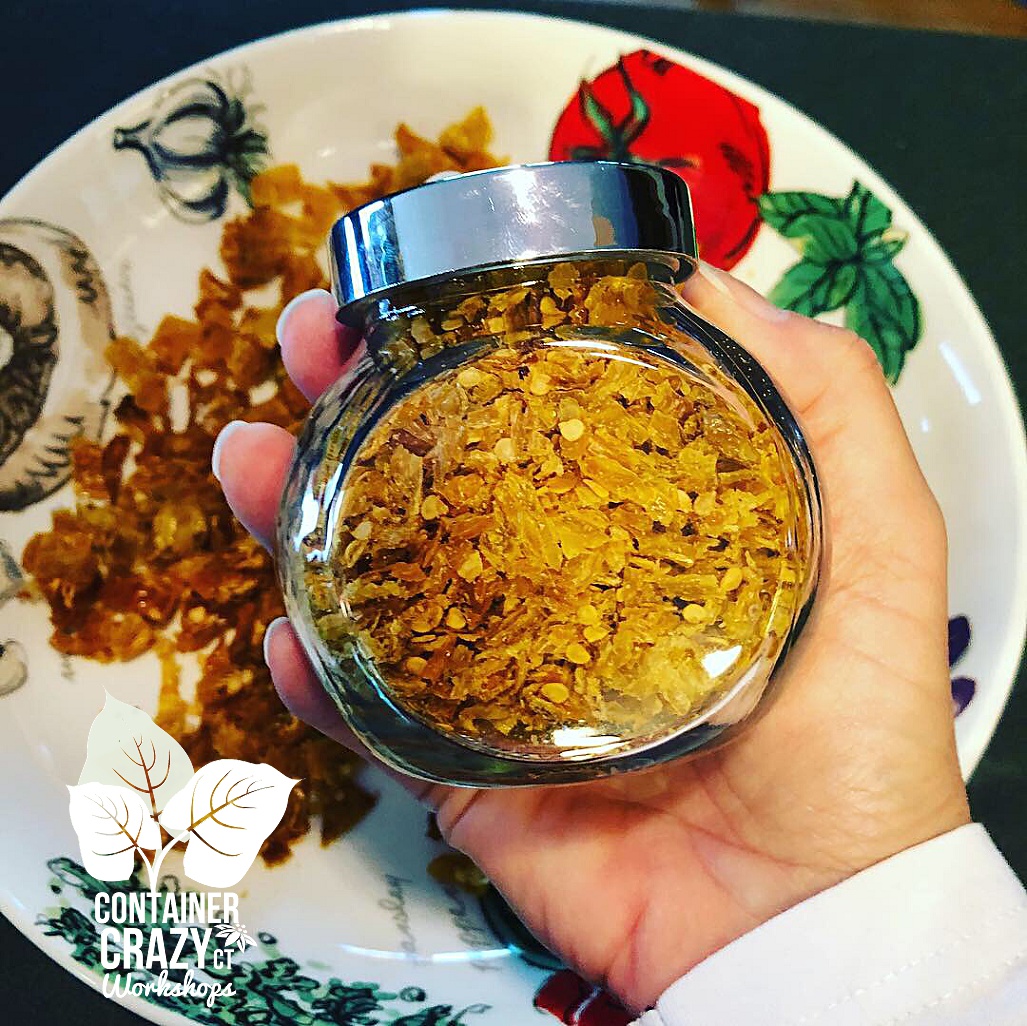
In this photo, I’m holding one of those 5″ square pots and was placing them outdoors for a few hours daily around mid-May (after any chances of frost) on non-windy days, under some shade to protect the new tender leaves. When moving a bunch of tomato seedlings or tomato starts (some people call them that) from the greenhouse to the outdoors daily is when I get plenty of exercise going back and forth. It should be into an area protected outdoors, for a few hours every day, until they may be permanently planted in container gardens, patio pots, fabric grow bags, or gardens of the ground later in May.

3-3.5″ Cell Trays

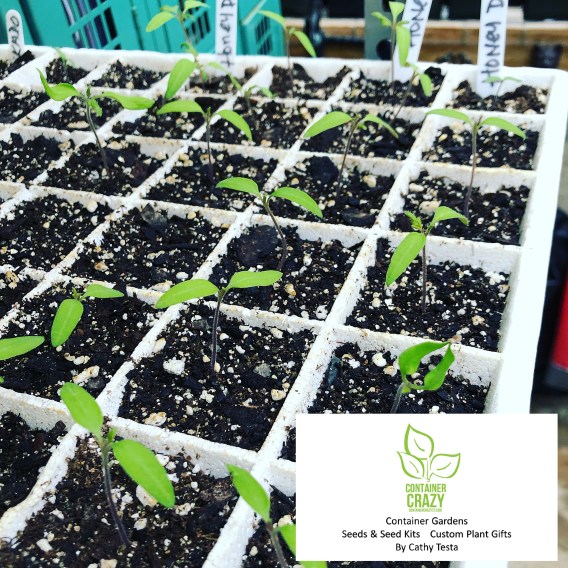
The above photo show them before they get moved into the 5″ square pots. I like using the type of trays shown above as my seedling trays. Each cell is about 3-3.5″ diameter and deep. I tend to do one seed per cell in these because I like giving each plant it’s own undisturbed growing space but you may sow more seeds per each cell (to save on soil), and then prick them out carefully to another pot when they get larger to un-crowd them. Many sources will say to prick out seedlings (whether it is one or more seeds grown per cell) at the sign of the first set of true leaves. I don’t always move them out (prick them out) that soon. I sometimes wait until the plant seems sturdier and has maybe 2-3 sets of the true leaves. The true leaves are the ones shaped like a tomato leaf, where if you look closely you can see the seed leaf below those (shaped more oval) in the above photo. The seed leaf, called a Cotyledon, is the food storage structure of a seed and it is the first leaf to appear above the soil when the seed germinates. It will feed the plant initially, then the true leaves form. Once your seeds have germinated and are starting to grow, you must give them plenty of light and you may also remove them from a plant heating mat if you used one below the trays.

Fox Cherry tomato

By the way, it is Fox Cherry Tomato growing in the photo above. Another favorite variety I have grown the past couple years. It produces cherry tomatoes that are rather large, all orange and red color, and great on skewers on the grill. I didn’t get new seed of this type this year but still have some packets from last season, so I’ll probably grow a couple rows of these to offer.

Cathy Testa holding a 3.5″ seedling pot

You can see here I was holding a cell that had two plants in it from seed. You may prick out one by very carefully removing it from the soil with the soil around the roots intact as much as possible. I sometimes use a tiny bamboo skewer as a tool. I will insert the bamboo stick (like a skewer or tooth pick size) under the root area (placing it in the soil and under, going to the bottom of the soil to release it), and push it up, rather than “tugging” on it from the stem, which could damage the delicate tiny seedling. You have to handle them gently at this stage when you prick them out of any growing trays to move them into a bigger pot, otherwise, you will damage them. When I move the baby seedlings into larger pots (1-gallon at times if they get really large), I will use a coarser potting mix and add some slow-release fertilizer prills, but usually only for those tomato plants which are large enough for a one-gallon pot and that is usually when we are closer to hardening off the plant outdoors after frost.

Good photo of the trays

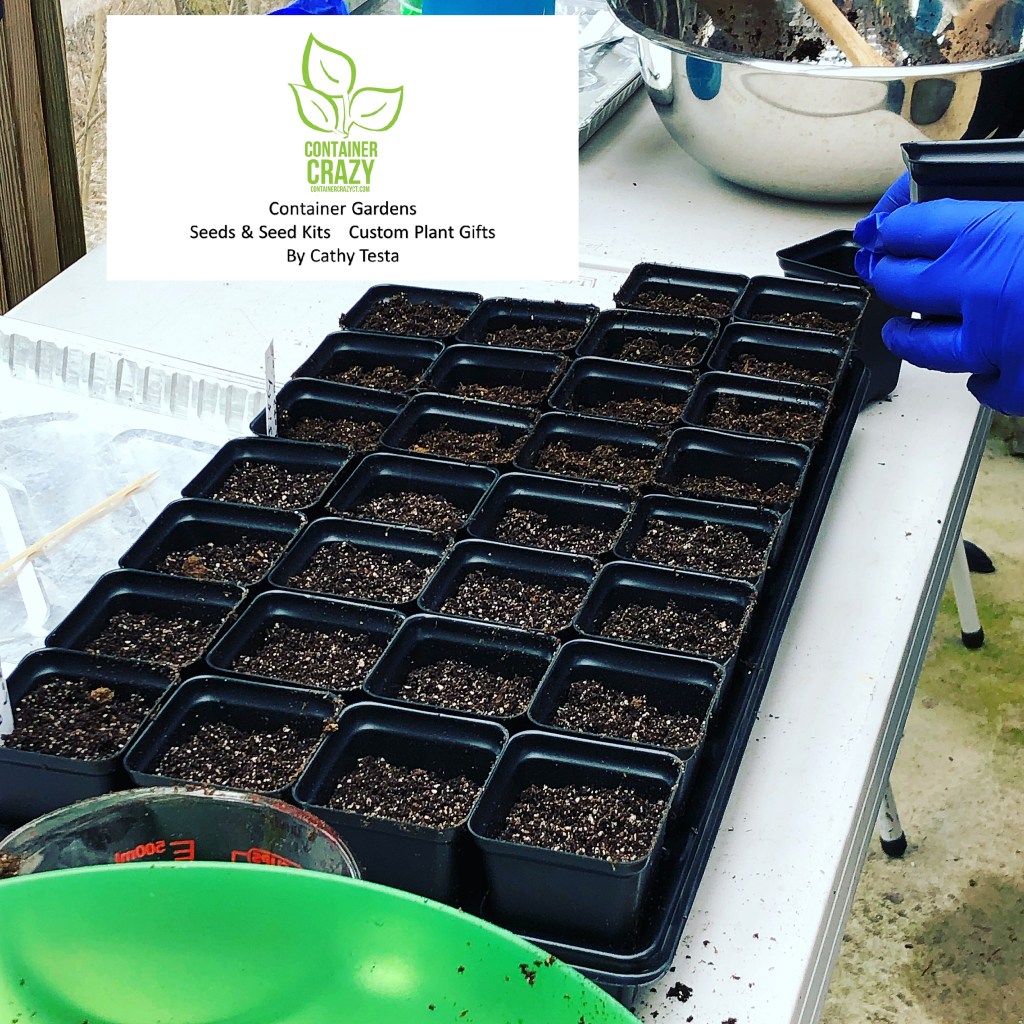
These 3.5″ cell trays shown above are a type I got a couple years ago and I really like them because the bottom holding tray is thick and sturdy. Each tray holds 32 plants (cells). This photo was actually from a seed starting session I held a couple seasons ago. Each person sowed a full tray and we used various types of seedling mixes. I wrote about our experiences with that in a prior blog post. When we fill them with seedling mix, it is to about 1/4″ from the top and sometimes I will gently tap the little pot on the table just to level the soil but you should not press down the potting mix as this would reduce the fluffy-ness and air to it and also would compact it. We use a small bamboo skewer to make a tiny pin-hole where the seed is placed. Some people will fill these cells to capacity with many seeds, but as indicated above, I usually do the one seed per cell.

Upstate Oxheart Tomato seeds

In my session that year, I handed out the seeds in these tiny paper like cups. You can see here the seeds of Oxheart tomatoes (which I wrote about in my prior post). The Upstate Oxheart tomatoes grow huge (giant) tomatoes! Sometimes we used tweezers to pick up one single seed to insert into the soil where we made a tiny divot hole in the seedling mix using the skewer. It is amazing that tiny seeds, made up of a seed coat (technically called a Testa), Endosperm, which is food storage tissue in the seed. Then there is a layer called the Aleurone layer, and a radicle which is an embryonic root. The root gets pushed into the soil first when the seed germinates and the top part of the plant, the Epicotyl, is the portion of the embryonic stem attached to the cotyledon(s) I mentioned above. The cotyledon (a seed leaf) is the food storage structure in the seeds and the very first leaves to appear after it germinates from the soil. All from a tiny single seed, which eventually grows into an amazing plant.

Oxheart in a Styrofoam Cup

One year, I came across these tall Styrofoam cups and thought I will use them to move them up from the 3.5″ cell trays but later, I decided I didn’t really care for these cups. First, they are not biodegradable, although cheap to find. And secondly, they toppled over easily, but they were doable. I used a nail to poke a bunch of drain holes in the bottom before pricking out a baby seedling to move into these Styrofoam white cups. Also, the shape being round doesn’t save shelf space as do the square 5″ pots shown behind them. The square pots are a great way to capitalize on space on the shelves in my greenhouse.

1 gallon Pots

Sometimes the plants grow rather tall and large before it is warm enough outdoors to plant them, and I will use either brand new one-gallon sized plastic pots typical in the nursery industry, or I’ll reuse a pot from a plant, always being sure they are thoroughly cleaned. And they must have drain holes. Here in these Monrovia pots are my nice looking tomato plants. I believe these were the Oxheart tomatoes which I mentioned in my prior pot have droopy leaves, which is normal for this variety of plant and its habit.

Empty Seedling Tray with the 3.5″ square cells, 32 cells per tray

As you can see, there are a few phases of seedlings. First is the smaller 3.5″ cells, then up to a 5″ square or maybe the Styrofoam cup idea, and then if the plant gets rather large, it is repotted again into a 1-gallon pot. This has been my typical process. So, you should bear in mind, the trays, seedling mix, and time it takes to do all and to have a space with sufficient sunlight or do all with grow lights indoors in your home. Seedlings are very much like tending to little babies requiring attention and care along the way. You can’t leave them totally unattended because you must monitor their growth and progress. You need to ensure they have appropriate moisture and air along the way. Sometimes you can place a very small fan to create a gentle breeze around the seedlings when they are larger (5″ pot size stage of pot or above, 1 gallon pot size) as this helps them to grow stronger and the air circulation reduces any chances of rot problems.

On Seedling Heat Mats

I would recommend the seedling heat mats. They gently warm up the potting media or seedling mix you used while you await for the seeds to emerge. The heat mats last a few years and are easy to store and clean up each season. I leave them on the whole time until the seeds emerge and look sturdy, then the trays get moved to other shelves in my greenhouse to continue growing. They are not kept on the seedling heat mats after they are growing well.

Speedling Trays – The stage where the Cotyledon has emerged first

Someone on a farm recommended this white seedling tray to me about 4 years ago. I do like them very much, the shape of the cells are v-shaped and it grows a strong root system, but I can no longer find the place where I had ordered them online, but I have seen them listed as hydroponic trays (they float). However, it seems the price of these are much higher now. It is a great long lasting tray, light weight, and easy to clean. The seeds grow well in these, but I’m not sure if I would pay the price for them now. In this photo above, you can clearly see the “cotyledons”, the seed leaf which is first to appear.

5″ squares with peppers and tomato

Here’s another clear photo of some plants in the 5″ squares growing along well. I put them on a white chair that day. I’m always taking photos – it is an addiction, a true problem, LOL. There is a tomato on the bottom left and some hot pepper plants.

New Yorker tomatoe seedling on left

This is a good photo above because it gives you an idea of the size of the 3.5″ cell pots (left) which I use when I sow the seeds initially, and then the 5″ square (right pot) which I use to move the seedling up into when the baby seedlings are a good size. This has a New Yorker tomato plant in it. I’m always trying out new varieties of tomatoes. It is part of the fun of tasting flavors later!

What the seedling looks like when it first appears!

Nothing beats that wonderful feeling when you see the seed has sprouted up from the soil! Here is the tiny seed leaves which emerges first. As soon as I see these, all the seedlings are carefully monitored to make sure the soil stays slightly moist. If you have a humidity cover over your seeds or over your seed trays, it should be removed at this stage. If it condensates too much, it will promote rotting of the very tiny delicate stems. Don’t over water either, if soaking wet all the time, this may lead to rot.

Other things you need to consider

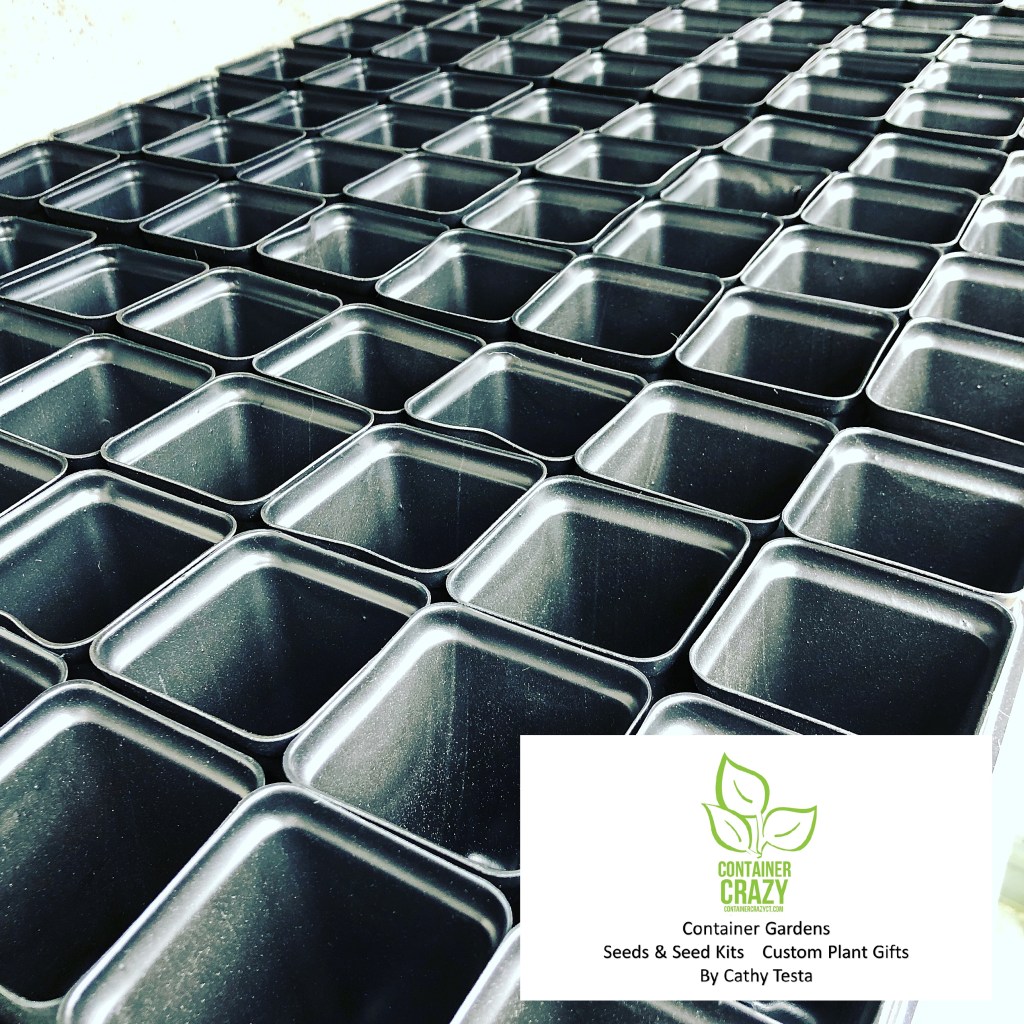
You may use practically anything for containers to sow and grow your seeds. Anything with drain holes that will hold the seedling mix will due, however, be sure all is clean if reusing anything. The seed sowing trays (or flats) shown above are my favorite, specifically the black plastic tray with 3.5″ cells/pots, because they are sturdy, pathogen free, easy to place on shelves, and these plastic cell pots keep the soil evenly moist. It is important to pick the right sized flats because you don’t want to put a seed in too deep of a pot (cell) or in one too larger either. Each type of seed has a recommended cell size to be enhance germination. Anything from 2″-3″-4″ is usually a good average size to use for tomato and pepper seeds.

While waiting for the seeds to germinate, you need to always consider having the correct temperature (70-75 degrees F), and to keep the potting mixed used warm, a heat mat for plants/sowing gently does so – and I think the mats are worth the investment. Then you should watch the seedling mix to make sure it maintains moisture and humidity. You need to check on your trays daily. A clear cover over the seedling trays or flats helps with the humidity. All must be balanced and not stay or get soaking wet or totally bone dry. You can’t just forget about them. For example, if you decide to leave for a few days, they will dry out so you need to ask a friend or family member to monitor them. Once they germinate, light is a critical factor. Using fluorescent lights or growing them in a greenhouse is best. A greenhouse is not a typical thing for gardeners to have so investing in a grow light is a good idea if you want to improve your strength of the seedlings. However, I’ve seen it done by sunny windows inside the home and it can work. And one last thought, do not forget to put the labels in the trays or cells. You will totally forget. Add a date to the label on the backside of the label, which will help you determine when you sowed them should you not see them come up later. Most packets will indicate how many days till they germinate. If they don’t come up, you can at least look at when you sowed them. Some seeds are a little slow to germinate, like hot peppers. Tomatoes tend to germinate faster.

Well, folks that’s it for today!

Thank you for visiting again!!

Cathy Testa
860-977-9473
containercathy@gmail.com
Broad Brook, CT

All You Need to Know About Starting Seeds Indoors

2 Comments

If you search the web, you will find a plethora of sites offering many articles, step by step instructions, growing charts, and tips, but will any one link or article give you all the simple answers you need to start seeds indoors? Probably not.

Think about this – there are millions of vegetable plants you may grow from seed in our world. How could anyone sum it all up in one fell swoop?

When I started growing vegetable plants from seeds, the desire to do so was sparked by the love of art packs from a particular seed company. The art sparked my interest and then I started to buy seed packets. I was interested in unique tomato plants and flashy hot pepper plants, rather than the traditional types I ate growing up on a farm. Maybe I got overloaded with the same types of tomatoes from when I was a kid, I don’t know, or maybe it is my love of art and creativity that got me into the different, unique, interesting varieties because they are like a work of art to me. A colorful purple tomato to me is cool. Or a pepper shaped like a UFO – that rocks! Plus you get to eat them and they taste delicious.

Need I say more? This is a photo from last season!!

However, I have spent countless hours reading seed sowing books, reviewing growing charts, looking up frost dates from different sites and all of which seem to give a slightly different answer, and determining what supplies and seeds are best for my area of Connecticut, and then I spent hours putting my own guides together. I guess, in some ways, it is good that I am an organized person and an over-thinker! Maybe I looked at too much, because my head would spin. After all, you could just buy a pack of seeds and plop them into soil, and it would sprout – but would it be successful?

Today, I want to try to share some of my seed sowing considerations in a random casual fashion:

#1) Start small and pick easy to grow plants. So, what veggie plants are easy, what grows like weeds? Hmmm, well, that is a tricky question. One may say, well a pumpkin seed is sure to pop up from the soil or a cucumber seed, but do you like pumpkins, do you have space to grow pumpkins in containers or a garden? They sprawl out for miles (well, for many many feet) and so that may not be the best choice for you. And cucumbers, well, they vine up and down and all around, but they don’t like their roots disturbed, so even though they are easy to grow, they have considerations if you start seeds indoors and then transplant. In my opinion, some herbs are easy to grow, like parsley, or mixed lettuces seem easy, or some basils, but even if they are easy, they all have unique personalities to consider. For example, basils like warmth. If you put them out too early when cool in the early spring, they don’t like that and won’t flourish. Cherry tomatoes are easier than regular tomatoes in my experience. No matter what – you will get tons of cherry tomatoes from one plant – it is amazing! Parsley is easily and it likes a bit of the cooler weather, unlike the basils.

Shown in this photo, Thai Basil (top left), Sacred Basil (top right), Curley Parsley (bottom left) and Genovese Basil (bottom right). Easy to grow herbs, as seen last year!

#2) Get the tools ready. Do you need a grow light? Many people will argue you do. And it does increase your success at sowing vegetable seeds indoors. But what is success? A perfectly straight upright seedling? Maybe. Maybe not. After all, I know many people who grow seedlings in seed trays set on their old fashioned heat radiators in their home, and the seedlings leaned towards the window for more sunlight, but they made it – and make it into their gardens. However, as you learn more, you start to consider the options of getting a lighting system so it increases your success and makes for healthier seedlings. As for myself, I have a greenhouse which provides sufficient lighting when the sun is out. In early spring, on many days, there are cloudy days. So far, I’ve gotten by just fine without grow lights. As I learn more, maybe I will get grow lights to add to my set up, but it is not going to be this season. Anyhow, what I’m getting at, is at a minimum, think about the tools you will need to sow seeds and start to pick up your supplies based on what you think you want to grow. BTW, I do use heat seedling mats to encourage germination of the seeds and to increase the start of healthy roots. This I have found helpful to invest in. That is a tool you may want to consider ordering now.

#3) Soil mix – This IS critical. First, for the ultra beginners, you should know that you can not sow your seeds in dirt from the ground for vegetable plants you need to start indoors in seedling trays ahead of the growing season. Believe it or not, when I offered seed kits last spring, one person thought you could put dirt from the ground into your seedling trays. They said my instruction sheet enlightened them and they had no idea dirt was a no-no. So, when you go out to get your soil for sowing seeds indoors, get bagged seedling mix or sterilized potting mix for patio pots. Either will be fine. The seedling mixes are finer than potting mixes, usually fresher since it is going to be seed sowing time soon, and perfect for tiny seeds to make contact with the seeds, etc. If you don’t want to deal with that, and want to sow seeds in the dirt, pick vegetable plants that you may directly sow into the ground after all chances of our spring frost and when the garden soil is workable. But you need to determine which plants you can sow directly into the ground, things like beets, for example. Some plants prefer to be directly sown into the ground. If you pick this option – remember, you have to prepare your garden area ahead as well.

A tomato seedling that was potted up into a larger pot by Cathy Testa

#4) Timing. This is another critical factor. All plants grow at different rates. Some take longer and some are faster. They need a certain number of days or weeks before they produce fruit. If you start your seeds too soon, they will be outgrowing your starter pots, getting root bound, start to struggle for the moisture it needs, and even start flowering, which leads to fruit (and for ultra beginners, flowers are where the fruits are produced. I don’t mean to sound rude or condescending, but if you are new to the world of gardening and plants, and didn’t know this – don’t feel embarrassed. I didn’t either when I was a kid and I grew up on a farm!). So, say you sow your tomato seeds too soon, then they grow larger and larger indoors, and then you need to put them in a bigger pot, and then they get flowers and then, you want to put the plant outside but it is still too cold out – it may even freeze one night if the temperatures drop down. You could loose the flowers from the cold temps, now you will have no fruit. Potentially, all your seedling work is lost. The same goes for starting seeds too late. If you start too late, your plant will sprout, it will grow, and you will think, awesome, and, now I can put it into my gardens or containers in spring outdoors, fine, but then you wait and wait and wait after its been growing in the garden, and it is almost early fall and you still don’t have any peppers. You started the seeds too late indoors. Peppers take more weeks to produce their peppers for some varieties (as an example), they have a required longer growing season. Timing is a critical thing. Get yourself a seed sowing calendar, look it over, and count back the number of weeks it indicates on the seed packet (or inside the packet) as to when to sow your seeds indoors. You count back from your last frost date in spring which in Connecticut usually falls around mid-May. If you end up buying seeds from me or a seed kit, I already did all this timing homework for you in my charts and calendars based on the seeds I will have available for sale.

#5) Okay, what else is needed? I guess it is Determination + Enthusiasm. Last year, we had the start of the pandemic and lots of things were short in supply (including some foods), AND as we all know, people were home so they had time to start their own gardens. The enthusiasm to start sowing your own seeds for your own amazing vegetable gardens was very high, and many people came to me for advice and for seeds or seed kits. Everyone was so enthusiastic, I just loved it. The pandemic even created a seed shortage by seed companies because so many people were trying to grow their own for the very first time! But, growing plants from seeds is not like making brownies for the first time. You read the directions on the box, set it in the oven after mixing all as directed, and you are successful, and you eat the brownies. Sometimes in the plant world, there are factors out of our control. So, you read the directions, you sow the seeds, but then all of a sudden there is an issue after planting them outdoors and they’ve been growing for a while. Say it is blossom end rot or a tomato horn worm, and ack! You are bummed!! But if you are still determined, you will succeed. So you take on the challenge, fix it if possible, and then you reap the rewards of an amazing tomato harvest or pepper harvest. And it feels good, it tastes good, and it is right there at your finger tips. Oh, again, that makes me remember something, I think cherry tomatoes are easier to grow from seed than regular tomatoes, so that is another tip for beginners. Usually you get lots of cherry tomatoes! Like tons of them! Did I say that already?

Heirloom Tomatoes I grew from Seed!

Will those of you who gave tomato and pepper growing from seed last season give it a go again this season? Yes! I know you will. I know there are some of you that so enjoyed it, you are on board. But maybe not, maybe you thought all these considerations were too much, too many things to think about, and if you don’t like to water plants, talk to them, and treat them like a cherished pet dog that needs care, well, then maybe you won’t. That’s okay too. The choice is yours and if you decide to make that choice again this season, and get seeds and/or seed starting kits from me, I promise to be your cheerleader and encourage you as well as give you as much information as I can about how to start sowing seeds indoors based on my experience.

Thank you,

Cathy Testa
Container Crazy CT
Broad Brook/East Windsor, CT
860-977-9473
containercathy@gmail.com

For details about my seed offerings, visit http://www.WorkshopsCT.com.

Top Nine

Leave a comment

When watching talk shows the other day, I realized so much was being shown regarding the “Top Nine” app used to generate the top nine photos in a grid format from Instagram feeds and it perked my curiosity.

I caved and did it – and here it is:

Top Nine 2019 by C Testa Copywrite_0002

Apparently, this is not an “Instagram” thing but a separate app but using Instagram – and it became popular and a bit of a trend. We may all assume the reason why? Because your curiosity kills the cat – you have to know – Gee, what is my top nine (most liked or most engaged photos of the year) per some app? Well, mine are above.

To be honest, it surprised me which were selected. How do they determine which photos are selected? I guess it is based on likes, shares, and engagement? Not sure, and I don’t have the right mind after the holiday hoop-la to research that aspect right now, but I did find it interesting and a bit of fun to use the app to find out.

My Photo Grid Explanation:

From left to right (starting from the top row), I thought it would be entertaining to say what I think of each of these photos which were generated by the Top Nine app.

The Jade Plant (Crassulas) – Ah, this is one plant I became involved with in 2019. Meaning, I propagated it (made cuttings and grew new plants) from it quite a bit. It is rather easy actually. I also used this plant in some of my install jobs in various containers. And offered them in my succulents workshops. But what would make it a top photo is the fact that I feel I can grow them myself and they are healthy and happy! Maybe people enjoyed the photo due to the Indigo Blue Background which is a popular color right now I heard.

The Beach Shot – That was a vacation my husband and I took last year in Naples, Florida. I wanted to make sure we’d go see the sunset which I had read about being wonderful on this beach, and we joined many other people that day doing the same. I guess that is a good photo, right? And it WAS a great afternoon waiting for the sun to set.

The Yellow Peppers – Grown from seed, hot and tasty. I love these yellow long banana shaped peppers, which I wrote about in my seedlings topics on this blog and for the workshop which I offered on seed starting last year too. So, yes, I agree on this photo. The peppers were easy to grow, abundant, and we ground them up after drying them in the oven to make hot pepper flakes of the yellow variety. They did not go wasted. My husband loves hot peppers and he shook those flakes on his various meals many times. We went thru two jars of the hot pepper flakes. Great for chili recipes too.

The Blue Pots – Ah, yes. I was on the hunt for a client, trying to find pots. I kind of knew these weren’t the right ones. I had put them on the floor and took a photo. You will see my hiking boots there as I looked down in the photo. But for some reason, this photo was popular with people on Instagram. However, it was not quite the right fit and I later found a better style and color for my clients’ needs. But that was a journey on a day of hunting for just the right patio pots. Pinch me – I love that type of work.

The Flyer in the Window – My workshop flyer was posted in a local package store’s window. I always appreciate when they share my flyers about my workshops. I guess that day, it was noticed quite a bit and thus, another top nine. I would say these clients are tops too. They have hired me for years to install their store-front pots. I do think the flyers look great in their store’s windows. Thank you!

The Cacti Cans – I pounded small drain holes in the bottom of soup cans with a hammer and nail last year and inserted a cactus in each. No drill required which I loved. And I even hand-stamped the sides of some of the cans with words and added chains to some to hang the cans. They are adorable. However, in the rain, one thing I forgot about is the cans start to rust. I did’t like the rusty look. That day a flower was blooming on one, as you can see, and it was adorable, so I snapped a photo.

The Burro Tail Sedum – I obtained a stock of these from a grower to provide in my succulent related workshops last year. Everyone loves these plants, which drip down into long tails as they grow over time. They work well in hanging baskets – which was a topic I offered last year too. These plants are great fillers in arrangements and easy to grow, drought tolerant and long living.  I still have some growing in my hanging baskets in the greenhouse now. I can see why a popular photo – and those who got them in my workshops surely loved them. Thanks to my amazing grower, I obtained a nice stock of them last year.

A Photo of Me – From many years ago. What I like about this photo is that my red head planter, the little red table with red chairs, and the red blooms of the Canna Lily plants in the background were all happening. I spray painted that little round table and the chairs red. It was a freebie find on the side of the road one day. My sister was annoyed cause it was on her street when I found it as I was leaving her house. She joked that was supposed to be her free find. 

The Cherry Tomato Leaf – This is all about my obsession with plants. I love taking close up shots of plants and their structures. It was also probably popular cause we all dream of eating fresh tomatoes. The photo was taken in March or early April, and the handwriting on the label is not mine – it is of an attendee’s who came to my workshop on seed starting last year. That will be my first project, setting up the Seed Starting Workshop for 2020. I can’t resist doing it – it was very rewarding. Seats will be limited because the plants are kept in my greenhouse until they are ready to be planted outdoors. Unless, of course, I got a bigger greenhouse.

By the way, this is what CNN has to say about the Top Nine app and trend. You may want to read their article before you try it!

Have a good start to your first week in 2020.

Best regards,

Cathy Testa
Container Crazy CT
860-977-9473
containercathy@gmail.com

Other Cathy T sites:

www.WORKSHOPSCT.com
www.ContainerGardensCT.com


Hot Peppers Ready for Winter Recipes

2 Comments

I’ve been so busy this month holding Succulent Topped Pumpkin Workshops and Demonstrations that I was not paying attention to a hot pepper plant in one of my large container gardens outside, but my husband noticed them this weekend, and he told me on Sunday that there were so many ripe yellow peppers on the plant, he was going to go pick them.

A Pepper Plants Copywrite C Testa_0010

Matchbox Pepper for Hangers

I grew two hot pepper plant varieties this year. One was called “Matchbox Pepper” (Capsicum annuum) and I picked this one because it grows very compact, so it was absolutely perfect for hanging baskets. It produced many tiny red peppers and was very decorative. I was happy with them. As they ripened, I collect them and gave some to friends and used some for cooking. That was earlier in the season.

A Pepper Plants Copywrite C Testa_0002

Lemon Drop Hot Pepper

Then came the arrival of the other variety I had selected, called, “Lemon Drop Hot Peppers” (Capsicum baccatum) on a plant quite the opposite in size to the matchbox type. It was not compact and grew to 3 ft tall and was almost as wide. I put the lemon drop type in a rather large pot because I didn’t have time to plant that pot with my usual tropical plants,  and I almost most forgot about it this summer as it grew larger.

The lemon drop one was situated in a very hot, full sun location. It gets brutal hot actually in that spot in my yard due to no shade and receives full sun all day, thus, it was good there because peppers like the sun and warmth. And this season, it got plenty of rain falls to help water it. Usually I’m a fanatic about watering, but I must admit, I didn’t drag the garden hose up there as often as I usually do but the pepper plant did just fine.

A Pepper Plants Copywrite C Testa_0004

The Lemon Drop Hot Pepper was selected because, of course, it has a vivid and bright lemony yellow color, and I like color in my plants and container gardens. Plus I thought they looked interesting and although I can’t chomp on raw hot peppers (like my husband can) because I will choke on it, I wanted to grow them for decor and possibly seasoning recipes. They also have a waxy and shiny appearance and one time, when I went to go look at them mid summer, I was impressed with how perfect they were – not a blemish.

My husband, Steve, adores hot peppers and often he will just toss a raw one in his mouth. He could not do that straight up with the Lemon Drops peppers, however. He told me they are “killer hot.” This reaction made me laugh because he normally can chop them down without choking, like I would if I attempted it.

Okay, back to when he spotted tons of them on the plant this past weekend. He decided to go pick them all on Sunday because frost was coming. He also wanted to dry them in the oven. He loves hot peppers so much, it makes me happy he wanted to preserve them.

A Pepper Plants Copywrite C Testa_0009

In the Oven at 180

I was feeling rather tired on Sunday, so I said, “Oh, I don’t know; I read they take a long time to dry in an oven,” but he persisted, so I googled it – “180 degrees in the oven for 4-5 hours or more,” I said.

He started to cut the tops off and I told him, “Oh no, don’t cut the tops,” as I looked on Google searches more and then found a U-tube video. This guy says to dry them whole on a cookie sheet in the oven at 180 degrees for several hours.

As the peppers sat in the oven, the smell started to permeate in the house. Steve kept checking them and after 4 hours, he thought, this seems like the oven is not hot enough. He decided to take them out and off the tray, chop them into smaller pieces, and put it back in the over at 200 degrees. By the time we decided to shut the oven off – they still didn’t seem dry enough, so the next morning, I put the tray of the lemon drop peppers back in the oven at 200 degrees for one more hour – and that worked.

A Pepper Plants Copywrite C Testa_0003

When I took them out, they crushed in my fingers. I got my small chopper grinder device, which I hardly ever use, and started putting the large pieces in there to grind. Sure enough, it worked perfectly, BUT, I could not taste test it. I know I would choke, so I had to wait for Steve to come home. As soon as he did, he asked, “Where are the pepper flakes?”

A Pepper Plants Copywrite C Testa_0008

Taste Test Time!

My husband, Steve, put a dab of the yellow pepper flakes on his finger to taste them on his tongue, and he was like, “Wow, these are very hot,” and then he immediately grabbed a cup to down some water. That is not a common reaction from him. He usually can take the heat. Thus, they are truly hot. I will have to use them carefully in my autumn and winter recipes.

A Pepper Plants Copywrite C Testa_0006

I’m super glad I grew some of the Lemon Drop Hot Peppers and Matchbox Peppers from seed this year, using certified organic seed and starting both of them early, as directed. The lemon drops take longer to ripen than the matchbox ones. I definitely plan to grow them both again next year and offer up seedlings for sale.

A Pepper Plants Copywrite C Testa_0005

Easy to Grow in Pots or Hangers

Hot peppers are super easy to grow in containers. They don’t get attacked much at all by critters, animals, or insects and are very decorative in pots or hanging baskets (like I did with the matchbox type but the lemon type needs bigger pots). They are not demanding for soil, although it must be well-drained, and they need regular watering but can handle some periods of neglect from watering if there is enough rainfall.

A Pepper Plants Copywrite C Testa_0001

The Lemon Drop hot peppers are harvested later in the season which is perfectly timed for when we get in the mood to start making pots of hot chili, warming soups, and hot sauces for the autumn season.

During the growing season, the pepper plants like warm conditions and need watering regularly especially when it is super hot out, and for these two varieties mentioned, there was no staking required as may be needed for the heavier sweet bell peppers.

I basically removed the ripe hot peppers from the plants when they were the right color, as shown on the seed packets. Both of these varieties formed blemish free fruit. And side bar, I love the way the artists depict the fruit on the seed packets by Hudson Valley Seed Co., which is a company I like for seeds. I offered up seeds for sale last year, and plan to do the same this spring, so stay tuned on that.

A Pepper Plants Copywrite C Testa_0007

Seed and Plant Details

Lemon Drop Hot Pepper
Capsicum baccatum
Small, crinkled yellow peppers with waxy shine
Hot as in cayenne range hot
Plant grows large – up to 34″ tall
Need big pot or can be transplanted in mixed container gardens
Seeds must be started early (8-10 weeks before last spring frost)
Transplant outdoors after frost passes
Grows fruit 98 days from transplant of seedling
Ripens 2 weeks later than other hot peppers
Plant full sun with well-drained soils

Matchbox Pepper
Capsicum annuum
Tiny, red peppers, decorative
Hot and must start early
Great plant size for hanging baskets
Start early; Sow indoors 6-8 weeks before last frost
Transplant to hangers or ground 3 weeks after spring frost
Pick a sunny spot to keep growing
Fruity and hot flavorful

Couple Other Workshop Updates

Only 6 seats remain open for the first Holiday Kissing Ball & Wreath Making Workshops in early December! See www.WORKSHOPSCT.com site for details. The 2nd session for beginners on a Wednesday evening is starting to fill as well, but has more seats remaining than the first Saturday session. See dates below in photo.

Succulent Pumpkin Workshops and Demo’s

Thank you to all who had me come speak, demonstrate, hold sessions on the fabulous Succulent Topped Pumpkin Centerpieces! What fun we had – and I loved seeing everyone’s unique twists on the pumpkins, from strings of spooky lights added, to swan gourds fixed on the top. Each year, this creative centerpiece topic gets better. There’s still time if interested to hold a session with live succulents – just contact me soon.

As for November, my mind is brewing on new ideas for workshops, and of course, this is when I start to look forward to early December’s holiday workshops and custom wreath orders to follow the month of December. But there’s still plenty of time for that – we have the autumn season to enjoy – or to prepare for – as noted below!

This Weekend’s Weather

Oh, and did you hear? A possible Nor’easter here in Connecticut this weekend, really? Oh gosh, I have to run out and finish putting away all my corms, tubers, rhizomes, and plants which have been all staged in the garage to be inspected, treated, and stored. The work never ends for the garden lover.

Thank you,

Cathy Testa
860-977-9473
containercathy@gmail.com
http://www.WORKSHOPSCT.com

Banner Poster KB Dates 2018