Sowing Tomato Seeds Every Spring Season in Connecticut

Leave a comment

Except this year.

And I am missing it!

Every year, from February to April, my hands are usually very busy sowing and growing tomato plants from seed in my greenhouse. I begin in February with planning out dates, looking at the required timing for each seed type, and doing other tasks such as gathering up my seedling soil mix, seedling trays, and sowing tools.

Usually, in March, some of the seed sowing begins! I get all my seedling trays prepared by washing them appropriately, selecting locations on shelves in the greenhouse, getting my seedling heat mats lined out as well, and hanging seedling grow light fixtures above some of the seedling tray locations.

But this year, I am not going through this set-up and sow process (except for some flower seeds) because, for a period of time in April, I will be away due to some travel planned. To be away and not be here at my home to monitor the sprouted and growing seedlings in my greenhouse would be disastrous because seeds require constant moisture and other small steps for growing success.

If it is your first-time growing tomato plants from seed, remember that once the seed is planted in your seedling mix and waiting to germinate and sprout from the soil, you cannot simple walk away and forget about them. Each day, you should monitor the moisture of the seedling mix, and if the soil is dry, remoisten carefully. I usually use a watering can with a shower head type spout which gently flows out water as I carefully move the watering can over the top of the seedling trays to apply just enough moisture to keep the soil slightly moist. I often move the trays off the heating mats, water, and let it drain, then return the trays onto the heating mat under the grow lights.

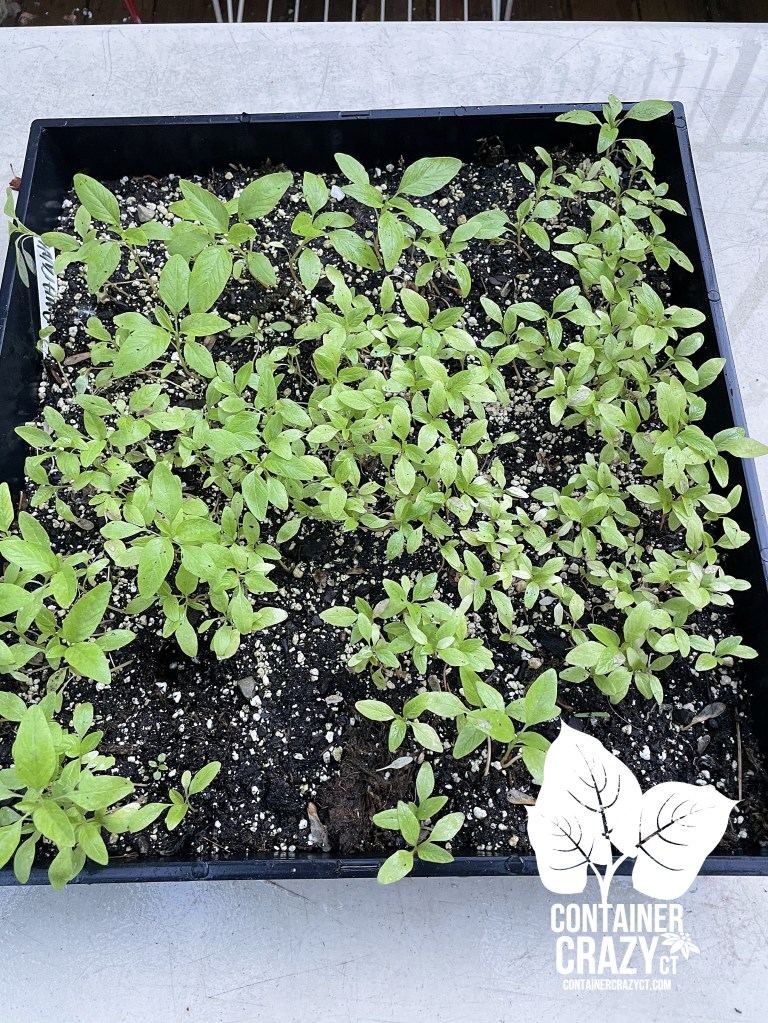
Then we wait. We wait for that first little green sprout to appear above the soil mix. It is always a little boost when I see it there, and it gives me a feeling of happiness. I know it sounds a bit corny, or silly, but it truly does. Soon that baby sprout will grow into a seedling. During this growing phase, tomato seedlings are just like babies, they require care and watching.

If you ignore seedlings by leaving them for a week at a time, or even a weekend, they will surely dry up and wither. There are some exceptions to this perhaps, like using clear covers to maintain a bit of humidity and moisture, but my style of sowing and growing tomatoes from seed involves reviewing them each day and monitoring their needs. Do they need a bit of moisture, do they need a new location in the greenhouse to receive more sunlight, do they need to be removed off the heat mats? All of these questions come to mind as I watch my baby seedlings start growing.

Some seeds require anywhere from ten weeks before your last spring frost date to two weeks before your frost date to be sown indoors. Here in Connecticut, I use a timeframe of about May 12 to serve as my last spring frost date, and then I count backwards on the calendar and mark each timing. For example, 10 weeks would fall on March 3rd, and 8 weeks before the May frost date would fall on St. Patty’s Day, March 17th.

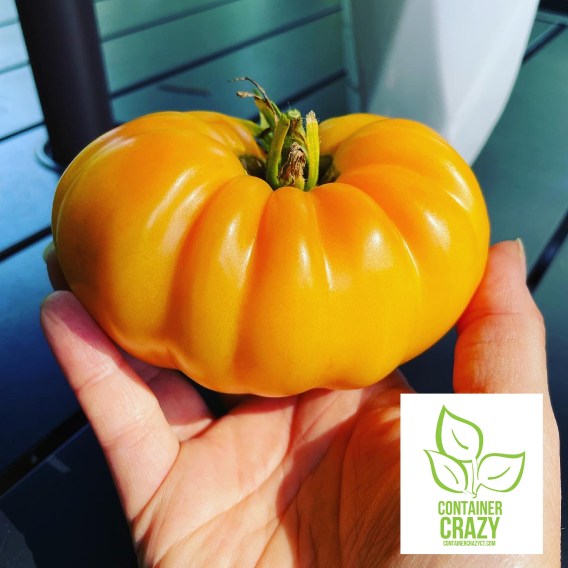
Let’s take for example an amazing tomato plant I grew from seed for a few years now called Oxheart. It grows tomatoes the shape of a heart and the fruit grows to three-pound sizes! They are incredible. The seed packet for Oxheart tomatoes indicates they may be started anywhere from 8 to 10 weeks before your last spring frost date in your state. You need to know what the estimated frost date is for your state and count backwards. Once I asked the seed company where I obtain my seeds from why some packets have such a long span, for example some packets will say sow the seeds three to eight weeks before the frost date. That is a long span, right? Eight weeks would be around mid-March while three weeks before falls around the end of April.

Their response was that it is because they provide a range. And you may go for some date in the middle of that range. Due to local climates, planting conditions, temperature, water, light, soil make up and more, all plays into how long it takes to grow your seedlings. Also, if you prefer more mature plants to transplant, you may start your seeds on the earlier side of that range. If you may be putting your seedlings into a cold frame outdoors, you may be starting later. I think for the past few years, I started them on the early side of the range and ended up with plants about the size big enough to put into one gallon nursery containers. And I’m happy with that size. One other thought is if you start on the early side of the range, you will need to pot up your seedlings into larger pots as they get bigger before they may be transplanted outdoor at the end of May. Just like babies needing new clothes as they grow. If you prefer not to pot up and have smaller plants, just start your seed sowing on the later end of the range indicated on the seed packet. But don’t go beyond the last week indicated on the packet. Say it is two to four weeks before the frost date, if you want till one week before the frost date, you may create a situation where your plants will not produce fruit on time. The reason you are starting the seeds indoors is because the growing season outdoors is not long enough to direct sow tomato plants due to our climate. So, you must start them early indoors to get started, then transplant after danger of spring frost and when it is warm enough outdoors.

To keep track of the timing on when to sow your seeds, I have created charts and I also note the dates on my wall calendar. This I have found to be very useful and helpful. Take the time, if you are starting seeds for the first time, to look at the “weeks before your spring frost date to sow” and mark the date on a wall calendar. Start with the expected spring frost date for your state, mark that and count backwards.

Memorial Day is the timing I use to plant the tomato plant outdoors. So, think about that span, anywhere from March till May, you are working on growing your seedlings and getting them prepared for the great outdoors. I like growing various tomatoes. Many are heirlooms which are some of the most delicious tomatoes you will ever eat. Some of my heirloom seeds are sown six to eight weeks before the frost date, some are sown four to six weeks before, and some are two to four weeks before. I suppose those I may sow around the end of April may make it on my sowing list because I will be back by that time from my travel, and let’s be honest here, I can’t resist sowing some – I just have to!

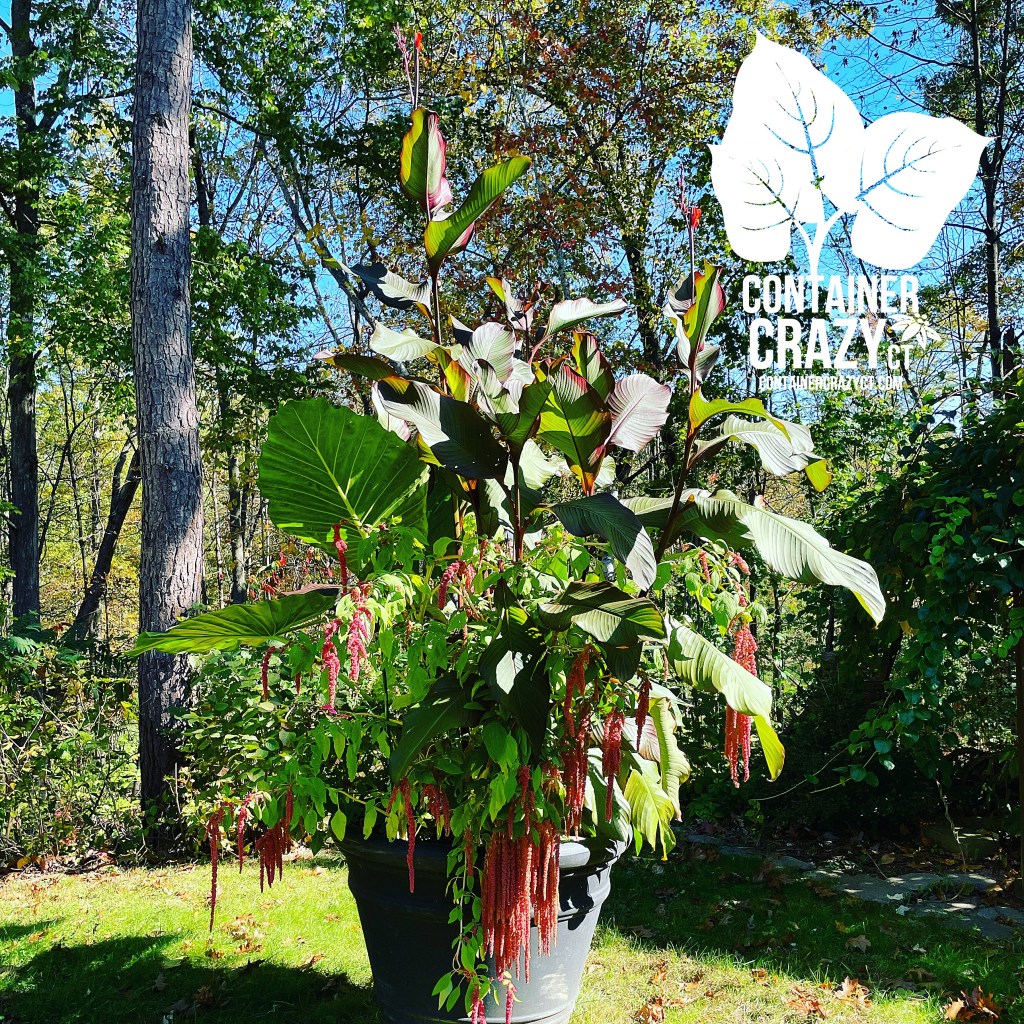
All of the tomato plants I start from seed usually are grown in container gardens at my home in fabric grow bags, large patio pots, and wooden large planters. I enjoy watching them grow and usually have to keep the squirrels away or pick the fruit before they fully ripen otherwise those little wild animals in my yard end up taking a bite or two. And of course, I’ve sold many tomato seedling, otherwise known as starter plants, to friends and family. They already told me they are going to miss my tomato plants this year. I don’t blame them!

And it is also important to remember that everyone has their own unique process and style to sowing and growing. I’m sure more advanced growers would have their own tricks of the trade perhaps, but for me, this calendaring process has worked out. You may find many more posts about my journey with tomato seeds on my blog site called, http://www.ContainerCrazyCT.com. Please feel free anytime to ask questions. Oh, and by the way, I have seed packets available if you are local and interested.

Thank you for visiting and enjoy your weekend. Below are photos of some of my tomatoes!

Cathy Testa
Container Crazy CT

Broad Brook, CT

You may find me also on http://www.WorkshopsCT.com and http://www.ContainerGardensCT.com

Photo of a Beautiful Goldie Heirloom Tomato on the plant
Next photo is of Cathy T’s deck with tomatoes growing in fabric grow bags. It looks like a big jungle of green and it is a great backdrop to a cozy chair where you may sit and watch the squirrels try to outsmart you!

These Tassel like Flowers will Hang to the Ground and Last for Weeks in Container Gardens

Leave a comment

I have tons of gardening and plant reference books in my home office on tropical plants, succulents, landscape designs, perennials, woody trees and shrubs, vegetables, herbs, fruits, container gardening, and more plant related topics, but I do not have many reference books specifically about annual flowering plants (such as sunflowers, zinnias, or marigolds). I guess that is because my passion with plants started with mostly large showy tropical plants, and annual flowers have always been somewhat of a staple plant to me in Connecticut, thus they are not typically the unusual types of plants I enjoy. I use annuals rarely and only when I want that pop of color in a container combination in the summer. I find annual flowers typically look tired towards the end of summer because they are fast growers and push out lots of flowers, exhausting lots of plant energy, whereas tropical plants and their flowers last well into the autumn season here in Connecticut.

However, I discovered upon researching amaranth annual flowers (herbaceous ornamentals or a short-lived perennial in some climates), a particular species caught my eye last year in a seed catalogue. What I read in one of my books is that they are plants from the “tropics” of the Far East (per the one book I have on annuals, which is an old book!). The book indicates they are “brilliant, heavy-looking plants, reaching 3 to 5 feet tall” and grow in rich or poor soils. Another website indicates they are native to India, Africa, and Peru. In some ways, they are similar to the tropical flowering plants I already enjoy; plants from warmer regions. This is why I picked them as a candidate to sow from seed last year, plus the species I selected is a variety that grows much taller than normal, very tall, reaching 48″ tall. This would be perfect as a specimen plant with my other large showy tropical plants such as canna lilies, elephant ears, castor bean plants, or banana plants in my container gardens and patio pots.

Container Gardens by Cathy Testa of Container Crazy CT – Featuring Amaranthus caudatus

Coral Fountain Amaranth (Amaranthus caudatus)
Love-Lies-Bleeding, Amaranth, or Tassel Flower

Of all the common names or flower descriptions of this plant, I guess tassel flower represents the flower form the best in my opinion of this species I selected. The plant’s large plumes (technically called inflorescences) dangle down in clusters of coral colored tassels as if they are fastened at the top of tall stalks. The flowers are fuzzy, clumpy, and resemble dreadlocks (another great word to describe their form and appearance!) They are chunky and petal-less. They resemble fountains or waterfalls in form, and may be used in wedding bouquets, as cut flowers in vases (long-lasting), and in container gardens where you wish to present a dramatic unexpected showy element. The foliage is not very large, and are a lime green lighter color on this type of amaranth, and I read the leaves are edible, but I did not experiment with that aspect, yet. After admiring the interesting aspects of this flowering annual with cool attributes, I decided to sow some seeds last year and give them a try.

Coral Fountain Amaranth – Cascading Plumes

When to Sow the Seeds

The seeds should be started indoors either at the end of March of middle of April based on our weeks before our typical spring frost timing in Connecticut (or use the appropriate 4-6 weeks before your last frost of your planting area). You may also direct sow these seeds in the ground after the threat of frost has passed (frost threat ends mid-May usually in Connecticut – check your weather and seed sowing charts). The seeds take 75 days (or about 2.5 months) from the time you transplant them to produce flowers. Starting them earlier will give you more time to enjoy the flowers which last well into the end of summer. The seeds are tiny and the packet has up to 250 seeds. That’s a lot of amaranth sowing, so use caution when sowing to not over do it.

Seeds Sown in a Flat Tray

Some Sowing Problems I Experienced

However, I experienced some problems when I sowed them. I did a whole flat tray of them, and they seemed to not be really pushing growth a while after germinating, so I painstakingly put them in 2″ round mini pots one by one and thought I’d wait to see if that would help. It did, but one day I left the tray of the mini pots outside by my greenhouse and a rain gutter above rushed water down on them during a rain fall that day – pretty much destroying them all. All the tiny seedlings got stressed and the potting soil completed washed out. My bad – I’ll remember there is a gutter above problem next time, but I did manage to salvage a few seedlings and decided to put them in planters later when they were large enough to transplant after all chances of frost. I think the reason they may have been slow to grow from seed initially is because seeds germinate best at 75-80 degrees F and they need a night temperature of at least 65 degrees F after transplanting. Maybe my night temps at the time in my greenhouse were not warm enough but I am not sure.

ACK! Rain gutters heavy downpour washed out all the soil

Exposure Full Sun or Some Shade

One of the containers I planted them in is a rather large round black container in my back yard (probably at least 3 feet in diameter and about 4 feet tall). I put canna lily plants, elephant ears plants, and some of the amaranth transplants I managed to salvage in it. The seed packet indicated the plants like dry, hot conditions in full sun but will grow in partially shaded areas. The large black round pot is on the east side and gets shade part of the day. The packet also indicates the plants are drought tolerant (and may get root rot in poorly drained soils where is stays wet in the ground all the time, which was not a concern for me since I do all in patio pots and container gardens with sufficient drain holes). A drought tolerant plant is beneficial for container gardening, however, as you don’t have to worry about dragging the watering hose or watering can out there too often in the summer to water it. They are very easy to grow and tolerate poor conditions once the plants start to grow and get established, in fact, you may want to use caution with not overwatering it once it is doing well. Wet soils for this plant may lead to root rot per various sources.

An Insect was visiting some of the foliage

Use Large Pot Sizes and Sturdy Stakes

Because this species of amaranth grows very large and tall, place this plant in an area where you enjoy witnessing them cascading at the corners or edges of your patio pots. Consider taller upright planters because of how the plumes will descend down in big chunks towards the ground level. You want to be able to enjoy how they flow downwards like a waterfall without them hitting the ground. Fortunately, that was the case of my big round black pot in the backyard. As I started to see them progress, I thought about the wild and unusual form being a real show stopper if they were staggered in huge garden. The plums grow so long and become top heavy thus a good support stake is recommended when they start growing flowers. I used thinner bamboo poles which would be hidden against the stalks in the pot. The weight of the flower plumes becomes substantial as they start to grow well and large into the summer months.

Castor Bean Plant Bottom Right with Darker Foliage
Coral Fountain Amaranth (bottom) near the dark foliage of an Alocasia (above)

Companions with Darker Foliage

Consider pairing it up with plants with darker foliage and use tall plants too. The color of this amaranth’s leaves are a light lime green with an oval shape, and the flowers are a light coral color. It will show up more against a darker foliage plant, like a canna lily with plum colored foliage or a castor bean plant with the darker foliage. And consider pairing them up with other plants which are mid summer bloomers so you will get a mix of bloom colors for the look you wish to achieve in your patio pot or container gardens. I noticed hot pinks looked great with them too for contrast. Think hot pink canna lilies.

In a Vase at Cathy T’s

Used in Floral Arrangements for Weddings

I started to create a board on Pinterest last season to show what the flowers would look like, but this board is of other photos of various Amaranth plants. I discovered quite a few photos where the flowers are used in wedding bouquets and arrangements, but the only consideration I had on that is when the flowers reach maturity, they tend to drop tons of tiny little seeds. When I placed some in vases last year, it dropped lots of seeds on my outdoor patio table. I wondered how they work with those as cut flowers for floral arranging to avoid that problem (the potential mess it makes), and realized that would take some more research. I now realize you would have to harvest the flower tassels before they mature to avoid the abundant seeds in them later. The flowers plumes bloom from July to frost, and mine were full with flower plumes towards the end of the summer here in Connecticut. If you wanted to grow some for a wedding, you would want the wedding to be a summer wedding and again, harvest them before maturity so you don’t get a situation of tiny black pepper sized looking seeds falling down your wedding aisle runner. The plumes also look great in tall vases and provide a rather exotic interesting vibe in outdoor spaces. They may be used as fresh flowers or in dried flower arrangements. In fact, I saw some in a floral shop this winter and I kicked myself for not saving the plumes of my own last summer.

Bees Loved – Many Visited!

Food for You or Pollinators

Some reference books indicate they are favored by bees and that is true, I did see lots of bees visiting the tassels of its petal less flowers and took photos, and at times I would witness a bird perch on the tall thick stalks. Additionally, there is some information about how parts of the plant are edible and seeds may be used in porridge. I didn’t really look into that much however. Maybe this year when I grow them again, I will do so. The seed packet indicates amaranth are one of the most nutritious of the ancient grains. This turned out to be a stunning plant, which friends and family noticed, when they visited. I had one by my entrance stairs, and one day, my brother shouted out as he was leaving, “That plant is cool!”

Amaranthus definitely have a cool vibe!

Cathy Testa
Container Garden Designer
Broad Brook, Connecticut
Zone 6b
860-977-9473
containercathy at gmail.com
See also:
http://www.WorkshopsCT.com
http://www.ContainerGardensCT.com

By My Stairs – the planting my Brother noticed one day!
Great Plant for our Important Bee Pollinators

How I start to Plan in the New Year

Leave a comment

Happy (or is it?) New Year 2022!

After waking up from the foggy mind, after our confusing holidays, I start to pull out my calendars from last year, which includes two (if not 3) wall style calendars, notebooks with key dates, reviewing my own blog posts from the past year for key dates, and going thru client binders to get my new 2022 calendars started.

Yes, I have all those various sources to track activity by dates. I want to remember the odd things that happened because it helps me to be prepared, or to try to plan ahead, and to remember, in the gardening world, lots of variables come into play (timing, weather, pandemics, etc.).

Unexpected Snow Fall in April?

For example, do you remember when we had a snow fall in April of 2021? I do. I purposely took a photo of the date scratched into the top of my fire pit cover, and I also noted the date on my 2021 wall calendars. The notations are reminders of things that can happen when you least expect it, or we should be expecting it, cause it probably happened the year before, or it may again…

Cold Rains on Memorial Day?

Like for example, do you remember the cold temperatures and crazy rain we had on Memorial Day weekend last year? It traumatized me because I literally finished planting a site the week before! I was so worried about the plants and how they would be impacted by the freak cold rain we got the whole weekend after I finished my job site. I went silent. My husband even asked me why I was so quiet as we drove out for a weekend at that time, and I told him, “I’m super disappointed in the weather we had over Memorial Day.” Then I stayed silent for the rest of the drive.

Flooding of Summer Fields…

Also, what about the floods we had in farmers’ fields in 2021 during the summer months – which impacted the availability and quality of pumpkins I use when I make succulent pumpkins in October, and of course the rain during the summer that messed up the ripening of our tomatoes?! Need I say more…?

And dare I say it, Ugh, COVID. As my friend posted recently, “We all want to say bye-bye to Covid!”

The darn Covid world. It is everywhere it feels like. We never thought it would last this long or rebound, right? How many challenges must we face? Let’s not get into how it impacted everything, shipping, staff, uncertainty, availability, etc. And the very sad and depressing things, such as many people getting sick, hospitals overwhelmed, it just seems hard to rise up again. My blood pressure has risen. From the stress (or too many sweets over the holidays.)

In the world of gardening, you do face challenges. I told a grower once, “Every single year, it is different.” They agreed. It was very hard to plan and predict in our usual manner.

Global warming impacts us too. We see lots of changes in weather. It is so unpredictable. Thus, my calendaring routine is even more critical. Or is it? Because sometimes, its been difficult to take a deep breath at times, and start again. But alas, it is January, and I must start again.

Today, is January 6th, 2022. It will be sunny (thankfully, because I have to take down some outdoor holiday decor) and it will snow tomorrow, but then be clear on Saturday (unless that changes). I’ve started to come out of my holiday brain fog and started looking at key gardening and planning ahead dates.

Sowing Information

I remember that last year, around this time, people started searching about sowing information for their seeds. So I’m going to re-share the link below where shared some tips from last year around this time:

Last Year’s Post in January 2021 above

I have to admit, I’m still not done reviewing things, but I’ve started, and it reminds me of this: January is about “planning” and probably early ordering (at least for me), February is “ramp up” month, March is “sowing” month, and April is “growing month” which goes into May. And hopefully this year’s end of May will bring better weather when we are ready to put all plants outdoors for our vegetables gardens and tropical plants, etc.

I know this post is a little choppy, but I needed to get it out there to let you know, I’m here and I guess I will take on the unexpected challenges yet again. Because when I’m in my greenhouse on sunny days in the winter, it revives me. I see the plants not giving up, despite being on the temperatures cool side in the winters, and some plants will even bloom. I’ve been witnessing, in fact, my Mangave plant blooming. It shot up a 10 ft tall stalk and the buds finally opened. They are still opening. The very top of the stalk is almost touching the roof. I have to step up on a ladder to get photos or look up as I did this this photo below taken a few days ago.

Mangave buds opening into 2022

In the meantime, I hope this post is not too blah, because besides all the gardening challenges of last year, I still encounter enthusiastic plant lovers and I still am very passionate about plants – and it makes it all worth it. I think I’ll be ready to go at it again. Stay tuned.

Cathy Testa
Container Gardens, Plants, Plant Gifts, Seeds, and More!
860-977-9473 (texts welcome)
containercathy at gmail.com
See also:

www.WorkshopsCT.com
www.ContainerGardensCT.com
http://www.ContainerCrazyCT.com (you are here now).

How Many Seeds Per Packet

1 Comment

Last year, when I was showing my seed packets for sale and my sowing process, a friend who was interested in both asked me, “How many seeds are in a packet?

This seems like a reasonable question to ask, especially if you haven’t tried sowing seeds before. In general, for the seeds I sell, there are about 25 seeds in the tomato and cherry tomato seed packets, except for one I offer called, Upstate Oxheart tomato. It has only 15 seeds per packet. Why? The tomatoes are nearly seedless and that is apparent when you cut a Oxheart tomato in half – and yes, it is shaped just like a heart – amazing. There are hardly any seeds in the actual tomato. This makes a challenge for the seed producers, so I always am sure to sow those seeds carefully as I don’t want to waste one – these tomatoes are big and juicy.

Oxheart tomatoes are not only huge! They are nearly seedless.

The same is about true for the hot pepper plants I’ve sown and grown, about 25 seeds per packet, and cucumbers. But plants like parsley will have 200 seeds, same with the basils, and they are smaller seeds than the typical tomato or hot pepper seed in size. In fact, they are so tiny that I am unsure how anyone could plop one tiny seed per a seed cell tray filled with seedling mix. Often, I will scatter seeds over the top of the seedling mix and lightly dust it with fine seedling mix to cover them. That is the case with how I handle parsley and basil seeds. Same with some lettuce mixes. I call it the ‘scatter’ method and I show exactly how I do it via my video’s. Videos are provided to my purchasers of seeds and seed kits, by the way.

Most seed companies will identify the number of seeds per pack, but other companies may just list the net weight on the packet or envelope. Some will provide this information in milligrams.

Seed sizes vary. Hot pepper and tomato seeds are about the same size, but larger seeds, like those of cucumbers or a moonflower, for example, are much larger and easier to handle. Larger seeds are great to use if sowing seeds with young children learning for the first time how to sow seeds. Think pumpkin seeds too.

I obtained Celosia seed one year. This is a flowering plant producing colorful fuzzy flowers, but the variety I selected is a mammoth type. It grows up to 60″ tall and you need to start the seed early indoors. When I opened the packet, I couldn’t believe how tiny the seeds were. There are 200 seeds per packet. Can you imagine sowing 200 seeds and having 200 of those plants?! So, I’m sure there is a method to sow seeds which are super tiny, but I decided to fill a square flat tray of about 3.5″ deep with the soil mix and just scatter the seeds on top. It worked. They germinated and then I carefully pricked out the seedlings when they were ready into 3-4″ pots to continue growing them. I have to admit though, I am not sure if this was the best or recommended method. To give you an idea of how small the Celosia seeds are, the packet indicates that there are about 600,000 seeds in 1 pound.

I often use the scatter method with lettuce mixes too, and will sow them in small long window box types of containers, always being sure to drill drainage holes in the bottom if there are none. I find for lettuce mixes, parsley, and basil, this scatter method works perfectly. It is important to scatter them as evenly as possible and you don’t need a whole packet to do this (unless your window box is huge). For example, one type of lettuce mix I sow has 500 seeds per packet. I often use half of the seed packet or less per container. Then I lightly top the seeds with fine seedling mix and let it all grow. If you want to prick out each individual tiny seedling later, you may do so to put them into larger pots (or the next size pot up) for the basils for example. Some may find the scatter method wasteful, but it works for me. Because you may harvest lettuce mixes, parsley, and basil repeatedly from the plant by cutting some off and just letting it regrow, I find this is suitable.

A larger seed popping up from the mix

Another time, I grew Panther Edamame Soybeans from seeds. The seeds are large, similar to cucumber seeds (but round), they are easy to handle. I was so excited when I grew these in patio pot containers on my deck. Because it is just me and my hubby at home, a couple plants was sufficient to get a handful of edamame beans to put in a bowl, add some water, and micro-wave to heat them up and then I toss some sea salt on them and eat the beans right from the pods. Yummy. They have a nutty flavor and these seeds may be direct sown into the ground or your patio pots if you want, versus starting them early indoors before the planting season. The packet holds about 100 seeds.

Some seeds need special treatment prior to sowing them, but tomato and hot pepper seeds are not one of them, but others like the moonflower needs to be nicked before you plant them. Otherwise, the hard seed coat prevents water from entering the seed for germination to start easily. When handling a seed that requires nicking (scarification), it is easier if the seed is bigger; it helps a lot as you attempt to make a nick in it without damaging the interior of the seed (the embryo). Many seeds with hard coats need to be nicked with a file, sandpaper, or a tool. Some may be soaked in water first. It is best to research the seed before proceeding and follow the recommended method. I have never seen a tool specifically for nicking hard coated seeds on the market (I think if someone invented it, it would sell like hotcakes). I read once that commercial growers use acid, something we surely can’t play with! Some hard coated seeds with crack open if you soak them for 24 hours.

Do you sow a whole packet of seeds? Let’s talk tomatoes, if you have 25 seeds in the packet, should you sow them all? Some may say yes because if any of them fail, you will have extra’s. Some will say no because are you really going to plant all 25 of those tomato plants? And if you did sow all of them, remember, you have to move them from the seed cell trays at some point into a next larger size pot and may even have to move them into a 1-gallon size pot before they go outdoors. This requires more pots and more potting mix.

Photo from Cathy T’s greenhouse – couple seasons ago. Can see the scatter method in the window box type planters.

One thing I love about the seed packets I get and sell is they are an envelope within an envelope. Each packet has a envelope (white) containing the seeds, and it has all the planting details on the white envelope. The white envelope is inside an outer separate envelope with even more plant information, and it is a colorful art pack made with a thicker type paper. It is almost like a little sleeve to protect your seeds within. I like that because if you don’t use all of the seed, you have a protected package to store them in.

Fox Cherry Tomatoes coming up – One seed per cell was used

Storing is another topic but when well stored, the seeds will remain viable based on the seed type and all of that, and the number of years is different based on the type of seed or plant. Look it up if you are concerned and use up all the seed if it is a type that doesn’t remain viable for more than one year. Parsley is an example. Parsley seed should be used in year one. At least for the type of parsley I have been sowing.

The next question that followed how many seeds are in a packet, was of course, ok, “How much soil (seedling mix) do I need?”

That is a good question! I love questions! LOL. The seedling mix often comes in an 8 quart bag in retail locations. I will put about that amount into a big bowl and add some water (I think it was one cup but I will double-check) and then very lightly stir it to moisten the mix. You don’t want mud or mush, you only want to lightly give it moisture. In fact, don’t pour the whole cup of water in there initially, pour some water, and mix and feel it in your hands. I often sow seeds in 32 cell plastic black trays with 3-3.5″ depth. I like that size plus they fit nicely on my seedling heat mats. I use about 8 cups of soil per tray, I believe. I will check my notes! Your containers or seed trays should be filled with pre-moistened mix or medium (as they refer to it) before you put your seeds in the trays. You may also moisten the mix in a plastic bag if you don’t have a bowl handy. Another method is to put the dry soil into your seed trays and set it in a base of water so the water will wick up into the mix prior to sowing your seeds. I don’t do this method however. I mix the soil with water like a cook does in the kitchen in a big bowl and it works for me. The seed kits I offer has mix, trays, and instructions as well.

By the way, I like the plastic trays because they are pathogen free and reusable. I have had issues with peat pots before. For some reason, they tend to grow mold on the sides. I tend to stay away from those now, however, if you use peat, I’ve read you need to moisten the pots first and never to reuse the peat pots which would be difficult anyhow because they fall apart. Peat pots are great for plants which do not like their roots disturbed (cucumbers) so you place the peat pot and the plant right into the ground when they are ready for outdoors. And I have never used compressed peat pellets. They are just not for me, perhaps because I always have soil mixes on hand. In fact, I got all my soil bags already last week. I wanted to plan ahead. More on the soil and potting mix world later, that is a big topic. Sowing starts in March so I am preparing ahead right now in January – and you should too!

Thanks for visiting.

Cathy Testa
860-977-9473
containercathy@gmail.com
See http://www.WORKSHOPSCT.com if interested in seed packet purchases.
Location: Broad Brook, CT
Part of East Windsor, CT

All You Need to Know About Starting Seeds Indoors

2 Comments

If you search the web, you will find a plethora of sites offering many articles, step by step instructions, growing charts, and tips, but will any one link or article give you all the simple answers you need to start seeds indoors? Probably not.

Think about this – there are millions of vegetable plants you may grow from seed in our world. How could anyone sum it all up in one fell swoop?

When I started growing vegetable plants from seeds, the desire to do so was sparked by the love of art packs from a particular seed company. The art sparked my interest and then I started to buy seed packets. I was interested in unique tomato plants and flashy hot pepper plants, rather than the traditional types I ate growing up on a farm. Maybe I got overloaded with the same types of tomatoes from when I was a kid, I don’t know, or maybe it is my love of art and creativity that got me into the different, unique, interesting varieties because they are like a work of art to me. A colorful purple tomato to me is cool. Or a pepper shaped like a UFO – that rocks! Plus you get to eat them and they taste delicious.

Need I say more? This is a photo from last season!!

However, I have spent countless hours reading seed sowing books, reviewing growing charts, looking up frost dates from different sites and all of which seem to give a slightly different answer, and determining what supplies and seeds are best for my area of Connecticut, and then I spent hours putting my own guides together. I guess, in some ways, it is good that I am an organized person and an over-thinker! Maybe I looked at too much, because my head would spin. After all, you could just buy a pack of seeds and plop them into soil, and it would sprout – but would it be successful?

Today, I want to try to share some of my seed sowing considerations in a random casual fashion:

#1) Start small and pick easy to grow plants. So, what veggie plants are easy, what grows like weeds? Hmmm, well, that is a tricky question. One may say, well a pumpkin seed is sure to pop up from the soil or a cucumber seed, but do you like pumpkins, do you have space to grow pumpkins in containers or a garden? They sprawl out for miles (well, for many many feet) and so that may not be the best choice for you. And cucumbers, well, they vine up and down and all around, but they don’t like their roots disturbed, so even though they are easy to grow, they have considerations if you start seeds indoors and then transplant. In my opinion, some herbs are easy to grow, like parsley, or mixed lettuces seem easy, or some basils, but even if they are easy, they all have unique personalities to consider. For example, basils like warmth. If you put them out too early when cool in the early spring, they don’t like that and won’t flourish. Cherry tomatoes are easier than regular tomatoes in my experience. No matter what – you will get tons of cherry tomatoes from one plant – it is amazing! Parsley is easily and it likes a bit of the cooler weather, unlike the basils.

Shown in this photo, Thai Basil (top left), Sacred Basil (top right), Curley Parsley (bottom left) and Genovese Basil (bottom right). Easy to grow herbs, as seen last year!

#2) Get the tools ready. Do you need a grow light? Many people will argue you do. And it does increase your success at sowing vegetable seeds indoors. But what is success? A perfectly straight upright seedling? Maybe. Maybe not. After all, I know many people who grow seedlings in seed trays set on their old fashioned heat radiators in their home, and the seedlings leaned towards the window for more sunlight, but they made it – and make it into their gardens. However, as you learn more, you start to consider the options of getting a lighting system so it increases your success and makes for healthier seedlings. As for myself, I have a greenhouse which provides sufficient lighting when the sun is out. In early spring, on many days, there are cloudy days. So far, I’ve gotten by just fine without grow lights. As I learn more, maybe I will get grow lights to add to my set up, but it is not going to be this season. Anyhow, what I’m getting at, is at a minimum, think about the tools you will need to sow seeds and start to pick up your supplies based on what you think you want to grow. BTW, I do use heat seedling mats to encourage germination of the seeds and to increase the start of healthy roots. This I have found helpful to invest in. That is a tool you may want to consider ordering now.

#3) Soil mix – This IS critical. First, for the ultra beginners, you should know that you can not sow your seeds in dirt from the ground for vegetable plants you need to start indoors in seedling trays ahead of the growing season. Believe it or not, when I offered seed kits last spring, one person thought you could put dirt from the ground into your seedling trays. They said my instruction sheet enlightened them and they had no idea dirt was a no-no. So, when you go out to get your soil for sowing seeds indoors, get bagged seedling mix or sterilized potting mix for patio pots. Either will be fine. The seedling mixes are finer than potting mixes, usually fresher since it is going to be seed sowing time soon, and perfect for tiny seeds to make contact with the seeds, etc. If you don’t want to deal with that, and want to sow seeds in the dirt, pick vegetable plants that you may directly sow into the ground after all chances of our spring frost and when the garden soil is workable. But you need to determine which plants you can sow directly into the ground, things like beets, for example. Some plants prefer to be directly sown into the ground. If you pick this option – remember, you have to prepare your garden area ahead as well.

A tomato seedling that was potted up into a larger pot by Cathy Testa

#4) Timing. This is another critical factor. All plants grow at different rates. Some take longer and some are faster. They need a certain number of days or weeks before they produce fruit. If you start your seeds too soon, they will be outgrowing your starter pots, getting root bound, start to struggle for the moisture it needs, and even start flowering, which leads to fruit (and for ultra beginners, flowers are where the fruits are produced. I don’t mean to sound rude or condescending, but if you are new to the world of gardening and plants, and didn’t know this – don’t feel embarrassed. I didn’t either when I was a kid and I grew up on a farm!). So, say you sow your tomato seeds too soon, then they grow larger and larger indoors, and then you need to put them in a bigger pot, and then they get flowers and then, you want to put the plant outside but it is still too cold out – it may even freeze one night if the temperatures drop down. You could loose the flowers from the cold temps, now you will have no fruit. Potentially, all your seedling work is lost. The same goes for starting seeds too late. If you start too late, your plant will sprout, it will grow, and you will think, awesome, and, now I can put it into my gardens or containers in spring outdoors, fine, but then you wait and wait and wait after its been growing in the garden, and it is almost early fall and you still don’t have any peppers. You started the seeds too late indoors. Peppers take more weeks to produce their peppers for some varieties (as an example), they have a required longer growing season. Timing is a critical thing. Get yourself a seed sowing calendar, look it over, and count back the number of weeks it indicates on the seed packet (or inside the packet) as to when to sow your seeds indoors. You count back from your last frost date in spring which in Connecticut usually falls around mid-May. If you end up buying seeds from me or a seed kit, I already did all this timing homework for you in my charts and calendars based on the seeds I will have available for sale.

#5) Okay, what else is needed? I guess it is Determination + Enthusiasm. Last year, we had the start of the pandemic and lots of things were short in supply (including some foods), AND as we all know, people were home so they had time to start their own gardens. The enthusiasm to start sowing your own seeds for your own amazing vegetable gardens was very high, and many people came to me for advice and for seeds or seed kits. Everyone was so enthusiastic, I just loved it. The pandemic even created a seed shortage by seed companies because so many people were trying to grow their own for the very first time! But, growing plants from seeds is not like making brownies for the first time. You read the directions on the box, set it in the oven after mixing all as directed, and you are successful, and you eat the brownies. Sometimes in the plant world, there are factors out of our control. So, you read the directions, you sow the seeds, but then all of a sudden there is an issue after planting them outdoors and they’ve been growing for a while. Say it is blossom end rot or a tomato horn worm, and ack! You are bummed!! But if you are still determined, you will succeed. So you take on the challenge, fix it if possible, and then you reap the rewards of an amazing tomato harvest or pepper harvest. And it feels good, it tastes good, and it is right there at your finger tips. Oh, again, that makes me remember something, I think cherry tomatoes are easier to grow from seed than regular tomatoes, so that is another tip for beginners. Usually you get lots of cherry tomatoes! Like tons of them! Did I say that already?

Heirloom Tomatoes I grew from Seed!

Will those of you who gave tomato and pepper growing from seed last season give it a go again this season? Yes! I know you will. I know there are some of you that so enjoyed it, you are on board. But maybe not, maybe you thought all these considerations were too much, too many things to think about, and if you don’t like to water plants, talk to them, and treat them like a cherished pet dog that needs care, well, then maybe you won’t. That’s okay too. The choice is yours and if you decide to make that choice again this season, and get seeds and/or seed starting kits from me, I promise to be your cheerleader and encourage you as well as give you as much information as I can about how to start sowing seeds indoors based on my experience.

Thank you,

Cathy Testa
Container Crazy CT
Broad Brook/East Windsor, CT
860-977-9473
containercathy@gmail.com

For details about my seed offerings, visit http://www.WorkshopsCT.com.