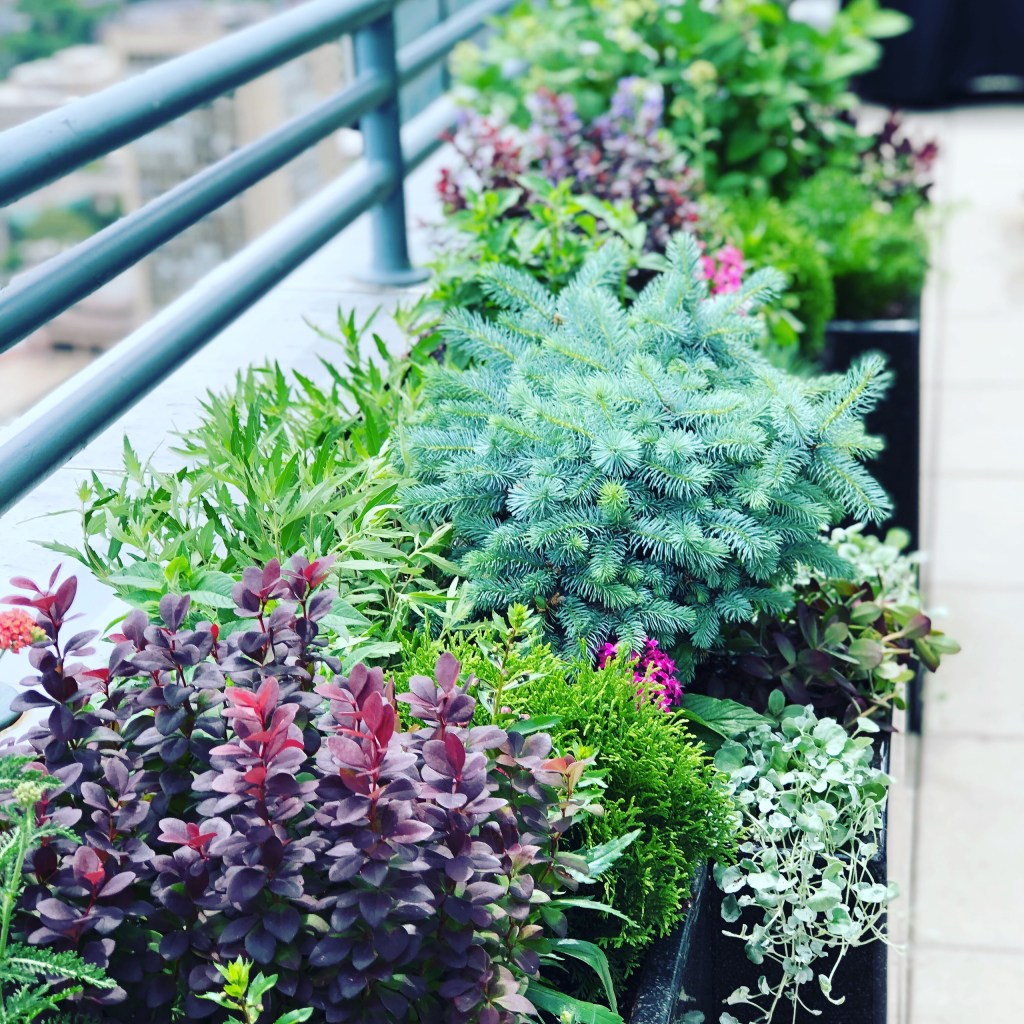
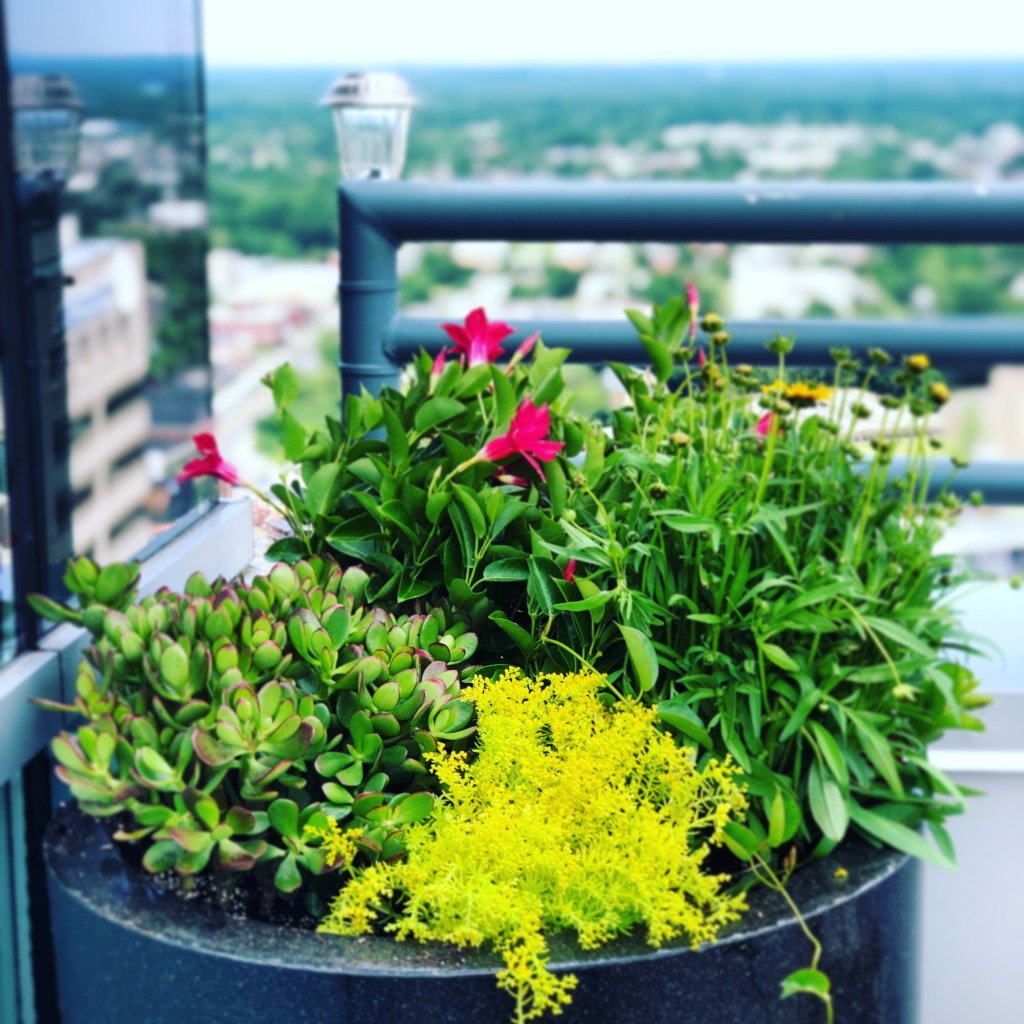
These are photos of vivid reds and yellow blooms in large patio pots showcased on a high-rise balcony. As you can see, the yellows and reds of the flowers on these plants stand out. They are also very drought tolerant. And full sun lovers.
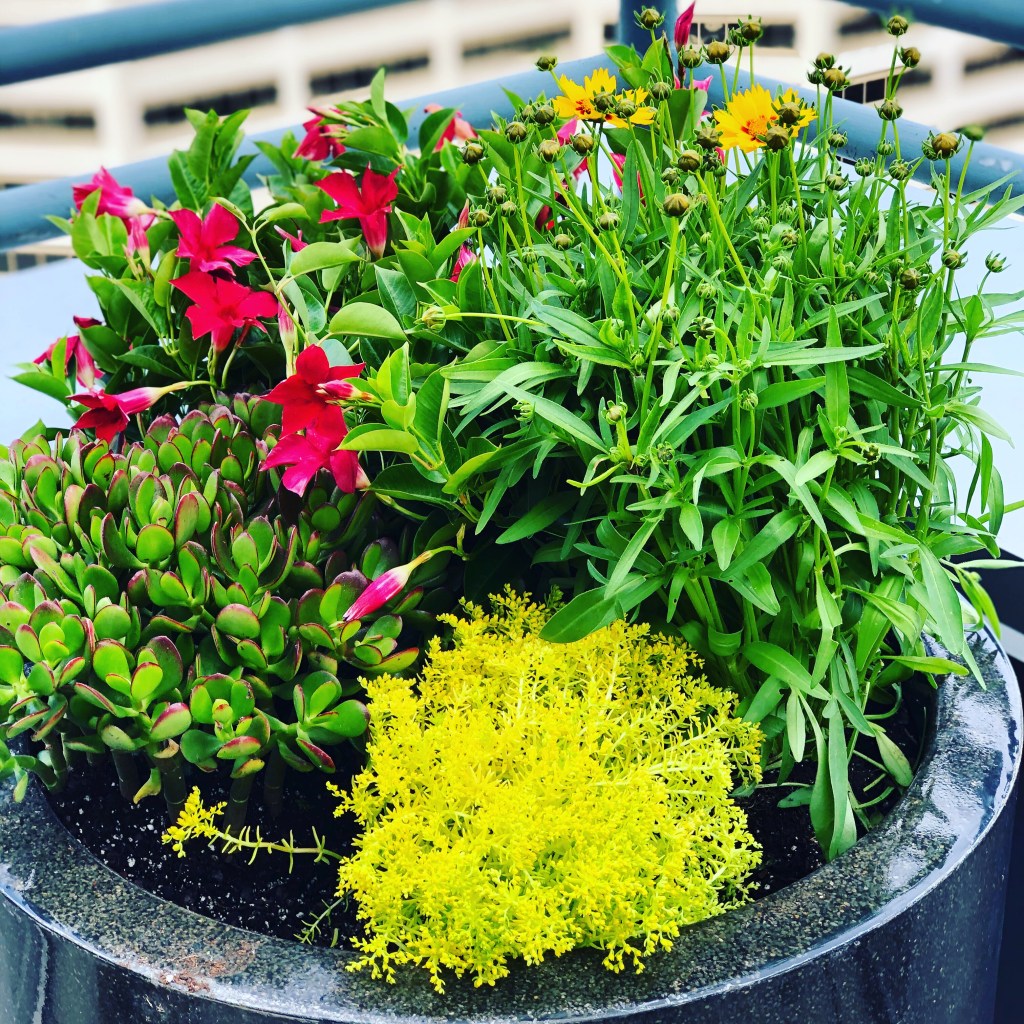
I planted this combination on a high-rise balcony many years ago. The conditions up there were brutal in the summers at times. It was very sunny and hot for the first half of the day. The second part of the day was shaded due to the height of the building’s walls and the sun’s movement. But it also was extremely windy at times, and as hot as a very hot beach summer day. Notice in the next photo how much the blooms opened up.
The pots shown here were quite large. Plenty of quality potting soil was used. Some soil moist was added to help manage moisture levels. I also added slow-release fertilizer into the soil. But it was key to find plants which would survive the high-rise conditions. They must get water too. It was imperative to find plants with strong abilities to survive in the sun, wind, and heat. These plants did this well. These also did not need lots of clean up. The faded flowers of the Coreopsis are easy clipped off (deadheaded) if needed. All the other plants held onto the flowers in this combination.
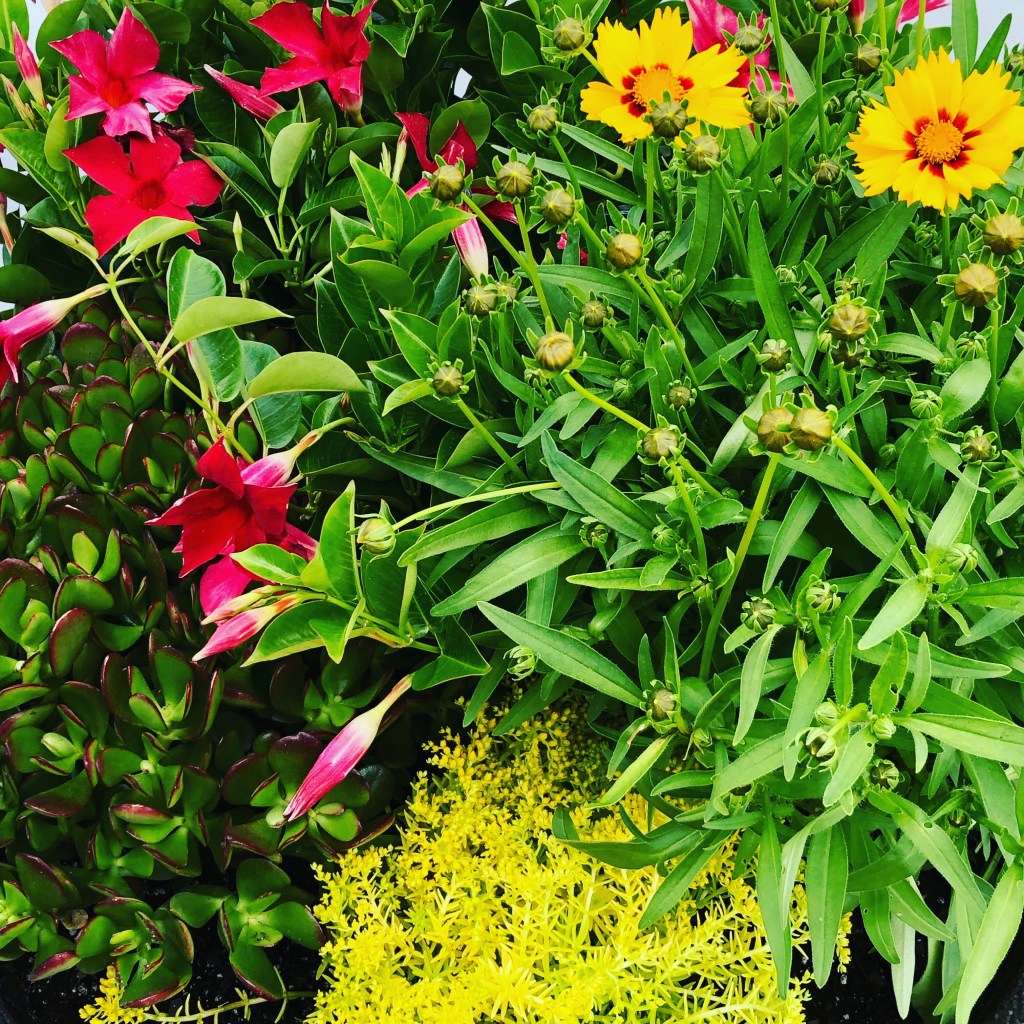
As the summer progressed, the plants became full and offered super bright colors seen from afar. This was good. The view from the balcony owners’ large living room allowed them to see the reds and yellows. I also focus on different textures too. You can see the fine texture of the yellow Sedum. The larger oval leaves of the red edged Jade plant are also visible. Yes, a Jade (as in a houseplant). I never overlooked using houseplant candidates as well as perennials and tropical plants. Just like in a garden, textures add the drama and flow needed to please the admiring eye. I often held up plants next to each other. I did this to look them over and see if they seemed to work together. I was just like that with my eyes. I would figure out if they played well together visually. I also needed to know the plants’ overall habits and culture needs.
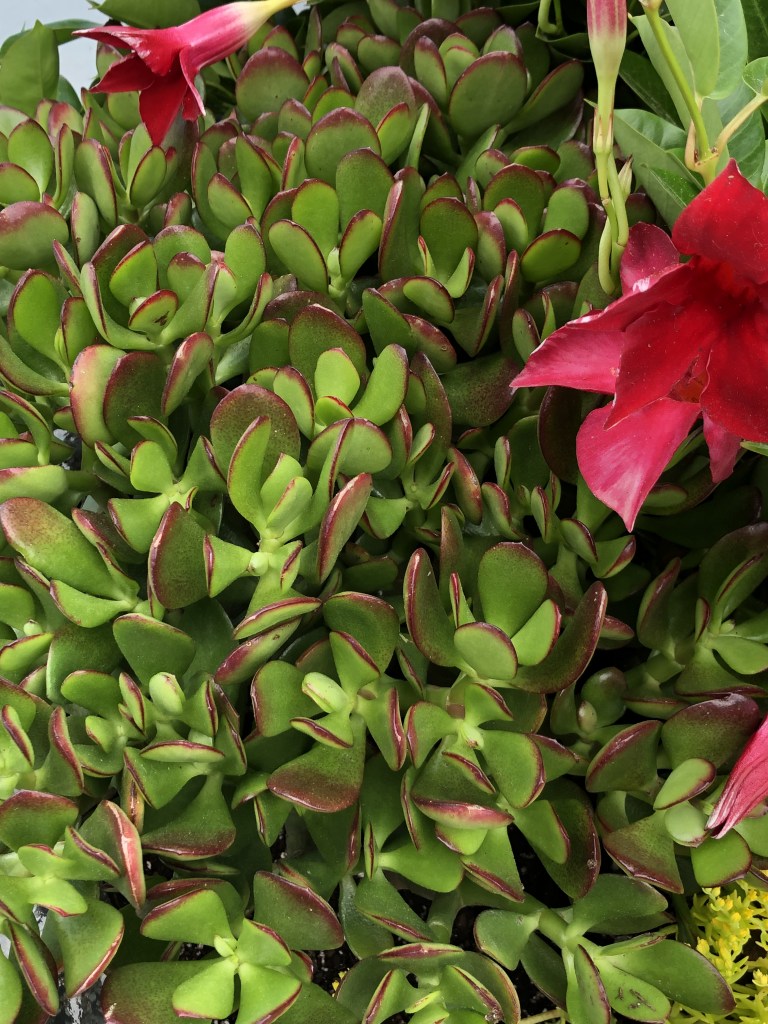
This is a Jade. It was a rather large plant. I loved the red edges. The red color only intensified in the patio pots with the full sun conditions. There was lots of warmth and heat on sunny days. These were able to withstand drought like conditions. I always emphasized that the owners should water every day. Plants need water. The soils dry out rather quickly up there on the top of a building in the city. And the owners were fantastic. They did water the plants as often as possible. They got an A+ on that as it wasn’t always easy, there were no faucets or hoses outside. All water was carried from the inside to the outside in buckets! When it rained, that was a bonus.
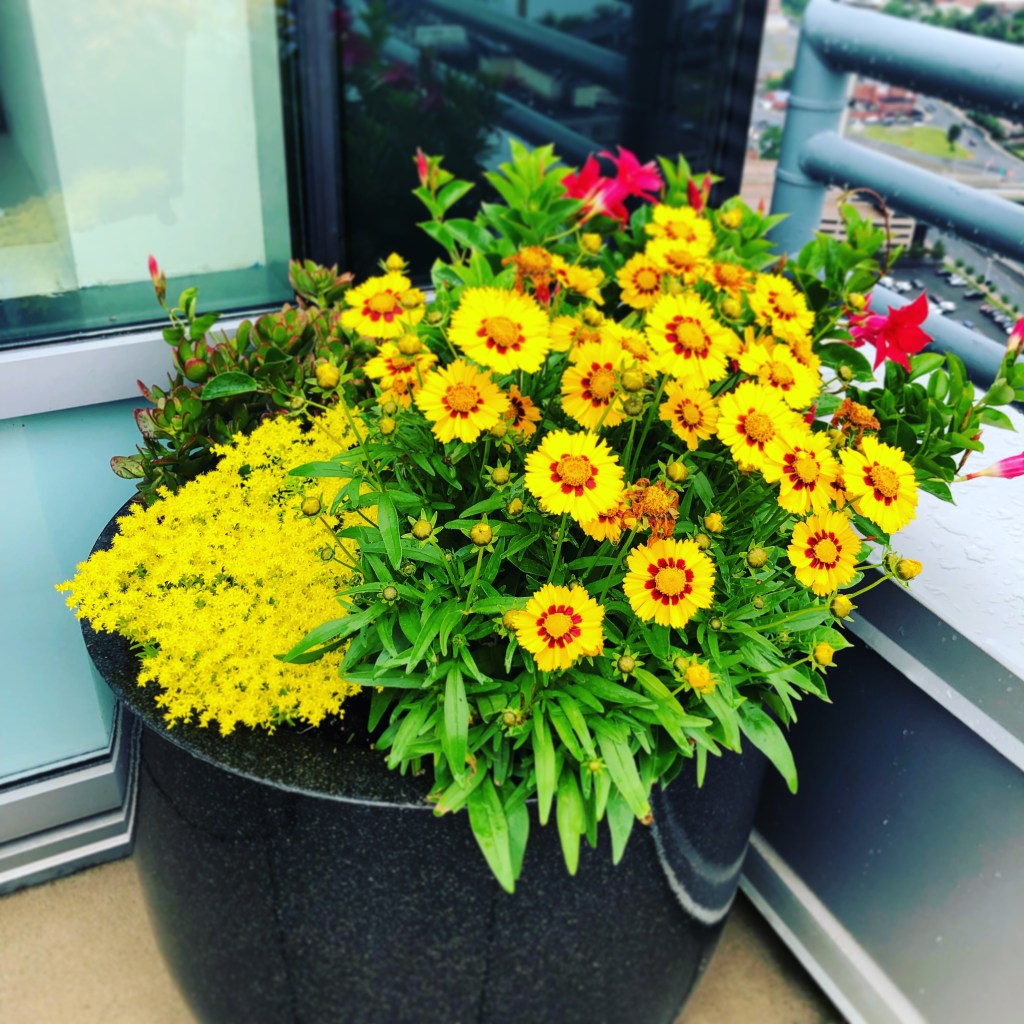
The yellow plant in the front is a Sedum. It is called, Lemon Ball Stonecrop Sedum. A perennial. Talk about an intensely bright yellow! Really pops. It was perfect for the front of the patio pot, tucked in nicely. That plant in this combination was a little more delicate. But, its vivid yellow was unbeatable.
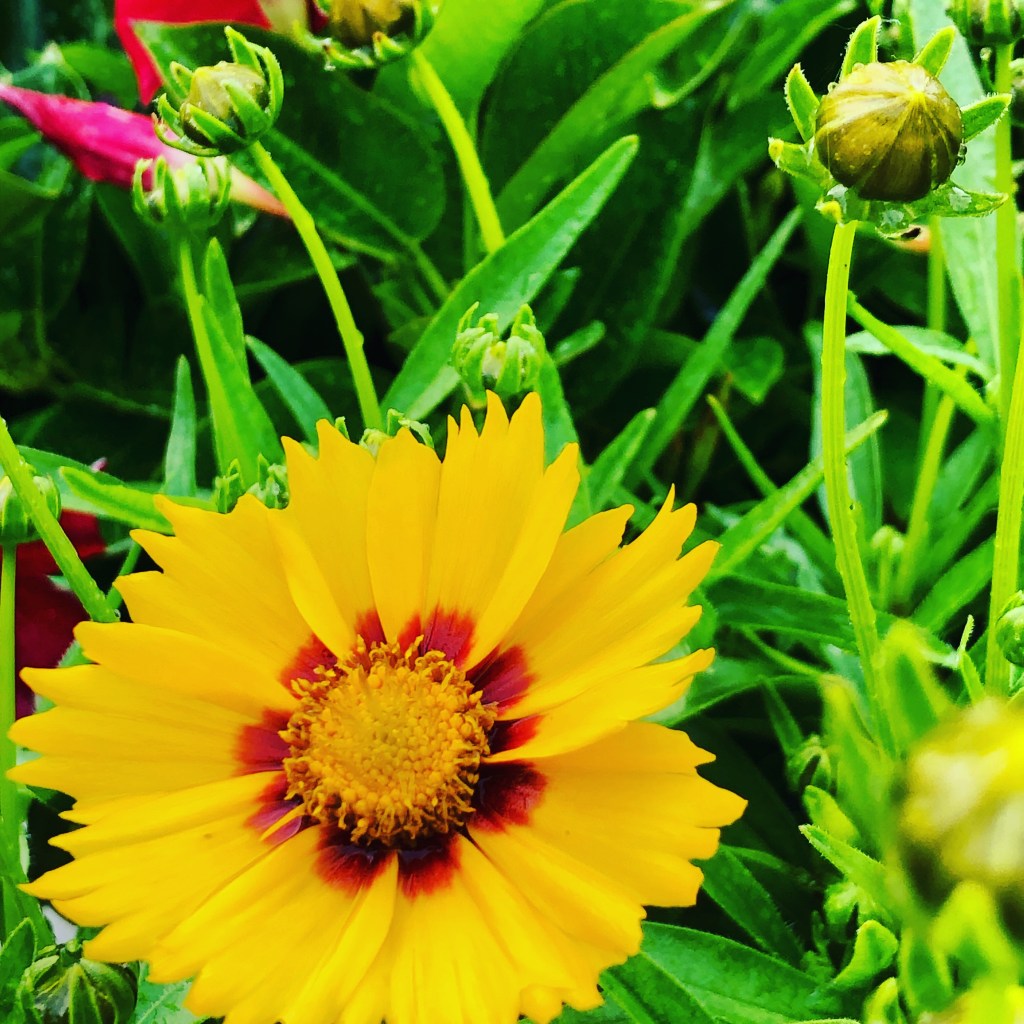
And a must on everyone’s list is flowers which bloom most of the summer. I added these Coreopsis because of their beautiful yellow coloring with red centers. They also handled the drought conditions quite well. This one is called, ‘Baby Seed’ Tickseed Coreopsis. These are butterfly magnets and work well in rock gardens too. It was always a treat to see a bee or two. I enjoyed seeing a bee come by up there when I put flowers into the customer’s containers. Way up there. I think it was 26 floors high, or was it 28? I can’t remember, but it was up high. If you couldn’t handle heights, you would not be capable of work up there on their open balcony. It didn’t bother me to look over the railing to the city streets below. It was a unique planting experience and a great learning one too due to the high-rise location.
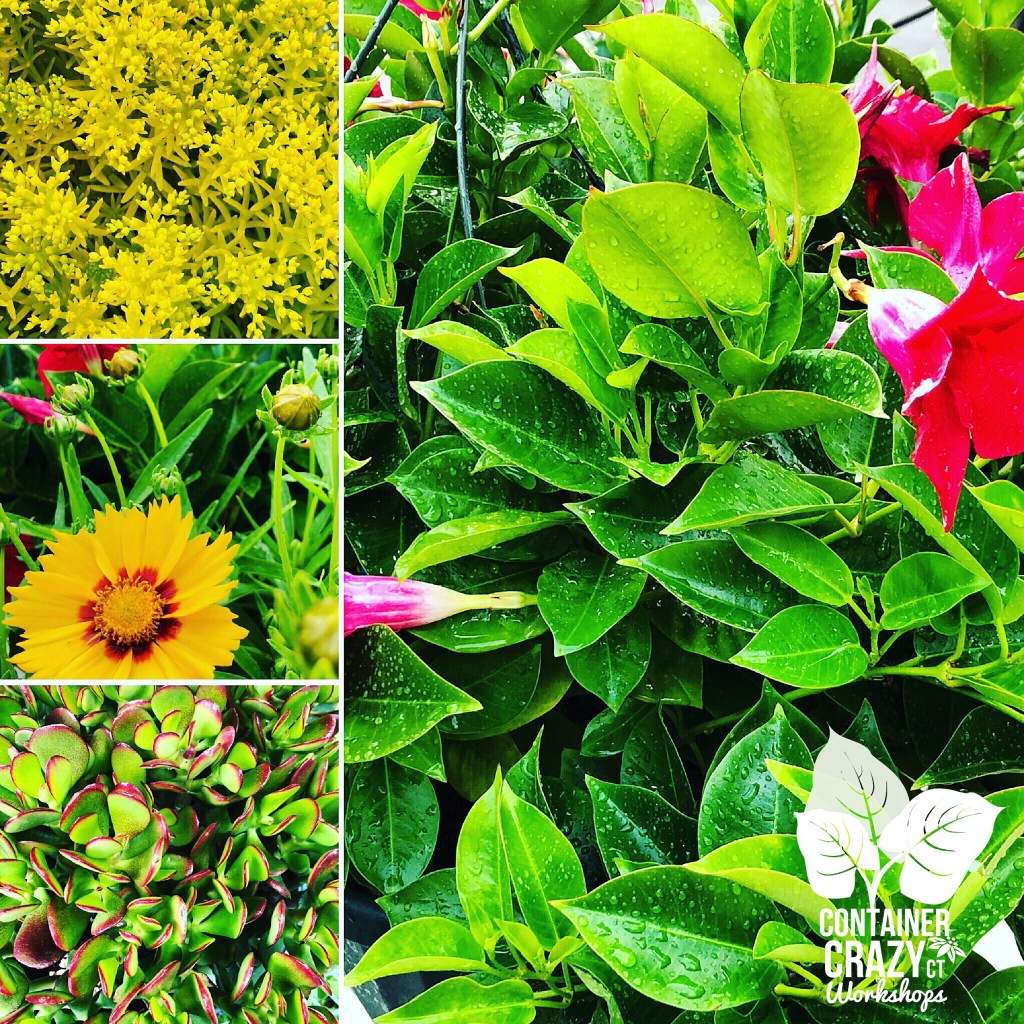
And there are of course the Mandevillas or Dipladenias. Big pretty blooms. Red on these and a vine-like habit. This one did not vine as much as others, but it was a staple for my balcony garden working days. They tolerate the winds, hold onto the flowers despite winds strong enough to move heavy furniture on the balcony. Furniture which had to be chained down appropriately always. Tropical plants they are.
Experiencing working on a high-rise balcony was one of my ultimate pleasures of having my former small plant related business. I only felt disappointed that they (the penthouse owner’s) did not discover me sooner. I wish I had worked up there when I was younger. I would have been able to handle more of the physical aspects. I was a solo worker. It was sometimes a challenge to figure out how to get all the soil bags, plants, and more up there. Because I am organized, I found ways to maximize my trips up the service elevator. I used wagons and a hand truck. I used the appropriate boxes and bins. I did it and I loved every minute of being up there. Well, maybe on those super-hot days, not so much. But I loved the plants and expansive balcony views enough to keep on working up there. It was an honor.
Cathy Testa
Date if this post: 1/29/2026
In this patio Pot: