Anchoring Holiday Evergreens in Your Patio Pots

5 Comments

This morning I read a post about collecting evergreens for container garden decorations, and it reminded me of how I once got yelled at for taking cuttings of wild berried shrubs by a roadside. Long story short, check with homeowners, even if the property looks abandoned or vacant!

winter jun

Winter Evergreens Touched by Snow and Ice 

However, seeing the post referenced above, and considering the many times I’ve put fresh evergreen cuttings and stems into patio pots and container gardens this time of year for holiday decorations, I thought I’d share the following quick tips on the how to anchor the stems, cuttings, and branches into your pots or container gardens:

Use Last Year’s Soil

Mentioned many times at my workshops and container gardening classes, leave the soil mix in the pots when you disassemble your containers in the fall season. It makes the perfect anchor for inserting your greens in winter. It is a great way to extend the life of your soil.

ContainerGardenTakeDown_0008

Boil Some Water

If the soil mix in the pot is frozen or a bit hard from a frost the night before, pour very hot (almost boiling water if possible) into the soil or over the top. It will soften it up just enough to insert your greens. This can be a bit of a pain, but it works! This is when the soil was moist prior from rainfall or plants, but if the soil is new or dry, the opposite is needed – If you poured fresh dry mix into a pot, you will want to moisten it because it will freeze later and hold in your newly inserted evergreens and stems very well during the winter months.

Spray Foam or Florist Foam

I have not attempted this idea, but saw it last night when browsing Pinterest – and thought, ‘Hmm, perhaps useful.’ Spray foam (the type used for construction gaps and cracks in walls available in spray cans) was used in a pot to insert stems and branches. A test of this will be done – but my initial reaction was, “Will the foam come out after, so the pot may be reused again next season?”

Another technique is using green florist foam blocks in a pot as the anchor base (the type of foam used to create floral arrangements). However, I find this to be an expensive option, and reusing soil mix from the prior season works just as well.

Custom Order

Weight the Bottom

There have been cases when a very tall and narrow pot has the potential to topple over from winter winds. I happened to have some old weights from a weight set sitting in my garage, so I put a round iron disk 3 or 5 pound weight plate in the base of the pot before filling it with soil. It makes the pot very heavy, but let me tell you – it won’t budge during a winter storm. The same could be done by reusing old bricks or stones in the base, however, you will want to remove them come next season if you use the pot for plants as it may clog the drain holes, but in winter, no problem.

Snowman in Pot by Cathy T

Tiki Stakes

Attach Tiki torch stakes at the base of birch branches, thick stems, or poles and insert into the soil to attach a holiday themed decor on the top of the pole or branch. They are available in places like the big box stores, hardware stores, and online – It really helps to anchor and insert heavier items. (Note: It might be a little harder to find them in stores during the winter – get them during the summer months.)

Cathy T Winter Pot

Pot Types

And last but not least, remember not all pots can remain outside – they must be tough enough or made of material to withstand the winter conditions (e.g., cast iron, double sided pots, wood, hypertufa, tin, metal, or frost free pots). See my Page on Pot Types.

Cathy Testa
http://www.ContainerCrazyCT.com
860-977-9473
containercathy@gmail.com

Don’t forget – Container Crazy CT has Holiday Gift Cards Available!
Email us today to get your’s in time for the Holidays.

Holiday Gift Cards and New Workshops

Leave a comment

Gift Cards and New Workshops

Hello everyone,

‘Tis the Season’ to get started for your upcoming holiday fun – So, here’s a heads-up on new items and activities I am super excited to share with you today. Container Crazy CT has new workshops being offered in 2016, gift cards available for the holidays, and more.

New Gift Cards

Container Crazy CT has new “Gift Cards” available for purchase. They are redeemable towards workshops, onsite consultations, container garden gifts, or seasonal plants. Perfect for the friends and family members in your life who enjoy DIY classes, plants, gardens, containers and art fun. The card has a beautiful holiday theme cover with a colorful container garden photo.

Greet Card Gift Card

A beautiful card with container garden photo

Returning Guest Artist

Laura Sinsigallo of timefliesbylauralie is returning as a guest speaker in 2016. We had such a wonderful time learning how to make her unique and eclectic wind chimes the last time she was here and she enjoyed teaching our group. As you know, Laura Sinsigallo has many talents from paintings to cute figurines for special holidays – she is a very creative person. Her program will be in April 2016 and the special Art Work to be made in class will be announced very soon.

Laura Sinsigallo with her painting - Out guest artist in April

Laura Sinsigallo with her painting – Out guest artist in April

Floral Design – New!

Mandy Mayer of jemshorticulture.com will be our new speaker at our 2016 workshops. I am so excited to have her join our list of guest artists. She designs beautiful bouquets and floral arrangements for weddings and special events. Her business is called “JEM’s Horticulture and Floral Design” located in Stafford Springs, and you won’t want to miss this workshop. We plan to have her program offered in February 2016. Stay tuned for details.

Photo by M. Mayer, Floral Designer

Photo by M. Mayer, Floral Designer located in Stafford Springs, Connecticut.

Kissing Ball Class

The first class is full, the supplies are ordered, and the workshop space is being adorned! So excited to have NEW and REPEAT attendees coming. If you were unable to sign up for this class, mini workshops are offered during the week following the first workshop date of 12/5. And don’t forget to bring your own florist wire and decor to adorn your balls, wreaths, etc. Looking forward to seeing you!

Special Orders for Wreaths or Kissing Balls

If you would like a handmade wreath or kissing ball, please don’t hesitate to ask. And don’t forget to visit my Pinboards and Instagram pages for inspirational ideas. It’s time to get your jingle on.

See you soon,

Cathy Testa
Enhance Your Outdoor Surroundings…
860-977-9473
containercathy@gmail.com

Overwintering Canna Plants from Container Gardens

19 Comments

Hello Visitors,

As noted yesterday, I am beginning to disassemble, dismantle, and take apart my container gardens and patio pots.

As I do, I will share with you the photos and steps in the event you can not attend my demo on Oct 17th, Saturday.

Yesterday, I took apart one pot of Canna plants. I selected the tall red one, figuring it would be easy to show you what I do.

Canna plants may be kept in the pot and stored inside, but today’s post shows you how to store the rhizomes.

Rhizomes

Rhizomes are the storage organs which are swollen stems under the soil that usually grow horizontally, below the soil about 6-8″ from the top of the soil line in the pot.

Mature rhizomes may be cut into sections to produce more plants, but you don’t need to do that step now. Just remove them from the soil and store them in peat moss.

Other Overwintering Options

Option #2: If you have a nice sun room in your home, you have the option of continuing to grow your Canna in the pot. However, I find if you keep your Canna plants in the same container for several years in a row, they start to get crowded and tend to not bloom or flourish as much.

Option #3: A third option is to leave the Canna plants in the pot and move it to an unheated basement where it remains cool all winter, but not below freezing. The plant will go dormant and may be revived the following spring after spring frost. In this case, however, you will need to watch for insects and water it sparingly so the soil does not go completely dry during the winter.

Canna Rhizome Removal

Tools: Clean pruners, loppers, or if you are not a full time gardener with various garden tools, use a long kitchen knife (like one you would use to cut bread).

When: You may wait until the Canna plants get hit by our fall frost later in October, and many references will say wait until it gets hit by frost. However, I’ve stored rhizomes in fall before frost and all works out fine as well.

Canna Australia in a Tall Red Pot

Canna Australia in a Tall Red Pot

Cleaning: Using sharp, clean tools is important to prevent pests and diseases from being transmitted to your plants or storage organs (rhizomes). It is also a good practice to wear gloves and wash your hands as you work, and wash your pots when you are done dismantling everything.

The Steps

Step One: Cut the stalks at the base, leave a little 5-6″ stub if you want. Most important – make a CLEAN cut. Do not tear, pull, tug or make a jagged like cut – the cleaner cut the better. If the stems are thin, pruners work. If not, I like using loppers for a clean cut. If you use a kitchen knife, remember to make the slice/cut as clean as possible.

Clean Cut at Base

Clean Cut at Base

ContainerGardenTakeDown_0022

ContainerGardenTakeDown_0020

Step Two: Remove other plants in the pot and save as needed or toss. Then remove the root ball. Usually, if the pot does not have a edge on the top rim, it slides out just by turning it over or rolling it on a table (unfortunately, for this red pot, I had to work at removing some soil inside to get it out).

ContainerGardenTakeDown_0024

ContainerGardenTakeDown_0018

You can see a rhizome poking out of the soil here in this photo above. This can help to locate where they are but you will not always see this in every case.

Step Three: Cut off (slice off) the bottom half of the soil mass. Be careful to not cut the rhizomes which should be about 6-8″ from the top of the soil line.

ContainerGardenTakeDown_0016

ContainerGardenTakeDown_0021

Step Four: I placed my hand to show about the distance from the top of the soil to where the rhizomes are in the soil. Start to remove the soil away from the rhizomes using your hands or tools. If you use tools, try to not damage the rhizomes accidentally — but if you do – don’t panic. Rhizomes are often cut into sections for propagation, it won’t kill them if you break one by accident.

ContainerGardenTakeDown_0017

Step Five: Pull the stems a bit apart, they may break away freely, meaning the rhizomes will separate. Take one stem in one hand, and another in the other hand and pull them away from each other, you will see how they break away. Then clean off as much as the soil as you can. You may use a garden hose to wash them off with sprays of water, but I don’t always do this because then the rhizomes get super wet. In this case, I did to show you how they looked.

ContainerGardenTakeDown_0015

Step Six: Trim off the stem stalks. I do this because any fleshy material stored has the potential to rot in the box of peat moss. I even trim the roots if they are super long with sharp pruners. Then let them air dry a bit (couple hours).

The last step is putting them in a container (box) with peat which I will show in tomorrow’s post.

ContainerGardenTakeDown_0023

In this particular case, the rhizomes were on the small side, but that doesn’t matter. Each piece you save is another new plant for next year.

Crocosmia (perennial)

This summer, I put a Croscosmia perennial in a blue pot. The hummingbirds adored this plant’s blooms. It was amazing to see them zip by every day. So, you have choices with perennials too on what to do with them if you grew them in your container gardens and patio pots.

They may be removed now and put into the ground to have in your garden or if you have a garage, some perennials will come back if you store the whole pot with the un-removed plant over the winter in the garage.

You may also bury pots with perennials in the ground, but I don’t like that idea because the pot will get dirty and probably worn out more – but this is an option. This information was noted on the container garden workshop handouts in May as well (for those attendees reading this information).

Before I cut back all the foliage from the Crocosmia perennial, which was tattered by the end of the summer, I collected the seeds from this plant for next season. They may be scattered in your garden or stored for next season.

I put seeds in prescription bottles. Its a great way to recycle the bottles and the label is available – with a quick sharpie marker, I write the plant’s name and date, and store the seeds in a cool, dark place until next spring.

ContainerGardenTakeDown_0009

ContainerGardenTakeDown_0012

The seeds are stored in pill bottles as shown above.

ContainerGardenTakeDown_0010

The root ball was removed from the blue pot. I decided to plant it in my big cement planter after doing a bunch of cutting back of the existing perennials in the cement planter, which also has some huge castor beans growing.

ContainerGardenTakeDown_0011

Then I put some stones around the Crocosmia to help me remember I moved it there. Even if I don’t keep it in this spot permanently, it is now saved for next season.

Crocosmia Blooms from a Prior Season

Crocosmia Blooms from a Prior Season

I love my big cement planter because the soil is so healthy and easy to work in, and dig in. Yesterday, I noticed some worm castings in the soil. This is what they look like below. It a sign the little critters in the soil are doing a great job of keeping the soil healthy. Worms increase air and water movement in the soil and help break down organic matter when they eat, leaving these worm castings behind which help the plant’s growth.

Worm Castings in Soil

Worm Castings in Soil

As noted in yesterday’s post, I sometimes put old soil balls/masses from dismantled containers into “big” pots or into gardens as a filler in the base – this is one example. The soil in this big cement planter is from former container gardens, and the worms moved in quickly. The soil is rich now.

ContainerGardenTakeDown_0013

Begonia from Tubers (see yesterday's post!)

Begonia from Tubers (see yesterday’s post!)

By the way, yesterday I wrote about storing tubers from tuberous Begonias. Here’s a photo of the plant from this summer (see above) which I found this morning in my files.

Note: The details about appropriate storing temperature, methods, and specifics by type of plant for overwintering various plants will be covered in the demo session on October 17th. If I were to write all the details here, this would be a very long post – and I’m wordy enough! But this shows you the basics. It is fairly easy to overwinter plants but there are other tips to be learned.

Keep tuned in – more tomorrow…

Cathy Testa
860-977-9473
containercathy@gmail.com

ContainerGardenTakeDown_0025

The Container Garden Take Down Process Begins

5 Comments

Hello Visitors,

I’m posting some misc photos this week of the work I will be doing here and there as I take apart my container garden plants. This is for the friends and workshop attendees who are probably ready to do the same – and I hope the information is helpful to you. As always, ask questions if you have them!

Tuberous Begonia

For the first time, I grew a tuberous begonias from tubers. They were started in early March indoors by placing the tuber’s hollow side up in moist peat. They must be kept warm and carefully watered to not over water or under water (keep moist). Shoots began to form, but it took a while for the plant to kick in and later produce blooms, but it was worth the wait.

Three of the plants were gorgeous and showed off orange flowers shaped like peony flowers (male flowers) and rose shaped flowers (female flowers) on the same plant. The stalks of these types of begonias are very fleshy and one plant leaned over from the weight of the plant by the end of summer, and from the force of the wind during last weekend’s rain storm.

I chopped off the top of the plant using clean pruners, and then tipped over the pot and got the soil base out carefully on a table. It was fairly simple to locate the storage tuber. I will allow it to dry a bit on newspaper then it will be stored over the winter in a cool dark place. These tubers should be checked to make sure they don’t dry out during this process in the winter months.

Tubers of these types of begonias must be dug up before our fall frost hits and dried slowly before storing them in peat moss at about 45 degrees F. Wish me luck – I hope to grow even more of these plants next spring!

Showing Steps of Taking Down a Tuberous Begonia

Showing Steps of Taking Down a Tuberous Begonia

Recycling the Soil

Recycling Soil for a Year or Two

Recycling Soil for a Year or Two

If you have attended my workshops in May on container gardening, you heard me go over the soil-less mixes and what I find has worked well over the years. I’ve also mentioned that reusing soil mix is not recommended, at least not for many, many years – and especially when you keep the mix in the pot with the plant. It just doesn’t retain water well or hold nutrients as nicely when it is worn out – BUT you can use it for a year or two, or put it into a compost pile, or sometimes – I will put it in a huge pot (like my big black pot with my red banana plant – see prior post on that). Putting it into bins like shown above is helpful. I remove all the foliage and make sure none of that it is the soil bin, and I put the cover on, but I also remove the cover from time to time to let it breath as the water condensates. These bins will be moved into my garage or growing room soon to stay over the winter and will be reused next year.

Castor Bean

Castor Bean Seed Pods

Castor Bean Seed Pods cut away from a huge plant!

If you are my neighbor or you drive down my road – you have definitely noticed the crazy size of my Castor Bean plants (Ricinus) at the end of my driveway.

A woman pulled in one day, drove down my long driveway to inquire what the heck was growing there. “She had to know,” she said.

This plant made me laugh every single time I left or returned home. It is massive! I’ll share pictures of it later.

This plant is easy to grow from seed. I got my seeds from Comstock Ferre in Old Wethersfield, CT this year. The plants reached about 12 feet tall at the end of my driveway. I also grew some in the ground in my backyard.

The leaves of this giant would be perfect to make leaf castings for birdbaths! This huge tropical can be impressive and comical, as mine was this season.

Just yesterday, I thought I better chop down one because it is becoming a hazard. It is blocking the view of oncoming cars as we leave our driveway.

As I cut it down with big loppers, my neighbor yelled out, “Cathy, What did you feed that THING?!”

Ironically, I gave it the ‘liquid blue’ only 3 times the entire summer, and it was only to the one growing in the pot. The other two grown by it’s side in the ground did not get watered or fertilized at all.

The potted one got watered daily however. I would fill a bucket in my car with water every time I drove out and stop to pour the bucket of water in the potted castor bean plant.

This plant gets huge stalks, which resemble bamboo. Its odd alien like flowers turn into seed pods with burrs on them, as shown in this one clump I chopped off yesterday. It did compete with other plants in the bed part though – my white lavender plants and bee balm were hurting later in the summer as the castor bean plants took over.

Castor beans do well in full sun – which the mailbox specimens were in most of the day, but they can take part sun too. The only other thing is that bed was filled with compost when it was edged with stone, so that is another reason why the plants probably did very well in the ground there too – good soil base.

And it is a fast grower, so if you decided to give it a try next year – take note of where you place it for it will take up space and compete for nutrients and moisture of other plants in the same bed.

Also, take note – all plant parts are poisonous. It is not overwintered by plant parts – but you may save the seeds to regrow them again next year. Or just see me in May.

Red Banana Plant with Two Coleus

Red banana plant with two types of Coleus

Red banana plant with two types of Coleus (Alabama on right, Icky Fingers? on left)

Okay, so I don’t always instantly remember the cultivar names, but on the right side is Coleus ‘Alabama’, which I love. And on the left side, it looks similar to the cultivar, ‘Icky Fingers’. These plants can be saved by taking tip cuttings and rooting them in water, then potting them up to save a small portion for reuse the following season. Or they may be cut back somewhat, dug up, put in a pot and grown as a houseplant over the winter by a semi-sunny window.

As for the red banana plant, I will be showing how to store what I call the “root base” of these plants at the October 17th session. This banana is a look-alike (not a true banana plant) but who cares, right?! This plant is gorgeous when it grows large especially. The leaves are broad and this cultivar ‘Maurelii’ (red Abyssinian banana) are reddish and lush colored with trunks of red coloring. They are relatives to Musa (true bananas) and I grow, overwinter, and sell these every year, obtaining stock from a local Connecticut grower.

These plants grow tall and large in our warm summers in big pots but must be overwintered since they are not hardy. You can move it indoors (if you have the space somewhere) — And remember, if you do move it indoors as a houseplant – do it before frost. Once it is hit by frost, the leaves turn black and to mush.

Or you can dig up the fleshy root base to store it over the winter in a cool place, just like you do with canna rhizomes. You can even store it in its container, if it didn’t grow too large, in a cool dark place until our spring arrives.

The steps on how I do this will be shown at my informal session on October 17th, Saturday. It is also shown on my blog post, step by step, from last October. I recognize you may want to take apart your’s at home now, so sharing all in advance as well.

Begonia ‘Gryphon’

Begonia 'Gryphon' Zones 9-11 - A Winner!

Begonia ‘Gryphon’ Zones 9-11 – A Winner

This begonia, at the base of this container garden, impressed me this season as a container garden filler. I ordered them from a local CT grower for spring, and sold this plant at my May workshops – and it turned out to be very impressive.

The leaves grew bigger than my hand, and the dark green leaves with little bits of white were showy – and healthy, all season. It was very reliable – and low maintenance. I just loved it.

It is considered a tropical plant – for zones 9-11, but is wonderful in our patio pots in during summer seasons. This type is best saved as a house plant. I will dig it out carefully with soil around its roots, and re-pot it into a nice pot to keep inside this winter. It should be kept by a brightly lit window area; not full harsh sun, but bright area inside the home. Be aware of drafts by windows in winter as well.

Lining Them Up

Lining them up

Lining them up

Besides moving 3 wheel barrel full loads of compost, which sat on my driveway all summer, I moved the pots which were carried down from my deck last week by my nephew and his friend to be lined up like soldiers. Somehow, they look taller here than they did on the deck all summer. I will decide which to tackle today and which to keep as demo’s for the workshop on the 17th.

Check-in tomorrow to see what gets done this afternoon.

Thanks,

Cathy Testa
containercathy@gmail.com
(860) 977-9473

← Back

Thank you for your response. ✨


There’s some cool historic stuff at the Farmers Market in East Windsor, CT

Leave a comment

The East Windsor Farmers’ Market is fairly new but its being held in a place which is not. Located at the Connecticut Trolley Museum, the market tents circle around the front lawn area of the museum grounds. The CT Trolley Museum is a showcase of historical exhibits showing how electric trolleys evolved and visitors enjoy a display of various trolleys in their main building.

Father’s Day is Opening Day

This weekend, Fathers get a free ride on the trolleys in honor of Father’s Day on June 21st. The old trolleys travel down a wooded street starting from the main parking lot area of the grounds for a few miles distance, and many of the trolleys are open-aired which makes for a fun breezy ride while you hear about the trolley museum’s history.

BackTrax Band at the Market

BackTrax Band at the Market

Opening Day Features BackTrax Band

On the opening market day which is this Sunday, June 21st, the BackTrax Band will be playing. Most of the band members are from the East Windsor area and they started playing together in late 1990’s.  They practice in a local family owned barn on a farm in town and move into the bars or venues like the markets to play for anyone interested in enjoying classic rock, country, and oldies.  So while you shop the market and browse the trolley museums features, you will hear some great music.

Great Seats to Eat, Listen, Relax

Great Seats to Eat, Listen, Relax

There are plenty of picnic tables at the market as well, so why not pack a lunch – or better yet – get lunch right there. This year’s market will feature many new foods – homemade pies, veggie samplings, and even some great hot dogs or Thai food. It is a nice place to enjoy some quality time with family and support your local enthusiasts.

Cathy T last year at the market featured succulent plants

Cathy T last year at the market featured succulent plants

Free Container Gardening Talk on June 28th

Another bonus, on the second weekend of the market, which is June 28th, I will be offering a free container gardening talk at noon. Look for me near the picnic tables.

My talk will cover a quick explanation of perennials and tropical plants, along with edibles, which all work in container gardens and why you should use them – These plants offer many benefits. Plus, we will go over the steps for success with container gardening and other tidbits you may not realize which will help or harm your patio pot and container gardens’ overall appearance and health, along with some design techniques and the right soil mix to use to control the growth of your creations.

A great place to walk your dog is at the market!

A great place to walk your dog is at the market!

Lately, I’ve been getting various bug questions about container gardens – there are reasons why some insects maybe showing up in your patio pots from time to time – and ways you can manage them or prevent them from happening again. I will share insight on this as well.

Usually by this time of year, many people have finished potting up their deck pots but this season’s weather has resulted in a somewhat slow start up – Our nights have been cooler and days not as hot for the start of summer – some container plants are slow to get going, thus, this visit is a great chance to get any last minute plants you may want to assemble in time for the July 4th celebrations. I will have various plants available or you may attend just to hear my talk, which I hope you do.

Address of the Trolley Museum is 58 North Road (Rt. 140).

Address of the Trolley Museum is 58 North Road (Rt. 140).

Whatever the reason for your visit to the market – to hear music, gets some fresh locally grown food, take a trolley ride, or hear some tips on container gardening – we hope you, especially those of you local to our town, will come support the market by attending and purchasing locally grown produce from the East Windsor market vendors.

Note: The market hours are 11 am to 2 pm.

Looking forward to see you there.

Cathy Testa
http://www.ContainerCrazyCT.com
860-977-9473
containercathy@gmail.com


Container Gardening Class at Strong Family Farm in Vernon, CT

Leave a comment

I grew up on a farm consisting of 100 acres of land along the Scantic River in East Windsor, Connecticut – and we had cows, chickens, a horse, rabbits, beautiful cherry trees, apple trees, blueberries, along with days of fishing in ponds, rivers, and even riding a mini-bike. Yup, I would jump on a mini-bike as a young kid, and go “outback” – which is what we called my parent’s property then and still do to this day.

There’s something magical about growing up on farmland. We explored a lot as kids. One time, I found funky shaped clay formations in a crevice where water ran off on a slope. As a child, I remember collecting them and checking them out carefully. Each was soft with round patterns and curvy shapes, formed by the action of rolling waters and clay soil on a hill side.

Flash ahead to my soil science class in my late-30’s and low and behold, our professor showed us a sample of the same thing. He said they are referred to as “clay dogs” and he found it interesting that I knew what they were immediately upon seeing him hand them out in class. He let me keep one of his samples, saying I was a soil scientist at heart. I don’t know about that, but the clay dog he gave me still sits on a shelf in my home office.

Being around nature is so inspiring – especially on a farm. In the summers, as a young kid, I sat on the side of my Dad’s hay baler to make sure the twine did not break as the square bales of hay passed by me when we rolled along in a large field. The sound of the tractor, the wind passing by, or the hot day’s summer heat would lead to more fun after our day’s work – because after we baled the hay – Dad would treat us to ice creams at Dairy Delight in East Windsor (a great ice cream place which still operates today on Route 5).

Sometimes, our trip for ice cream was in the pickup truck – we would stand in the back bed as we traveled down Scantic Road – something I don’t think would be allowed today. The breeze blew off all the hay dust from our bodies as we headed down to Dairy Delight. This is one of my very vivid memories – it was a fun ride for sure, and man, was that ice cream ever good after a hot day of baling hay, especially because it was shared with Dad.

We also swam in the Scantic River from time to time. My parents didn’t have to worry as we played “outback”, and my Mom literally rang a bell to call us for dinner time. We even had a fort and stayed over night in it sometimes. One time, our cows came scratching their backs against the outer walls of the fort and we sat inside quietly laughing – and being a little scared too, but they eventually left and our fun continued at the fort for that night.

Mom and Dad under a Catalpa Tree at the Farm

Mom and Dad under a Catalpa Tree at the Farm

Picking up a blade of grass from the field to put between your fingers and blow to make sounds was a little toy on a farm as I would take the walk outback down to the river. Or collecting walnuts to eat from our big walnut tree was an experience. When you are surrounded with nature, you begin to witness life and the curiosity sets in – at least it did for me. And of course, we had a barn, a barn where we held plays as kids – setting up a stage once – and acting something out as our parents and neighbors endured our little show. The list goes on.

Cathy T teaching a class

Cathy T teaching a class

That is why being asked a second time to talk about Container Gardening at Strong Family Farm feels special to me. Strong’s farm is located in Vernon and it has been standing for 135 years, once comprising more than 50 acres on West Road and Hartford Turnpike. The farm has served as the home and workplace for more than seven generations of Strongs. Just like our family’s farm is serving generations for us too – Today my nieces and nephews enjoy the nature on the farm like we did as kids. It is fun to witness their excitement as Grandpa sits them down on the tractor seat to pretend drive – something my nephew asks for every time they visit my parent’s farm- and he even refers to my Mother as “Chicken Mom” cause he knows when he visits, he gets to go see the chickens before going on the tractor in the big barn.

Located  on 274 West Street, Vernon, CT 06066

Located on 274 West Street, Vernon, CT 06066

Strong Family Farms hosts various activities throughout the year, such as their “Adopt-A-Chick” program offered each spring. For a small fee, participants foster a spring chicken over the course of 10 weeks. During this time, class members help feed and nurture the young chickens. If you don’t have a farm of your own, this place is a way to share a farm experience.

Annual Programs

They also host movies on the farm and have a community garden. In the fall, they have a Annual Scarecrow Contest and Harvest Festival. Check out their website at http://www.StrongFamilyFarm.org for details and dates – it is a great place for kids’ activities and very family oriented.

Container Gardening Workshop

The farm has large yellow barns and this weekend’s Container Gardening Workshop/Class will be held inside the barn – which is a unique experience also, as you look up at the big beams in the ceilings and sit on bails of hay. Even the sun beaming thru cracks in the barn walls reminds me of farm life as a child. Birds fly by in their meadows and old antique farm equipment hangs on the walls, making us feel the presence of the many past years of farming held in this space.

The farm life is so beneficial to your health and well-being, as we know – when you grow your own – you grow your spirit too. So, if you still have patio pots to pot up – come join us – the fee is only $10 for non-members and $5 for members of the farm and it is a fun activity for kids too. There will be various plants available for purchase and you will learn the steps for success and other growing tips.

Date: Saturday, June 6th, 10 am to noon @ Strong Family Farm, 274 West St, Vernon.

Please remember to bring cash or checks, as credit cards are not accepted. Plants to expect: Some large tropical plants (drama to containers), herbs, annuals, and even some houseplants and perennials. All attendees receive documentation and Cathy T tips. We hope to see you there!

← Back

Thank you for your response. ✨

Cathy T in-front of her chicken coop and plants at her home in Broad Brook, CT

Cathy T in-front of her chicken coop and plants at her home in Broad Brook, CT

Round Two – Container Garden Workshop in Broad Brook on May 23rd

Leave a comment

During this busy month of gardening preparations, this is a short quick post to first say THANK YOU to the wonderful attendees of Workshop No. 1 on May 16th.

It did not rain, we had tons of fun, it moved so fast, and everyone’s container garden creations with tropical plants, perennials, and annuals are beautiful.

And the second reason for this post is to remind anyone interested in Workshop No.2 on May 23rd.

Hands-On and Fun

Hands-On and Fun

To Register, fill out the Contact Form below
or text at 860-977-9473

Each Attendees Receives Instructional Booklets and Plant Catalogues

Each Attendees Receives Instructional Booklets and Plant Catalogs – Plus a GIFT bag

It’s DIY, Educational, Plant Filled, and about Potting Passion!

Cathy T shows how to work with color echos in your pots.

Cathy T shows how to work with color echos in your pots.

We Make Big Pots – for Big Statements!

Beautiful Creation by Attendee Donna at last week's class - Love the dark tones and textures!

Beautiful Creation by Attendee, Donna, at last week’s class – Love the dark tones and textures!

Cathy T talks about why Big Pots are important for Container Gardening

Cathy T talks about why Big Pots are important for Container Gardening

Attendees Get into the Zone - The Pot Planting Zone

Attendees Get into the Zone – The Pot Planting Zone

Talk about FOCUS! :)

Talk about FOCUS! 🙂

Awaiting Delivery After Class - So Pretty

Awaiting Delivery After Class – So Pretty

More photos will be posted in the near future – Stay Tuned.  Enjoy your Containers and Patio Pots!

Cathy Testa

Container Crazy CT

← Back

Thank you for your response. ✨

For More Information:

CLASS DESCRIPTION

Petasites japonicus (butterbur) – Awakens in a Pot every Spring

16 Comments

Did you know that some plants are big time troublemakers in the garden (invasive, prolific spreaders, aggressive) but they are amazing STARS in patio pots and container gardens?

My blog page titled “Troublemakers Turned Stars” talks about which troublemaker garden plants you may use in container gardens. And, it starts with this plant:

Petasites japonicus (butterbur)

Two pots, one on a table behind the other

Two pots, one on a table behind the other

Its key feature: HUGE ruffled green leaves reaching 32″ wide.  It prefers shade and may be used in water gardening because it likes moisture – lots of it. In fact, in a container garden, you need to provide it with a nice long watering to soak the soil well daily in the heat of hot summers.

Why it’s a star in container gardens and patio pots:  Because of its huge leaves.  I like lush foliage, so this one is a keeper. And because you can overwinter it very easily in a big container garden or patio pot just by moving it into a sheltered location after the season is over towards the end of Autumn.

My storage location for this plant growing in large patio pots is my little shed or unheated garage. I’ve been moving pots with Petasites in it for 3+ years now at the end of the season to store them over the winter.  It is best to cut back all the foliage after it gets hit by a light frost in Autumn.

In the Spring, roll it back out, position it somewhere to show the big leaves off which follow its flowering cycle. This plant is interesting. It shoots out flower buds first and leaves start coming out in various places in the pot after.

Here is a photo below taken this month of the flower pods rising. Once you have this pot outdoors, be sure to cut off the flower heads before they start to set seed because you do not want it to be carried by wind to your landscape to take hold because in the ground, this baby spreads like wildfire and is hard to control. You don’t want it in places where it will take over the landscape unless you know how to control it very carefully. And one way to control a plant like this is to use it in container gardens and patio pots.

Petasites japonicus, variegatus

Petasites japonicus, variegatus

Why it’s a troublemaker:  This plant has rhizomes at the base, and they grow rapidly via a spreading habit.  In the garden, they would easily take over an area and invade. They can be a problem to remove.  In fact, in a container garden, sometimes the roots will creep up to the top of the pot or out of the bottom of the pot’s drainage holes.  They are ambitious. One way to provide extra reinforcement is to sit the pot on top of another as shown here.

Place the Pot with Petasites on top of another

Place the Pot with Petasites on top of another

Moved into the shed for winter after a haircut

Moved into the shed for winter after a haircut

Caution:  If you decide to use this plant in a container garden, be aware when it flowers, the seeds can self-sow in the garden. Sometimes, I’ve kept mine raised above the ground on an elevated deck, so this has not been an issue. Or again, as shown above, situate it on top of another pot filled with soil so if the roots escape, they will go into the soil in the pot below it.

At the end of the season, rolling these back into a sheltered location such as a garage, shed, or other space is plenty of protection to keep it alive in a dormant state until the climate and conditions are favorable for reappearance each spring.

This is why I love using perennials which return every year in pots – they save you money – and become treasured specimens.  In many cases, troublemaker perennial plants are great candidates for container gardening.

To see more about Petasites japonicus, click HERE.  It is a blog posting I wrote a couple years back with more photos of the plant’s flowers, root structure, and habit.

A Returning Petasites for Several Years

A Returning Petasites for Several Years

The leaves on this plant grow to dish plate size which make them very showy. When you put them away at the end of the season, it is helpful to moisten the soil so there is a bit of moisture, and visit it maybe once during the winter to put some snow on top to melt into the soil – this is what has worked for me.

Variegated Petasites (butterbur)

Variegated Petasites (butterbur)

Here’s a variegated Petasites I scored last year from The Garden Barn and Nursery in Vernon, CT. I’m glad to see the variegation on the leaves returning right now in my blue pot. After a few years, this pot may require a refresh of new potting soil – and a division of the plants.

Perennials like this are wonderful candidates in container gardens, and reasons why perennials will be discussed at this year’s Container Garden Workshops on May 16th and May 23rd, 2015. To learn more about the workshops in Broad Brook, CT, see HERE.

Detailed information about the plant and characteristics can be located HERE at the Missouri Botanical Garden website.

Stay tune for more about “Troublemakers Turned Star” plants for container gardens and patio pots.

Cathy Testa

IMG_9042 (1)

Powerful Perennials in Container Gardens – An Intro to May’s Hands-On Workshop

7 Comments

The Theme – Powerful Perennials

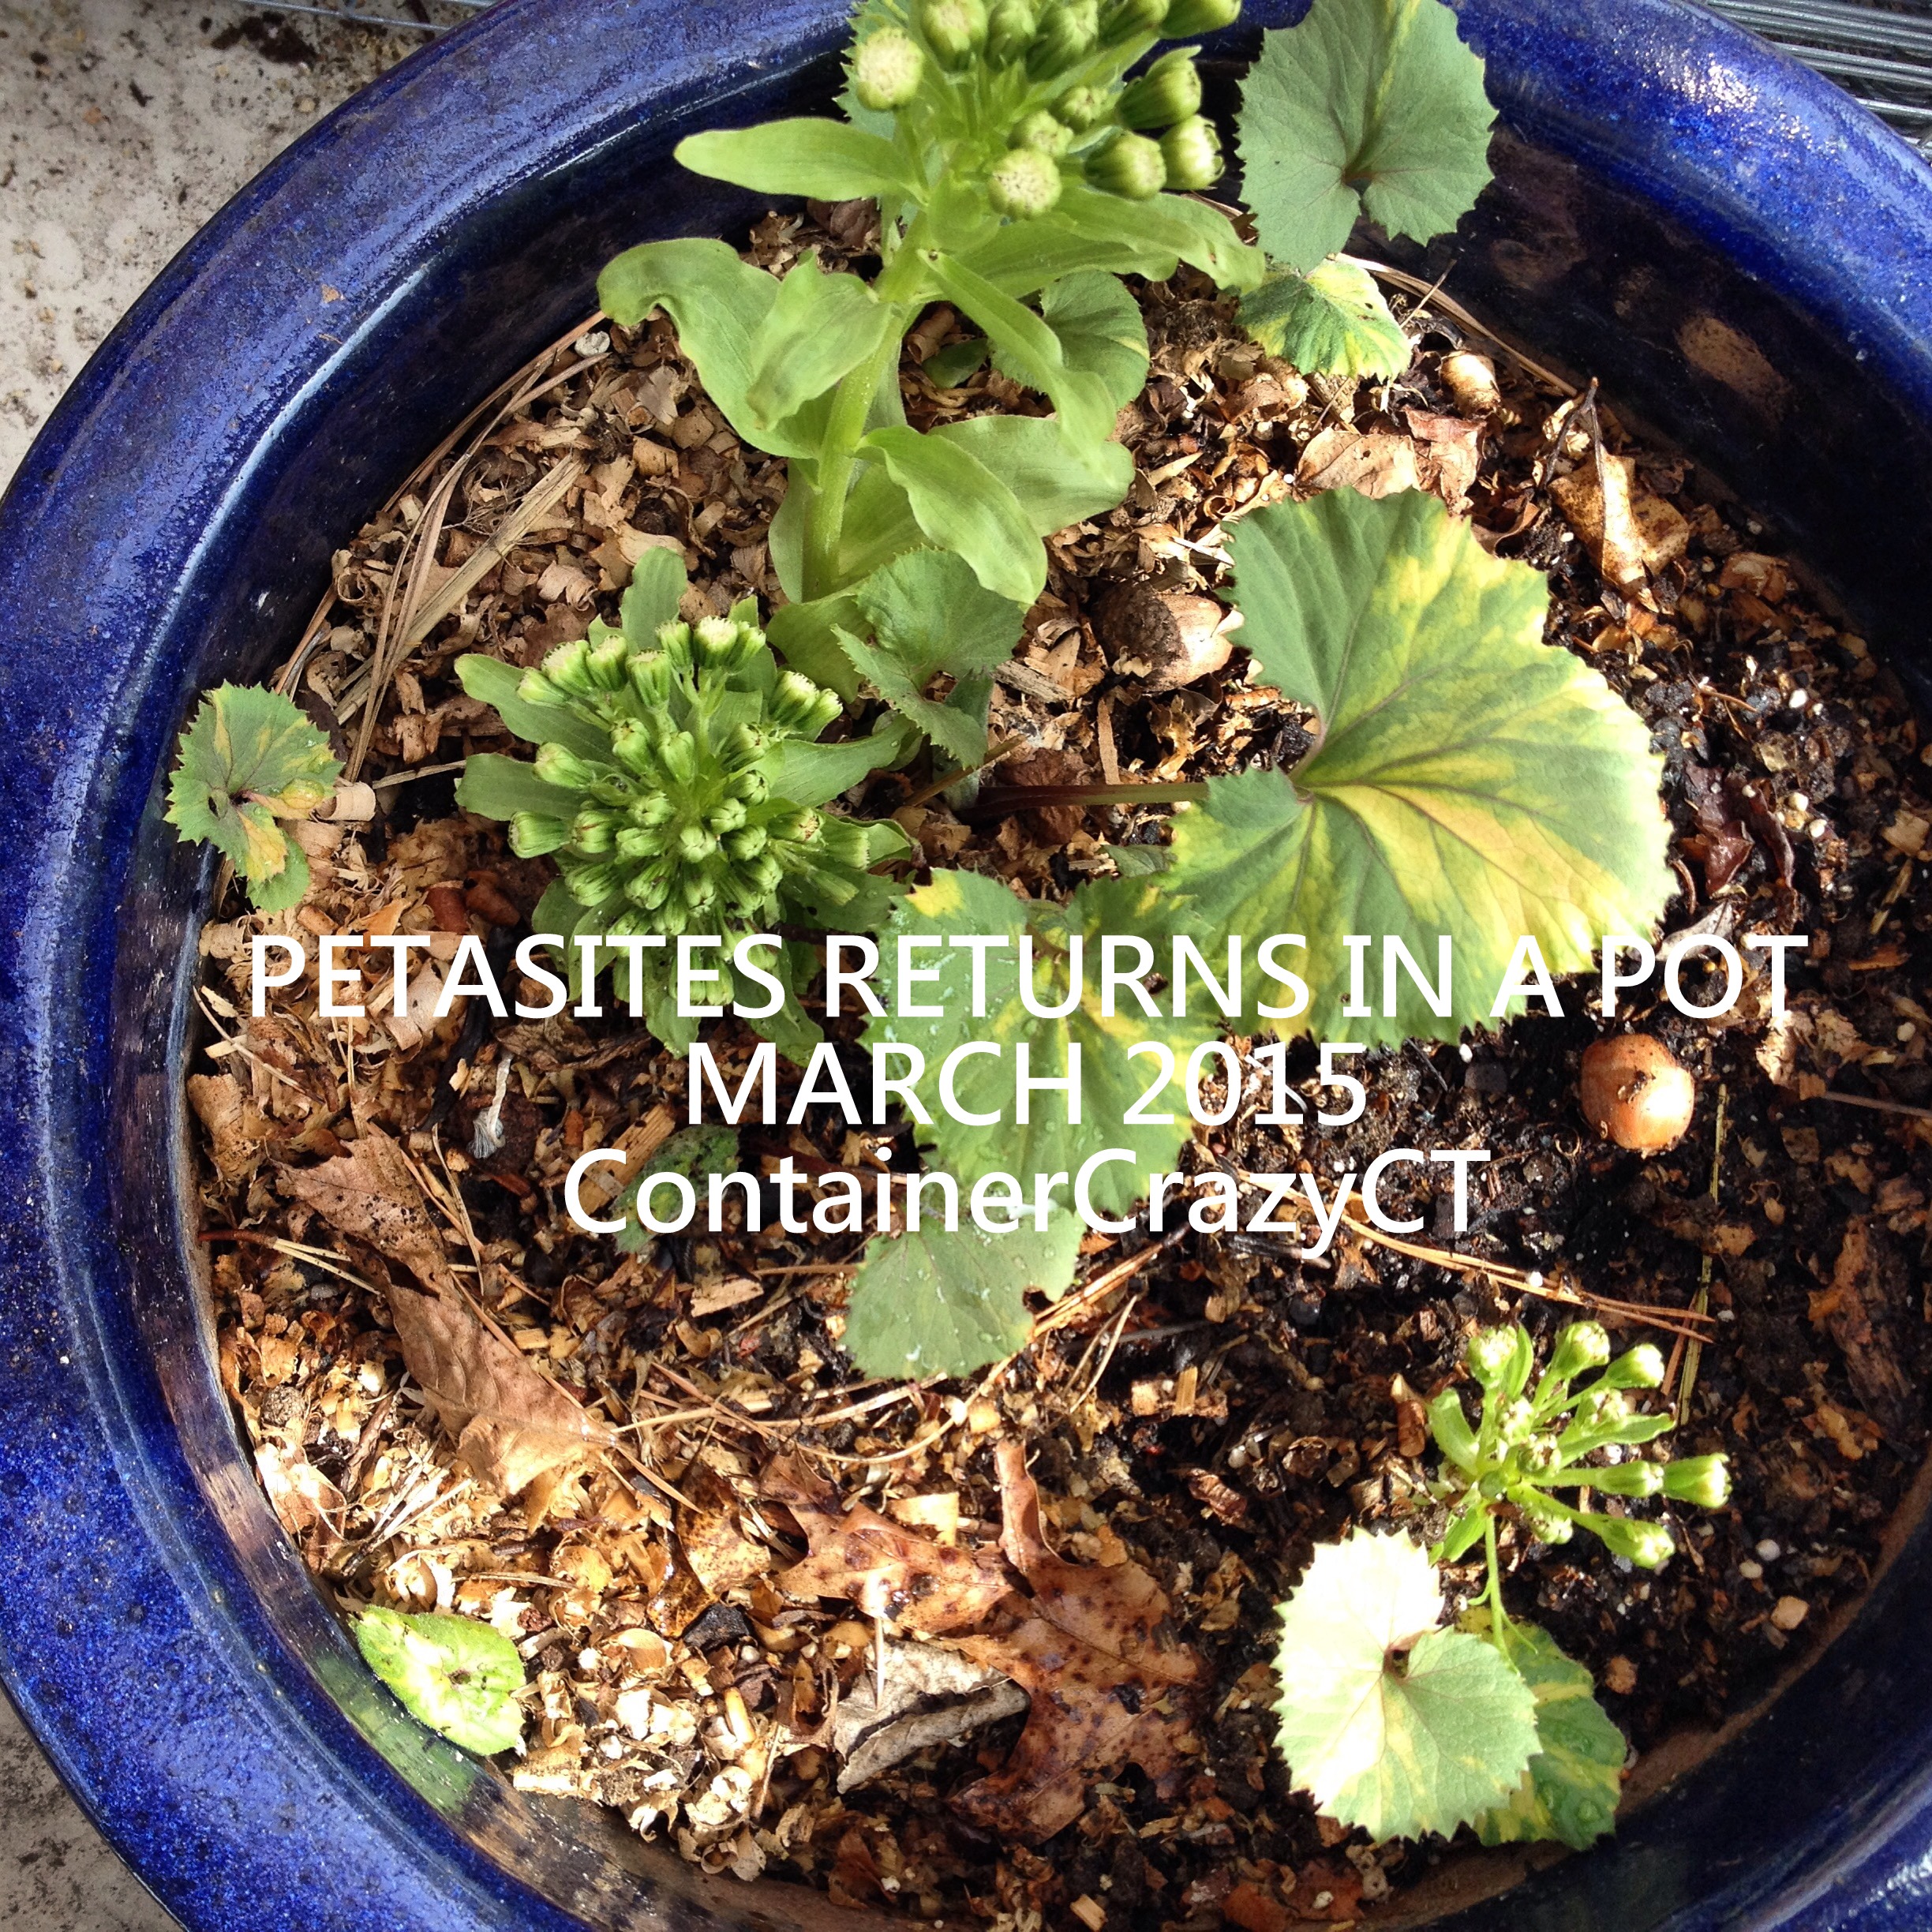
Perennials, which return year after year in your gardens (or more technically stated, are a plant that normally survives for three or more seasons), are excellent candidates in container gardens and patio pots.

However, they are often overlooked for this use and many people do not understand their amazing benefits in container gardens or know which to select to achieve stunning combinations to make your container gardens look amazing in your outdoor surroundings!

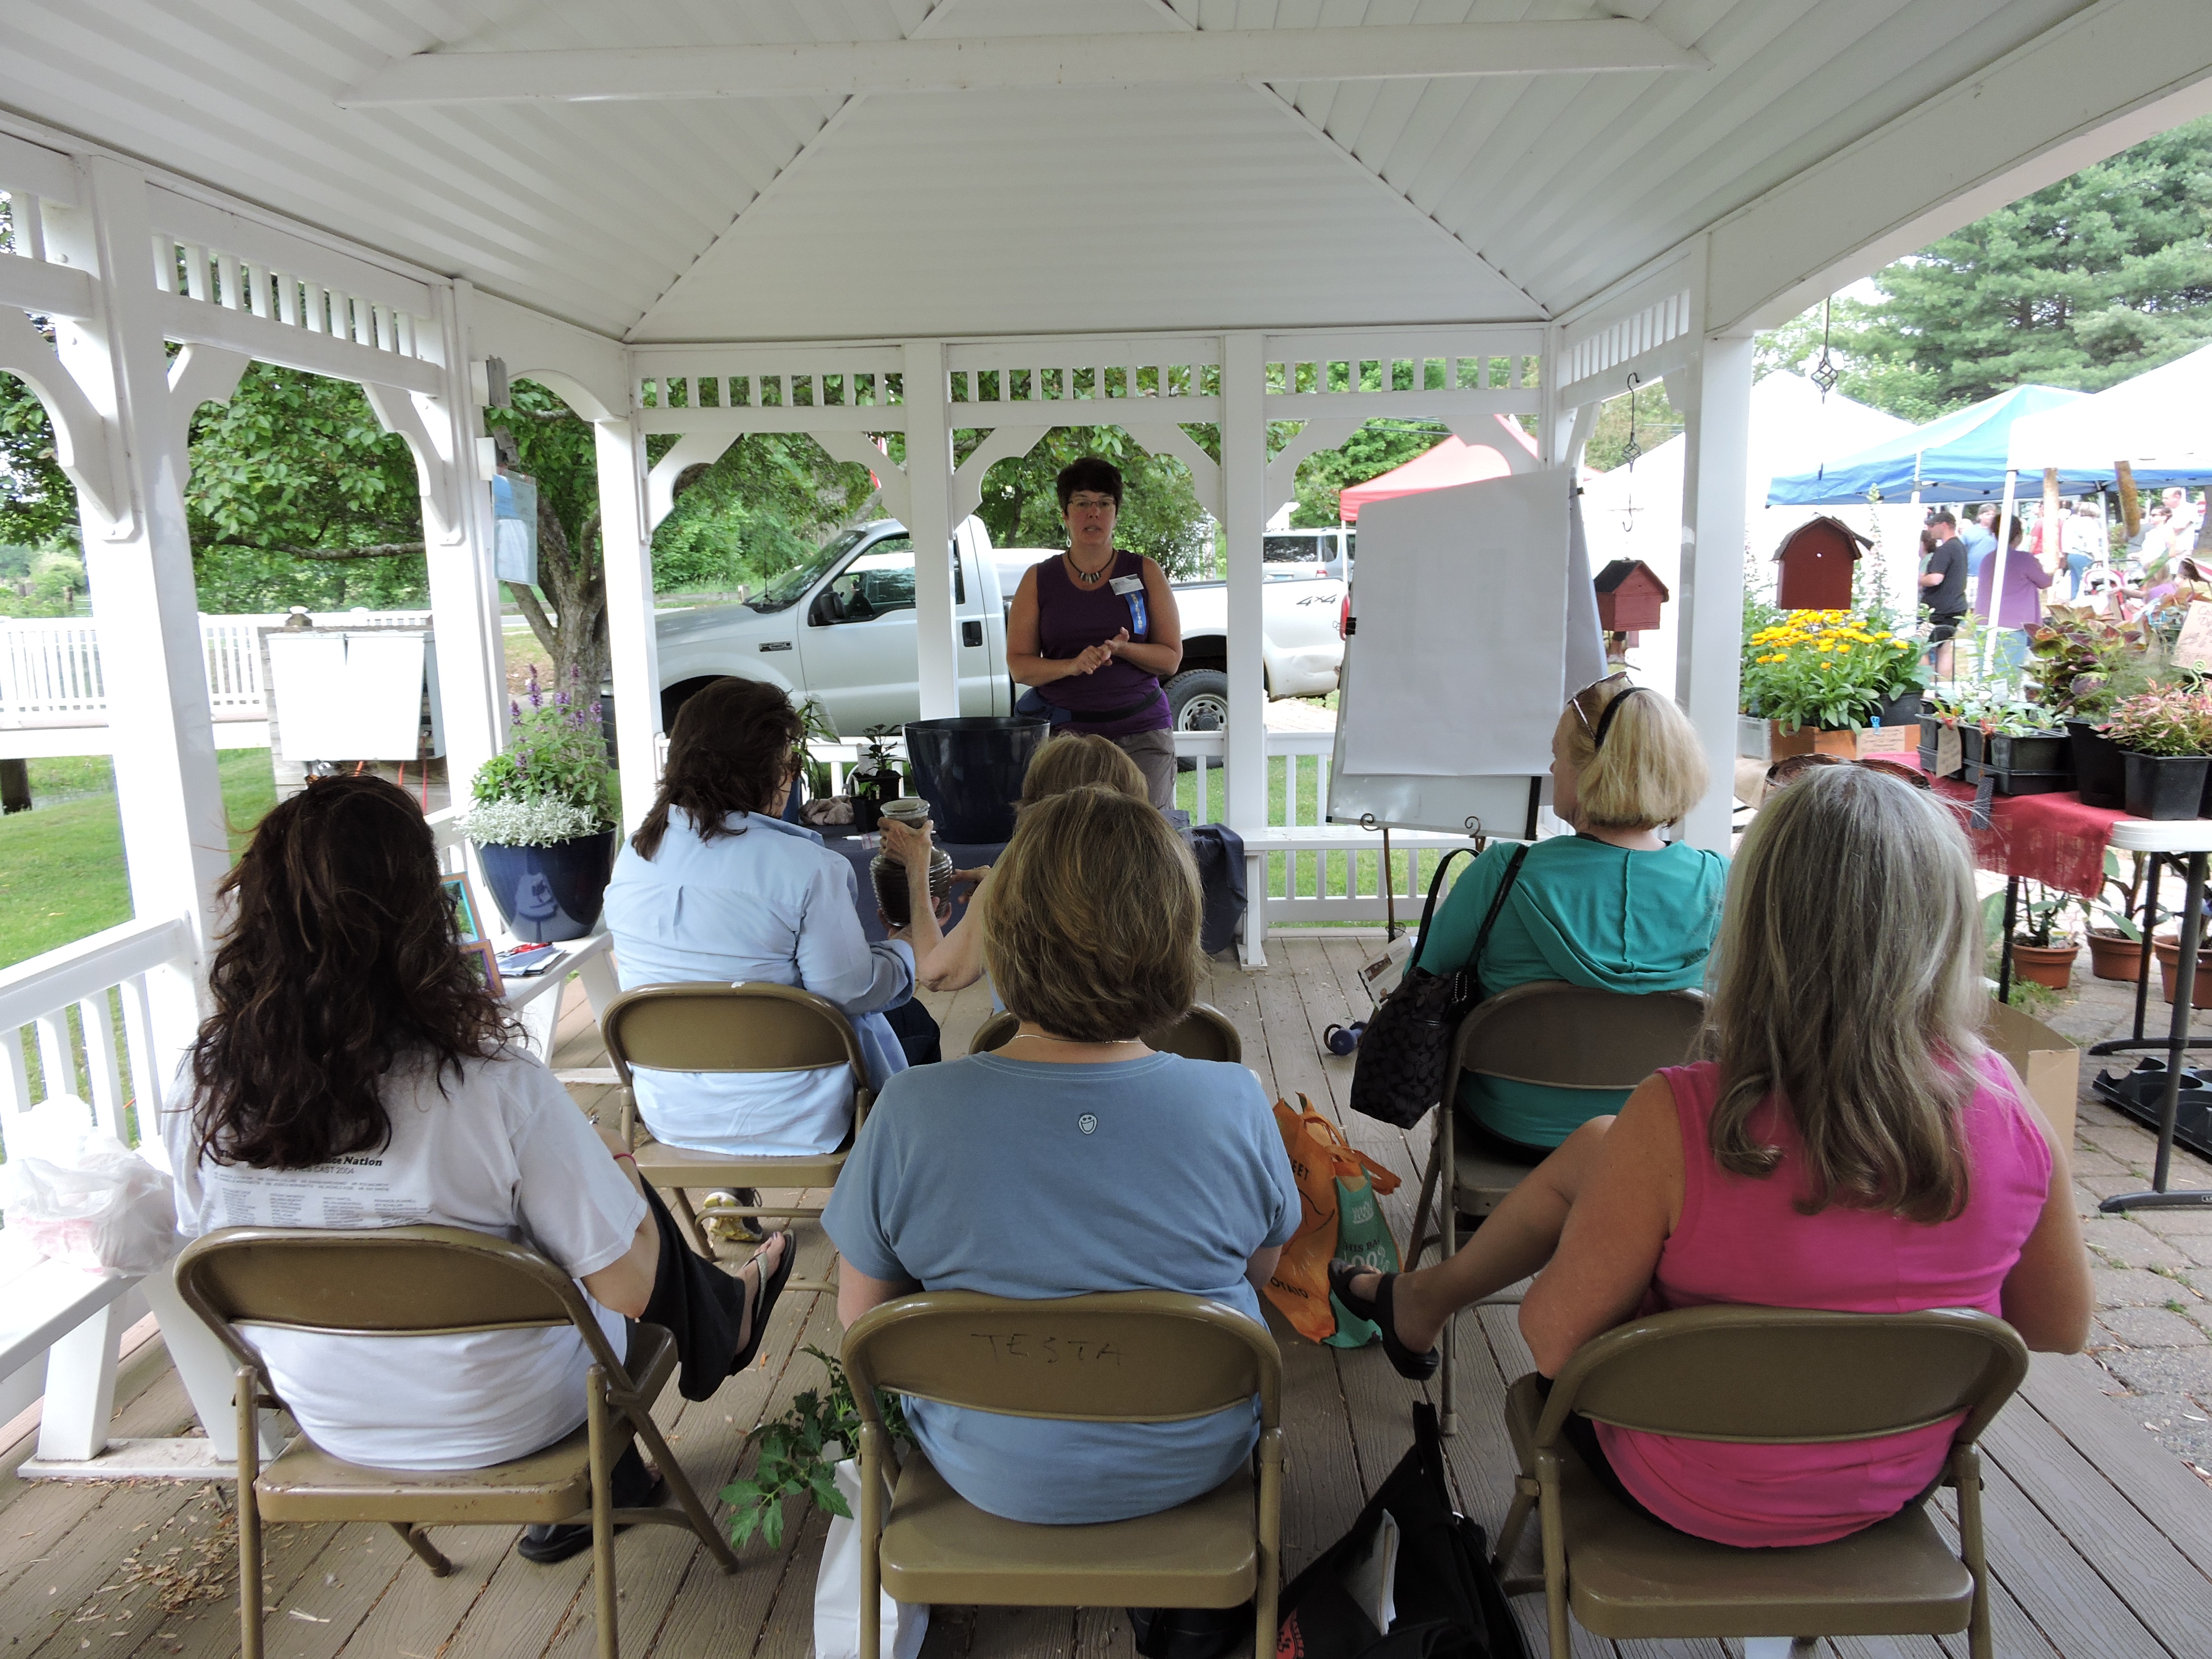
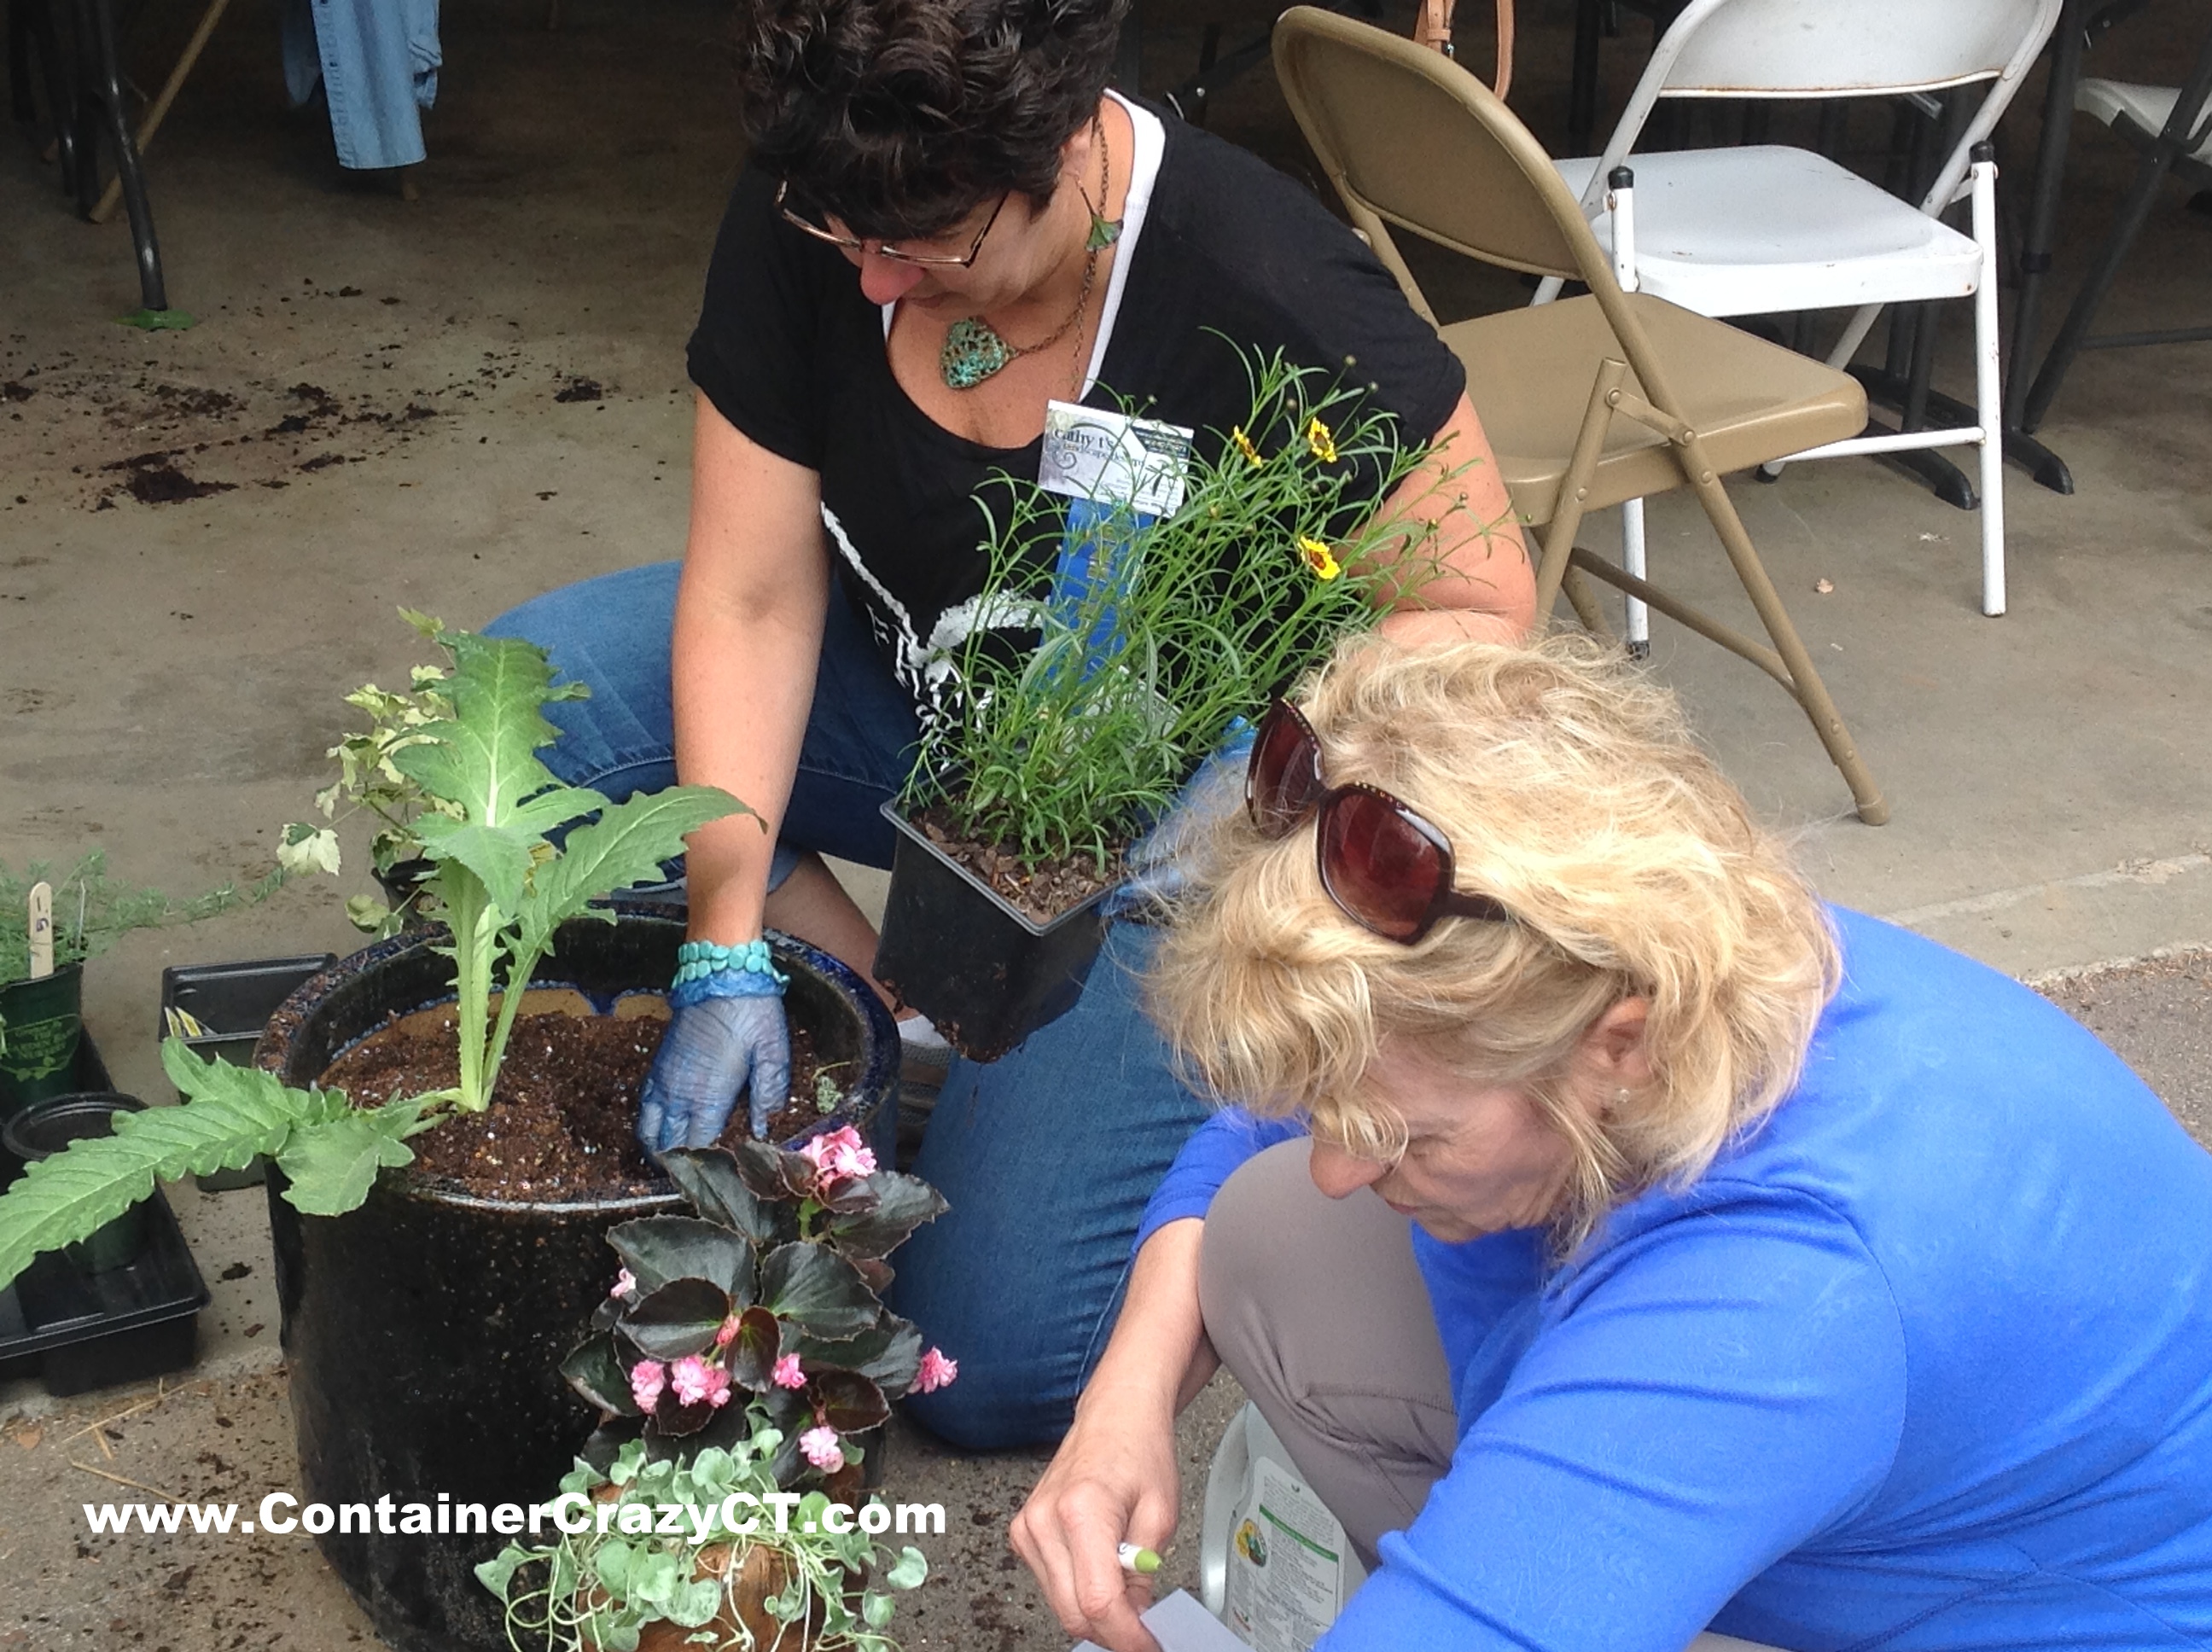
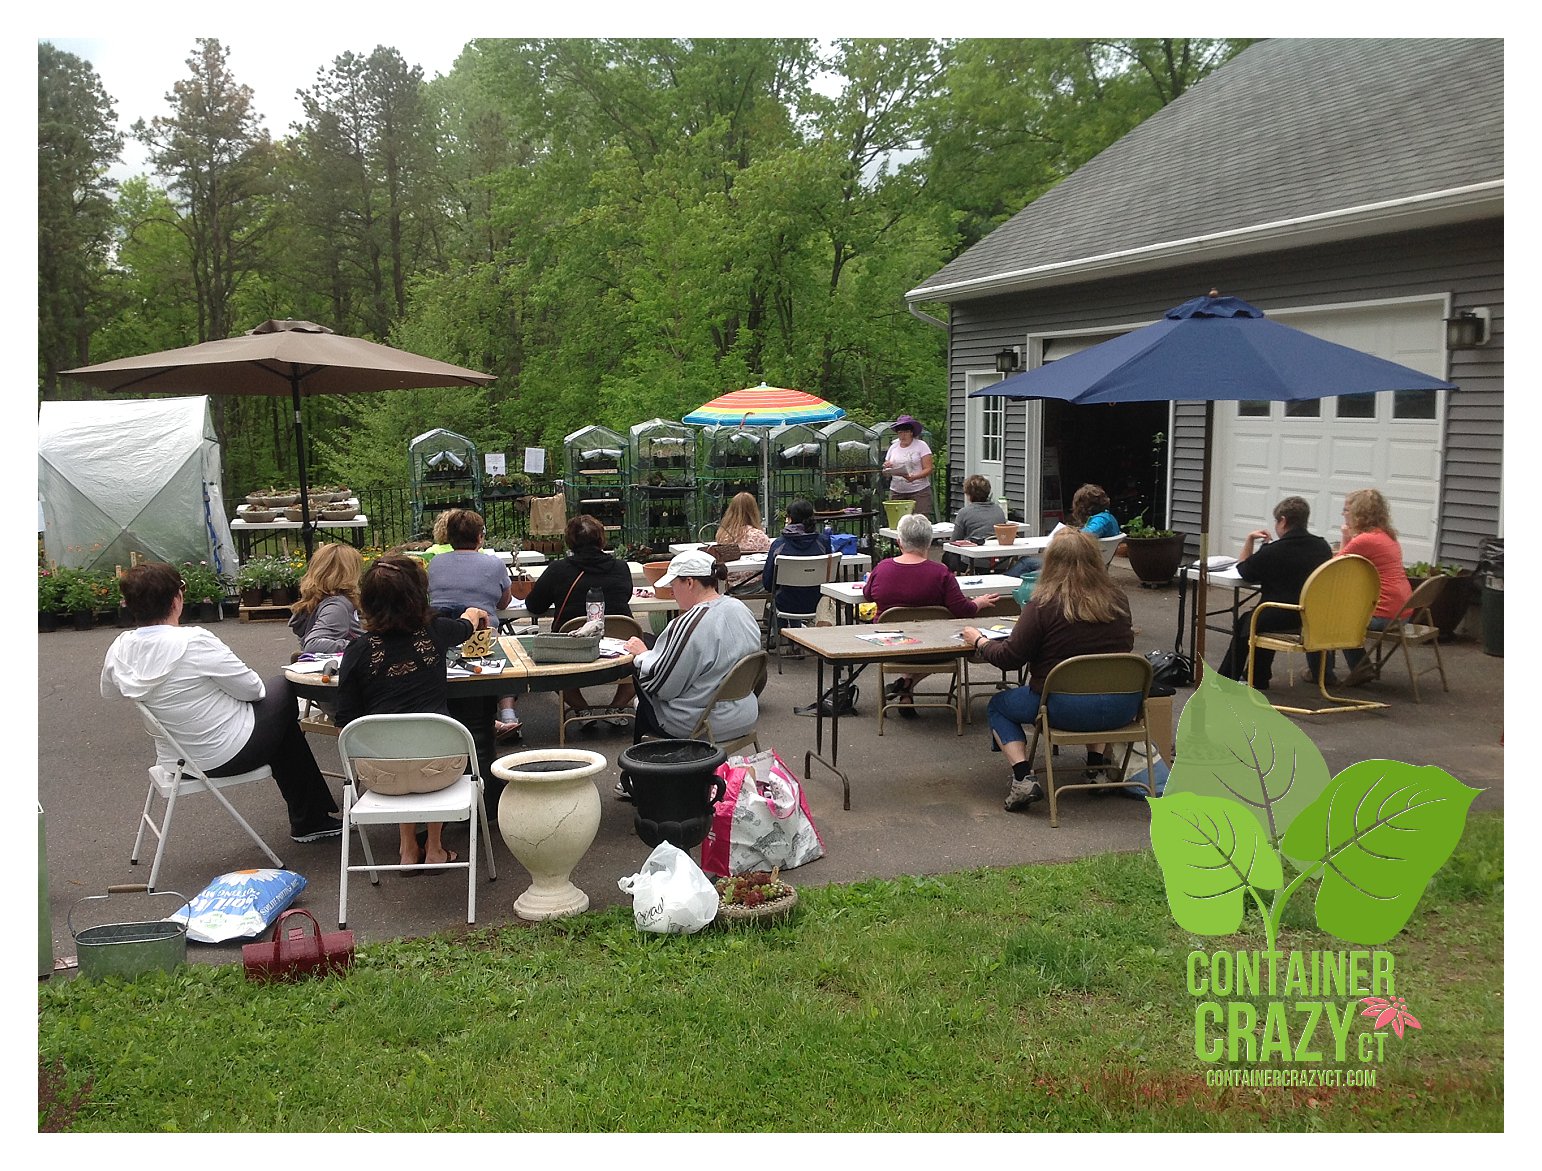
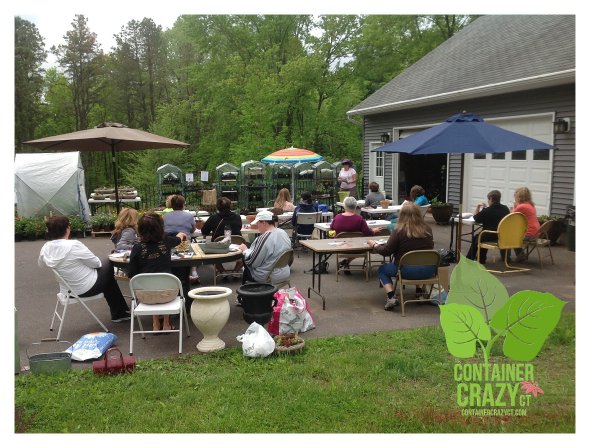
This year’s Container Garden Workshops hosted by Cathy Testa of Container Crazy CT in Broad Brook, CT will focus on perennials which perform beautifully in container gardens and patio pots, and how and why you should use them to your advantage.

Container Garden with Mix of Perennials and Annuals

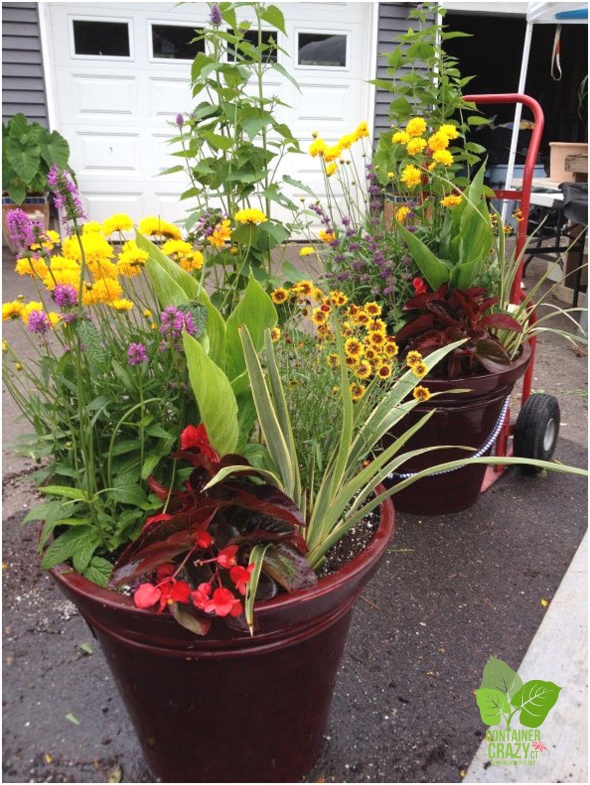
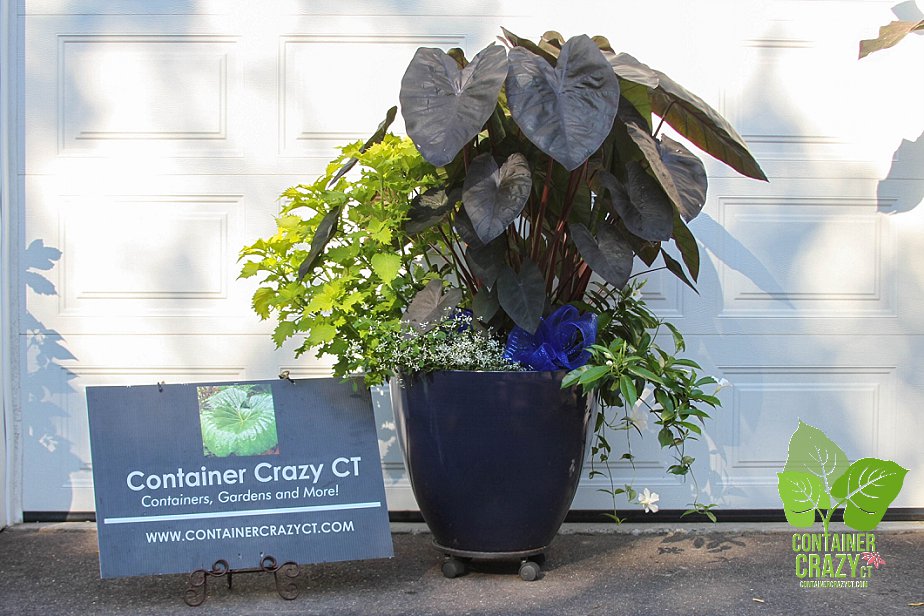
Container Garden with Mix of Perennials and Annuals Upon Planting!

Burst of “Dynamic” Color Periods

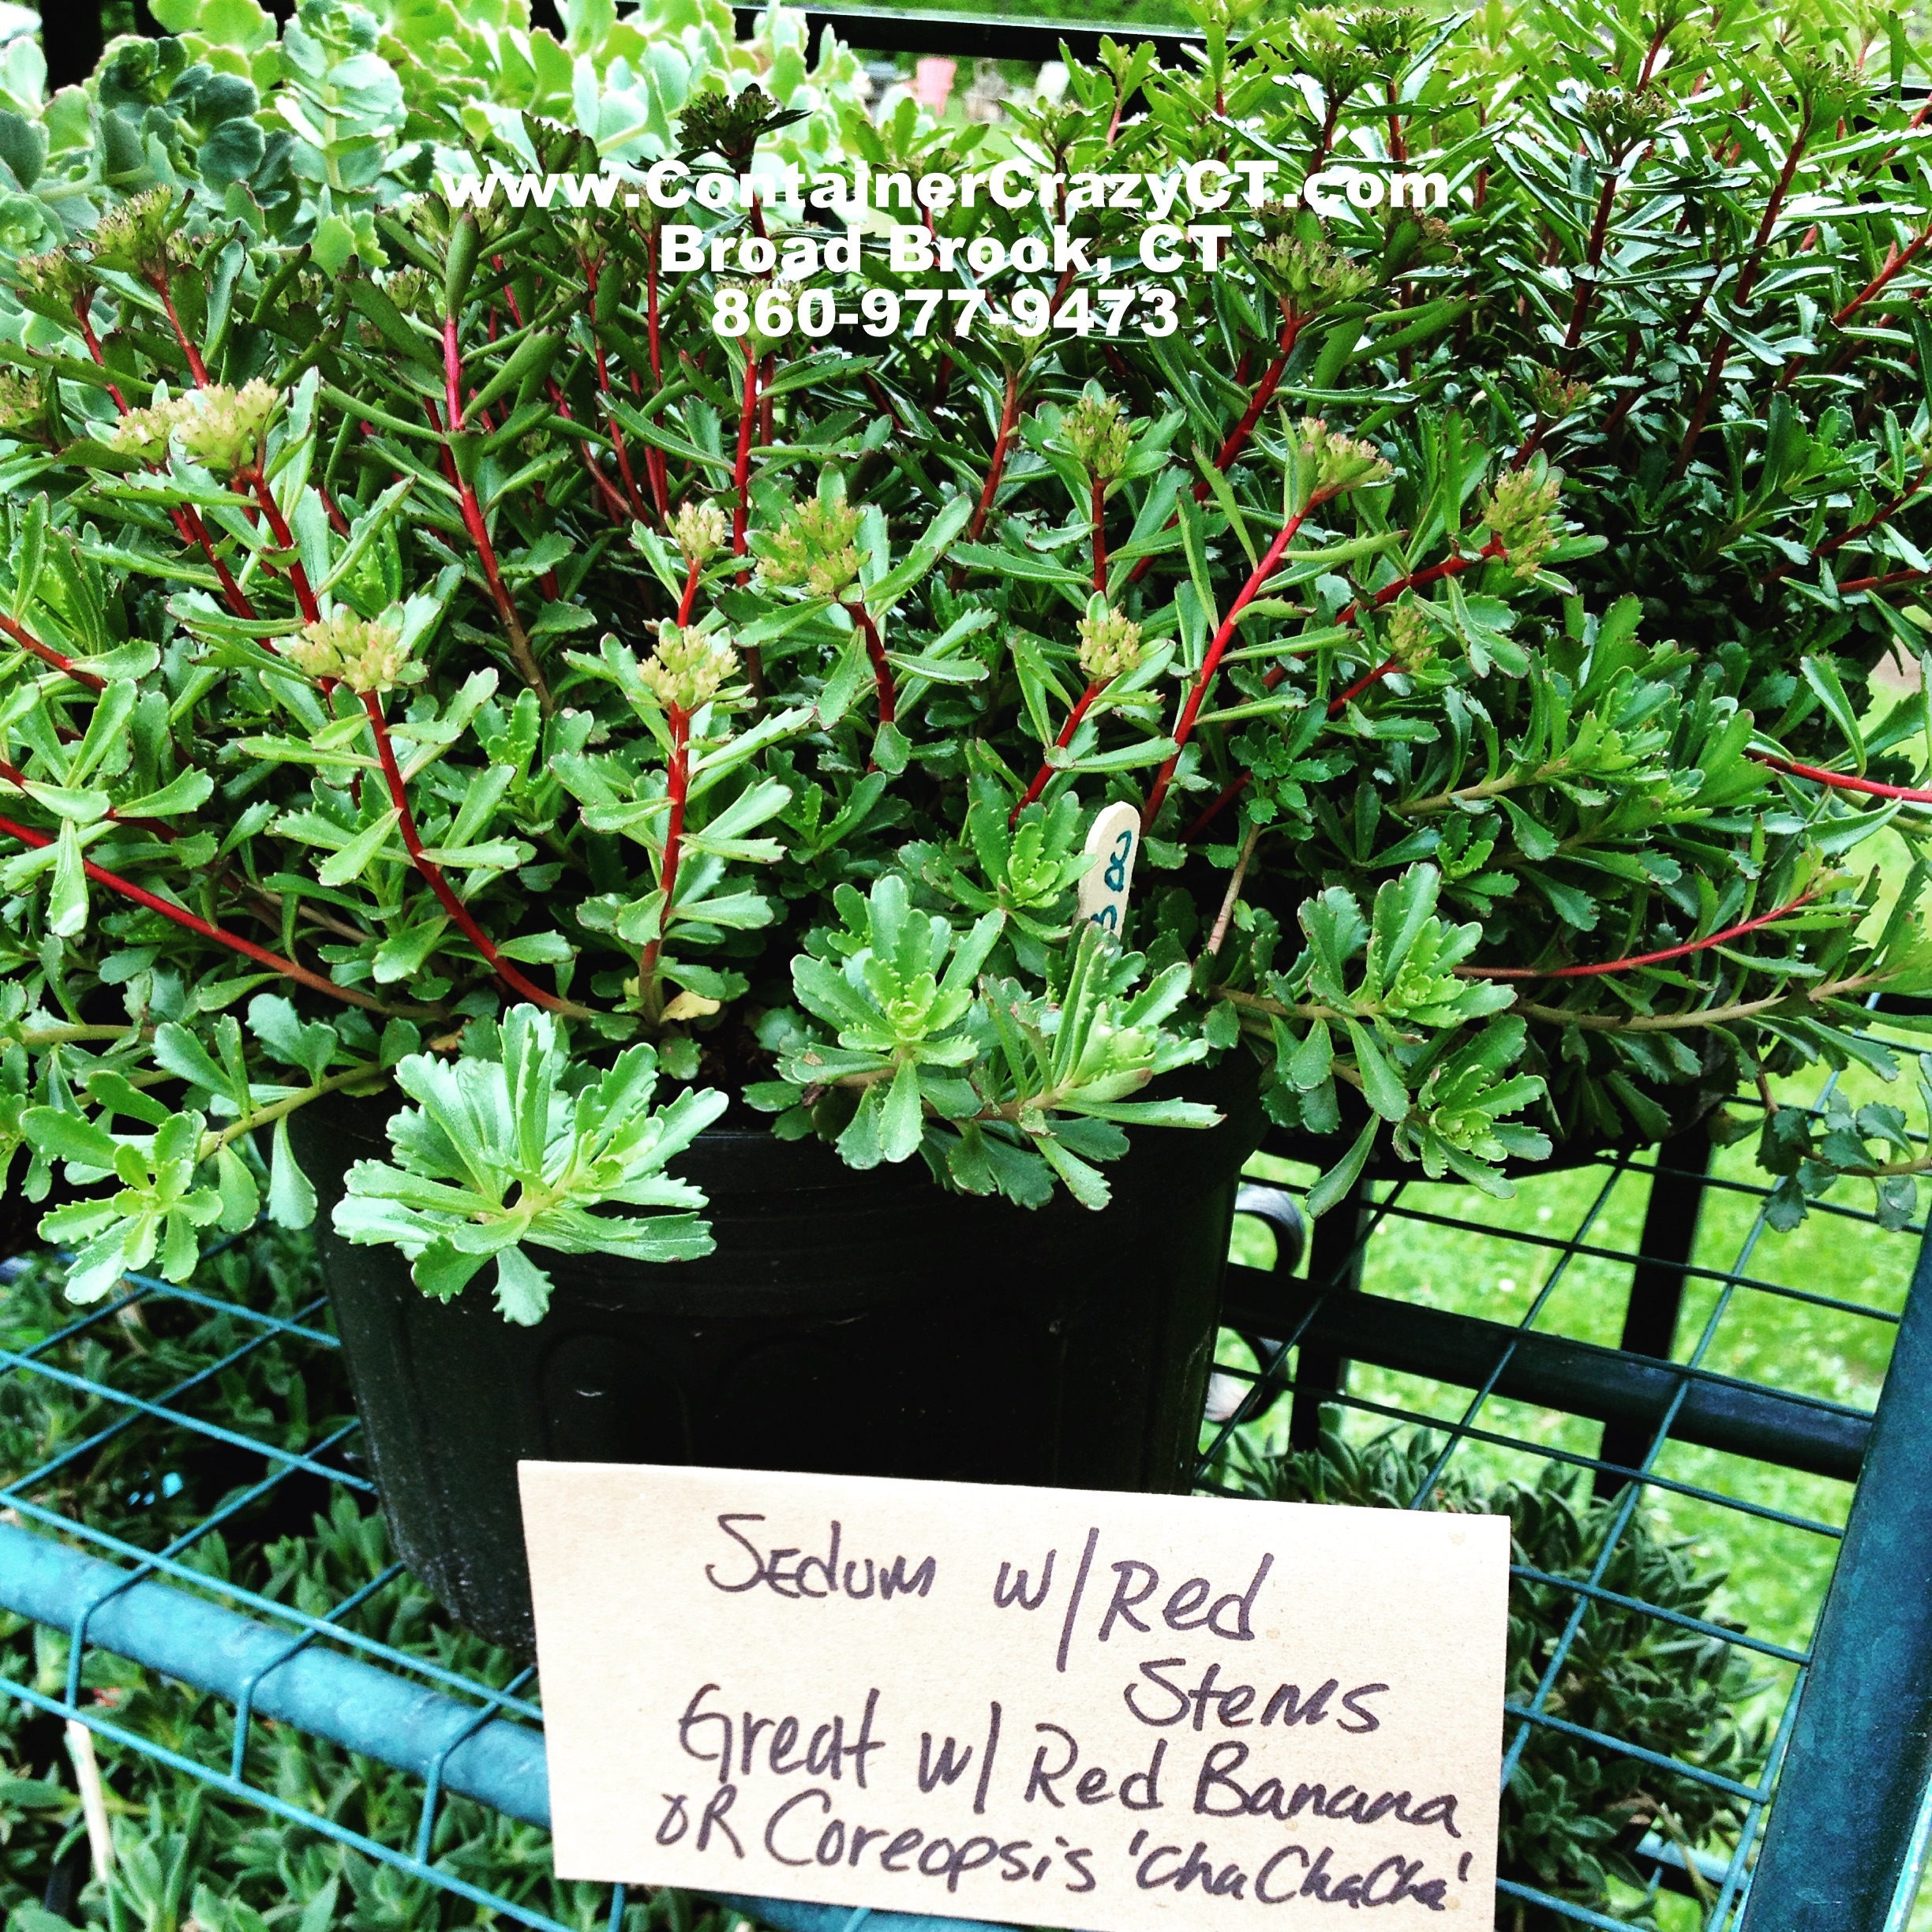
We all love color – and know many annual plants provide constant color in your container gardens, but so do perennials. Many perennials bloom at specific times during the season so they add a dynamic element to your containers. Some are short bloomers for a period of weeks, while other are long lasting for several months – It is a matter of knowing which perform best to maximize their show in your container gardens. Think of perennials as providing a burst of color at the right times to compliment the other mix of plants in your container gardens and patio pots.

Perennial: Agastache 'Blue Fortune' blooms all summer long

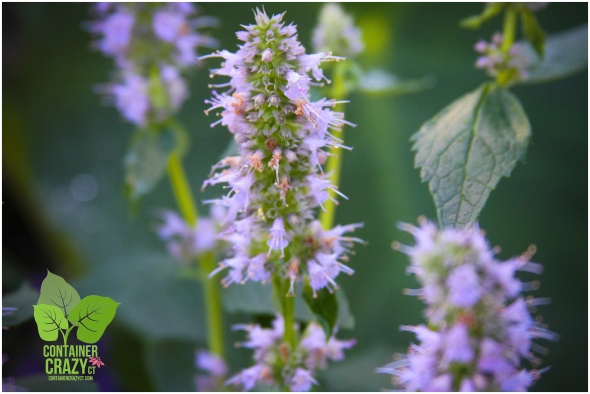
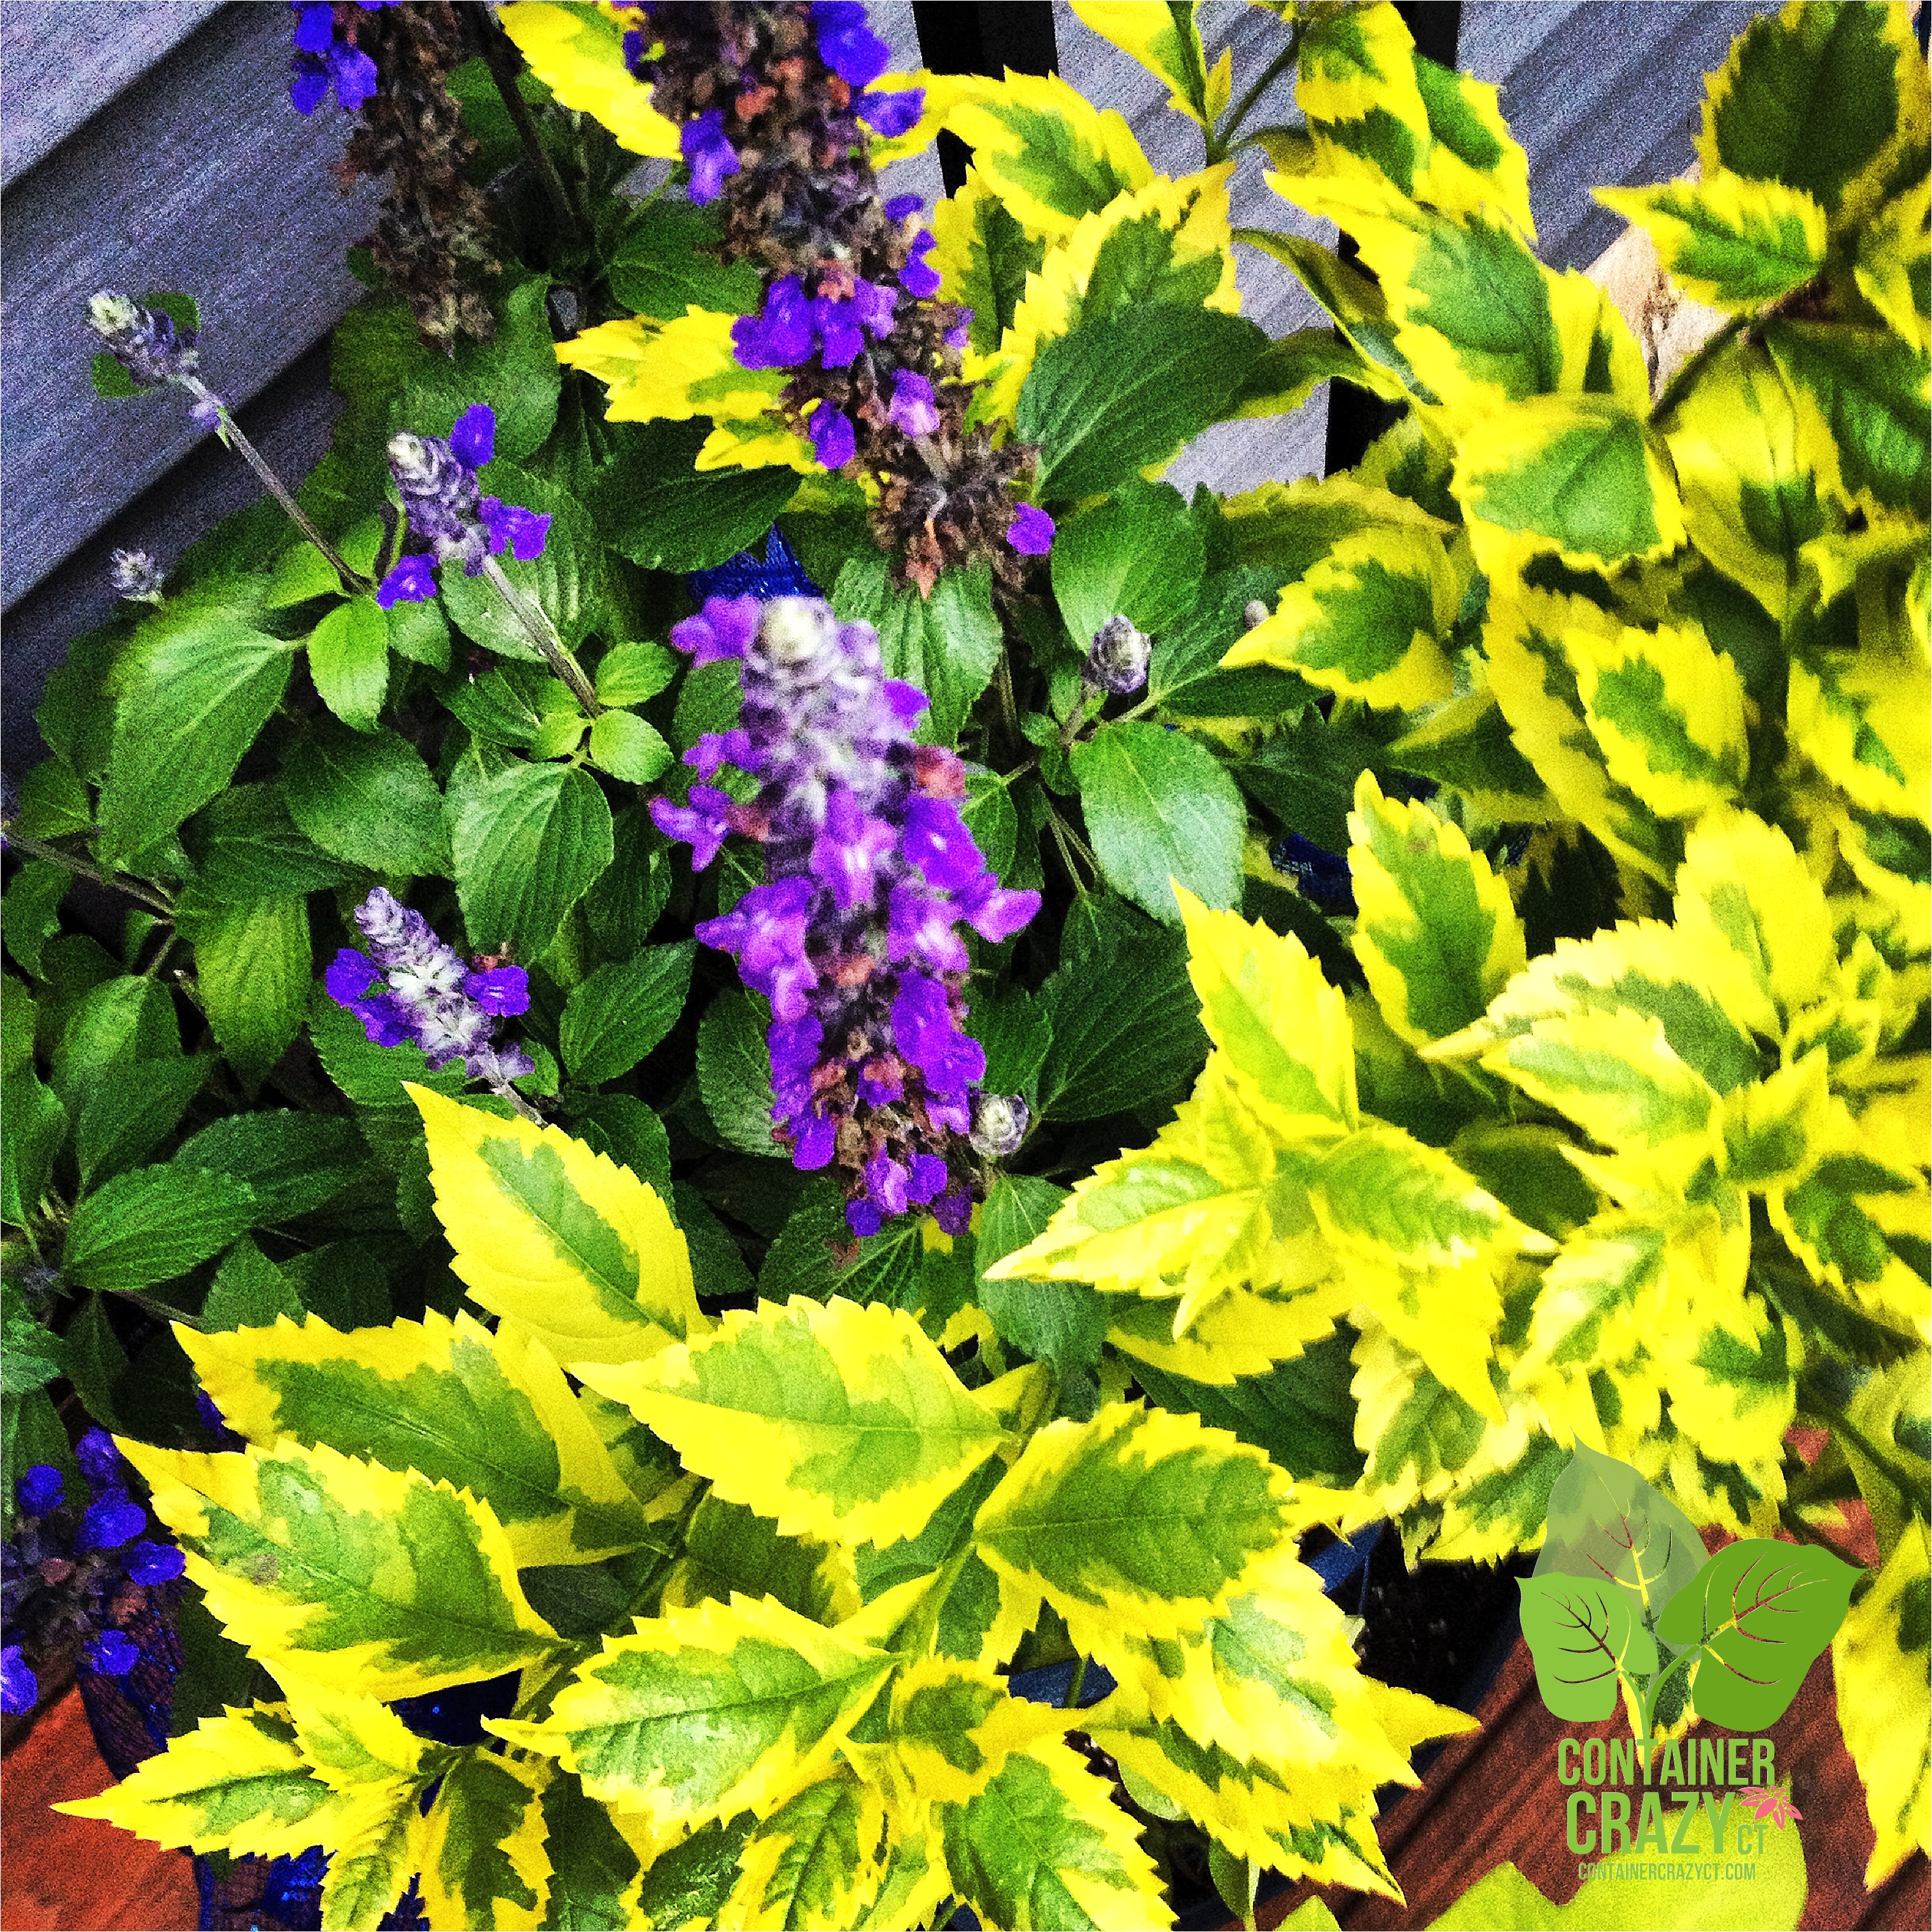
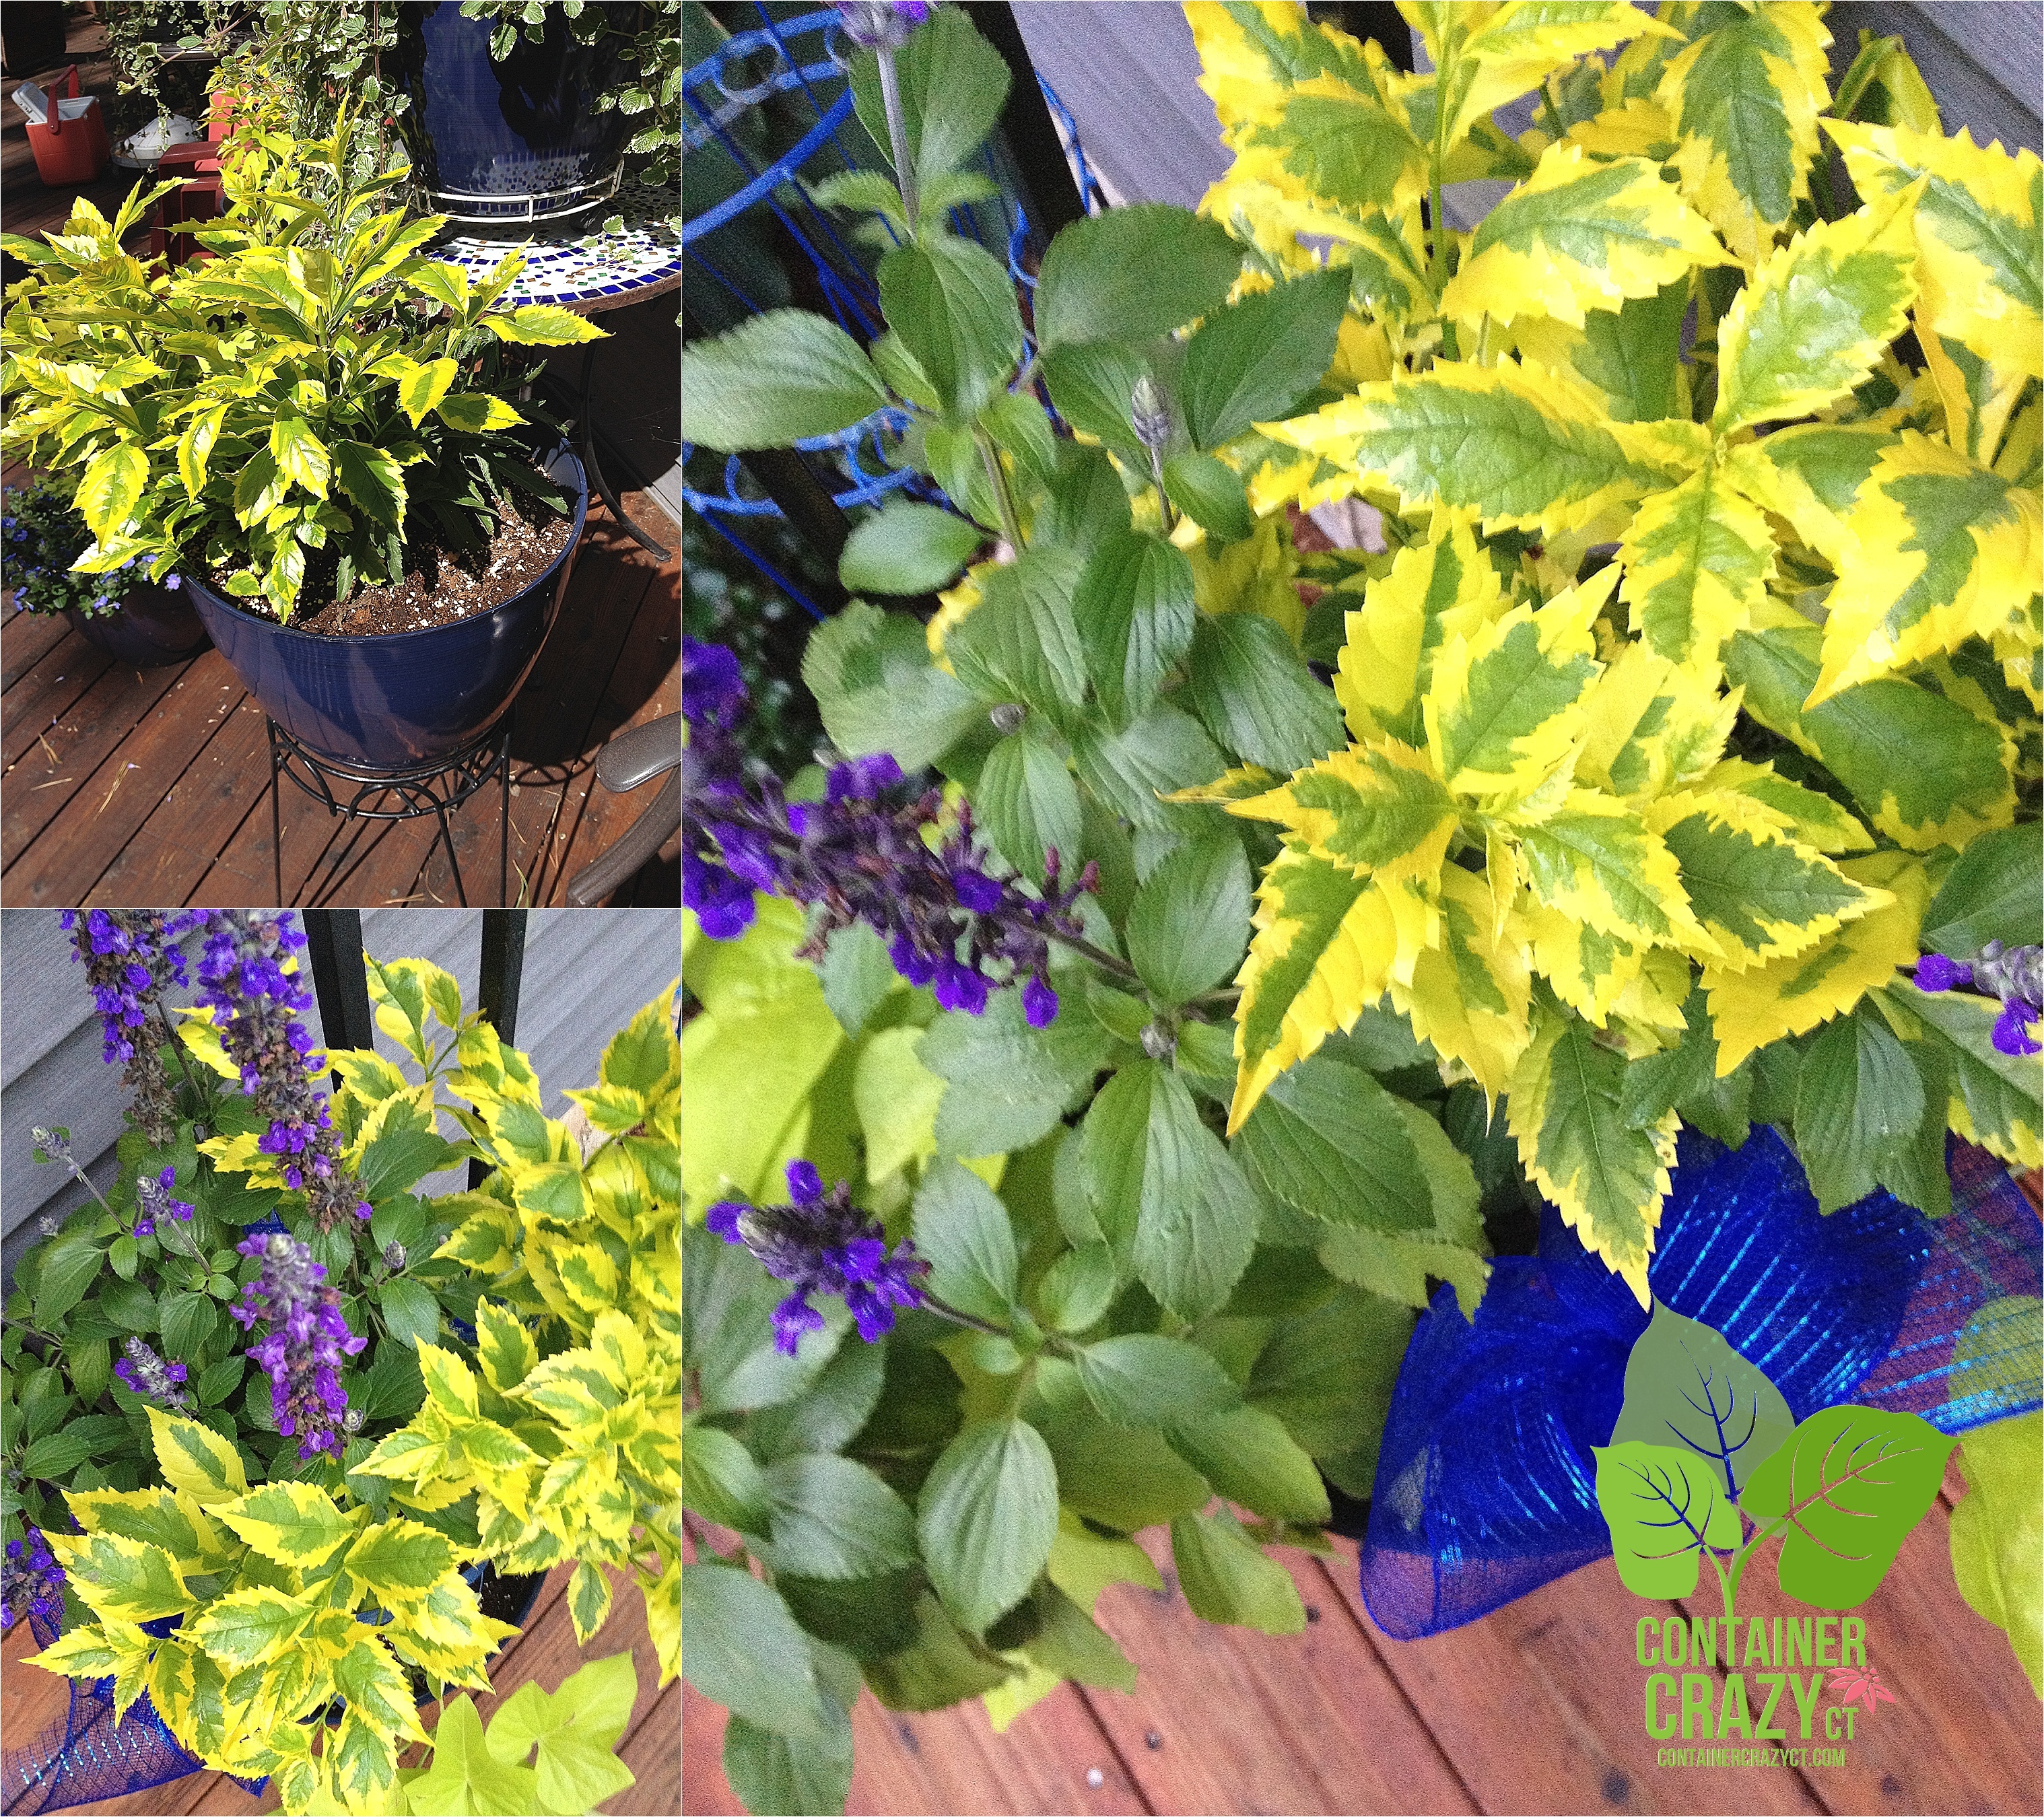
Perennial: Agastache ‘Blue Fortune’ blooms all summer long

For example, a blue flowering perennial, called Agastache ‘Blue Fortune’, which also goes by the common name of anise hyssop, has a very long lasting soft blue flowers in summer. The blooms start in July and continue blooming all the way into September. Not only is that long-lasting, if you find the blooms look tired towards the end of the summer, you only have to snip them off from the tall stems of the plant, and guess what? Within two weeks, you will see new fresh buds forming and opening up on your plant in the container garden.

Perennials Don’t Get Exhausted

Perennials don’t peter out as quickly as annuals because most do not profusely bloom during the entire summer which takes lots of energy, and they have reserves from previous year’s growth, unlike annuals, such as a petunias. Petunias, as an example, usually look tired or worn out by the end of August. I’m not saying annuals don’t rock in container gardens because they do and they are a must have – but people often overlook the values and bonuses of using perennials in container gardens and only consider them for the gardens of the ground.

Are Stars in Containers

Some perennials are aggressive spreaders in gardens, but when used in container gardens, they turn into stars. An example is the perennial, Ajuga reptans, also by the common name of bugleweed. You may know this one too. In the spring time, this low growing, ground cover looking perennial spikes up tons of purple flowers in May; they are noticeable.  However, they also have a habit of spreading in lawns – which is a nuisance.  This perennial actually travels from one spot to the next underground – so folks who desire perfect lawns dislike this plant.

Ajuga in a small pot

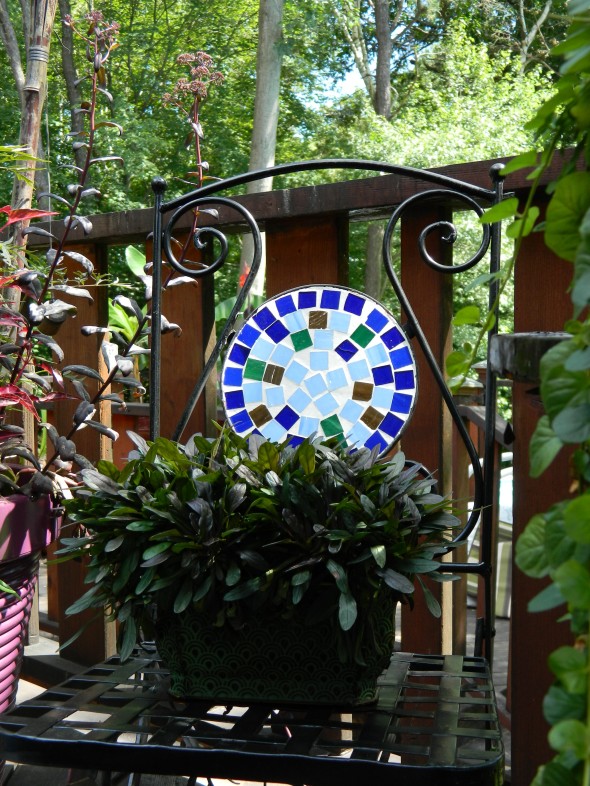
Ajuga reptans in a small pot packs a lot of punch – Just Adorable!!

In a container garden, however, the spreading issue of Ajuga is eliminated and controlled.  Because it is a tenacious plant, it will return in a container garden for several years however – the problem aspect is now a solution in container gardens and patio pots; it shines during the growing season with various foliage colors and tidy habit serving as an exception filler in container gardens with other mixed arrangements.

Ajuga reptans

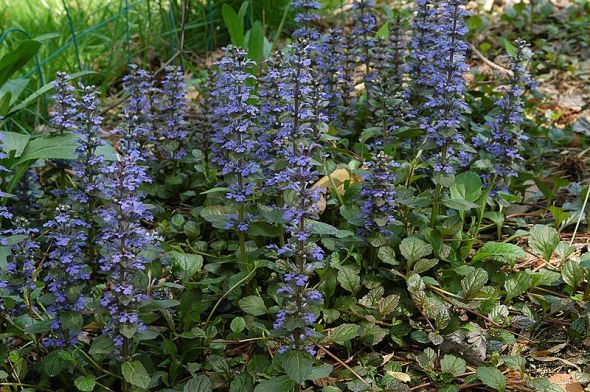
Image: Wikipedia/EnLorax – Ajuga in the ground – shows the blooms, which are so pretty in a container!

Ajuga reptans is just one of the many examples of perennials which can be vigorous or quick spreaders in the ground, but is not a problem in a container. The flush of purple color from its blooms is beautiful in a container especially when combined with other spring colored plants like the soft yellow of daffodils or pinks of tulips. Or it can serve as a very long lasting foliage feature in your container gardens, and this perennial doesn’t get lots of problems.

For this upcoming Container Garden Workshop in May 2015, two cultivars of Ajuga reptans: ‘Burgundy Glow’ and Ajuga ‘Chocolate Chip’ will be available for purchase along with many other wonderful perennial plants. Both of these cultivars I have used in containers and patio pots with wonderful results.

‘Burgundy Glow’ has white, pink and purple variegation on its leaves with 6” spikes of blue flowers in May, and ‘Chocolate Chip’ has intense violet-blue spikes rising 3” above miniature, vibrant, chocolate-hued foliage in May through June. One year, I used ‘Chocolate Chip’ in a little container and it was so pretty, and this one can take shady conditions too.

Ornamental Grasses or Grass-like Perennials

You may not think of ornamental grasses or grass like perennials as container garden plants but two of these which I can name right off the bat are Hakonechloa macra ‘All Gold’ and its counter opposite in regards to color is Liriope muscari ‘Big Blue’.

Hakonechloa macra 'Aureola' on right

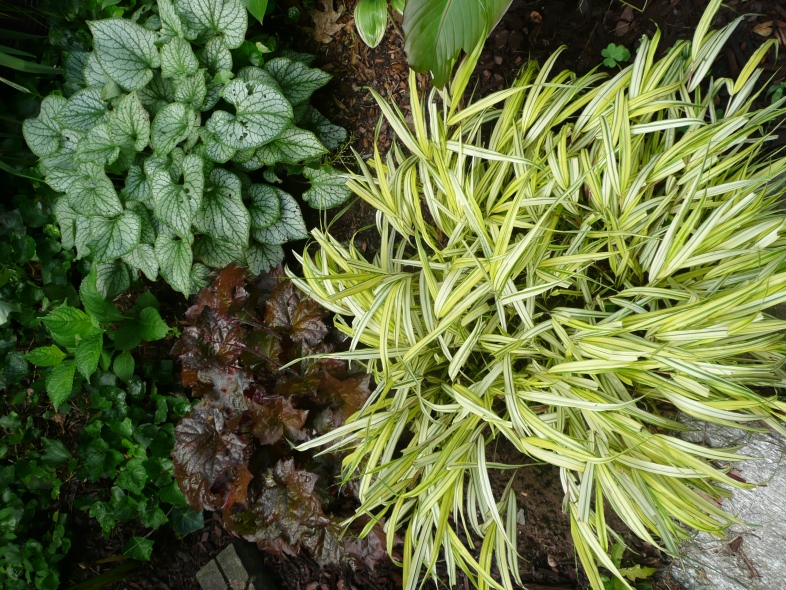
Hakonechloa macra ‘Aureola’ on right – Similar to ‘All Gold’ but All Gold  is well – all gold!

Hakonechloa macra ‘All Gold’ is one of many hakon grasses I selected for this workshop because it has stunning gold blades of foliage that grows in graceful clumps and the color is intense and vivid. Take that intense vivid color and put it next to the right color bloom of another perennial – and voila – you have eye magic or eye candy.

Then there’s Lirope muscari ‘Big Blue’, the polar opposite in color compared to the hakon grass – it has a dark green long strap-like leaves – and it is not an ornamental grass but a perennial, so it, like ornamental grasses, it returns year after year and is tough too.

Lily turf is Lirope’s common name, and it can be used to cover lots of turf – because it does spread – so this one fits my “Troublemaker Turned Star” scenarios for container gardens. It is a strong grower which is a problem in landscape situations, but it makes a wonderful low height type thriller with 15-18” long leaves with violet flower spikes in late summer in containers and patio pots! I’ve used Lirope in containers and it comes back every single year – it’s tough! This enables me to reuse it and just add new supporting candidates with it in the pot every season.

Container Garden with Perennials: Heuchera, Hellebore, Bellis, Euphorbia.

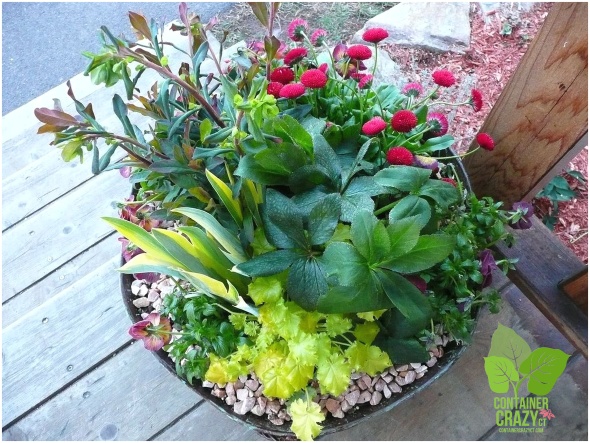
Container Garden with Perennials: Heuchera, Hellebore, Bellis perennis, Euphorbia in early Spring!

Other Perennial Benefits

There are other wonderful benefits to using perennials in your pots – Again, they return, as mentioned above, for at least three or more years – so this saves you money; they may be transplanted into your gardens or yard after the summer season is over in the fall, so you will enjoy them for years to come; and they give a dynamic bloom period or show at specific times in your container gardens. This gives your container a living interest because suddenly, in the midst of summer, a burst of a new color opens in the blooms of a perennial in the container, or perhaps it is an early spring bloomer or late bloomer in the fall – either way, it adds a new interest for you to enjoy and view. It is the ta-da of container gardening.

Perennial Purposes

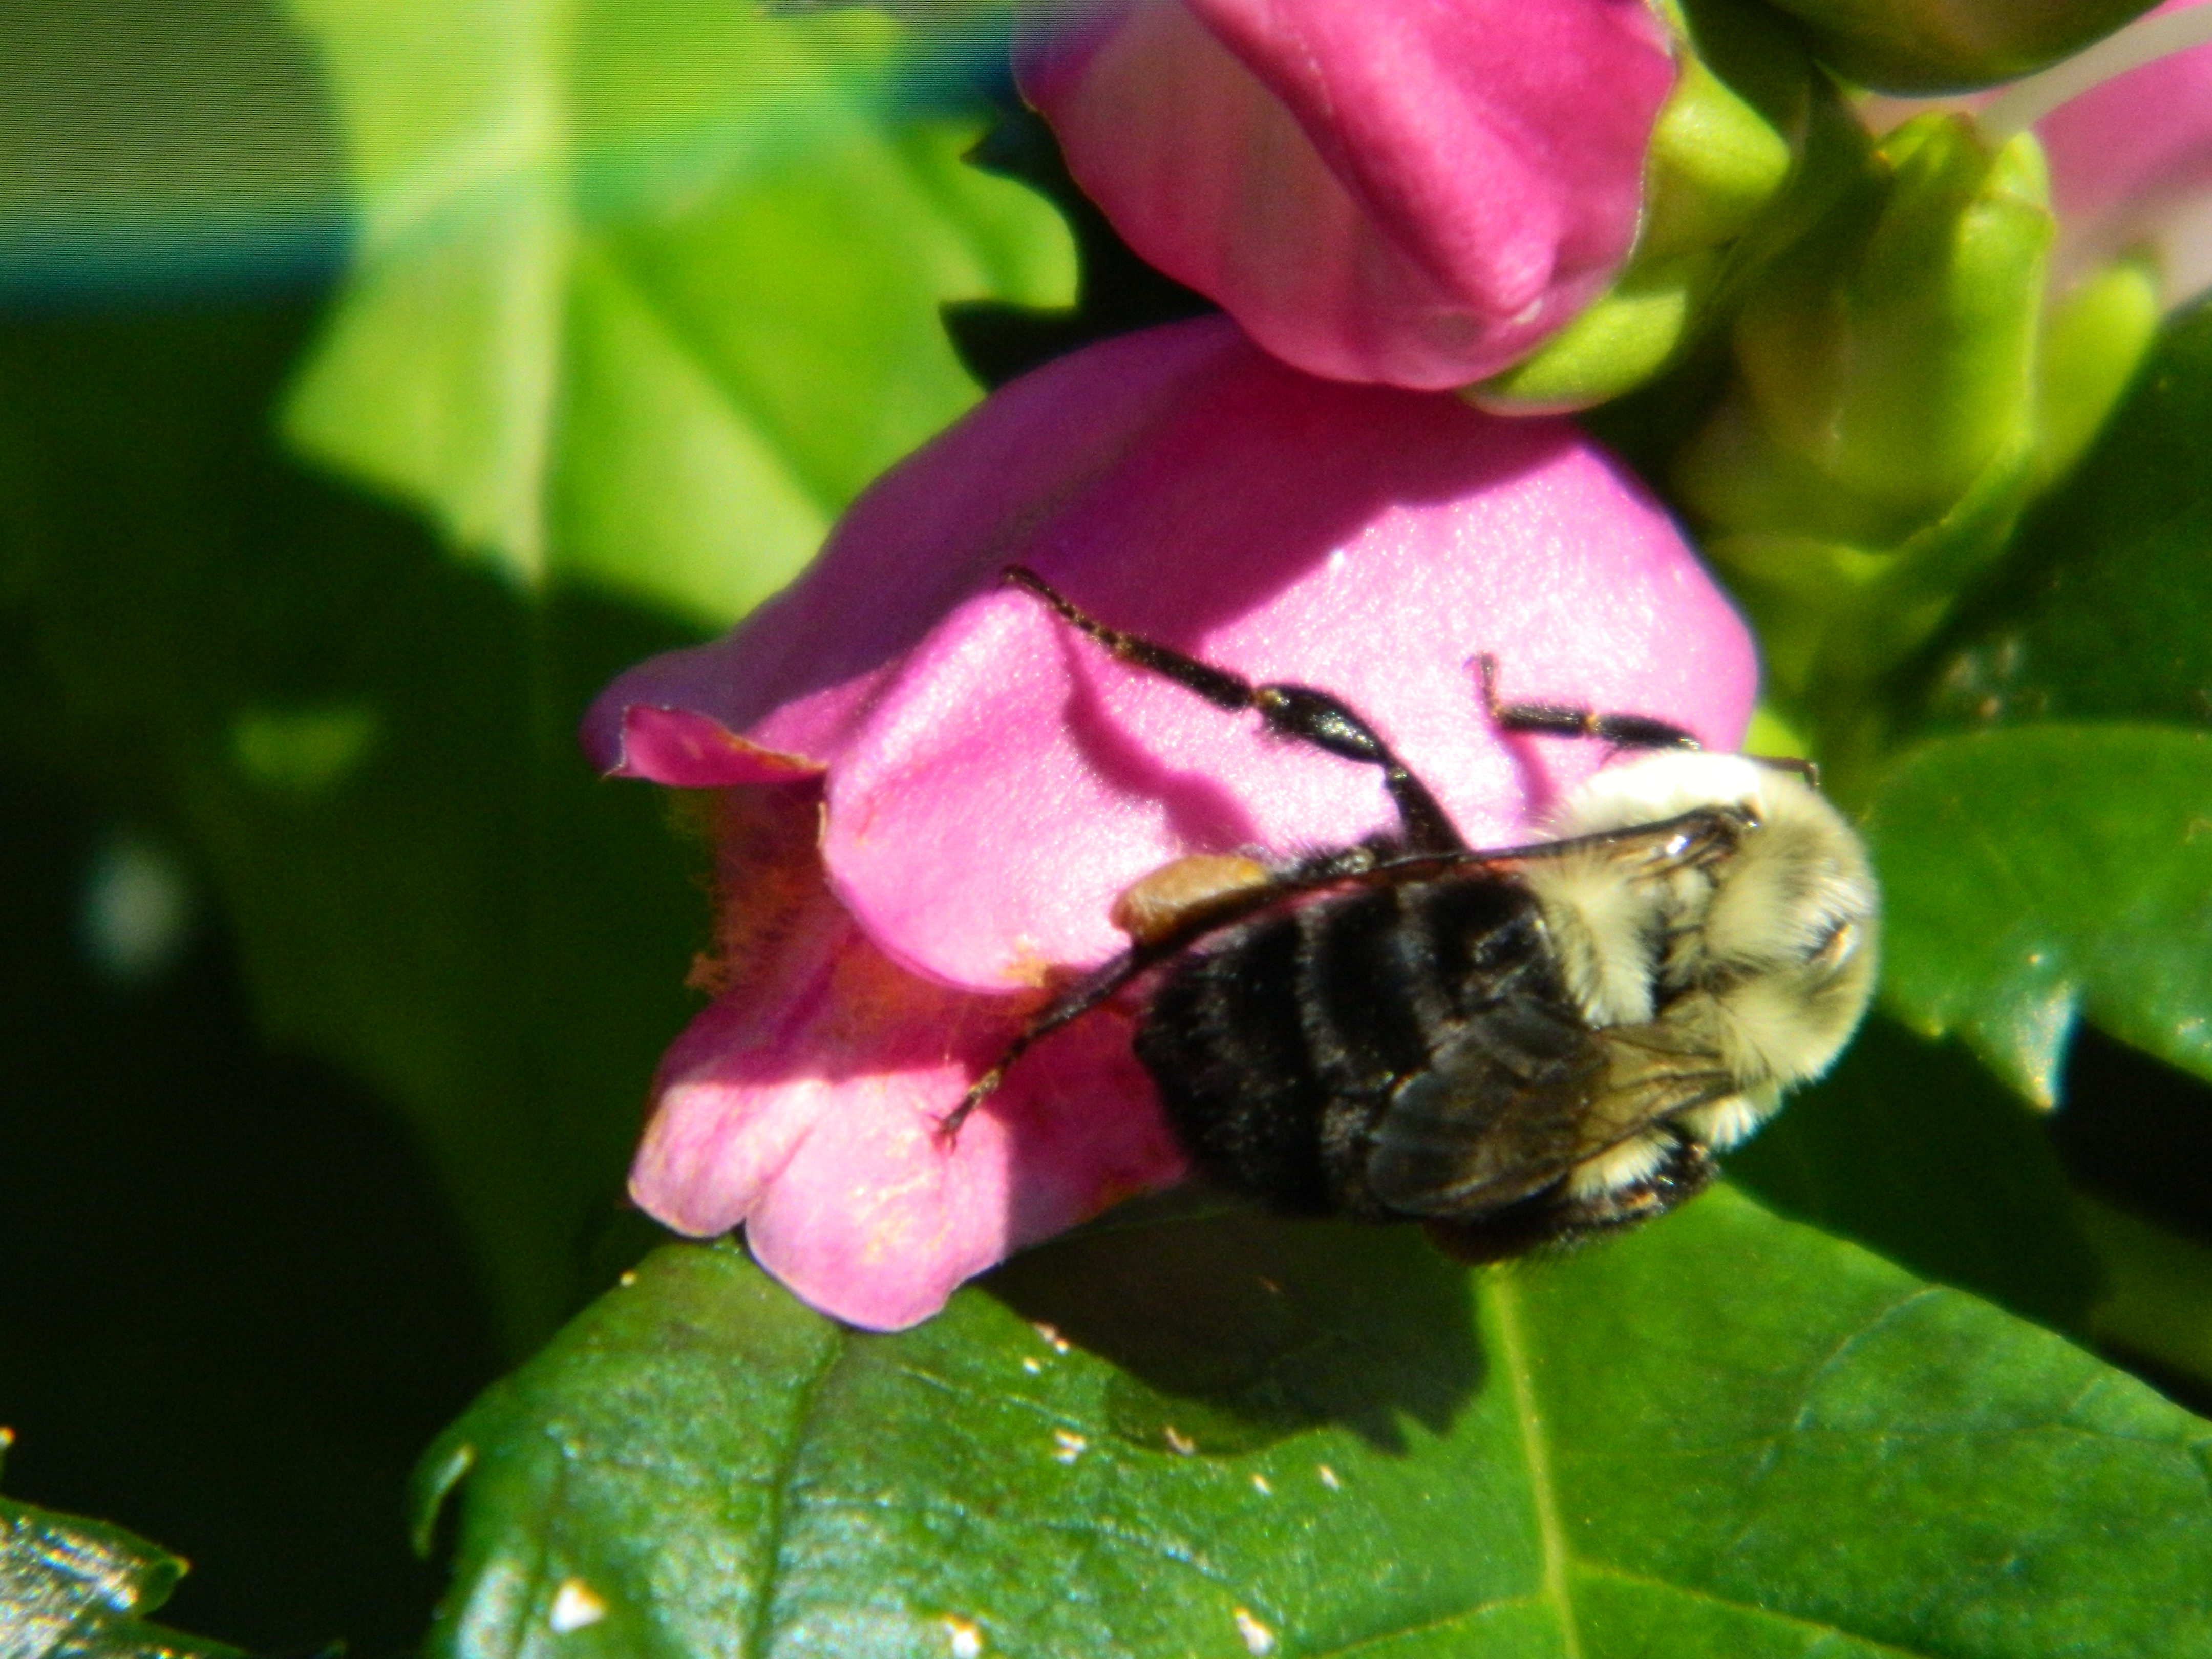
Perennials also serve lots of other wonderful purposes. They have fragrant foliage and flowers, many can be used as a cut flower for your vases, and they attract butterflies and bees – and others have medicinal purposes too.

Bee enjoys a Perennial (Turtlehead)

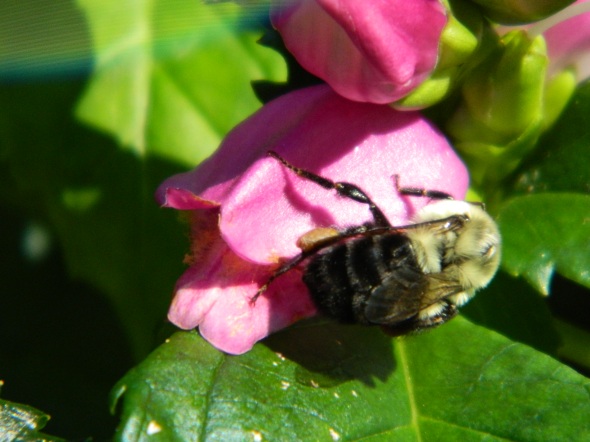
Bee enjoys a perennial (Turtlehead) – A late season bloomer and very showy plant in containers!

There will be varieties for sun and shade available at these two workshops in May 2015. A total of 120 perennial plants have been ordered, 6 each of 23 species. Learning their features and how to use them with other plants in the containers will be part of this workshops offerings.

Red Banana Leaves with Various Elephant Ears

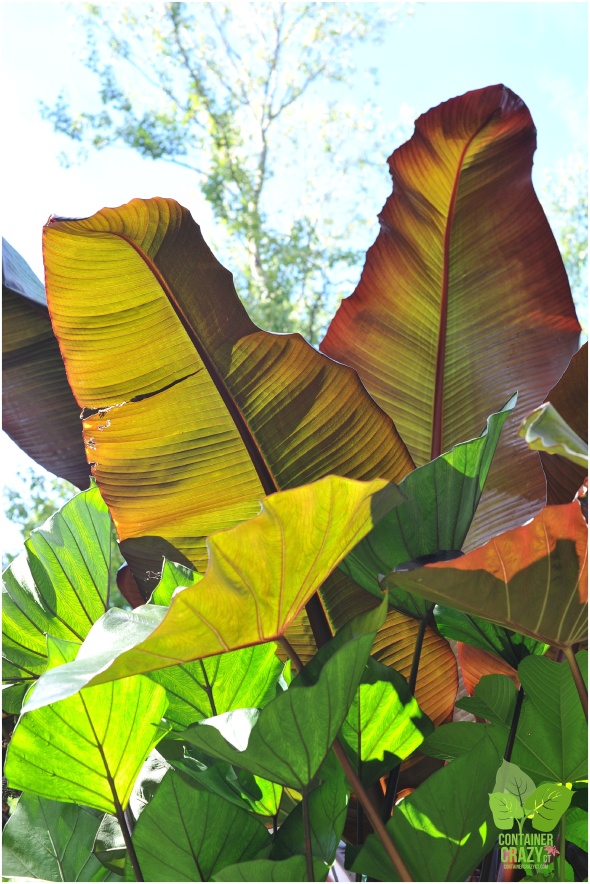
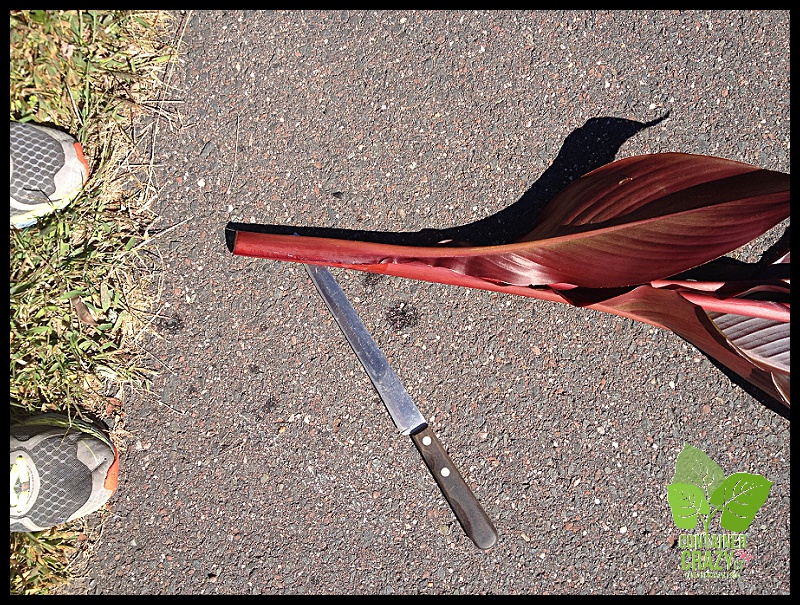
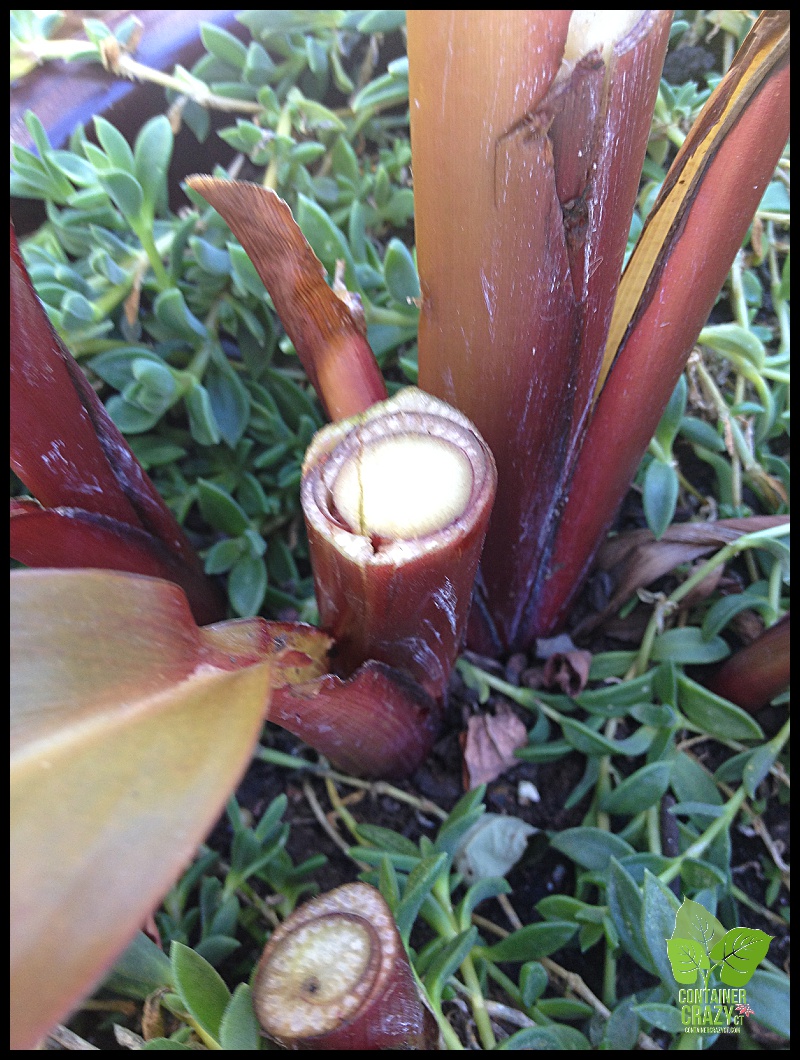
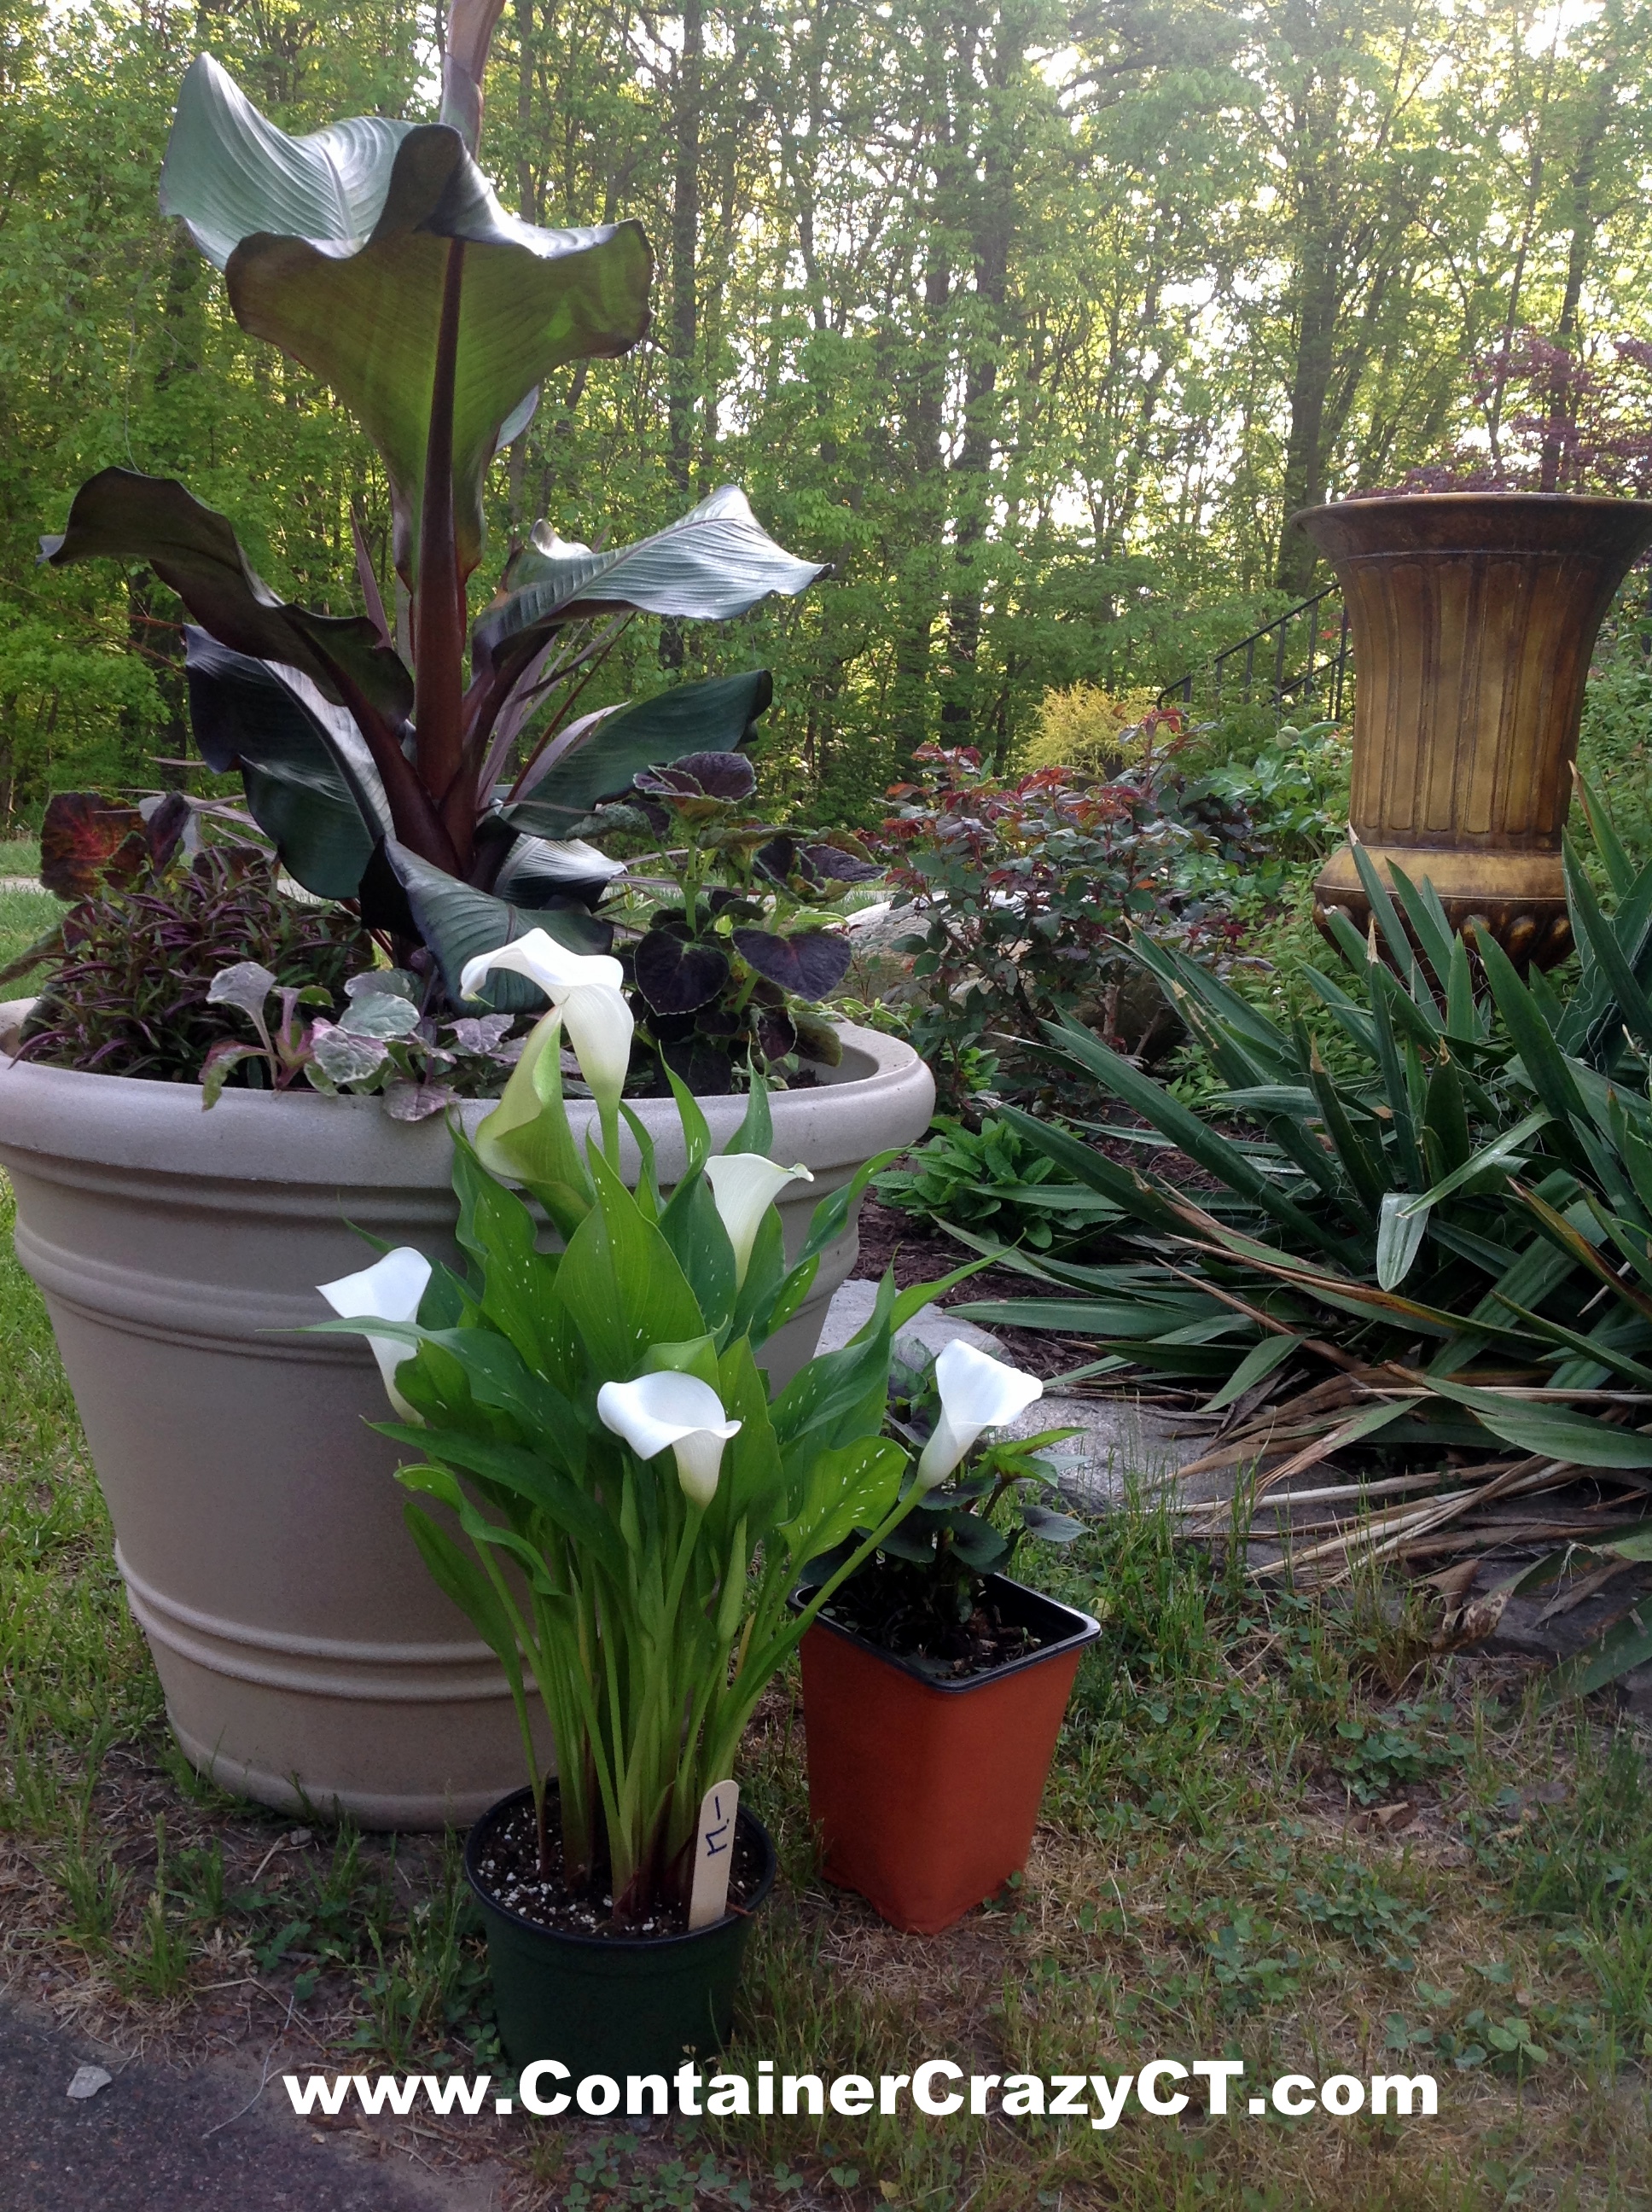
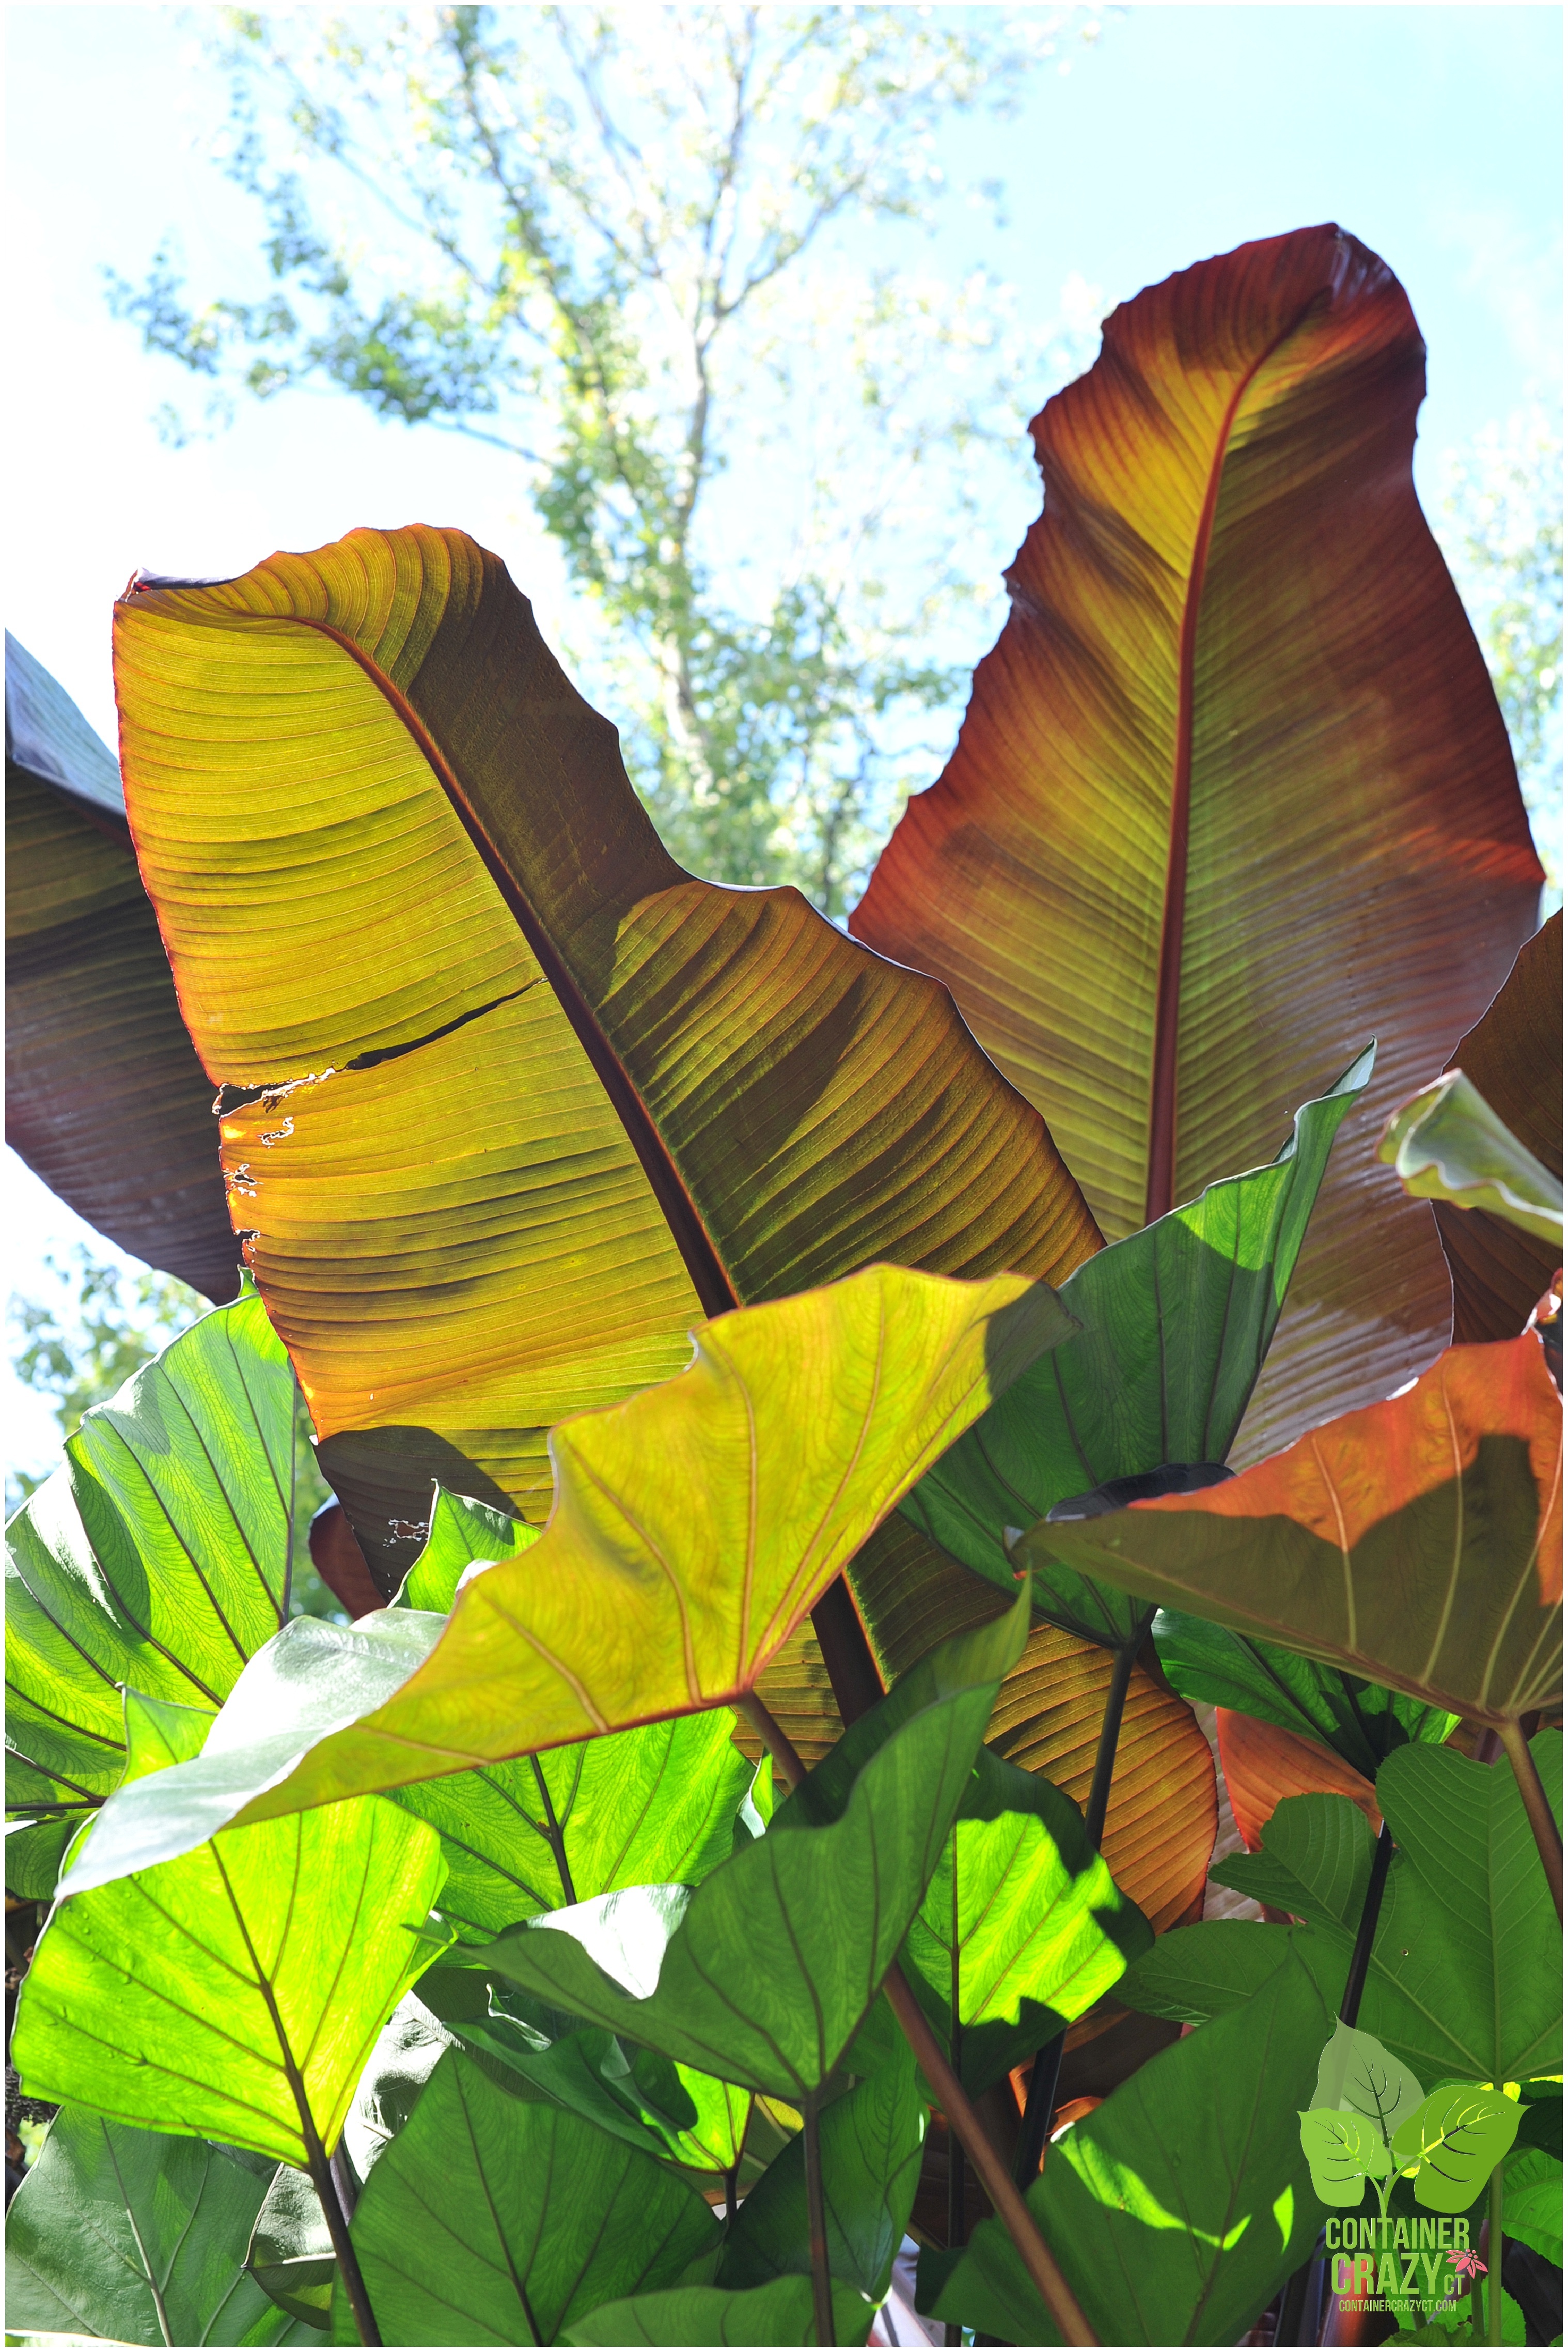
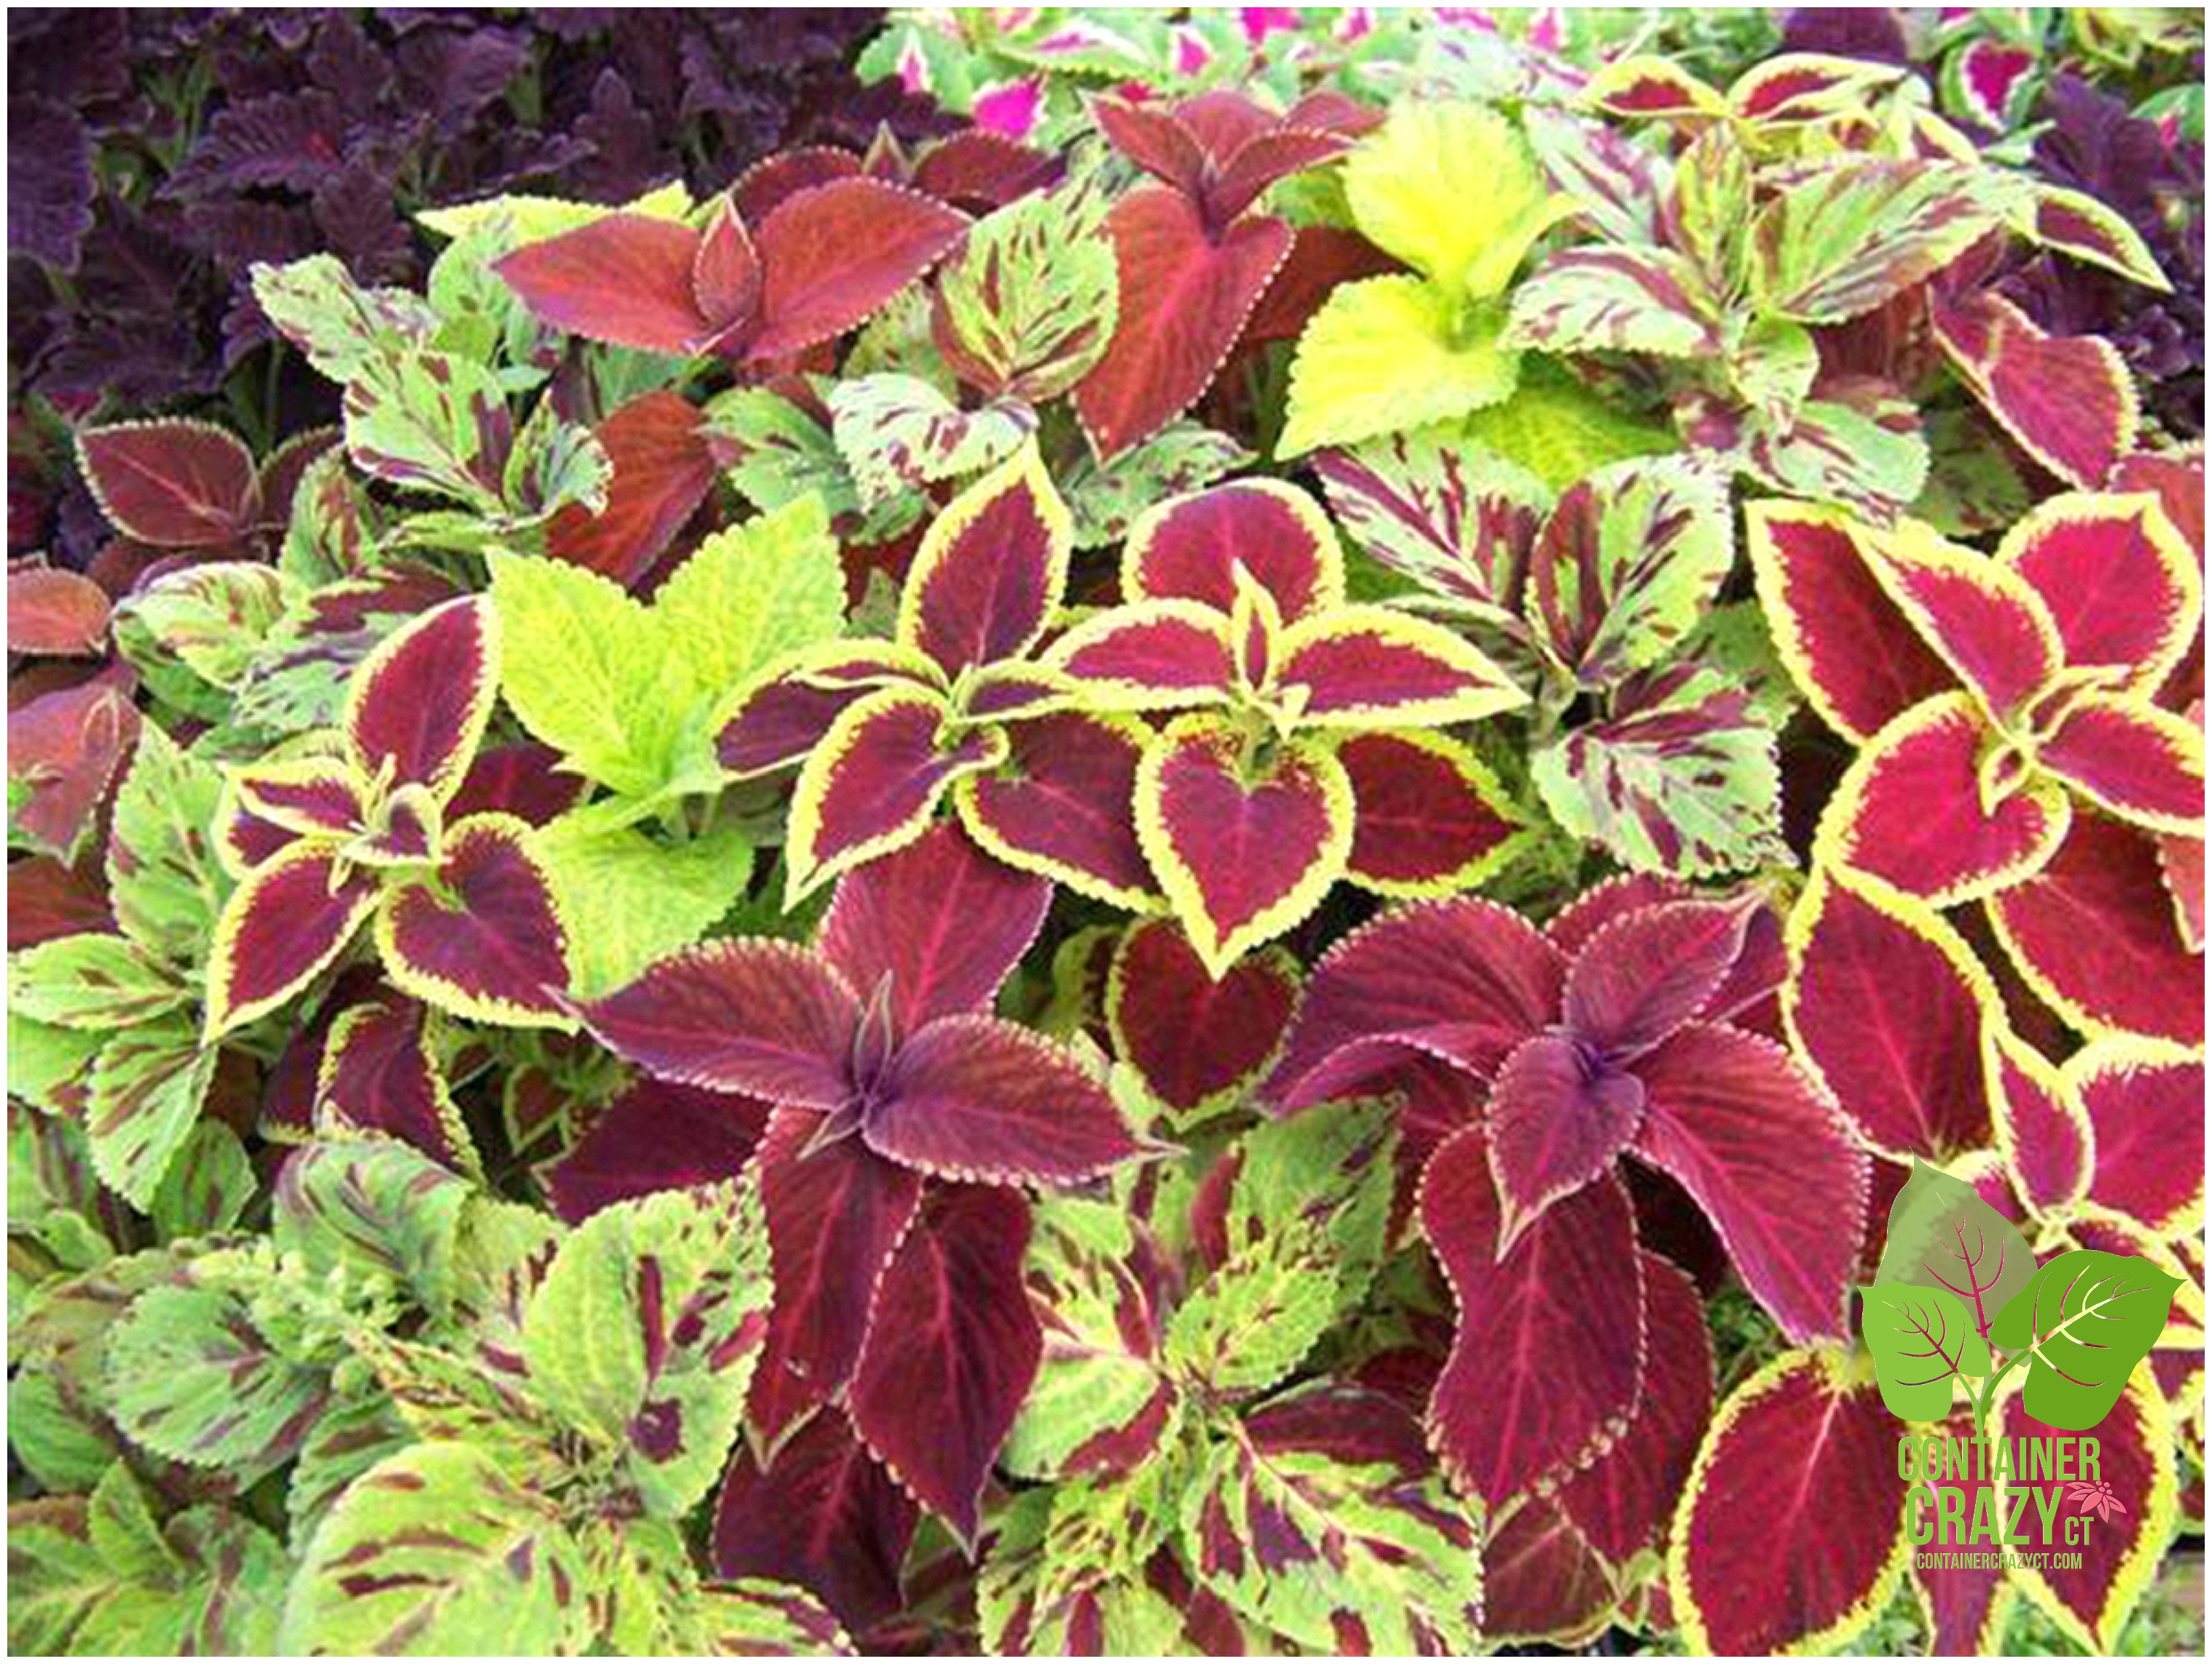
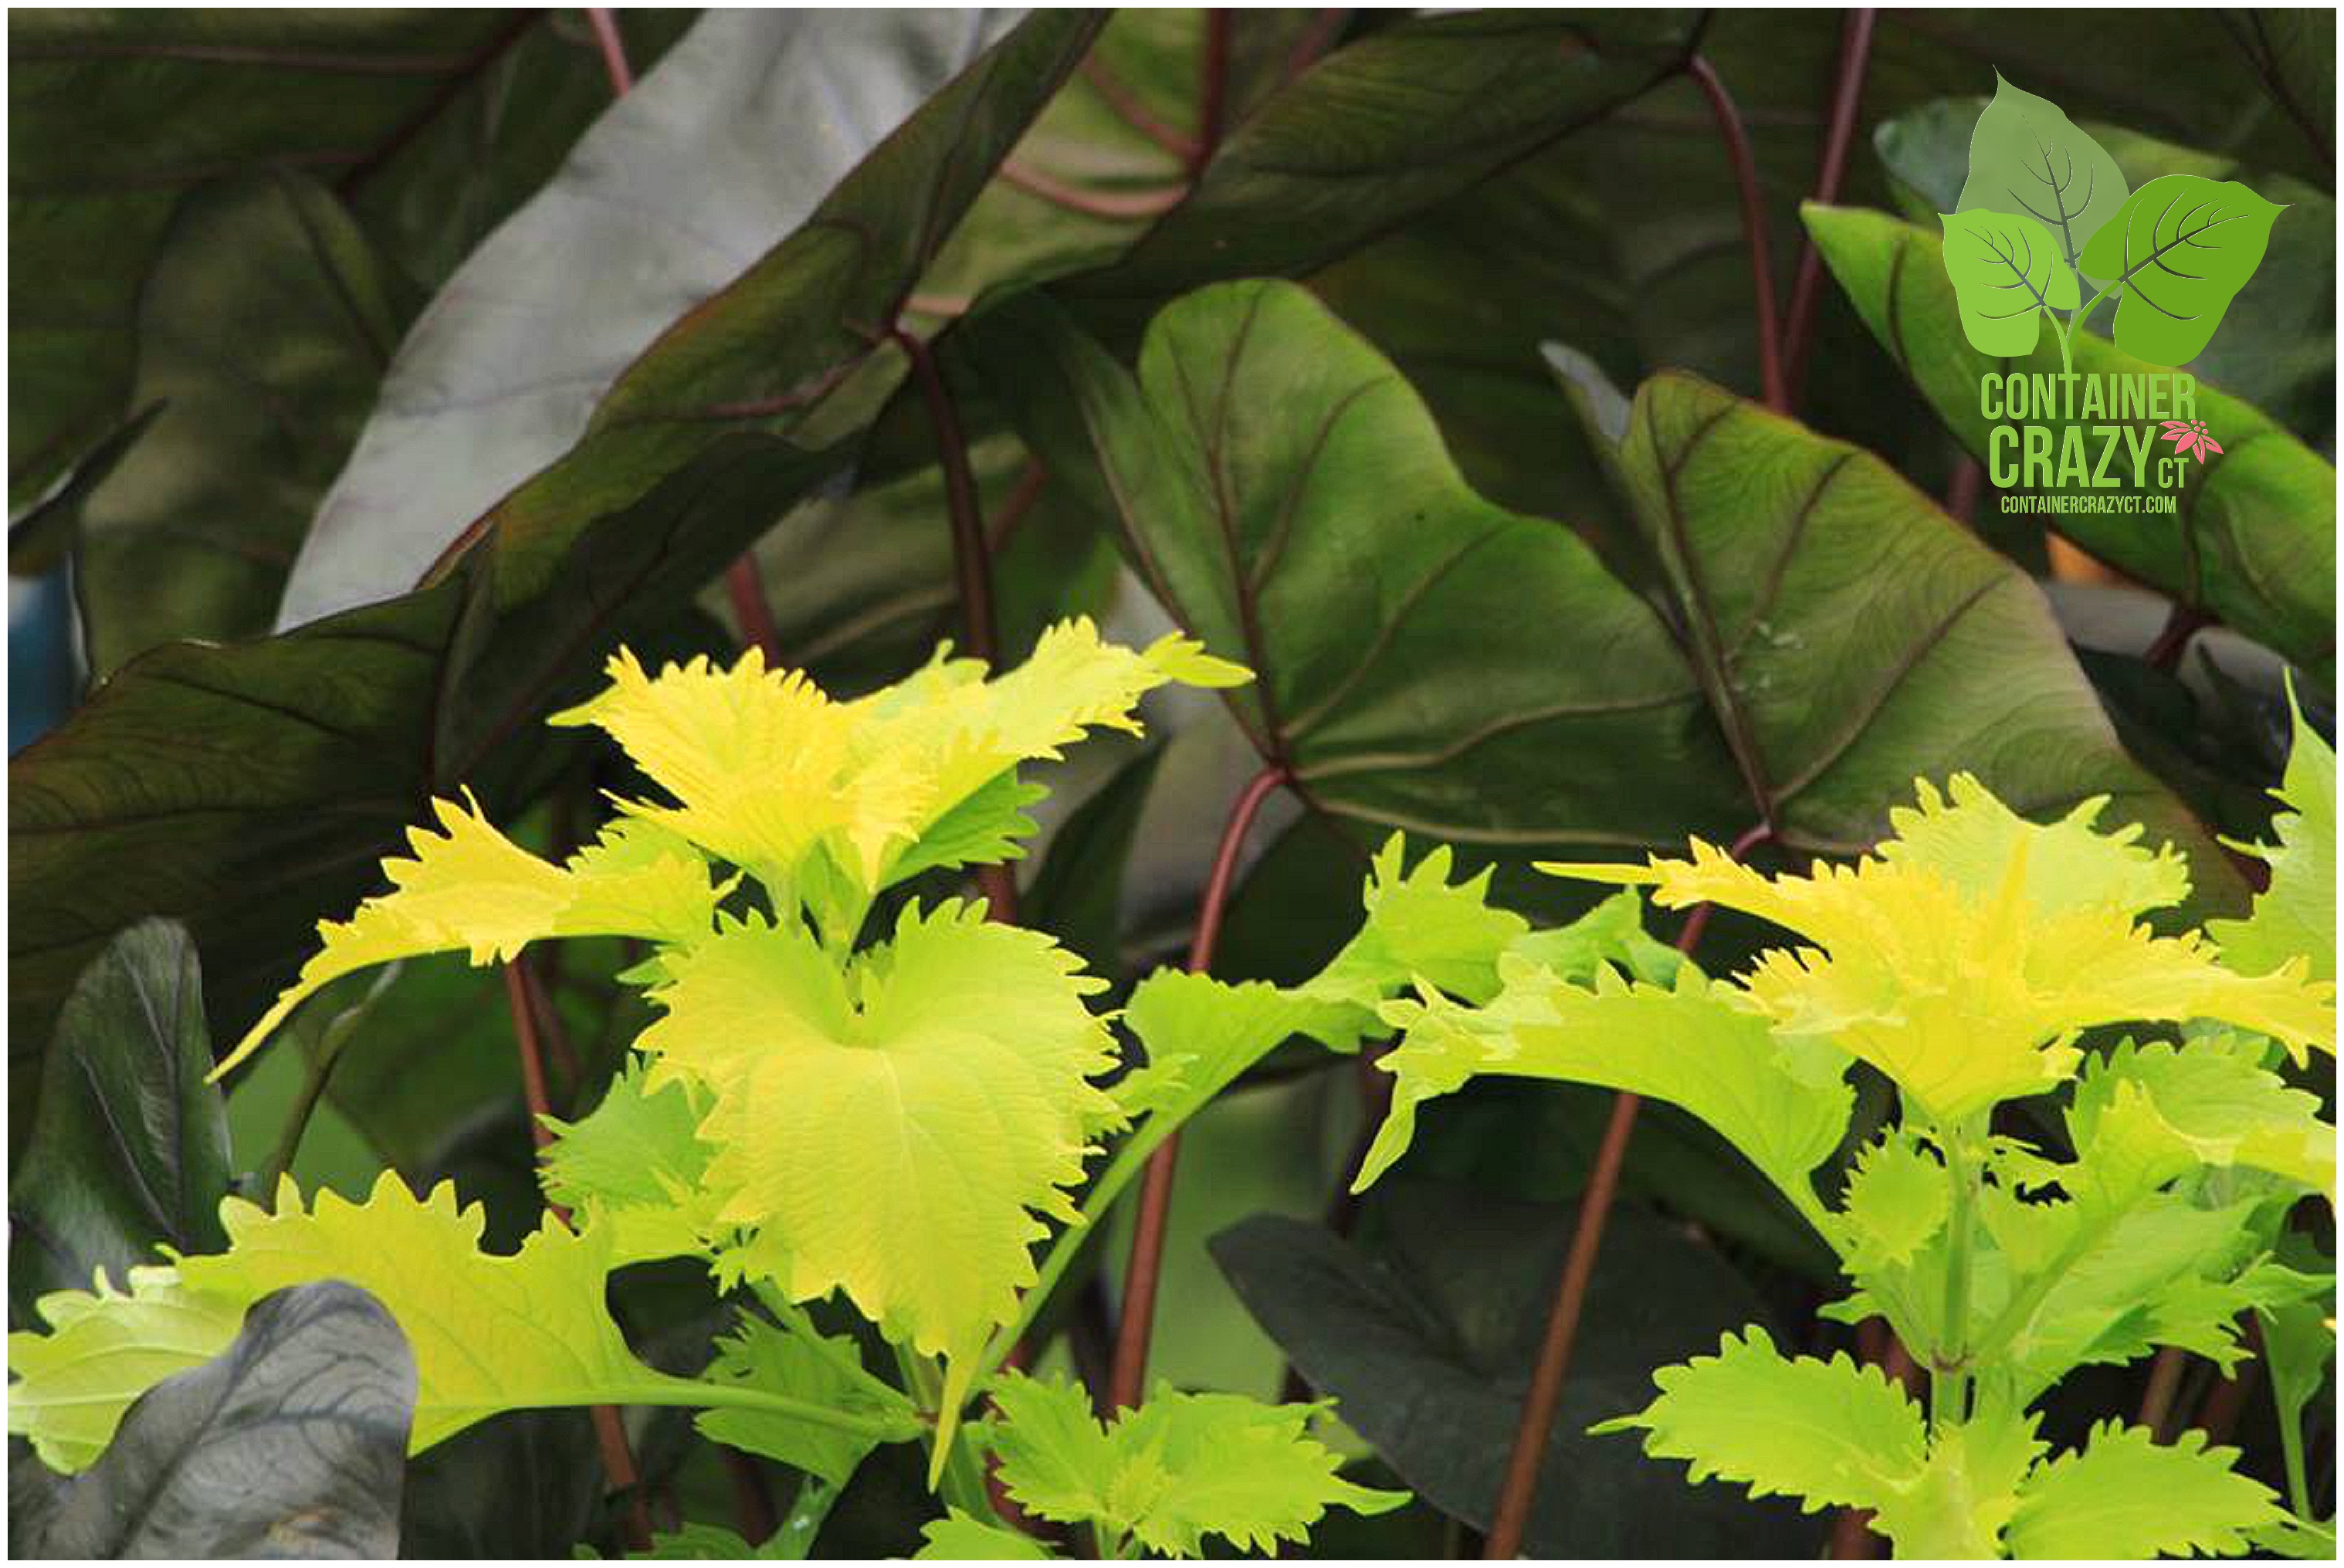
Red Banana Leaves with Various Elephant Ears – The Type of Tropical Plants Available at the May Workshops!

Tropical Additions

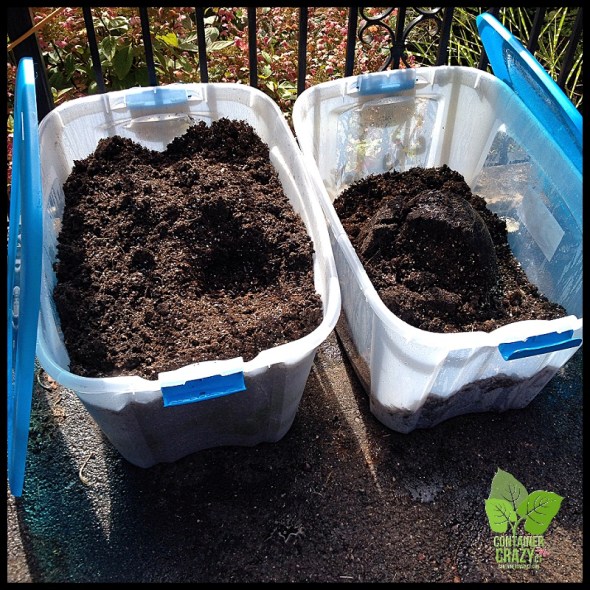
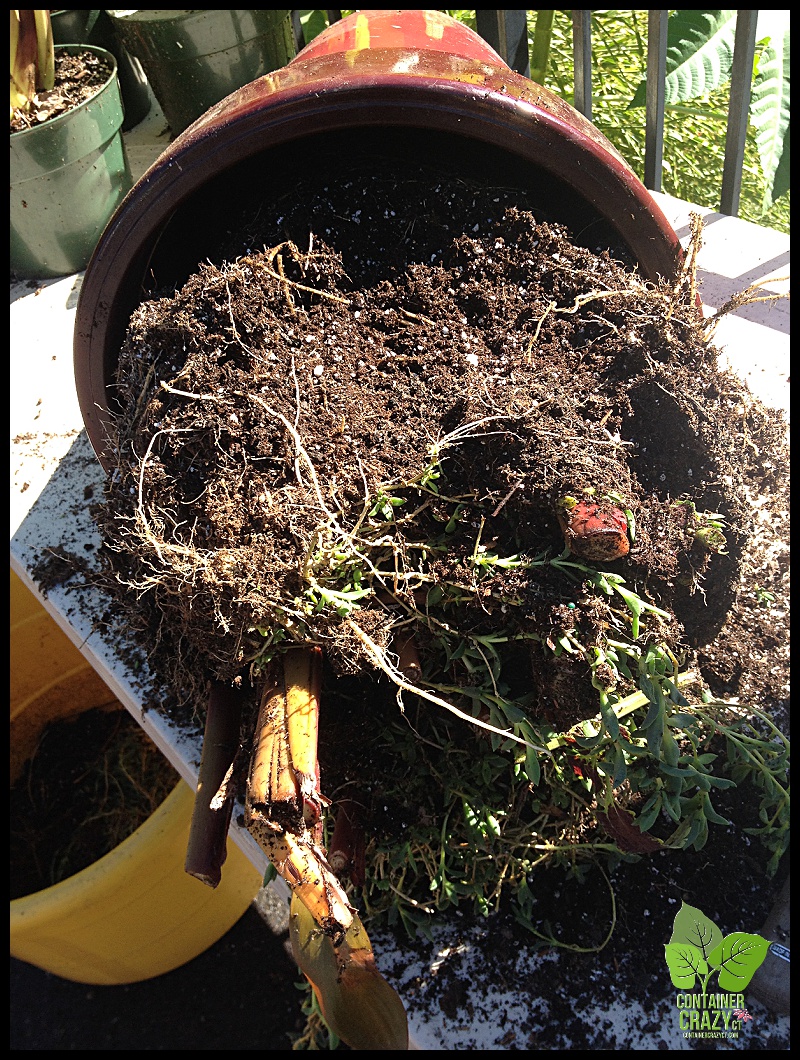
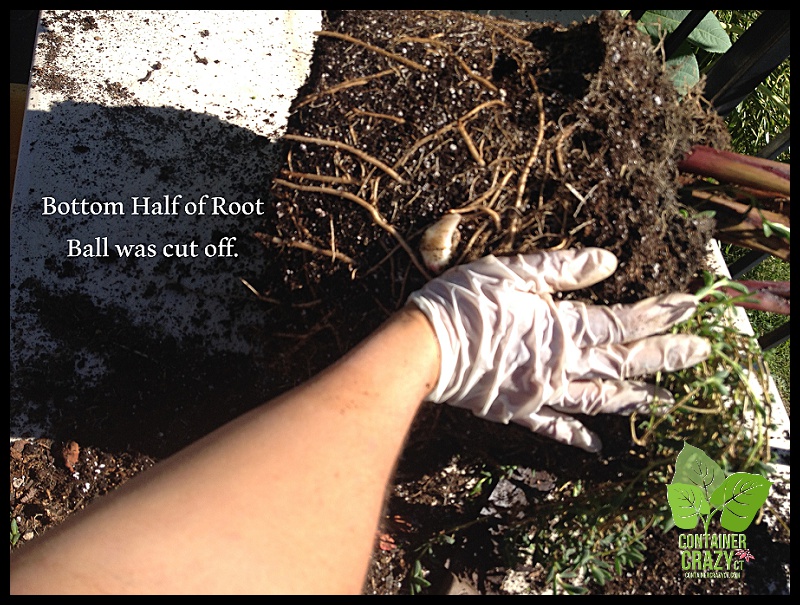
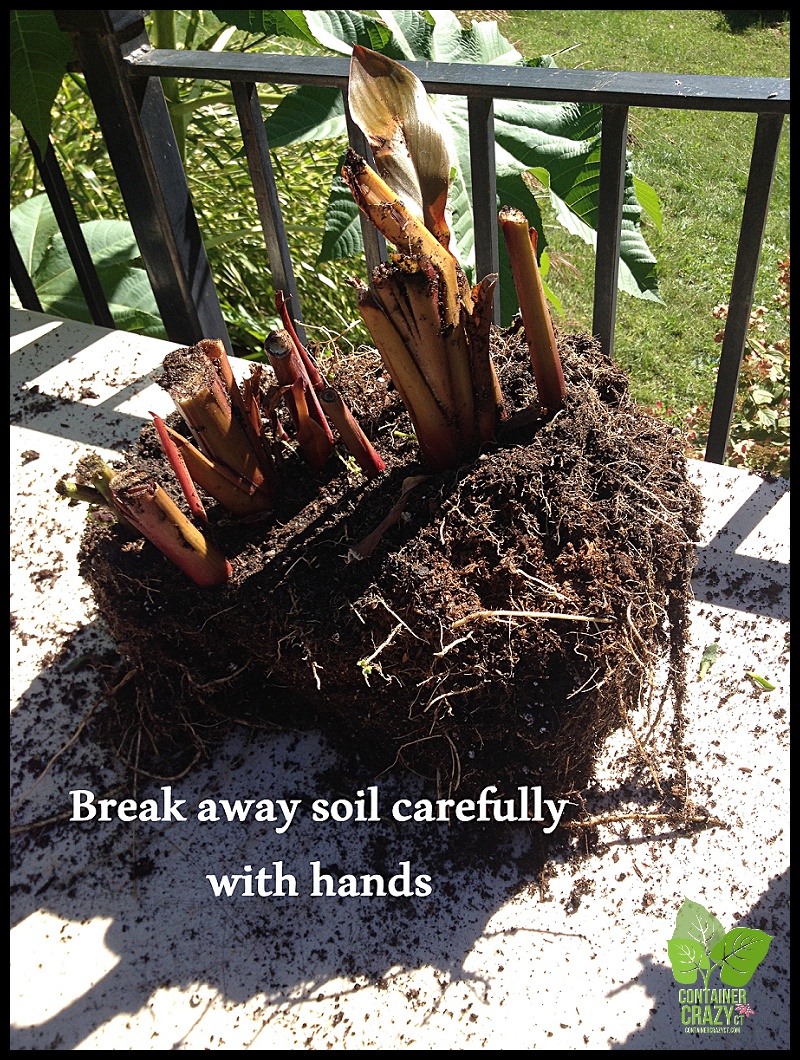
Tropical plants with large lush foliage features will be part of the Container Garden Workshops this year as well – because they are a passion and, like perennials, they have great benefits – the ability to reuse them year after year when appropriately stored over the winter, their dramatic and showy role due to their ability to grow fast, and adaptability to warm climates, which is what we have here in CT during the summer months. Many tropical will last all the way into October with no signs of stress, giving you a real show until the first frost of fall arrives.

Containers in Sept 2015

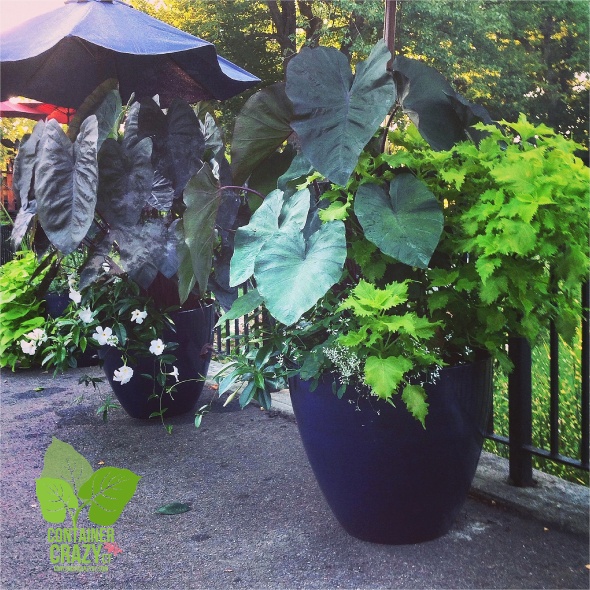
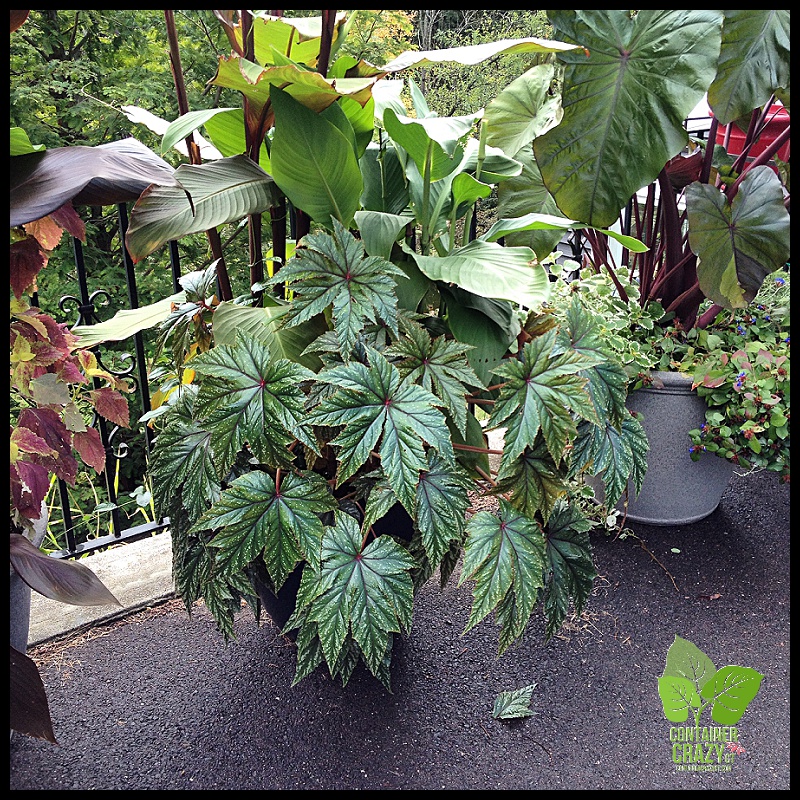
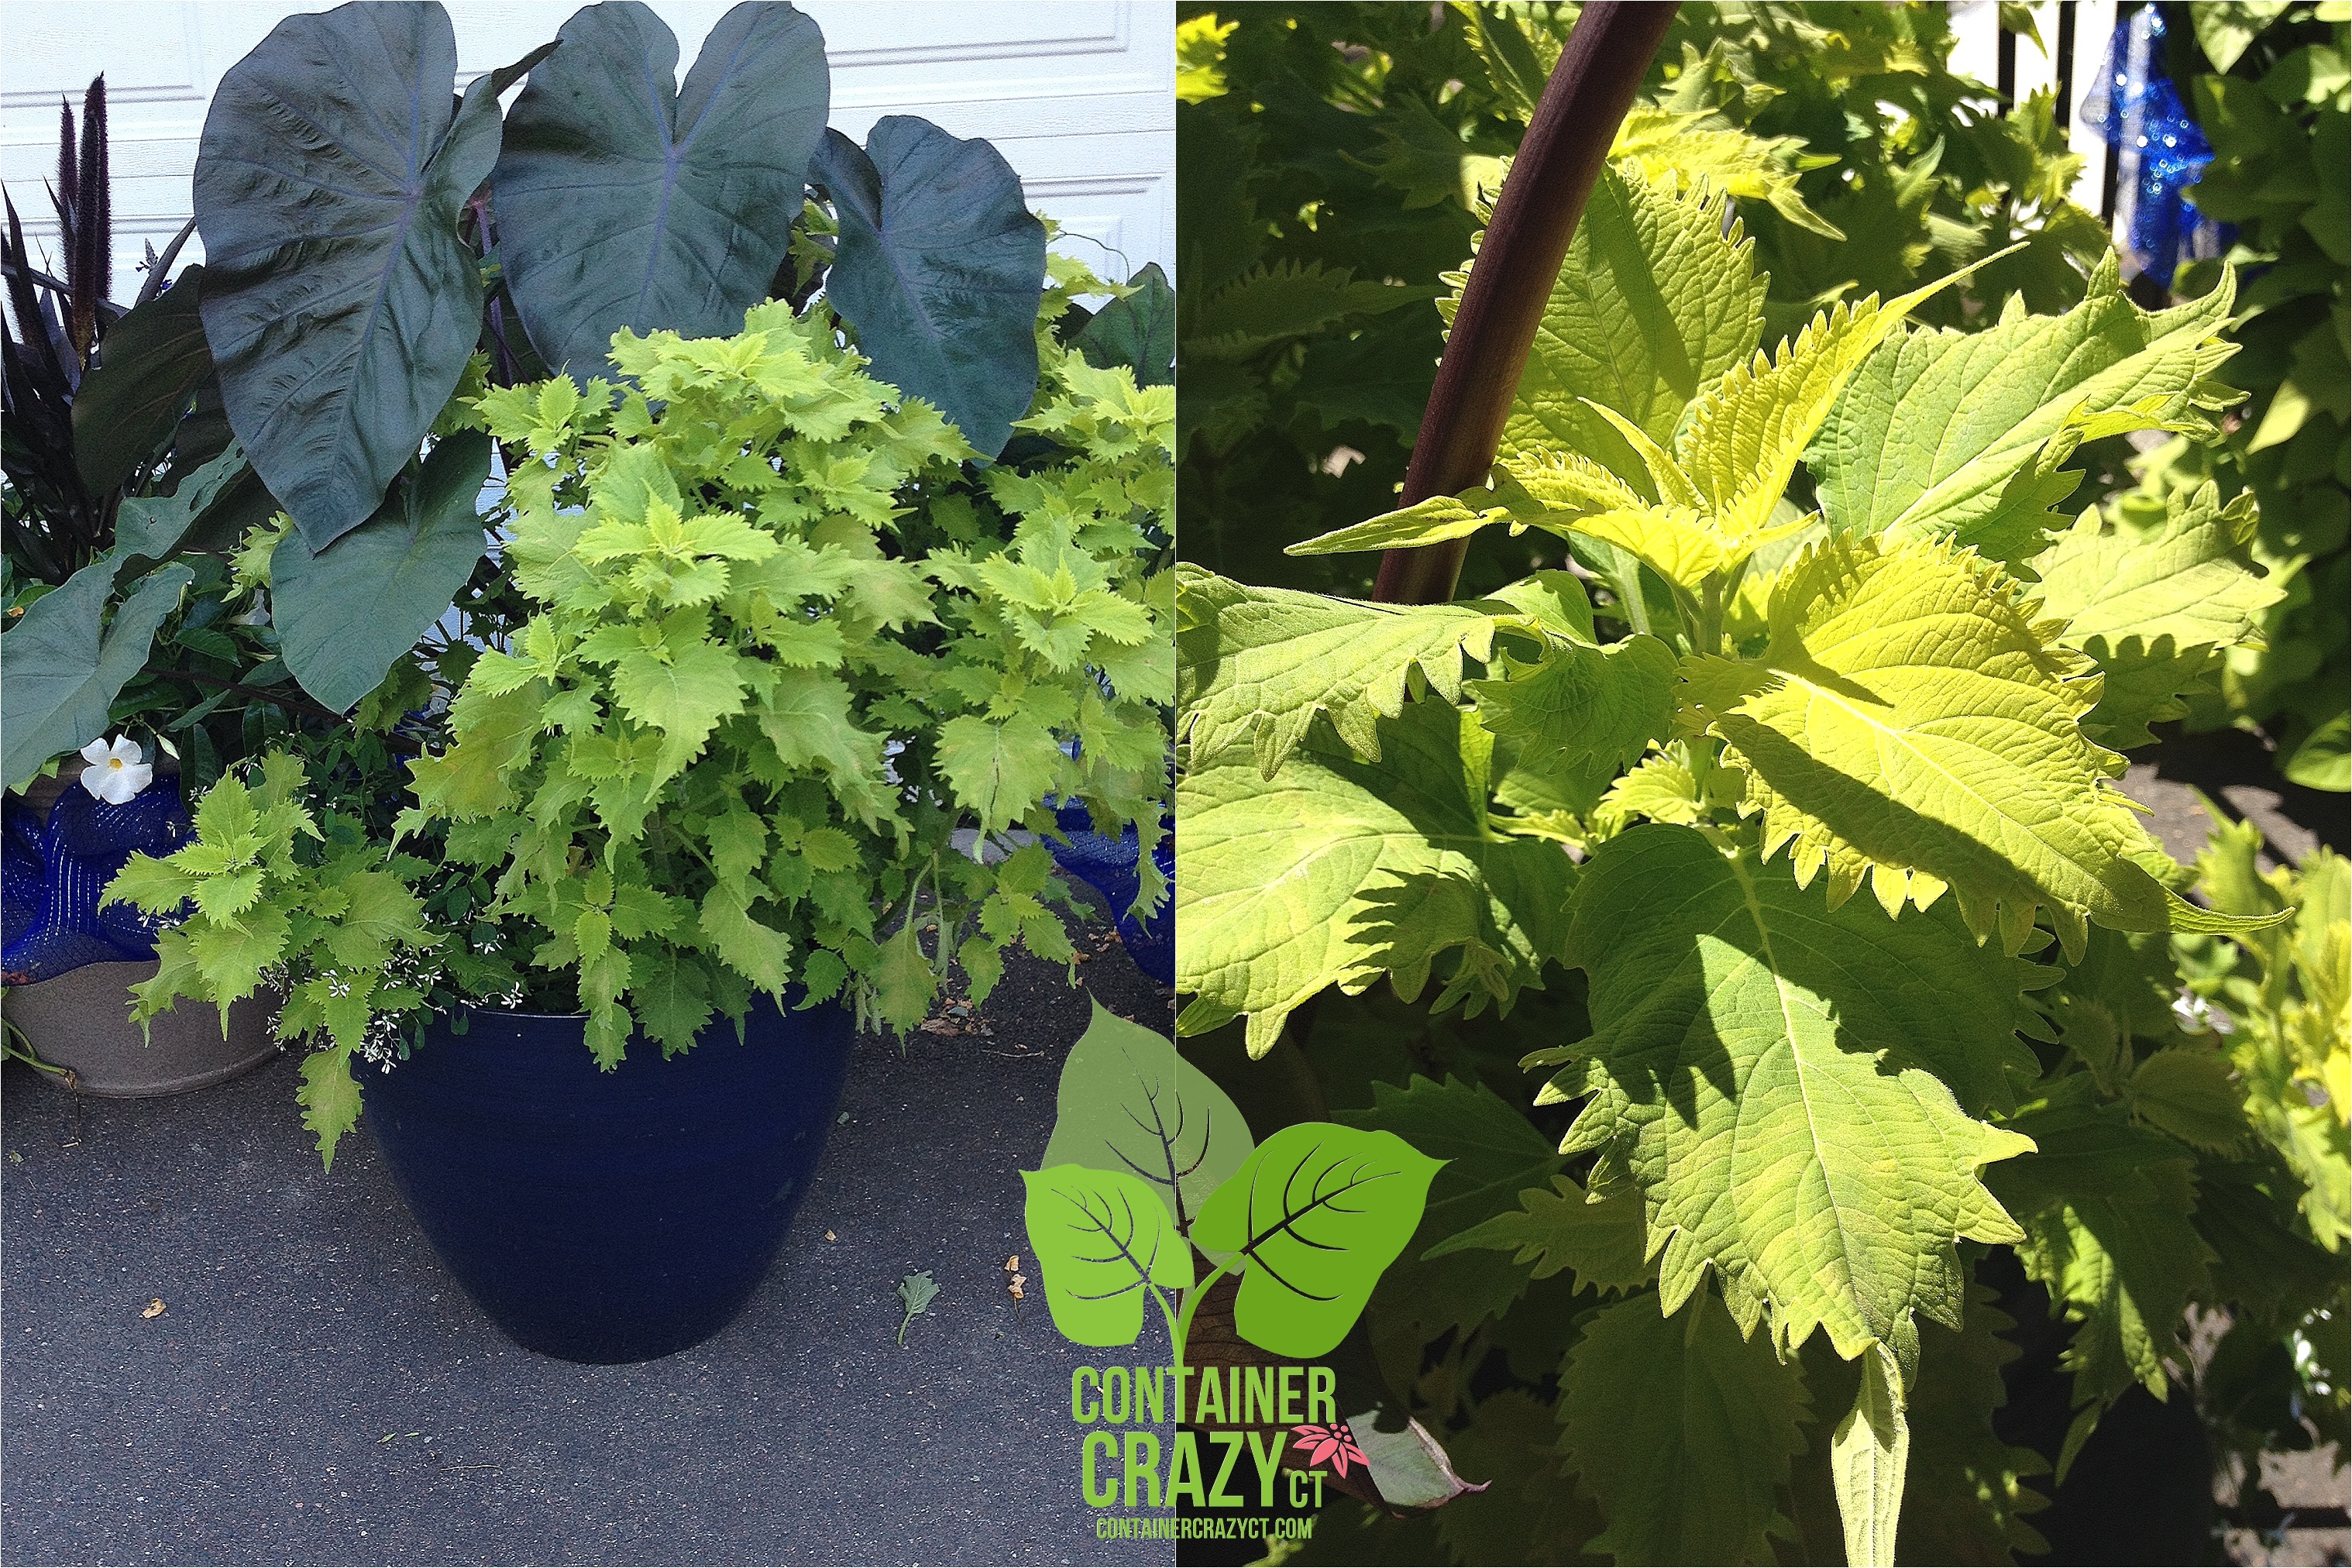
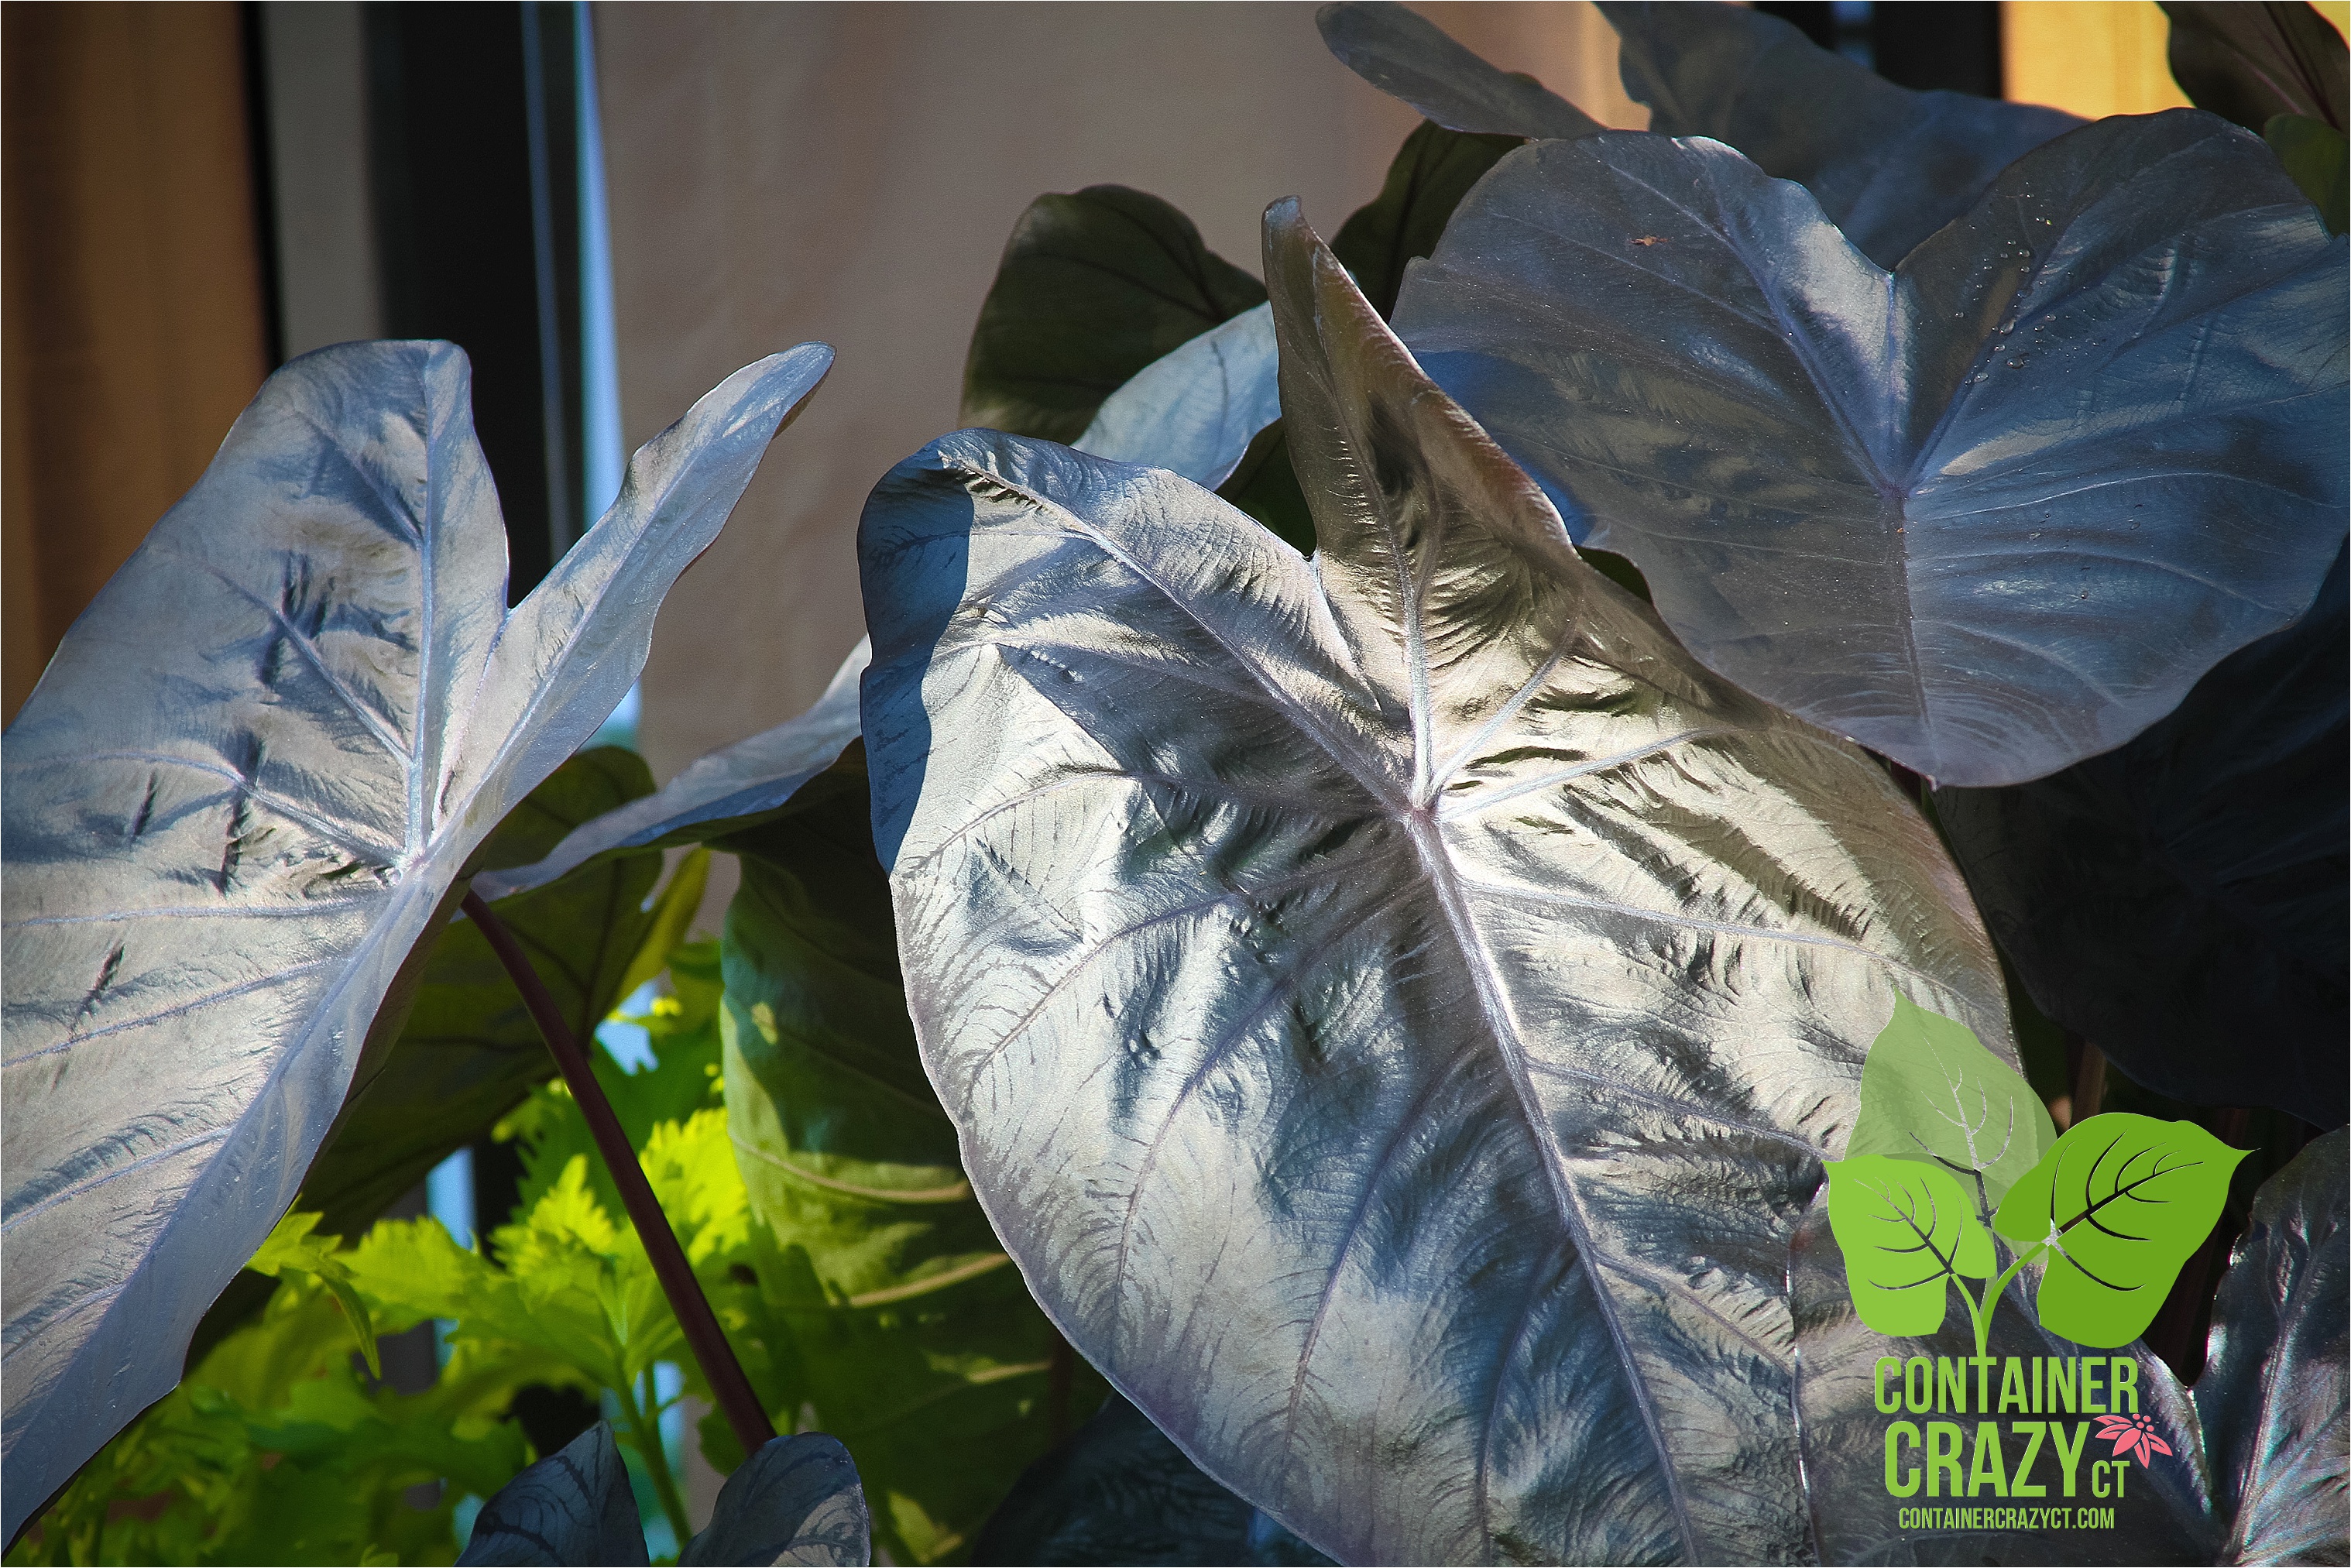
Containers in Sept 2015 shows the thriller of Colocasias (Elephant Ears) – Available for Purchase at the Workshops!

Every year, elephant ears (Colocasia), banana plants (Ensete and Musa), and some other unique tropical plants are offered as part of this workshop. Pairing up a dark toned elephant ear, such as Colocasia ‘Maui Magic’ with a vivid bloom of a perennial has dramatic effects in containers, and in this workshop you will see how it’s done.

A total of 185 tropical plants have been ordered, 8 each of 21 species, and learning their features and how to use them with other plants in the containers will be part of this workshops offerings.

Pinboards – Perennials with Power for Container Gardens

Start visiting my pinboard titled, Perennials with Power for Container Gardens, to get a glimpse of what the featured perennials and tropical plants will be at the Container Garden Workshops scheduled on May 16th and May 23rd, 2015. I will be adding photos up until the workshop dates. This will give you an idea of what will be featured, and some are shown in container gardens and patio pots too.

Two Workshop Date Options

This year, the workshop is being offered on two dates. There are some considerations beyond your calendar’s availability on which date you may want to select. Both sessions will have the same topics and materials available.  More details of what is included in the class is listed on www.ContainerCrazyCT.com, click MAY CLASS (BIG CONTAINER GARDEN) under the Nature with Art Programs menu.

May 16, Saturday – Session No. 1:

The May 16th date is after our typical spring frost date but we won’t know until we hit April. Experts say we are “almost guaranteed” to not get frost from May 10th through September 26th, but after our winter and global changes – do we trust weather guarantees anymore?

This means if you elect to attend session no. 1 on May 16th, your containers may require protection if we get an overnight frost. Frost is not as harsh to perennials, but will affect tropicals. If you are okay with moving your pot or covering it with a light sheet if forcasters say we will get a frosting, then May 16th is for you.

May 23, Saturday – Session No. 2:

The May 23rd date will be safe – however, it is Memorial Day weekend, and schedules tend to be busy – but with that said, nothing is better than placing your newly arranged container garden out on your deck or patio just in time for the festivities.

Registration one of 3 ways:

  1. Visit the Facebook page for Container Crazy CT and click on EVENTS to join.
  2. Complete the Contact Form found at the bottom of the class pages from the top-menu bars of http://www.ContainerCrazyCT.com.
  3. Email containercathy@gmail.com or call (860) 977-9473

Payment:

$15 per person + cost of plants purchased at the class. Payment of class fee of $15 is required by mail one month prior to the class date. Payment is non-refundable for any cancellations one week prior to the class date. Sales tax is applicable on all plant purchases during the class.

Send to: Cathy T’s Landscape Designs, 72 Harrington Road, Broad Brook, CT 06016

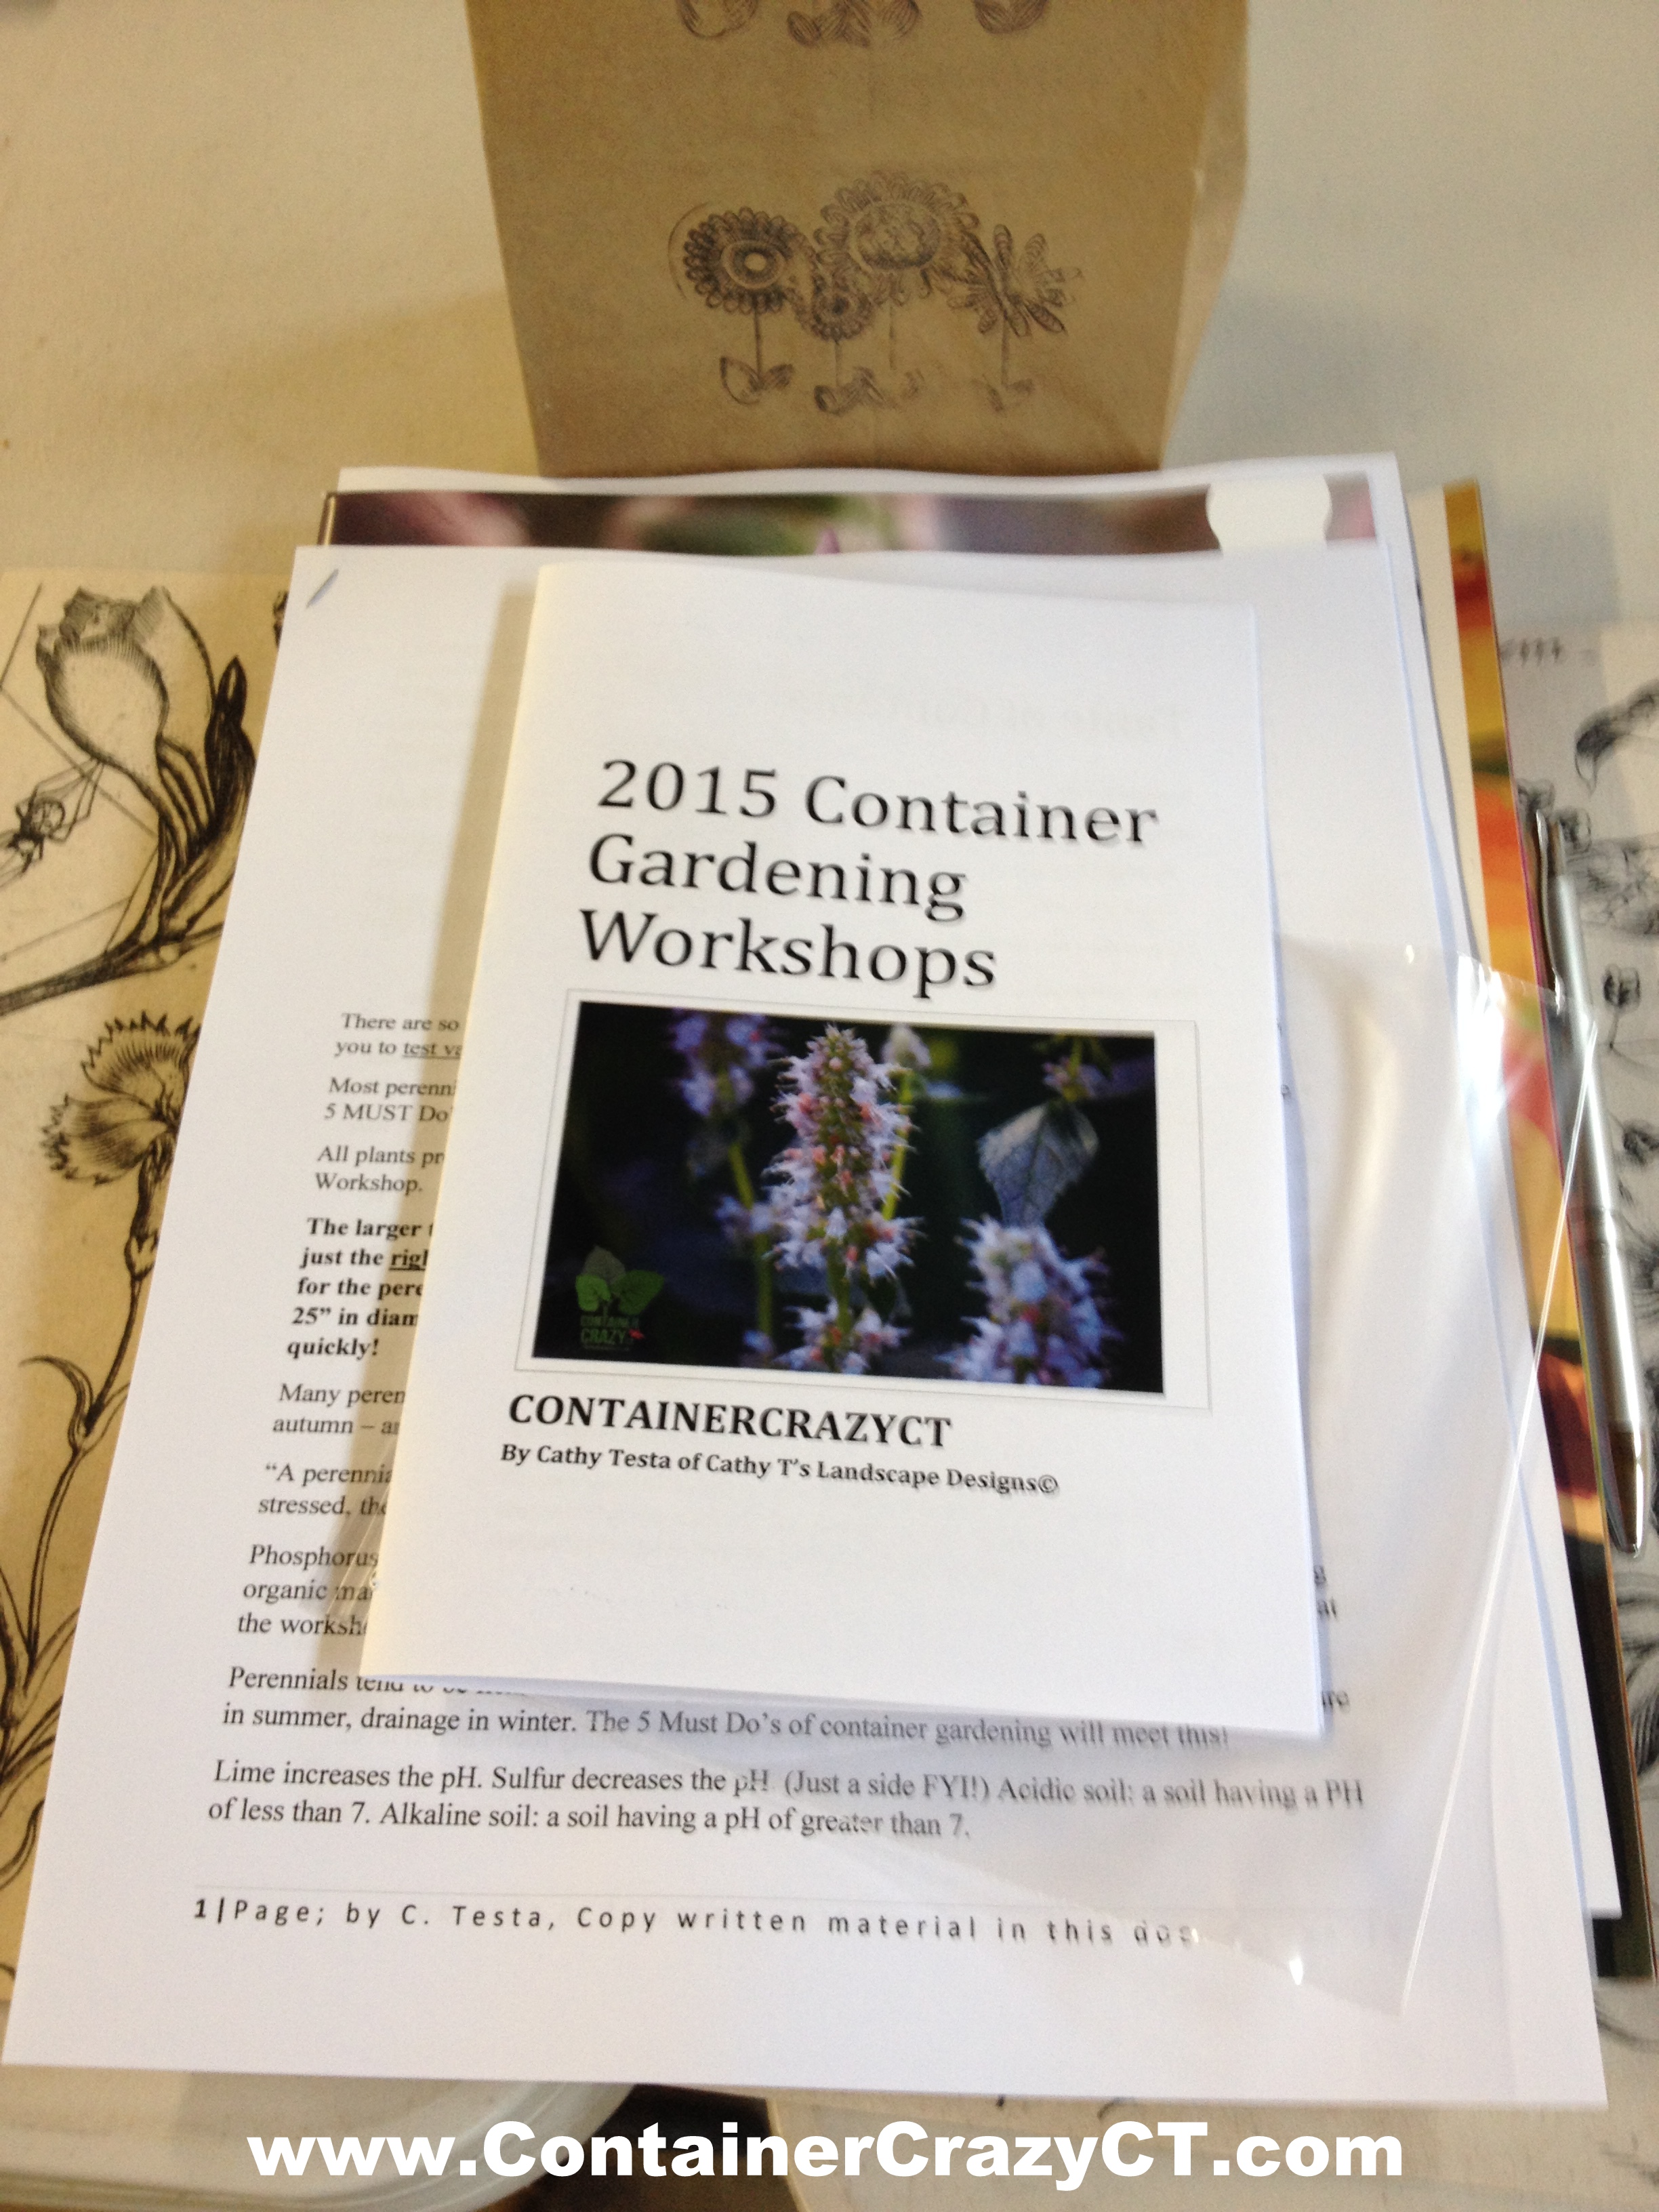
For a PDF version of this text: Container Garden Workshops Intro 2015

← Back

Thank you for your response. ✨

Thank you,

Cathy Testa

Cathy Testa is a container garden designer in Broad Brook, CT. Her work has been featured on the television program, CT Style, and in several gardening publications. She offers classes year round where nature is combined with art and is available for container garden installations.

Succulents ContainerCrazyCT_0010For a Calendar of All Events and Workshops, click HERE.


Wasabi Coleus with Vivid Lime Green Coloring is a Top Performer

4 Comments

When it comes to a wide array of foliage colors, coleus plants are one of the best to use. It is no wonder the National Garden Bureau has declared 2015 the Year of the Coleus. Just look at this image below, downloaded from the bureau’s website (www.ngb.org/downloads). The variegation is speckled, trimmed on the edges, and splashy! And this plant is so easy to grow. Coleus plants are known for being tough and are quite recognizable by plant lovers.

Mix of Coleus - Photo from National Garden Bureau

Mix of Coleus – Photo from National Garden Bureau

Last year, I used Wasabi coleus (Solenostemon scutellarioides ‘Wasabi’) in several container gardens for a wedding client. The bride wanted lime green along with cobalt blue and white colors in her décor for the wedding. Lime green was an easy plant color to obtain. There are many plants with lime green or chartreuse colors, and I immediately had several pop into my head, such as:

  • Alchemilla mollis (lady’s mantel) – ruffled foliage, lime green foliage and flowers (filler)
  • Canna ‘Pretoria’ – tropical fast grower, lime green foliage (thriller)
  • Heuchera ‘Citronella’ or ‘Lime Rickey’ (coral bells) – foliage lime green, many Heucheras offer it
  • Iris ensata ‘Variegata’ (variegated Japanese iris) – sword like foliage with half lime green stripes
  • Lamium maculatum ‘Anne Greenway’ (dead nettle) – spiller with lime green and white foliage
  • Lysimachia nummularia ‘Aurea’ (golden creeping Jenny) – great spiller with lime green foliage
  • Sedum rupestre ‘Angelina’ (sedum) – great filler or spiller, tough for hot sun containers
  • Tradescantia andersoniana ‘Sweet Kate’ (spiderwort) – strap like vivid lime green with blue-purple flowers

These are just examples of perennials in that color, but many annuals, ornamental grasses, and a few shrubs also show off lime green or chartreuse colors. The plant list could go on and on, but it was important for me to have strong performers and those which would last towards the end of the summer.

Containers with Wasabi Coleus by Cathy T

Containers with Wasabi Coleus by Cathy T

Two easy plant choices, which I knew from experience would last, were the annual plants, Wasabi coleus and Ipomoea batatas ‘Marguerite’ (sweet potato vine). Both plants have bright yellow to lime green foliage and really stand out in container gardens.

Close up of Wasabi Coleus

Close up of Wasabi Coleus – Heavily Serrated Leaf Edges

Wasabi Coleus

One of the aspects I adore about how Wasabi coleus worked in the container gardens is how its lime green coloring was highlighted or intensified as it sat near the dark toned elephant ear plants in the pots.

Wasabi Coleus with Dark Toned Elephant Ear Plants - Photo by Patrick C.

Wasabi Coleus with Dark Toned Elephant Ear Plants – Photo by Patrick C.

For the elephant ears, two varieties were used, Colocasia esculenta ‘Black Magic’ and C. esculenta ‘Black Diamond’. The coleus was so vivid and intense next to the darker toned elephant ears making each plant all the more dramatic.

Colocasia esculenta 'Black Magic'

Colocasia esculenta ‘Black Magic’

Colocasia esculenta ‘Black Magic’ has to be one of my all time favorite dark toned elephant ears. It has amazing downward facing heart or ear shaped leaves rising from tall plum to purple-black stems and grows to about three to six feet tall. The reason I find them great tropical performers is because the stems cluster and rise in a nice full batch from the center, and they stay tidy but are very lush and full, serving a the main thriller plant in the container gardens.

Container Garden by Container Crazy CT - Wedding Pots

Container Garden by Container Crazy CT – Wedding Pots

Coleus has strong stems which helps it to stand upright in the container as a filler plant next to the elephant ears. However, those strong stems may break in windy situations or if bumped up against. But, the good news is with a quick snip to any damaged stems, regrowth bounces back nicely.

Wasabi Coleus on left in the pot

Wasabi Coleus on left in the pot

Wasabi coleus does not tend to send out blooms, so I did not have to deal with cleaning them up. From the time I planted them in the containers until the point it was time to tear them out, there was not a flower in sight which to me was a good thing because I prefer the foliage colors and textures of coleus plants – the flowers are not that intriguing to me.

Wasabi Coleus ContainerCrazyCT_0023-001

In fact, I experienced no problems with Wasabi coleus. No blemishes, no spots, thus no worries. It was an excellent specimen from beginning to end.

Containers in Sept 2015

Containers in Sept 2015

The lime green to chartreuse color of this annual plant served to meet the client’s desired colors, and provided a nice texture with its heavily serrated edges, plus it grew upright and tall, filling in nicely alongside of the other plants in the container. However, there were a couple other plants incorporated into the pots with similar lime-green coloring.

Some of the wedding pots mid summer

Some of the wedding pots mid summer

Duranta – Sky Flower Tala Blanco ‘Gold Edge’

Another plant, which is not a perennial but annual in our CT planting zones with lime green appeal, is Duranta serratifolia (Sky Flower Tala Blanco ‘Gold Edge’).

Duranta Gold Edge  -- Photo by Cathy T

Duranta Gold Edge — Photo by Cathy T

This species is a shrub and its vivid lime green to bright yellow foliage with green centers is extremely electric. The coloring is very bright and the plant is tough. The only concern is handling it because stems have sharp spines, but otherwise, it definitely adds flare to the containers. As noted above, cobalt blue was another color requested, and this plant made the blue to purple flowers in the pots pop.

Duranta at Different Stages of Growth

Duranta at Different Stages of Growth

Marguerite Sweet Potato Vine

You don’t even need to say or mention why sweet potato vines are excellent for container gardens. They trail, grow relatively fast, and are showy in pots. Pretty much everyone into gardening knows of them – similar to how gardeners are aware of coleus plants. This is why the ‘Marguerite’ sweet potato vine was used as the spiller, a plant which trails off the sides in the container gardens. It has a nearly perfect lime green color and grows quickly.

Sweet Potato Vines next to cobalt blue gazing ball decor in the pot

Sweet Potato Vines next to cobalt blue gazing ball decor in the pot

The sweet potato vine plant eventually grew so long, I had to pick them up in my arms when moving the pots into my trailer for delivery. It felt like I was holding the train of a wedding gown. Ipomoeas are sun to part shade annuals. They are very versatile in any type of container gardens from hanging baskets to window boxes. Sweet potato vines could be considered the staple of spillers because they cascade so nicely and keep growing.

Sweet Potato Vine Marguerite (Spiller)

Sweet Potato Vine Marguerite (Spiller)

The container gardens at the wedding event served more purposes than just dressing up the space, they were great for protecting guests from tripping over the tent cords. And the bright lime to yellow green of the three plants (Wasabi coleus, Marguerite sweet potato vine, and Sky Flower) seemed to glow at dusk as the wedding day progressed which turned out to be beneficial.

Placed at key places during the Wedding Event

Placed at key places during the Wedding Event

After the container gardens were returned to my nursery, because they were obtained as rentals by the bride and groom, they continued to show their beauty until the early days of fall. When the season was over, I piled the stalks and cuttings of the plants into a garden cart to compost. Even here, you can see how amazing the bright lime greens showed up in the pile of mixed plants removed from the containers.

Garden Cart at Take Down

Garden Cart at Take Down

By the way, many people view coleus as a shade plant, but it can take part sun or dappled sun. Coleus ‘Wasabi’ was a great filler in these container gardens, but many other varieties tend to cascade downwards, serving as what I’ve titled as a “sprawler”. Sprawlers are similar to spillers, except they reach out a bit like arms coming down or reaching out of a pot. Also, big plants, like the elephant ears used in this combination, provide some shade over the lower growing coleus plants.

Containers by Container Crazy CT of Broad Brook, CT

Containers by Container Crazy CT of Broad Brook, CT

One sprawler which comes in mind is Coleus ‘Dipt in Wine’. It has a red wine color. One year when I used it in a container garden, it gently moved its way outward and downward from the pot. And…well, I could go on and on about coleus plants, so I should stop here.

At the Wedding Event - Pot staged in different places by hammock in a small garden bed - Photo by Patrick C.

At the Wedding Event – Pot staged in different places. Here by hammock in a small garden bed – Photo by Patrick C. (A family member of the groom and bride!)

Saying “The Year of 2015” is the “Year of Coleus” seems a little silly because it has always been a yearly choice for me.

Cathy T being silly on delivery day

Cathy T being silly on delivery day

For more details about how to grow and care for coleus, visit the National Garden Bureau page.

Cathy Testa

P.S. Only 15 days until spring!

Sweet Potato Vine next to white Mandevilla vine and Blue Gazing Ball

Sweet Potato Vine next to white Mandevilla vine and Blue Gazing Ball