Trailing Red Small Daisy Flowers that can Take it Rough

3 Comments

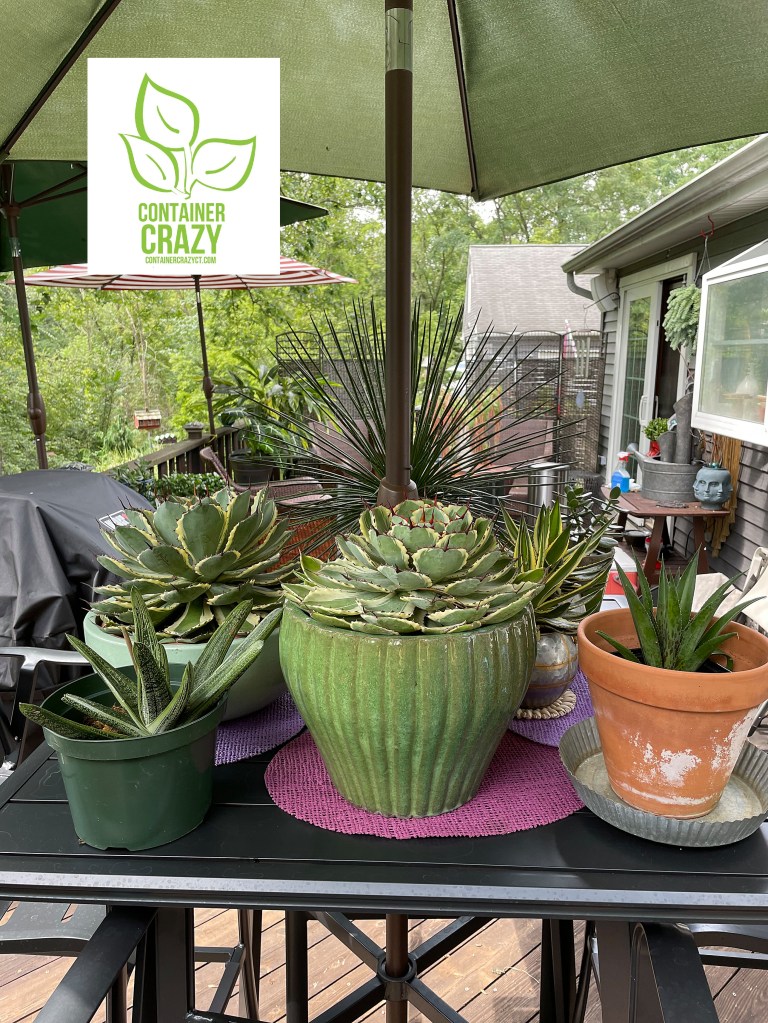
I am always in search of tough (as in tolerant) plants for container gardens and patio pots for full sun locations due to having a few clients with these environmental conditions at their outdoor settings. In fact, I often refer to the location as “full on sun” when I talk to my husband about it, and he jokes about that term to this day. It is a hot location with lots of heat in the midst of summer with limited water sources outdoors. Thus, I like plants to be drought tolerant if possible.

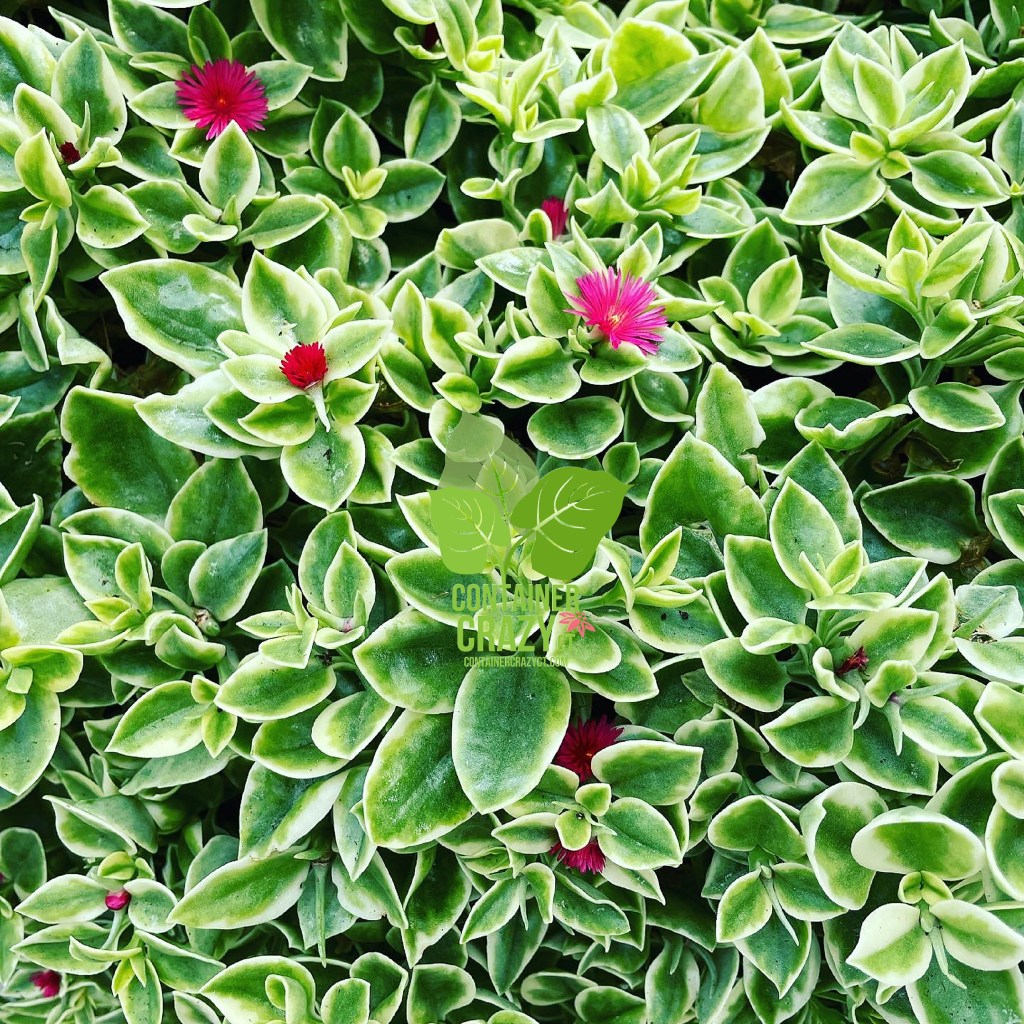
Last year, I happen to notice an annual plant at a local nursery with light green and white succulent like foliage, and thought this may be a candidate for my full sun project because the succulent foliage led me to believe it probably is similar to a succulent plants (able to retain water in its leaves and are drought tolerant) but I wasn’t sure.

However, despite not knowing the plant’s requirements as of yet, I also noticed it blooms small red flowers and I was in search a red and yellow combinations for a theme I was planning on this site that year. I looked at the label, of course, and thought it over and decided to give this annual plant a try.

‘Mezoo Trailing Red’ is the Tradename

A Spiller in Habit

In addition to having the succulent like foliage, the hot red colored blooms are what I was searching for, and having a bit of an unusual variegated foliage coloring, it also would work as a spiller plant (plants which trail or hang down in planters and pots). I grabbed a couple to add to my selections to plant in some large long planters. And, also, it has a lighter tone of a foliage color, making good contrast to darker plants.

‘Mezoo Trailing Red’

It is known as ‘Mezoo Trailing Red’ as the tradename, but upon some research, I discovered it’s botanical name is, Dorotheanthus bellidiformis. Try pronouncing that one! So, I will just refer to it as “trailing red” or “Mezoo” in this post. It is a tender perennial that is winter hardy to planting zones 9-10, but here in Connecticut, it is treated as a annual plant and is not hardy in our CT zones. I’m in Zone 6b.
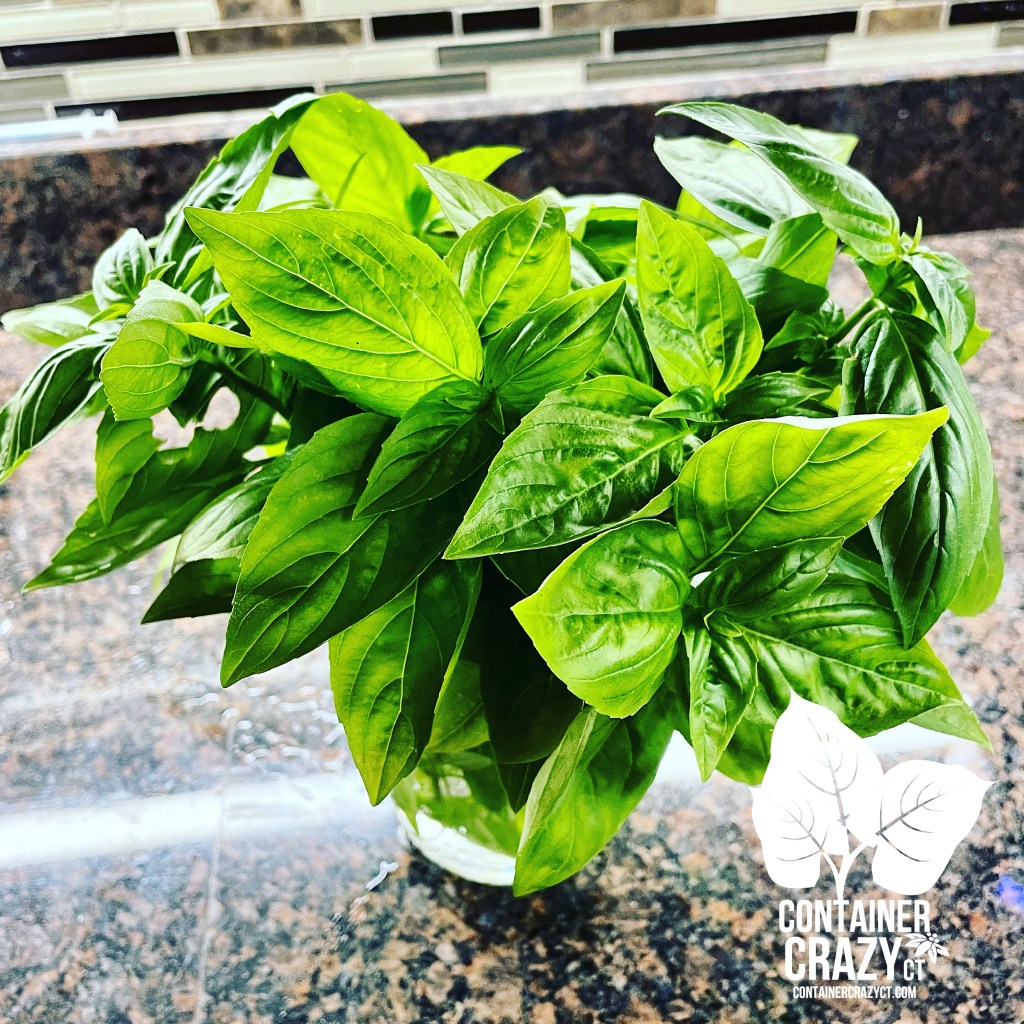
Easy to Root

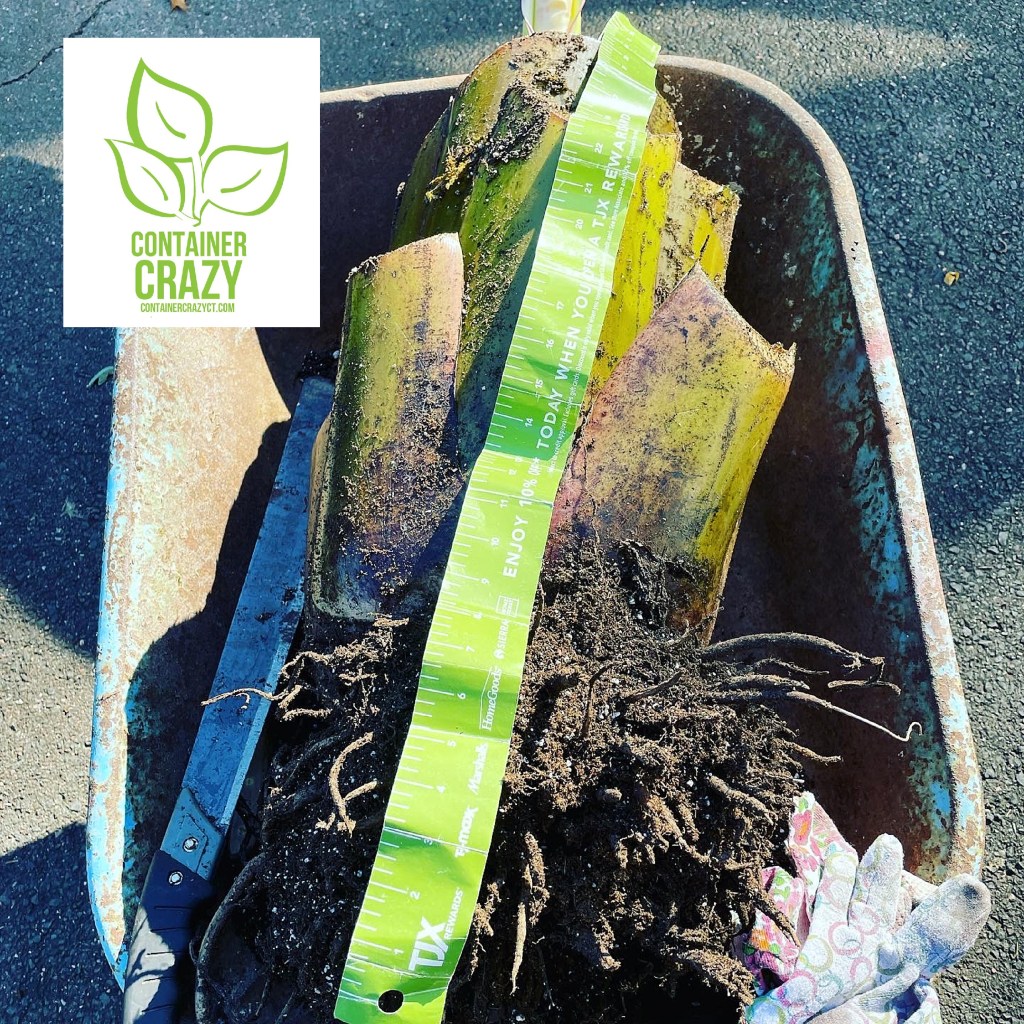
However, I discovered yet another benefit about this plant, it is easy to root from a tip cutting by placing it in a jar of water and letting roots form from the stem end tip. I did that after the summer with some cuttings and managed to start a couple smaller plant to keep in the house over the winter.
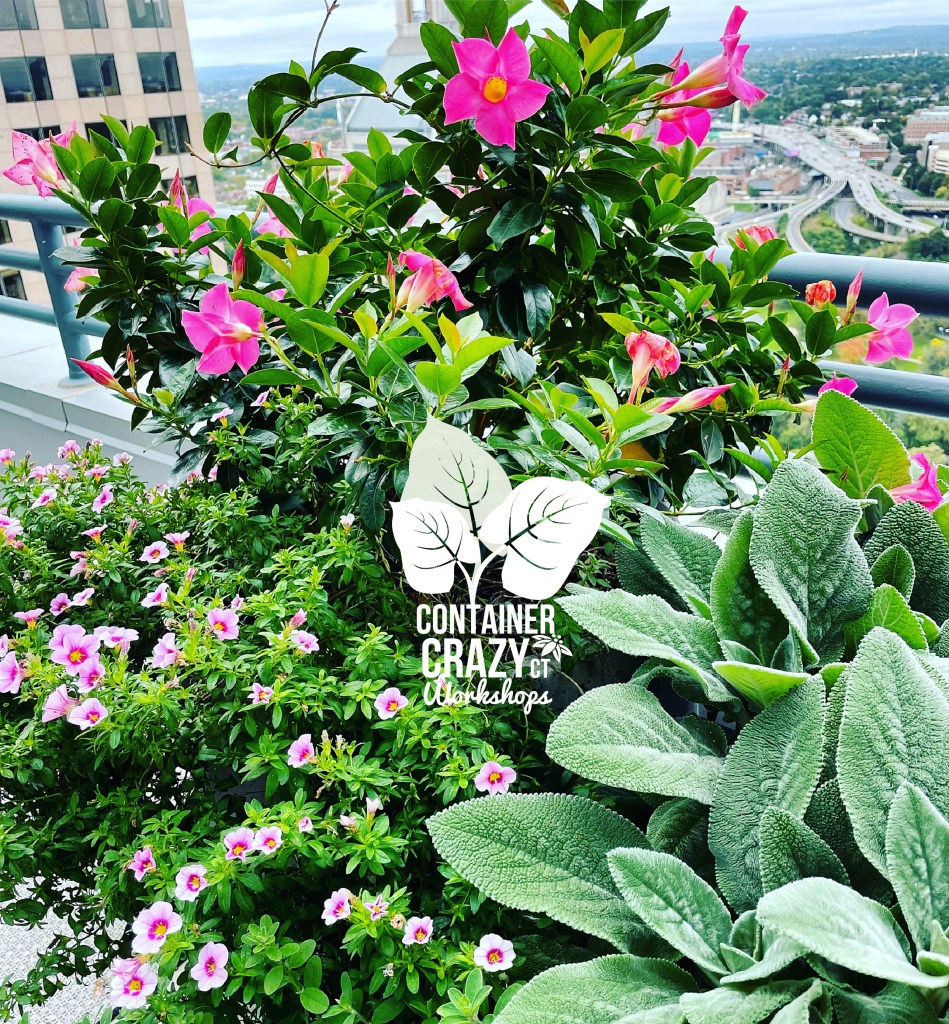
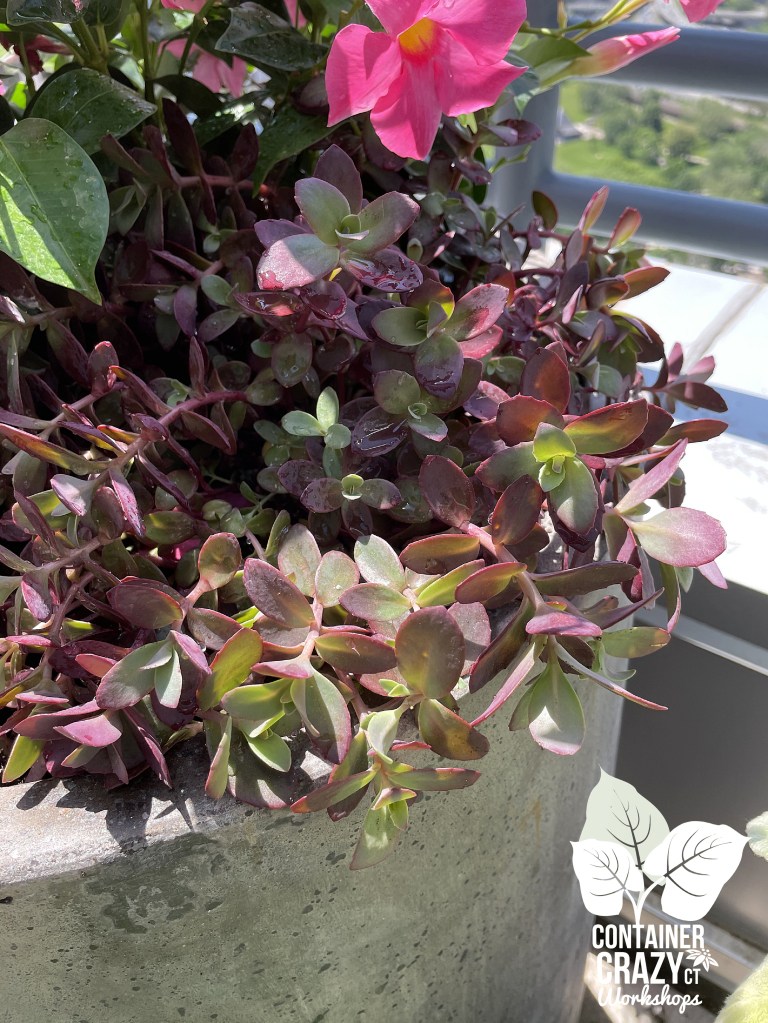
Great with Darker Contrasts nearby (dark greens), and also looks nice with soft blues!

Blue Green Coloring

There are different types of green and the foliage green on ‘trailing red’ is a bit of a blue green with hues of white to creamy white edges on the leaves. I thought how it seemed to click in color with a few blue Senecio plants I had to plant as well, which I used a little fillers to tuck in next to the Mezoo trailing red plant. However, by the end of the summer, Mezoo took over the area in the center of this tall and long planter. The Senecio got crowded out quickly. I didn’t mind, however, because Mezoo turned out to be just beautiful and full to the max.

Abundant Growth

The amount of growth that occurred in one summer in the planters really shocked me when I returned later in the season to take a look at the plants. The Mezoo was lush, full, and trailing over the edge down to the middle of a 5-6 foot tall square planter. There were no signs of insects and about the only issue I had with it was as some of the leaves dried up here and there (just a bit), the dried up papery residue of the leaves stuck to the outside of the planter under the plant’s hanging foliage and blooms. I washed that up later off the planter, when I took the Mezoo out of the planter, before fall arrived, by using some mild soapy dish type water. I was glad the planter’s outside covering was not damaged.

Drought Tolerant

This is the type of plant that tolerates some dry periods as well, which is a bonus. It is low maintenance and takes somewhat dry to medium moisture. Well-drained soil is preferred by it, and I had placed between two dark green globe shaped shrubs and thus, the plant was somewhat protected, but I don’t think it needed any extra protection. It grew massive and was impressive. It dripped over both sides of the planter, to about half-way down. I was impressed. Take note, it doesn’t like to stay completely dry and fortunately, we had good rainfall to get some moisture into the soil in the planter that year.
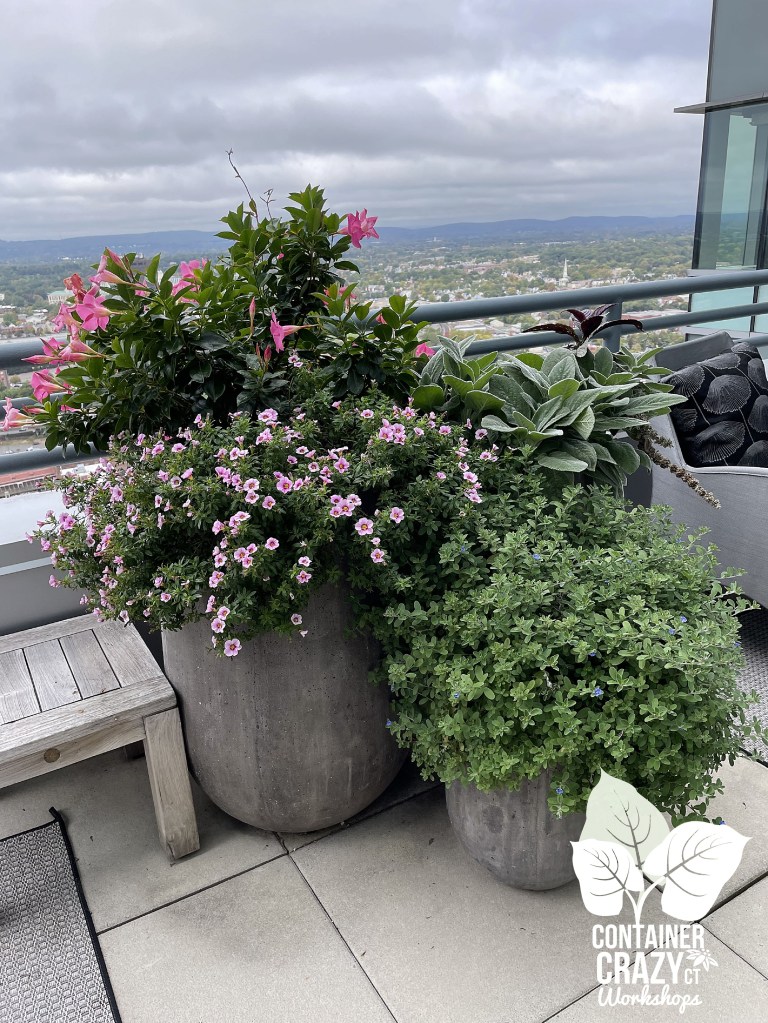
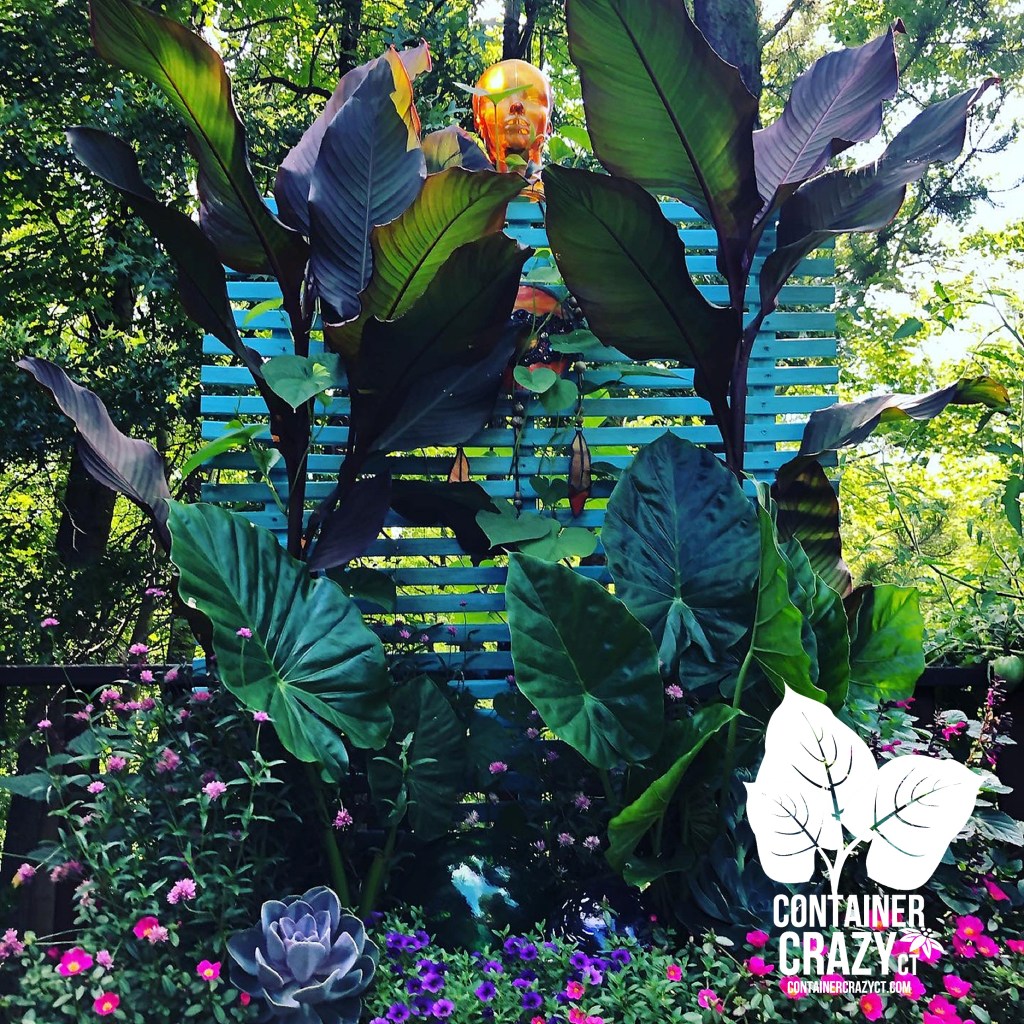
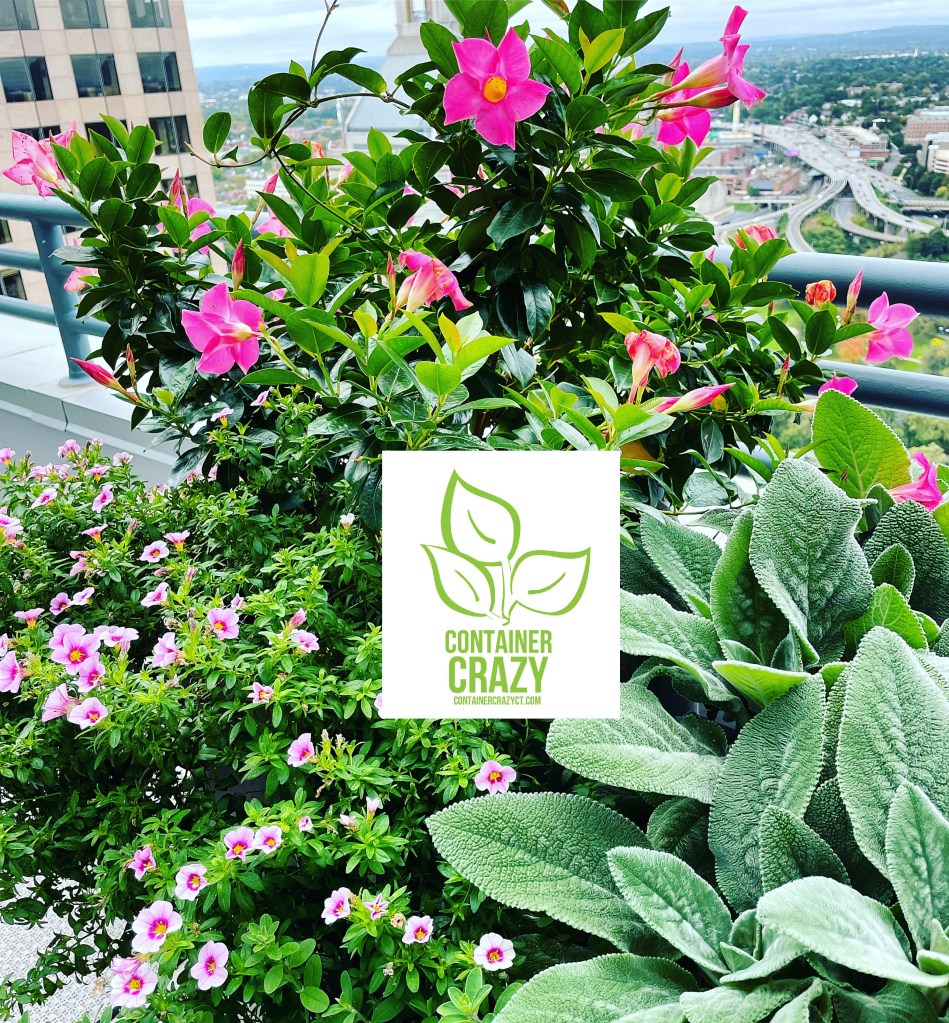
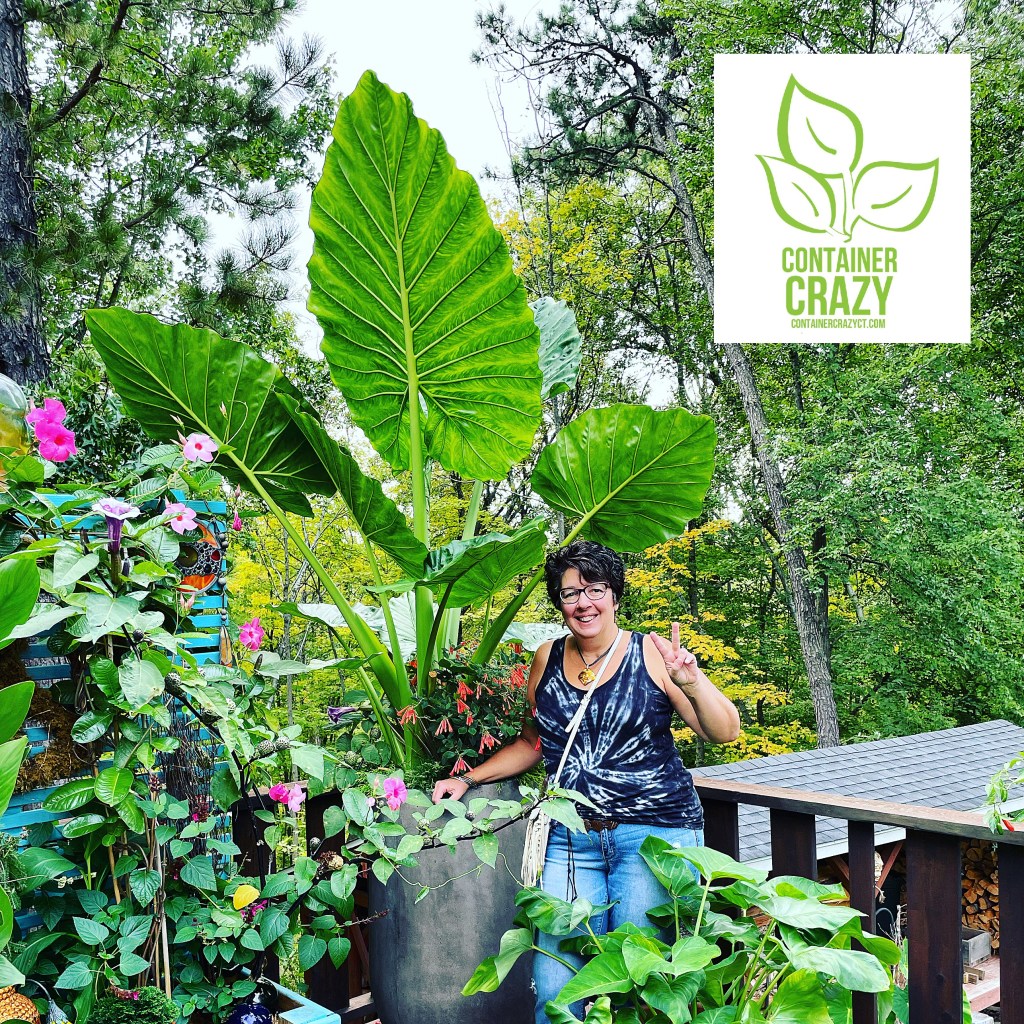
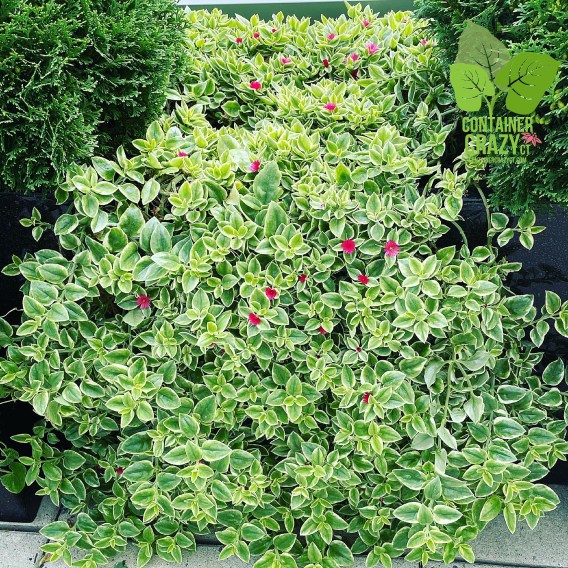
Overflowing Abundance

Like a Waterfall

Just look at this photo above. It is very apparent this plant was thriving. It was full, lush, bursting with foliage and flowing thru the two side shrubs like a waterfall. When I saw this abundance of growth, I said an, “Oooohh, so nice!” comment out loud to myself, which is typical of me. I surprise myself sometimes. LOL. I was pleased.

When I got back to my greenhouse, from digging it out at the site, I decided to take a few cuttings (as noted above) and showed it to my plant followers, and immediately a friend and plant enthusiast chimed in to say she has one as well and loves how well it performs in her hanging baskets at home. She also takes tip cuttings to root as a method to save some over the winter months here in Connecticut.

Sometimes its worth a shot to try out a plant you are unfamiliar with and often they will give you clues to their habit and tolerance. This one I would definitely recommend for sunny locations in containers and patio pots. It handled the heat, wind, sun, limited watering, and crowding between two other plants pretty well. It has a lower habit (doesn’t grow upwards), so if you don’t want to block the view behind it, which we didn’t want to block the skyline, it worked very well and I experienced no insect issues on it all summer long. I will say, we did have more moisture than usual that summer and maybe that helped, but overall, it can take it rough.

Mezoo used on a Succulent Pumpkin Centerpiece by Cathy Testa of Container Crazy CT

Blooms are Small but Long Lasting

It also blooms many daisy red small flowers from about June up to October. The flowers do not fall off so no worries about a mess on the ground area and also no worries about deadheading. I do wish the flowers were larger however.

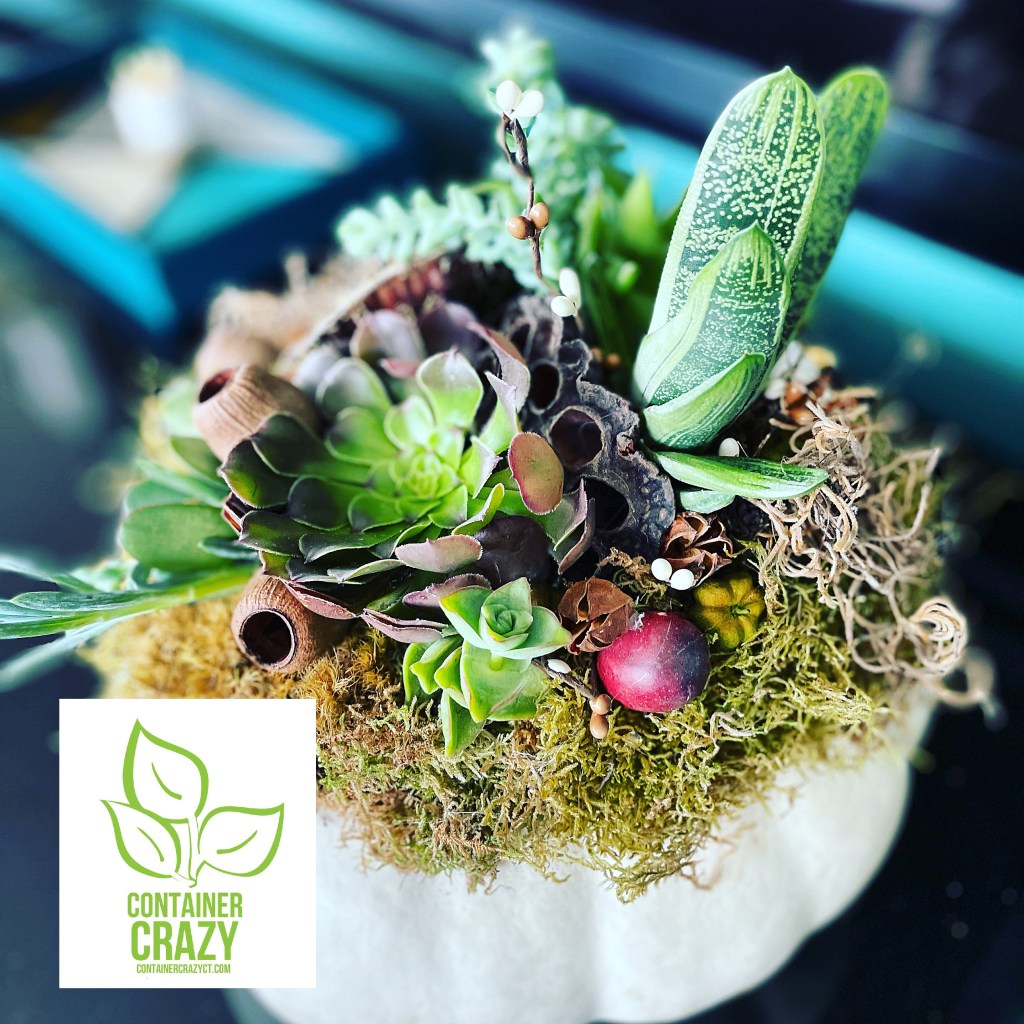
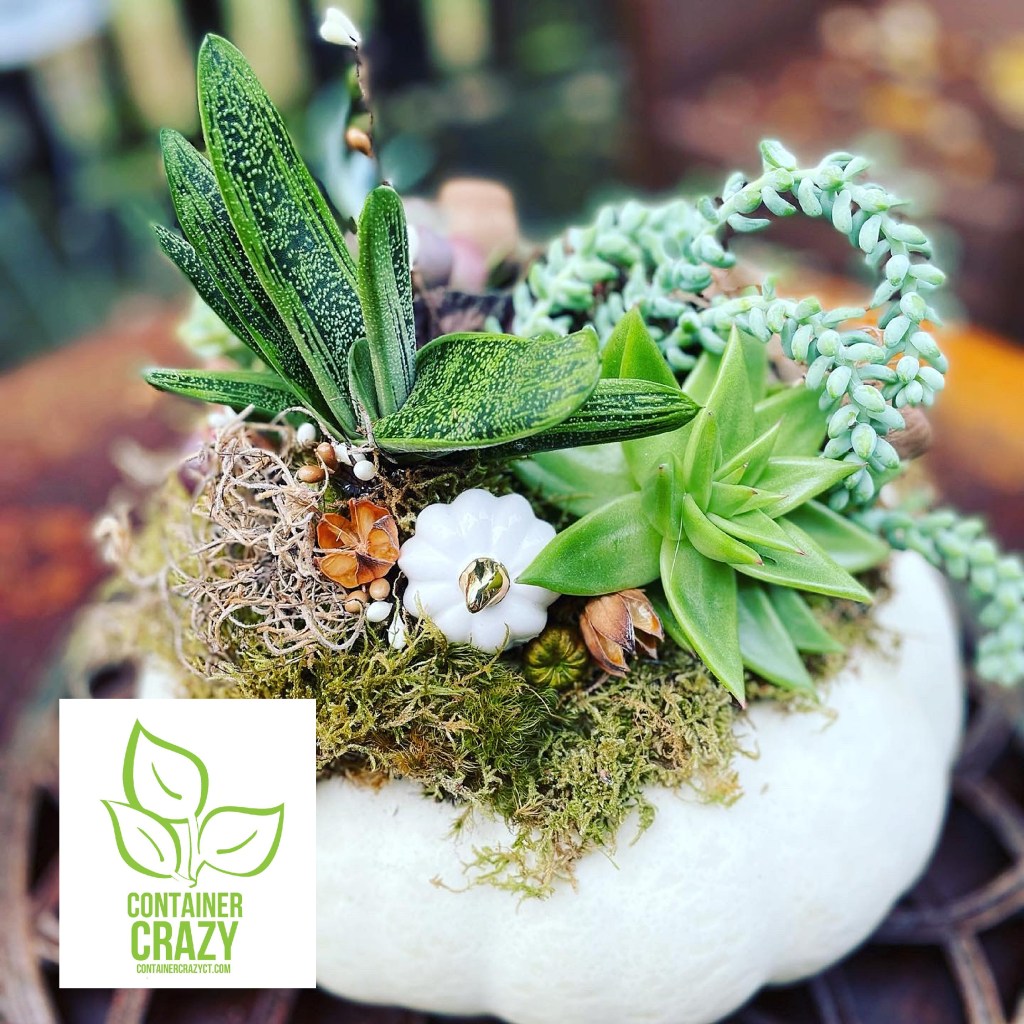
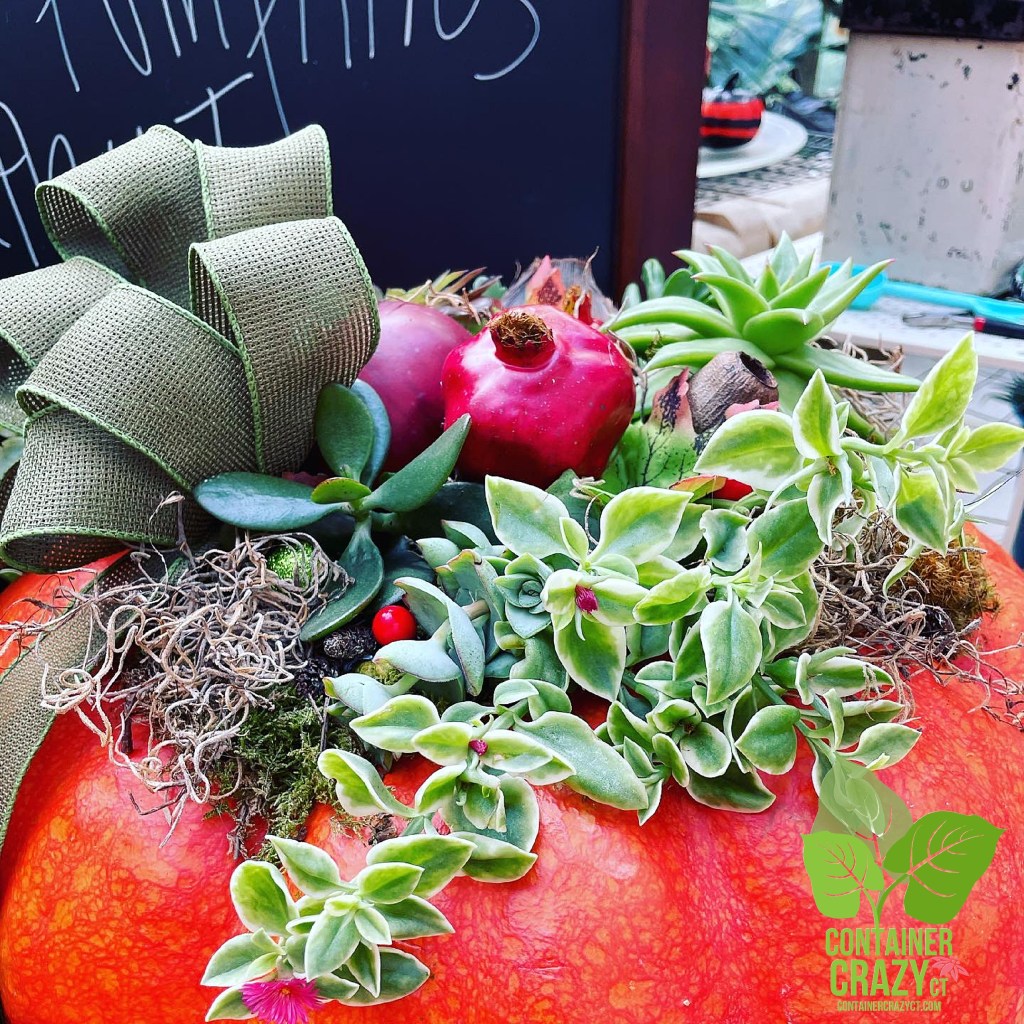
Later in the autumn season, I ended up tucking some of those cuttings I took on top of my succulent topped pumpkin centerpieces. I guess the bonus list continued onward. It just hit me how they would look pretty on my pumpkins.

Dripping over the edge of a long square planter

Benefits Reviewed

  • Dry to medium moisture (somewhat drought tolerant; don’t allow soil to completely dry out)
  • Likes heat and can take the heat
  • A spiller that cascades over pots (but has a low mat forming habit)
  • Easy to take tip cuttings to root in water
  • Full sun lover
  • Low maintenance, no deadheading required
  • Can take average well-draining soils
  • Makes a decent winter houseplant
  • Pairs well with succulents
  • Not a high feeder
  • And well, lastly, I liked using the cuttings on my pumpkins as noted above!

Thank you for visiting!

Cathy Testa
Broad Brook/East Windsor, CT
Zone 6b
Container Garden Designer
Posted: 1/18/2022

Side View – Container Gardens by Cathy Testa of Container Crazy CT in Broad Brook, Connecticut

Hot Pinks for Full Sun in Containers

Leave a comment

Here’s a combination I created last summer for a client. I loved the way these plants thrived. Despite some troubling weather set-backs we had in 2021 at the start of the container season, they performed beautifully all summer into early fall. These plants tolerate full sun, drought, and wind fairly well.

Hot Pinks For Full Sun – Upon Planting Photo of Dipladenia, Calibrachoa, and Sedum stonecrop

The beautiful fluted hot pink flowers of the tropical plant in the center, called Dipladenia vine, was a perfect candidate. These plants continuously bloom and hold on to their blooms pretty well in windy conditions. It does not vine upwards, like Mandevilla vines do, but spread out more as it grows. The flowers are just gorgeous, and sometimes towards the end of the summer, they may fade a bit to a softer pink but overall they retain their form and color beautifully in containers.

Paired with Calibrachoa (left lower plant) – An annual in CT

I paired up the Dipladenia (thriller plant in the center) with a annual plant, Calibrachoa. The Calibrachoa has small Petunia like blooms on trailing stems which would eventually cascade over the rim of the pot (serving as a spiller) in this combination. It also is a sun lover and prefers well-drained soil kept evenly moist. The reason I selected the Calibrachoa, an annual plant here in Connecticut, is because of the coloring and form of the flowers. It has an outer pink to lavender color with a ring of a darker toned pink in the centers of its blooms. It was one color I had not see before for this annual, and thought of how well it would pair with the hot pink Dipladenia. It repeats the form of the larger hot pink flowers of the Dipladenia, and shares the same coloring in the pink hues.

Calibrachoa spilled over the edges

Also tucked in the corner is a Sedum (stonecrop) (see top photo on right) which is a perennial. It is called ‘Firecracker’ of the Sunsparkler series. Again, using another sun lover which tolerates periods of drought. The Sedum is hardy in Connecticut as a zone 4-9 plant, and blooms from late summer into early fall, however, it ended up getting hidden by the plants next to it by the end of the season. You couldn’t see it later in the season which is unfortunate, because I loved how the burgundy shiny succulent foliage gave a darker contrasting color to the hot and soft pinks in the combination. Sedum stonecrop plants makes nice groundcover in hot full sun landscapes, and again, I tend to use perennials in pots here and there as the anchors or foliage (filler) plants. They are good performers and easy care plants in either situation.

Full by mid-Summer into Fall

To the right of the planter with the hot pinks, I planted a large leaved perennial, a Lamb’s Ears perennial plant with a hardiness up to Zone 4. It is a hardy plant in Connecticut, typically used in sunny landscape beds, but I enjoy using perennials in my container gardens as well for adding the foliage power. I knew the soft, silvery, woolly leaves would look beautiful with the hot and soft pinks nearby. These plants are very easy care and again, love the hot sun, and can take drought. This Lamb’s Ears is called ‘Big Ears’ (Stachyz byzantina) because the leaves are huge, and the plant caught my attention right away. Bigger than the typical varieties of this plant, it was a perfect candidate for the tall planters. Another benefit of this plant is it is not preferred by deer, which is not an concern at this location but good to know for use in landscape beds. I also find, if planted in full sun, it doesn’t get any insect issues. If you try to plant it in shade or part sun, it won’t perform as well, and may even rot if in a damp location. And of course, it is soft and fluffy, and one of those plants you like to touch which makes it a fun candidate in outdoor areas on patios, decks, and wherever you may reach out to touch it. It grew at least two times bigger by the end of the summer season in its planter.

Stachys byzantina ‘Big Ears’ (Perennial, Hot Full Sun, Zone 4 Plant)
Evolvulus pilosus ‘Blue Daze’ annual

In the smallest of the trio of tall planters, I planted a plant with soft blue flowers which are also sun lovers, or part sun. These bloom all season and tolerated the conditions at this site well (hot sun, windy, periods of drought). However, by the end of the year, while the plant grew huge, it didn’t have as many flowers as I expected, but the foliage stayed lovely. I had written about this plant before. I used it in wedding container gardens for a client. Blues is a tough color to find in blooms and thus, this is one of the blues available. It doesn’t drop its flowers nor require deadheading, which was a bonus. And no insect issues encountered. I only wished it was more prolific with blooms. I loved the way it looked with the other two planters, soft delicate foliage, and easy care. And as noted in my prior blog post about using these years ago, I learned the blooms close during cloudy conditions and or in the evenings, as you can see in this photo below.

Late Summer

But what you may also see is all the plants were extremely full, lush, and healthy all the way into early fall as shown in the photo above. You can even see a bloom that formed on the Lamb’s Ears on the far right. It was a shame to take all the plants out when I replanted for the fall season, but at the same time, it was a pleasure to know this combination performed well. The perennials may be salvaged at the end of the season by replanting them in your landscape beds. See more photos below. And, thank you for visiting my blog!

Cathy Testa
Container Garden Designer
See also:
www.WorkshopsCT.com
www.ContainerGardensCT.com
http://www.ContainerCrazyCT.com
Located in Broad Brook section of E. Windsor, CT
860-977-9473
containercathy at gmail.com

Upon planting – before Memorial Day
‘Big Ears’ Stachys byzantina – Perennial
Sedum stonecrop – perennial
Mid Summer Photo

Flowering Tropical Plants for Decks in Connecticut

Leave a comment

Are you new to Connecticut and have no idea what flowering plants you should grow in containers or patio pots on your deck this summer?

I saw this question asked by a CT newbie on a gardening group on Facebook recently, and thought, hmmm, that is a GREAT question.

So to start to answer the question above, I will share some of my suggestions. Let’s start with tropical plants:

Flowering Tropical Plants

If you are new to Connecticut, you may not be aware of the wonderful tropical style plants which showcase beautiful flowers and are perfect to grow in container gardens and patio pots on your deck this summer. The key thing to know about tropical plants is that you should not put them outdoors until after frost in the spring here in CT (known as the last frost date) because tropical plants can not tolerate frost conditions. Thus, the key timing is to put them out around Memorial Day as a guide. Frost usually occurs around mid-May and it changes slightly year to year but mid-May is a good all around watching point, check the weather forecasts, etc. Once we are past frost, many tropical plants do wonderfully during our summers here in Connecticut in pots, planters, and container gardens.

Blooms all summer

Another cool thing about using tropical plants is many tend to bloom all summer into the fall season, usually into September and October, without fading or wearing out as with other annuals type plants. They usually showcase long lasting flowers. And just as with spring timing, you have to take them in before the frost which occurs in the fall in Connecticut. I blog a lot about storing underground tubers, rhizomes, corms, etc. here on this site which you may search for in the fall on this blog by using the search word “overwintering” for more details on when you should take them in and steps to store them over the winter to reuse each season.

Hot Pink Canna Lily Flowers

Canna Lily Plants

Canna lily plants are not hardy in Connecticut, at least they used to not be hardy, but if grown in the ground, they sometimes come back (due to global warming). That’s another story, as the focus of my blog site and this post is about growing them in pots.

In pots, you may plant them using plants you would pick up from a local nursery (or from me if local to my area – see below). Or you may start them by purchasing the rhizomes and planting them in one gallon size nursery pots indoors with potting mix to give them an early start, in March. They will start to grow from the rhizomes inside the house, and then you may transplant them outdoors after our spring frost in Connecticut by the end of May typically.

Love full sun, grow really tall, not a lot of problems

Canna lily plants love full sun but they are also okay in part sun or even part-shade. Many grow really tall and others species or cultivars are dwarf sized. Anywhere from 4 feet to 8 feet or taller. Their flowers attract hummingbirds and the plants are easy care. Flowers are pink, red, yellows, peach, orange, and some have dark burgundy colored leaves.

Speckled with red on yellow flowers

I usually do not encounter insect problems with Canna lily plants, other than the Japanese beetles that come out one time a year in the summer, they may eat some of the leaves and you may see some holes, but the beetles don’t stay out all summer so I usually just cut the damaged leaves off and tolerate them for a month. This occurs in July or August on one or two plants. Sometimes they only bother one of my plants and leave the rest alone, so I don’t find them to be a nuisance.

How to plant them…

As far as planting them, use a good quality potting mix and add some compost. I typically add slow-release fertilizer to all my container gardens and patio pots as well. See my prior blog post, called the 5-Must Do’s for more information. I typically don’t regularly fertilize my Canna lily plantings on a monthly schedule, with liquid plant food as often recommended, unless I have the watering can with me and I’m fertilizing other plants, than maybe. But, in general, they are very easy to grow. They tend to be low-maintenance plants, other than the part about storing them over the winter, that is a bit of maintenance in the autumn season, but worth it if you wish to reuse them each season. And of course, as with all container gardens and patio pots, you must water them in the summer as needed.

Very Tall Canna (dark foliage) in a large square planter on my deck 2020

Can be top heavy…

One thing to note about Canna lily plants is that they do grow tall and their stems are usually thick enough to stand on their own, so staking is not required at all, but I typically grow them in large pots of 22″ in diameter at a minimum and about as deep. They tend to multiply and produce more shoots so a good clump can form over the summer. As a bigger clump of stems form, it can be top heavy in a pot, and if a small pot is used, they may toppled over from the wind at times. The rhizomes from which they grow are usually about 6 inches deep in the soil, so when you are ready to take them out by digging up the tubers in the autumn season, you will find them there in the soil below. And if you are growing a really tall variety, be aware a very windy location could tilt them, but I don’t encounter that here at my house on the deck. I’m talking if you grew them on a high rise or place where it is unprotected with super strong winds.

These toppled over from wind at times last year (pot was really not stable enough for the tall varieties)

Make More Plants!

Another great benefit to using Canna Lily plants is they tend to grow bigger rhizomes each season. You may dig up the rhizomes in the autumn season, and divide them into pieces and store them from late fall and over the winter in a cool basement, dark place, and where it will not freeze (where it will not drop below 32 degrees F). You get more plants over time with this process.

Thriller in Arrangements

As I’ve noted before, a good balance of plants in container gardens is having a thriller (tall center plant), spiller (drapes over the edges of pots and hangs down), and fillers (self-explanatory). Canna lily plants make excellent thrillers. They give height to your container and planters, and bloom all summer into fall, non stop. As flowers fade, just remove them if you wish, keep the plant cleaned up as desired, and enjoy them all summer on your deck. And best of all is seeing hummingbirds zoom up to the flowers while you sit and enjoy their show.

Pair Them Up With..

Practically anything. As you see in the photo above, I have succulents in the base of the planter with those tall Canna lilies and various annuals. They are great with practically any warm season loving plants that enjoy full to part sun. On this post, about my Aqua Blue Planter on my deck from 2020, you will see a list of the plants I used as fillers and spillers below the tall Canna lilies. Many larger leaved foliage type plants do well with Canna lilies as well, such as Elephant’s Ear (Colocasia), which are also tropical plants. They do flower but usually only one or two blooms. However, for a tropical look, I just love using the big ears of Colocasias with my Canna Lily plants and other topical plants with fantastic foliage. Because many succulents enjoy summer hot weather, they pair well as fillers too.

I will continue blog about other tropical plants great on decks in the summer in Connecticut.

Stay tuned or follow this blog to receive an email when each new post is published here.

Thanks for visiting,

Cathy Testa
Container Garden Designer and Installer
Broad Brook/East Windsor, CT
Zone 6b

Tomato Seed Sowing and Planning

Leave a comment
Tomato Plants 2021
Tomato Pots Deck 2021

These photos motivate me to sow and grow again in 2022. I know we experienced some rough wet summer weather (as noted in my prior post) last year, but photos are what prompt me to grow again. Let’s hope we have a good growing season this year!

Goldie Tomato – an Heirloom

Nothing pleases me more than when a person who purchased a starter plant from me sends or texts me a photo as they start their harvest, such as in this photo above, sent by Shannon. Doesn’t that plate of fresh Goldie tomatoes make your mouth water?! I am planning to grow these golden delicious heirlooms again in 2022.

I also add a new tomato or two to my sowing and growing list for each season and will be providing that list to my regulars or post it on www.WorkshopsCT.com soon.

Paul Robeson Tomato – 2021

This photo of a tomato, with a bit of a purple hue, sliced up on a white plate was taken by me last summer. It is the Paul Robeson tomato with orange, green, and purple hues. It produces large sized fruit and the fruit resists cracking. I plan to sow some of these seeds as well this year. Another keeper on my list. And I pray for better weather so I can eat more of these this summer!

Basil 2021

An an absolute must to repeat sowing again are the basils. OMG, how can one have a fresh home-grown tomato sliced up on a plate without fresh basil leaves? I can smell it now – almost!

So in January, as I write this, on 1/13/2022, I have decided on which I will sow again and have ordered my new varieties for sowing. Check! Seed ordering done!

Cathy Testa
Zone 6b Connecticut
Container Crazy CT
WorkshopsCT
Container Gardens CT

Frost on Plants

Leave a comment

It finally arrived here in Connecticut. Frost on our plants. Last week, it dropped into the 28 degrees F range in the evenings of Friday and Saturday (Nov 5-6th weekend).

For months, I was putting away frost tender plants from my container gardens, because I wanted a head start and it takes a lot of time to dig up plants from pots to store underground portions (rhizomes, corms, bulbs) for frost tender plants, as well as move containers into my garage or basement for the winter months, or just doing cleaning of empty nursery pots for use next season.

The frost of fall appeared a bit later than last year in 2020 (it was on Halloween weekend in 2020), but this year, in 2021, it decided to arrive about a week later, and we could feel it. As I walked out of my house the other day to check my greenhouse to make sure the heat was working well, I saw frost on my truck.

Frost 2021 Nov 5-6 weekend

I carefully walked on the frost covered grass and carried my flashlight to point here and there, hoping I wouldn’t stumble upon any wild animals, on my way over and down to my greenhouse. It is kind of pretty to go out at an early hour, think it was like 5 am, and see all the glitter on the plants outside from the overnight frost. But it was very cold and I didn’t stay out there too long in my slippers and PJ’s with a very thick bathrobe!

Later, when the sun was finally up, I got a glimpse of a rose bush near my house and I thought, look how pretty that is with the glittering frost on the roses!

While it may look pretty on the outdoor plants, we definitely do not like seeing our tropical plant toppled from frost, which is why I did all my overwintering chores early. It seemed to take forever. My list pretty much consists of Canna Lily plants, elephant ears (Alocasia and Colocasia), red banana plant (Ensete), some Mandevillas, and of course, I move in all my succulent and cacti plants early as well.

This year, I made a note on my calendar to check my stored tubers, rhizomes, corms in about a month. I want to make sure there is no rotting or problems. Last year, I ran into that and I think it was due to not having some air holes in new plastic storage bins I used, so I drilled very small holes into the covers of my storage bins which are kept in my unheated basement, stacked up in a corner, where it stays cold but not below freezing during the winter months.

And as I noted above, I check my greenhouse in the early part of the winter heating phases to make sure all is going well, that the heat is on, and I will sometimes take the flashlight and look at the plants. Did you know, some critters (insects) come out at night. Not common in the winter months cause the greenhouse is kept at a low temp (around 50 degrees F), just warm enough to allow my low temp tolerant plants hang in through the winter months.

In the winter, I pray for sun during the day hours. Not only for myself but for my plants in the greenhouse, so they may stay toasty warm during the winter days (and not utilize any heat). The cost to heat it is getting a bit too much. But so does a good dinner out! LOL. Choices!

My greenhouse also doubles as a creative space for me to make items with plants for the decorating seasons, such as upcoming holidays. It can be cool in there in the midst of winter however, requiring me to wear a thick coat, etc, but on the days when the sun is in full force with no clouds, it is like a sauna at times and I try to capitalize on those days. It will warm up your bones in an instant. On sunny winter days, it feels like the tropics.

On rainy days, the greenhouse can bring me some relief too. I suffer from tinnitus and the rain pouring down hard on the roof top is the most soothing sound to me, as it drowns out the ear ringing. Also, distractions drown out the ringing, so when I am creating or working with plants in there, it also brings me relief because I am distracted and in the “zone.”

We just did the ol’ “fall back on the clocks,” and this is a time of year of transition. It will be darker out at dinner time and dark out when we get up. I will try to not let that bring me down. The thing that keeps me up is knowing the holidays will be near and that I will be making wreaths soon, right after the Thanksgiving weekend.

Wreath by Cathy T

While times are tough, there are shortages of supplies, and also many prices increases for us all around, I still will attempt to make the most beautiful wreaths possible. If you are looking for a hand-made wreath, kissing ball, or boxes of greens, look me up if you are near me. All is arranged as porch-pick up’s and are noted on my site called, www.WorkshopsCT.com.

Well, not much else to report today. I basically wanted to make sure I record the date of our fall frost, because it is important for next year to remember when it comes around. Each year is slightly different.

Enjoy today’s sunny weather!

Cathy Testa
Container Crazy CT
860-977-9473
containercathy@gmail.com

Fall is Fantastic

2 Comments

We are having a wonderful spout of good weather in Connecticut this year, 2021, during our fall season. The temps have been just lovely, no more rain (like we had all summer practically), and minus the mosquitos here, the fall weather has been fantastic to continue my various plant projects.

I am still taking down some of my tropical plants at home to store and overwinter, while finishing up some container garden installations for the fall season for clients, and also making beautiful custom made succulent topped pumpkin centerpieces for my orders.

I thought I would show some photos of various projects I’ve been doing, jumping from one project to another this month of October 2021 in Connecticut.

Cathy T holding a banana leaf Oct 2021

Well, here I am, holding a very long banana leaf from my red banana plant (Ensete ventricosum ‘Maurelli’). It is not hardy to our zone (6b) so I take it down every fall. It has become a ritual. I never had any issues with storing it as described on this blog via other posts (search Overwintering or Ensete), but this past spring, when I took the “stump” out of the storage bin, it was a little more damp than usual. I figured it was due to no air holes in my bins, so I drilled some very small air holes in the bin covers for this season. Or maybe it was the “new peat” I bought that stayed too damp, I’m not sure, but I have done this process again! Cutting down each leaf, chopping off the top of the plant, then storing the base. (See more photos below). People liked this photo when I shared it because it really shows the size of the planter, the plant’s leaves. I’m 5’6″…so, you can see how long these leaves grew this season in 2021. You may notice the plant is in a big black pot, I usually plant it directly into the big cement planter, but got lazy this year, and it did just as fine, the roots went thru the drain holes into the big planter below. I also fill this planter with Castor Bean plants, other Alocasia and Colocasia plants, and other perennials, etc.

Callicarpa Beautyberry Shrub Oct 2021

This is not a tropical plant above, it is a deciduous shrub, called Callicarpa. Just look at the purple berries this year! The foliage is a lime green (normal color). But this year, the berries have been abundant and really a deep purple color. I wondered if our abundant rainfall contributed to the color being so intense this season? I planted 3 of these side by side by my deck at the ground level years ago and I remember taking a measuring tape out to ensure I was giving it the recommended distance for spacing. People notice this shrub right now – it is beautiful. It makes a nice shrub for massing together as the branches arch and fill the area. I had cut it back in early spring and it performed nicely. I’ve never seen birds eat the berries, even though some sources say they do. I’ve never tried to grow it from seed, perhaps I should try to do so. Mr. Micheal A. Dirr’s manual indicates the seeds require 90 days cold stratification.

Cathy T holding a large Succulent Topped Pumpkin 2021

Yup, that’s me – trying to hold onto this very heavy and large succulent topped pumpkin I made for an order. Isn’t it beautiful – and so are the plants behind me! I could barely hold the pumpkin long enough for my husband to take a photo.

Ensete stump
Ensete stump

Referring back to the top photo of me holding the red banana plant leaf, here is the stump I dug out after chopping off the top. I use a machete. This stump was left in my garage for about a week, mostly because I was busy doing other fall plant project, but also to allow it to dry out somewhat. It is still moist from the water held in it, so a good suggestion is to tip it upside down and let the water drain out of it after removal from the pot or ground. I did have to cut off more of the top to fit it inside my storage bin which is about 3 feet long. The cover barely shut – this stump is a doozie! (That is heavy and big).

Container Garden by Cathy T in the month of October at a client site

If there’s one thing I will tell the plant Gods when I visit them some day, is, “THANK YOU!!” for offering me the wonderful opportunity to plant on a high rise. This is an October photo of just one of the many container gardens I install at this client site, and it is full and lush. I love how the fuzzy big leaves of the Lamb’s Ears plant grew extremely well, no blemishes, and as perfect as ever. It is called Stachys byzantina ‘Big Ears” and I guess you could say, I do have a fondness for big plants which make a big impact. It is a perennial plant for full sun (hardy to Zone 4). The silvery soft leaves are low maintenance and used as groundcovers, or in containers as I did here. I paired it with two flowering plants, one an annual and the other a tropical lover for hot sun. They looked just beautiful but it was time for the take down process this month. The nice thing about using perennials in containers is if you wish to move the pot (not doable in this case due to the location), you may do so to an unheated garage and there is a good chance the perennial will return the following spring. Or you may dig out the perennial from the container garden and plant it in the ground in the fall to continue your plant investment.

Mop Head Hydrangea Bloom at my House

I guess you could say, this month of October 2021 has been a very colorful one. This plant above usually hasn’t produced many blooms for me before, but this year, it took off. I had these big colorful blooms and I cut them from the plant just yesterday. I read you may spray the flower head with hairspray (aerosol hairspray) and set it in a cool dark room to dry. I am trying that out this season with these Hydrangea mop-head blooms in purple, blue, and rosy tones.

At a Client Site

A pumpkin centerpiece I created (referred to as a succulent topped pumpkin) is shown above at a lady’s home. I absolutely love how she decorates her table, putting the Family piece and candle holders with the mums all around. And a nice photo she took, which I decided to share here. Isn’t this another beautiful fall color photo? And yes, that is a real pumpkin, one of a nutty brown color. Sourcing my pumpkins was a little trickier this year. Many local farmers had issues growing them because of our summer abundant rainfall. Some fields were flooded and ruined some of the crop. I had to hunt and peck to find good ones for my succulent topped pumpkin creations this season.

More of my creations above. I love making these in October. I have made some Halloween themed too.

Me in-front of a Wall of Mandevilla

That is me again, here I am standing infront of a wall of Mandevilla plants I installed in the spring. By October, they were full and gorgeous all the way to the top of the 7 foot wall situated above planters. I have to say, I was distraught early this spring because right after I finished planting these, there was an extremely freak cold rain day where temps dropped so low and it poured, cold rain. I was so worried it would ruin my work at the client’s site, but the Mandevillas did well, and the rain all summer encouraged their growth. The foliage was shiny, perfect and lush. Each year is different, and I was so thankful these performed well. They have white trumpet shaped blooms that last all the way into the fall. These plants are vine-like growing easily up when trellised. They will keep on climbing, reaching for the skies, which they did here on this high-rise garden. I have planted the red, pink, white types. All add a tropical feel to any container gardens outdoors in summer.

Plant Gifts by Cathy T

Well, I guess that is it for now. I’ll finish off today’s blog post to remind everyone I offer custom plant gifts, especially popular in the autumn and at the holiday season. Look me up on Facebook or Instagram under Container Crazy CT. I do all in containers, planters, patio pots, dish gardens, etc. You name it. This month I’m offering adorable succulents, bagged up and ready for pick up. If interested, DM me on Facebook or text me!

Thank you and enjoy the rest of this week’s perfect and fantastic fall weather.

Cathy Testa
Container Crazy CT
Zone 6b
Broad Brook, CT
cell: 860-977-9473
email: containercathy@gmail.com

Today’s weather: 72 degrees F day, Lows at 48 degrees F at night (still safe for tropicals outdoors, I suspect the frost will arrive later next week!)

Tomorrow – partly sunny and Saturday and Sunday look nice during day. 37 degrees predicted for Sunday night.

Back to work I go outside today. Trying to make the most of this perfect fall weather, did I mention, it is fantastic?!

Overwintering Canna Lily Rhizomes Part II

2 Comments

In my prior post, I detailed my process for overwintering my canna lily plant rhizomes in my area of Connecticut (Zone 6). I’m continuing it here for those who have asked questions (some asked in person and some via Facebook recently).

Basic Steps:

As noted on my prior post, cut down all the foliage, dig up the root ball, brush or wash away the soil, and let the rhizomes with a stalk attached air dry. After the rhizomes sat in the sun for a day, it was much easier to pull them apart to separate the rhizomes from larger clumps.

These rhizomes with partial stalks were left out on the table for a day in the sun

When I showed a friend how to do this process in person, she freaked out when I pulled the rhizomes by the stalks to separate them and then I started tapping the rhizomes on the ground to knock off more dirt. She was worried I was damaging them, and I said, “Oh, don’t panic, they will be fine.” I thought it was kind of funny but I get it – you don’t want to ruin them.

How to separate the big clumps

Sometimes when you have Canna Lily plants growing in a container for several years, when you pull the root ball out, it is one big clunk of a mass of roots and rhizomes all stuck together. It can be hard work to pull them apart. It is better to separate the rhizomes so when you replant them, they will be individual plants. The big clump over time will just not produce as nice of plants and will reduce the flowers. What I find is I try to separate them as much as I can and if they are really stuck together, let them sit in the sun for a day or two, and after it is dried out, take a stalk in each hand and pull apart and usually they will come apart easily.

Big Clumps “before” they sat in the sun for a day. Above photo this photo is after.

See the larger clump on the top right? That clump was much easier to separate after I let it sit in the sun for a day and overnight. Sometimes you will hear a “snap” like noise as you pull the stalks and the sections cracked away, and that is fine within reason. You basically do your best to separate them cleanly, but if they don’t – one or two cracks in the rhizomes is not going to ruin it all. After I separated them, I also cut the stalks to be about 4″ from the top of the rhizomes and let it all sit in the sun again for another day.

Preparing the Storage Bins

I store my canna lily rhizomes in plastic bins. Narrow bins work better. The deep bins are not necessary and if you stack too many rhizomes in a deep bin, they tend to rot more. So the narrow boxes are just right. You want to lay the rhizomes next to each other versus piling them up on top of each other for best results.

Last fall, I made the big mistake of not drilling some air holes in the new bins I had purchased, and some of my elephant’s ear tubers had rotted (ack!). Never again. So get your drill out and make holes the size of a pencil eraser. Not much bigger than that. You want little holes, not big holes. Also, put the peat moss about 1/3 of the bottom. Do not fill the container with the peat. You only need enough to allow a nice bed for the rhizomes to sit on with some of the peat poured over the top lightly.

Narrow Bins Work Best
Rubber Maid Box Lid

When I asked my husband if the drill was charged, he responded with, “What size drill bit do you need?” My response was, one the size of an eraser of a pencil. He got it. I don’t speak measurements well. Everything is visual for me! I want the holes to be tiny and just enough for some air circulation to occur in the box. It needs to breath just a little while it sits in my unheated basement for the winter months.

Label the box

I can’t stress enough the importance of labeling the box with the date and the items you put in there. I wrote it down in a notebook one year and then couldn’t find the notebook later! It just helps IF you are storing several types of tropical plants underground storage organs (tubers, rhizomes, corms, bulbs, etc.).

Stalks cut shorter, and allowed to dry in the sun again

After I trimmed the stalks to be shorter, I let them air dry again because otherwise that open fleshy wound could invite insects in the bin. It somewhat cures the rhizomes, you may also want to turn them over mid day to let it dry on the other side. Doing this on sunny days is best because if it rains, they get wet all over again.

One of the separations

More plants next season

One of the best motivators for doing all this work is you will end up with many rhizomes to plant when you bring them back to life in the spring time.

About the peat

Peat with some Perlite

About the peat

Does peat confuse you? It used to confuse me – cause peat moss is also used for hanging baskets or other projects in the gardening world. Do not use “Long Fibered Sphagnum Moss” which is used in hanging baskets, it is a more light dull brown color, and it does not work appropriately. It can hold onto moisture too much. The “Long fibered” moss, like shown in this photo below, is useful in craft projects, etc., but I find it does not work well for storing tubers, rhizomes, corms, etc. It stays too wet and doesn’t repel problems.

img
Do not use this type for storing the rhizomes

Use the brown spaghnum peat moss that typically comes in bags or square bales. It looks like this:

It looks like this without the white perlite

Last year, I had some extra perlite (white round balls in the photo below) which I tossed into a bin. Perlite is not in peat moss (just thought I’d mention that for observant people! LOL.).

In Bales or Half Bales

Available in compressed bales or half-bales

I’m not recommending any particular “brand” but usually I buy a compressed big bale like the one shown above, put it in a wheelbarrow, and break it apart with a small shovel. This type of peat is used in gardens, as soil amendments, and in potting mixes. It is used dry and I find it maintains well for several years, so the peat in my storage bins is reused over and over again “unless I had some type of bug or rot issue” in the bin which hasn’t occurred too much over the years. Also, I’ve read the peat moss’s acidic nature helps to keep problems out of the bin and away from the rhizomes. But we won’t go into that here, as I am trying to keep it simple. It is a great item to use because it retains a tad bit of any moisture just enough but allows air too.

Air holes along the top edge too

You will notice I drilled a few holes along the top edge of the bin too. If you are stacking these bins in your basement, the airholes on the top may be covered by the box above it so side holes are helpful.

Now, I’ve been told these things by people:

I just put my whole pot with the plant in the basement. (Yes, that works, but over time a big root ball in a pot won’t perform as well so eventually it is time to divide those rhizomes.)

I just put it in newspaper. (I am guessing this works but I trust my process and just keep doing it this way).

I just leave the canna plants in the ground. (Years ago, we could not leave the canna plants in the ground. They would freeze and die BUT I have found some that I planted in the ground next to my fireplace wall where the woodstove is used inside the basement, the canna lily plants have regrown. I believe the soil being a warmer in that area and the fact we have warmer temps from global warming has led to “some” canna lily plants surviving our winter ground temperatures, but I wouldn’t bet on it for any in containers left outdoors as they would certainly freeze. If you want to store the whole pot in the basement and not remove it to divide the plants, that is another option.)

I can’t be bothered with storing the rhizomes and will just get plants from you next year. (Yes! Sounds good to me. I grow many canna lily plants in spring and offer them for sale.)

Waiting on Storing this one!

Timing

All of this work may wait if you want to enjoy your tropical non-hardy plants here in CT, like this one I’m standing next to. I am waiting to do this one till at least early October because I am in love with this Alocasia. I almost lost tubers I had stored of these because of the non-air hole situation described above. The biggest leaf on this plant seems to be just getting bigger and bigger.

Gorgeous Alocasia Leaf 2021

Well, that’s it for today. I am continuing my work today outside here at my home. My husband has a joke that before we know it, it will be Halloween, then Thanksgiving, and then Christmas! I will say, “Stop saying that! Because I love my deck filled with plants and it depresses me to take all this down, but he is correct. Time flies when you are having fun.”

Thank you for visiting my blog.

Cathy Testa
Container Gardening Designer
860-977-9473
Broad Brook/East Windsor, CT
Today’s Weather: 75-79 degrees F. Cloudy till about noon.
Tomorrow Weather thru Wed – looks good, then rain at end of the week. Rain equals wet working outside. I’ll thank myself later that I did this in the sun and not fighting the elements!

What I do for work:

Install Container Gardens
Grow Plants from seeds (and rhizomes, tubers, etc.)
Create and sell Succulent Topped Pumpkins in fall (next month!)
Create and sell handmade greenery wreaths and kissing balls for the holidays (December!)
Write with typo’s – LOL.
Stare at plants as much as possible
Have a good day…

Canna Lily Overwintering Rhizomes 2021

7 Comments

Yesterday, it began. My first disassembly of a canna lily in a pot to store the underground rhizomes for the winter.

This process may be done anytime between now (September) up to our October frost. Frost may occur anywhere from early to late October in my area of Connecticut (Zone 6).

Because I want to get a head start on my work of overwintering various tropical plants, I did this one yesterday.

It was in a black nursery pot which was inserted into a metal decorative pot. I usually, as a rule, don’t do this – I usually plant the plants into larger patio pots, but alas, I was just too busy and you can see how the rhizomes and root ball area grew so large, it started to burst open the black nursery pot!

I used large pruners to cut the foliage off first, then worked to remove the black pot out of the silver pot – it was tricky!

Since the pot cracked open, I used regular kitchen scissors to cut the pot so I could get the root ball out. Then the real work began, trying to take this big rootbound mass apart.

First, I cut it in half. The rhizomes are usually about 6-8″ from the top and I do my best to not cut any of the rhizomes, but if you do, do not panic. It usually won’t totally harm the rhizomes. However, you do want to avoid too many cuts because cuts are areas where rot or insects can set in later. I also cut off the bottom half of the soil by slicing it off but am very careful not to cut into the rhizomes. Sometimes you may see where the rhizomes are once you start removing the soil areas here and there around it.

After cut off the bottom half of the soil off, cutting below where I think the rhizomes are located, I keep trying to remove soil by hand, with a soft brush, with tools, being careful to not nick the rhizomes.

I usually use a hori-hori garden knife, but I decided to just grab a large kitchen knife to do the work, first slicing it in half. After that, I used my hands and a small butter knife to chip away at the soil mass. I was careful not to cut into the rhizomes. Then after, I took the hose and blasted it with water to remove as much soil as possible. You need a strong spray so this hose end worked perfectly, minus the mosquitos attacking me near the hose at that moment!

Because the roots were so tightly bound up, the hose was really helping to wash away the soil. I really wanted to separate this mass because over time, if they stay in a big clump like this, they just don’t grow as well or produce as many flowers.

After the soil is washed away, it allows for more ease to try to pull apart the rhizomes by grabbing the stalk and tugging. In some cases, they will pull away cleaning without breakage. (Note: The larger clump I am still going to try to break apart after it dries more in the sun.)

I will let these sit on a table for a day or a few hours, and then store them in plastic storage bins in my unheated basement with peat (see type below). I will show the bins later but they are standard plastic storage bins with covers. I drill small holes in the covers to allow air circulation (important). Also, I think shorter horizontal bins work better than deep bins. You don’t want to bury them deep, just enough to cover the rhizomes with peat to help them stay cozy, hold light moisture, and stay dry. All a balancing act.

This is what the canna lily looked like before. It is one of the tallest varieties I have and I want to save some of these rhizomes in good shape. Of course, can I remember the name of it right now? No! LOL. Am I getting old? It will come to me. It is actually not that healthy looking in this photo. It got stressed from being root bound. Next year, it will look much much better. You can store the whole root if you want and I’ve done that before, but it was time for this canna lily to receive more attention so it will grow better from individual rhizomes next season, plus I’ll get more plants that way!

So the one I took down is the far left one. See the one on the right in the blue pot. That one was repotted in spring into that larger pot from a nursery pot. It will probably be easier to pull apart when I work on that one next.

Basic Steps:

  1. Cut off the stalks of foliage. Use clean, sterilized tools.
  2. Take the root ball out of the pot. Cut off the soil mass “below the rhizomes.”
  3. Take off as much as soil as possible around the rhizomes and roots. Use tools like your hands, soft brush, butter knife (I did), to scrape away soil but be careful not to nick the rhizomes or cut them. A garden hose with a strong blast really works well.
  4. Break apart the rhizomes carefully by grabbing hold of the stalks and pulling. Sometimes they pull away easily. If they don’t, keep trying to remove soil, let it sit out and try again when drier.
  5. Let sit out to dry and cure. (A few hours or a day or two).
  6. Store them in bins with peat (or people have told me they use newspaper but I prefer sphagnum peat moss that is sold in big square bales. It is reusable year after year so I keep the peat in the bins after taking the rhizomes out in spring time.)
  7. Make sure the location you store them is a cool dark place with no chances of freezing. (35 to 40 degrees F is the recommendation). My unheated basement works well by the door inside.
  8. Next spring, plant the rhizomes in a standard nursery pot (1 gallon size) and use good professional potting mix to get them started again. Plant the rhizome about 6-8″ deep in the pot. March is a good time to get them started. I do this in my greenhouse but you can do it by a window in the home where it is warm, etc. Before my greenhouse, I placed them on the floor in the pots by a kitchen slider window.
  9. Grow them in part to full sun when it is after our spring frost time. Usually the same time you may safely plant your tomato seedlings outdoors. Remember, put in shade first for a few days to acclimate.
  10. The photo below is of a bale of the peat moss. It is not the stringy peat you see in hanging baskets – it is the brown peat that you may break apart in a wheelbarrow if you buy a big bale. I reuse it for years if there are no issues in the bins. It is long lasting.
Premier Soil Amendments #0092
Copy of Peat in a Bale from web – available at various stores (Agway, Lowes, etc.)

Before or After Frost Timing

From my years of doing this routine, you may do this either before or after October’s frost. If you wait till frost, the foliage will be blackened from the frost. The frost and colder temps probably helps to put them in a dormant state this way, but I always have done it before frost with no issues in September. If you wait till frost, it is just colder outside and sometimes wetter – and messier.

See my prior posts on this topic (search Overwintering or Canna lily in the search box). Some are linked below as well.

Thank you and enjoy your weekend!

Cathy Testa
Container Gardener and Designer
Broad Brook/East Windsor, CT
Today’s date: Sat, 9/11/2021
Today’s forecast: 75 degrees F mid day, sunny with some fluffy clouds – yes!
860-977-9473
“Containercathy@gmail.com”

Overwintering Agaves Early

2 Comments

This will be a quick post. I am trying to document how I overwinter various plants from the outdoors to the indoors in my area of Connecticut as I work on them. This week we are having gorgeous weather, thus I am getting a head start on my plants at home because I will be busy the rest of the month working on clients’ plants.

Agave (ah-GAH-vay)

These plants are considered succulent perennials hardy in zones 9-11, some maybe hardy in zones 7-6, but in my case, I treat them as non-hardy plants and move them into a lower temperature greenhouse for the winter. The greenhouse is not heated right now because it is still warm enough outside, but by mid-October, we could get frosts and my agaves should not be subjected to any frosts.

During the summer, my agave plants are in full sun locations on my outdoor deck in individual pots. Some are super heavy and require a hand-truck to move them to my greenhouse, while others I can manage to lift and carry in my arms in the pot, although it requires a bit of muscle power to do so.

I usually allow the soil to dry in the pot as much as possible but we had so much rain and moisture this year, some of them are still holding damp to moist soils. However, it is best to move them indoors when the soil is dry if possible.

Over the winter, I suggest you do not water them at all and allow them to stay on the dry side. If the soil stays wet and you move them indoors, they may get root rot (especially if you are moving them into a house with air conditioning still on and in a non sunny situation).

Inspect the Plant

Steps

  1. Let the soil dry out as much as possible before you decide to move in your agave plant. As noted above, wet soggy soils only invites problems (i.e., root rot, insects that like moisture, and fungus sometimes)
  2. Inspect the plant for insects. Use the methods below to blow away any insects, debris, etc.
  3. Lift to inspect roots if possible (optional)
  4. Wash the outside of the pot with mild soapy dish water if possible

Inspect

Usually my agaves do not have any insect issues on the succulent foliage. You may find a spider in there (a good one), a cricket hiding between the foliage, maybe even a tree frog sitting on the plant! They seem to like one of my bigger agaves. I find one or two tree frogs every year hanging on them earlier in the season. Before moving them inside, check them over for any potential insects or debris (like fallen tree leaves or twigs, etc.). Ways you can handle the inspection are by:

Using a leaf blower to blow anything off of it.
Using a hose with a harsh spray to blast the leaves with water to dislodge any debris.
Use a little brush to brush away items caught between the leaves.

Lift from pot to look at roots – optional and if possible

This agave is in a plastic pot inserted within a glazed pottery pot. I decided to lift the plant out and inspect under. Yes, the soil is still moist, but otherwise, the roots look fine. When I lifted it up, a tiny cricket insect jumped out – so it is helpful to check and get all those little hiding bugs a chance to get out before they move into your home or greenhouse.

You can see here the plant is pushing out a side shoot (pup) which will eventually form another baby agave. Overall, the roots look fine, but the soil is staying so wet, I decided not to reinsert the plastic pot into the glazed pottery pot when I moved it into the greenhouse. This will allow the air to help dry out the situation. Also, right now, the greenhouse is nice and sunny and warm. It will help to dry out the soil.

Overall this agave showed no major concerns. It is now safe in my sunny greenhouse to await the cooler days of fall and then eventually winter where it will be protected until next year. I have written about overwintering agave plants before. To locate the posts, type the word ‘Agave’ in the search box on this site.

Thank you for visiting. Let me know if you have any questions.

Cathy Testa
Container Gardener
860-977-9473
containercathy@gmail.com

Protect Pots from Rain

Leave a comment

In most cases, we adore the days of rainfall during the summer because it offers a break from watering our container gardens and patio pots, but this year, 2021, we got our fair share of rainstorms and too much at times.

I found that soil remained wet too long in some cases. It stressed our tomatoes, however, most tropical like plants love the rain. For some of my succulents, it was just too soggy. They did fine, but with today’s expected downpours (due to Hurricane Ida remnants passing over Connecticut today, tonight, and tomorrow), once again my succulent plants (agaves, jades, echeverias, etc.) will get more rain pounded on them as they sit in their patio pots. They haven’t had lots of dry periods this season, so the soil has stayed more on the “moist” side than dry side for days.

Because of this, I decided yesterday to move some of my plants onto a deck table with a patio umbrella so they won’t get blasted again. Yes, it is a bit of a PIA (pain in the a**) to move them, but I just don’t want that soil water logged at this point as we transition into September.

I will most likely move some of them to my greenhouse too. I am only doing this as part of my overwintering process early because I have a busy month coming up and this is my only week to get come chores done early. So again, plants may stay outdoors for quite some time, even into early October “for some types of plants.” However, when it comes to my succulents, I don’t like them to stay in a water logged state too long. Fortunately, this weekend’s forcast looks fantastic. It is predicted to be in the mid-70’s with sun from Friday to Saturday (yes!). But it looks like more rain on Labor Day! Rain rain rain this year.

Plants not poorly affected by rain are my tropical plants, such as this upright Alocasia, which I adore. Tropical plants add a real feel of a jungle or rain forest, and I love having that look on my deck because it makes me feel like I’m in Hawaii. If you can’t be somewhere tropical, might as well try to get that feeling at your home.

This plant is showy and grows extremely large leaves. I took the time to measure the biggest leaf yesterday. It is 3 feet height and 3 feet wide with a 3 foot long stalk. In fact, it was hard to hold up the ruler as I tried to take a few photos of it yesterday.

These plants are accustom to dealing with tons of rain fall cause they are from the tropics and are used to it – it is in their genetics, basically. That is cool. With all the strong rainstorms we had this summer, the leaves just kind of tussled around and didn’t break or even tear. Also, the leaves have the ability to shed water droplets and also the texture of the Alocasia leaves allow the water to run off quickly.

Members of the Alocasia, Colocasia, and Xanthosoma are always on my plant list. They grow huge. I love the heart-shaped elephant ear leaves and enjoy looking at them every single day. In fact, my jungle look is at the end of my house by my bedroom, so I see this via a slider door and have watched hummingbirds visit quite a bit this year as they go to the orange tubular flowers below this Alocasia shown above.

Another plant which has done well despite the rain is my Mandevilla. In fact, the Mandevilla twined around one of the stalks of the Alocasia this summer as it reached out for places to twine as it grew. This one is called, Alice Du Pont, and it is a plant which I overwintered last year in my basement in the pot. I took it out early to start growing in my greenhouse and then planted it in a big raised bed like planter on my deck. I fed it bloom booster water soluble food about once a week for a time in the middle of the summer and it has bloom beautifully. It is considered a tropical vine and works well when trying to create that jungle look with some trumpet like gorgeous hot rose colored flowers.

These tropical plants will grow well into early fall. I perform a combo of overwintering techniques from mid September till mid-October. Some are stored in their small pots in my basement or greenhouse, some are taken down (foliage and tops cut off) and tubers or rhizomes below are stored in boxes in my unheated but not freezing basement. And some are kept going by harvesting seeds and sowing them next season. The Mandevilla (and Dipladenia) can be a little tricky to overwinter and get growing again. It helps that I can start them early in the greenhouse. I started some others and they did not take off or produce as many blooms. You can’t win them all in the world of nature. There are just so many factors which are out of your control. Like rain for example, but then again, rain is a helper at times as well. Mandevilla are stored as dormant plants in a dark place at about 40 degrees F over the winter. The soil should not completely 100% dry out but stay more on the dry side than wet.

As for the Alocasia noted above, also known as Elephant’s Ear or Taro, I’ve dUg them up and divided off any side shoots as well as put the tubers in boxes in my unheated basement. I’ve detailed the steps in prior blog posts on this site. This spring, I did encounter a problem. Some of my tubers were soft in spots which usually doesn’t happen. I know what I did wrong. I used “new boxes and bins” and neglected to drill some air holes in the covers. I was rushing because I was busy. I planted them anyways in spring but they were really slow to grow AND I was worried the rotted parts would ruin the whole process. Some made it and some others were tossed. The tubers must be stored in a dry cool place, away from any chances of freezing, and after the plants go dormant for the winter. I hope I will be more successful this year. Time to get the drill out!

This photo is of my Ensete (red banana plant) with Castor Bean plant (left) and another type of elephant’s ear on the right. It is the first time in years that I did not directly plant the Ensete into the large square big cement planter. I planted it into a big pot and set it into the big cement planter. I got a little lazy and busy, but it is doing just fine. It still grew massive leaves and looks super healthy. I added compost to the soilless potting mix in the black pot. I grew the castor bean from seeds of last year and the elephant ear from a stored tuber. I won’t be working on these plants until early October.

Well, I think it is time to go work in the light rain before the harsh rain arrives later today and will be pounding overnight. We have seen a lot of flooded areas around here, ditches over flowing, damp lawns, and run off. We even got a huge sink hole down the road from rain this season. It is at least 6 feet deep. We are lucky compared to the people in NOLA. I can’t imagine what they are going through and they are in our thoughts.

One last thing – other methods for dealing with rain (drain holes are a must in pots, elevating the pots with plant saucers or trays, moving them under tables, and spacing them out so air flow circulates around the patio pots after the rainstorm, and maybe even a fan. Yes, I put a fan on my tomato plants this summer, it was that wet out there!)

Cathy Testa
860-977-9473
9/1/2021
Today’s temps: 66 degrees F (100% rain at 10 am); 60% rain tomorrow (Thursday)
Container Crazy CT
Broad Brook, CT

Another huge pot with Canna Lily, Amaranth (from seed), and annuals – will blog on these later!