

In my prior post, I detailed my process for overwintering my canna lily plant rhizomes in my area of Connecticut (Zone 6). I’m continuing it here for those who have asked questions (some asked in person and some via Facebook recently).
Basic Steps:
As noted on my prior post, cut down all the foliage, dig up the root ball, brush or wash away the soil, and let the rhizomes with a stalk attached air dry. After the rhizomes sat in the sun for a day, it was much easier to pull them apart to separate the rhizomes from larger clumps.
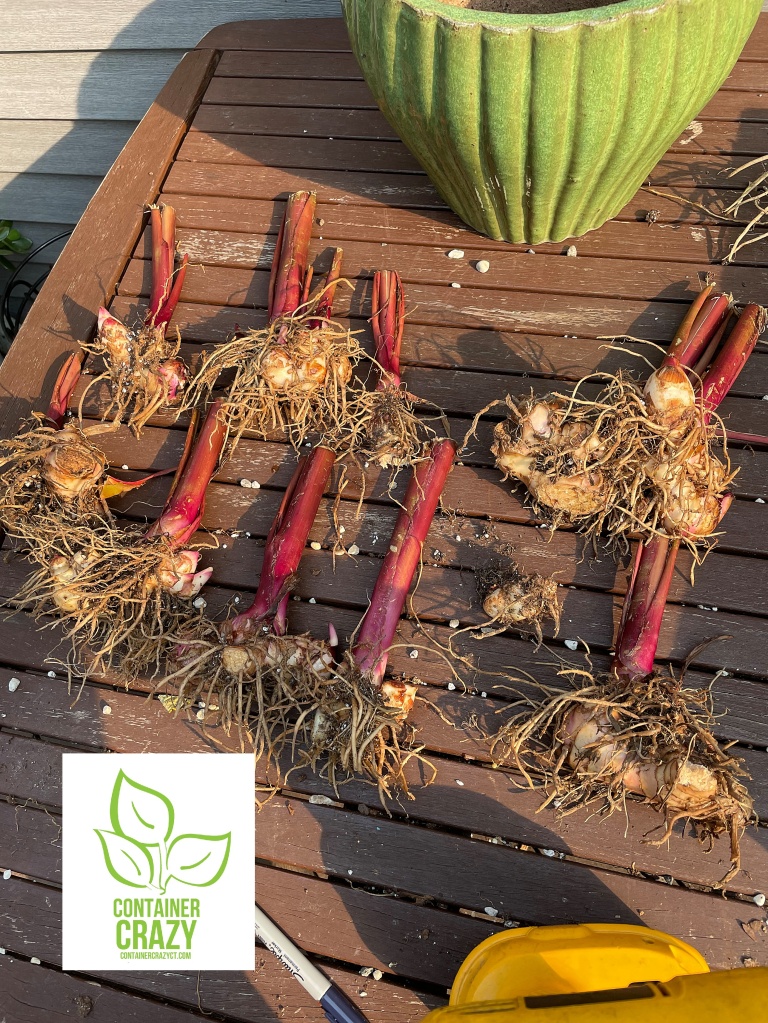
When I showed a friend how to do this process in person, she freaked out when I pulled the rhizomes by the stalks to separate them and then I started tapping the rhizomes on the ground to knock off more dirt. She was worried I was damaging them, and I said, “Oh, don’t panic, they will be fine.” I thought it was kind of funny but I get it – you don’t want to ruin them.
How to separate the big clumps
Sometimes when you have Canna Lily plants growing in a container for several years, when you pull the root ball out, it is one big clunk of a mass of roots and rhizomes all stuck together. It can be hard work to pull them apart. It is better to separate the rhizomes so when you replant them, they will be individual plants. The big clump over time will just not produce as nice of plants and will reduce the flowers. What I find is I try to separate them as much as I can and if they are really stuck together, let them sit in the sun for a day or two, and after it is dried out, take a stalk in each hand and pull apart and usually they will come apart easily.

See the larger clump on the top right? That clump was much easier to separate after I let it sit in the sun for a day and overnight. Sometimes you will hear a “snap” like noise as you pull the stalks and the sections cracked away, and that is fine within reason. You basically do your best to separate them cleanly, but if they don’t – one or two cracks in the rhizomes is not going to ruin it all. After I separated them, I also cut the stalks to be about 4″ from the top of the rhizomes and let it all sit in the sun again for another day.
Preparing the Storage Bins
I store my canna lily rhizomes in plastic bins. Narrow bins work better. The deep bins are not necessary and if you stack too many rhizomes in a deep bin, they tend to rot more. So the narrow boxes are just right. You want to lay the rhizomes next to each other versus piling them up on top of each other for best results.
Last fall, I made the big mistake of not drilling some air holes in the new bins I had purchased, and some of my elephant’s ear tubers had rotted (ack!). Never again. So get your drill out and make holes the size of a pencil eraser. Not much bigger than that. You want little holes, not big holes. Also, put the peat moss about 1/3 of the bottom. Do not fill the container with the peat. You only need enough to allow a nice bed for the rhizomes to sit on with some of the peat poured over the top lightly.


When I asked my husband if the drill was charged, he responded with, “What size drill bit do you need?” My response was, one the size of an eraser of a pencil. He got it. I don’t speak measurements well. Everything is visual for me! I want the holes to be tiny and just enough for some air circulation to occur in the box. It needs to breath just a little while it sits in my unheated basement for the winter months.
Label the box
I can’t stress enough the importance of labeling the box with the date and the items you put in there. I wrote it down in a notebook one year and then couldn’t find the notebook later! It just helps IF you are storing several types of tropical plants underground storage organs (tubers, rhizomes, corms, bulbs, etc.).

After I trimmed the stalks to be shorter, I let them air dry again because otherwise that open fleshy wound could invite insects in the bin. It somewhat cures the rhizomes, you may also want to turn them over mid day to let it dry on the other side. Doing this on sunny days is best because if it rains, they get wet all over again.

More plants next season
One of the best motivators for doing all this work is you will end up with many rhizomes to plant when you bring them back to life in the spring time.
About the peat

About the peat
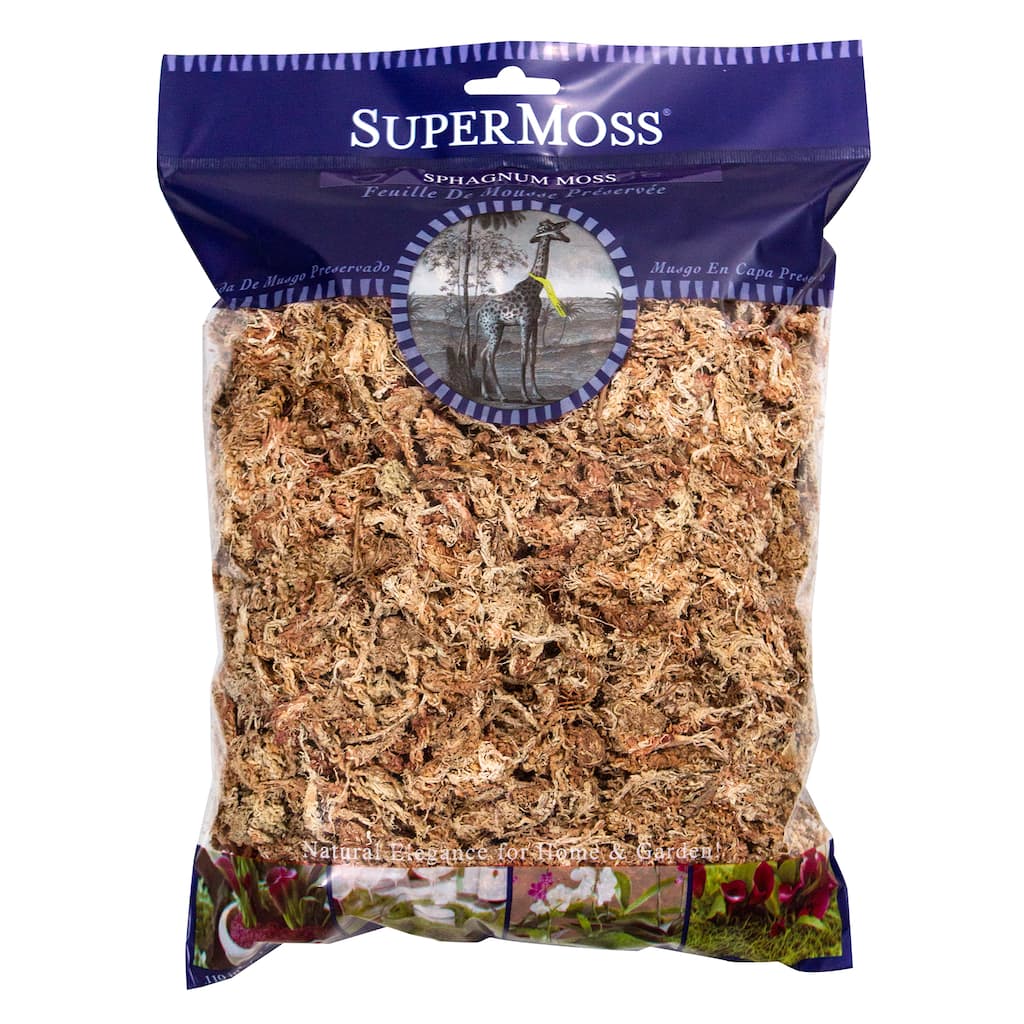
Does peat confuse you? It used to confuse me – cause peat moss is also used for hanging baskets or other projects in the gardening world. Do not use “Long Fibered Sphagnum Moss” which is used in hanging baskets, it is a more light dull brown color, and it does not work appropriately. It can hold onto moisture too much. The “Long fibered” moss, like shown in this photo below, is useful in craft projects, etc., but I find it does not work well for storing tubers, rhizomes, corms, etc. It stays too wet and doesn’t repel problems.
Use the brown spaghnum peat moss that typically comes in bags or square bales. It looks like this:
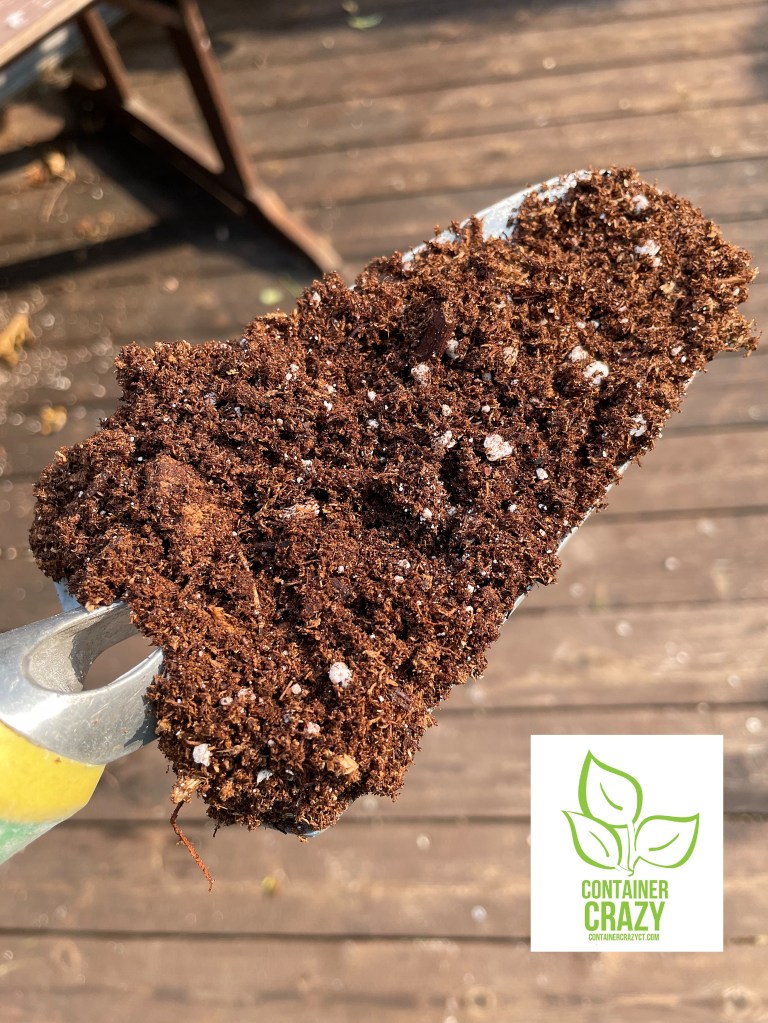
Last year, I had some extra perlite (white round balls in the photo below) which I tossed into a bin. Perlite is not in peat moss (just thought I’d mention that for observant people! LOL.).
In Bales or Half Bales

I’m not recommending any particular “brand” but usually I buy a compressed big bale like the one shown above, put it in a wheelbarrow, and break it apart with a small shovel. This type of peat is used in gardens, as soil amendments, and in potting mixes. It is used dry and I find it maintains well for several years, so the peat in my storage bins is reused over and over again “unless I had some type of bug or rot issue” in the bin which hasn’t occurred too much over the years. Also, I’ve read the peat moss’s acidic nature helps to keep problems out of the bin and away from the rhizomes. But we won’t go into that here, as I am trying to keep it simple. It is a great item to use because it retains a tad bit of any moisture just enough but allows air too.

You will notice I drilled a few holes along the top edge of the bin too. If you are stacking these bins in your basement, the airholes on the top may be covered by the box above it so side holes are helpful.
Now, I’ve been told these things by people:
I just put my whole pot with the plant in the basement. (Yes, that works, but over time a big root ball in a pot won’t perform as well so eventually it is time to divide those rhizomes.)
I just put it in newspaper. (I am guessing this works but I trust my process and just keep doing it this way).
I just leave the canna plants in the ground. (Years ago, we could not leave the canna plants in the ground. They would freeze and die BUT I have found some that I planted in the ground next to my fireplace wall where the woodstove is used inside the basement, the canna lily plants have regrown. I believe the soil being a warmer in that area and the fact we have warmer temps from global warming has led to “some” canna lily plants surviving our winter ground temperatures, but I wouldn’t bet on it for any in containers left outdoors as they would certainly freeze. If you want to store the whole pot in the basement and not remove it to divide the plants, that is another option.)
I can’t be bothered with storing the rhizomes and will just get plants from you next year. (Yes! Sounds good to me. I grow many canna lily plants in spring and offer them for sale.)
Timing
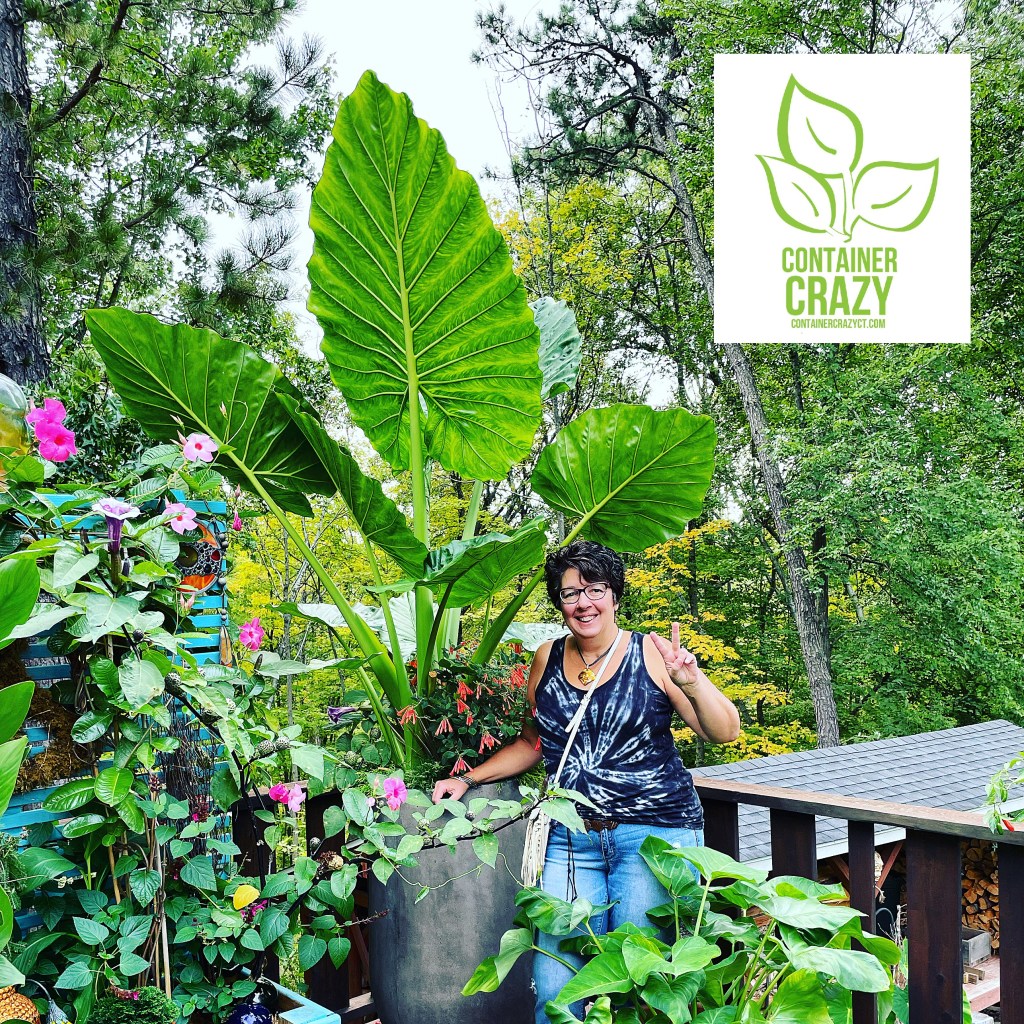
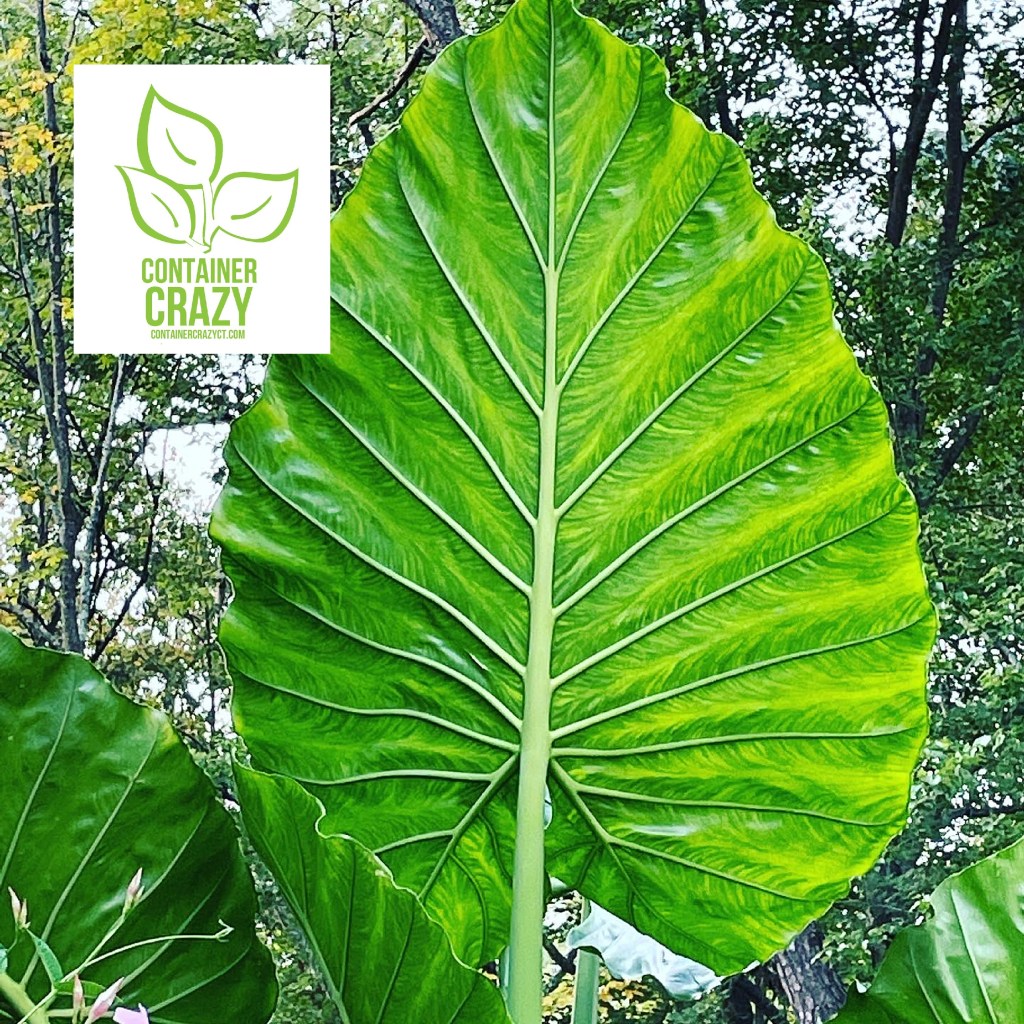
All of this work may wait if you want to enjoy your tropical non-hardy plants here in CT, like this one I’m standing next to. I am waiting to do this one till at least early October because I am in love with this Alocasia. I almost lost tubers I had stored of these because of the non-air hole situation described above. The biggest leaf on this plant seems to be just getting bigger and bigger.
Well, that’s it for today. I am continuing my work today outside here at my home. My husband has a joke that before we know it, it will be Halloween, then Thanksgiving, and then Christmas! I will say, “Stop saying that! Because I love my deck filled with plants and it depresses me to take all this down, but he is correct. Time flies when you are having fun.”
Thank you for visiting my blog.
Cathy Testa
Container Gardening Designer
860-977-9473
Broad Brook/East Windsor, CT
Today’s Weather: 75-79 degrees F. Cloudy till about noon.
Tomorrow Weather thru Wed – looks good, then rain at end of the week. Rain equals wet working outside. I’ll thank myself later that I did this in the sun and not fighting the elements!
What I do for work:
Install Container Gardens
Grow Plants from seeds (and rhizomes, tubers, etc.)
Create and sell Succulent Topped Pumpkins in fall (next month!)
Create and sell handmade greenery wreaths and kissing balls for the holidays (December!)
Write with typo’s – LOL.
Stare at plants as much as possible
Have a good day…

I’ve had no problem storing canna lily rhizomes/tubers in the past. But this year, I think because it got to a hard freeze, then warmed, I have some soft, rotted sections. What do I do?
In situations where it has some rot – you could cut off the rotten spots and still use the rhizomes, but if it is totally mushy and rotten (the whole rhizome), its usually no good to plant and toss them out. Hope this helps! Cathy T.