This was back in 2019. I used a hammer and nail to pound little drain holes in the base of the soup cans (easy peasy!), and put a cactus plant in each. I had started to do letter stamping on the cans’ sides prior for fun. These just ended up on a wood shed floor and a photographer (JMS Art & Photo) took photos of it when here taking other photos of my plants that day. Note: Only downfall of the cans is they start to rust – but that could be a good thing if you like a rustic look.
Table in the Greenhouse
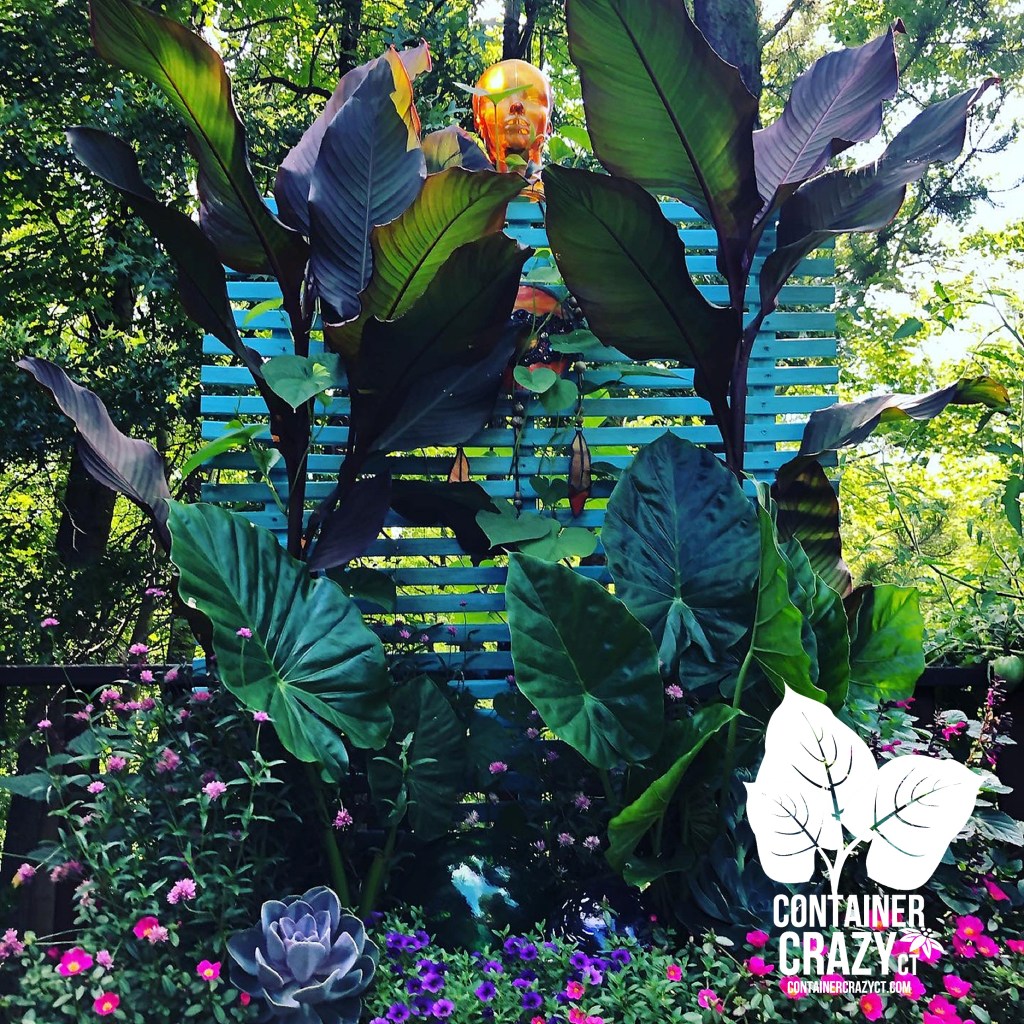
I know that every square inch of my greenhouse should probably be used for plants only, but I can’t help myself. I like creating a mix of vintage or antique things to put around my plants. The table is a very old small draft table a retired engineer gave away for free one year (actually his daughter posted it for free) so I went to get it. The typewriter in the background was from my husband’s uncle’s typewriter shop. The vintage fan is from a farm in Vernon, which I picked up as part of their tag sale one summer. But of course, what is the most impressive is that succulent plant and the way the flower stems grew. It is such a beautiful photo, again by JMS noted above.
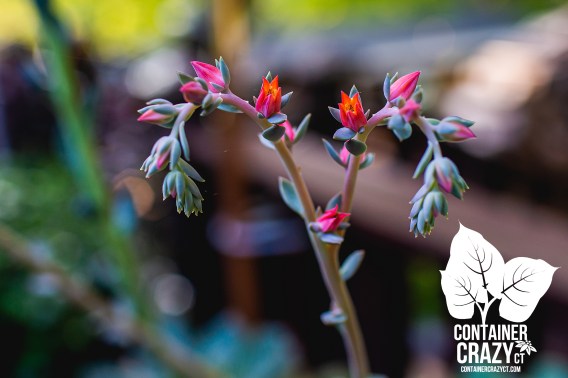
Succulent Blooms in Summer
Speaking of succulent blooms, here’s a beautiful photo of one which was outdoors in summer. It was growing in the shape of a heart! Hummingbirds visit these blooms a lot. They like them, so take note, succulent flowers are great for your little hummingbirds in summer and they last a very long time on long tall stems. This bloom was actually growing from a hanging basket filled with succulent plants, so the flowers were high up and the hummingbird was fun to watch.
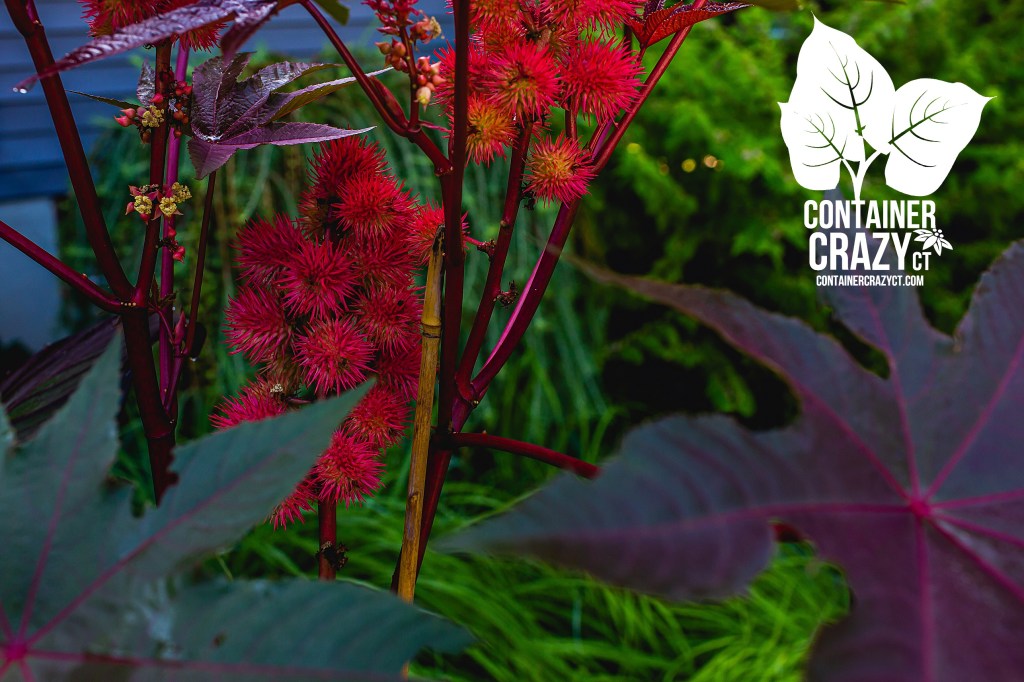
Castor Bean Seed Pods
Castor bean plants are easy to grow from seed. I wrote about this plant and an artist’s depiction of them too via this post. This variety has red stems, reddish foliage, and red round seed pods which are spiny. You wait to harvest them at the right time when the seeds inside are mature, and crack the pods open. Gloves are recommended as the spines can be a nuisance when cracking open the seed pods. Keep your seeds over the winter and sow in the spring. These plants grow super tall and huge. I probably will sow more seeds this spring again. They make a tropical affect in the garden.
Morning Glories
Another photo by JMS (noted above). I love the way she captured the shadow of the morning glories growing along my garage wall. I wrote about morning glories last month, see here. Plants offer many artistic benefits and one being the way plants’ foliage and flowers capture light or twine and grow – this is why I am obsessed with plant photography!
I remember a friend not wanting any photos of herself on her garden website, and I get it, some people just prefer privacy, but as for myself, I felt it was an important aspect of my plant blog or websites to show who I am, after all, I know if I’m looking up a service person of some kind, I like seeing who they are. And often times, if working as a container garden installer in particular, it is nice to see who you will be entrusting your plantings to. Anyhow, today I decided to share some photos of me with plants from the past to present for fun. I was clearing out some file storage and came across a few photo memories!
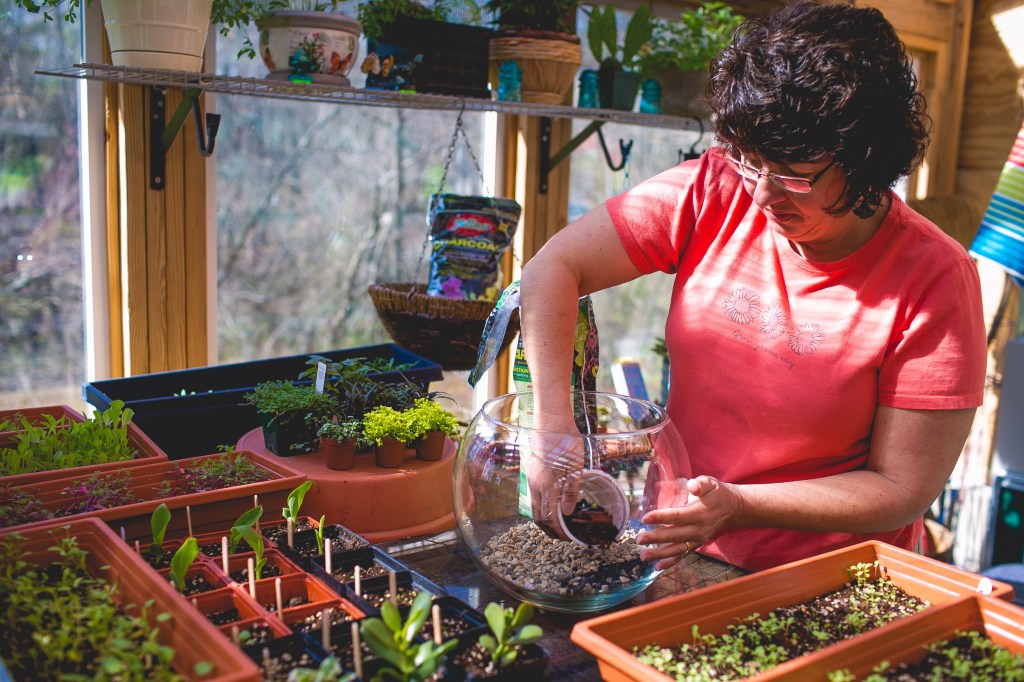
Photo Shoot for a Feature in Go-Local Magazine
This is me, making a terrarium in my greenhouse. The editor of Go-Local came by with a photographer to take some “action” shots of me for a feature of my small business in their magazine issue. Go-Local is a cool mag! They feature small businesses in various towns and I love seeing their magazine still today. I offer Terrarium Kits and used to do Terrarium Workshops as well. In this photo, I’m sprinkling some horticulture charcoal in the bubble bowl, or perhaps that is the soil. I was surrounded with all kinds of plants which some I stared myself.
This one didn’t end up being used, which we can see why – my eye looks weird, but the rabbit with plant was cool. I made it as a plant gift around Easter. There is moss in the base with cute little dwarf like plants inside. It was just adorable. Sometimes I will spot cool and unique containers, and the red shiny bunny things were perfect as a neat pot of tiny plants.
Cathy Testa with a Tray of Castor Bean Seeds Just Starting to Push Out Leaves
Happy Camper Here – also by Go-Local, of me holding a tray of Castor Bean seeds which were just pushing up their first leaves. I wrote all about this plant, here’s the link. Anyhow, the greenhouse is my ‘heaven on earth’ as I am always happy in there, especially when the sun is shining. What is neat about Castor Bean plants is you can clearly see the cotyledons shaped differently from the first set of true leaves. It is an easy seed to sow and the plant grows massive.
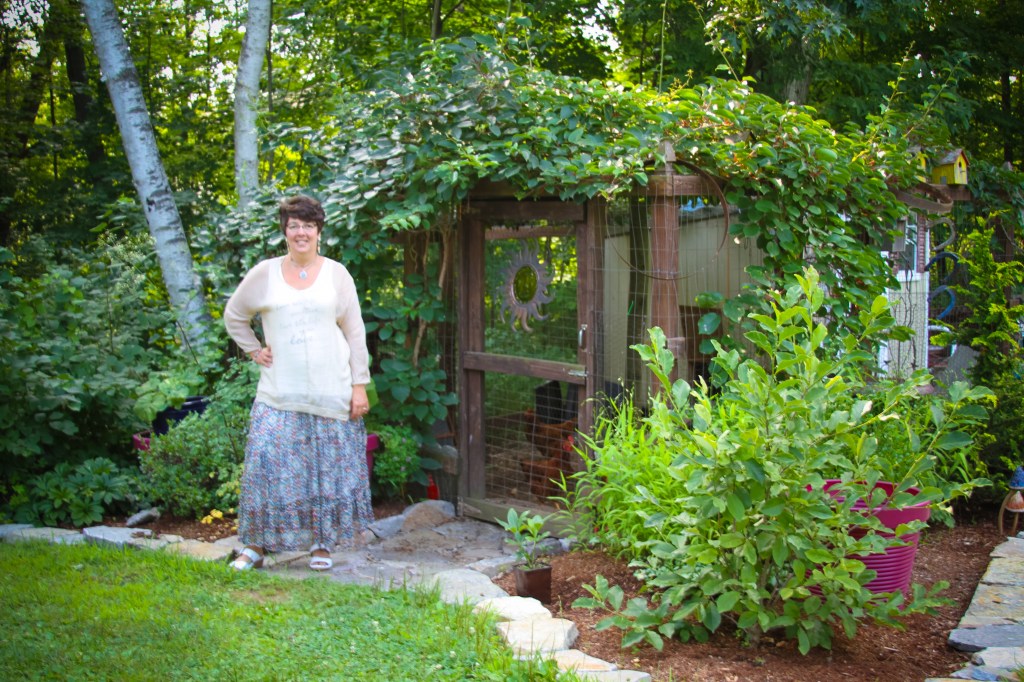
2014 – In-front of my Chicken Coop
The chickens had quite the chalet back then, but I didn’t end up keeping the chickens, as they were unable to free range (too many wild predators in my yard with the Scantic River near by). The birch tree in the background is gone now (probably fell from a storm) and the Magnolia to the right of me is much taller now – probably as tall as me now, and has some intense rosy pink flowers each season. The outdoor chicken pen is covered with Kiwi Vines – they grow super fast and must be pruned often to not allow them to wander too far. They do produce kiwi fruit (takes about 5 years from planting with a male and female plant) and they are hardy in Connecticut. I usually don’t eat the fruit – they are small and a little bitter. Even though the chickens are no longer here, I love this area still with the shed and outdoor pen. I always try to think, what can I do with that outdoor pen? It is all shade now in summer due to the Kiwi Vine covering the top. If I had grandkids, it would be turned into a fairy garden.
Little red table with the Red Blooming Canna Lily
That little red table was a freebie find on the side of the road by my sister’s house and I spray painted it red. It was just coincidence the red canna lily plants in the background were blooming red too for this photo shoot. Those canna lily return each year now because the wall is located above an indoor basement woodstove, so the soil stays warmer in winter – that is my theory anyhow. There is a honeysuckle vine to my left, which I chopped all the way down last year because it was getting aphids a lot the past two years and I thought, heck, I’ll just chop it all down – it grew back healthy. And the red head planter was purchased while on vacation, and I still have it today. For some reason, no matter which plant I put in that red head planter, it thrives. Right now it has a hobbit jade that is doing super well in my home. I put it outside every summer. You can see some catmint (blue flowers), lamb’s ear (silvery foliage), a yucca plant with spent flower stem (that blooms every other year), along with other things, it is kind of a messy area now that needs work!
Coastal Maine Botanical Gardens
I don’t remember what year this was but many years ago. We always attended the North Atlantic Blues Fest in Rockland, Maine, and one year, we went to the Coastal Maine Botanical Gardens on our way up or back, can’t recall, but I do recall the magnificent Delphiniums in the background at the gardens. Could you imagine having those at your home?!! Just beautiful.
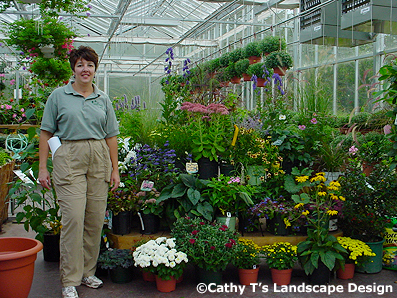
Ah the Younger Me!
Sometimes when I see photos of me, the younger me, I think that was before I got the annoying tinnitus ear ringing issue! Anyhow, I look happy, don’t I? Who wouldn’t with a stash of plants like this – but they weren’t for me – they were for attendees of my container gardening workshops. Aren’t they beautiful plants? I used to pick up plants from Sunny Border in CT at that time. I haven’t been there in a long time, but years ago, it was a fav of mine. They used to have some cool tropical type plants but I am not sure if they do anymore. It is a massive wholesale grower.
Me at The Garden Barn in Vernon, CT
This is me, gosh, I think 10? years ago, really? Time flies. I worked there for two or three summers and this was me before I was about to do a presentation about perennial combinations for container gardens. If you haven’t been to The Garden Barn and Nursery in Vernon, CT, I highly suggest you visit them. They are a huge garden nursery and packed to the gills each season. I still go there from time to time, and always know I can find something I need. They are closed right now for a short time in the winter but are always packed with plants all year otherwise.
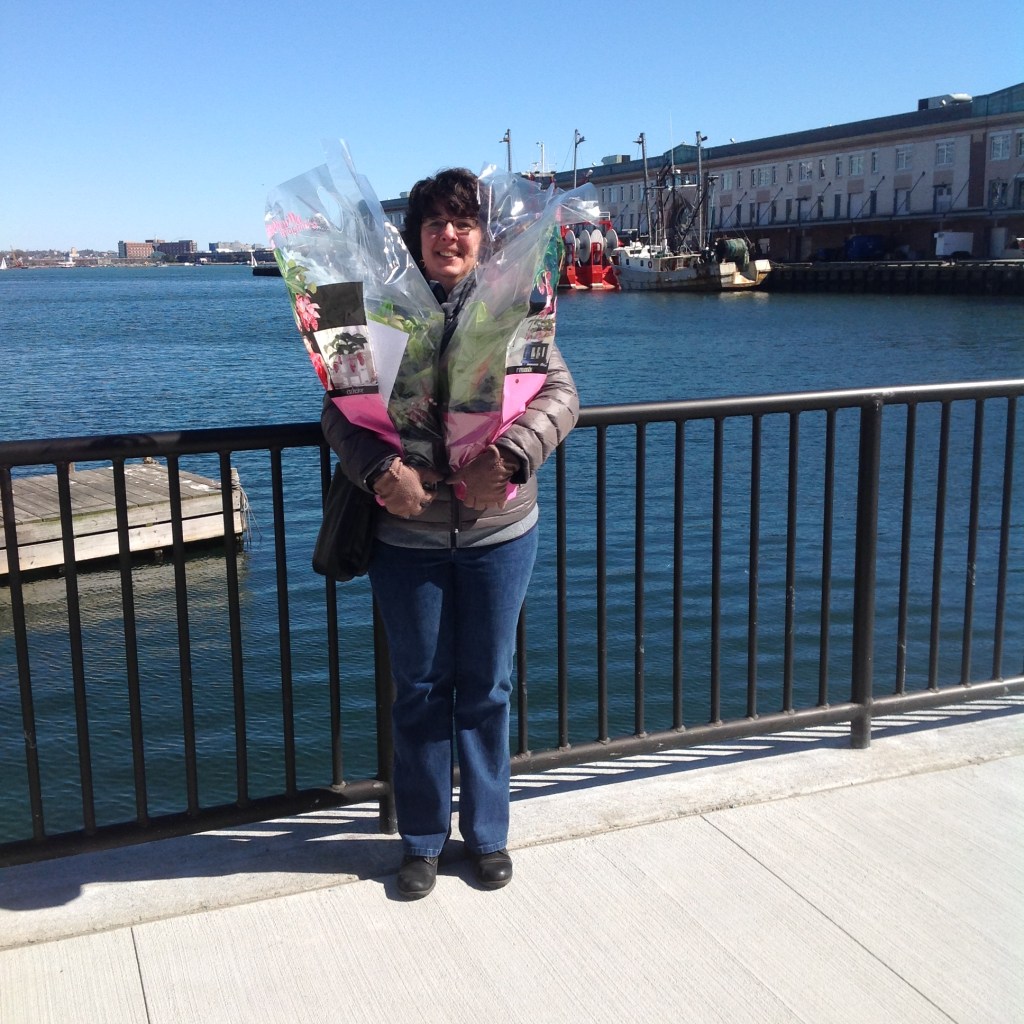
Outside of the Seaport World Trade Center in Boston, MA
Going to the Boston Flower and Garden Show was always a routine for me. My husband, Steve, would indulge me for a weekend in the Seaport World Trade Center area in Boston. We’d have Mexican food mid-day, go back to the flower show, and usually go out to dinner for Italian food. This area has changed a lot in regards to buildings, etc., and this year, they are not holding the flower show at the trade center, as it is undergoing renovations and they are looking for a new location. Many buildings around this area have been torn down and replaced with high rises and such. Remember the old run down Irish Bar, what the heck was it called? It is gone now. Anyhow, I just loved going with Steve. I am holding plants I could not resist buying at the show with pink tropical flowers – and guess what? I can not recall the name of them right now.
Presenting in my Garage
LOL! I look so serious, I can only imagine I was talking about big pots during a container gardening presentation in my garage.
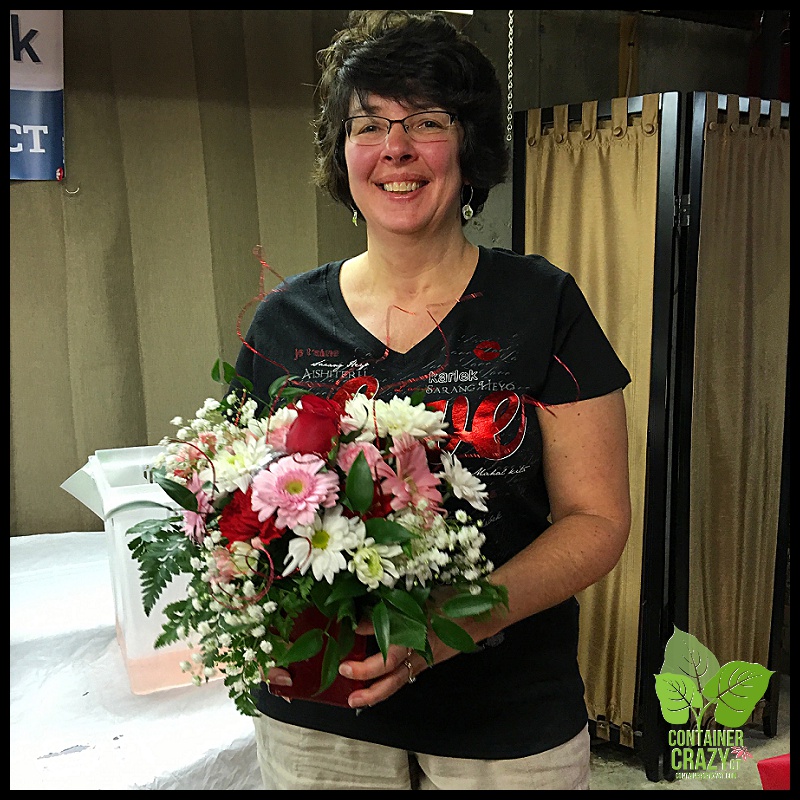
Me holding a Floral Arrangement
I coordinated a floral arrangement class once with guest speakers, and they did a wonderful job for my group of attendees teaching floral arranging and everyone made a gorgeous bouquet. It was around Valentine’s Day too. I made one too. Here I am, a happy camper. I have to note “floral arranging” in vases is really not my forte. I don’t know why, but I find it a bit challenging. Whereas container gardening and other plant related creations are not difficult for me. Not sure why I can’t do floral arrangements with cut flowers. Plants attached to roots and soil are not a problem for me – maybe that is what it is, something about the stem positions? Who knows!
2021 Cathy Testa of Container Crazy CT
Finally, here is a recent one of me. I’m in my truck getting ready to head out to plant some plants at a container gardening site. This is those selfie types – you know all about those! I was happy to have a beautiful day to do some work and enjoy the sunshine, which I’m terribly missing right now during the winter. February is tough for me and why I got distracted with photos as I was organizing my office and office files.
Snowshoeing in New Hampshire
One of my winter hobbies is snowshoeing. I really do enjoy it and we went off on a trail for hours one day in Jackson Village, New Hampshire. Yes, that cooler has food for lunch. The beer was my husband’s. LOL. It started to snow heavily and we were covered in snow by the time we returned to our vehicle that day but it was lots of fun and the snow is so pretty. It is one way I keep myself distracted in winter – snowshoeing. The place we went to had many many trails, linked above, and I recommend it. There were lots of choices for trails. You could spend many hours there. They also have cross-country skiing there.
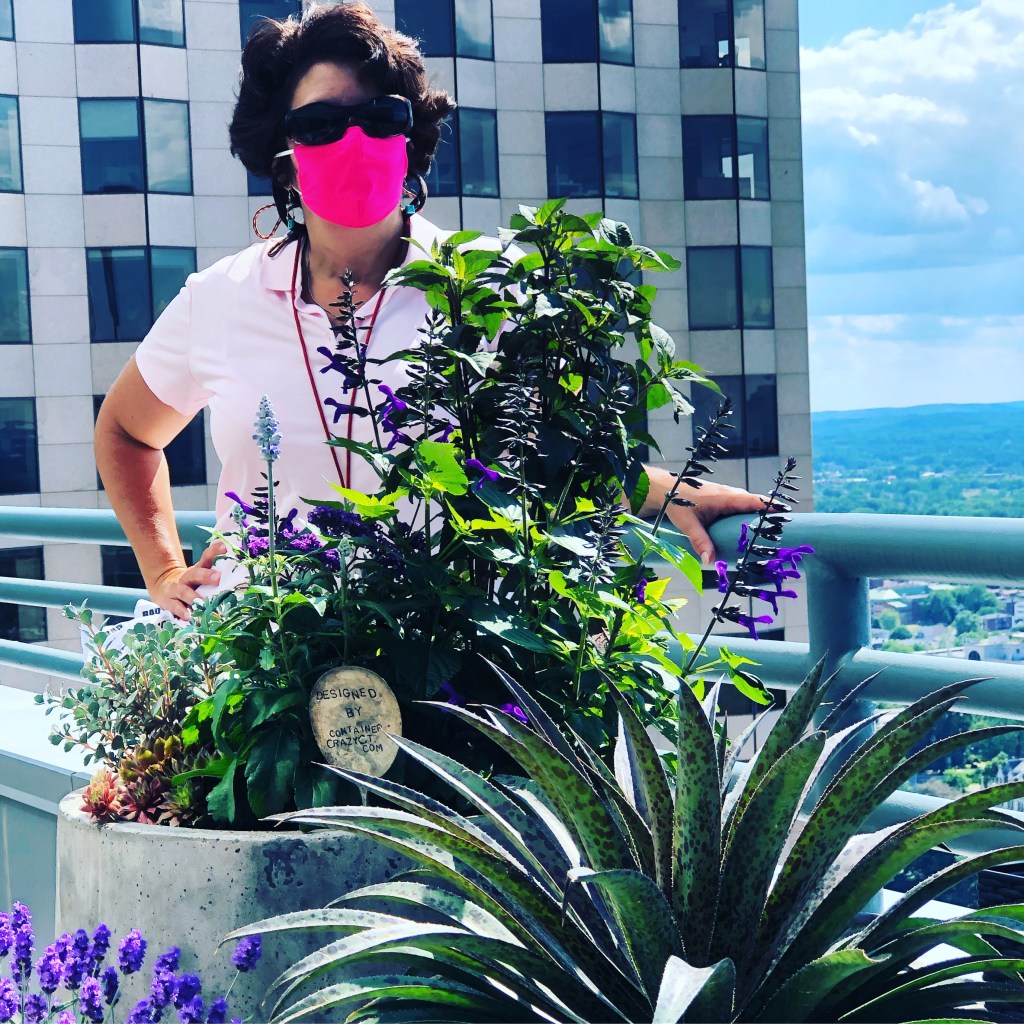
On a High Rise
I’m super happy to have a few high rise customers and do lots of planters and pots for them every season. In the foreground is a Mangave, on the right. Isn’t it spectacular?! I loved using it in a very tall planter one year in the summer there. I will write about this plant more. I have one that shot up a bloom stalk about 10 feet tall in my greenhouse which started in October and is still standing. More on that later. After working on a high rise for a few years now, I have learned a lot more about what works well. Sometimes I think I should write a mini-book about my experiences of working on high rise outdoor spaces. It is fun, unique, challenging, and rewarding.
Well, if you are not bored by now, I’m glad. I hope you enjoyed the me photos. It is a way for me to look back and seeing flower colors beats the dull and gray wet day outside right now.
Have a good weekend,
Cathy Testa Container Gardener Zone 6b, Connecticut 860-977-9473 containercathy at gmail.com Dated: February 4, 2022
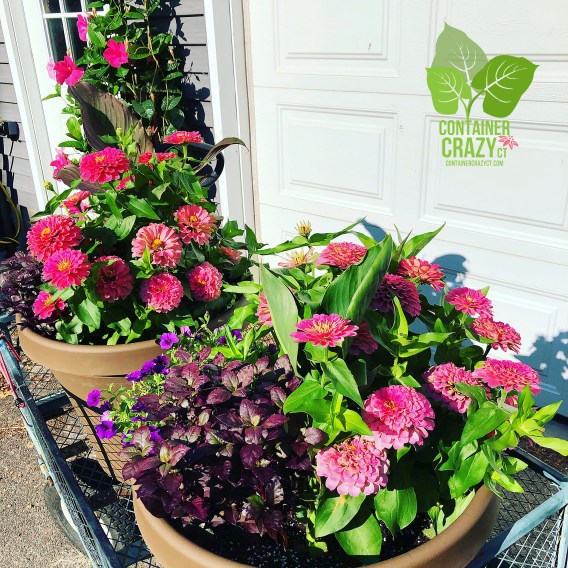
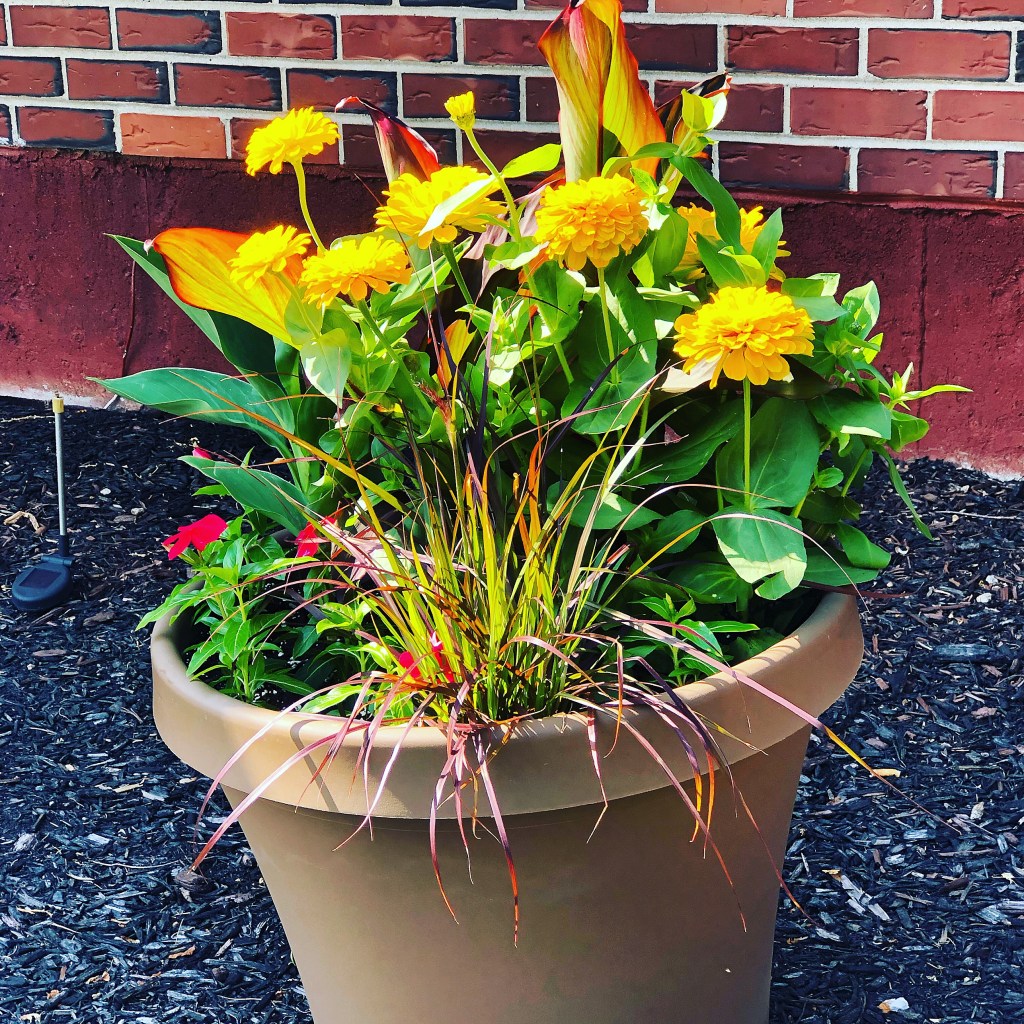
A mix of elegant pastel colored blooms and pops of bright vivid flower colors offers the feel of a cottage style country garden in several container garden planters.
Container Gardens by Cathy Testa of Container Crazy CT
When I look at this photo above of several planters I designed and assembled for a customer a couple years ago, I think it feels like a cottage country garden. There is a wonderful mix of pastel bloom colors and splashes of deep reds and bright cheerful yellows to capture attention. I could envision butterflies and bees visiting the blooms all summer long.
The Plectranthus (plant with white edges on leaves) is a heat lover and cascades over the rim of the pot (spiller) creating a bit of softness. And the Pennisetum grass in the back adds that bit of wispy texture and a dark contrasting color. There is a Canna Lily off-center which would grow tall and have yellow blooms and the Zinnias with big chunky bright yellow flower heads gave structure to this pot, but there were 7 more pots to complement these plants.
Placed in the customer’s front Landscape Beds
The planters were placed in a south facing landscape bed which receives full sun most of the day starting probably around noon time. The idea was all of the pots would be placed in various locations in the front of the customer’s home, of which are visible from the street and also from inside the home from a large picture window. The goal was blooms and color.
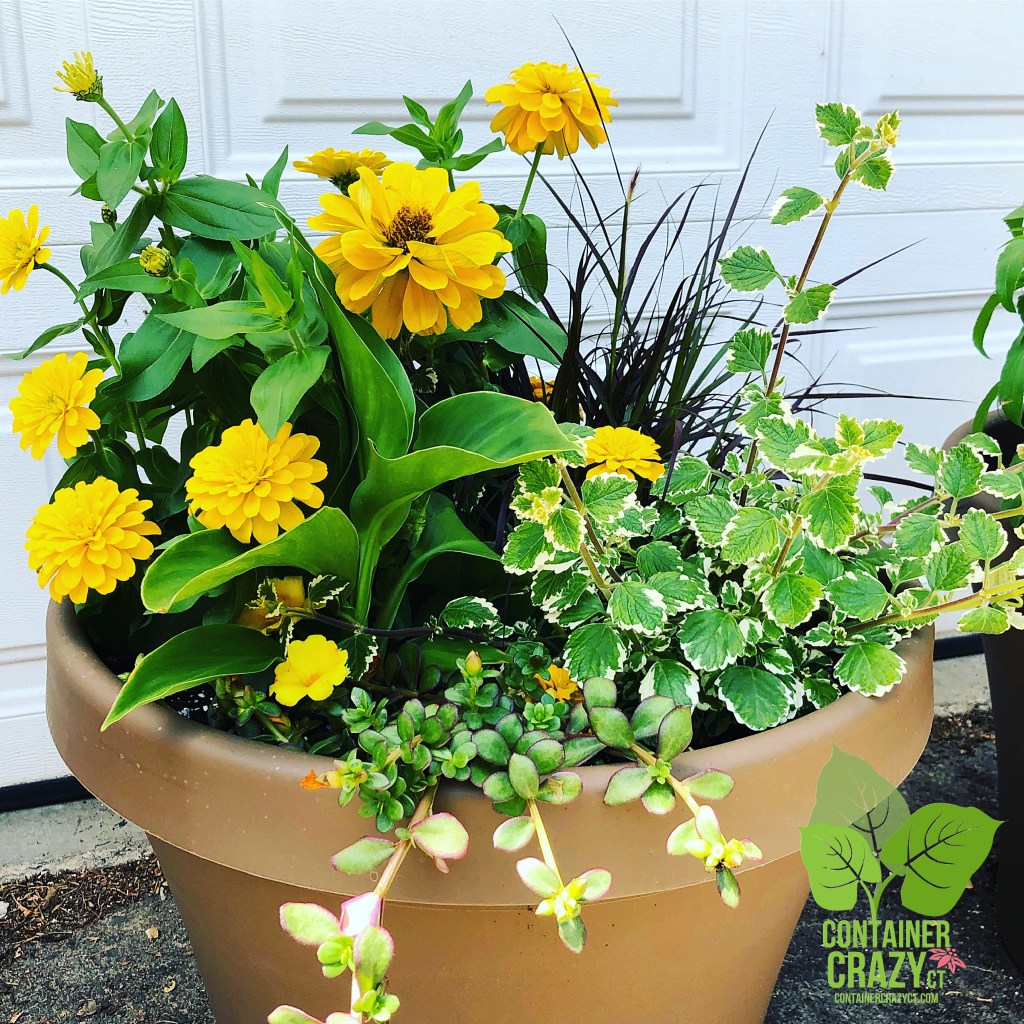
Bright Yellow Zinnias popping against the darker tones of the Canna Lily plant and the Pennisetum grass.
I used yellow blooming Zinnia plants in some pots and pink blooming Zinnias in others. The Zinnias provided the big pops of color I was looking for and the plants grown locally were extremely healthy, plus many people adore Zinnias because they are a traditional charming blooming summer plants. When I picked them up, I knew the customer would love them. On the back side of the planter, tucked in were little red blooming Vinca plants to echo the tones of the darker tones of the foliage of the Canna Lily and the ornamental grass. Always looking to repeat colors and provide contrast is key (dark colors against lighter colors).
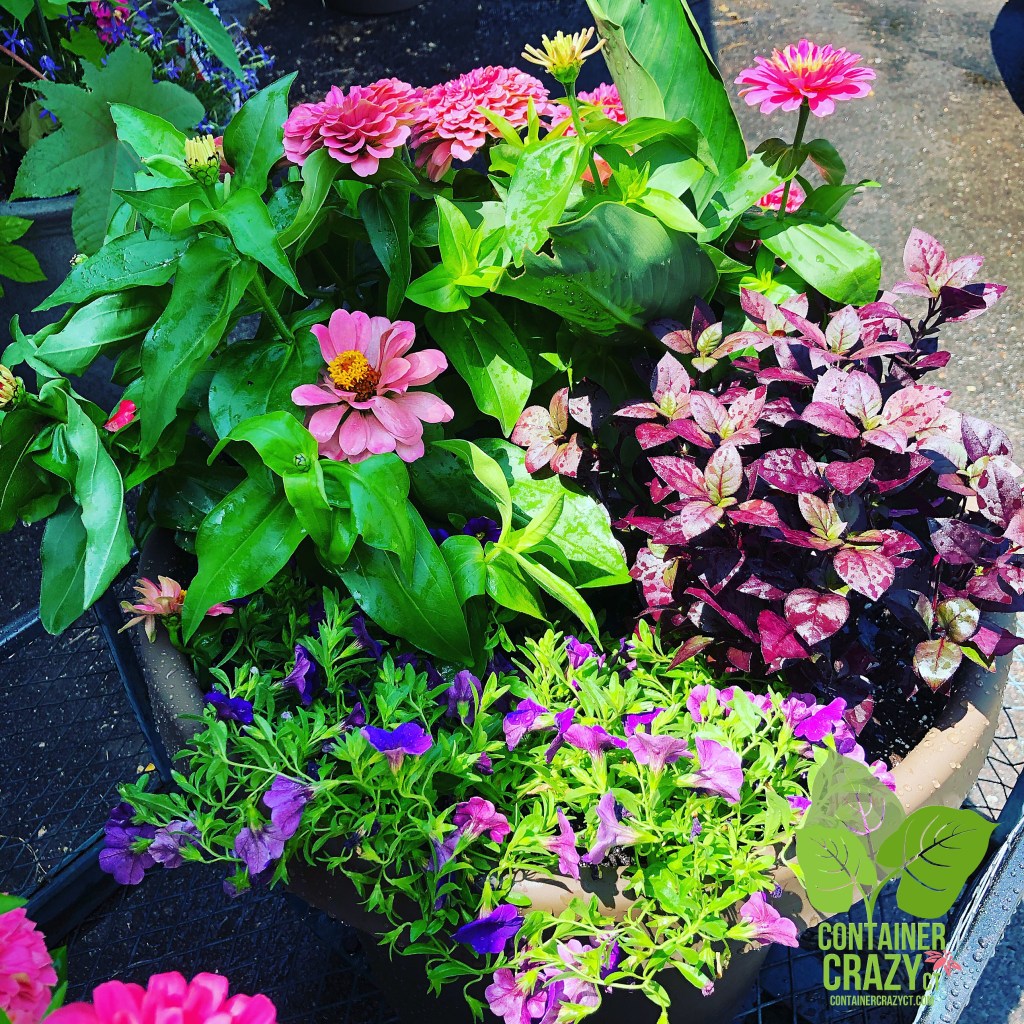
Pink Zinnias, Purple Million Bells Calibrachoa, and Alternanthera ‘Plum Dandy’ – By Cathy Testa of Container Crazy CT
The hot pink blooming Zinnias were irresistible as well. There were lots of closed buds on the plants which is awesome, more flowers to come all summer long. Also, the Zinnia flowers were really big and full plus the foliage looked fantastic. I added some purple Calibrachoa, and I had to add one of my favorite foliage fillers, Alternanthera ‘Plum Dandy’. Alternanthera plants prefers full sun to part sun and are easy-care plants. I’ve used the cultivar, ‘Plum Dandy’ before, a few times, in various container gardens at my own home and other sites, and I feel it is a nice staple foliage filler with a darker tone. The tone, a deep rich purple-like color, worked well with the pinks in these planters.
Alternanthera ‘Plum Dandy’ with Pink Zinnia Flowers
The purple foliage of Alternanthera is alluring to me. I love how rich and solid it looks. This plant doesn’t produce showy flowers, in fact, I don’t recall ever seeing any blooms form, so it is not used for that aspect, but incorporated into the plants to provide a nice deep contrasting filler color against the green foliage of the Zinnias.
Check it out Alternanthera ‘Plum Dandy’ in my own tall planters I have on my deck used the same year as in these pots for my customer on this prior blog post: Overwintering Plants. You will see it in the pot extremely full and lush by the end of the season. Coincidentally, the Plectranthus is also in the same prior blog post (white edges to leaves). Both of these are superb full sun foliage fillers. They grow fast in the appropriate conditions and require little maintenance.
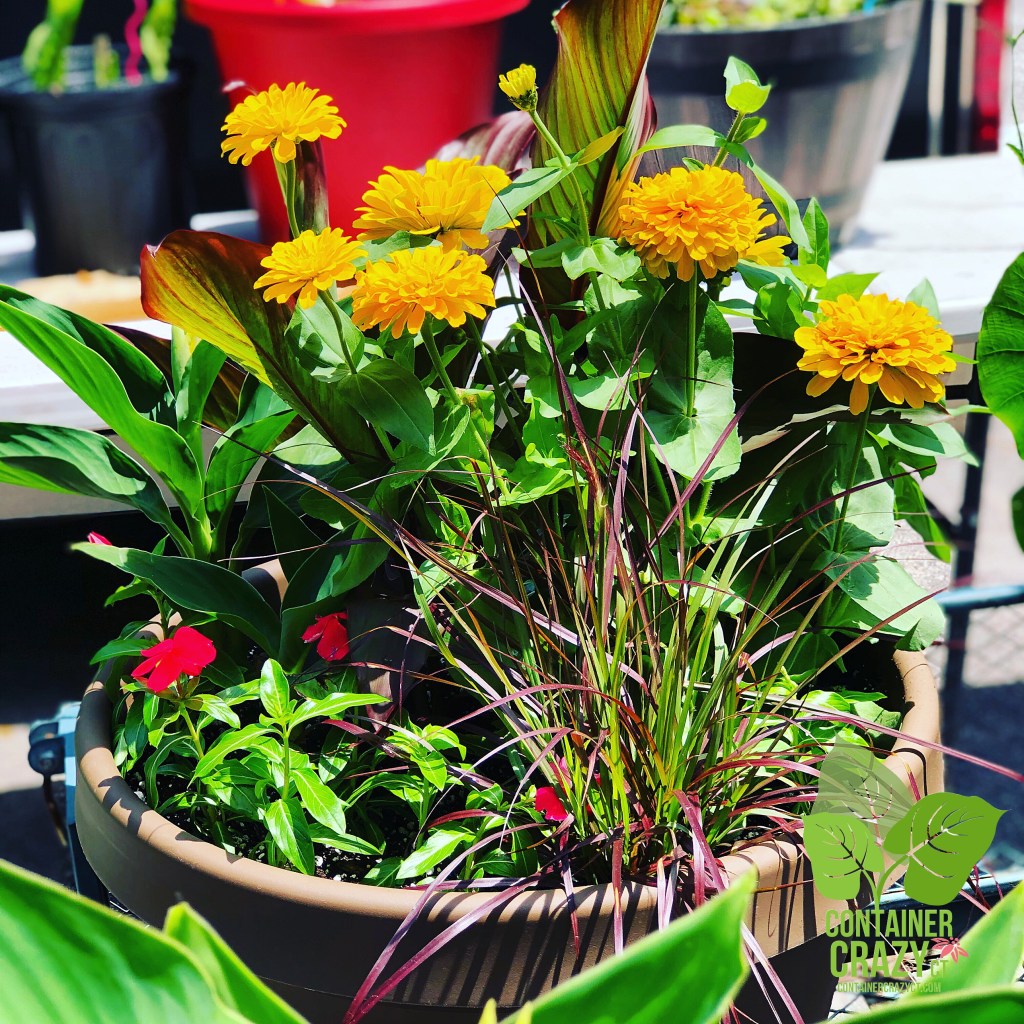
Red Zinnias with Canna Lily and Yellow Blooming Lantana
A yellow blooming Lantana was added to the planters with red Zinnias and Canna Lily plants. Lantanas are very reliable plants and are drought tolerant. They do well in hanging baskets especially if you are not good with watering. This one, shown above, is called Lantana camara ‘Luscious Bananarama’ – Wow, that’s a flashy tradename! It is able to tolerate dry soils and loves heat. It will attract butterflies as well, along with the other bloomers in these planters.
Loading them into the garden cart
You will notice in the photo above, with the two pots in a cart, the pot on the right has an Elephants Ears (Colocasia) plant as the thriller. For the fillers, there is a Gomphrena pulchella Truffula Pink plant (annual as well) with pink ball like flowers and the taller bloomer, Verbena ‘Media Shower’ annual with lavender flowers. Both of these plants are so pretty. They both have very thin stems and grow tall with the round flower balls at the tips, and while sturdy, they have very delicate and wispy looks to them. The Verbena grows taller than the Gomphrena so it adds a bit of change in heights to the planters – also an important design aspect.
When planted at my home, I noticed little white butterflies visited the blooms mid-summer often on the Gomphrena pulchella plant. To see it in my planter at home, see this post: Aqua Blue Planter. I used them there and just loved them.
I partnered the Gomphrena with a blue Salvias (almost purple) in the customer’s planters. The whole goal was to provide lots of flower colors for the customer that would bloom all summer and all of these annuals in the planters would do so, plus they were all very healthy plants to use at the start, which is very important. The Canna Lily and Elephants Ears plants were to be the big showy tropical thrillers in the centers or off-center. They would grow much larger over the course of the summer.
Loading them Up to Deliver – Container Gardens by Cathy Testa
I remember as I started to load up all the planters into my truck, with the help of my husband, thinking how the plants all together looked so lovely and reminded me, again, of a cottage style country garden. Sometimes we are able to create a desired garden look by using various containers with a mix of whatever goal you desire.
In the customer’s landscape front of home upon delivery – Container Gardens by Cathy TestaLoading them up in a garden cart (so pretty with the pink blooming Mandevilla in the background!)Pink blooming Begonias, Pink Hypoestes (pink and green leaves), and Colocasia (Elephants Ears) and Canna Lily.Alternanthera ‘Plum Dandy’ up closeCanna Lily with burgundy darker foliage – to repeat the color of the Alternanthera
In the end, the pots were all bloomers adding a bit of charm similar to cottage country gardens. It was a pleasure to look back at these photos, especially during the winter. I hope you enjoy them too.
Container Gardening Tips with this Post:
Always purchase healthy plants to start (weaker plants are more susceptible to insects and diseases)
Use varying heights in your arrangements to guide the eye and try to not over crowd plants
Focus on contrasting colors (dark colors next to light colors) to make colors more visible to the eye
Use various structures and leaf sizes (wispy straps of ornamental grasses next to chunky leaves of Canna Lily)
Incorporate some spiller type plants to soften the edges of your pots (Plectranthus as an example) to draw the eye downwards
Get plants with lots of buds to open if possible
Enjoy and thank you for visiting. Please share your comments!
Are you new to Connecticut and have no idea what flowering plants you should grow in containers or patio pots on your deck this summer?
I saw this question asked by a CT newbie on a gardening group on Facebook recently, and thought, hmmm, that is a GREAT question.
So to start to answer the question above, I will share some of my suggestions. Let’s start with tropical plants:
Flowering Tropical Plants
If you are new to Connecticut, you may not be aware of the wonderful tropical style plants which showcase beautiful flowers and are perfect to grow in container gardens and patio pots on your deck this summer. The key thing to know about tropical plants is that you should not put them outdoors until after frost in the spring here in CT (known as the last frost date) because tropical plants can not tolerate frost conditions. Thus, the key timing is to put them out around Memorial Day as a guide. Frost usually occurs around mid-May and it changes slightly year to year but mid-May is a good all around watching point, check the weather forecasts, etc. Once we are past frost, many tropical plants do wonderfully during our summers here in Connecticut in pots, planters, and container gardens.
Blooms all summer
Another cool thing about using tropical plants is many tend to bloom all summer into the fall season, usually into September and October, without fading or wearing out as with other annuals type plants. They usually showcase long lasting flowers. And just as with spring timing, you have to take them in before the frost which occurs in the fall in Connecticut. I blog a lot about storing underground tubers, rhizomes, corms, etc. here on this site which you may search for in the fall on this blog by using the search word “overwintering” for more details on when you should take them in and steps to store them over the winter to reuse each season.
Hot Pink Canna Lily Flowers
Canna Lily Plants
Canna lily plants are not hardy in Connecticut, at least they used to not be hardy, but if grown in the ground, they sometimes come back (due to global warming). That’s another story, as the focus of my blog site and this post is about growing them in pots.
In pots, you may plant them using plants you would pick up from a local nursery (or from me if local to my area – see below). Or you may start them by purchasing the rhizomes and planting them in one gallon size nursery pots indoors with potting mix to give them an early start, in March. They will start to grow from the rhizomes inside the house, and then you may transplant them outdoors after our spring frost in Connecticut by the end of May typically.
Love full sun, grow really tall, not a lot of problems
Canna lily plants love full sun but they are also okay in part sun or even part-shade. Many grow really tall and others species or cultivars are dwarf sized. Anywhere from 4 feet to 8 feet or taller. Their flowers attract hummingbirds and the plants are easy care. Flowers are pink, red, yellows, peach, orange, and some have dark burgundy colored leaves.
Speckled with red on yellow flowers
I usually do not encounter insect problems with Canna lily plants, other than the Japanese beetles that come out one time a year in the summer, they may eat some of the leaves and you may see some holes, but the beetles don’t stay out all summer so I usually just cut the damaged leaves off and tolerate them for a month. This occurs in July or August on one or two plants. Sometimes they only bother one of my plants and leave the rest alone, so I don’t find them to be a nuisance.
How to plant them…
As far as planting them, use a good quality potting mix and add some compost. I typically add slow-release fertilizer to all my container gardens and patio pots as well. See my prior blog post, called the 5-Must Do’s for more information. I typically don’t regularly fertilize my Canna lily plantings on a monthly schedule, with liquid plant food as often recommended, unless I have the watering can with me and I’m fertilizing other plants, than maybe. But, in general, they are very easy to grow. They tend to be low-maintenance plants, other than the part about storing them over the winter, that is a bit of maintenance in the autumn season, but worth it if you wish to reuse them each season. And of course, as with all container gardens and patio pots, you must water them in the summer as needed.
Very Tall Canna (dark foliage) in a large square planter on my deck 2020
Can be top heavy…
One thing to note about Canna lily plants is that they do grow tall and their stems are usually thick enough to stand on their own, so staking is not required at all, but I typically grow them in large pots of 22″ in diameter at a minimum and about as deep. They tend to multiply and produce more shoots so a good clump can form over the summer. As a bigger clump of stems form, it can be top heavy in a pot, and if a small pot is used, they may toppled over from the wind at times. The rhizomes from which they grow are usually about 6 inches deep in the soil, so when you are ready to take them out by digging up the tubers in the autumn season, you will find them there in the soil below. And if you are growing a really tall variety, be aware a very windy location could tilt them, but I don’t encounter that here at my house on the deck. I’m talking if you grew them on a high rise or place where it is unprotected with super strong winds.
These toppled over from wind at times last year (pot was really not stable enough for the tall varieties)
Make More Plants!
Another great benefit to using Canna Lily plants is they tend to grow bigger rhizomes each season. You may dig up the rhizomes in the autumn season, and divide them into pieces and store them from late fall and over the winter in a cool basement, dark place, and where it will not freeze (where it will not drop below 32 degrees F). You get more plants over time with this process.
Thriller in Arrangements
As I’ve noted before, a good balance of plants in container gardens is having a thriller (tall center plant), spiller (drapes over the edges of pots and hangs down), and fillers (self-explanatory). Canna lily plants make excellent thrillers. They give height to your container and planters, and bloom all summer into fall, non stop. As flowers fade, just remove them if you wish, keep the plant cleaned up as desired, and enjoy them all summer on your deck. And best of all is seeing hummingbirds zoom up to the flowers while you sit and enjoy their show.
Pair Them Up With..
Practically anything. As you see in the photo above, I have succulents in the base of the planter with those tall Canna lilies and various annuals. They are great with practically any warm season loving plants that enjoy full to part sun. On this post, about my Aqua Blue Planter on my deck from 2020, you will see a list of the plants I used as fillers and spillers below the tall Canna lilies. Many larger leaved foliage type plants do well with Canna lilies as well, such as Elephant’s Ear (Colocasia), which are also tropical plants. They do flower but usually only one or two blooms. However, for a tropical look, I just love using the big ears of Colocasias with my Canna Lily plants and other topical plants with fantastic foliage. Because many succulents enjoy summer hot weather, they pair well as fillers too.
I will continue blog about other tropical plants great on decks in the summer in Connecticut.
Stay tuned or follow this blog to receive an email when each new post is published here.
Thanks for visiting,
Cathy Testa Container Garden Designer and Installer Broad Brook/East Windsor, CT Zone 6b
On winter days like today, with soft white fresh snow falling, many of us start daydreaming about the seeds we will sow in a few months, and perhaps start planning out our key sowing dates, as well as ordering various supplies for starting our seeds.
Starting Seeds Indoors
Starting seeds indoors is something I’ve been doing for a few years now for warm season vegetables (tomatoes, hot peppers, and some herbs), and every year, I like to try new varieties or heirlooms. I’ve been successful with using my greenhouse to grow my seeds indoors, along with using appropriate supplies and soil mixes, and providing care (watering, monitoring, etc.) without the use of grow lights, however, this year, I think I’m ready to take the plunge and experiment with supplemental lighting.
Types of Lights
This post will not explain what you need, what type of lights you should get, or any of that, because I will be in the midst of researching and starting with just testing out one system of lights above some trays of seeds in a couple months in my greenhouse, however, I can tell you why I feel I should turn on the lights over my trays of seedlings for the first time this year.
Because it will improve the results – I think…
With a greenhouse, you have lots of advantages, such as space, heat, and “natural” sunlight. However, many winter days are cloudy and cold, with not much sunlight at all in the months of February and March (March is usually about when I start my warm season vegetable seeds). Cloudy days limit growing progress, but it won’t stop progress. I have been able to grow my seedlings fairly well but it does slow things down not having sufficient sunlight every day.
Heating Mats, Nursery Pots, Soil Mixes, and Labels…
I thought, because I’ve invested so much already by investing in using the heat mats for seedling trays and everything else, not to mention the cost to heat a greenhouse, why keep on spending? But, in the world of gardening, you always seem to be getting another item to improve your growing processes. I decided I would purchase one of the fluorescent lights sets to hang over the trays during germination and help the plants once they start to grow. My thought is I will only use the lights when the days are cloudy. On sunny days, I’ll allow the sun to warm up the greenhouse and provide the natural sunlight for the plants.
Seeing Lights in Greenhouses
I remember walking into a very large nursery up north once, and they had lights all hanging above, and thinking, hmmm, they use supplemental lights. From what I’ve been reading, the lights should be placed about 3-6″ above the seedling trays once they germinate, but you have to watch you don’t burn anything when you move them this close to the trays. I will be doing so and monitoring how the plants look. There are signs to pay attention to if the lights are too close, which I will know, because I’m accustom to monitoring plants.
Baskets of Herbs I Grew without Supplemental Lights
Are Lights Needed to Succeed?
Some people will argue that you most definitely need artificial supplemental lights to succeed with growing seedlings indoors, but I’ve always argued that is not 100% true. I’ll let you know what I think after my first season trial with supplemental lights for my seedlings. But, I have done it without supplemental lights for years, so you can do it, but using the lights will improve the seedlings health overall. I’ve used heat mats to help keep the soil warm in the greenhouse, and adding lights may give the seedlings an extra boost. It may take them from normal to champion status. Kind of like training an athlete. Improving each time.
Types of Lights
There are fancier and more modern light options out there beyond the fluorescent types, but I’ve decided I will take baby steps this year. I want simplicity, ease of hanging them, plug in style to an outlet, and give the lights a try. I’ve just ordered the system, and some more nursery pots because I know I’ll go thru them light crazy. Then I decided I need more labels, and the supplies list begins!
Light to Germinate
Most of the seeds I grow require light to germinate (some seeds require darkness), and they need light to grow well once they have germinated in order to grow strongly. Using a greenhouse really helps of course, and/or using the fluorescent lights will improve the results – but if you use both a greenhouse and supplemental lights – it should be awesome, I hope. As long as all other factors are done appropriately along the way, such as using good seedling mix, accurate timing of starting seeds before the frost dates, and monitoring. I usually check my seedlings every day once they germinate.
Plants Produce Their Own Food
Plants use light to produce their own food. If light is not available after they germinate, they are slower growing, they may be stretchy looking from reaching for sunlight, but once natural sunlight is provided on sunny days, if they experienced a day or two of clouds, they tend to rebound very quickly in a greenhouse setting. Plus a greenhouse gets very warm on sunny days! Once I use the new supplemental lights on the cloudy days, I should see them be stronger than ever before. Stay tuned as I share my progress.
Cathy Testa containercathy at gmail.com Broad Brook, CT Zone 6b Area
After waking up from the foggy mind, after our confusing holidays, I start to pull out my calendars from last year, which includes two (if not 3) wall style calendars, notebooks with key dates, reviewing my own blog posts from the past year for key dates, and going thru client binders to get my new 2022 calendars started.
Yes, I have all those various sources to track activity by dates. I want to remember the odd things that happened because it helps me to be prepared, or to try to plan ahead, and to remember, in the gardening world, lots of variables come into play (timing, weather, pandemics, etc.).
Unexpected Snow Fall in April?
For example, do you remember when we had a snow fall in April of 2021? I do. I purposely took a photo of the date scratched into the top of my fire pit cover, and I also noted the date on my 2021 wall calendars. The notations are reminders of things that can happen when you least expect it, or we should be expecting it, cause it probably happened the year before, or it may again…
Cold Rains on Memorial Day?
Like for example, do you remember the cold temperatures and crazy rain we had on Memorial Day weekend last year? It traumatized me because I literally finished planting a site the week before! I was so worried about the plants and how they would be impacted by the freak cold rain we got the whole weekend after I finished my job site. I went silent. My husband even asked me why I was so quiet as we drove out for a weekend at that time, and I told him, “I’m super disappointed in the weather we had over Memorial Day.” Then I stayed silent for the rest of the drive.
Flooding of Summer Fields…
Also, what about the floods we had in farmers’ fields in 2021 during the summer months – which impacted the availability and quality of pumpkins I use when I make succulent pumpkins in October, and of course the rain during the summer that messed up the ripening of our tomatoes?! Need I say more…?
And dare I say it, Ugh, COVID. As my friend posted recently, “We all want to say bye-bye to Covid!”
The darn Covid world. It is everywhere it feels like. We never thought it would last this long or rebound, right? How many challenges must we face? Let’s not get into how it impacted everything, shipping, staff, uncertainty, availability, etc. And the very sad and depressing things, such as many people getting sick, hospitals overwhelmed, it just seems hard to rise up again. My blood pressure has risen. From the stress (or too many sweets over the holidays.)
In the world of gardening, you do face challenges. I told a grower once, “Every single year, it is different.” They agreed. It was very hard to plan and predict in our usual manner.
Global warming impacts us too. We see lots of changes in weather. It is so unpredictable. Thus, my calendaring routine is even more critical. Or is it? Because sometimes, its been difficult to take a deep breath at times, and start again. But alas, it is January, and I must start again.
Today, is January 6th, 2022. It will be sunny (thankfully, because I have to take down some outdoor holiday decor) and it will snow tomorrow, but then be clear on Saturday (unless that changes). I’ve started to come out of my holiday brain fog and started looking at key gardening and planning ahead dates.
Sowing Information
I remember that last year, around this time, people started searching about sowing information for their seeds. So I’m going to re-share the link below where shared some tips from last year around this time:
I have to admit, I’m still not done reviewing things, but I’ve started, and it reminds me of this: January is about “planning” and probably early ordering (at least for me), February is “ramp up” month, March is “sowing” month, and April is “growing month” which goes into May. And hopefully this year’s end of May will bring better weather when we are ready to put all plants outdoors for our vegetables gardens and tropical plants, etc.
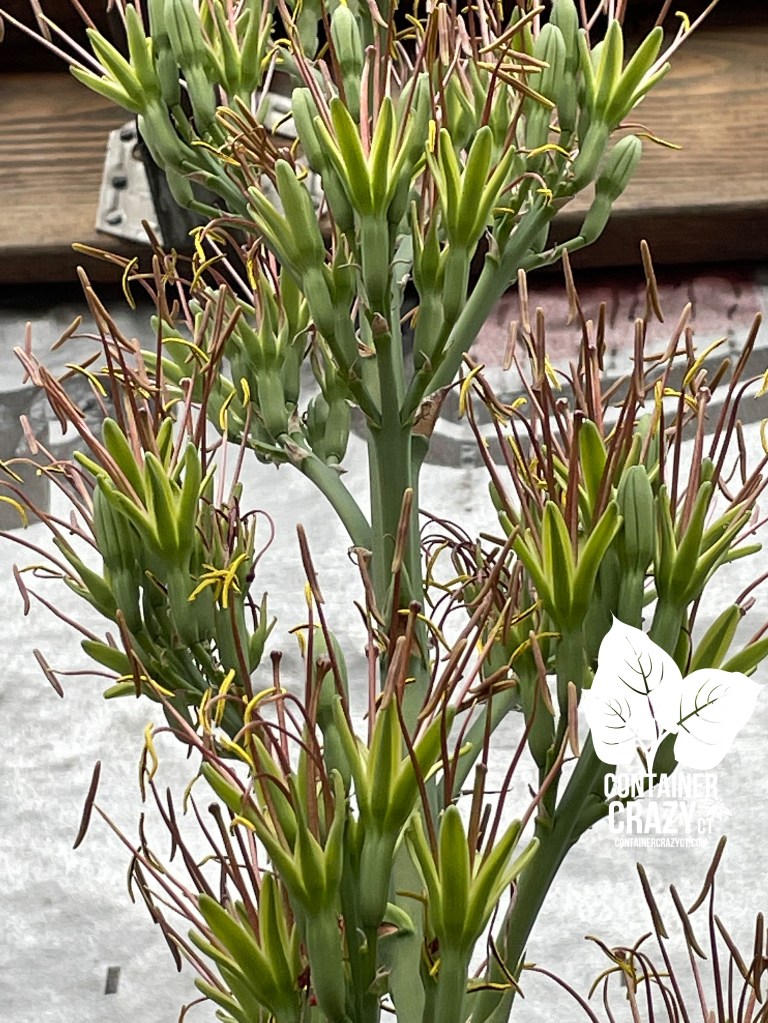
I know this post is a little choppy, but I needed to get it out there to let you know, I’m here and I guess I will take on the unexpected challenges yet again. Because when I’m in my greenhouse on sunny days in the winter, it revives me. I see the plants not giving up, despite being on the temperatures cool side in the winters, and some plants will even bloom. I’ve been witnessing, in fact, my Mangave plant blooming. It shot up a 10 ft tall stalk and the buds finally opened. They are still opening. The very top of the stalk is almost touching the roof. I have to step up on a ladder to get photos or look up as I did this this photo below taken a few days ago.
Mangave buds opening into 2022
In the meantime, I hope this post is not too blah, because besides all the gardening challenges of last year, I still encounter enthusiastic plant lovers and I still am very passionate about plants – and it makes it all worth it. I think I’ll be ready to go at it again. Stay tuned.
Cathy Testa Container Gardens, Plants, Plant Gifts, Seeds, and More! 860-977-9473 (texts welcome) containercathy at gmail.com See also:
I hear the wind blowing outside as I type this – Yup, I’m an early bird. Lots to do, wreaths to make, and holiday gift orders to create.
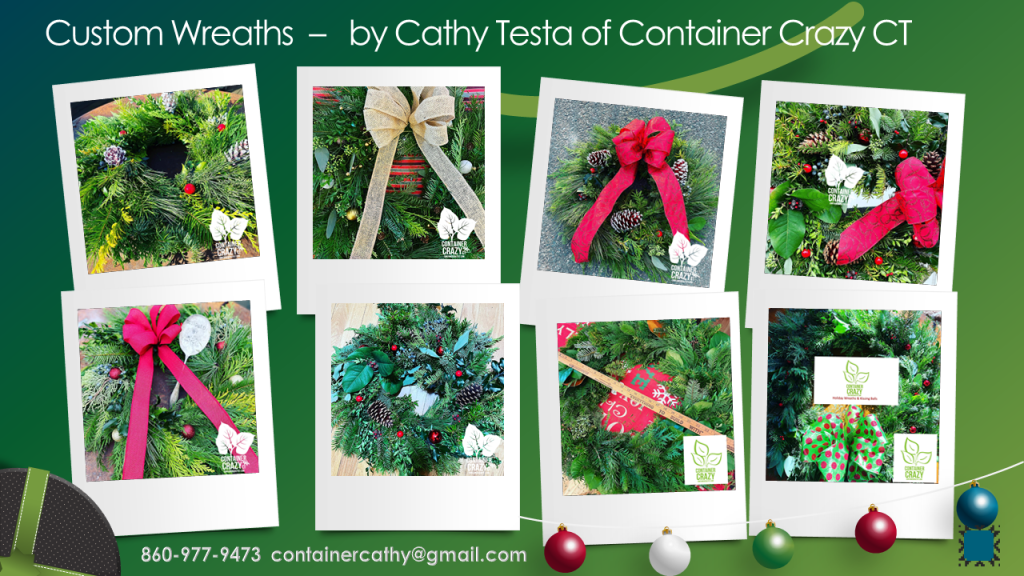
If you are local and interested, please feel free to reach out regarding my custom hand-made wreaths with a fresh mix of greenery, bow and some décor, or bow-less, which some people prefer.
2021 Wreaths Made to Order for Porch Pick-ups, Broad Brook, CT
I started humming Christmas tunes the other day as I was gathering up my beautiful fresh greenery materials to make a wreath. Usually, I start watching or listening to an old classic holiday movie while I make the wreaths, because watching is not really possible as I’m looking down as I work to create a wreath, adding decor and items after I assemble the wreath itself. But hearing the holiday themes of a good movie provide me that uplifting feeling of the holidays coming up and decking our halls with greenery!
Hubby Holding Wreath
I have to admit, I do think about the crowd of attendees at my former Holiday Wreath and Kissing Balls Workshops from time to time. There was always a “spirit of good holiday vibes” with me when I would setup my workshop space for the annual workshop tradition, but alas, those have ceased (when COVID hit and also because I think Cathy T KB Clause got a bit worn out.) Setting up the space was very time consuming. It was almost like throwing a mini wedding, but I’m so happy to create custom wreaths and other items since I ceased the workshops! My offerings are outlined on www.WORKSHOPSCT.com for more information.
Large KB’s
The next best thing is making custom orders for everyone. I’m still here working at it, so if you need a wreath and are local, contact me – while supplies last. Ho-Ho-Ho, let’s Go-Go-Go!!!
Thank you – Cathy T.
Cathy Testa Container Crazy CT Broad Brook, Connecticut 860-977-9473 For More Info about Holiday Products at www.WORKSHOPSCT.com
For more information regarding this year’s custom orders, please visit www.WorkshopsCT.com. Please note, Container Crazy CT, is not offering the holiday workshops any longer. This was due to the onset of COVID. However, we are offering custom orders for pick up of wreaths and holiday kissing balls, as well as boxes of fresh greens, if you wish to make your own creation at home. All is arranged by porch-pick-up’s. See the details on site noted above.
In my prior post, I detailed my process for overwintering my canna lily plant rhizomes in my area of Connecticut (Zone 6). I’m continuing it here for those who have asked questions (some asked in person and some via Facebook recently).
Basic Steps:
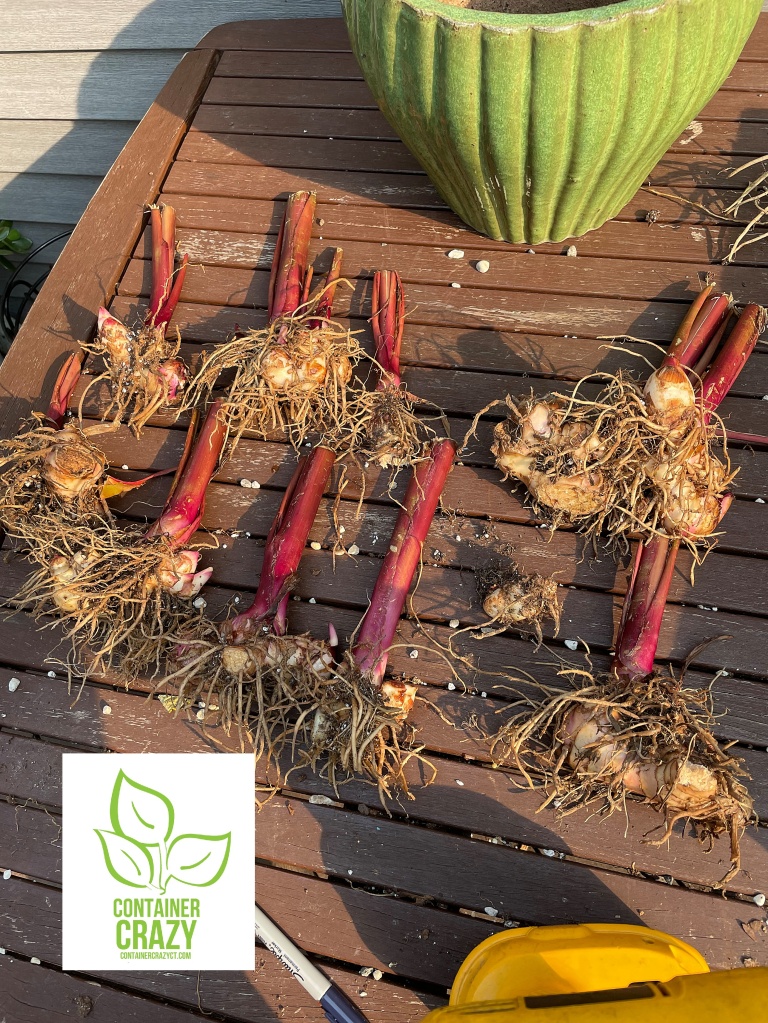
As noted on my prior post, cut down all the foliage, dig up the root ball, brush or wash away the soil, and let the rhizomes with a stalk attached air dry. After the rhizomes sat in the sun for a day, it was much easier to pull them apart to separate the rhizomes from larger clumps.
These rhizomes with partial stalks were left out on the table for a day in the sun
When I showed a friend how to do this process in person, she freaked out when I pulled the rhizomes by the stalks to separate them and then I started tapping the rhizomes on the ground to knock off more dirt. She was worried I was damaging them, and I said, “Oh, don’t panic, they will be fine.” I thought it was kind of funny but I get it – you don’t want to ruin them.
How to separate the big clumps
Sometimes when you have Canna Lily plants growing in a container for several years, when you pull the root ball out, it is one big clunk of a mass of roots and rhizomes all stuck together. It can be hard work to pull them apart. It is better to separate the rhizomes so when you replant them, they will be individual plants. The big clump over time will just not produce as nice of plants and will reduce the flowers. What I find is I try to separate them as much as I can and if they are really stuck together, let them sit in the sun for a day or two, and after it is dried out, take a stalk in each hand and pull apart and usually they will come apart easily.
Big Clumps “before” they sat in the sun for a day. Above photo this photo is after.
See the larger clump on the top right? That clump was much easier to separate after I let it sit in the sun for a day and overnight. Sometimes you will hear a “snap” like noise as you pull the stalks and the sections cracked away, and that is fine within reason. You basically do your best to separate them cleanly, but if they don’t – one or two cracks in the rhizomes is not going to ruin it all. After I separated them, I also cut the stalks to be about 4″ from the top of the rhizomes and let it all sit in the sun again for another day.
Preparing the Storage Bins
I store my canna lily rhizomes in plastic bins. Narrow bins work better. The deep bins are not necessary and if you stack too many rhizomes in a deep bin, they tend to rot more. So the narrow boxes are just right. You want to lay the rhizomes next to each other versus piling them up on top of each other for best results.
Last fall, I made the big mistake of not drilling some air holes in the new bins I had purchased, and some of my elephant’s ear tubers had rotted (ack!). Never again. So get your drill out and make holes the size of a pencil eraser. Not much bigger than that. You want little holes, not big holes. Also, put the peat moss about 1/3 of the bottom. Do not fill the container with the peat. You only need enough to allow a nice bed for the rhizomes to sit on with some of the peat poured over the top lightly.
Narrow Bins Work BestRubber Maid Box Lid
When I asked my husband if the drill was charged, he responded with, “What size drill bit do you need?” My response was, one the size of an eraser of a pencil. He got it. I don’t speak measurements well. Everything is visual for me! I want the holes to be tiny and just enough for some air circulation to occur in the box. It needs to breath just a little while it sits in my unheated basement for the winter months.
Label the box
I can’t stress enough the importance of labeling the box with the date and the items you put in there. I wrote it down in a notebook one year and then couldn’t find the notebook later! It just helps IF you are storing several types of tropical plants underground storage organs (tubers, rhizomes, corms, bulbs, etc.).
Stalks cut shorter, and allowed to dry in the sun again
After I trimmed the stalks to be shorter, I let them air dry again because otherwise that open fleshy wound could invite insects in the bin. It somewhat cures the rhizomes, you may also want to turn them over mid day to let it dry on the other side. Doing this on sunny days is best because if it rains, they get wet all over again.
One of the separations
More plants next season
One of the best motivators for doing all this work is you will end up with many rhizomes to plant when you bring them back to life in the spring time.
About the peat
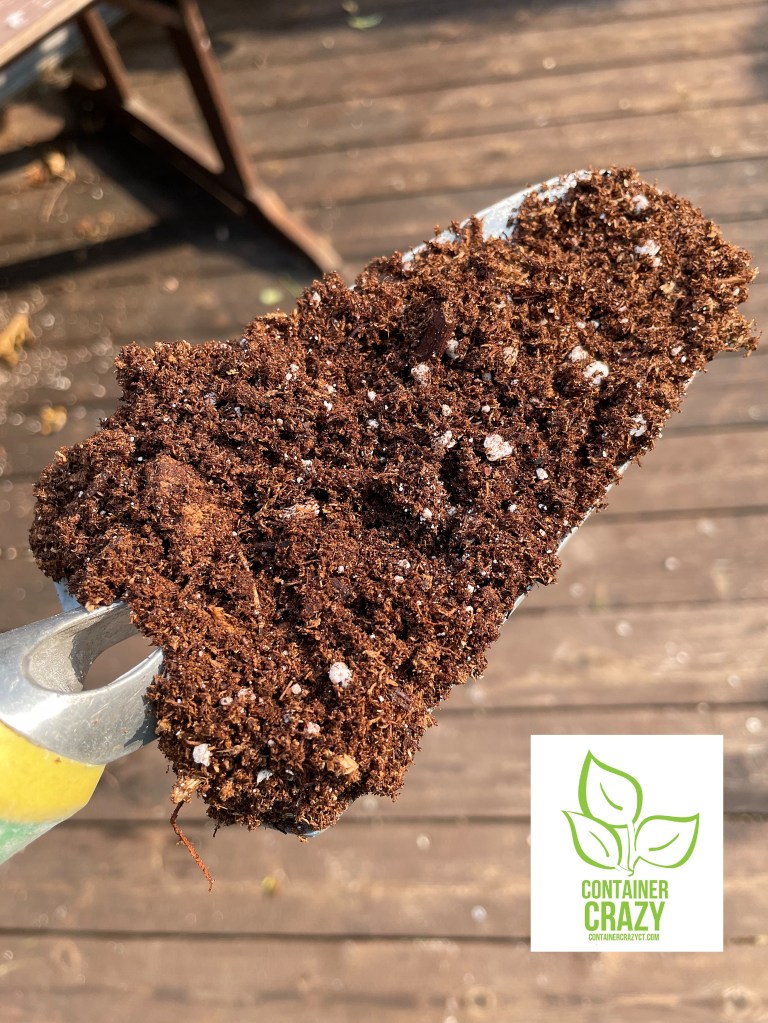
Peat with some Perlite
About the peat
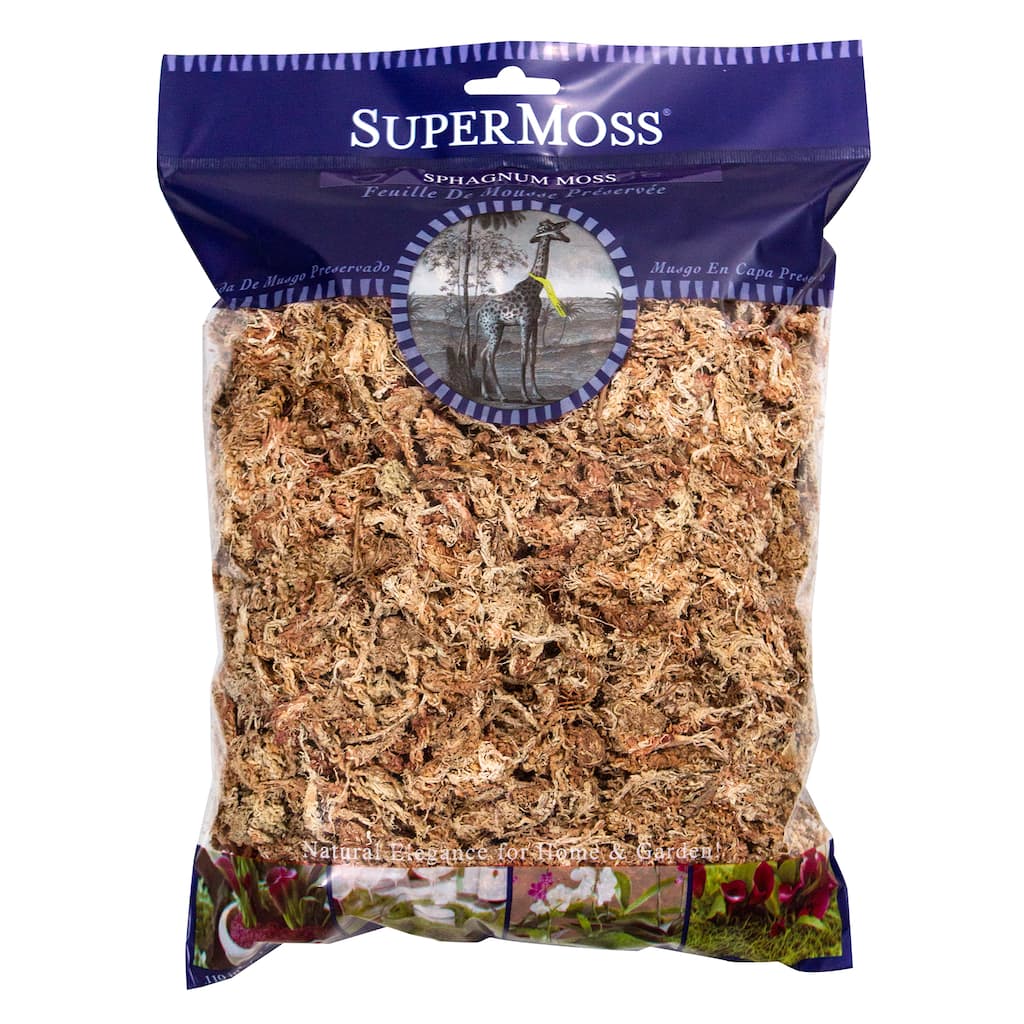
Does peat confuse you? It used to confuse me – cause peat moss is also used for hanging baskets or other projects in the gardening world. Do not use “Long Fibered Sphagnum Moss” which is used in hanging baskets, it is a more light dull brown color, and it does not work appropriately. It can hold onto moisture too much. The “Long fibered” moss, like shown in this photo below, is useful in craft projects, etc., but I find it does not work well for storing tubers, rhizomes, corms, etc. It stays too wet and doesn’t repel problems.
Do not use this type for storing the rhizomes
Use the brown spaghnum peat moss that typically comes in bags or square bales. It looks like this:
It looks like this without the white perlite
Last year, I had some extra perlite (white round balls in the photo below) which I tossed into a bin. Perlite is not in peat moss (just thought I’d mention that for observant people! LOL.).
In Bales or Half Bales
Available in compressed bales or half-bales
I’m not recommending any particular “brand” but usually I buy a compressed big bale like the one shown above, put it in a wheelbarrow, and break it apart with a small shovel. This type of peat is used in gardens, as soil amendments, and in potting mixes. It is used dry and I find it maintains well for several years, so the peat in my storage bins is reused over and over again “unless I had some type of bug or rot issue” in the bin which hasn’t occurred too much over the years. Also, I’ve read the peat moss’s acidic nature helps to keep problems out of the bin and away from the rhizomes. But we won’t go into that here, as I am trying to keep it simple. It is a great item to use because it retains a tad bit of any moisture just enough but allows air too.
Air holes along the top edge too
You will notice I drilled a few holes along the top edge of the bin too. If you are stacking these bins in your basement, the airholes on the top may be covered by the box above it so side holes are helpful.
Now, I’ve been told these things by people:
I just put my whole pot with the plant in the basement. (Yes, that works, but over time a big root ball in a pot won’t perform as well so eventually it is time to divide those rhizomes.)
I just put it in newspaper. (I am guessing this works but I trust my process and just keep doing it this way).
I just leave the canna plants in the ground. (Years ago, we could not leave the canna plants in the ground. They would freeze and die BUT I have found some that I planted in the ground next to my fireplace wall where the woodstove is used inside the basement, the canna lily plants have regrown. I believe the soil being a warmer in that area and the fact we have warmer temps from global warming has led to “some” canna lily plants surviving our winter ground temperatures, but I wouldn’t bet on it for any in containers left outdoors as they would certainly freeze. If you want to store the whole pot in the basement and not remove it to divide the plants, that is another option.)
I can’t be bothered with storing the rhizomes and will just get plants from you next year. (Yes! Sounds good to me. I grow many canna lily plants in spring and offer them for sale.)
Waiting on Storing this one!
Timing
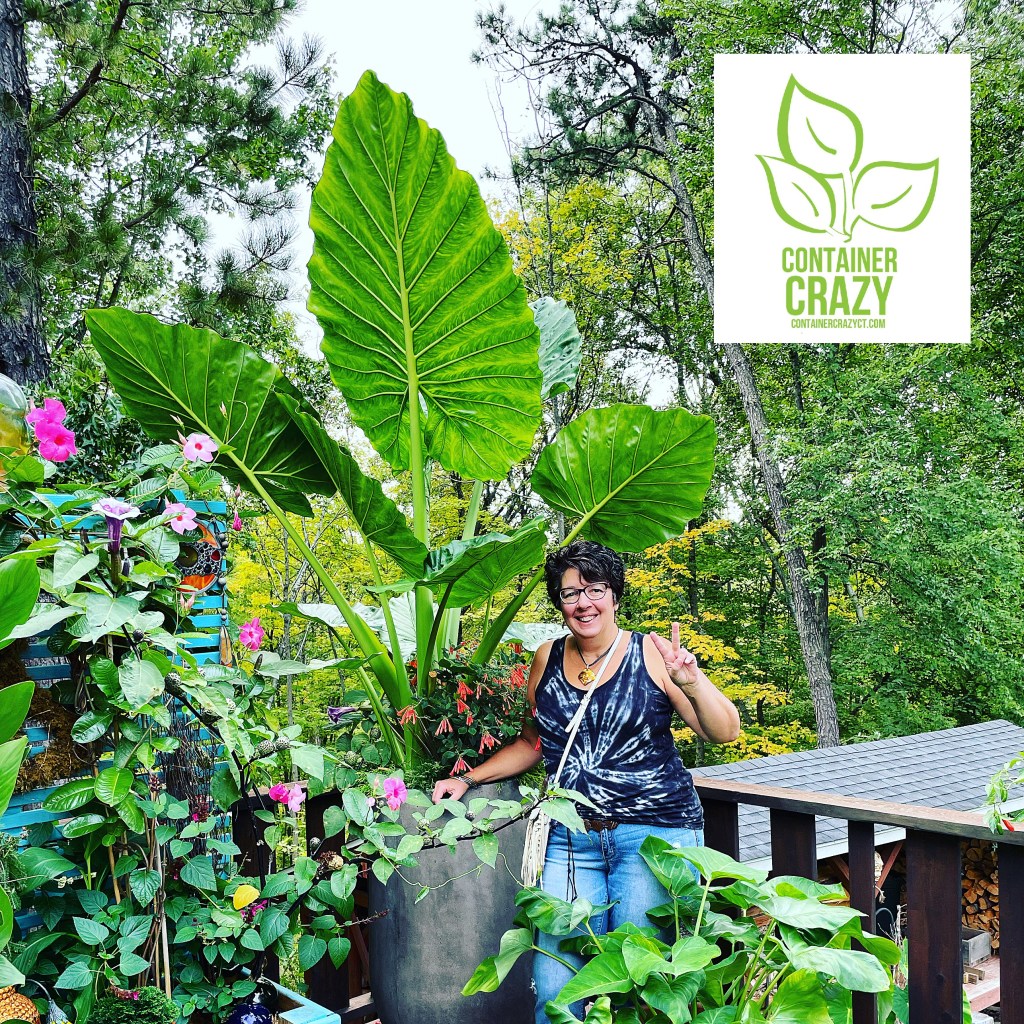
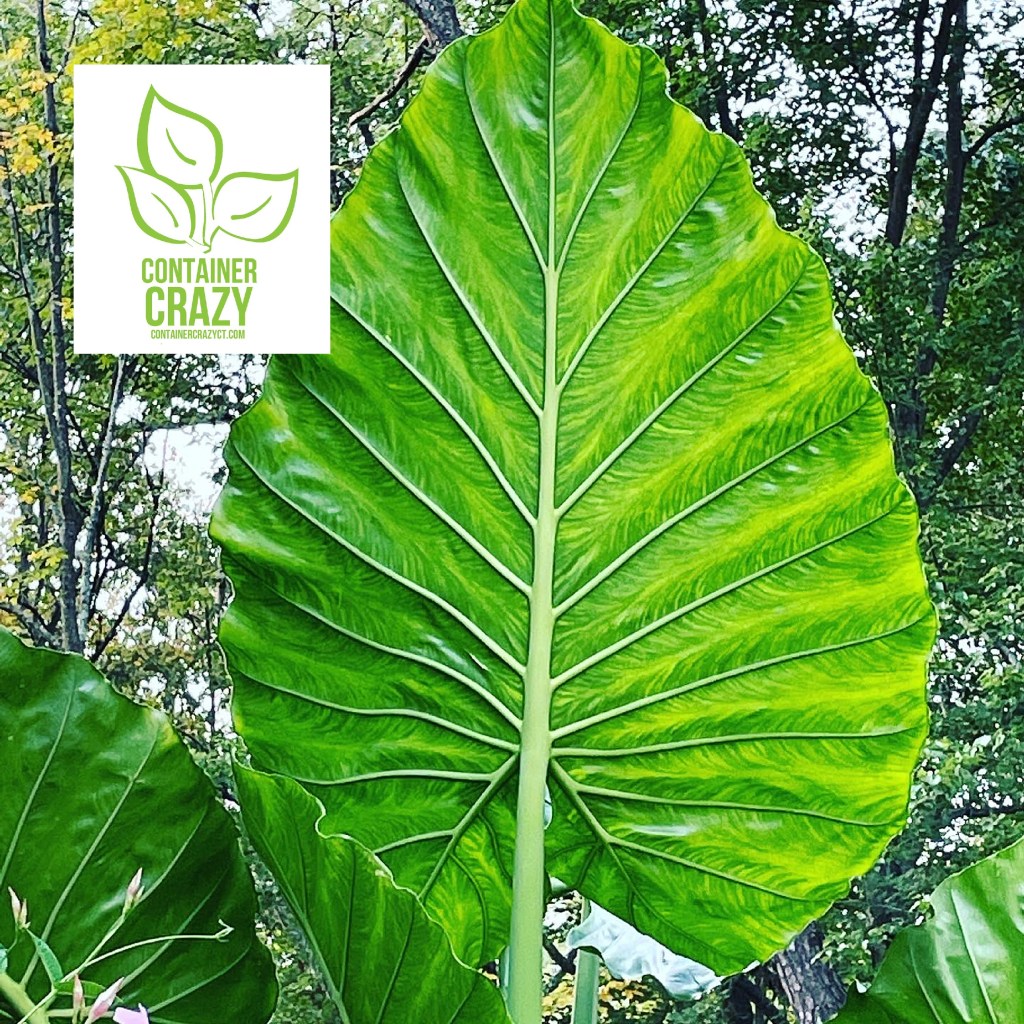
All of this work may wait if you want to enjoy your tropical non-hardy plants here in CT, like this one I’m standing next to. I am waiting to do this one till at least early October because I am in love with this Alocasia. I almost lost tubers I had stored of these because of the non-air hole situation described above. The biggest leaf on this plant seems to be just getting bigger and bigger.
Gorgeous Alocasia Leaf 2021
Well, that’s it for today. I am continuing my work today outside here at my home. My husband has a joke that before we know it, it will be Halloween, then Thanksgiving, and then Christmas! I will say, “Stop saying that! Because I love my deck filled with plants and it depresses me to take all this down, but he is correct. Time flies when you are having fun.”
Thank you for visiting my blog.
Cathy Testa Container Gardening Designer 860-977-9473 Broad Brook/East Windsor, CT Today’s Weather: 75-79 degrees F. Cloudy till about noon. Tomorrow Weather thru Wed – looks good, then rain at end of the week. Rain equals wet working outside. I’ll thank myself later that I did this in the sun and not fighting the elements!
What I do for work:
Install Container Gardens Grow Plants from seeds (and rhizomes, tubers, etc.) Create and sell Succulent Topped Pumpkins in fall (next month!) Create and sell handmade greenery wreaths and kissing balls for the holidays (December!) Write with typo’s – LOL. Stare at plants as much as possible Have a good day…
One year, many years ago, I went on vacation with my husband and some friends to Cancun, Mexico. We adventured from our hotel via taxis one afternoon and stopped at a mini local market. I was so into the market, looking at all the handmade items, jewelry, knickknacks, and I then saw beautiful hand-made pottery type bowls in super colorful patterns on the inside of the bowl with a wonderful terra color to the outside of the bowls. I bought one immediately, and the man selling them did the sign of the cross with his hands after I paid him cash, and he said a prayer right in front of me. He was so thankful for my purchase. I remember thinking, wow, I wish I could buy at least 5 more of these gorgeous bowls, but they wouldn’t fit in my suitcase!
Here is the bowl filled with various tomatoes and peppers from my container gardens this year. Aren’t the colors of the bowl and fruit just amazing? It is a good way for me to display the fruit as a reference for next year when I grow the starter plants from seed again. That is my main goal usually is to show what the fruit looks like, and comment on how they tasted.
This year, again, I’ve said has been a very humid and very wet summer in Connecticut. My plants didn’t do as well as last year, but alas, I got enough fruit to give my opinion on them. If only they grew better, I would have a lot more to eat, and so would Steve, my husband.
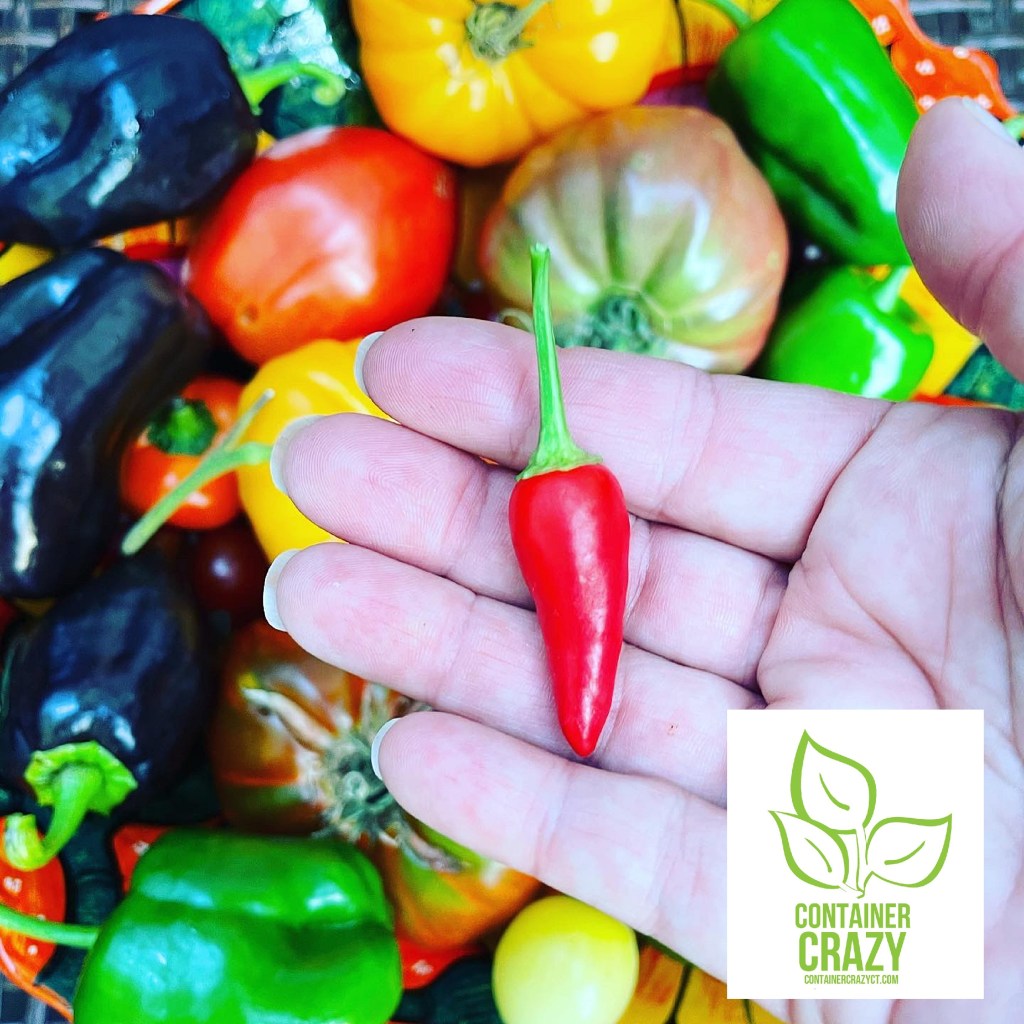
What is this Pepper?
Okay, who out there can help me? I obtained seed packets which are a mix of chili peppers. When I sowed them, I thought, “Wait, how will I know which is which when I go to sell the starter plants?!” Because it is a mix, I won’t know until I try these out and see them grow and produce peppers.
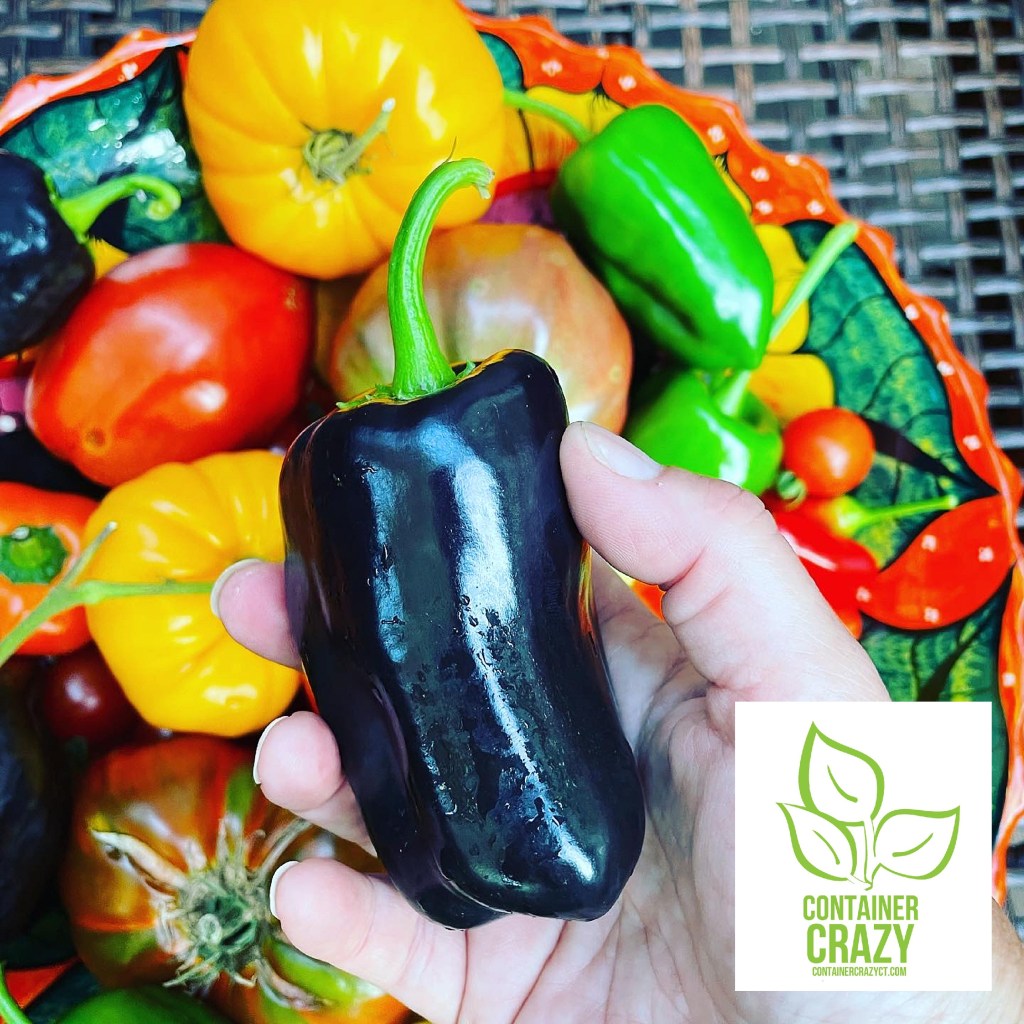
I ended up with 3-4 patio pots of the pepper plants on my deck and had to wait and see. One plant produces the pepper shown above, it turns black from a green color. One day, I tossed one on my grill whole, roasted it, and we tasted it. It was very yummy! Then I did that again a month later with some more of the black ones, and they were a lot hotter than the prior picked black peppers. The heat turned up the longer they stayed on the plant.
The Green Ancho Poblanos Peppers
This one above, is on a different plant (not the same as the ones that turn black). Look at the top – how it kind of indents. I has a different shape than the ones that have been turning black on the other pepper plant on my deck. I was able to find this green one described as:
Ancho Poblano represent the golden mean of the pepper universe. They’ve got some spice, but you can easily chomp right into them. They’ve got some genuine pepper flavor, but it’s muted a bit by the heat. They’re great fresh, cooked, pickled, dried, or blistered in fire when fully ripe. They grow abundantly on bushes that reach nearly three feet tall. Plant early, though, if your goal is to maximize the number of ripe pods you get; they do require a fairly long growing season.
I agree, they have some heat. At first I questioned if they were Habaneros cause the seed packet contained some of those as well, but I thought, that can’t be possible. The Habaneros I purchase in grocery stores are not nearly as large, but these green ones are hot. My husband is the taste tester, and it is always comical to see him take a big bite, chew, and then the expression on his face! At first, he was like, “Oh, they are mild,” then a few chews after, he says…, “OH NO, they are HOT!!”, and he then spit some out. LOL.
Habaneros (green stage – to turn yellow)
This week, I finally spotted a pepper that is the size of the Habaneros on another plant on my deck. I thought, “Ah-ha! Here it is!” Steve hasn’t taste tested it yet. It is supposed to turn yellow so I will let you know. So basically, all the seeds in this packet are a mix. It also includes a red pepper (small oval long shape) that starts green, and I think this is a Serrano pepper.
Serranos Hot Peppers
Well, I am thinking these are Serranos, but I’m not 100% positive. Steve still has yet to taste these. I think I will make some salsa this weekend with tomatoes and some of these peppers to give them a try. These red peppers are abundant on a small plant in a pot on my deck. The plant looks like a Christmas tree with all the green and red peppers right now.
Thus, again, the confusion lies in the fact the seed packet has a mix of Pica Chile various species of hot pepper plants. It has been fun to witness what is produced, but the only downfall is I don’t know what I will get but I will definitely start these mixes again from seed next year for people who enjoy the adventure of seeing what types of hot peppers they will be able to use in their cooking from their plants!
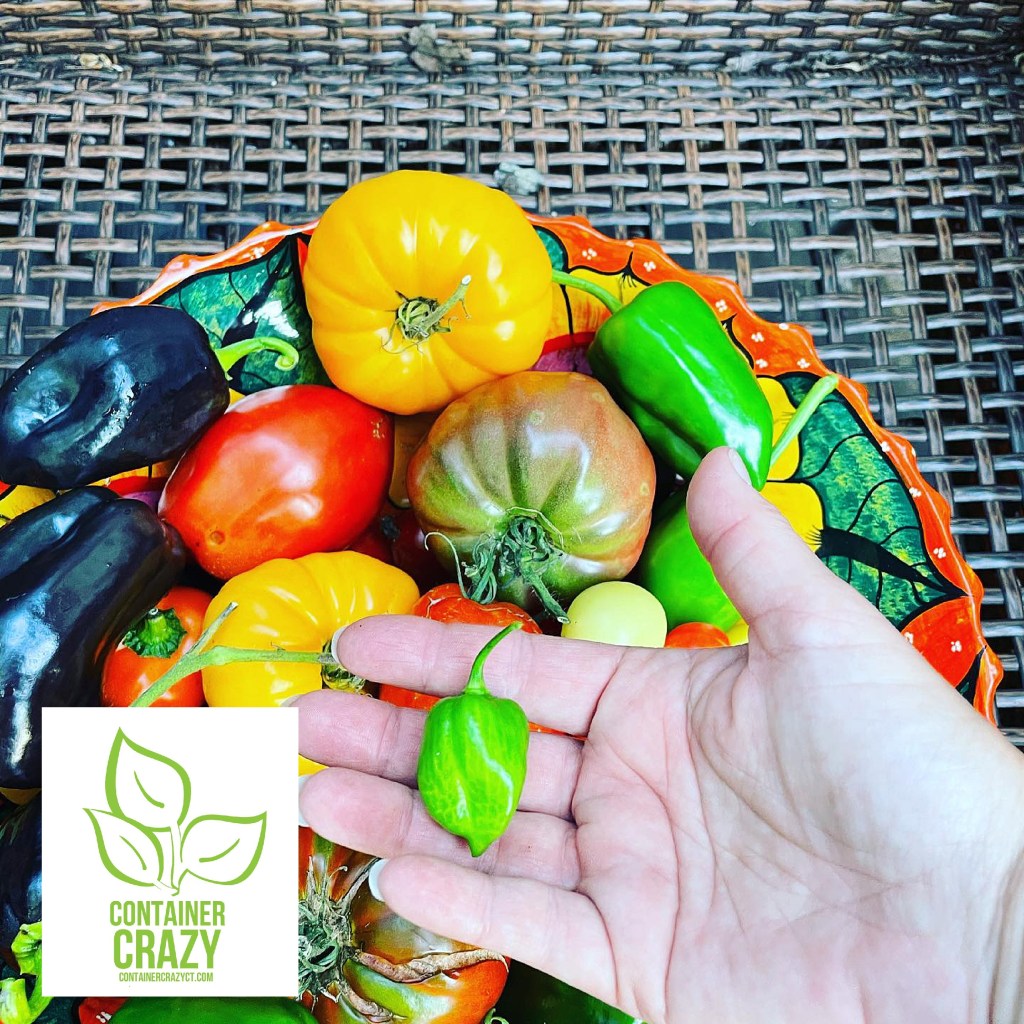
The Bowl from Cancun with a Mix of Tomatoes and Peppers
Starting from my logo on the left, lets go clock wise! At the clock noon position, is a Goldie (obvious from the golden yellow color), Ancho Poblanos (green pepper, mild to hot) 1 pm, Habaneros (green small sitting on-top of some red Matchbox peppers and Tiny Tim tomatoes), a Mandurang Moon tomato at 6 pm, another green Ancho Poblanos, and then the black peppers (name unknown) at the 9-10 pm position of a clock. There are others in there, such as Paul Robeson tomatoe and a StoneRidge, and a Cherokee Purple.
Granted, some of the fruit doesn’t look perfect, some cracking from too much moisture this season (lots and lots of rain storms), and all that – but overall, they still taste amazing.
Hot Matchbox Peppers
This one is definitely a Matchbox hot pepper (pointy tip) in a different pot and not from the “mix of variety seed packet.” It is from a separate packet and I’ve grown them before, they are super compact, perfect in small pots, and product lots of hot red peppers, starting from green color.
Cherokee Purple
I’m pretty sure this is the Cherokee Purple. It looks very similar to the Paul Robeson tomatoes. Paul Robeson are orangey purple green beefsteaks, and I am taste testing both. Both the Cherokee and PR’s are just amazing. My only disappointment is I wish I had more of the plants on my deck or in a garden. I did restrain myself this season, I can only keep up with so much watering, I thought. Then it poured like heck this summer. Things got over watered by nature.
Paul Robeson Tomato
The PR’s are noted to resist cracking and have exceptional flavor. They just look very similar to the Cherokee and sometimes I forget which I took a photo of later when I start to blog and post about them.
Goldie
Speaking of tomatoes which resist cracking, I would say by observation this season, Goldies fit that description as well. They are blemish free and absolutely perfect looking yellow golden tomatoes. I wrote about them in my prior post this month. It is an heirloom and sweet golden flesh. They do melt in your mouth. Oh I hope next year will be better growing season cause I want these again for sure!!!
The Mandurang Moon tomatoes are about the size of cherry tomatoes and a pale yellow. I thought when I cooked with them in a sauce, it intensified the flavor of this tomato. They are also perfect, no blemishes, and firm. The plant stays shorter with stalky center stems and leaves that look like potato plant leaves. I blogged about these earlier as well on this site.
The bowl with a mix
Others in this bowl are some Tiny Tim tomatoes (super compact plant) and some StoneRidge. More on those later.
It is interesting to note that even though I felt like my plants suffered, I still was able to enjoy the fruit – enough for two. We add one to sandwiches, roast a couple to put next to steaks from the grill or corn, and add some to salsa’s, whatever. It was just enough to test the varieties and take notes here so I will remember come spring 2022 when I do this all over again!
Thank you and enjoy your weekend. It is supposed to cool down tomorrow after a very humid day today!
Cathy Testa Written Aug 27 2021 Container Crazy CT Located in Broad Brook/East Windsor, CT
860-977-9473 containercathy@gmail.com
I sell starter plants in the spring time, I install container gardens and patio pots for clients, I dabble in holiday items such as succulent topped pumpkins in the fall, and fresh greenery wreaths and kissing balls in the holiday winter season. I ponder what is next, what should I continue but I do know, I really LOVE growing the tomato plants from seed, so that is a keeper on my to-do lists! Thank you for visiting, Sorry about the typo’s or grammar errors, I have to rush out to water before the humidity kicks in! Cathy T.