My last post, before today’s post, was titled, March is a big sow month – well, to follow on from that, April is a BIG GROW Month.
I have many tomato seedlings started from seeds and growing now, and the more warmth, sun, and good days of April we get will increase their sizes over the next 3-4 or 5 weeks of indoor growing in the greenhouse before they are transitioned outdoors for a few hours to harden off and then ready by end of May.
End of May is my target date for planting the tomato starts in containers, because to me, it is the safest and warmest time. Memorial Day is the key date. And I truly can’t wait. I’m overly anxious this year, it was a long winter. I hated February, Ugh. Now it is April – yahooooo. That means weather will improve, we can be outdoors more, I’m cleaning up my perennials and shrubs outdoors, and I am checking on my starter plants daily, potting some up, all that jazz.
I spend time cleaning the greenhouse floors of debris, taking tables down to the greenhouse outdoor areas to prepare for when seedling will go outside for some real sunshine, and inspecting everything, but it is also still a waiting month. I so want to put all my nice tropical plants outdoors, but we can still get cold snaps. It requires patience. Sometimes I can’t take it – LOL.
This Connecticut weather is nutso sometimes. As we know, it snowed just last week. Yup on Friday. It melted fast – thank God. And tomorrow will be 70’s degrees, which will mean my greenhouse temps will rise fast tomorrow and I’ll be opening the side manual vent, and putting on small fans, etc. But then overnight, it can get cold just a couple days later. It is nutso! I know I said that already. LOL.
I still have not removed the bubble-wrap, which covers my auto-fan in the greenhouse up at the top on one wall, because I don’t want cold air to blow in on the cold snaps. I have to say, taking care of plants in a greenhouse, is a daily, if not minute by hour operation! Why they call it a “nursery.” And April is a big month of getting things growing more – as the warmer temps and more sunny and longer sun days improve.
April this month thru mid-May is a big grow month. I will little by little have more patience as I watch the seedlings grow larger and I pot them up. I can smell the tomato plants now when I’m in the greenhouse and brush against them. That familiar scent that says summer is coming.
In fact, the sun is out right now as I type this – so I have to keep this short cause I have a bunch of heirloom tomatoes I need to pot up today. They are ready for step two.
March is a key time to start sowing many warm season vegetables seeds in order to give them enough time to grow indoors before they are safely moved outdoors in mid-May.
I started sowing many seeds yesterday, and had to caution myself a few times to not over do it, which is easily done when you get on a roll. Because every seed you sow will need to be potted up at some point between now and May, you must ensure you don’t waste time, energy, and effort – as well as supplies, like seedling mix, etc.
It is important to remember, March is a big sowing seeds month. It is really when you start to hit some of the early seeds, like some hot peppers, which may be started between the 8 to 6 weeks before our spring frost date in Connecticut.
I will be sowing seeds now thru end of April for all kinds of plants. I still have some seed packets available. If you are local, and are considering sowing some of your own or want to sow with kids as a day project, now is a good time to reach out. Again, mostly seeds for tomato, cherry tomato, hot pepper plants, some herbs (parsley, thyme, basil, chives) and a speciality flower.
Other things I’m tending to is looking over some of my prized plants. And updating my WorkshopsCT.com site with current availability. Also, I’m planning out my container install game plans. And thinking spring!
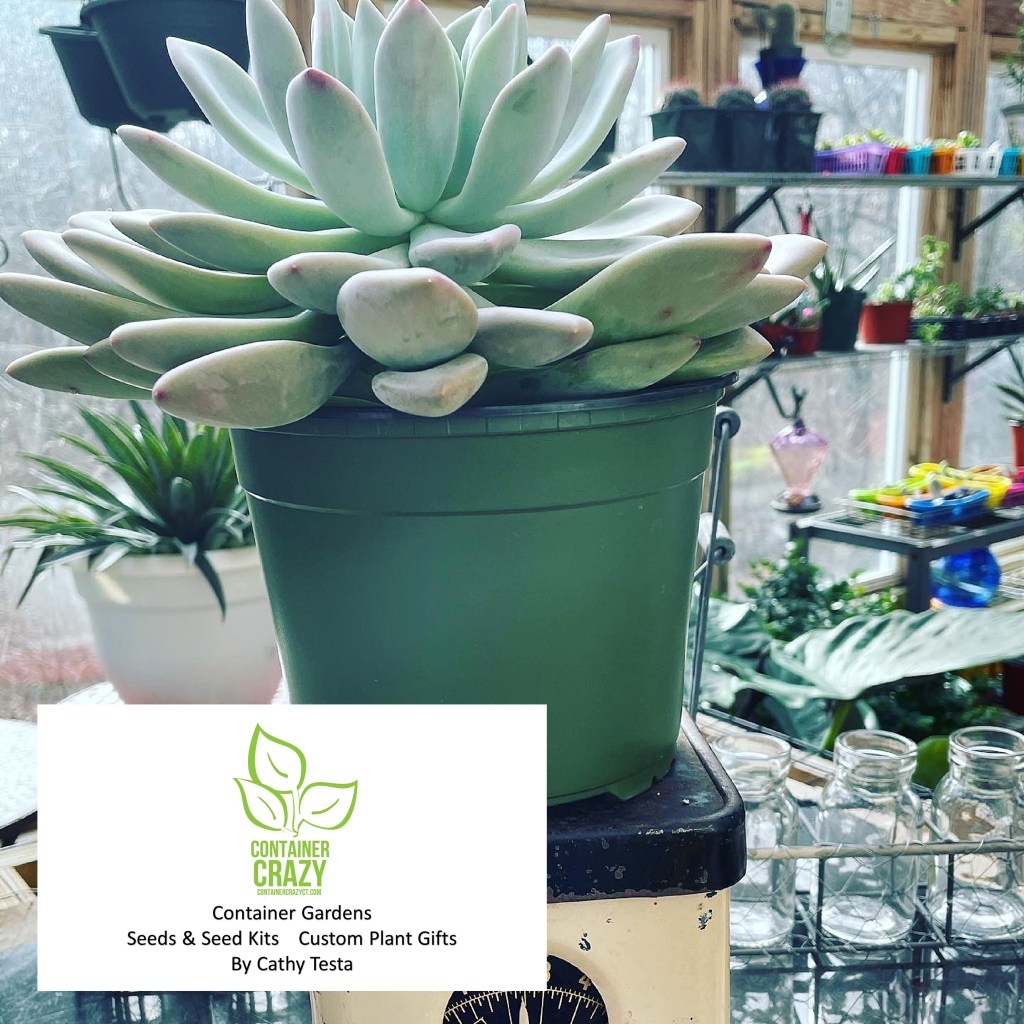
A big Succulent!
We had the most gorgeous week last week, some days where we didn’t need a coat on for a period of time. The sun was just glorious and helped to push along some of my early sprouted seeds. But, I know that we get a “flash type snow storm” every March usually. In fact, last year, I wrote the words COVID with a sad face in the snow on my steps in March.
Last Year March 2020
While we need to still be patient, March is a key sow month. Time to pay attention to your calendars, consider getting your seeds now before it is too late if you haven’t done so already, and clean up supplies.
Seed Packets
Some things I’m thinking of getting for myself this year are Rain Barrels. I like the look of urn rain barrels and it is a great resource for on the go watering around the home. Another item I think I may acquire is a portable hose reel for my job sites, where it can quickly connect to an indoor tap, or perhaps a leakproof carrying type watering bag to carry water. A bag that may be rolled up like a tote. Good for me for my off site jobs because I usually have to put a lot into my truck, the more portable, the better.
Anyhow, I just wanted to do a super quick post about how March is a month to pay attention. Time to get those birdhouses out and get ready. Spring is coming but winter may show its face one more time!
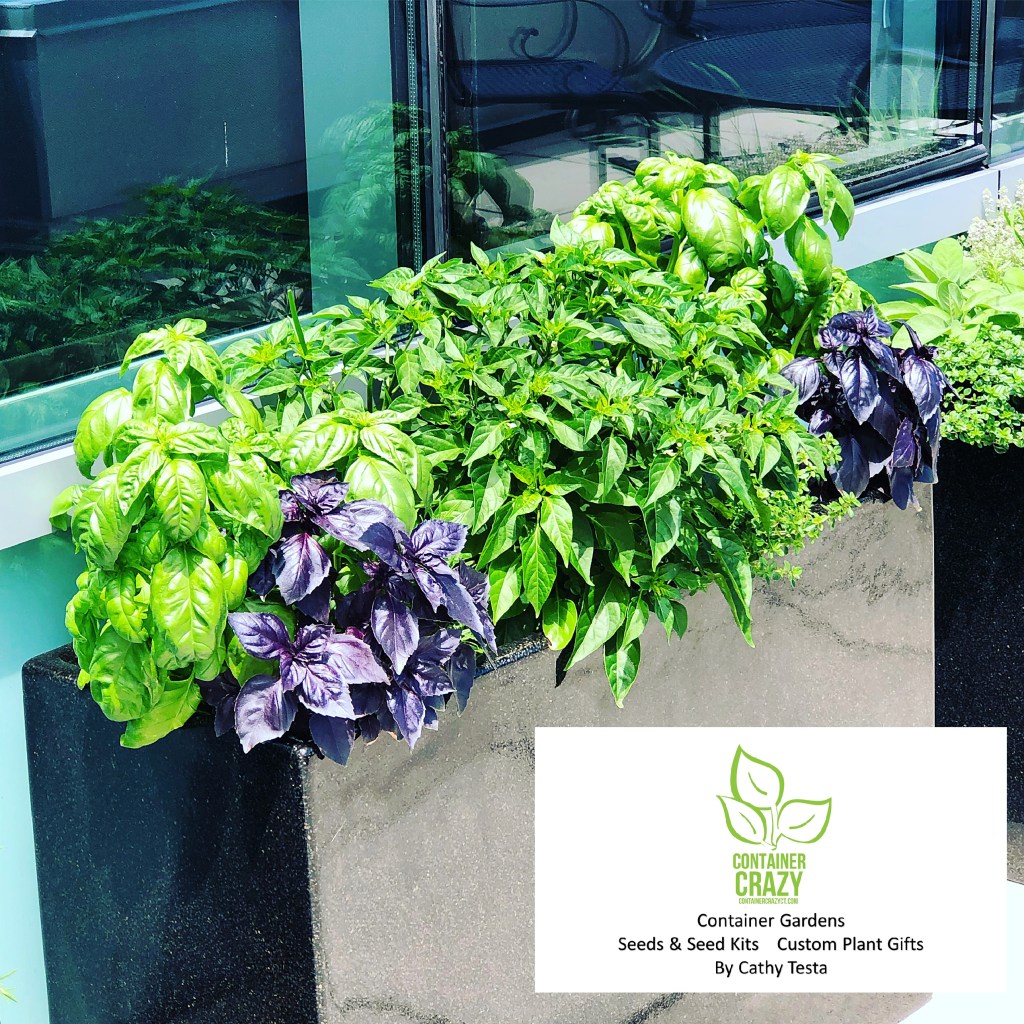
Genovese basil was the number one type of basil requested of the several types of basil I offered last year. This herb plant is a typical deep green color and it grows medium-to-large sized leaves. You may directly sow basil seeds into your gardens or you may start them in seedling flats, small pots, or whatever type of container you prefer, and then move them outdoors when it is warm enough, usually late May or early June. The time to start the Genovese basil seeds indoors in my area of Connecticut is 2-4 weeks before our last frost date, then you may transplant them after the frost period and this is usually done when outdoor temperatures are about the same as when you would plant your warm season tomato starter plants.
Basils do not tolerate frost or cold temps
Basil plants like to grow in hot weather and will not tolerate light frosts. So do not tempt growing them too early and putting them outdoors until it is hot outdoors. All you really need is a sunny area outdoors, or a sunny window indoors that stays warm, and it will be okay. It prefers areas that are full sun or full sun with some light shade at different parts of the day. I usually have two or three pots outdoors with my seed grown basil plants on my deck in a south-east location. I could not endure not having some of the freshly picked Genovese basil leaves because the leaves are full of flavor. And you may harvest the leaves all season long by cutting stems just above new leaf growth or cutting leaves individually off the plant. You may also sow basil seeds repeatedly in the summer in intervals all the way till before our temperatures start to cool down. Once it is cool outdoors, the plants do not perform well.
It is the perfect pesto basil
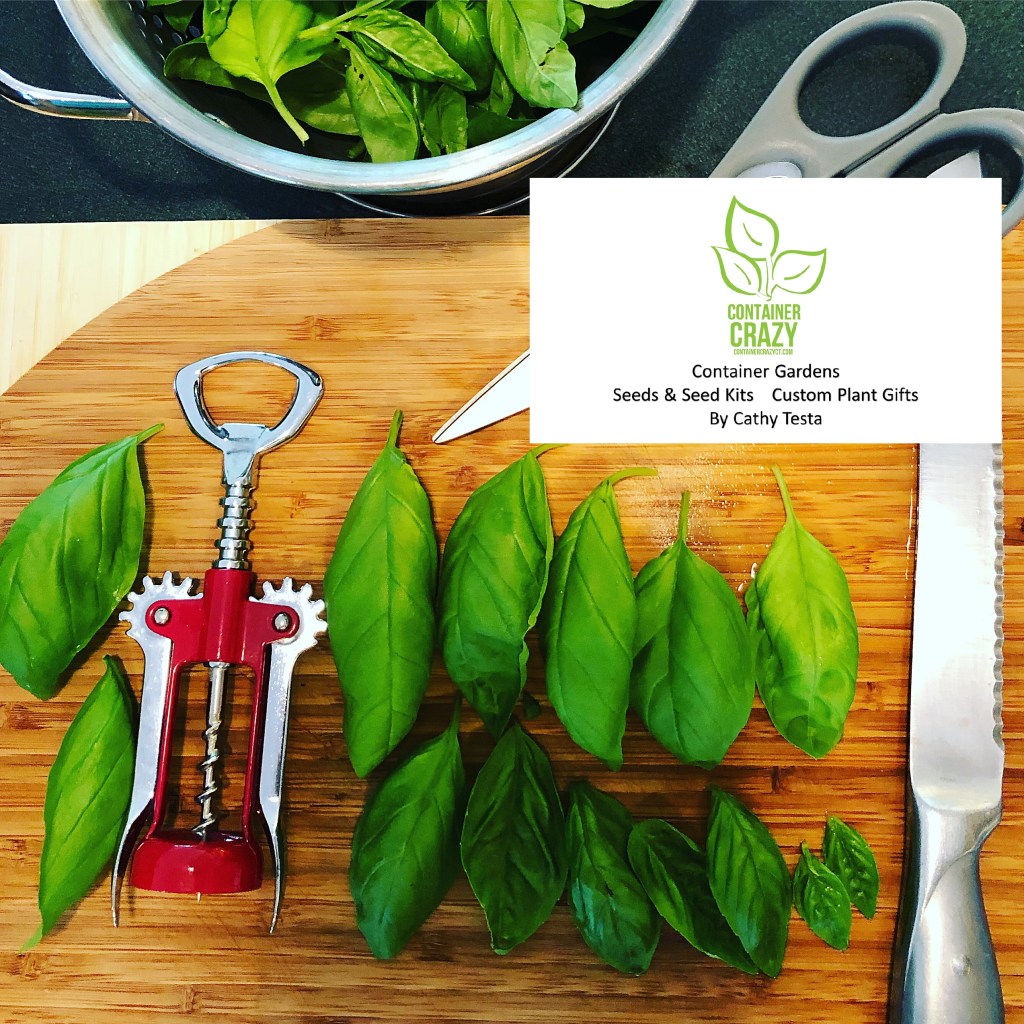
However, the great news is Genovese basil is the perfect type to make pesto. The pesto may be frozen to be used all winter long. The rewards are great. And as mentioned, laying a few of the big leaves on slices of fresh tomatoes is heaven in the summer months. Especially if you have some fresh mozzarella to lay on top for making a fresh, juicy, delicious, and favorable basil topped sandwich. I also enjoy chopping up the leaves to toss fresh with cut up tomatoes and garlic, olive oil and pasta. This is why I got more basil seed packets this year to sow my own and sow some as transplants for my friends, clients, and whomever is interested.
Scatter the seeds
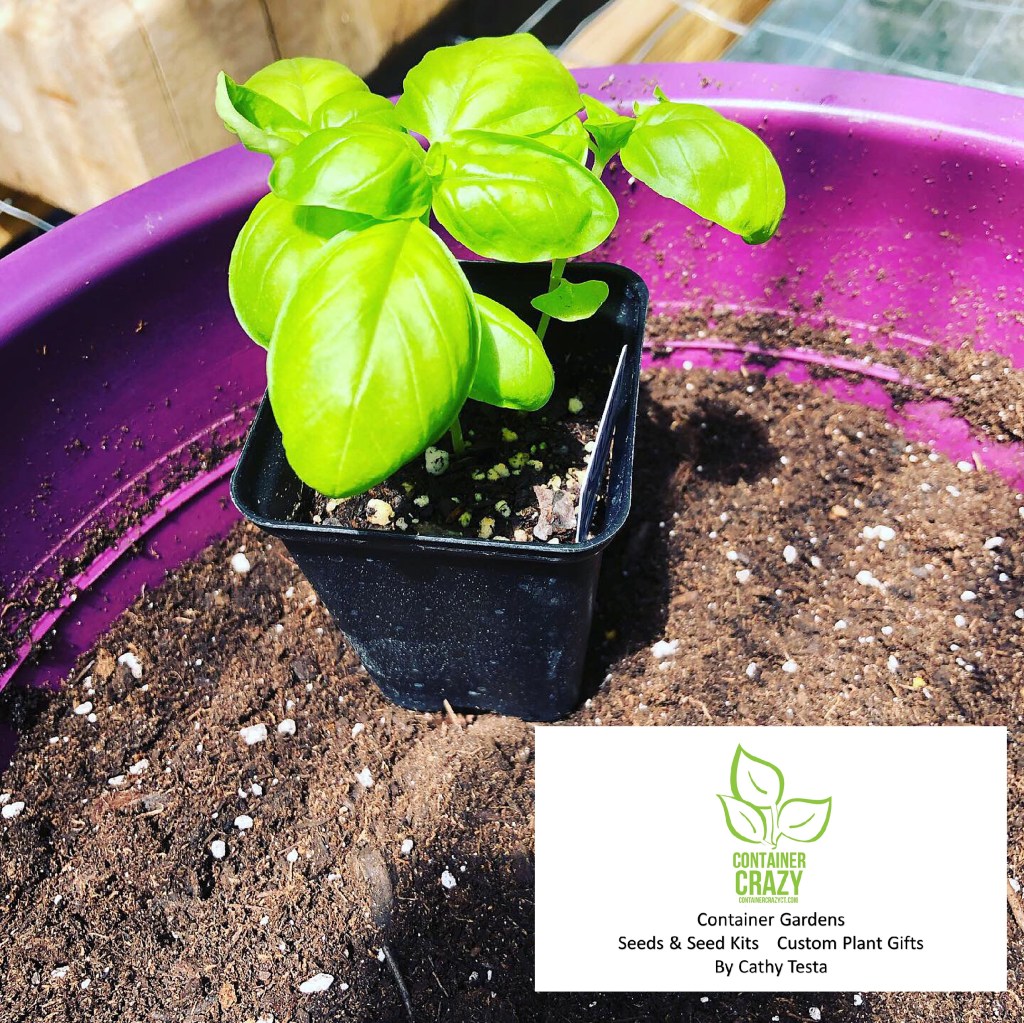
When you buy a packet of basil seeds, there are plenty of tiny seeds in the packet. Sometimes up to 250 seeds. Usually I scatter some of the seeds from the packet onto seedling or potting mix in medium to smaller sized pots or into my cell seedling tray flats of 2-3″ pots. I am always sure to not get anxious to start basil seeds too early because, again, they like the heat. If you start too early and it is not warm enough, they will just fail. Basil is very sensitive to cold. If you have a sunny warm spot in the home, they may do fine but just remember, they don’t like the cold, so don’t get too anxious to start them. Usually a month before our enjoyable outdoor temperatures is a good time to start them. And if grown indoors, they will need light. If none is available in your home, a grow light is recommended.
Above are Genovese basils just starting to grow from seed. You can see the cotyledons in this photo below the true leaves.
I always grow basil in pots and not in the ground. As you may or may not know, I do all my gardening in containers, and thus that is why this site is called Container Crazy CT. And basil is a perfect candidate for container gardening. The plants will grow well all season long and I rarely have any issues from bugs or diseases when I grow basil in patio pots outdoors in the summer. In fact, I grew some basil from seed to put in container gardens on a high-rise balcony last season for a client. I was extremely pleased with the outcome. The plants loved the heat, sun, and thrived at a roof top level garden. I was super proud of how well the Genovese basil grew in this scenario.
Basil planter on a roof top
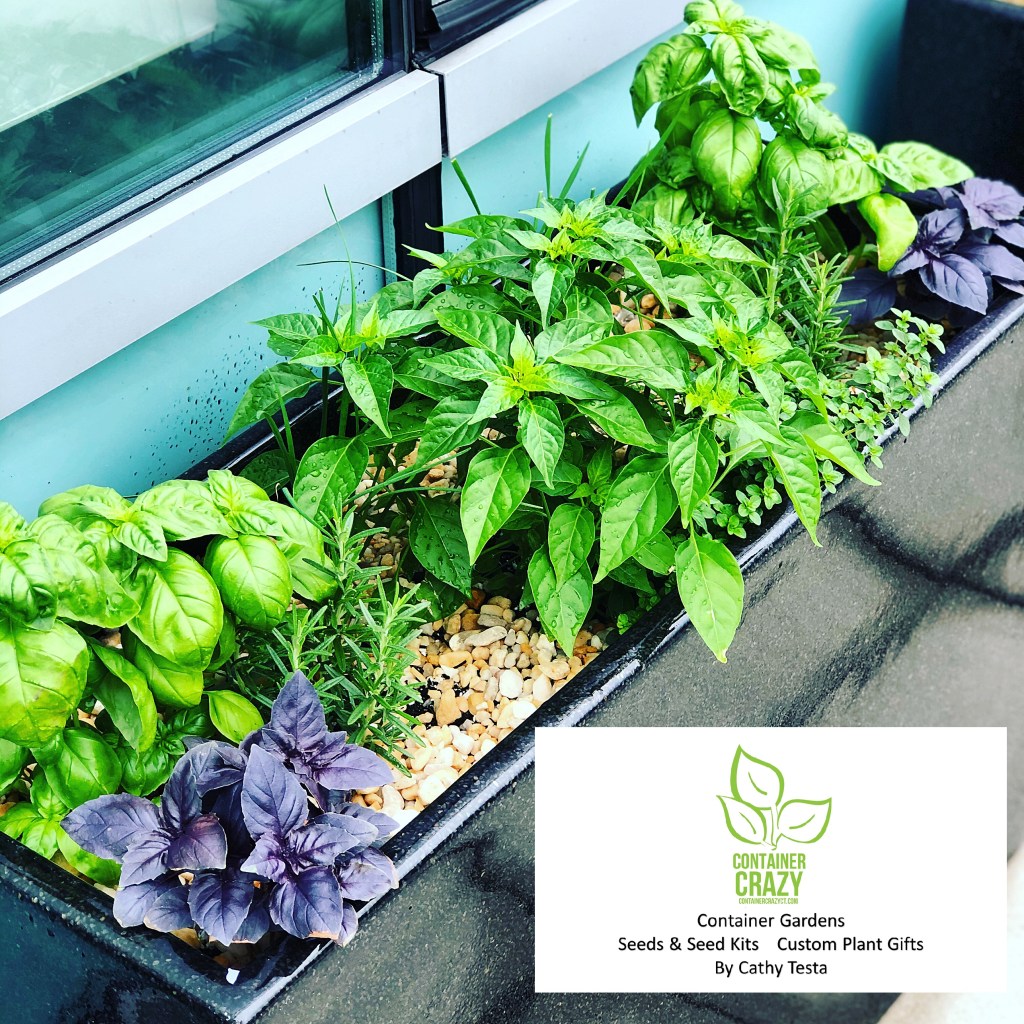
A High Rise Herb Kitchen Garden by Container Crazy CT – See the two Genovese basil plants in each corner.
In fact, by the end of the summer season, just before I was ready to install their fall gardens, the basil plants were absolutely gorgeous, full, tall, and still very much usable. I harvested all the stems of the basil plants and put them in vases for my clients to continue to use as long as possible. Here is a photo of how they looked later in the season below. My eyes bugged out of my head when I saw how wonderfully they had grown. Due to the heat, sun, and good breezes as well as consistent watering by my clients, these plants were just stunning and large – and healthy. As you can imagine, it is very warm on a roof top thus, a testament to how much the basil plants thrived in a hot location.
A mixed herb garden on a roof top balcony – with Genovese basils in the corners
But you don’t need a high rise roof top style area to enjoy growing basils in containers or patio pots! You only need warmth, sun, and nice starter plants from seed if desired. Usually I plant my Genovese basil at my home in various pots of various sizes. Some are as big as 22-25″ diameter round pots, or I’ve grown them in long styled window boxes, and square terracotta containers of about 8-10″ square. They do well in any pot with sufficient drainage holes, good quality potting mix that is well draining, and if you water appropriately. In the garden, slugs may find your basil plants, but that doesn’t happen in my patio pots and containers because they are elevated from the ground usually. I find basil is an easy care container plant.
From small 2-3″ pots to larger outdoor potsProbably a 15″ diameter plastic pot size and there is one Thai basil mixed in with the Genovese in this photo above.
Keep the soil fairly moist
You must keep the soil fairly moist when you grow basil in containers, and bear in mind that soil will dry out faster usually in container gardens versus in the ground. And you should use potting mix (not dirt from the ground) in containers and patio pots. But nothing beats having the plants handy when you want to make up a quick dinner. As I mentioned, it is so super easy to toss cut up Genovese basil leaves with pasta. In the photo above is the point when the basil was probably getting ready to flower before the end of summer. You should harvest the leaves before this stage, or be sure to continuously cut stems and leaves in summer, otherwise the plant will produce flowers and go to seed.
Wine Opener shows the size of the Genovese basil leaves
One time I was carrying a tray of basil plants I grew from seed with a tray of succulent plants, Aeoniums, and I noticed how the green colors looked pretty again the dark colored succulent rosettes, so I snapped a spontaneous picture. Of course, these two plants don’t “go together” but I thought it was rather neat for the eyes.
Basil next to Aeonium black rose succulentsGenovese Basil Plants in a Container Up-close
In summary, if you want to grow your own Genovese basil plants, I have seed packets available and provide step by step instructions, sowing calendars, and tips along the way. I can’t imagine not having these amazing herb plants every summer to harvest from, as I love them so much. I will be growing them this season again. It is a must have in any kitchen garden. I would say it is an essential herb if you want to enjoy a true summer of fresh! Remember the basics: warmth, sunny spot, and harvest regularly. Let me know if you are interested in my seeds or seed sowing kits.
Thank you for visiting and be sure to check me out on www.WORKSHOPSCT.com too!
It is Valentine’s Day weekend, so I thought it is appropriate to share information about how I grew big tomatoes in a big pot.
Upstate Oxheart Tomatoes
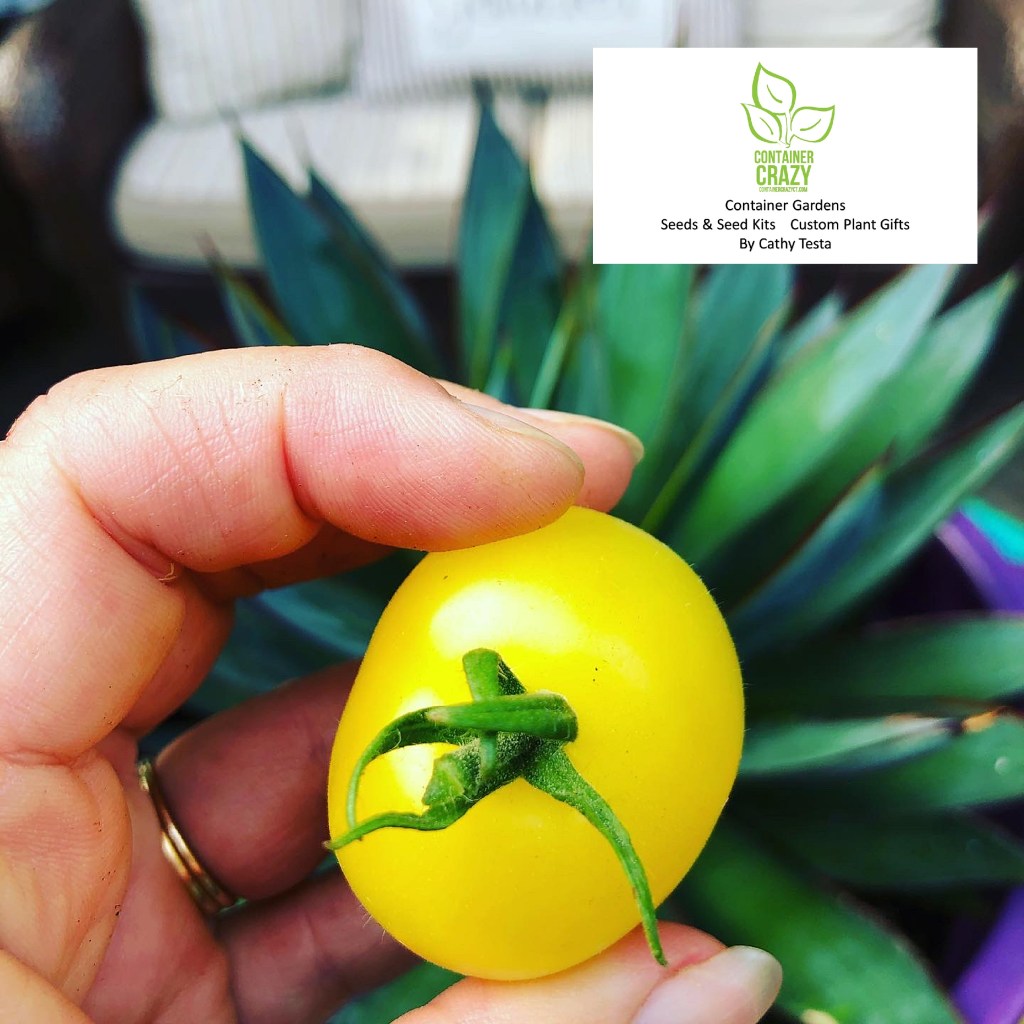
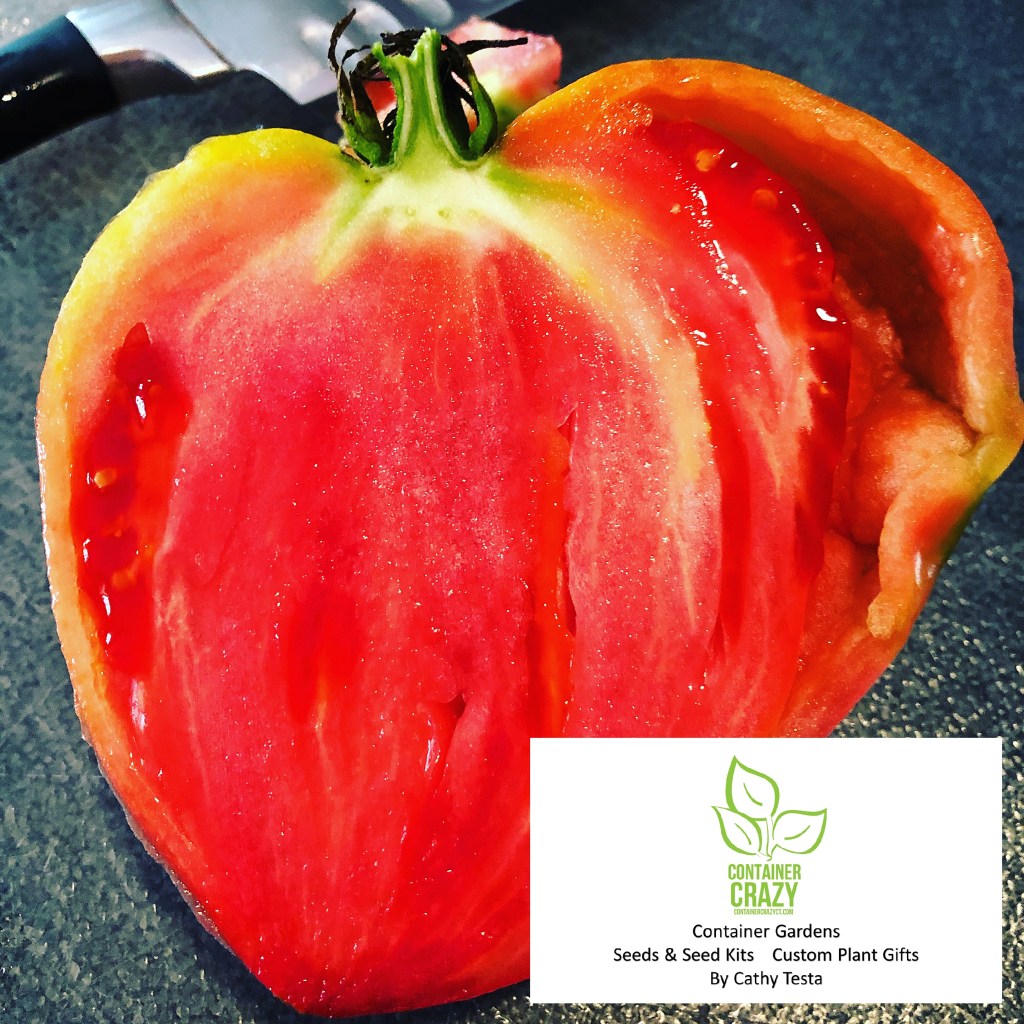
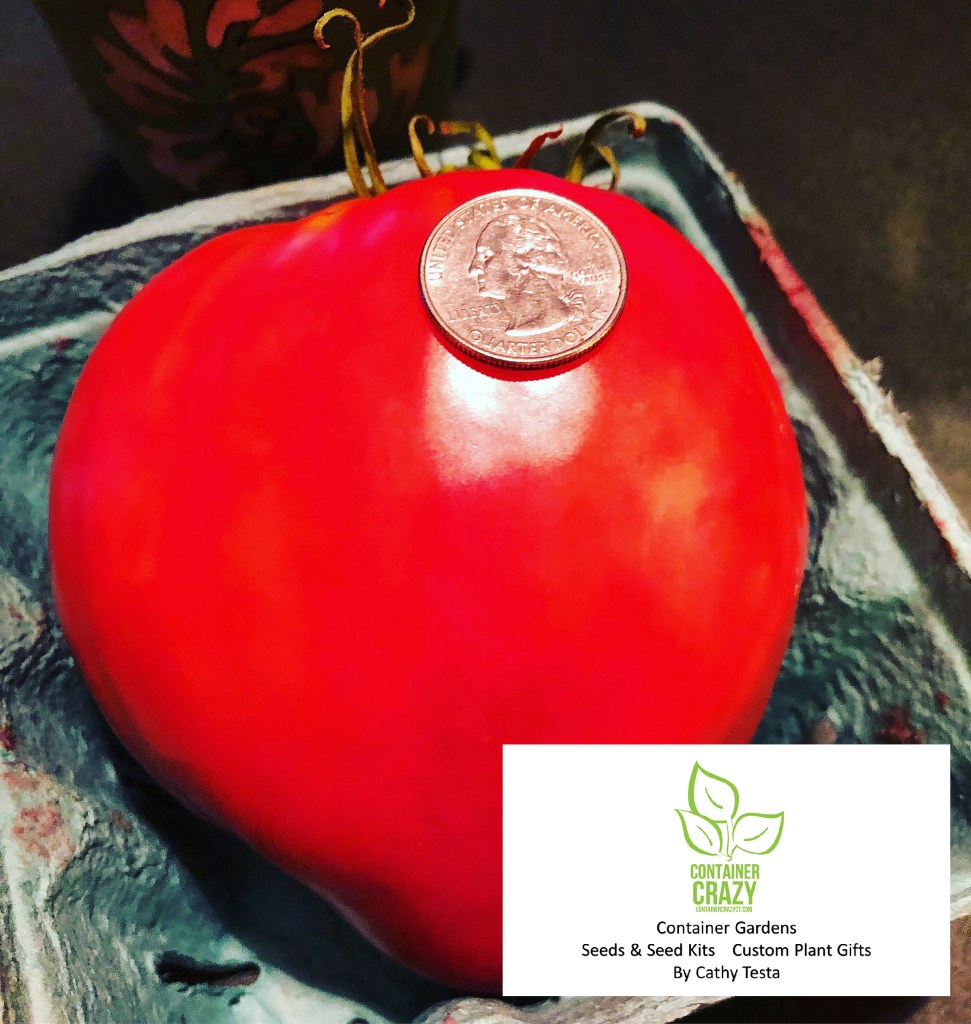
The reason I picked this seed a couple years ago to add to my growing list is just because I thought it would be super cool to grow giant tomatoes, and this variety did not disappoint. The tomato fruits were definitely stunners. Each tomato weighed between 2.5-3 lbs. and they were as big as grapefruit or bigger. The shape of the tomato is heart shaped. It is really fascinating when you cut one in half. I couldn’t get over how it truly looks like a heart. Another cool factor, they are nearly seedless. So if you like to cook with tomatoes and don’t want to bother removing the seeds from your sauces, this is the one.
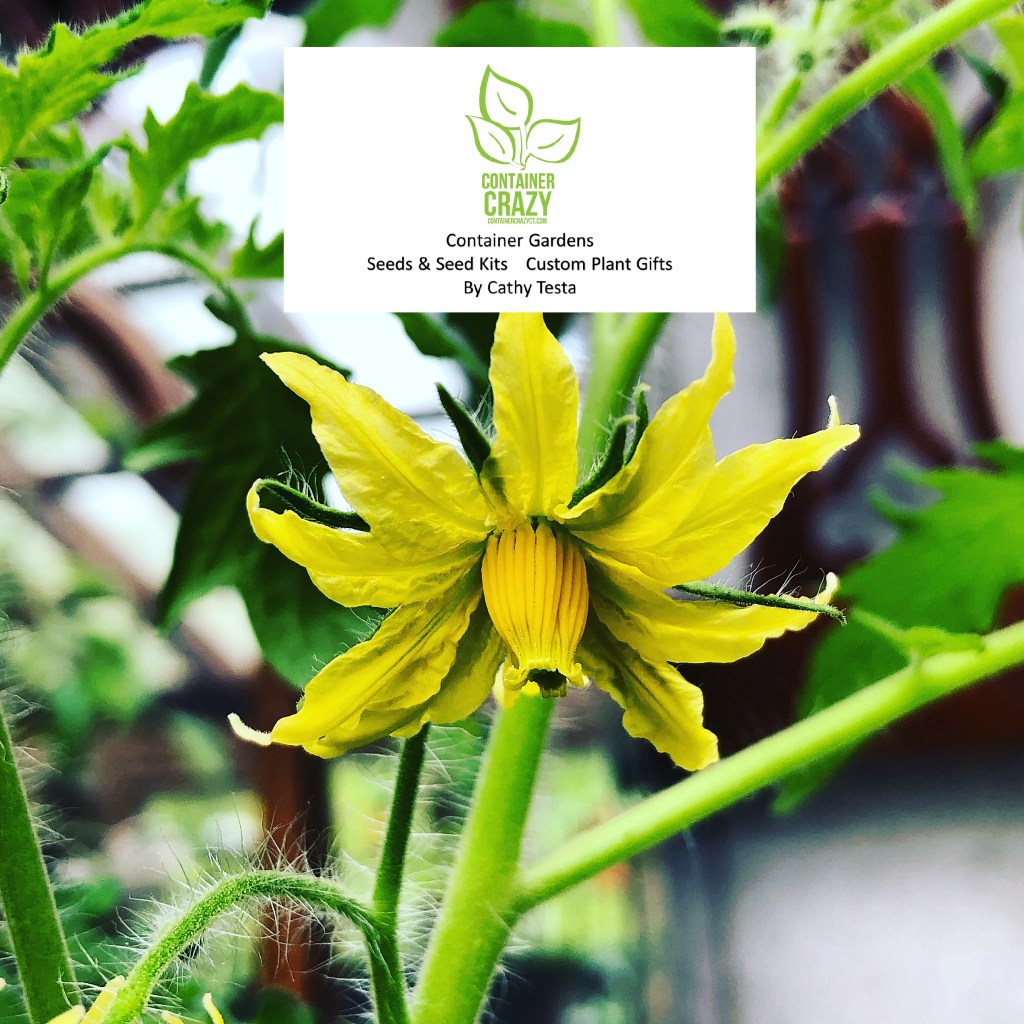
The Flowers
When I saw the first flower on this plant, I thought, “Wow, these are big flowers and pretty.” I guess that was the first sign to me that the plant’s fruit would grow as promised and be big, really big. In addition to the flowers, I noticed the leaves seemed to droop a bit, and at first, I was worried something was wrong with the plants, but upon reading more, this habit, where it almost looks like the leaves are wilting downwards, was perfectly normal for this plant.
Upstate Oxheart Flowers
Indeterminate
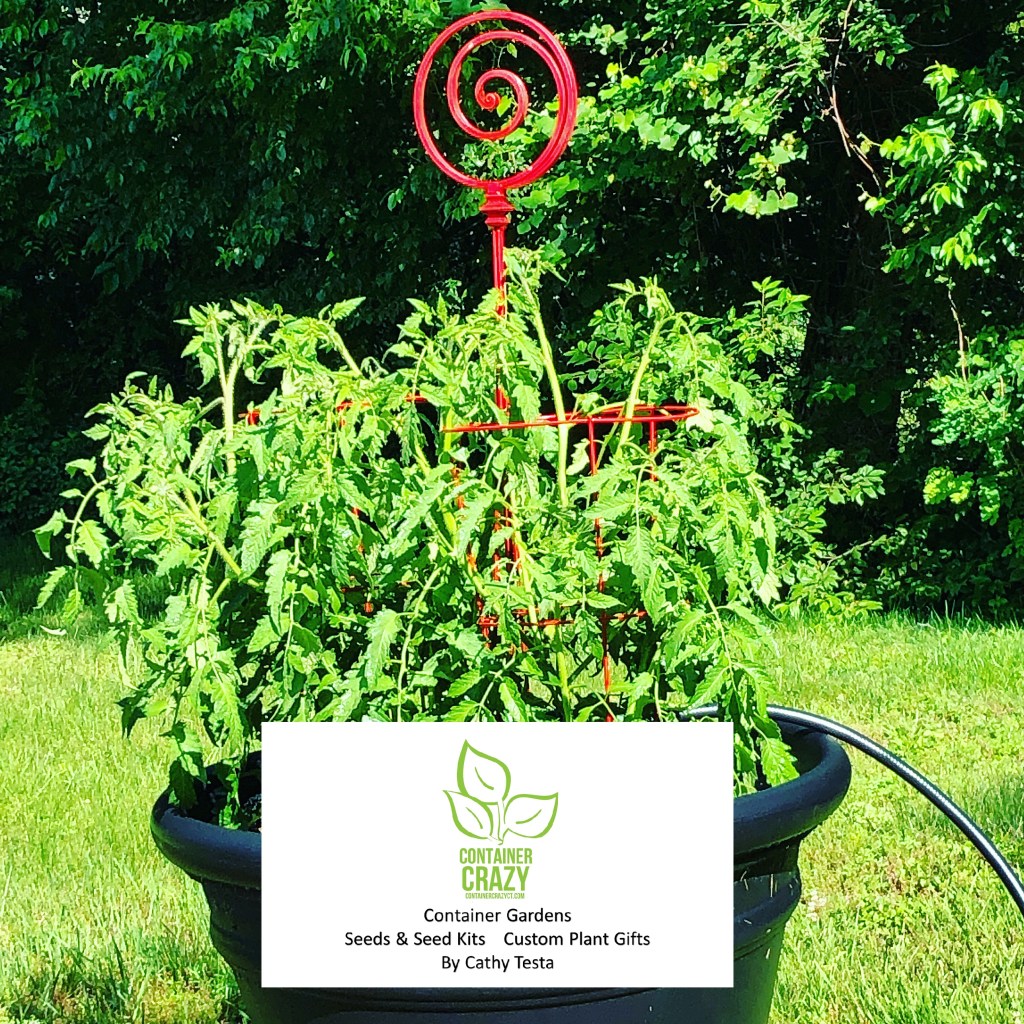
This plant is indeterminate. It will require staking. In fact, it can grow rather tall, up to 18″ high or even reach 10 feet. I don’t think mine was as tall as 10 feet! But it did grow rather large and I grew a single plant in a huge black pot. Here you can see it in the pot.
Upstate Oxheart Tomato Plant in a Huge Pot
You do not have to get a pot this big, which it is about 3-4 feet tall and probably 2 feet or more in diameter, because I have grown these in 20 gallon fabric grow bags as well. You just need to bear in mind that it will require support because the stems will continue to grow and reach out. Additionally, the bigger the pot, the more growing power you give it.
Surrounded with wire
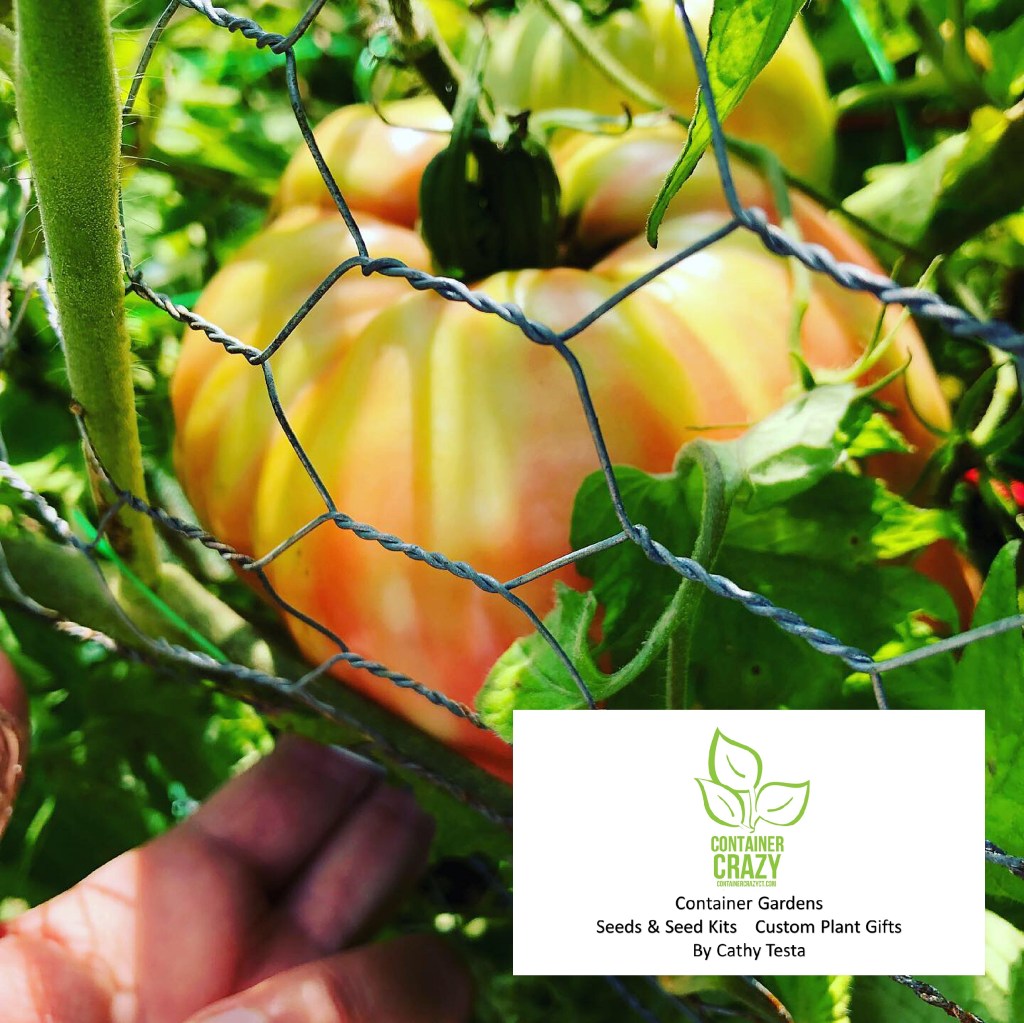
What I did with this one above was completely surround the pot with wire. The first year, I used chicken wire but the second year, I purchased a sturdier hard wire. It worked at keeping any animals away but it was tricky for me to reach down into the pot to get the tomatoes. Sometimes, I would get a small step ladder and carefully reach down to grab one as it ripened to a rosy color.
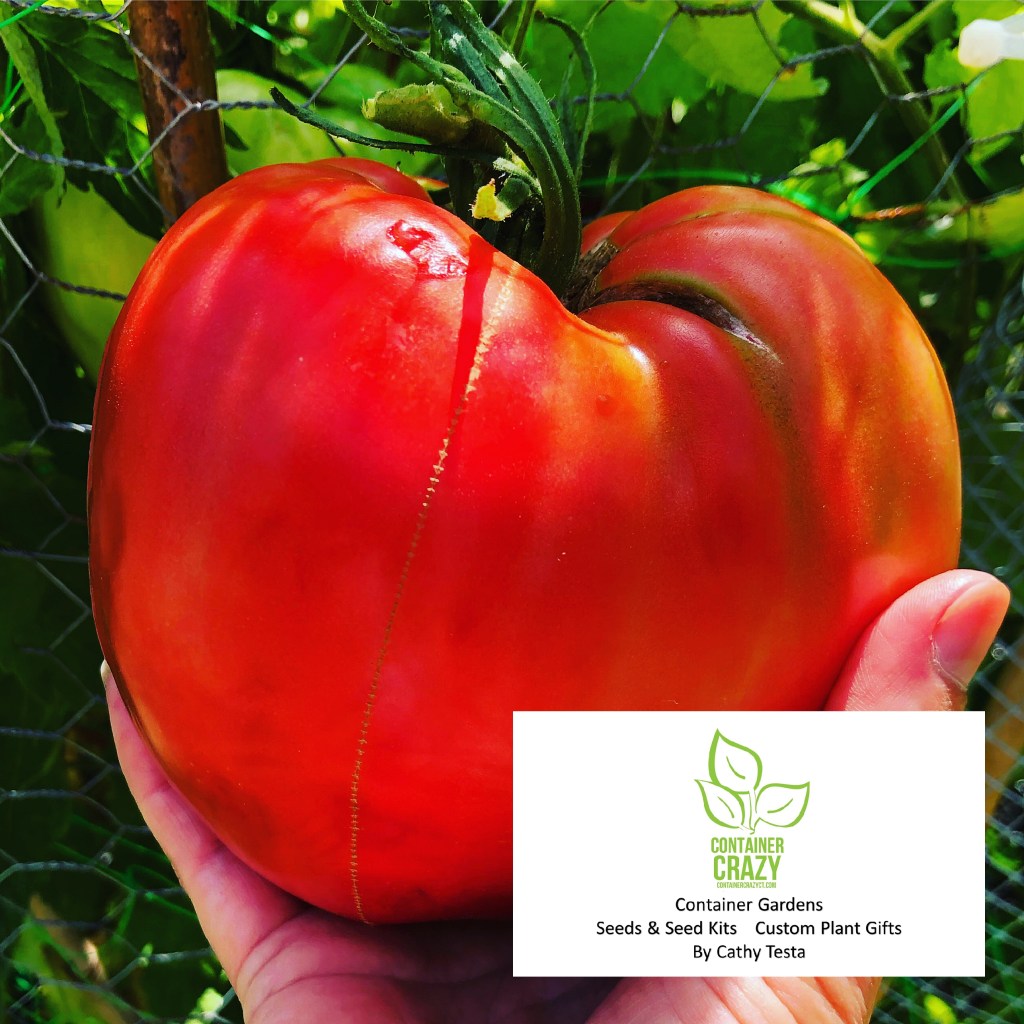
Oxheart – Wire around and the tomato starting to change color
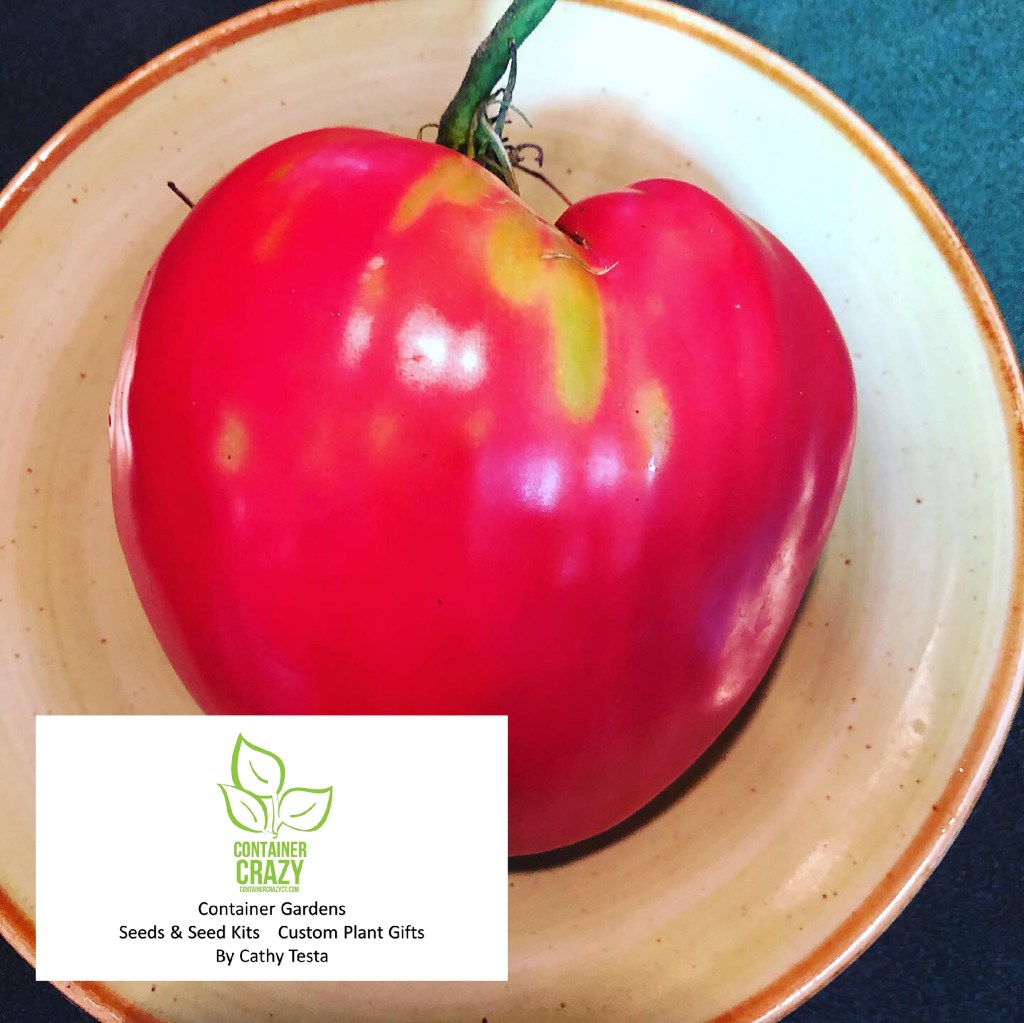
This variety of tomato is ready to pick when it is a rosy color. Also, the fruits are soft to the touch. I am not sure how to describe the flavor, other than delicious. It is a delicate but powerful flavor, we really like eating these. My husband, Steve, described it like eating a steak. The meat of it is full, dense, and heavy. In fact, the fruits feel heavy when you pick them. They weigh up to 3 lbs! Maybe even more if you used a technique to try to grow them even larger, but it really starts with using seeds of plants which naturally grow a really big tomato, and this is one type which does.
Upstate Oxheart on a Plate
The first year, I started the seeds at the 10 week timing prior to our last spring frost. This is early March, but I felt like the plants were getting rather large when it was almost time to harden them off (put them outdoors to acclimate before permanently planting them into the pots outdoors), so this year, when I grow some of these, I am going to wait till the 6 week mark.
Normal for leaves to droop
Another thing I noticed about the habit of this variety, is the leaves droop down. They almost look like they are wilting, and at first, that concerned me. I was worried and did some more research discovering this was perfectly normal for this plant. When it grows larger outdoors, it has a messy hair look (for lack of better wording) but there is no need to panic. It will grow fruit just fine.
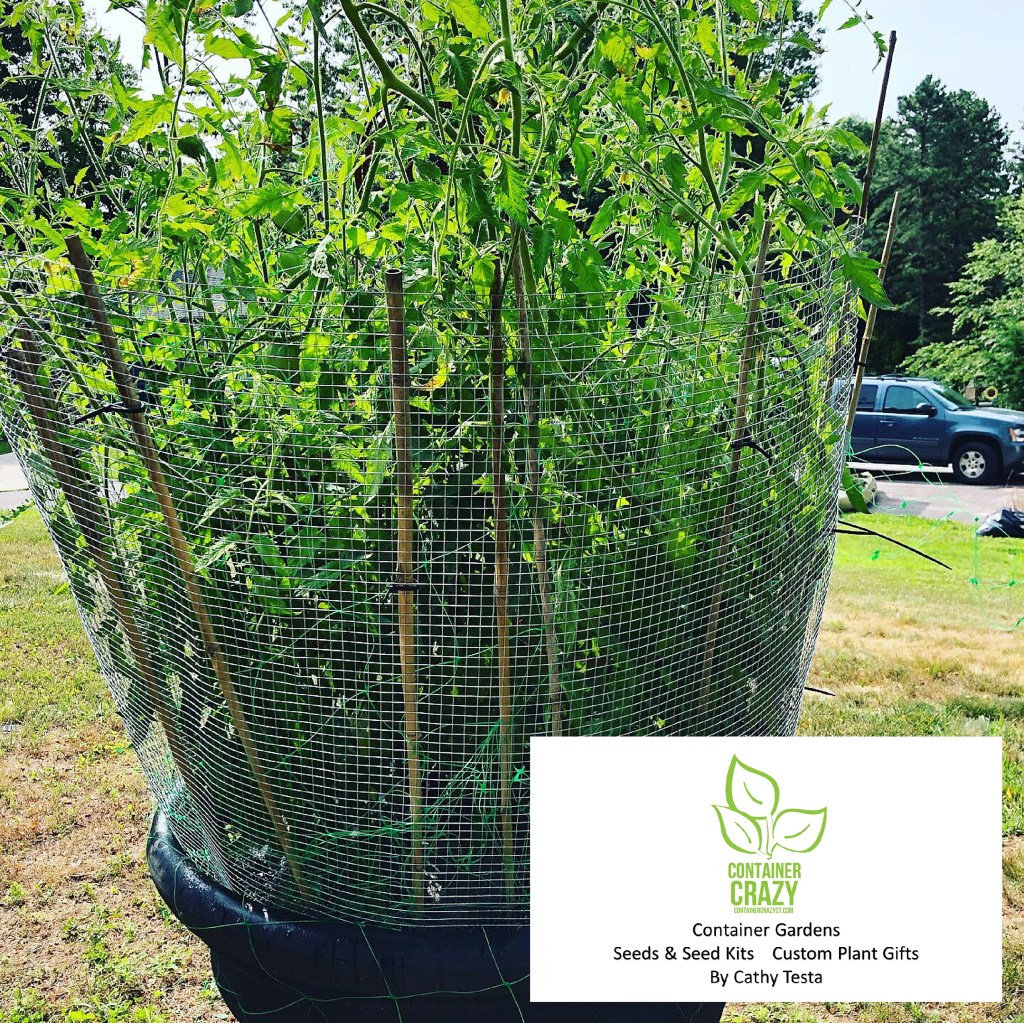
Surrounded with wire
The 2nd year I grew some of these, I decided to take bamboo stakes and push them into the top of the big black pot. Then I got some hardwire fencing material and wrapped it around. The last step was taking zip ties and attaching them to the bamboo stakes to secure all. This worked. It kept any critters away but it was tricky to reach down to grab the fruit. Sometimes I used a small step ladder to reach down into the plant to get the fruit. It was worth it.
Wire around the whole plant to protect from animals
Nearly Seedless
This variety, Upstate Oxheart, is nearly seedless. This is good if you wish to not have seeds in your sauces, but it is important to know, because the fruit is nearly seedless, you get a smaller amount of seeds in the packet, so each seed sown and grown is precious. When you cut the fruit open, you can see there is very little seed, and it does in fact look like the inside of a heart! Amazing!
Nearly Seedless and Shaped Like a Heart
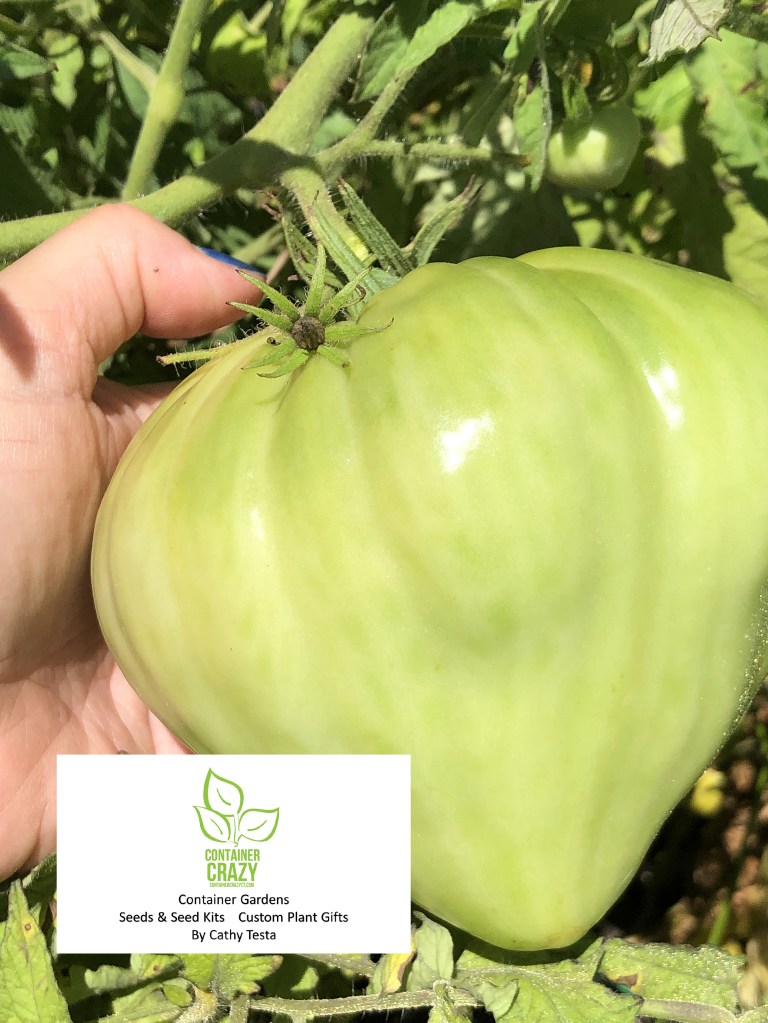
When I would go check on the plant, I loved seeing the big tomato fruits starting to grow. Many of them would look perfect with no blemishes. Even though they got large, they rarely cracked. The plants start to produce fruit about 84 days from the time you transplant it into your pot or gardens.
At the green stageAt the green stage
Sometimes when I would reach in to take a photo, I would put my hand near the tomato so you could see how big it was getting, and the texture of it felt heavy and firm. As it ripes, as noted above, it starts to feel a little soft to the touch, like if you push slightly on it – it feels soft. When it turns a rosy color, it is ready. These also ripen very easily on the counter – which I discovered when I grew them on my deck in fabric grow bags last year. Because those were not wrapped in wire, a squirrel had discovered them, so I picked them before they got rosy and it was fine on the counter to ripen.
Doesn’t this Upstate Oxheart Tomato look delicious?
Oh another thing, which I just remembered, was I usually used pruner to cut them from the stem because they did not tug away easily. I didn’t want to damage them so pruners were used to cut the stem.
Sliced to Perfection
To give you an idea of the size, I put a wine opener on top of four slices. Just looking at these makes my mouth water. Another way I like to eat them, other than just taking a fork and knife and taking bites, is tossing them with pasta, basil, chopped garlic, olive oil and a little amount of balsamic vinegar (like a capful). Yumm.
Easy fresh – Just toss all together
I typically will mix all in a bowl first without the pasta and let it sit on the counter to blend the flavors. Then when the pasta is ready and hot, add that in. So easy, oh and let’s not forget the fresh parmesan cheese!
Look at this tomato – not a blemish!
The fruit may get a crack or two on the top from the weight, but overall, I felt like these were blemish free and smooth skinned. The seeds are started indoors 6-10 weeks prior to our last spring frost. I did not order more seed of this variety this year because I want to try some other heirlooms and beefsteak sized tomatoes, but I still have seed left and probably will grow a limited amount of the Upstate Oxhearts.
Now, on to the How-To’s.
Get the seed! Upstate Oxheart Tomato (Solanum lycopersicum) gets a thumbs up in my gardening book. If you are local and want seed from me, see my contact information below. I sell the packets and can mail it to you or deliver if local. But if you want a big tomato, the first step is get the seed.
Get a big pot or a large fabric grow bag. Set it up in the sunniest place outdoors when it is time to move the seedlings (transplants) outdoors. I had the big black pot shown above in a very very sunny area, so sunny, it doesn’t get much shade at all, but it did require watering, and I would drag my garden hose there and hang it over the top of the wire, and let it run for a bit to water it.
Fill the pot with the appropriate potting mix, compost, some fertilizer, and you are good to go. Be sure when you plant it to surround it with support somehow right away, so as it grows, it will have the support/cage required to hold up those big fruits. Believe me, it is so fun to point them out. “Hey, come check out my giant tomato!” When I would show friends, they would gasp when they saw them. Sometimes they would ask me – what did you feed that plant?!
It is not the feeding, it was the variety and care to start with. Feeding only enhances an already really large tomato, so stunning, it will make your own heart beat!
Happy Valentine’s Day Everyone!
Cathy Testa containercathy@gmail.com 860-977-9473
See my site: WorkshopsCT.com for Seed Sowing Kits!
When we (my husband, Steve, and I) redid our kitchen, many years ago, I insisted on having a kitchen window above the sink area because knew I wanted to put some plants in there.
OUR KITCHEN GARDEN WINDOW
Our kitchen garden window faces south and sticks out and is about 3 feet by 2 feet, and it has a long shelf in the middle, so I can put plants on the shelf above or below at the counter sink height. The window gets colder in the winter because it is sticking out and experiences the cold air around it. In the summer, however, it gets very warm at times, but I can vent it by cranking open the side window panels. But in either scenario, the kitchen window was useful for not only putting some smaller winter plants in there, but to put some herbs in there for use in my cooking. The kitchen window type looks like the ones on this Pinterest page: https://www.pinterest.co.uk/pin/460070918175924579/
This little area, if you happen to have a similar kitchen window over your sink in your home, is a decent place to grow some kitchen herbs. But some herbs are easier to grow than others, especially if you are a beginner not knowing where to start.
Easy Herbs
In my opinion, parsley and salad mixes are two easy seeds to give a try. Salad mixes are not herbs, but I wanted to mention them because many leafy salad mixes are easy to grow from seed and put in a smaller container in the kitchen window, and so is parsley. If you are a beginner, grab some seed of these now (or buy from me) and then start your venture of growing herbs for the first time in your kitchen (and from seed)!
Other herbs you may see listed as easy to grow from seed in the kitchen are basil, chives, and mint.
Basils (needs warmth!)
I agree on the basil, it is easy to sow and grow EXCEPT it has to be warm. They will not do well if your kitchen window (like mine that sticks out) when it is cooler – which is the case right now in winter. So basils, I would not recommend in a cool spot during the winter months. You may start basil in seedling trays if you wish and if you have a warm, sunny spot in your home. In the summer months, you can continuously sow the seed all summer for a steady ongoing supply, but they are very sensitive to cold temperatures.
In the summer months, a kitchen garden window with enough sunlight is a great place to grow your basils in pots if you wanted. There is also a type of basil I tried last season, sacred basil, which is primarily used in teas. I have seed available too if nearby and interested. What I liked about the sacred basil is it grew fast and plentiful in my patio pots and it bloomed all summer. The bees adored it. In fact, I rather enjoyed it as a decorative plant maybe more so than harvesting it as a tea.
The only thing to consider if you want to try basil from seed to have in your kitchen window, it is best if you find a warm location in your home to start them in a seedling tray (somewhere warmer), otherwise they will suffer the kitchen window in the winter months. The types of basil I have grown from seed are Thai, Genovese Basil (big leaves great for pesto and other things!), and Sacred basil.
We all love basil for kitchen gardening, and you may start seedling trays of it ahead indoors and transplant it to patio pots in the summer months. I have done this with several types of basils. Usually I start them by seed in April (4 weeks before our last frost date) to transplant into pots or move outdoors in late May. I’m not trying to discourage growing basil from seed cause it is not that difficult to do but it does need warmth.
Basil is definitely a kitchen desire however, we all love basils, at least I do and I must have it for adding to fresh tomatoes. It is so easy to use. Just chop it up, add it to warm pasta with fresh cut up tomatoes, no cooking and toss – add some cheese, and wow, yummy! But all I’m saying is basil likes warmth to grow well from seed.
Cathy Testa’s Herbs – She also sells these in May
Chives (New for me)
Chives is a new one for me to try and I have seed, so I will comment on that later this season. I love adding flavors to dishes, and chives has that oniony like flavor, so I picked it to test out this season. It also has an upright habit and I think will do fine in smaller pots, or in a kitchen window garden. However, some chives are considered aggressive in the outdoor gardens, which I will research. I’m only alerting you to this in the event you are considering growing herbs from seeds and transplanting them outdoors later in the summer. While some sites will say chives are easy to start, I haven’t tried them yet so I can not comment. I’ve also seen dill and cilantro as listed easy which I disagree on only because I’ve seen those suffer more as plants than other herbs. The type of seed I got for chives is a perennial herb, so it will come back the following season when grown in the ground. But you may start chives indoors and eat them like scallions. Even their purple round flowers are edible and look pretty in salads!
Mint (Cuttings are easy)
Mint – yes, easy to grow BUT mint is very aggressive in the ground, so if you decided you wanted to grow some mint in your kitchen window, you could try this one but if you wanted to transplant it to the garden outdoors, don’t do that – it spreads by the roots like wild fire. It is a okay outdoors in patio pots and containers where the roots are contained (and sitting on a surface which is not the ground, the roots will come out of the drain holes and go into the earth).
Mint is fun to grab snips of it when you are having fresh cocktails outdoors in the summer. Mint is not just for teas either. I like tossing it with fresh warm pasta right out of the strainer and adding fresh parmesan cheese and a bit of frozen bagged peas – sounds funny but it is yummy! And so simple. I don’t even cook the peas, I just make sure to toss it all when the pasta is very warm from the pot, and all the fresh flavors blend. If you like mint flavors, like I do. My cousin, Maryse, makes a watermelon feta salad with mint in the summer, it is just delicious!
However, I must admit, I have not started mint from seeds only because mint is so easy to find in garden centers AND it is very easy to start mint by taking cuttings. Just snip some stems, stick in water on your window sill, and roots will form. Then transplant to a pot in your kitchen garden and it grows easily. Then continue to harvest leaves, stems, or snips for your many recipes. I tend to put mint as a spiller plant (a plant which trails or spills from the edge of pots) in the outdoor container gardens in the summer months because they tend to grow fast and large (maybe too large for a kitchen garden). Everything from chocolate mint to orange mint. I have not grown mint from seeds yet.
Now let’s get back to the parsley and salad mixes, two easy ones.
Parsley (Can take cooler temps)
Parsley will germinate (begin to sprout/grow from seeds) a bit slower than other herbs, but it is easy to grow from the time it surfaces from the soil. It is also very easy to sow into a pot. Last year, I grew curly parsley (top left in the photo above). This year I’m growing the flat-leaf Italian parsley from seed, which will be a larger type of plant compared to curly parsley, but I love parsley – so each type to grow from seed is great for me.
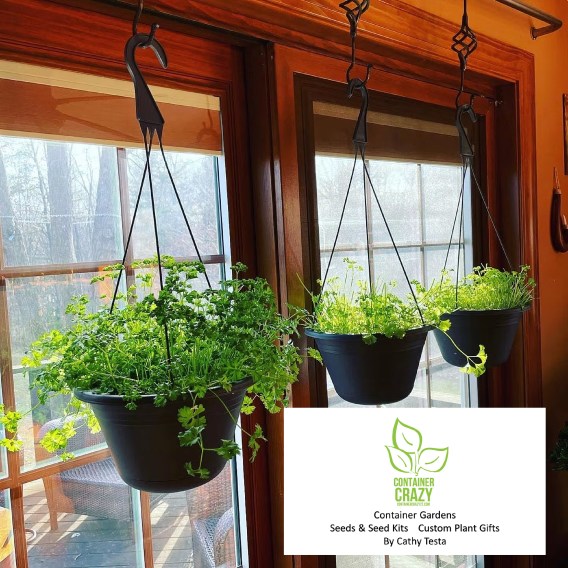
I do find that flat leaf parsley is more flavorful, but I used the curly parsley all winter! Yes, I grew it from seed and hung baskets of it from my curtain rod in the area to the right of my kitchen sink. There is a slider door there and I hung it up and let them grow. I clipped from it so many times, I can’t count. I used it in pasta sauces (guess I like pasta), soups, sometimes fresh on a salad for a bit of parsley flavor and crunch, and to top other things. Kind of using the curly parsley as a garnish which you eat.
And parsley just continues to grow as you take snips from it. However, I did notice that it did not grow as vigorously as it did in my greenhouse. My greenhouse has lots of sun light on sunny days in the winter, so it thrived there, but when I moved it to my kitchen slider window, it slowed down a bit but still was plentiful. I will get to light in a minute, but overall what I am saying is parsley is a candidate if you are a beginner.
Parsley may be started 8 weeks before frost indoors which is around mid-March for my area of Connecticut, but because it doesn’t mind the cooler weather, I have sowed parsley all winter in my greenhouse and then I moved them to indoors to my south facing kitchen slider. If you have a warmer window in the home with sunlight, parsley is easier as a first type of herb to try from seed compared to basil. One thing to bear in mind with parsley seeds is they can be slow to germinate, but once they surface they grow fast.
Salad Mixes
Salad is not an herb but it is another kitchen item you could try that is simpler in my opinion to grow from seed. And salad mixes don’t mind the cooler temperatures in the kitchen window. But, in the summer, if the salad mix gets too hot – it bolts (shoots up flowers) and isn’t as tasty. Another great thing about salad mixes is you may cut from them from your pot or indoor window box and they will grow and grow continuously usually for a while, until you eat it all up. They like the cooler temps.
You can cut from it to have it at a baby leaf stage and add your herbs, such as the chives, basil, and parsley – and voila, you are a chef in the kitchen. Plus, taking snips of salad leaves off these right in your kitchen is kind of fun. And pretty. Salad mixes are typical various greens and look pretty together.
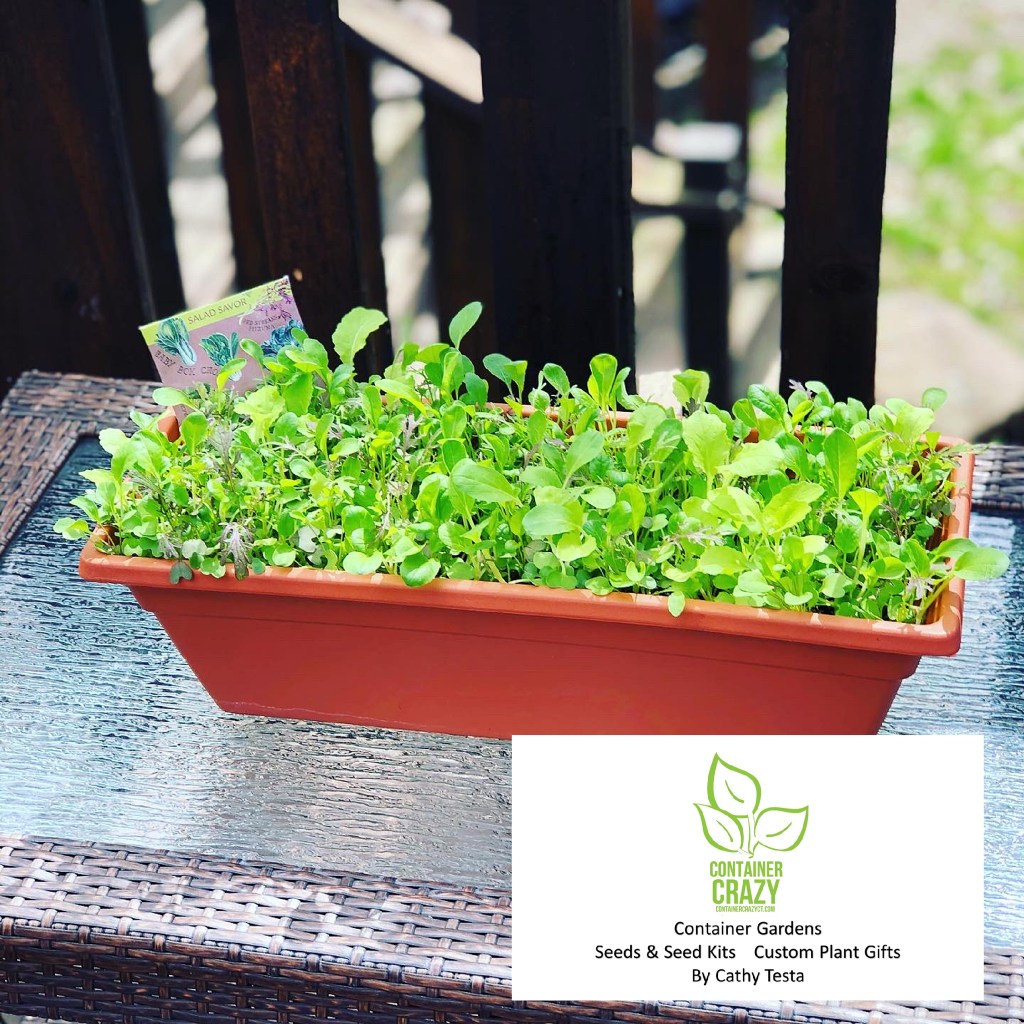
When I say salad mixes, I mean leafy salad (unlike romaine or something like head lettuce). It is also called Salad Greens, rather than lettuce, if you look for seed packets. I often sow salad mix seed in smaller window boxes. And usually start the seed I have in early March at the 10 week before frost date. Here’s a photo of a mix I did in a smaller window box. See how wonderful the mix of greens look! Think of this, March is around the corner. Only 2 weeks away from when I’m writing this (which today is 2/11/2021).
Self Watering Pots
My sister, Rosalie, contacted me after she saw how I had parsley baskets hanging from my curtain rod in my kitchen area. She is going to hang some pots in-front of her kitchen window this year. Her window does not stick out but it is right above her kitchen and gets sun. She is going to give it a try.
One recommendation I gave Rosalie was to use “self-watering” pots – those which have no hole in the bottom and are inserted into another holding pot, so it won’t drip down on her counters. A water reservoir sits below the pot to water the plants, but you have to be cautious of not overwatering because it does not drain out either. Wet roots are not good so anyhow, the reason I said self-watering is because they won’t drip.
However, for a kitchen area, these work well. And by the way, if you go get window boxes to try this, be sure it has a drain tray below it – otherwise when you water, it will drip out onto your surfaces. Most window boxes are designed with that little tray below it.
Hanging baskets of curly parsley growing this winter at Cathy T’s Home
How to Start
Now, onto the how to’s.
To keep it simple, here are my recommendations:
(1) Determine if you have a warm enough spot in the home. If you have a kitchen window like mine, and it faces south or west, it is doable. If it faces north, you won’t get enough sun and usually north facing windows are colder and too cold. East is questionable as well. You only get morning sun in an east window. But the south and west windows typically get decent sunlight. You need sun to make your plants thrive. No sun, no plants.
(2) Get the easy seeds, and if you are local, I have seed packets and kits available and will guide you. Local is East Windsor, Connecticut or nearby towns, such as Ellington, South Windsor, Enfield, Windsor Locks, etc. I am offering free delivery to local residents in my town (East Windsor, CT) right now.
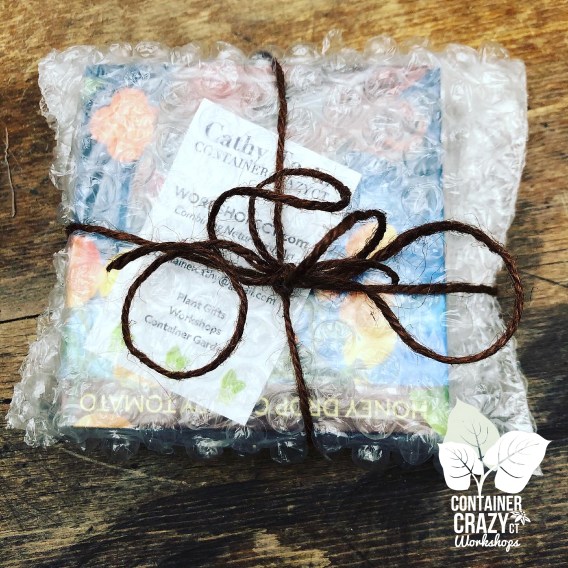
Bag kits by Cathy Testa of Container Crazy CT
Another tip: Don’t buy too many seed packets – seeds for parsley are usually plentiful in a packet! A packet of parsley could fill many smaller pots (like 5-6″ in diameter) as an example. At least the seed packets I sell have lots of seeds, up to 200 hundred for parsley. And one more tip, parsley seeds do not last long, you should use them the first or second year tops.
Kits by Cathy T.
(3) Get your containers, pots, smaller window boxes, or whatever you want to start your seeds in. Again, parsley can be directly sown (seeded) in the pot to start them. You don’t need to start them in seedling trays and transplant them into your pots. You can sow them directly in the pots or window boxes which I recommend get smaller sizes for the pots or window boxes. This is the case with the salad mix as well. It may be sown/seeded directly into the window box to start them from seeds indoors. Key thing is make sure whatever pot you have has some type of drainage holes. That is critical and self-watering pots drain to a pot as well but it drains into a reservoir. If other pots or window boxes don’t have holes, you will need to drill them. And of course, consider the weight of the pots – maybe you will hang them from macramé hangers and if they are heavy, they could be an issue. Think about the area and sizes.
(4) Get your seedling mix sold in bags. Potting mix (for container gardens, patio pots) works too. Do not use dirt from the ground! It is too dense and does not drain well, will be too heavy and could harbor many problems. Get at least 4 to 6 quarts of seedling mix and make sure the bag is fresh, etc. Seedling mix is written on the bag and should be available now at your local garden centers or stores like Agway. And again, my kits have some mix in the kits to start your sowing of seeds indoors. Pre-moisten the mix a bit before you put it into your pots.
(5) Sow the parsley or salad mix seed directly into the top of the pot filled with your seedling mix to about 1/4″ from the top. Only a few seeds (some say a pinch of like 5-6 seeds) and lightly cover it (the seeds) with seedling mix. I give specifics on seeds in my kits but the seed packet also tells you the depth of the seed, etc. Since the seed are so tiny for parsley and salad mixes, you scatter it over the top of the soil and gently cover it with the seedling mix. Then water gently – I give more details in my instructions to buyers so this is in simple terms.
(6) Place them in a warmer location if possibleat first – say your kitchen bay like window is cold like mine in the winter, it will be too cold to germinate the seeds, but if you have warm spot – like a window with the heating radiator below it or maybe even on the floor near a slider window that faces south or west, or a table in a warm spot in your home by a window with some sun, start them there then hang them in your window or place them into your garden kitchen window after they germinate or place them on the shelf in the kitchen window.
Similar to what I did with my baskets of herbs, I started them in a warmer spot, they germinated (sprouted) and grew a little, and then I hung them on the south facing slider window area for as long as they lasted. If the area where you are trying to get the seeds to sprout is too cold, it will be very slow to germinate and not sprout from the soil. Hope this is making sense. On top of it – parsley seed is slower in general to germinate – just how that seed is, so be patient. If you want to take it a step higher, get a heat mat to put below the pots or window box, and or get some grow lights.
Or if your kitchen garden window gets lots of sun, you may start them there. But a cold area in the home is a no-go. If you have a sun room for example, and it is cold, it won’t work. If you have a window with a big cold draft, that will keep the potting or seedling mix too cold. Roots do not like cold and it will slow the growth.
Grocery store herbs
Oh, another quick thought – those herbs you buy in the grocery store that are in little black pots with soil. I don’t find they continue to grow all that well in winter inside the home (especially the basil). But in the summer, basil are easier to keep growing either indoors or outdoors (again because they like warmth). This is just based on my experience. I’ve been working with plants for 10 years, and every time I didn’t have basil handy, and grabbed one of those pots in the grocery store, and placed it on my kitchen bay window area, it kind of didn’t thrive. Probably, again because the bay kitchen window is too cold in the winter.
Delivery Valentines Day Theme – Get to add with your chocolates or wine gifts!
I hope this post helps you if you are a beginner. I’ve done all my gardening in pots of all shapes and sizes, and this is referred to as “container gardening.” Gardening with herbs in pots or window boxes to me, is a form of container gardening. Container gardening is a great way to learn. There are tons of sites out there with tips on how to grow herbs, and I sense many want to grow herbs indoors in their kitchen. Start off small and learn. Let me know how you make out! Comment below. Thanks!!
Cathy Testa Container Crazy CT Location: Broad Brook Section of East Windsor, CT