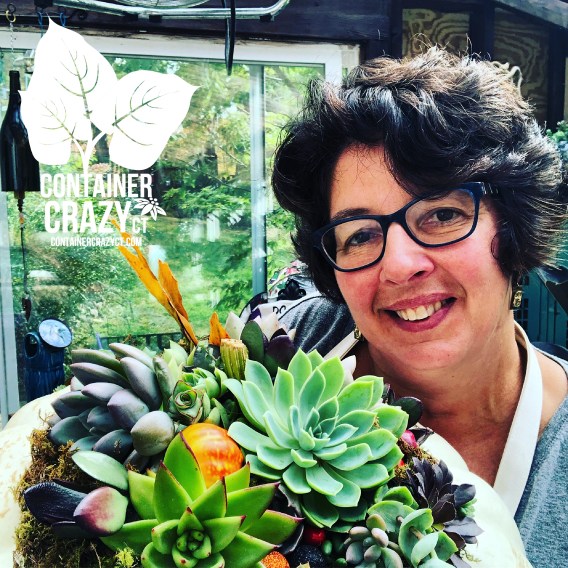
I made my first two succulent pumpkin centerpieces for an order yesterday, and gosh, it was so much fun. I typically make these in my small hobby greenhouse and the “Zen” feeling in my greenhouse puts me into a total creative zone.
The leaves of the trees outside are starting to turn the color of yellow for autumn, and the wind was blowing around quite a bit. Every once in a while, I’d look outside from my work table in the center of the greenhouse to see if any bears would be there outdoors on the property – and nope! I have NEVER seen bears here in my yard, but there have been three sightings in my town last week of a momma bear with her two cubs. And it was nearby for one sighting so it makes me wonder, will they ever adventure here? I hope not!
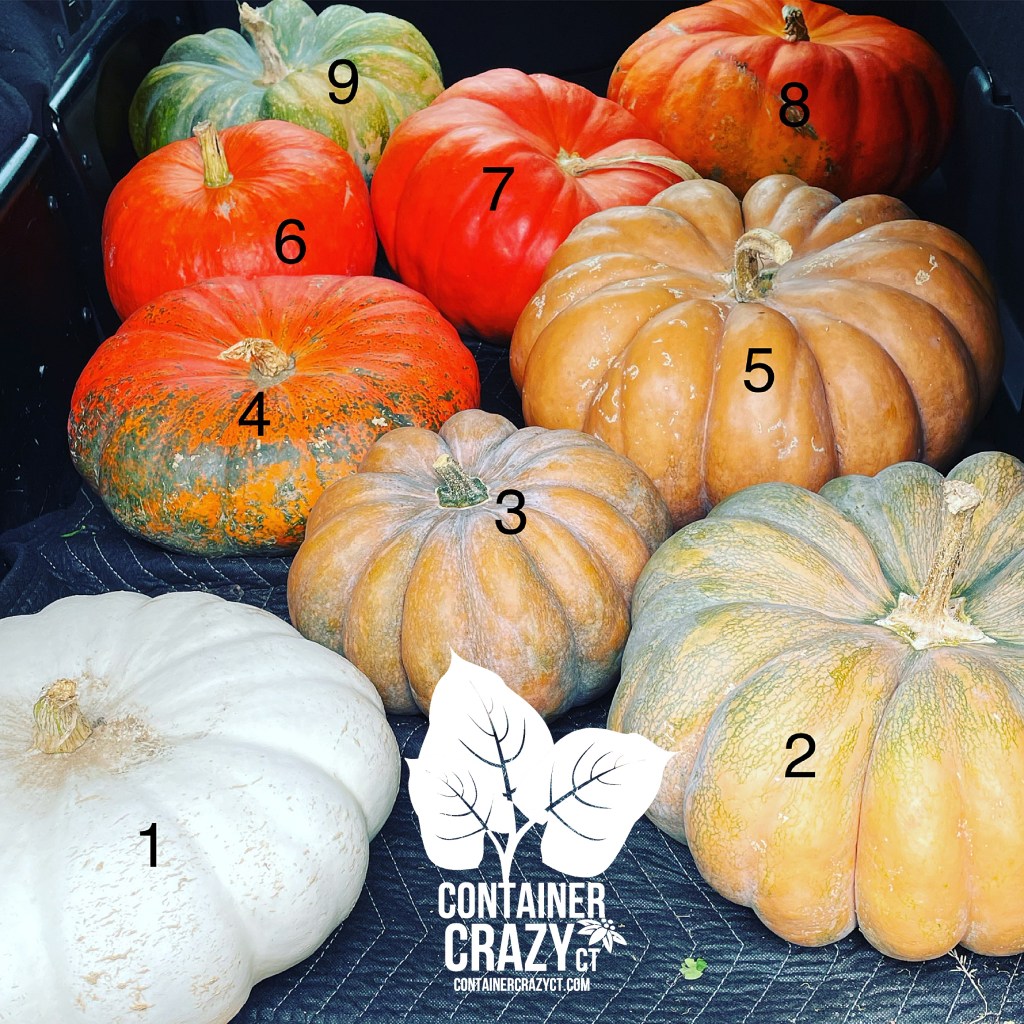
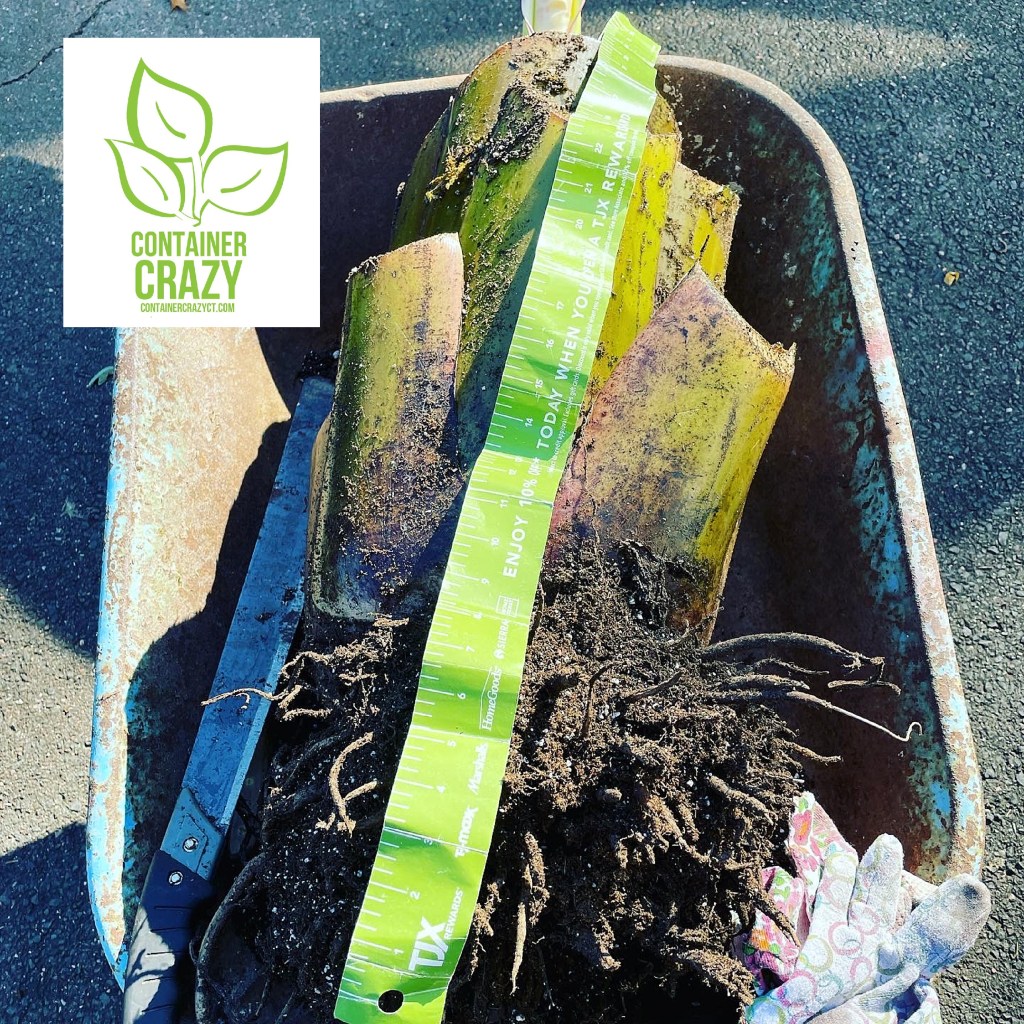
I picked up 9 pumpkin candidates from nearby farms in my town the day before. We had a drought year and I wondered how well the pumpkins would grow and this year they look great (last year we had too much rain). Number 9 was selected by a repeat customer right away along with a cheese pumpkin (not shown in this above photo) which I grew myself this year for the first time as a test (with the help of my cousin who grew veggies in her community garden plot in our town for the first time this year too!). She planted a couple of my pumpkin plants in her garden and I planted one pumpkin plant in a container here. I got about 7-8 pumpkins total for the smaller cheese pumpkins, but some had blemishes on the side but two were perfect – one has been used so far for a succulent pumpkin! Yes!
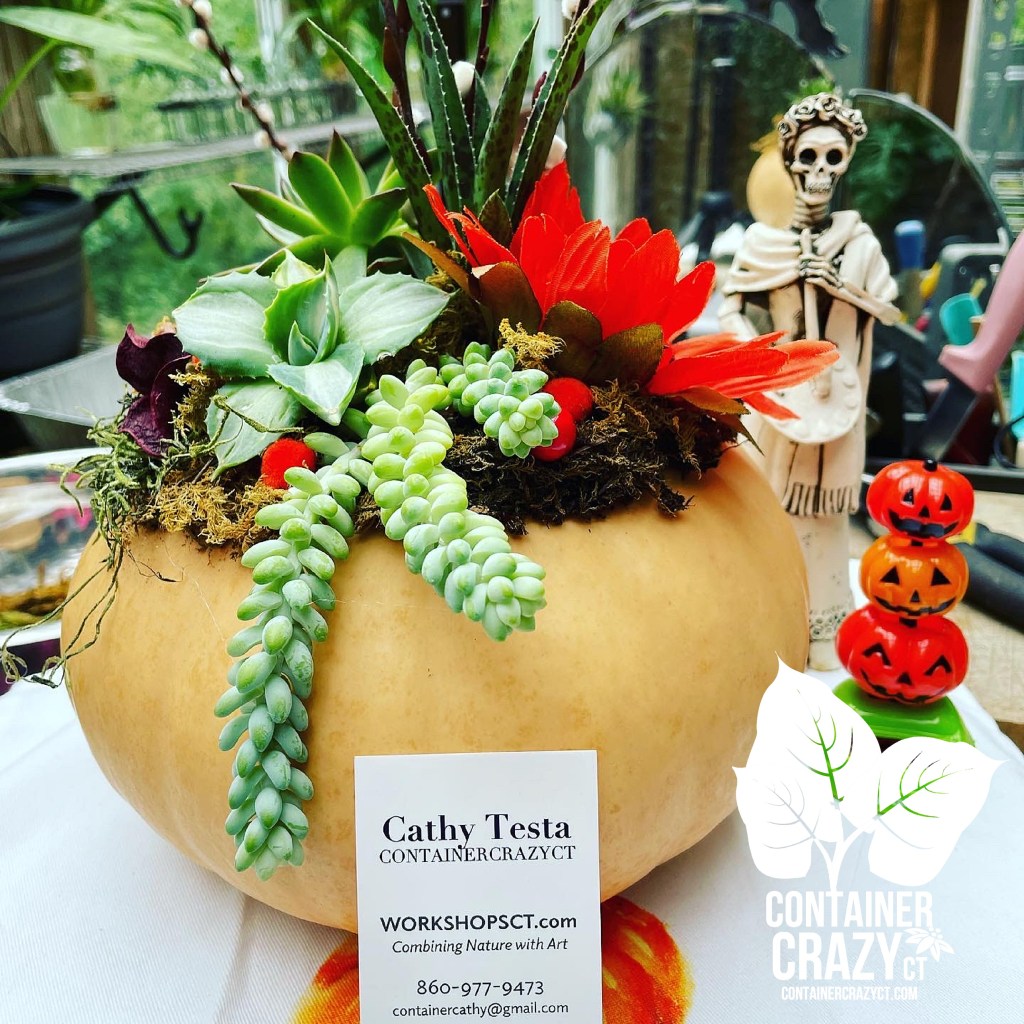
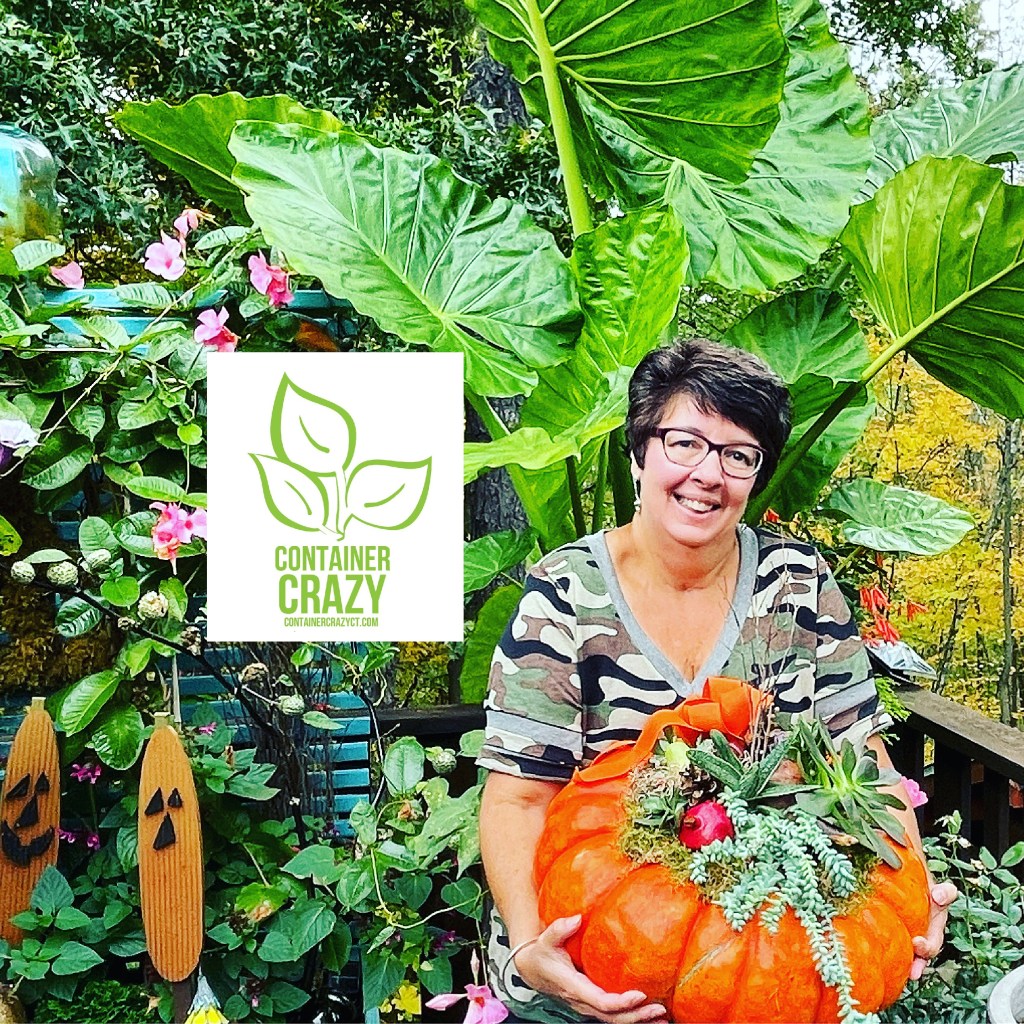
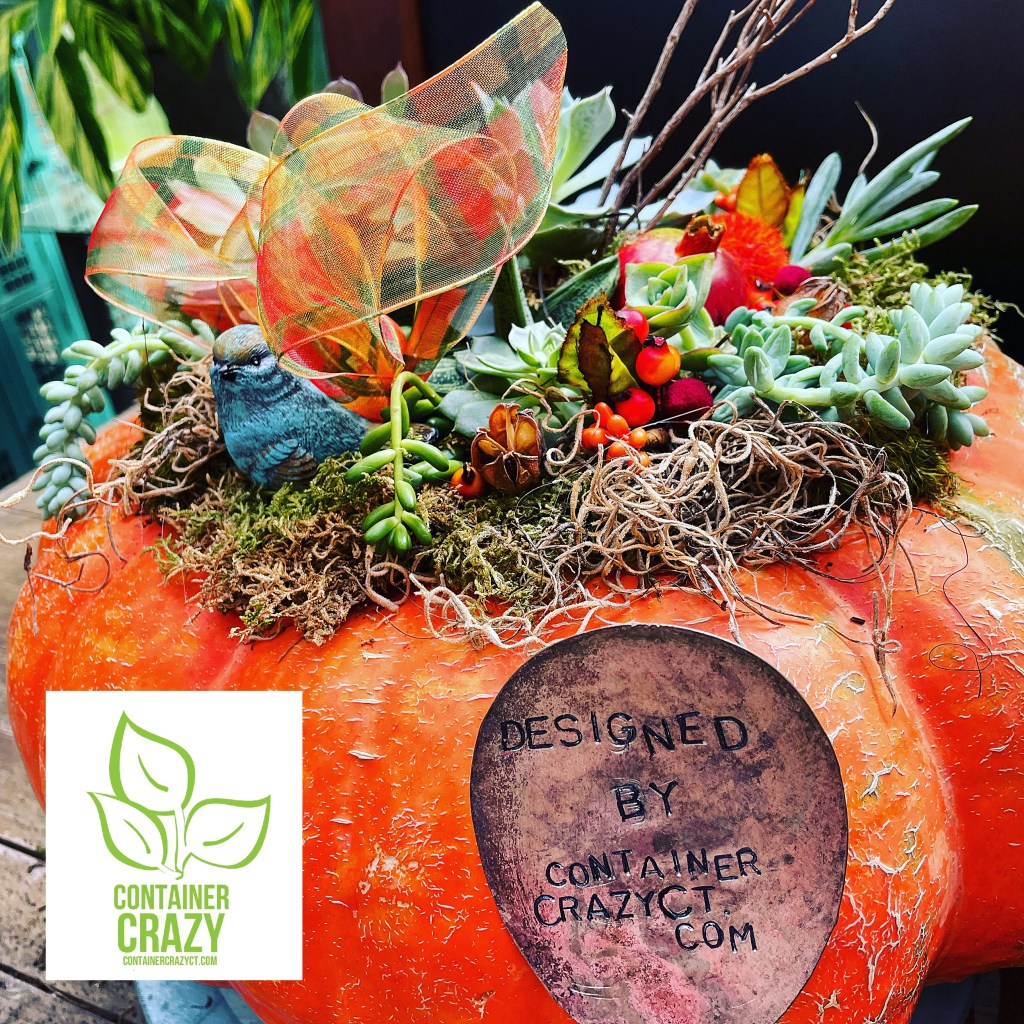
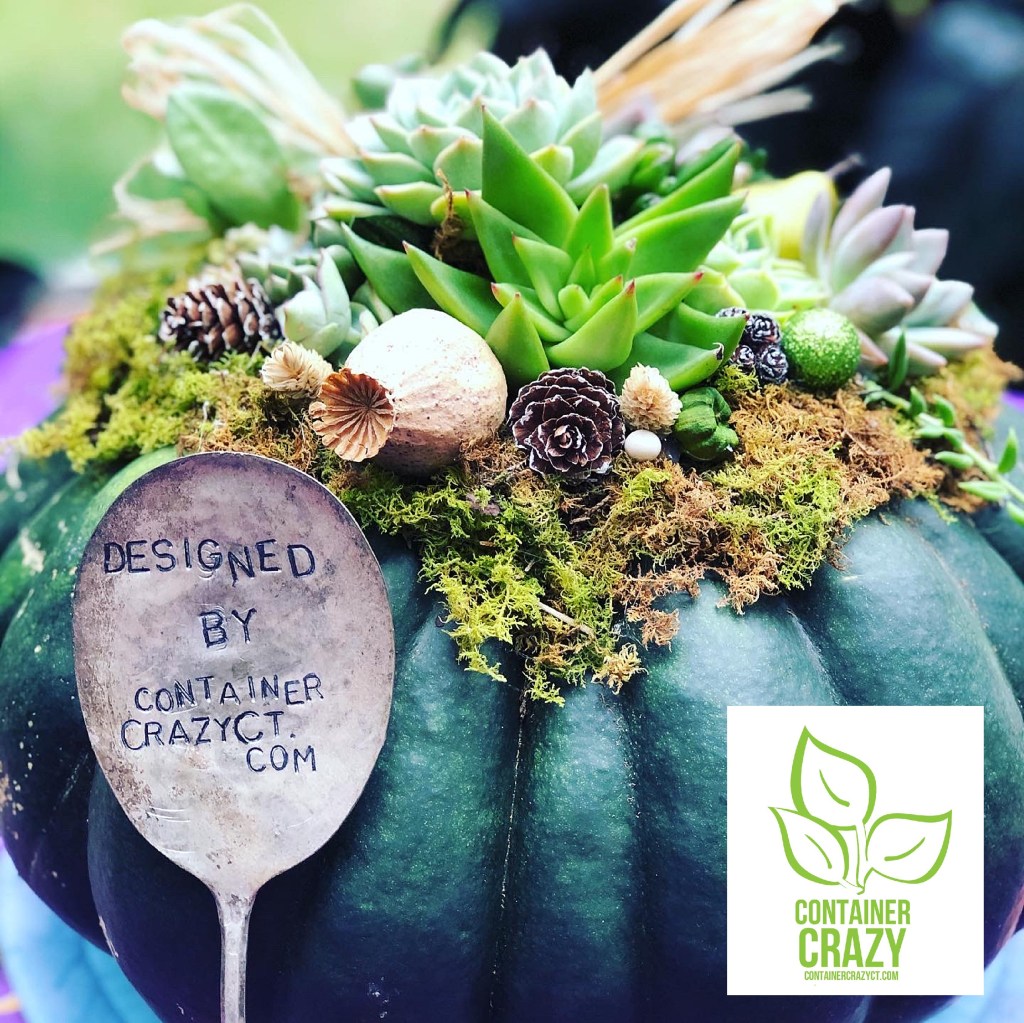
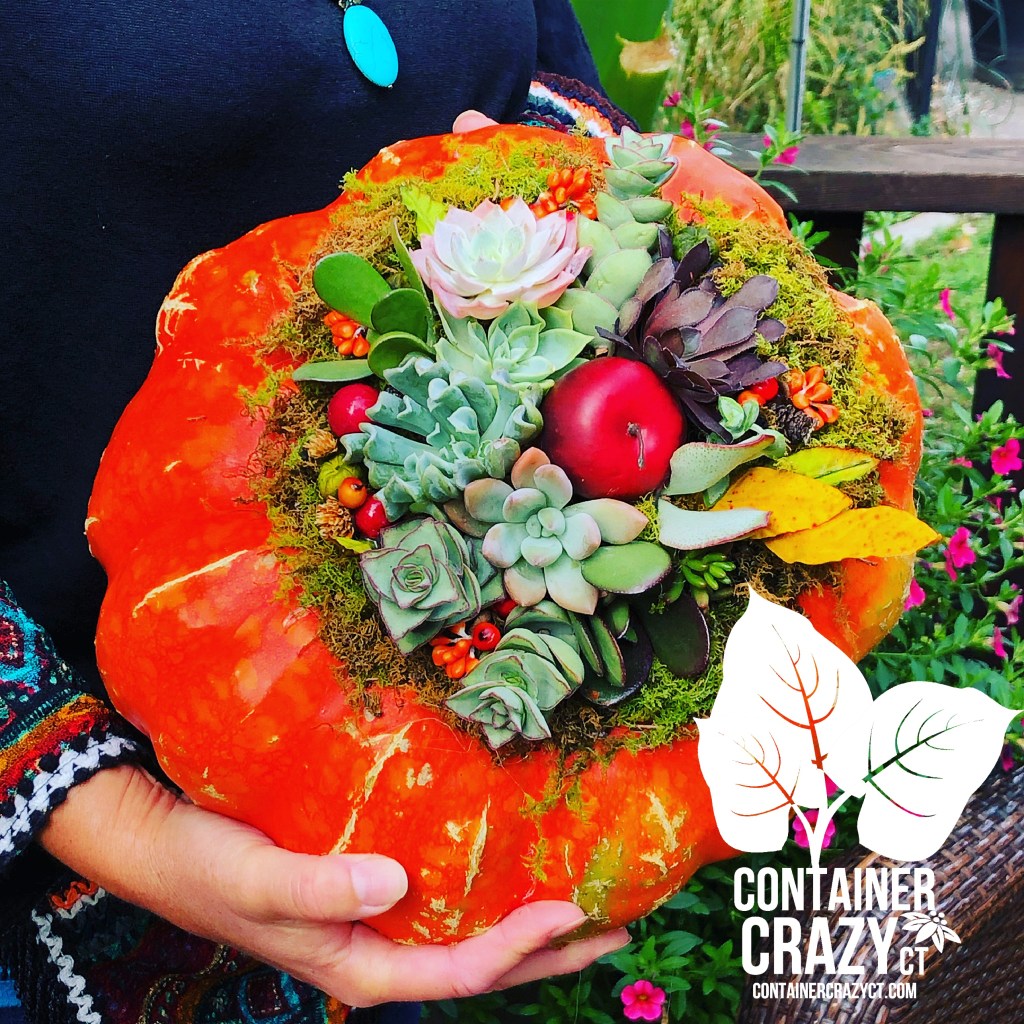
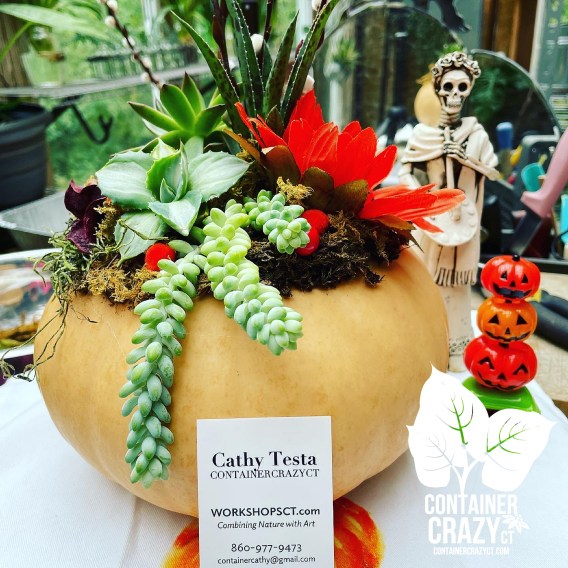
And…here it is in the above photo. It is about 7-8″ diameter. I grew them from seed and kind of just experimented. I don’t plan to be a “big pumpkin grower” but it was fun to see how they would turn out. They arrived (were ready to pick) a little earlier than I would have liked so I will adjust my seed starting process for next year. But these pumpkins last a long time, can be stored and baked too. Anyhow, it was so very rewarding to make my fall themed arrangement on this pumpkin because it was home grown by me! The shape is perfect for the succulent pumpkin making process as well.

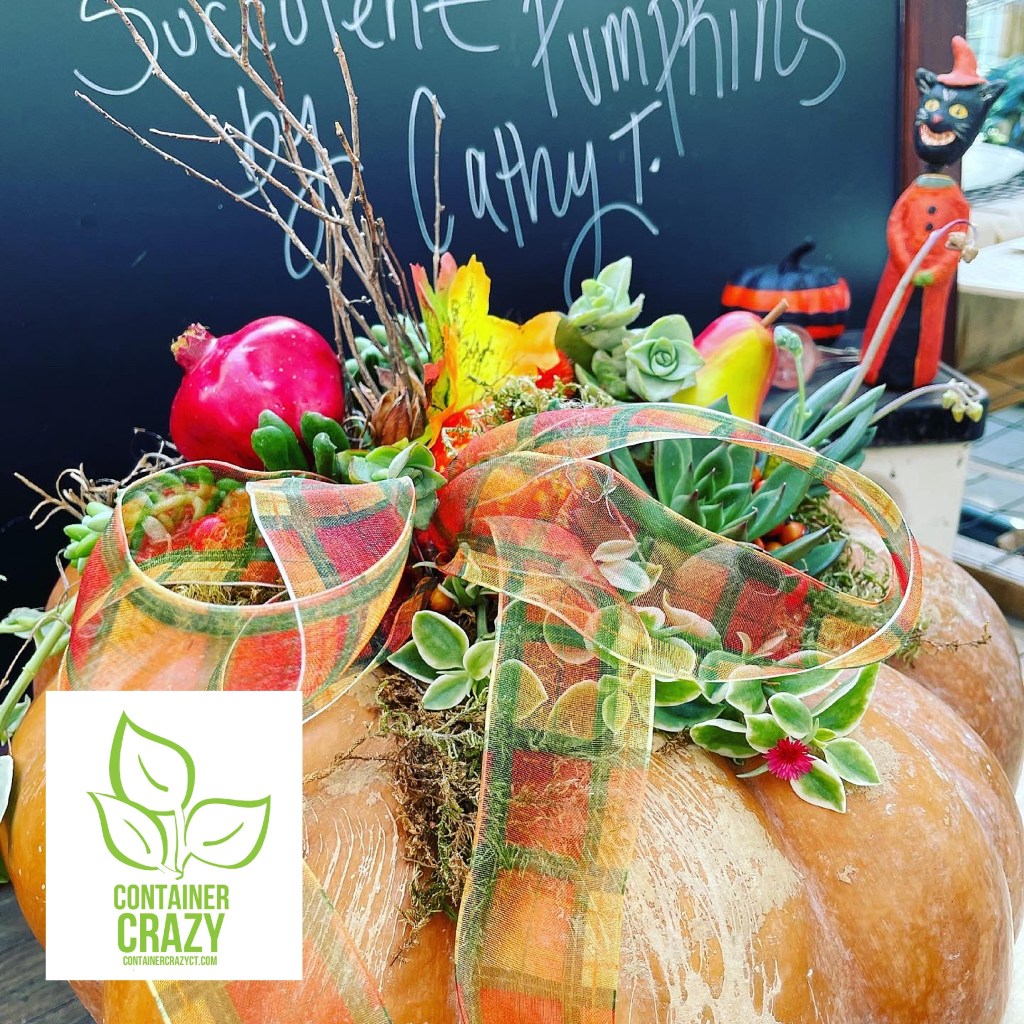
The other pumpkin I used yesterday was sourced from a local farm. I’m so fortunate to have local farms nearby! It is a blue-green color and very very heavy – you’d be surprised by the weight of some of these pumpkins. I carried it to the greenhouse and get into my “Zen” and create. Sometimes I listen to blues music and totally just zone out or sing along. I guess it is that space where some artists say they are at their best. To me, it is a pleasant time of creating and hopefully the end results reflects my Zen-mode. Also when in Zen, my tinnitus is not as noticeable which is another huge bonus cause I suffer from tinnitus.

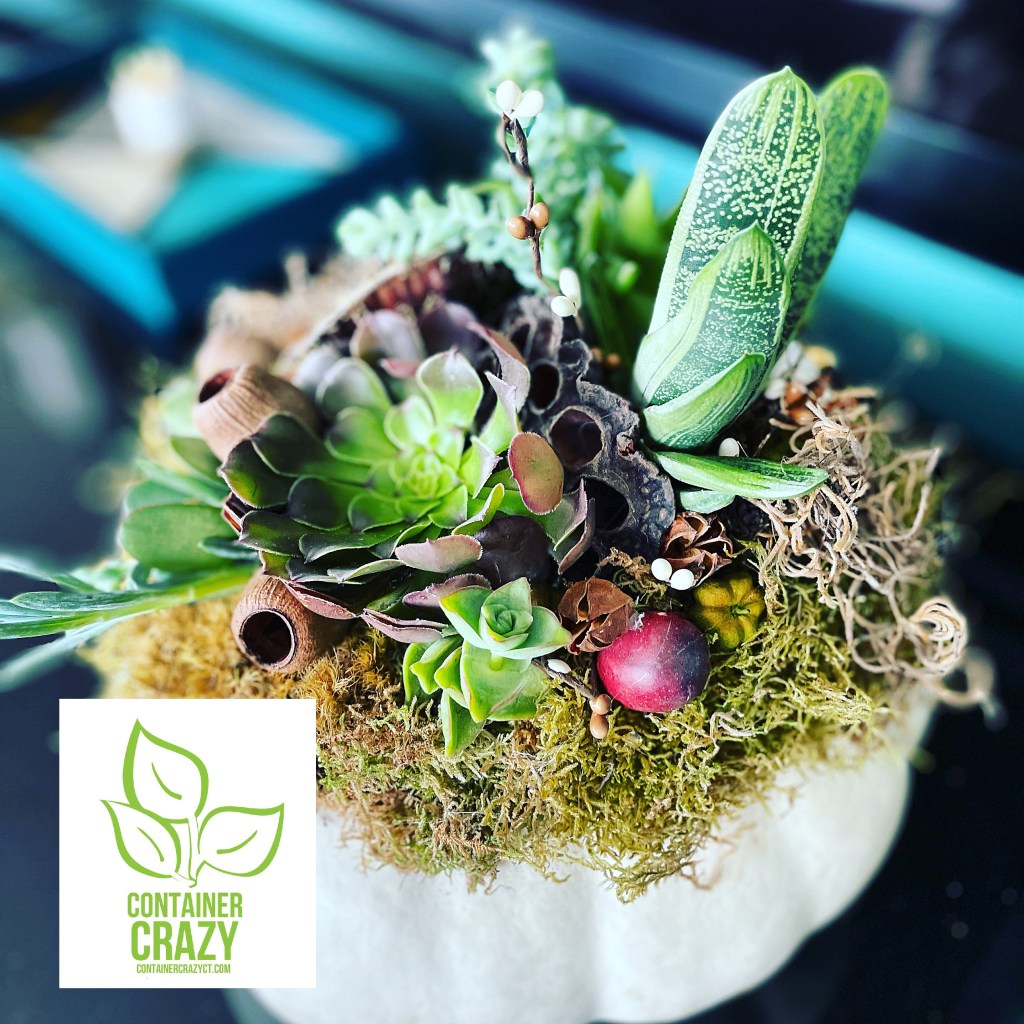
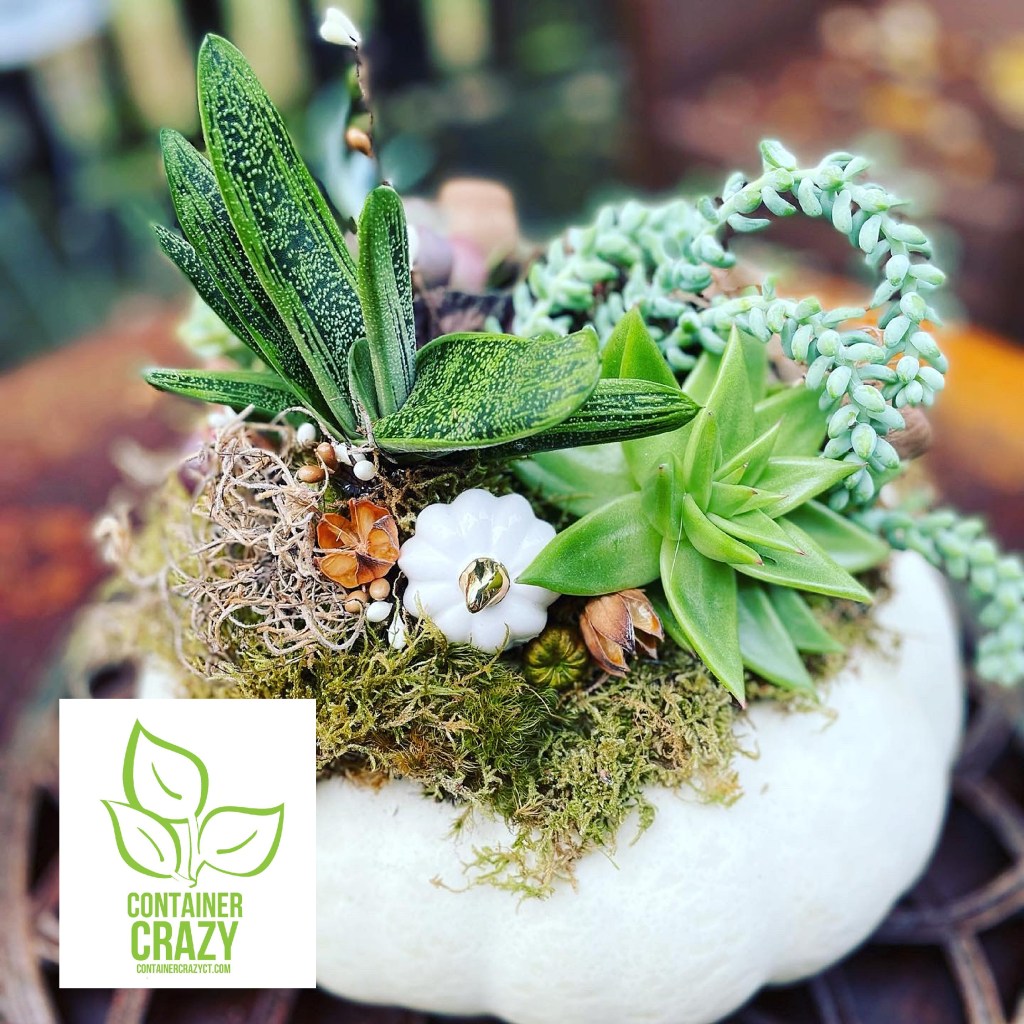
If you can believe it – the large pumpkin finished with 11-15 different plants of all sizes! It is quite the bargain when you consider the succulent plants may be transplanted later to keep going. So as a wonderful colorful living autumn centerpiece in your home, and then plants are maintained later. Anyhow, this customer wanted reds and orange themed décor. Oh and I forgot to mention, this year I also put a dwarf agave on each pumpkin which I think is pretty cool. The plant is rare and a nice find!

I really want to make a pumpkin with the color theme above for the décor embellishments. I like this neutral feel of the soft whites, cream whites, beige, brown, etc. Maybe I’ll make that one today. Even if not for a standing order, maybe as a gift, or maybe someone will purchase it after I make it – we will see!! It is a rainy day so it is perfect to be creating again, I hope.

Well, I better get to it – I have to pack my truck for a job tomorrow and then hopefully some time today make another Succulent Pumpkin. FYI, I’m located in the Broad Brook section of East Windsor, CT. Thank you for visiting my blog and have a great day. Feel free to contact me with any inquiries or questions.
Cathy Testa
Container Crazy CT