Grow a Giant Tomato, as Big as Your Heart

2 Comments

It is Valentine’s Day weekend, so I thought it is appropriate to share information about how I grew big tomatoes in a big pot.

Upstate Oxheart Tomatoes

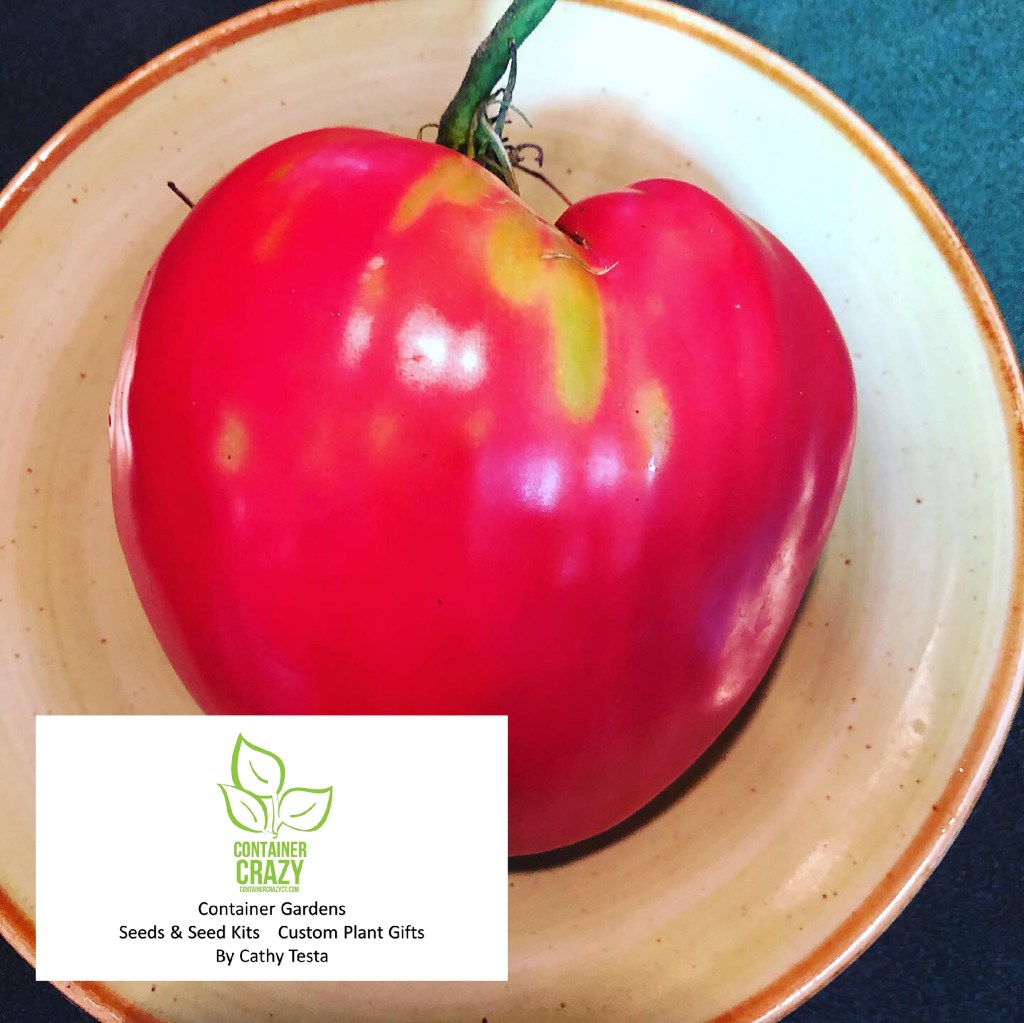
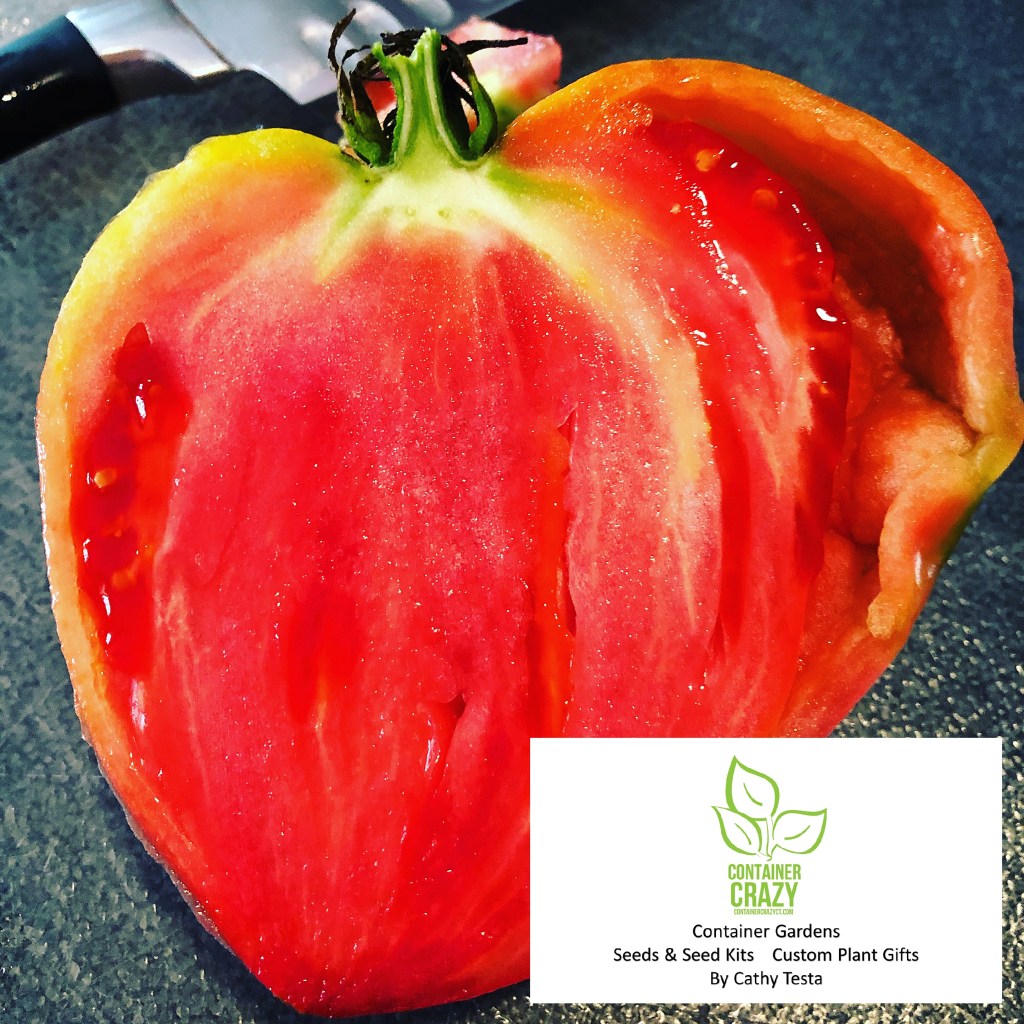
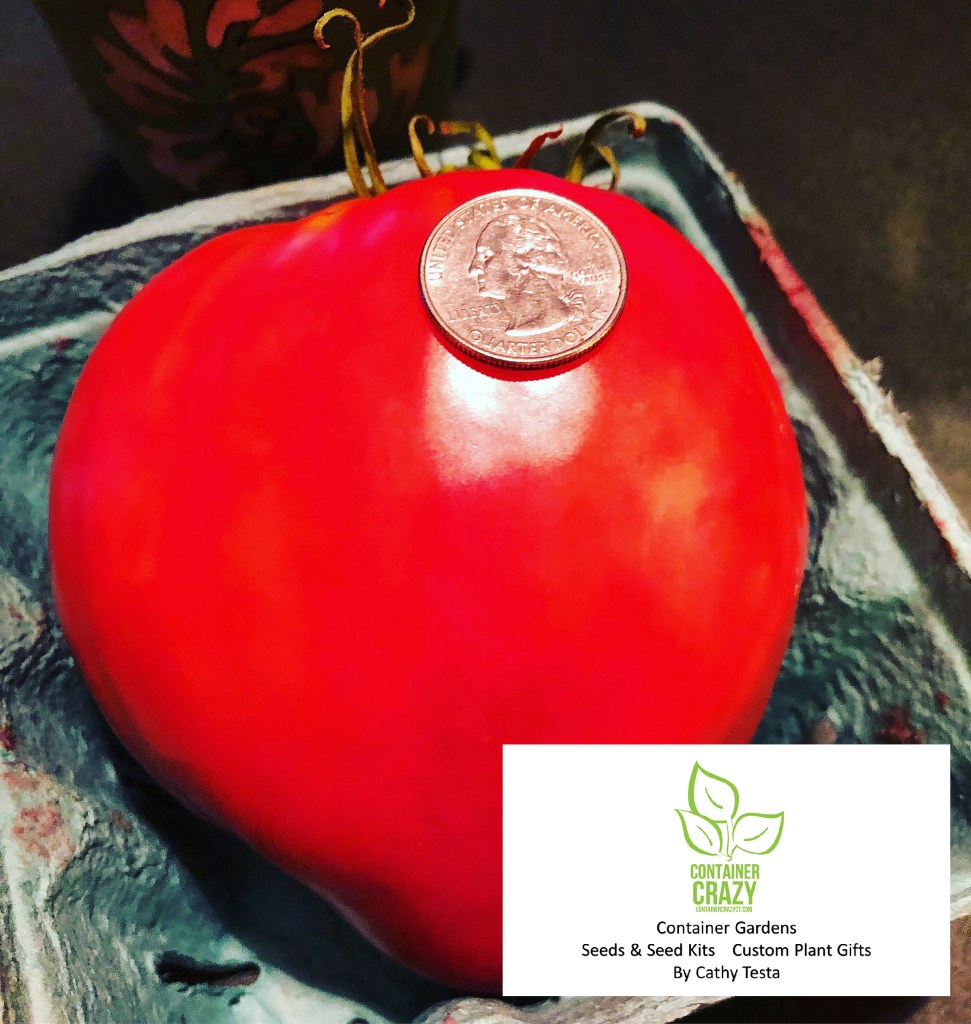
The reason I picked this seed a couple years ago to add to my growing list is just because I thought it would be super cool to grow giant tomatoes, and this variety did not disappoint. The tomato fruits were definitely stunners. Each tomato weighed between 2.5-3 lbs. and they were as big as grapefruit or bigger. The shape of the tomato is heart shaped. It is really fascinating when you cut one in half. I couldn’t get over how it truly looks like a heart. Another cool factor, they are nearly seedless. So if you like to cook with tomatoes and don’t want to bother removing the seeds from your sauces, this is the one.
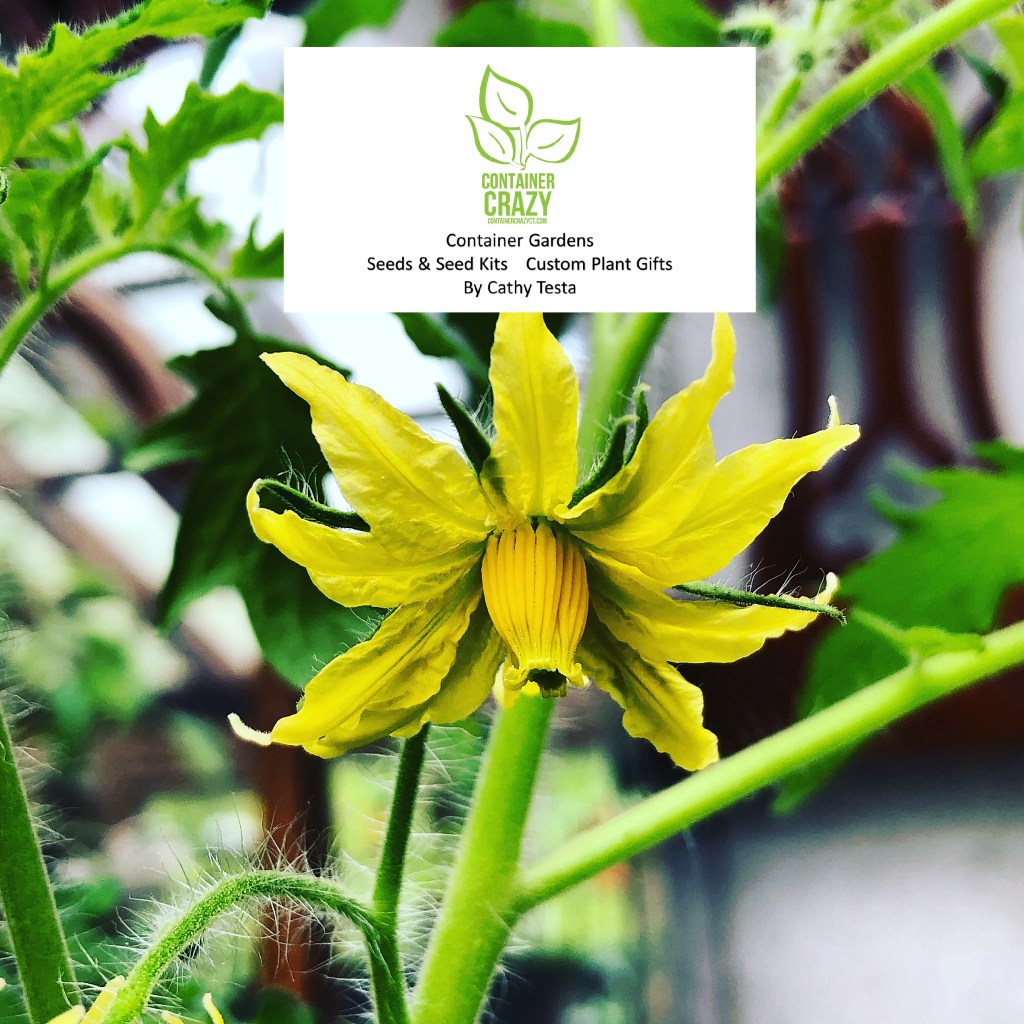
The Flowers

When I saw the first flower on this plant, I thought, “Wow, these are big flowers and pretty.” I guess that was the first sign to me that the plant’s fruit would grow as promised and be big, really big. In addition to the flowers, I noticed the leaves seemed to droop a bit, and at first, I was worried something was wrong with the plants, but upon reading more, this habit, where it almost looks like the leaves are wilting downwards, was perfectly normal for this plant.

Upstate Oxheart Flowers

Indeterminate

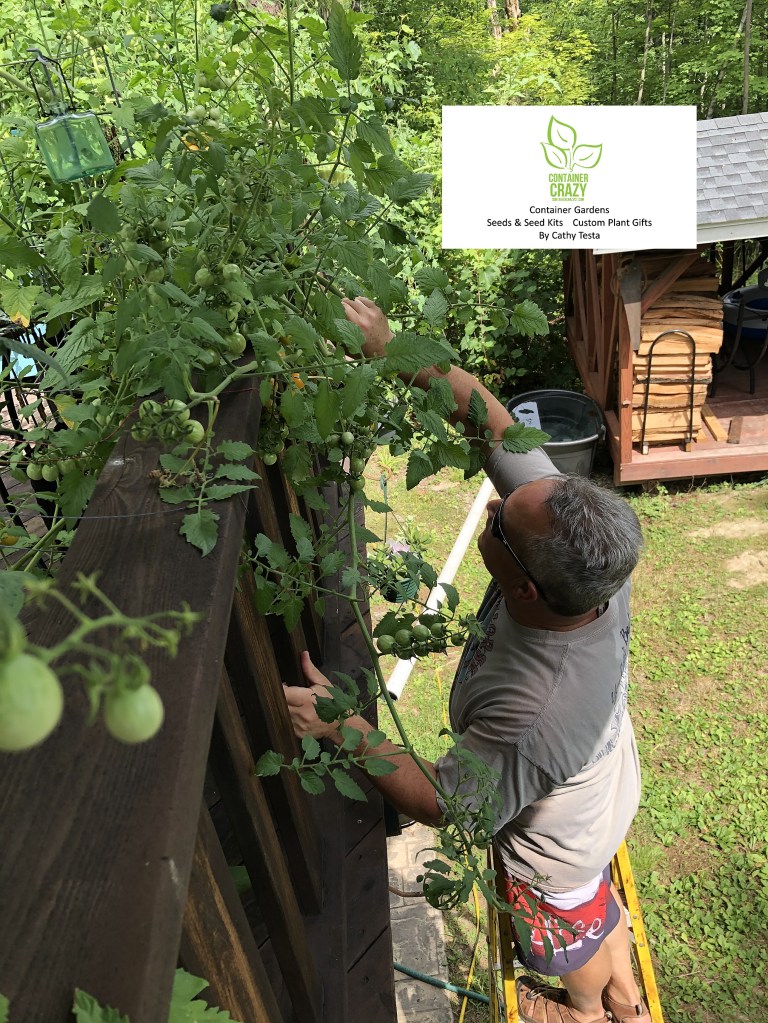
This plant is indeterminate. It will require staking. In fact, it can grow rather tall, up to 18″ high or even reach 10 feet. I don’t think mine was as tall as 10 feet! But it did grow rather large and I grew a single plant in a huge black pot. Here you can see it in the pot.

Upstate Oxheart Tomato Plant in a Huge Pot

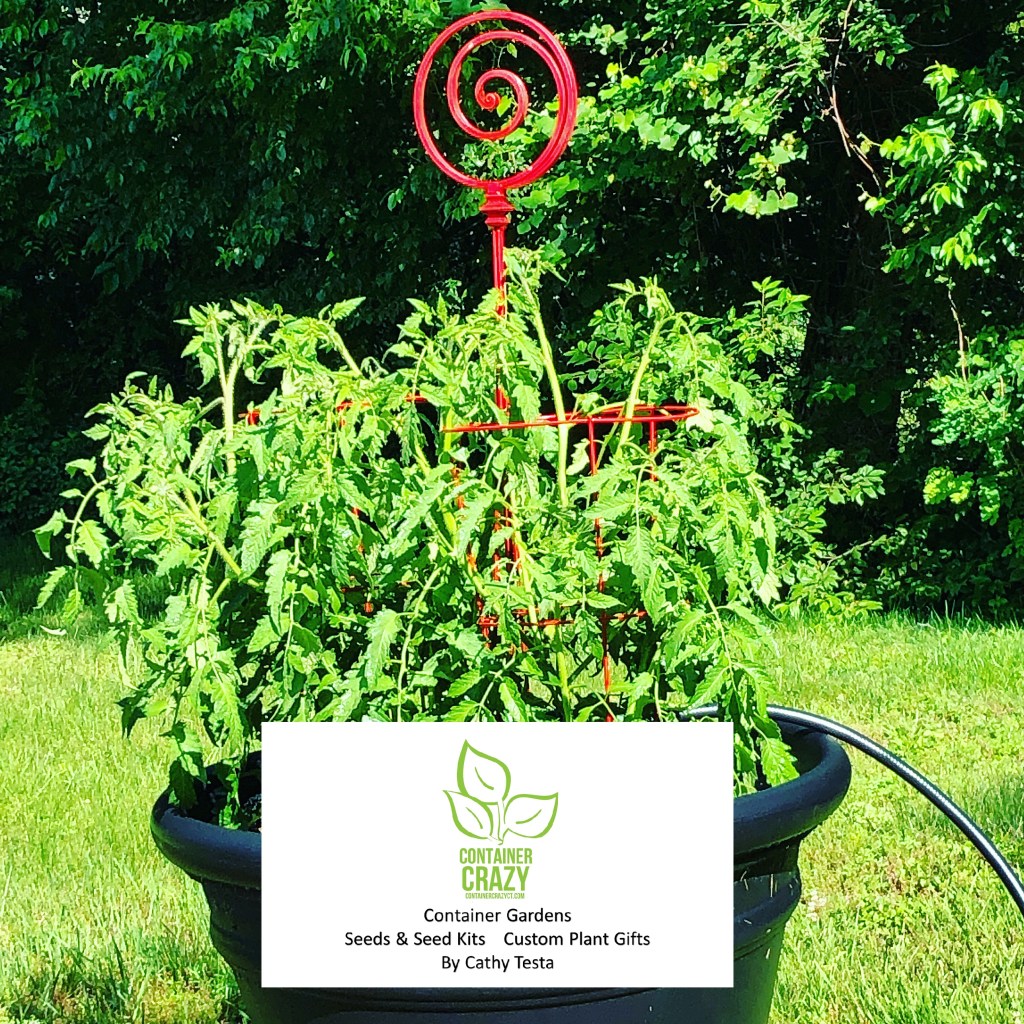
You do not have to get a pot this big, which it is about 3-4 feet tall and probably 2 feet or more in diameter, because I have grown these in 20 gallon fabric grow bags as well. You just need to bear in mind that it will require support because the stems will continue to grow and reach out. Additionally, the bigger the pot, the more growing power you give it.

Surrounded with wire

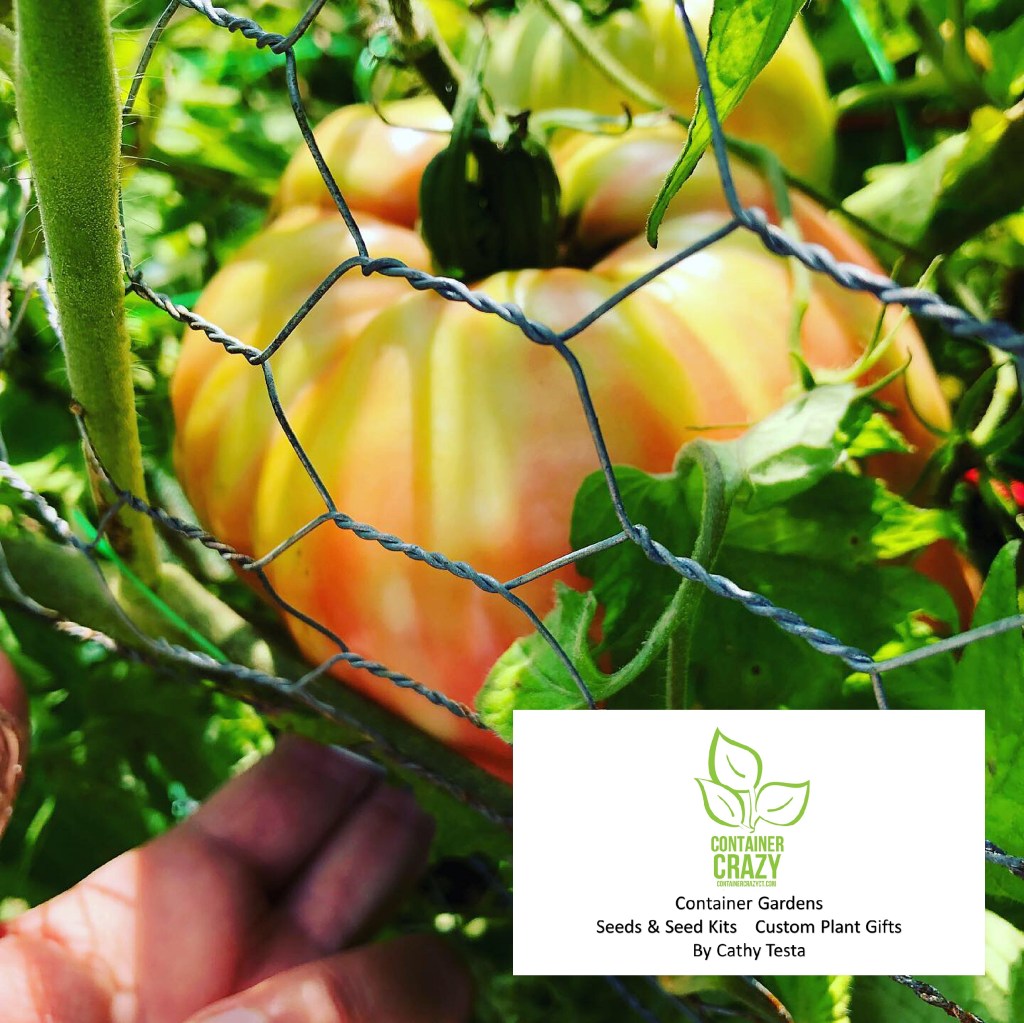
What I did with this one above was completely surround the pot with wire. The first year, I used chicken wire but the second year, I purchased a sturdier hard wire. It worked at keeping any animals away but it was tricky for me to reach down into the pot to get the tomatoes. Sometimes, I would get a small step ladder and carefully reach down to grab one as it ripened to a rosy color.

Oxheart – Wire around and the tomato starting to change color

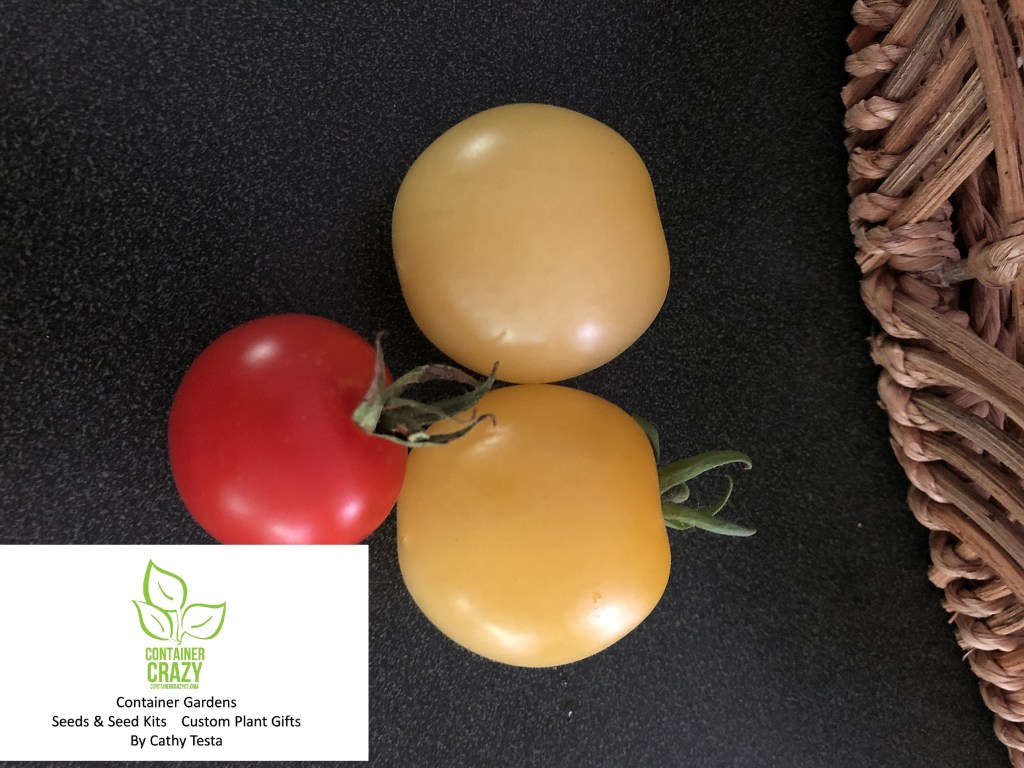
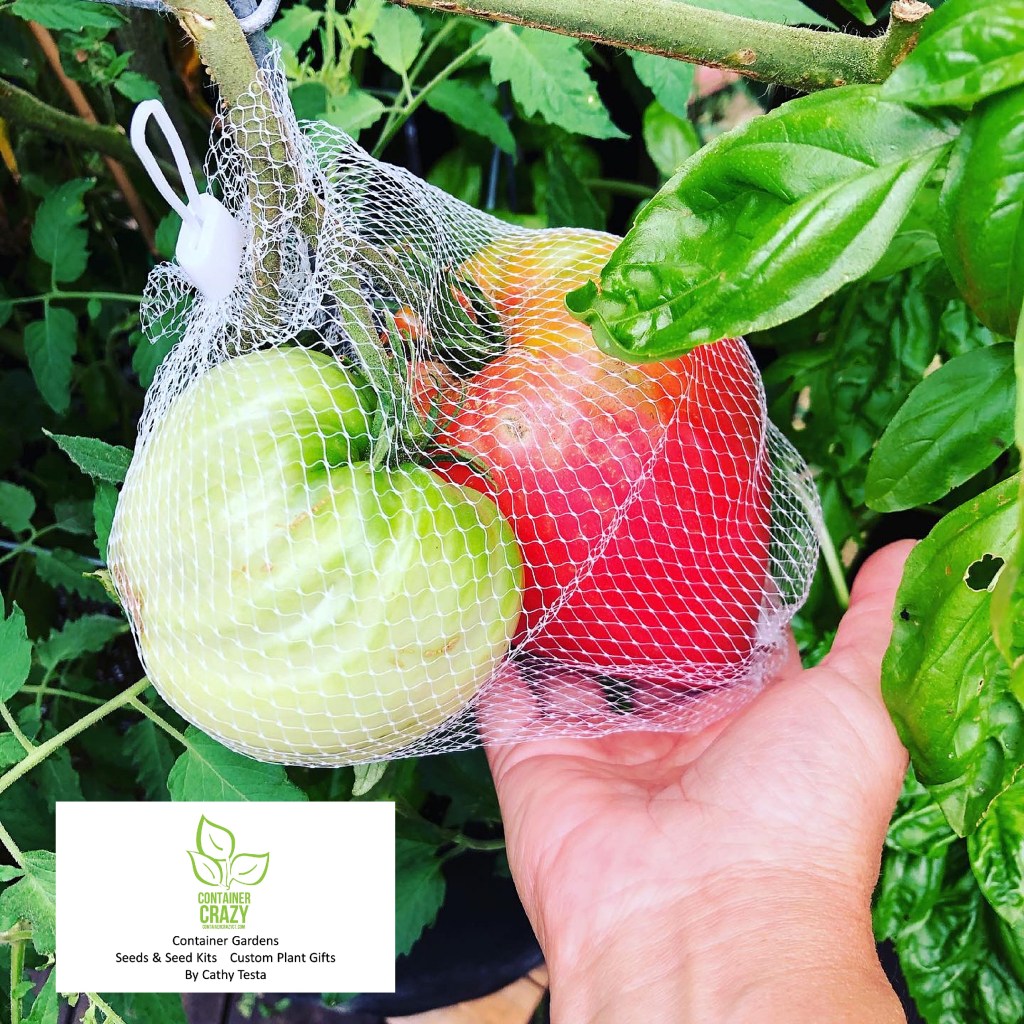
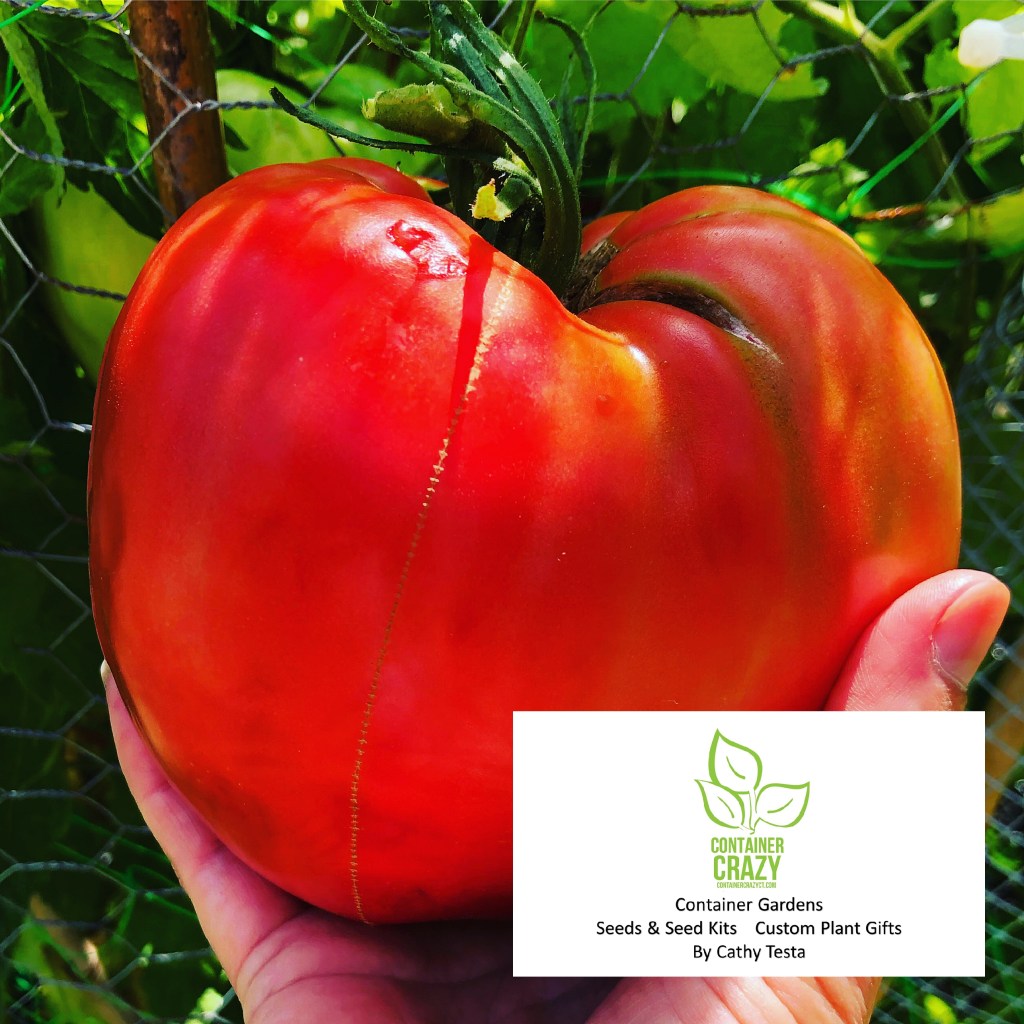
This variety of tomato is ready to pick when it is a rosy color. Also, the fruits are soft to the touch. I am not sure how to describe the flavor, other than delicious. It is a delicate but powerful flavor, we really like eating these. My husband, Steve, described it like eating a steak. The meat of it is full, dense, and heavy. In fact, the fruits feel heavy when you pick them. They weigh up to 3 lbs! Maybe even more if you used a technique to try to grow them even larger, but it really starts with using seeds of plants which naturally grow a really big tomato, and this is one type which does.

Upstate Oxheart on a Plate

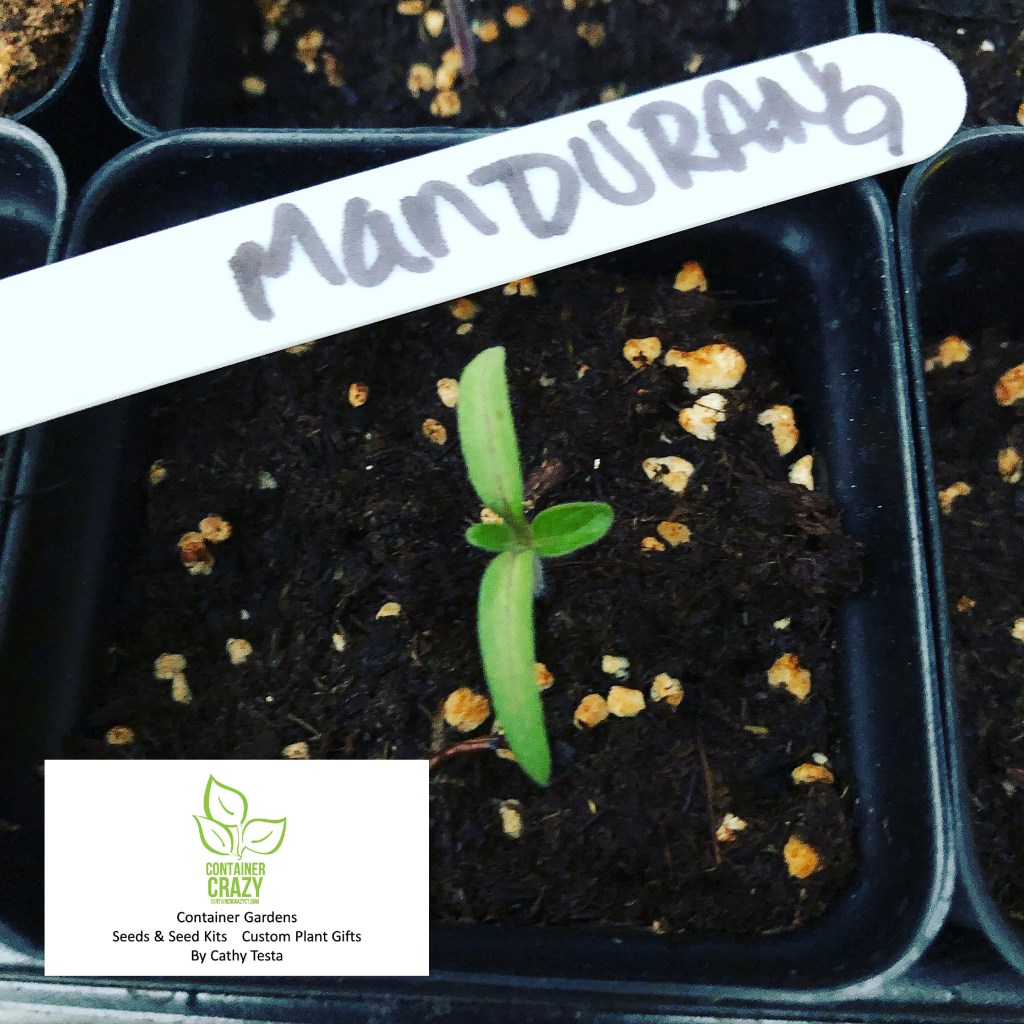
The first year, I started the seeds at the 10 week timing prior to our last spring frost. This is early March, but I felt like the plants were getting rather large when it was almost time to harden them off (put them outdoors to acclimate before permanently planting them into the pots outdoors), so this year, when I grow some of these, I am going to wait till the 6 week mark.

Normal for leaves to droop

Another thing I noticed about the habit of this variety, is the leaves droop down. They almost look like they are wilting, and at first, that concerned me. I was worried and did some more research discovering this was perfectly normal for this plant. When it grows larger outdoors, it has a messy hair look (for lack of better wording) but there is no need to panic. It will grow fruit just fine.

Surrounded with wire

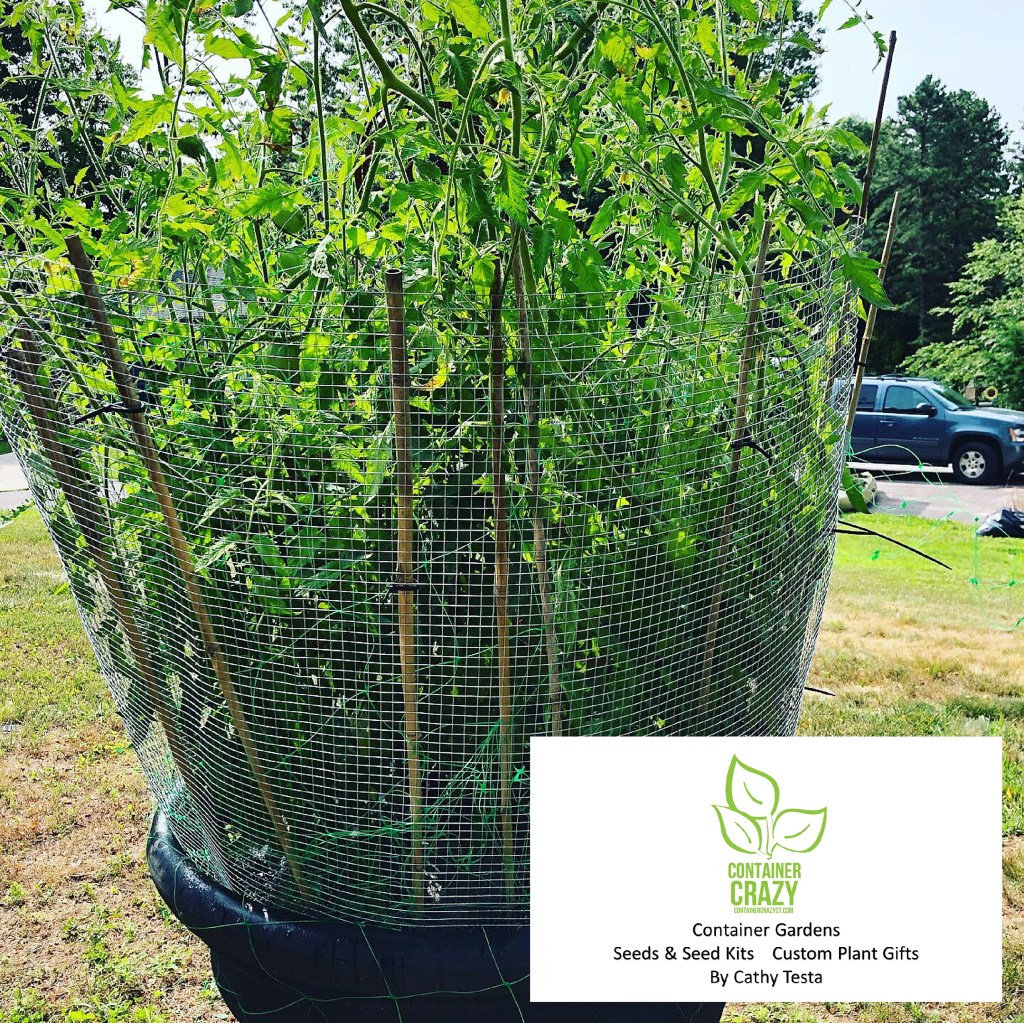
The 2nd year I grew some of these, I decided to take bamboo stakes and push them into the top of the big black pot. Then I got some hardwire fencing material and wrapped it around. The last step was taking zip ties and attaching them to the bamboo stakes to secure all. This worked. It kept any critters away but it was tricky to reach down to grab the fruit. Sometimes I used a small step ladder to reach down into the plant to get the fruit. It was worth it.

Wire around the whole plant to protect from animals

Nearly Seedless

This variety, Upstate Oxheart, is nearly seedless. This is good if you wish to not have seeds in your sauces, but it is important to know, because the fruit is nearly seedless, you get a smaller amount of seeds in the packet, so each seed sown and grown is precious. When you cut the fruit open, you can see there is very little seed, and it does in fact look like the inside of a heart! Amazing!

Nearly Seedless and Shaped Like a Heart

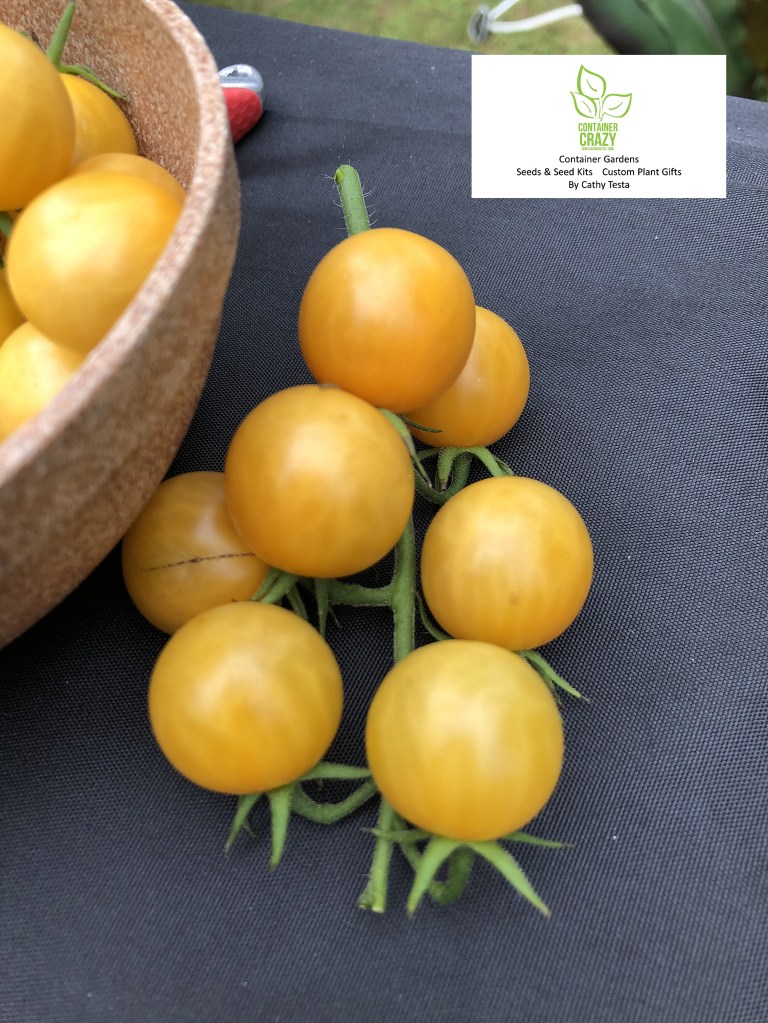
When I would go check on the plant, I loved seeing the big tomato fruits starting to grow. Many of them would look perfect with no blemishes. Even though they got large, they rarely cracked. The plants start to produce fruit about 84 days from the time you transplant it into your pot or gardens.

At the green stage
At the green stage

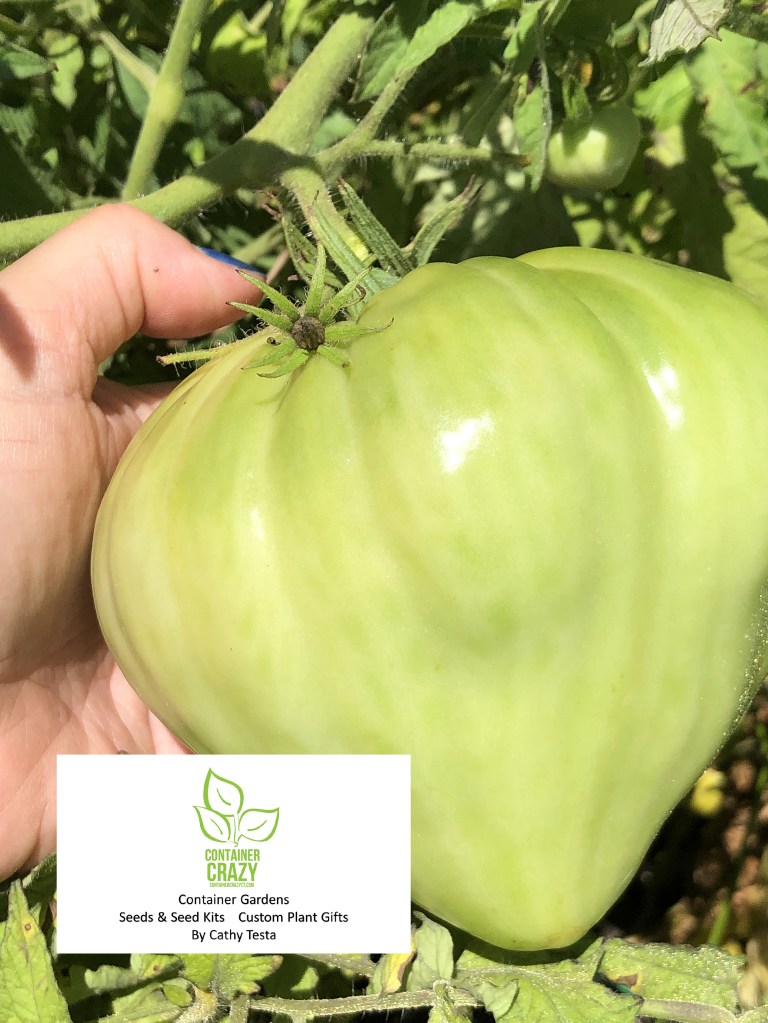
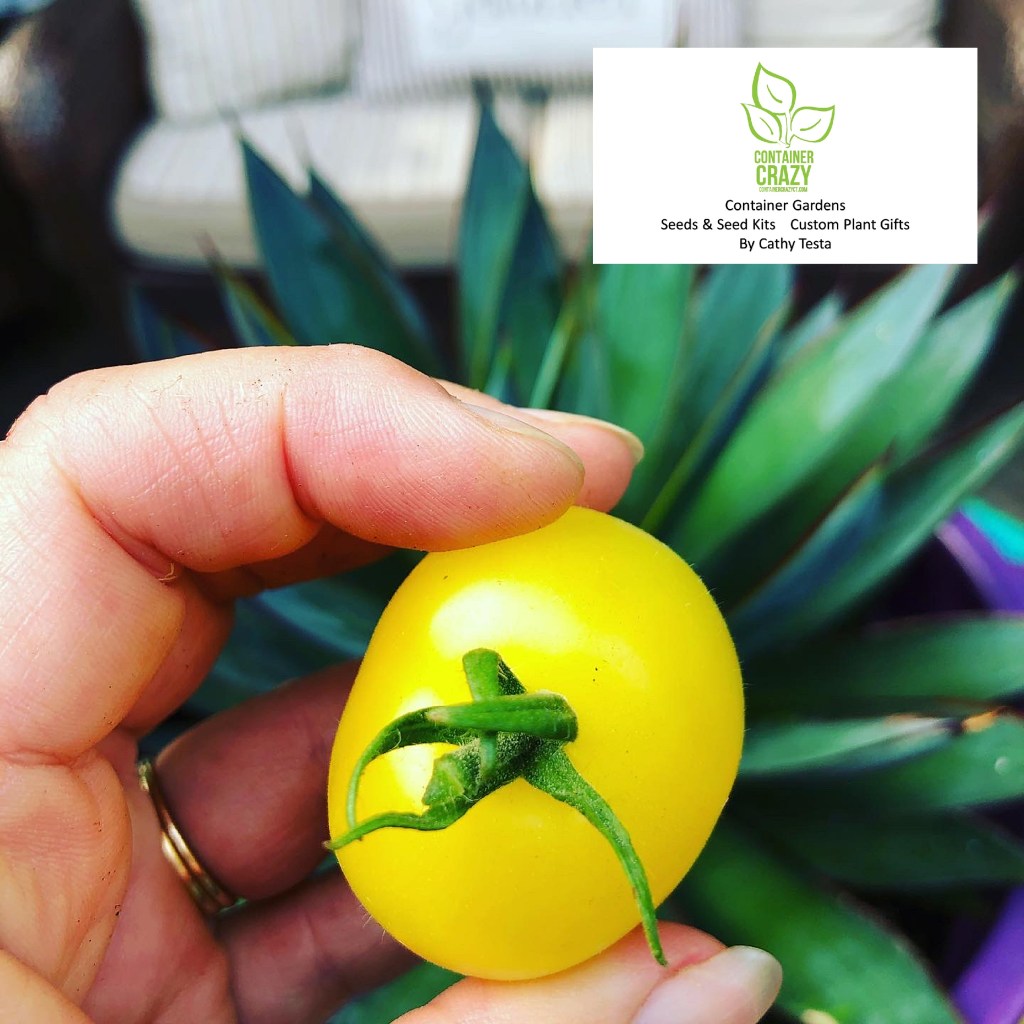
Sometimes when I would reach in to take a photo, I would put my hand near the tomato so you could see how big it was getting, and the texture of it felt heavy and firm. As it ripes, as noted above, it starts to feel a little soft to the touch, like if you push slightly on it – it feels soft. When it turns a rosy color, it is ready. These also ripen very easily on the counter – which I discovered when I grew them on my deck in fabric grow bags last year. Because those were not wrapped in wire, a squirrel had discovered them, so I picked them before they got rosy and it was fine on the counter to ripen.

Doesn’t this Upstate Oxheart Tomato look delicious?

Oh another thing, which I just remembered, was I usually used pruner to cut them from the stem because they did not tug away easily. I didn’t want to damage them so pruners were used to cut the stem.

Sliced to Perfection

To give you an idea of the size, I put a wine opener on top of four slices. Just looking at these makes my mouth water. Another way I like to eat them, other than just taking a fork and knife and taking bites, is tossing them with pasta, basil, chopped garlic, olive oil and a little amount of balsamic vinegar (like a capful). Yumm.

Easy fresh – Just toss all together

I typically will mix all in a bowl first without the pasta and let it sit on the counter to blend the flavors. Then when the pasta is ready and hot, add that in. So easy, oh and let’s not forget the fresh parmesan cheese!

Look at this tomato – not a blemish!

The fruit may get a crack or two on the top from the weight, but overall, I felt like these were blemish free and smooth skinned. The seeds are started indoors 6-10 weeks prior to our last spring frost. I did not order more seed of this variety this year because I want to try some other heirlooms and beefsteak sized tomatoes, but I still have seed left and probably will grow a limited amount of the Upstate Oxhearts.

Now, on to the How-To’s.

Get the seed! Upstate Oxheart Tomato (Solanum lycopersicum) gets a thumbs up in my gardening book. If you are local and want seed from me, see my contact information below. I sell the packets and can mail it to you or deliver if local. But if you want a big tomato, the first step is get the seed.

Get a big pot or a large fabric grow bag. Set it up in the sunniest place outdoors when it is time to move the seedlings (transplants) outdoors. I had the big black pot shown above in a very very sunny area, so sunny, it doesn’t get much shade at all, but it did require watering, and I would drag my garden hose there and hang it over the top of the wire, and let it run for a bit to water it.

Fill the pot with the appropriate potting mix, compost, some fertilizer, and you are good to go. Be sure when you plant it to surround it with support somehow right away, so as it grows, it will have the support/cage required to hold up those big fruits. Believe me, it is so fun to point them out. “Hey, come check out my giant tomato!” When I would show friends, they would gasp when they saw them. Sometimes they would ask me – what did you feed that plant?!

It is not the feeding, it was the variety and care to start with. Feeding only enhances an already really large tomato, so stunning, it will make your own heart beat!

Happy Valentine’s Day Everyone!

Cathy Testa
containercathy@gmail.com
860-977-9473

See my site: WorkshopsCT.com for Seed Sowing Kits!

Growing Dwarf Tomatoes and Are They Easier to Grow?

2 Comments

Last season, I grew two types of dwarf tomatoes from seed. I was interested in dwarfs for a couple reasons, one being that dwarf tomato plants are well suited for growing in container gardens and patio pots and because I truly enjoy mixing up the types of tomatoes I grow.

Mandurang Moon Dwarf

Mandurang Moon Tomato was one dwarf I picked out. It has a dwarf habit which refers to the plant’s size (not the size of the tomatoes). It also grows a thicker stalk so it is a bit more solid and sturdy. And the tomato shape is round to oval, with a mild yellow to cream coloring. The size of the tomato fruit is larger than a cherry tomato, but not as large regular sized tomato. However, I had issues with starting them indoors from seed, and at first, I was miffed as to why.

Mandurang Moon next to a Fox Cherry Tomato

SLOW TO NO GERMINATION

I grew them along with all my other types of tomato seeds. All were placed in the same type of seedling trays and set on seedling heat mats in the same environment in my greenhouse, and with same exact seedling potting mix. I wasn’t sure what went wrong, but I quickly noticed the Mandurang Moon tomato seeds were not germinating well. I had only a few which sprouted as compared to other tomato seeds I was starting.

Mandurang Moon Tomato – Only a few germinated

THIS DWARF PLANT NEEDED MORE WARMTH

I took the seed packet back out of my files, and re-read the directions. A key aspect stood out. It says to “start seeds indoors in a warm location with plenty of light.” The “warm location” was key. Upon doing more research, I discovered warm could mean up to 80 degrees F. I can’t remember where I read that temperature, but I wrote it down in my notes so I would remember for this year, that these dwarfs may need a bit more paying attention to in regards to temperature and light as compared to the other types of tomatoes I grew from seed.

Size and color of this dwarf Mandurang Tomato fruit

COLD TEMPERATURES WILL PREVENT GERMINATION

My greenhouse, which is a lean-to style, is not heated to 80 degrees in March or April when my seeds are typically started. It is more along the lines of a 55-60 degree F greenhouse because I would be homeless if I heated the greenhouse to higher temperatures. Heat costs are high, so I keep it to 55 to 60 degrees F.

However, on sunny days, the greenhouse temperature quickly rises to above 80 degrees F. It is like the tropics on sunny days, no doubt. Usually this flux of temperatures (55 degrees F on cloudy days to over 80 degrees F on sunny days) scenario is not a problem for starting seeds, but apparently, it could be an issue for this type of seed (as noted, it needs warmth). Most seeds germinate best in temperatures from 60 to 75 degrees F. And having a greenhouse offers abundant sunlight unless we have clouds all day, which contributes to the warm and light requirements.

CLOUDY DAYS OF WINTER

In the winter, we get many cloudy days. I started to consider the seeds did not germinate well because overall my greenhouse is not warm enough. And I don’t currently use grow lights. Usually all is fine with my tomato growing from seed with the sun’s rays through the greenhouse windows and roof, but in this case, it may have caused the slow germination to no germination issue and made this dwarf a bit more difficult to germinate from seed. Although not all was lost. By the way, when I start researching grow lights, I will share it here. Supplemental light, especially if growing indoors in the home, could be as easy as mounting a fluorescent light above the seedling trays. Adding grow light enhances all overall.

VIABLE SEEDS

I knew the seeds were fresh and not old, so it was not due to a potential viable issue. If seeds are not stored appropriately, this could be a problem for germination. And as far as light, well, I’ve been fine for years with the sunlight I receive in my greenhouse (on the sunny days), but overall, seedlings need light once they emerge from the soil. Otherwise, they may grow leggy, and the best scenario is about 14-16 hours of light. One of these days, I may invest in grow lights but the greenhouse natural light has worked for me for many many tomatoes.

One I held in my hands shows the size and color – Yummy!

NUTURED THOSE WHICH DID SPROUT

I did have some of the Mandurang Moon seed which sprouted, and I was very careful to nurture them since there were not many, and I planted them along with all my other tomato plants outdoors when the safe outdoor planting timing approached. And the dwarf Mandurang Moon did produce fruit and they were delicious. So not all was lost. The seeds for this dwarf are started early indoors. And transplanted outdoors when they are about 5″ tall.

TIMING IS 6 TO 8 WEEKS BEFORE FROST

The timing of when to sow this dwarf type is indicated at 6 to 8 weeks before your last frost date. That puts me in the March timeframe when it is still cold outdoors, but as noted, it often becomes a tropical oasis in my greenhouse on sunny days. However, I think what I will do this year is two things: Sow these seeds a bit later (closer to the 6 week date before frost date) and also I may just do a seedling tray inside the home to compare the differences. Will the fact my home is warmer than inside the greenhouse improve the germination rate and timing? We will see. Maybe I will have them germinate in the house and move them to the greenhouse when they get a few leaves growing so they will obtain ample sunlight to keep on growing. I will keep you posted! As far as the other dwarf I grew from seed, I will write about that one later!

Please, if you enjoyed this post, please comment and/or share any dwarf plants you grew in the tomato category. I’d love to hear if you have any tips to offer.

Thank you,

Cathy Testa
860-977-9473
containercathy@gmail.com

Mandurang Moon with a Mikado Tomato and some fresh Mozzarella and basil – all grown from seed!
Except the cheese of course!

My Honey harvesting our Honey Drop Cherry Tomatoes

4 Comments

Last season, I grew about 5-6 tomato plants in 20 gallon black fabric grow bags along one side of my upper deck. The end of the deck, where we lined them up, is the east end and I put the plants along the deck’s wooden railing on the south side, opposite the wall of my house.

Each grow bag had one individual tomato plant in it and the grow bags were spaced out about 3 to 4 feet apart. I also put the grow bags on caddies with wheels (plant saucers) so I could turn or re-arrange them as needed. Each had a square tomato cage placed around the plant for support. I prefer the square cages, they fit perfectly in the fabric grow bags and remain stable.

This is what the plant looked like in the grow bag, but it gets over grown quite quickly in summer, with the tomato stems reaching up and over the deck railings, thus harvesting the tomatoes later in the season was getting a bit tricky.

Grow Bag with my Beautiful Tomato Plant growing along smoothly

No worries, my husband, Steve, loves tomatoes so much, he quickly grabbed a ladder from our garage and carefully climbed up to pick the cherry tomatoes which were unreachable from the deck side. We grew a few different types of cherry tomatoes in these fabric grow bags, but hands-down, one of my all time favorites is the “honey drop cherry tomato.”

Honey Drop Cherry Tomato 2020

We, my husband and I, snack on these delicious cherry tomatoes all summer long. In fact, sometimes I have to remind Steve to leave some for me when we get a basket full. He gobbles them up quickly.

AS CLOSE TO A HONEY TASTE AS YOU CAN GET

The honey drop cherry tomatoes are a beautiful golden color and are very sweet. The seed packet shows a bear going for the tomatoes, and this makes sense to me. They are as sweet as honey. And my honey, Steve, harvested them often for us (or for himself!).

The name of this cherry tomato is perfect because if you ask me, the flavor of them is as close to honey as you could get. It is like eating a piece of honey candy without the guilt. Thus, the bear on the seed packet, again makes sense. I’m not sure what else I can say about how yummy these are!

Steve harvesting them from the ladder

When Steve was gathering them for us from the ladder, of course, I was saying, “Be careful – don’t fall down.” I’m so happy he enjoys tomatoes immensely because I certainly put the effort into growing them (and I enjoy the whole process from start of seeds to the first and continuous tasty bites in summer), and I grow all my plants in container gardens. It is worth the effort for both of us.

FABRIC GROW BAGS ARE HANDY

I find the fabric grow bags work wonderfully on the deck, for many reasons. Such as they are light weight to set up initially, easy to order and store, they have handles attached, so I roll the plants around easily by tugging on the handle (in the beginning phases when I set them up), and the air is able to breath through the fabric which offers many soil and root benefits, yet, we know, or you may not know, depending on how often you visit this blog, that watering is required because the soil in the container gardens (grow bags in this case) dry out much faster than they would in the ground. Drainage works well through the fabric, thus no drilling of drain holes in the bottom of the pots (as done with plastic pots) is required. Also, when the season is over, and I cut all the tops of the plants off, Steve and I each grab one handle and carry the big root ball down to the driveway for when I do my clean up phases in the fall.

Honey Drop Cherry tomatoes

OTHER TYPES OF CHERRY TOMATOES

These cherry tomatoes are a nice size, but another type I’ve grown, Fox Cherry Tomato, is a bit larger, and you see some of those in the photo above (the reddish ones in the basket which Steve is holding). The location on the deck is pretty good from the standpoint of receiving full sun most of the day and the area is easy to water. We have a garden hose at that end of the deck always ready to do my routine of watering all plants in containers on our deck – which I rather enjoy, so it is not a bother to me. I find watering therapeutic. When I water my plants, at least daily in the heat of summer, I enjoy looking at the plants, seeing the cherry tomatoes ripen, and I may even have a hummingbird come by to investigate the plants near my cherry tomato plants, or I will watch the bees visiting the flowers earlier, things like that – I just don’t mind it.

Reaching in to find them all

You can see all the many clusters on this plant, hanging from above, and the plants seemed very happy indeed to keep on growing this way. In fact, it allowed some nice air circulation around the stems hanging to avoid any potential issues. Poor air circulation around tomato plants may lead to disease problems later. As noted in the prior post, a squirrel did find a tomato or two but overall, we managed to harvest them for ourselves. The squirrels could not really reach the clusters hanging so that was a nice benefit too.

WHEN TO SOW THE SEEDS

These cherry tomatoes are started indoors 4 to 6 weeks before our last frost date in Connecticut. They need a warm bright spot indoors (if you sow them in your home). I start my seeds in my greenhouse on heat mats and had no issues with these types of seeds sprouting easily and growing until I could harden them off outdoors later and before they are grown outdoors in their permanent locations. They were a popular selection when I sold the seedlings because those of you who bought them the year before discovered how amazing the flavor is and it is a vigorous grower. You can expect to start picking cherry tomatoes from it about 70 days from the time you transplant the seedlings into your containers, grow bags, or the gardens. In fact, I think if you are new to sowing seeds or starting vegetable plants, cherry tomatoes are one of the easiest to grow and you get a huge harvest, so it is very rewarding.

A FEW SEED PACKETS AVAILABLE

I have a few seed packets of the honey drop cherry type remaining from my last year seed orders, and I have other cherry tomatoes on the ready to grow this season. The Fox Cherry is another favorite, but for flavor, I have to say, I think the honey drop were the best last year – well, we can’t say that can we? Cause all fresh home-grown tomatoes taste amazing! I guess the main difference with the fox cherry and honey drop is the fox cherry tomatoes are larger. I also like to grow the Bumble Bee Mix Cherry tomatoes, which I will blog about soon. I got more of the bumble bee type (new seeds) because I ran out of those seeds last year. They are somewhat a striped color (pink, yellow, and sometimes a slight purple tone, also super tasty). The bumble bee type need to be sown earlier than the honey drop however, but no bother, I can’t wait to start sowing seeds.

By the way, the honey drop cherry tomato is indeterminate, with a vining habit (versus bushy) and keeps growing and growing giving you a steady supply of fruit until the fall frost kills the plants. I don’t pinch or sucker the plants. When they get a bit unruly because of so many stems growing, I may cut off some of the stems with clean pruners to give the plant more air circulation as needed. Otherwise, I let the ramble all around. I have taken a small round table to prop up some of the stems on the deck side as needed. I know it may seem silly, but it is all worth it to me and to Steve. We love these cherry tomatoes, and so will you if you decide to try them.

Thank you for visiting my blog. Please comment by clicking the link below or the red comment box (if viewing from a laptop), I’d love to hear from you. Let me know, what is your favorite cherry tomato to grow in your gardens?

Cathy Testa
860-977-9473
containercathy@gmail.com
http://www.ContainerCrazyCT.com
http://www.WorkshopsCT.com
http://www.ContainerGardensCT.com

Protecting my Tomatoes from Squirrels

Leave a comment
Netting the Tomatoes

The squirrels discovered my beautiful Upstate Oxheart tomatoes on my deck last year and out of frustration, I decided to net them with plastic fruit type netting. You can see from this photo, the tomatoes are huge. The seed packet details these as “a stunner: huge, heart-shaped, and delicious fruit,” all of which is very accurate.

GROWING FROM SEED

I have grown these from seed the past couple years and I was super impressed with the yield, sizes of the fruit (2-3 lbs), and exceptional light but favorable sweet taste. Additionally, they really do look like the inside of a heart when you slice them open. Both my husband and I enjoyed eating these beauties, and it didn’t take long for a squirrel to spot them up on my high level deck along the railing last season last summer at the peak of their tomato’s ripening phases. They ripen to a rosy pink color.

FABRIC GROW BAGS

I grew them in my black fabric grow bags last year and the plants grew large and some of the branches hung over the railing of the deck. Each time I’d witness a fruit starting to turn slightly pink, I started to worry about a squirrel discovering them – which they did and that was starting to get really annoying. Nothing is more frustrating then seeing a big bite out of a huge tomato just about to ripen to maximum perfection! Ugh!

DID THE NETTING WORK?

Did the white plastic netting, surrounding the fruit only, work? Kind of. I didn’t see them munch on them in the nets, but I also got accustom to taking the fruits off the plant before they were fully ripened so the squirrel wouldn’t have a chance either. Then I would let the tomato fruit finish ripening on the counter. This worked just fine for this type of tomato – meaning it ripened with no big issues right on the counter.

WHEN TO START THE SEEDS

I didn’t order new seeds of this type this season because I still have some packets left from 2020 and they are still very much viable, but I probably will not sow all of them, or if I do, just a limited amount this year because I am excited to try new types of tomato and have new 2021 seed for the newbies on my seed sowing list.

But this type of tomato needs to be started early. The upstate oxhearts seeds should be started 6-10 weeks before our last spring frost date. Last year, I started them at the 10 week mark, but this season, I’m going to wait to start them a little later. I found they grew quite large in the greenhouse and some needed to be potted up into gallon pots, so I made a note to maybe start them more like at the 8 week mark and see how that goes.

HARD WIRED MESH IN A BIG POT WORKED

The squirrels seem to be more aware of my goodies the past two years. The year prior, I grew the upstate oxheart tomatoes in a giant black plastic pot, which is 3 feet tall, so kind of my waist height. I inserted 3 feet long bamboo poles into the pot along the top rim and then surround the whole thing with hard-wired mesh. That definitely kept out any critters, like squirrels or groundhogs, but it was difficult for me to “reach in” to get the tomatoes. However, it did prevent any unwelcomed diners from visiting the fruit. The pot also was located in a place that was a job to drag my garden hose to it to water, but it worked at keeping critters away! In fact, I found those really big pots to be useful that way – they can’t easily climb up the pot and into the big pots, but for those in grow bag last year, on my deck, squirrels would sometimes jump from a tree limb onto a deck railing to go investigate. We decided to trim back some trees near the end of the deck to make it more difficult for them.

SQUIRRELS WON’T STOP ME

The whole issue of squirrels visiting the tomato fruits is a big problem it seems for many, but for myself, I know it won’t stop me from growing tomatoes again this year. One neat thing that happened with the plastic mesh (shown in the photo above) is a cross-cross pattern appeared on the skin of the fruit. It developed a pattern! That was interesting.

I suppose I will keep testing more techniques to keep the squirrels away. I read that hot pepper spray may work, and there are probably some products on the market. But for now, my strategy is a) not to give up, b) pick the fruit before it is fully ripe, c) yell at the squirrels, and or d) grow them in that super-sized pot again that is so high up and wrap the whole thing in hard type of mesh wire. Gosh, the things we do for fresh juicy tomatoes.

WHEN THEY RIPEN

Upstate oxheart tomatoes ripen 84 days from transplanting the seedlings into your pots or gardens. They are indeterminate plants so they will keep growing taller and produce fruit continuously. Pruning or staking them is necessary or letting the branches (vines) topple over my deck railing worked well. The plant can reach up to 10 feet high. It sprawls out and around and when I grew them in that big black pot I mentioned above, the hard-wired mesh I put around it served to help support it as well. The fruits, which can grow to 3 lbs sizes, are heavy so that extra support is helpful.

Cathy Testa
860-977-9473
containercathy@gmail.com
http://www.WorkshopsCT.com
http://www.ContainerGardensCT.com
http://www.ContainerCrazyCT.com

COMMENTS Please! If you enjoyed this post – please comment by clicking the red block on the top. I would love to hear what you have used to keep squirrels way from your tomatoes in the summer.

When to sow seeds

2 Comments

The quick answer is, if you live in my area of Connecticut, usually early to mid-March for some plants. But each type of warm season vegetable has a bit of different timing as to when to sow the seeds indoors ahead of the planting season. And the best way to double-check those timings is by looking at the seed packets and/or following specific seed sowing guides.

For beginners, it may feel overwhelming to do all the planning homework on when you should start start sowing your seeds for your favorite tomato or hot pepper plants. But knowing when to start is key. Many people start by buying packets without really knowing the timing, and that is sometimes a mistake if the seeds are not ordered on time and/or if they don’t realize the growing requirements of the plant itself.

If you start sowing seeds indoors too early, things get messy. The plant will be too large and root bound before you are able to safely plant it outdoors (after frost in May). If you start too late, you are basically not giving the plant enough time to produce fruit (and that would be a major disappointment).

I think what is even more important than knowing when to sow the seeds indoors, is when to get your supplies ready.

Last year, with the onset of COVID, people discovered many seed sources were so bombarded with orders that the seed sources were sold out or delayed due to shipping issues associated with COVID. This may result in a major problem, you definitely need the seeds on time to start them on time.

This issue, however, actually allowed me to sell seed packets and seed sowing kits I had already assembled for an upcoming farmers market talk in early spring last year, which was also cancelled due to COVID.

I quickly let everyone know I had them available and people came by to pick them up from me via zero-contact porch pick-ups. The whole process was a fun adventure for me and people told me they enjoyed not only my seed selections but my instructions and guides.

In my opinion, you should really start to think about the whole preparation process right now in late January or at least by early February.

Why? Because you need several items to sow your seeds: seedling trays, seedling mix, and a set-up (place in the home with sufficient light) or you may even need to purchase grow lights to hang over your seedling trays.

I’ve created 3 guides which I included in the packages for anyone who buys seed packets from me or seed sowing kits. Each guide is a bit different.

One guide is a chart which shows when to sow the seed, how many weeks it will take for the plants to be ready, when to plant it outdoors safely. It is a nice one-pager for reference.

Another chart I provide is a new one I created this year, which is also a one-pager and it shows “the weeks before frost” specifically for the seeds I am offering this season. If you wish to learn which seeds are available, just email or text me (see below information) or visit http://www.WORKSHOPSCT.com.

In other words, each type of plant must be started a number of weeks before your last spring frost date. My “weeks before” chart lists shows the 10 week mark, 6-8 week mark, 4-6 week, 2-4 week, etc. For example, some hot peppers are started 10 weeks before, which is early March (when to sow).

Lastly, a chart I provided last year was an actual “calendar month by month.” It is similar to wall calendars. I’m still thinking about if I should do this one again, or just use the new “weeks before chart.”

But the general point is – all of this information took lots of time for me to assemble for you to make it easier for you to do your sowing.

My seeds are primarily focused on warm season vegetables such as the tomatoes, cherry tomatoes, hot peppers. I hand-pick new varieties each year based on their uniqueness, taste, and if they are heirloom, etc. I also pick out parsleys, basils (3 types), and chives, etc.

I also created a chart for young kids which is a way to record the progress of the seeds. I’m liking this idea more and more to include with anyone who buys seeds and/or seed starting kits from me for their kids to use as additional education tools.

Photo sent to me by a mom – she was hardening off the plants she sowed from my seed kits with her daughter

Another reason why planning is so important is because plants growing indoors from seed need to be hardened off before you put them into container gardens or patio pots (or gardens) after frost in the spring. This process occurs one to two weeks before you plant them outdoors permanently. It is a process to acclimate the seedlings to the outdoor environment.

Once of the best parts of offering the seeds and sowing kits is that I hear feedback from buyers of how wonderful their harvest is – and yes, sometimes there is feedback of issues (the dreaded tomato hornworm). But that is all part of the learning process.

A couple of my buyers have children. I absolutely adored when one mom sent me a photo of her daughter holding a huge Upstate Oxheart tomato next to her face. These tomatoes plants grow huge tomatoes, and it was super fun for them. And they sent me of a photo of a tomato on a kitchen scale weighing 2 lbs. too. They were thrilled, and it still brings a big smile to my face knowing my help got them into growing and enjoying their new hobby.

So cute!

The more I hear of the kids with their parents or their grandparents (the cool ones! LOL), the happier I am that they experienced the sowing process together. This year, I picked a really compact and tiny tomato variety that I think will be much fun for kids (and adults).

But it all starts when you decide to give it a go. Here is a tip sheet if you are considering it for this season.

Thank you,

Cathy Testa
860-977-9473
containercathy@gmail.com
Located in Broad Brook, CT
By appts, pick-ups, mailings, and drop offs
See more at http://www.WORKSHOPSCT.com

How Many Seeds Per Packet

1 Comment

Last year, when I was showing my seed packets for sale and my sowing process, a friend who was interested in both asked me, “How many seeds are in a packet?

This seems like a reasonable question to ask, especially if you haven’t tried sowing seeds before. In general, for the seeds I sell, there are about 25 seeds in the tomato and cherry tomato seed packets, except for one I offer called, Upstate Oxheart tomato. It has only 15 seeds per packet. Why? The tomatoes are nearly seedless and that is apparent when you cut a Oxheart tomato in half – and yes, it is shaped just like a heart – amazing. There are hardly any seeds in the actual tomato. This makes a challenge for the seed producers, so I always am sure to sow those seeds carefully as I don’t want to waste one – these tomatoes are big and juicy.

Oxheart tomatoes are not only huge! They are nearly seedless.

The same is about true for the hot pepper plants I’ve sown and grown, about 25 seeds per packet, and cucumbers. But plants like parsley will have 200 seeds, same with the basils, and they are smaller seeds than the typical tomato or hot pepper seed in size. In fact, they are so tiny that I am unsure how anyone could plop one tiny seed per a seed cell tray filled with seedling mix. Often, I will scatter seeds over the top of the seedling mix and lightly dust it with fine seedling mix to cover them. That is the case with how I handle parsley and basil seeds. Same with some lettuce mixes. I call it the ‘scatter’ method and I show exactly how I do it via my video’s. Videos are provided to my purchasers of seeds and seed kits, by the way.

Most seed companies will identify the number of seeds per pack, but other companies may just list the net weight on the packet or envelope. Some will provide this information in milligrams.

Seed sizes vary. Hot pepper and tomato seeds are about the same size, but larger seeds, like those of cucumbers or a moonflower, for example, are much larger and easier to handle. Larger seeds are great to use if sowing seeds with young children learning for the first time how to sow seeds. Think pumpkin seeds too.

I obtained Celosia seed one year. This is a flowering plant producing colorful fuzzy flowers, but the variety I selected is a mammoth type. It grows up to 60″ tall and you need to start the seed early indoors. When I opened the packet, I couldn’t believe how tiny the seeds were. There are 200 seeds per packet. Can you imagine sowing 200 seeds and having 200 of those plants?! So, I’m sure there is a method to sow seeds which are super tiny, but I decided to fill a square flat tray of about 3.5″ deep with the soil mix and just scatter the seeds on top. It worked. They germinated and then I carefully pricked out the seedlings when they were ready into 3-4″ pots to continue growing them. I have to admit though, I am not sure if this was the best or recommended method. To give you an idea of how small the Celosia seeds are, the packet indicates that there are about 600,000 seeds in 1 pound.

I often use the scatter method with lettuce mixes too, and will sow them in small long window box types of containers, always being sure to drill drainage holes in the bottom if there are none. I find for lettuce mixes, parsley, and basil, this scatter method works perfectly. It is important to scatter them as evenly as possible and you don’t need a whole packet to do this (unless your window box is huge). For example, one type of lettuce mix I sow has 500 seeds per packet. I often use half of the seed packet or less per container. Then I lightly top the seeds with fine seedling mix and let it all grow. If you want to prick out each individual tiny seedling later, you may do so to put them into larger pots (or the next size pot up) for the basils for example. Some may find the scatter method wasteful, but it works for me. Because you may harvest lettuce mixes, parsley, and basil repeatedly from the plant by cutting some off and just letting it regrow, I find this is suitable.

A larger seed popping up from the mix

Another time, I grew Panther Edamame Soybeans from seeds. The seeds are large, similar to cucumber seeds (but round), they are easy to handle. I was so excited when I grew these in patio pot containers on my deck. Because it is just me and my hubby at home, a couple plants was sufficient to get a handful of edamame beans to put in a bowl, add some water, and micro-wave to heat them up and then I toss some sea salt on them and eat the beans right from the pods. Yummy. They have a nutty flavor and these seeds may be direct sown into the ground or your patio pots if you want, versus starting them early indoors before the planting season. The packet holds about 100 seeds.

Some seeds need special treatment prior to sowing them, but tomato and hot pepper seeds are not one of them, but others like the moonflower needs to be nicked before you plant them. Otherwise, the hard seed coat prevents water from entering the seed for germination to start easily. When handling a seed that requires nicking (scarification), it is easier if the seed is bigger; it helps a lot as you attempt to make a nick in it without damaging the interior of the seed (the embryo). Many seeds with hard coats need to be nicked with a file, sandpaper, or a tool. Some may be soaked in water first. It is best to research the seed before proceeding and follow the recommended method. I have never seen a tool specifically for nicking hard coated seeds on the market (I think if someone invented it, it would sell like hotcakes). I read once that commercial growers use acid, something we surely can’t play with! Some hard coated seeds with crack open if you soak them for 24 hours.

Do you sow a whole packet of seeds? Let’s talk tomatoes, if you have 25 seeds in the packet, should you sow them all? Some may say yes because if any of them fail, you will have extra’s. Some will say no because are you really going to plant all 25 of those tomato plants? And if you did sow all of them, remember, you have to move them from the seed cell trays at some point into a next larger size pot and may even have to move them into a 1-gallon size pot before they go outdoors. This requires more pots and more potting mix.

Photo from Cathy T’s greenhouse – couple seasons ago. Can see the scatter method in the window box type planters.

One thing I love about the seed packets I get and sell is they are an envelope within an envelope. Each packet has a envelope (white) containing the seeds, and it has all the planting details on the white envelope. The white envelope is inside an outer separate envelope with even more plant information, and it is a colorful art pack made with a thicker type paper. It is almost like a little sleeve to protect your seeds within. I like that because if you don’t use all of the seed, you have a protected package to store them in.

Fox Cherry Tomatoes coming up – One seed per cell was used

Storing is another topic but when well stored, the seeds will remain viable based on the seed type and all of that, and the number of years is different based on the type of seed or plant. Look it up if you are concerned and use up all the seed if it is a type that doesn’t remain viable for more than one year. Parsley is an example. Parsley seed should be used in year one. At least for the type of parsley I have been sowing.

The next question that followed how many seeds are in a packet, was of course, ok, “How much soil (seedling mix) do I need?”

That is a good question! I love questions! LOL. The seedling mix often comes in an 8 quart bag in retail locations. I will put about that amount into a big bowl and add some water (I think it was one cup but I will double-check) and then very lightly stir it to moisten the mix. You don’t want mud or mush, you only want to lightly give it moisture. In fact, don’t pour the whole cup of water in there initially, pour some water, and mix and feel it in your hands. I often sow seeds in 32 cell plastic black trays with 3-3.5″ depth. I like that size plus they fit nicely on my seedling heat mats. I use about 8 cups of soil per tray, I believe. I will check my notes! Your containers or seed trays should be filled with pre-moistened mix or medium (as they refer to it) before you put your seeds in the trays. You may also moisten the mix in a plastic bag if you don’t have a bowl handy. Another method is to put the dry soil into your seed trays and set it in a base of water so the water will wick up into the mix prior to sowing your seeds. I don’t do this method however. I mix the soil with water like a cook does in the kitchen in a big bowl and it works for me. The seed kits I offer has mix, trays, and instructions as well.

By the way, I like the plastic trays because they are pathogen free and reusable. I have had issues with peat pots before. For some reason, they tend to grow mold on the sides. I tend to stay away from those now, however, if you use peat, I’ve read you need to moisten the pots first and never to reuse the peat pots which would be difficult anyhow because they fall apart. Peat pots are great for plants which do not like their roots disturbed (cucumbers) so you place the peat pot and the plant right into the ground when they are ready for outdoors. And I have never used compressed peat pellets. They are just not for me, perhaps because I always have soil mixes on hand. In fact, I got all my soil bags already last week. I wanted to plan ahead. More on the soil and potting mix world later, that is a big topic. Sowing starts in March so I am preparing ahead right now in January – and you should too!

Thanks for visiting.

Cathy Testa
860-977-9473
containercathy@gmail.com
See http://www.WORKSHOPSCT.com if interested in seed packet purchases.
Location: Broad Brook, CT
Part of East Windsor, CT

All You Need to Know About Starting Seeds Indoors

2 Comments

If you search the web, you will find a plethora of sites offering many articles, step by step instructions, growing charts, and tips, but will any one link or article give you all the simple answers you need to start seeds indoors? Probably not.

Think about this – there are millions of vegetable plants you may grow from seed in our world. How could anyone sum it all up in one fell swoop?

When I started growing vegetable plants from seeds, the desire to do so was sparked by the love of art packs from a particular seed company. The art sparked my interest and then I started to buy seed packets. I was interested in unique tomato plants and flashy hot pepper plants, rather than the traditional types I ate growing up on a farm. Maybe I got overloaded with the same types of tomatoes from when I was a kid, I don’t know, or maybe it is my love of art and creativity that got me into the different, unique, interesting varieties because they are like a work of art to me. A colorful purple tomato to me is cool. Or a pepper shaped like a UFO – that rocks! Plus you get to eat them and they taste delicious.

Need I say more? This is a photo from last season!!

However, I have spent countless hours reading seed sowing books, reviewing growing charts, looking up frost dates from different sites and all of which seem to give a slightly different answer, and determining what supplies and seeds are best for my area of Connecticut, and then I spent hours putting my own guides together. I guess, in some ways, it is good that I am an organized person and an over-thinker! Maybe I looked at too much, because my head would spin. After all, you could just buy a pack of seeds and plop them into soil, and it would sprout – but would it be successful?

Today, I want to try to share some of my seed sowing considerations in a random casual fashion:

#1) Start small and pick easy to grow plants. So, what veggie plants are easy, what grows like weeds? Hmmm, well, that is a tricky question. One may say, well a pumpkin seed is sure to pop up from the soil or a cucumber seed, but do you like pumpkins, do you have space to grow pumpkins in containers or a garden? They sprawl out for miles (well, for many many feet) and so that may not be the best choice for you. And cucumbers, well, they vine up and down and all around, but they don’t like their roots disturbed, so even though they are easy to grow, they have considerations if you start seeds indoors and then transplant. In my opinion, some herbs are easy to grow, like parsley, or mixed lettuces seem easy, or some basils, but even if they are easy, they all have unique personalities to consider. For example, basils like warmth. If you put them out too early when cool in the early spring, they don’t like that and won’t flourish. Cherry tomatoes are easier than regular tomatoes in my experience. No matter what – you will get tons of cherry tomatoes from one plant – it is amazing! Parsley is easily and it likes a bit of the cooler weather, unlike the basils.

Shown in this photo, Thai Basil (top left), Sacred Basil (top right), Curley Parsley (bottom left) and Genovese Basil (bottom right). Easy to grow herbs, as seen last year!

#2) Get the tools ready. Do you need a grow light? Many people will argue you do. And it does increase your success at sowing vegetable seeds indoors. But what is success? A perfectly straight upright seedling? Maybe. Maybe not. After all, I know many people who grow seedlings in seed trays set on their old fashioned heat radiators in their home, and the seedlings leaned towards the window for more sunlight, but they made it – and make it into their gardens. However, as you learn more, you start to consider the options of getting a lighting system so it increases your success and makes for healthier seedlings. As for myself, I have a greenhouse which provides sufficient lighting when the sun is out. In early spring, on many days, there are cloudy days. So far, I’ve gotten by just fine without grow lights. As I learn more, maybe I will get grow lights to add to my set up, but it is not going to be this season. Anyhow, what I’m getting at, is at a minimum, think about the tools you will need to sow seeds and start to pick up your supplies based on what you think you want to grow. BTW, I do use heat seedling mats to encourage germination of the seeds and to increase the start of healthy roots. This I have found helpful to invest in. That is a tool you may want to consider ordering now.

#3) Soil mix – This IS critical. First, for the ultra beginners, you should know that you can not sow your seeds in dirt from the ground for vegetable plants you need to start indoors in seedling trays ahead of the growing season. Believe it or not, when I offered seed kits last spring, one person thought you could put dirt from the ground into your seedling trays. They said my instruction sheet enlightened them and they had no idea dirt was a no-no. So, when you go out to get your soil for sowing seeds indoors, get bagged seedling mix or sterilized potting mix for patio pots. Either will be fine. The seedling mixes are finer than potting mixes, usually fresher since it is going to be seed sowing time soon, and perfect for tiny seeds to make contact with the seeds, etc. If you don’t want to deal with that, and want to sow seeds in the dirt, pick vegetable plants that you may directly sow into the ground after all chances of our spring frost and when the garden soil is workable. But you need to determine which plants you can sow directly into the ground, things like beets, for example. Some plants prefer to be directly sown into the ground. If you pick this option – remember, you have to prepare your garden area ahead as well.

A tomato seedling that was potted up into a larger pot by Cathy Testa

#4) Timing. This is another critical factor. All plants grow at different rates. Some take longer and some are faster. They need a certain number of days or weeks before they produce fruit. If you start your seeds too soon, they will be outgrowing your starter pots, getting root bound, start to struggle for the moisture it needs, and even start flowering, which leads to fruit (and for ultra beginners, flowers are where the fruits are produced. I don’t mean to sound rude or condescending, but if you are new to the world of gardening and plants, and didn’t know this – don’t feel embarrassed. I didn’t either when I was a kid and I grew up on a farm!). So, say you sow your tomato seeds too soon, then they grow larger and larger indoors, and then you need to put them in a bigger pot, and then they get flowers and then, you want to put the plant outside but it is still too cold out – it may even freeze one night if the temperatures drop down. You could loose the flowers from the cold temps, now you will have no fruit. Potentially, all your seedling work is lost. The same goes for starting seeds too late. If you start too late, your plant will sprout, it will grow, and you will think, awesome, and, now I can put it into my gardens or containers in spring outdoors, fine, but then you wait and wait and wait after its been growing in the garden, and it is almost early fall and you still don’t have any peppers. You started the seeds too late indoors. Peppers take more weeks to produce their peppers for some varieties (as an example), they have a required longer growing season. Timing is a critical thing. Get yourself a seed sowing calendar, look it over, and count back the number of weeks it indicates on the seed packet (or inside the packet) as to when to sow your seeds indoors. You count back from your last frost date in spring which in Connecticut usually falls around mid-May. If you end up buying seeds from me or a seed kit, I already did all this timing homework for you in my charts and calendars based on the seeds I will have available for sale.

#5) Okay, what else is needed? I guess it is Determination + Enthusiasm. Last year, we had the start of the pandemic and lots of things were short in supply (including some foods), AND as we all know, people were home so they had time to start their own gardens. The enthusiasm to start sowing your own seeds for your own amazing vegetable gardens was very high, and many people came to me for advice and for seeds or seed kits. Everyone was so enthusiastic, I just loved it. The pandemic even created a seed shortage by seed companies because so many people were trying to grow their own for the very first time! But, growing plants from seeds is not like making brownies for the first time. You read the directions on the box, set it in the oven after mixing all as directed, and you are successful, and you eat the brownies. Sometimes in the plant world, there are factors out of our control. So, you read the directions, you sow the seeds, but then all of a sudden there is an issue after planting them outdoors and they’ve been growing for a while. Say it is blossom end rot or a tomato horn worm, and ack! You are bummed!! But if you are still determined, you will succeed. So you take on the challenge, fix it if possible, and then you reap the rewards of an amazing tomato harvest or pepper harvest. And it feels good, it tastes good, and it is right there at your finger tips. Oh, again, that makes me remember something, I think cherry tomatoes are easier to grow from seed than regular tomatoes, so that is another tip for beginners. Usually you get lots of cherry tomatoes! Like tons of them! Did I say that already?

Heirloom Tomatoes I grew from Seed!

Will those of you who gave tomato and pepper growing from seed last season give it a go again this season? Yes! I know you will. I know there are some of you that so enjoyed it, you are on board. But maybe not, maybe you thought all these considerations were too much, too many things to think about, and if you don’t like to water plants, talk to them, and treat them like a cherished pet dog that needs care, well, then maybe you won’t. That’s okay too. The choice is yours and if you decide to make that choice again this season, and get seeds and/or seed starting kits from me, I promise to be your cheerleader and encourage you as well as give you as much information as I can about how to start sowing seeds indoors based on my experience.

Thank you,

Cathy Testa
Container Crazy CT
Broad Brook/East Windsor, CT
860-977-9473
containercathy@gmail.com

For details about my seed offerings, visit http://www.WorkshopsCT.com.

November is Almost Here

Leave a comment

By now, most of you have probably stored or disassembled your container gardens and patio pots of tender outdoor plants. And, after talking about light frosts for over a month, I may officially say our hard frost will arrive tomorrow evening, Friday, 10/30/2020 on Halloween weekend! It is predicted to drop down to 23 degrees F here in my area of Connecticut.

Alocasia Ready for Storing for the Winter

Along with the seasonal changes comes planning ahead for the next holidays on the list – Thanksgiving and Christmas!

I’m still making custom Succulent Topped Pumpkin Centerpieces themed in fall (and/or Halloween decor) and all are arranged via Porch-Pick-ups in my area of Connecticut (Broad Brook/East Windsor). Thank you for your recent orders. I so enjoy making these for everyone! And there is still time to request an order: 860-977-9473 or see my site www.WorkshopsCT.com for more photos and details.

Succulent Topped Pumpkin Centerpieces by Cathy Testa of Container Crazy CT

But next will be planning ahead for the Holidays, which will be so different this year. First, we all know we are concerned about COVID. Smaller safer gatherings will be required.

But, decorating, perhaps will be even more important than ever because we will be home staying safe. Decorating for the holidays is one of my passions and I know so many of my friends, customers, and family feel the same. The holidays are not the same without our personal decorating embellishments.

But, for the first time in 10 years, I am not offering my holiday workshops. It is a change I must accept due to our COVID world, but I will not let this stop me from offering the types of quality products and beautiful holiday greens I have in the past.

I am very excited to be taking custom orders for my hand-made evergreen filled wreaths and kissing balls starting by the end of November. I’m also offering loose greens this year. All of the details may be found on my site called, www.WorkshopsCT.com. All are made by hand and with love!

Holiday Greens by Cathy T!

I saw a funny joke on Facebook recently saying, “It is snowing because of all the people putting up their Christmas decorations up in October.” It made me chuckle.

Usually, I have to start clearing out my workshop spaces now in time to prepare for December, but this has changed. In a way, I’m relieved to not have to do it – it was a major effort!

I also would start to decorate early as well in order to make my home as cheerful as possible for my workshop attendees. I’ve accepted this is the new normal for now and it doesn’t totally bum me out – I am, in fact, very excited to offer my products in a new way.

Again, the details are on www.WorkshopsCT.com. I’ve changed the title of that website page to reflect my name, as it isn’t all about my workshops anymore but more about my current offerings focused on combining nature with art.

Well, just a quick post today – brace yourself for the much needed rain we will get all day, and the snowflakes tomorrow! It has happened before in October, and it will again.

Cathy Testa
860-977-9473
containercathy@gmail.com
www.ContainerCrazyCT.com
http://www.ContainerGardensCT.com
www.WorkshopsCT.com

Overwintering my Alocasia Plants

17 Comments

There are many tender tropical plants which I overwinter each year around this time of year in October. They are either dug up and packed up in a cool, dry, frost free place, moved into my home as a houseplant, or moved into my low-temperature greenhouse for the winter.

Today, I will share how I overwinter my newest favorite tropical plant, Alocasia macrorrhiza or Alocasia macrorrhizos (Jumbo Upright Elephant Ears).

Here is a photo of me standing by it around mid-September 2020. It is quite tall and an impressive specimen showcasing dark green huge leaves, big enough to serve as a patio umbrella.

Cathy Testa standing next to her Jumbo Upright Elephant Ears plants in 2020

Each leaf reached just slightly over 3 feet long from tip to the start of its rigid stalks, which were also 3 feet long. Thus, the plant towered over us at 6 feet tall total. The width of the leaves reached about 2-2.5 feet across.

Measuring the leaf after it was removed in the fall from the planter

This plant is not winter hardy here in Connecticut, so it must be removed from the planter to store the tubers (or rhizomes) for the winter. This may be done after the plants get touched by a light frost (which will damage the leaves and make them turn yellow) or immediately after a hard frost (which will completely kill the top parts of the plants and its foliage.)

I prefer to move them in before frost for two reasons: (1) It is not cold out and easier to work with the plants. And (2), sometimes if you leave the tubers in the soil too long, when they get cold and wet this time of year, rot may actually start on the tuber before you dig them out. The tuber will be soft if any rot has started. BTW, the tuber is referred to as a rhizome as well. For the sake of this post, I will use the term “tuber.”

Cathy Testa holding a leaf from the Jumbo Upright Elephant Ears plant in October 2020

While working this weekend to continue my overwintering chores, I asked my husband to take a photo of me with a single leaf to show the shear size of this dramatic foliage plant. I obtained the tubers in 2019. That year, the plant grew more clumps of leaves, but this year, in 2020, the plant grew much taller stalks and bigger leaves. I always tell my followers and customers, the bigger the bulb, the bigger the plant.

This planter going into my greenhouse

If the plant in your container or patio pot is small enough, you may bring it into your home for the winter, or even into a greenhouse. However, I typically choose to store them by digging up the tubers, after cutting off all the foliage, and storing them in my basement, which is unheated but does not freeze.

The location is key. You need to consider the place you are putting them. A cold closet in the home may work. You need to experiment the first time you do this and hope for the best. A garage (unless it is attached and gains some heat from the house), does not work. The tubers would freeze and die.

Okay, here are my steps:

(1) Chop off all the foliage. You may use either a sharp long kitchen knife or a machete, which I often use the machete when it is a very thick stalk or stump. Just be sure your tools are clean to not transmit any disease or insect problems. I usually start with removing each leaf stalk individually, then cut across the whole stump area if it happens to be large.

(2) Dig out the bottom part with the tuber from the soil. Do this by digging around the plant with your shovel or garden trowel and pushing down around in a circle. You should hear the roots snapping as you are cutting them during this process. Then lift the whole clump together out of the soil. Try to be sure you are not breaking the tuber below the stump area.

(3) Lay the bottom parts in the sun. The bottom part of the plant will either have a visible tuber, or not. Either way, lay them in the sun for a minimum of one day to dry (and/or cure, as they say). Sometimes, I let them sit in the sun for a few days but do not leave them out if you get a hard frost after digging them out. If the bottom piece you dug out is thick and fleshy, turn it upside down to allow the excess water to drain out. These plants hold lots of water. You may gently brush away any excess soil or use a garden hose to blast off the soil, but sometimes I prefer not to add any more moisture to them if I can help it.

Lay the tubers out in the sun

(4) Snip off any long roots. Notice in this next photo how long the roots reached. Because the soil was fluffy and dry in my planters, I actually pulled the roots out of the soil because I wanted to see how long they were. They almost reached the bottom of the gray tall planters. The reason I snip off the roots is to eliminate as much fleshy material from the pieces. Fleshy, wet materials may rot in the storage box.

Showing the root lengths

(5) Put the stumps (for lack of a better word) and or tubers into a storage box and cover it with peat moss. Sphagnum peat moss may be purchased in large square bales or in bags in smaller amounts. It is a natural and organic ingredient that absorbs moisture and aerates around the tubers in the box. Pour some of the peat moss in the box in the base, lay the tubers and stumps on it, and then pour dry peat moss over and around them. Do not over do this. You are only lightly covering them with the peat moss. BTW, the peat moss is reusable every year. It lasts a very long time.

(6) Place the box in a cool, dark, dry location that doesn’t get below freezing and is somewhat unheated. Such as my basement. If placing the box on a concrete floor, place a tray or something to elevate it a bit off the floor because as that floor gets cold in the winter, it may create condensation in the storage box. My basement does get some woodstove heat from time to time, but the woodstove is way at the opposite end of the basement from where I store my overwintering boxes. And the woodstove is not used all winter, just on some nights. So the area where I put all my overwintered plants in boxes stays colder. It has become my sweet spot for this process. It is okay to stack your boxes on top of each other. I use plastic bin type boxes with a lid. Do not use clear plastic boxes, use those that will eliminate any light. Sometimes I have drilled holes into the lids to allow some air to enter. The tubers tend to stay dry but just slightly moist by the peat around it – but not wet. Do not store them in a very wet state. This will lead to rot. If your basement is too hot and dry, they will dry up and shrivel and may just rot away to a dry state which is not usable. If your basement is super cold, the tubers might freeze and die.

(7) Label the box with a sharpie marker, date it, and note what you stored so you will remember in the spring. If the tubers make it, you may recognize them, but if they don’t, you will be wondering what you stored, at least I have, because I store many types of container garden plants over the winter months.

An Alocasia in a large pot

You have other storing or moving options as well. You could just move the pot with the plant into your basement and hope for the best, but you may not have the space, or the muscle power to move a big pot. And usually a big pot is too big for a home. But that is another option to mention. If you move the entire pot with the plant into your basement, you will need to monitor it for insects and add water to the plant, but at a very minimal fashion. You are not watering it like you would during the summer season.

Left – See the Tuber?

In this above photo, the tuber on the left is covered in brown papery like material, which you leave on there. However, on the photo on the right, you really only see a stump. Storing either works for me.

This storing process allows the plant to go into a dormant state. They will not grow in the dark boxes and will usually do fine. When spring returns, you may bring them out of the darkness by starting them in smaller pots inside the home to awaken them. They should not be planted outdoors in your patio pots or container gardens again until all chances of spring frost has passed. These tender bulbs will bring back repeat performance year after year by following my steps above.

If you found this post helpful, please comment below or share my site with others.

Thank you.

Cathy Testa
Owner of Container Crazy CT
Broad Brook, CT 06016
860-977-9473
containercathy@gmail.com
Other sites: www.WORKSHOPSCT.com and www.ContainerGardensCT.com
Container Garden Designer, Plant Lover
and a little “Crazy” about plantings in containers!

Currently taking orders for custom Succulent Topped Pumpkins. They are created with live succulent plants, fall or Halloween decor, and are amazing on real pumpkins. They are low maintenance, easy care, and last for months. Porch Pick-ups and some deliveries arranged. Inquire for current prices. 860-977-9473 texts are welcome.

How to Determine which Plants to Bring Inside

4 Comments

I’ve been sharing my methods and timing regarding when to bring in outdoor plants (in container gardens or patio pots) indoors during the fall season to prepare for the winter months here in my area of Connecticut (Broad Brook/East Windsor, Zones 6).

But how do you actually determine which plants to bring inside and when?

Sometimes other factors come into play besides the lower temperature drops that some plants will not tolerate.

For example, this kitchen herb garden, which I planted for a client on a balcony, is booming still. I visited the site just yesterday, and look how large these herbs are in September. Amazing! All of the herb plants are still thriving and not showing much stress yet from being exhausted from growing all summer in the heat nor from drops in evening temperatures recently.

Herb Gardens at Container Crazy CT Client Site as of September 15th

It would be a sin to take these all down right now, don’t you agree? There still time to enjoy these wonderful, fresh, aromatic, and delicious herbs. Due to the full sun conditions and appropriate watering by my clients at their residence, their herbs are absolutely thriving.

I’m especially proud of these herb plants because many of the herbs in these planters were started from seed by me earlier in the season and planted as starter plants. I’m in love with how well they did and how amazing they taste. The clients are still enjoying every snip and harvest.

We decided to let them be for a while more. While my herbs at my home are dwindling, such as my basil (which prefers warmer temperatures than we get during our fall cooler temperatures), their herbs are still perfectly fine. They get more sun where they are located compared to my location.

MatchBox Peppers Grown by Cathy T of Container Crazy CT

Just look at these matchbox peppers, which I grew from seed earlier this year as well. They are booming with small hot peppers. They are tiny and super spicy. They completely cover this plant, which was described as compact. I’ve grown these in hanging baskets too and they are perfect for them. Of course, these can remain outdoors a couple more weeks until we get frosts.

Sometimes we get a few “light” frosts before a hard frost. Light frosts may occur as early as October 4th. A hard frost could be anywhere from mid-October to very early November, based on my experience and records. So, yes, you could decide to leave something like this herb garden growing a while longer to capitalize on the wonderful harvest. The key is to pay attention to the weather forecasts and your weather apps.

Skull Terrarium with Succulents and Cacti

Here is another example of a plant related item which could stay outdoors a while longer. It is a terrarium I made a couple seasons ago. I created it around Halloween and used decoupage glue to adhere a skull print on fabric inside of it. I remember thinking it would look super cool with plants.

You will notice the white area, ironically resembling a mask, which is where the glue will get wet. It left a white area mark there – so my test of this fabric has a flaw, or does it? It looks super cool to me.

A terrarium with a creepy mask image, all coincidental, not planned!

I could leave this terrarium outdoors for a few weeks more here in Connecticut. Before any frost would hit it. But I wanted to move it indoors into my greenhouse before it gets waterlogged with rain. We initially had rain predicted for this Friday by our weather forecasters, but that seems to have changed to “chances of rain” now. Anyhow, the plants are thriving, there are no insect issues, so why chance it? It is easy to take inside to keep growing another season.

The key thing is things change fast in regards to weather this time of year. You may be humming along, enjoying your outdoor plants, and thinking it is so beautiful outside. It is warm, some flowers are still blooming, and the fall air is just right where you feel comfortable working outdoors in the 70 degree range. And the next day, it will be 80 degrees F out. Like summer! What’s the rush, right?

But there will be that night where it gets cold fast, like this Saturday, predicted to be in the 40’s. Still not freezing, still safe for many plants, but it is coming.

Determining what to move indoors has the factors of weather, upcoming freezes, but also, some of that determination is based on how you use the plants (or how you enjoy their show). As in the example of the herbs – still very much usable. Or, it could be how beautiful the plant is at the moment.

Supertunia annuals in full bloom and glory at the start of the fall season

Take for example, this dish garden, also at my clients’ site. Good Lord. Look at those hot pink Supertunia annual flowers. I gasped when I saw how much they grew from earlier this season to now in mid-September. Usually, I would take this dish garden away to take apart and store, but how could we? They are still amazing. And until they get hit by frost, might as well enjoy the show, right?

This dish garden also houses some amazing succulents. All look fabulousa. However, for succulents, I prefer to take special care with removing if you are taking them indoors. I prefer to move them before things get really damp and cold. With a drop in temperatures by the weekend at night, this could happen. Then tender succulent plants may start to suffer. If you are not taking them in, you may risk it and keep them outdoors. But most non-hardy tender succulents, in my opinion, should be moved in before it starts to get chilly consistently in the low 50’s and 40’s.

Succulents still thriving but Moving them in Before Cold Rains is Smart

What happens this time of year is we get temp swings. All will humm along fine and then BAM! It will turn cold and you will be taking out your favorite sweatshirt. As for myself, getting some of this moving in container work done early may be a bummer because you want to enjoy the beautiful creations a while longer, however, I never regret getting some of it done ahead (before warm gloves, sweatshirts, and my warmer hiking boots are required.)

A dish garden with annuals and succulents by Cathy T.

And another factor is the fall mums we have available around here in Connecticut this time of year. If you are going to display them, you might as well get them out soon so you may enjoy them throughout the fall season. There are tons of mums around to be had. Some places sell out of mums by mid-October, so you want to get them soon so you can enjoy them for a while before snow comes right?

Did I say snow, OMG, don’t even go there Cathy! LOL.

Cathy Testa
Container Garden Designer
Plant Blogger
Workshop Organizer
Plant Obsessor
860-977-9473
containercathy@gmail.com

Don’t forget! Towards the end of September, it is succulent pumpkin creation time. I will have some succulent new stock available if locals are interested! I will post photos on my usual feeds. If interested in a custom made succulent topped pumpkin, now is the time to give me the order.