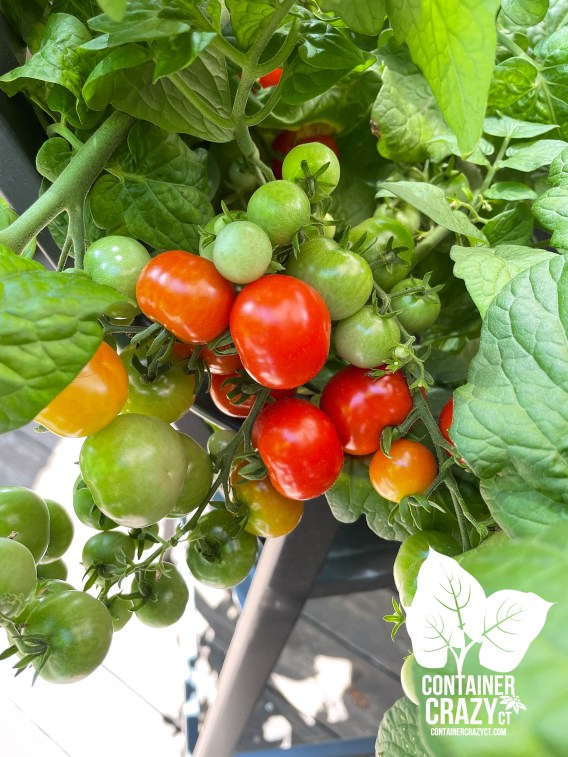
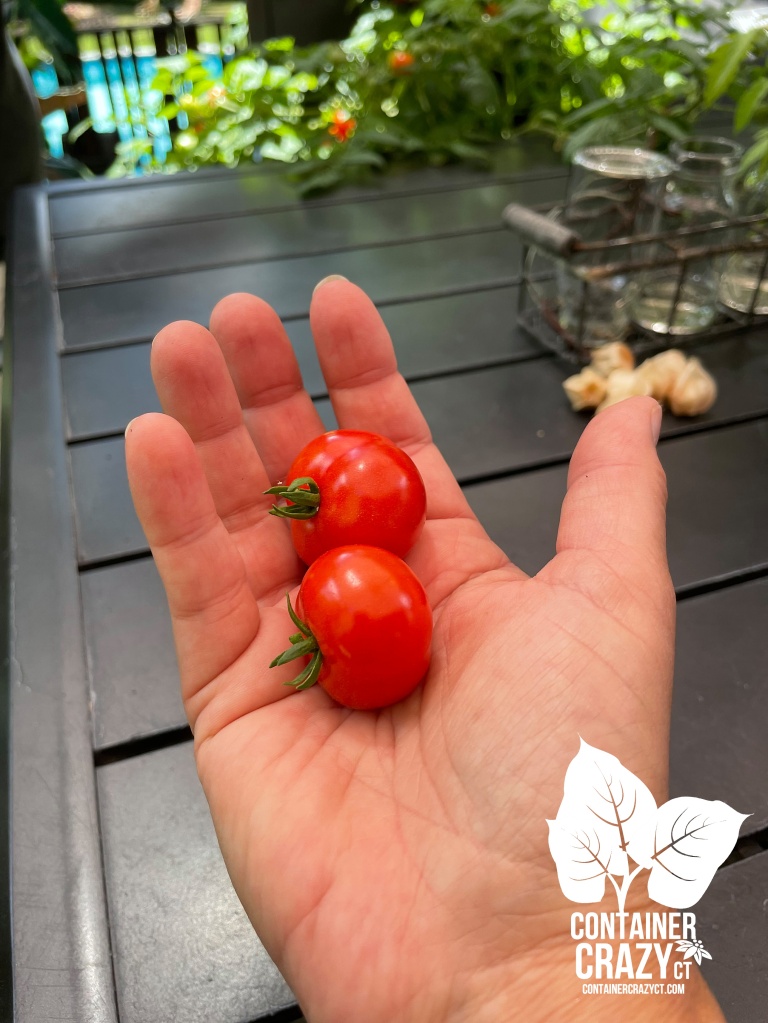
Tiny Tim Tomato are a perfect sized plant for smaller containers, window baskets, hanging baskets, and patio pots. The plant has a dwarfing habit and I planted mine in patio pots which are 11″ deep and 14″ diameter on the top. The plant stays smaller and so do the fruits, but this year, many of the Tiny Tim fruits reached almost the size of my Fox Cherry tomatoes. Tiny Tims are about the size of a regular marble or maybe one of those bigger marbles you played with as a kid. Remember those?
Pot Size: 11″ Deep and 14″ diameter on top of the pot (Drain holes in base)
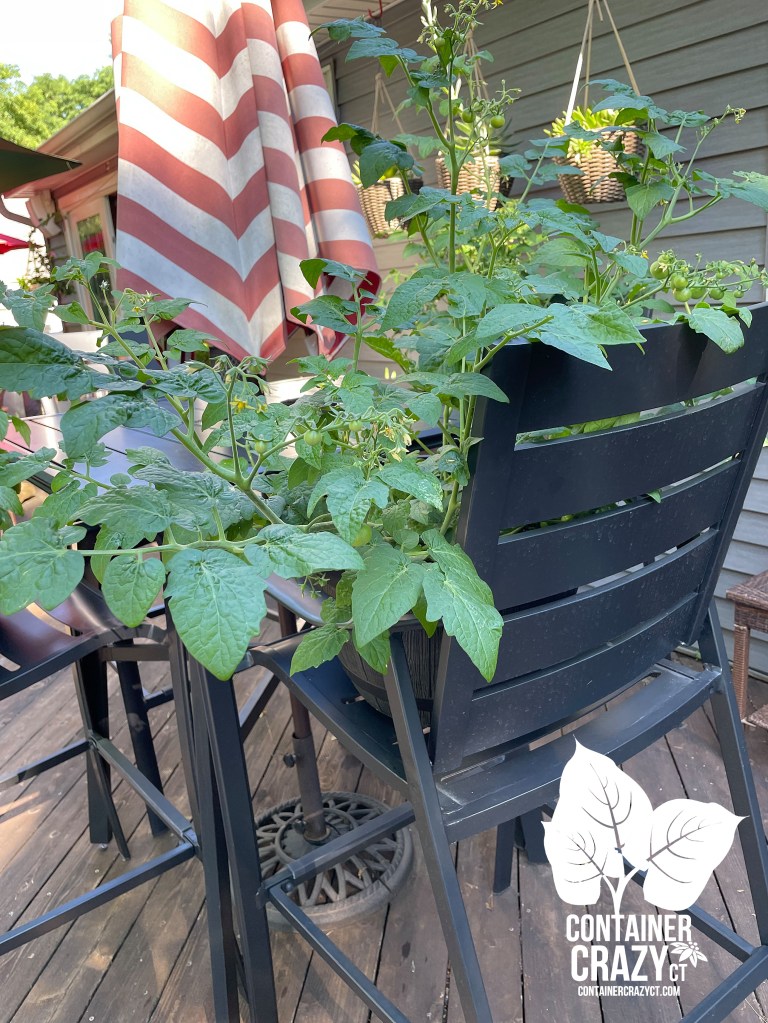
I ended up putting the 3 patio pots I planted with Tiny Tim’s on high top chairs. We find the chairs someone uncomfortable for ourselves, but they were the perfect fit for our Tiny Tim pots! They branched out and I would drape the stems and branches over the back of the chairs and onto the adjacent table. The squirrels and chipmunks never jumped up there either which was really nice. I was sure they would try but they did not fortunately. The fruit stays on the hanging clusters well and didn’t drop off.
Clusters like grapes!
I was super impressed with the abundant clusters of fruit which formed on the plants this season. It’s been a hot dry season, but I watered the pots daily with a good soaking. The sweet-to-tart fruits are ready earlier in the season than my other tomatoes, and grew to the 1″ fruit size or bigger size this year, due to the weather pleasing these plants. It probably helped that they were set on high back chairs to allow for perfect drainage and air circulation below the plants and pots. No major issues were encountered. They were the perfect dining guests all summer and still are now.
Tiny Tim Tomato Plants
In this above photo, the patio umbrella is closed but I typically kept it open. During rain storms, I made sure it was open so the plants were somewhat protected. Another bonus of having these 3 pots situated on the high-back chairs is it was easy to reach the plant to harvest the tiny tomatoes and water daily. It is a great plant when you don’t have much room outdoors, or have room to spare on a table. The seed packet indicates it does better in pots than in gardens of the ground.
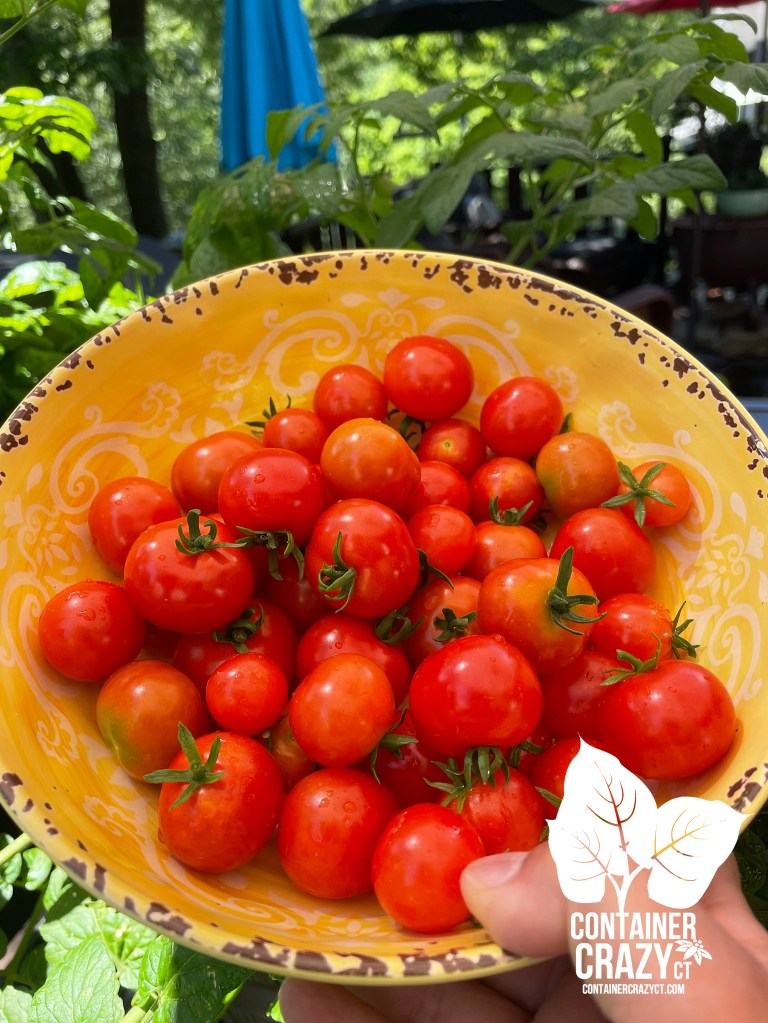
Fruit Ripened Beautifully
The fruiting clusters ripened beautifully and are still ripening many fruits right now as I type this on 8/26/2022. The flavor to me is more on the tart side than sweet. I find Fox Cherry tomato fruit to be much sweeter for example, but we still enjoyed these. They are the perfect appetizer size on small crackers with cheese, or mixed with other yummy summer goodness. One day, I tossed them with fresh avocado, shredded mozzarella cheese, fresh basil leaves, pasta, and crushed black pepper.
I also planted Tiny Tim tomato plants, which I started from seed as well, into long rectangular planters at a high rise balcony site (think typical large window box sizes). My client’s told me the fruit has thrived all season. The planter is a self-watering type but the plants are high above on a high rise with exposure to lots of the elements and with a dry year at that – and the plants did well. I’m happy I chose them this season to try. I have photos of the balcony plants, but I have to find them in my iphone, which is overloaded with photos at the moment!
Various Sizes
In this photo above, you can really see the sizes. I have grown these before and the fruit was much smaller, but again, our tropical heat probably helped them to grow larger. I used a typical potting mix with added slow release fertilizer. I don’t recall ever applying liquid fertilizer later – they have been doing just fine all along. These would be the perfect candidate for small children to grow in pots – they are adorable plants.
Sitting Upon the Patio Table
Tiny Tim Tomato are sown 3-9 weeks before your last frost and transplanted after frost, and these may just last until mid-September. We will see. Another side bar: They probably will hold up well to the stormy afternoon weather being predicted for today. They are compact and probably, hopefully, won’t topple over. I’ll be sure to harvest all the ripened bright red fruit today before the storms arrive.
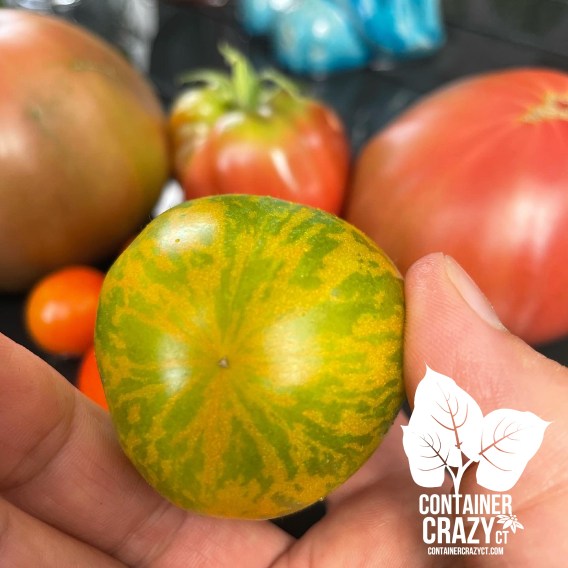
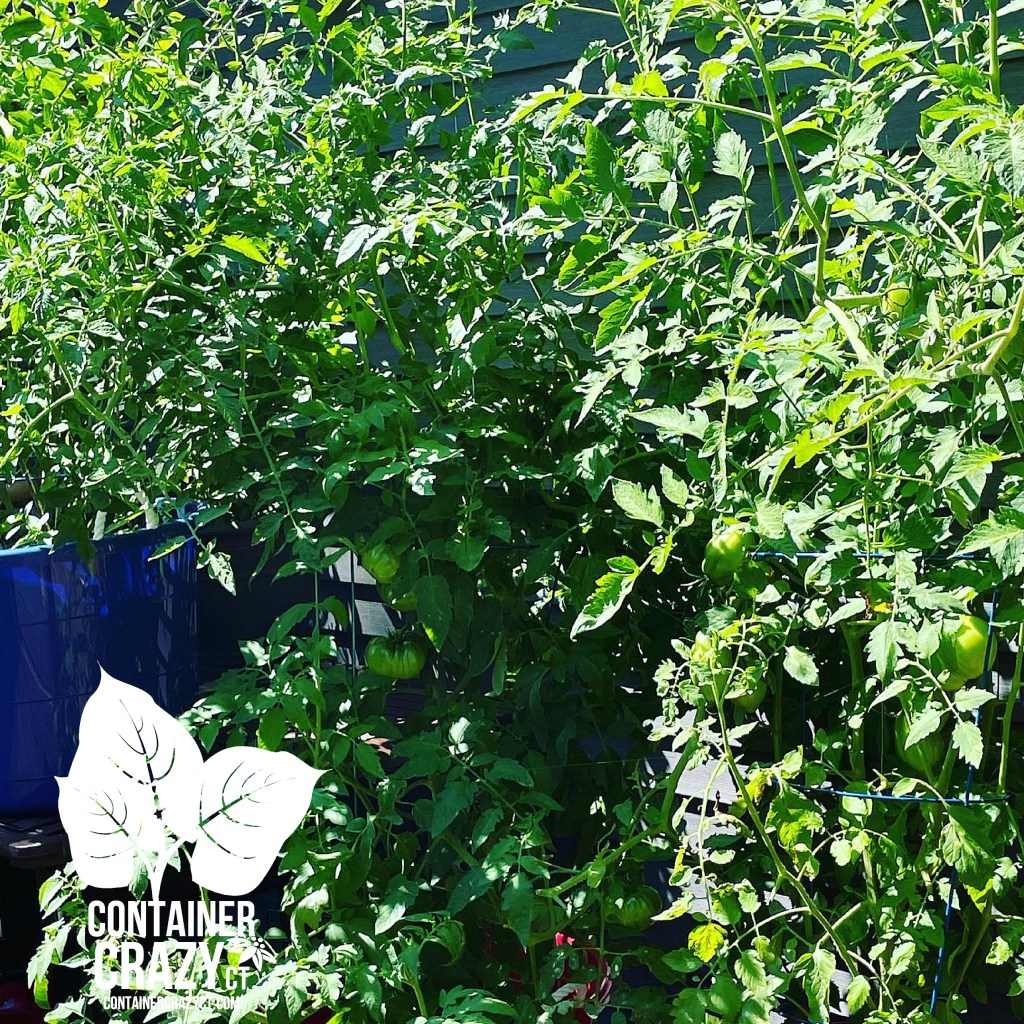
Green Zebra: Tangy flavor; green color to green and yellow striped colors as they ripen, medium sized round fruit (about the size of a tennis ball), and a good long yielder. Indeterminate so it grew to about 7 feet tall and keeps branching out further. My plant on my deck still has fruit hanging on it as of this date, August 25, 2022.
Planted with: Professional potting mix by SunGro with “Espoma Tomato-Tone with Calcium added” to soil upon planting (Tomato-tone is a dry fertilizer powder mixed into the soil; comes in a bag) and I also fertilized the plant later in the summer, maybe once or twice with Espoma tomato food (liquid feed) with a 1-3-1 NPK ratio (comes in a bottle and mixed with water) as needed.
Cherry tomato on the left. The GREEN ZEBRA ON RIGHT IN FABRIC GROW BAG at the start of the planting.
Planted in: A black fabric grow bag (I believe it is the 15 or 20 gallon size) and placed on the east end of my deck facing south, bag located against the house. The plant has reached the gutters and expanded so much, it looks like a Christmas tree from the inside of my house by the end of August. I kind of get a chuckle when looking at it right now.
The Green Zebra plant is way over to the right of the chair in this photo by the door which is barely visible!
Taking Notes: When I planted my tomato plants here, I made notes of the potting soil used and fertilizer upon planting as noted above. In my other planters, I added compost to the base of the pot and mixed it in somewhat, but I did not add compost to the Green Zebra fabric grow bag components. The Green Zebra fruit never got the dreaded blossom end rot, and another bonus – it did not get munched on by squirrels or chipmunks, which I’m guessing maybe because they are green and not red, thus less visible to them as a sneaky snack. Lastly, as noted, it is still holding some fruit while my other tomatoes like the Cherokee Purple and Goldies are done fruiting now.
Fruit is ready to eat at this stage of coloring
When to pick it: For the folks who bought the Green Zebra plants from me in spring time, a couple texted me to ask when they should pick them? I responded with, “The packet says when soft to the touch,” but what I found is the flavor was better when I saw the yellow stripe coloring within the green color of the fruit.
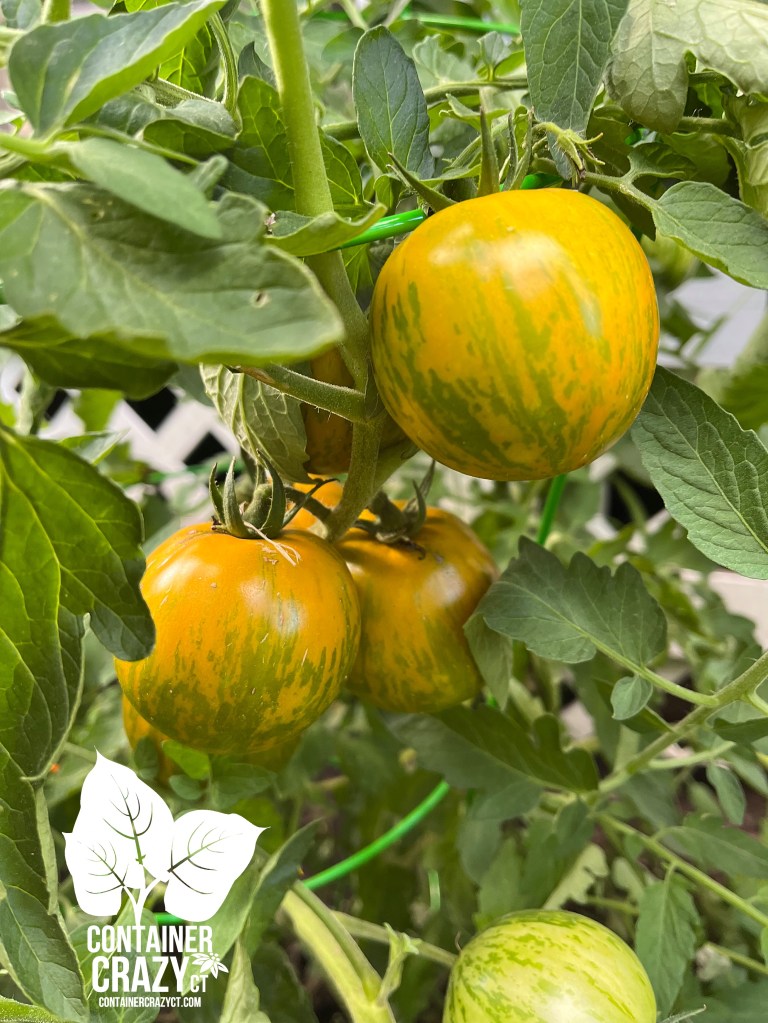
Clusters of the Green Zebra tomatoes on the plant 2022
Pruning: The packet also indicates to prune it to have no more than 3 main branches for a healthy harvest, but I pruned it just to reduce the size a bit and started to attach twine to light fixtures and other things on the deck and would take branches and train them along the twine. It looks rather messy and silly, but that is how I roll. I like it – it adds a jungle affect to my deck and this is fine with me. I was happy the plant experienced no major issues, no blossom end rot on the fruit, no bites from critters, and no blemishes or blight on the leaves.
Color before it starts to get some yellow tones
Size of Fruit: I did expect in my mind to have bigger fruit but most of them didn’t grow larger than a tennis ball. Maybe one or two about the size of a baseball. All smoothed skins, soft to the touch when nearing ready to pick, no blemishes, and rather interesting patterns made it a fun one to try. I like putting tomato slices on pretty plates and adding slices of mozzarella or other red tomatoes. This makes a colorful appetizer! Oh, and many of the fruit produced in clusters too on the Green Zebra plant. They start off looking a bit like cherry tomato clusters but grow much larger than cherry tomato fruit.
Comparing to other tomatoes (At first, I was picking the Green Zebras too early).
Its Unique Flavor: Now, for the true test! The flavor. My husband will eat any tomatoes of any kind. He loves tomatoes. And he slices, gobbles, and grabs as many as he can and approved of the taste of the Green Zebra. (He also asked me one day why they weren’t turning red yet so I reminded him these are green new ones I was trying out this year for the first time.).
As for myself, I did think it was “tangy” and I just wasn’t sure how to use them other than adding them in for a beautiful color affect with cheeses and or with red tomatoes, but then one day, I decided to toss them with chopped up fresh cilantro and a couple small cherry red tomatoes, and OMG! That is when I decided these are a keeper on my list. The flavor with the cilantro was very delicious. And by this point, the tomatoes were the juiciest too. Some people don’t like the flavor of cilantro but I absolutely love cilantro and this was the best taste to me with these tangy juicy tomatoes. Perfect as a salsa too or to put on taco’s on taco night!
Green Zebra Tomatoes with Chopped Fresh Cilantro and a few small red cherry tomatoes.
I probably won’t take down this plant for another few weeks but I’m starting to feel like I need to say good-bye to the other indeterminate plants with no more blooms or fruit. My cherry tomatoes are still producing and turning red right now and I’ll write about those later. Hope you are still enjoying your Green Zebras too if you got some from me!
Cathy Testa Container Crazy CT Blogging today Other websites:
Picking up a couple vining Hyacinth Bean ‘Ruby Moon’ plants in 4″ small pots from a nursery was a nice little find this season for me.
I was first intrigued by the trifoliate leaves with purple veins. I like when foliage offers touches of colors to serve as color echoes in container gardens. I also had never grown these before and thought they would make a nice candidate as something different to try this season in my container gardens.
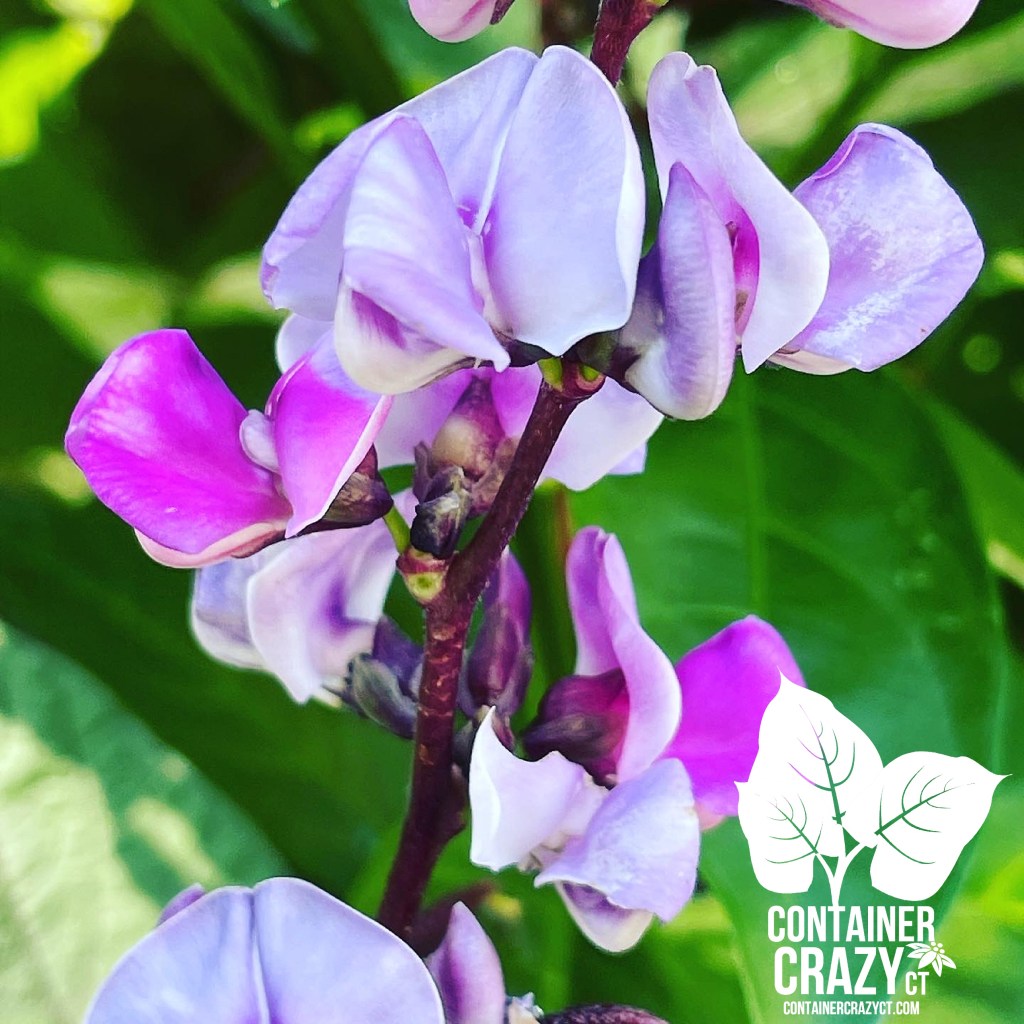
Hyacinth Bean ‘Ruby Moon’ or Lablab (Dolichos) is a vining annual in my Connecticut planting zone (CT Zone 6b) and the plant tag indicates it would produce striking vines with ornamental seed pods, flowers, and foliage. It should be planted in full sun and provided with support for the quickly climbing vines.
If you are looking for an vining climbing plant with purple bloom colors, this is a wonderful candidate. It grows up to 10-20 feet and mine easily climbed a trellis inside a big planter at 7-8 feet tall, making the trellis invisible by now (mid July). The vines continue to reach up, looking to grow higher. Additionally, I read this plant continues to showcase its attributes into the early fall season, so it is a long (and tall!) performer.
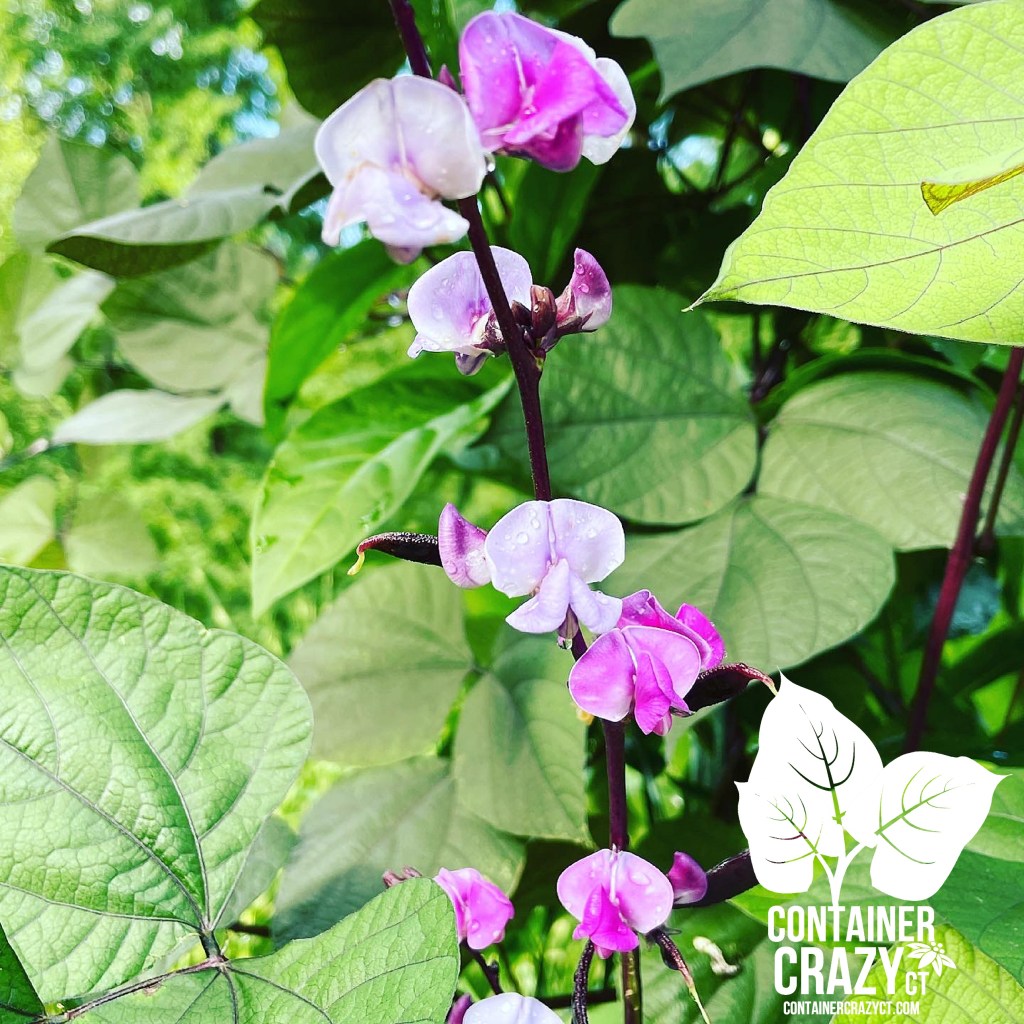
Birds were perching on the trellis pole quite often until it became invisible due to the growth of the Hyacinth Bean plant covering the trellis, and I loved seeing them against the pink-purple flowers. Its turned out to be one of my favorite combinations this season. The stalks of the flowers are purple as well.
I included a Pink Pentas annual in the lower base of the same planter, a elephant ear bulb, two Canna lily plants to the side (one yellow with red specks blooms, and another variety with red blooms), and tucked in a Original Pink Mandevilla (bushy with limited vining), and also a little blue ornamental grass behind it. The pot is rather large with a big soil volume and it is my favorite combination this season. I water it every day, although, I read the Hyacinth bean plant is rather drought tolerant.
Yellow Bloom Spike coming up on the Canna Lily
Every day, as I leave my driveway, I look at it. It is also visible from my couch in the living room. In addition to seeing the birds visit it (when the trellis was visible), I sometimes witness little butterflies flutter by it – and hummingbirds zoom past this big planter to my hummingbird feeders. The hummingbirds probably will visit the Canna Lily blooms soon, they are opening right now.
Flowers arrive first followed by these beautiful dark purple beans. My sister-in-law, Vicky, would adore this plant because purple is her favorite color. I read that the beans may be harvested after they turn brown to save the seeds to sow, which I will do for sure for growing from seed next spring. Oh, and the tag indicates this makes a nice cut flower as well for its unique-ness!
Hyacinth Bean ‘Ruby Moon’ – Purple Flowers
Upon researching this plant, it seems it is edible (the beans, that is) but with a specific cooking process required, thus, it is really for its ornamental value rather than edible benefits. I won’t go into the edible information here because I specifically bought it to try something different for a flowering climber type plant, and because it is a rapid climber.
I did not encounter any insect issues on this plant, which was either luck or a bonus. A plant I had next to it, a purple blooming Datura, in another pot got many holes in the leaves by an insect however, and I just cut it down yesterday because I could not take the look of all that leaf damage anymore on the Datura sitting next to my gorgeous bean plant with no issues.
Vines are Reaching high!
If you are looking for a rapid climber, easy care, and purple color tones, this is a good one to use. I’m so glad I spotted it in a nursery, which was out of town, when I was trying to locate something different. Think purple colors around it or contrasting colors to make it pop (like the green leaves of the Canna Lily). I think you will enjoy it too, and also, remember, this grew from a very small plant into a giant – so it was not a big expense to buy this plant!
Have a great weekend,
Cathy Testa Container Crazy CT Container Garden Designer Plant Enthusiast Blogger containercathy at gmail.com 860-977-9473 On Facebook and Instagram under Container Crazy CT
One of the wonders and benefits of growing lots of plants and being surrounded by woodlands in my yard is the invitation of wildlife. This year, I’ve seen lots of snakes, so, if this is not your thing, brace yourself, because one made it’s way into my greenhouse!
Garter snake – harmless, I believe!
I’m not too afraid of snakes but I definitely don’t want to find one in a pot I’m carrying in my hands! Fortunately, this guy made it out safely when I left the greenhouse’s screen door open just a crack. I think they found their way in via a drain (they, yes, there was a ring neck snake in my greenhouse this winter as well).
I felt badly that it would not survive in there because I do not have mice or slugs in my greenhouse, nor a source of water, so I’m glad this guy found his way out. In fact, he was drinking water from the rims of pots – so I knew he was thirsty. It took a while. I had to leave him alone to travel across the floor to the screen. He had his face right against the screen and I was like, “Dude, slide to the right to the opening!” Finally, he did.
Luna Moth 2022Luna Moth Side View
Then, just yesterday, I spotted a beautiful Luna Moth on a shrub on my driveway at 7:30 am. What a sight. I’ve seen them before, but this one was absolutely perfect, so I rushed out to take a photo or two. What a sight – they are just beautiful.
We have two huge groundhogs and lots of rabbits in the yard now. This is typical. And of course the squirrels and I’ve seen a chipmunk spying at my pots already. The list goes on and on. It is a wild life jungle. We even have five huge blue heron nests in the woodlands. I can hear them make their bird calls when they arrive. I am in tune with the sounds of these animals in my surroundings. And there have been quite a few hummingbirds this season. They zoom up to my flowers, pop around, investigate, and I have my hummingbird feeders in various places.
It is just wonderful to watch the wildlife, but it is also tricky because I have to watch them from getting my tomatoes later this year on the deck (that is for the chipmunks and squirrels). I want to build a huge garden enclosed some day in my yard, but that is a huge project for a later date/year.
Fox Cherry Tomato 2022
I plant all my tomato starts in large pots and fabric grow bags. Usually a minimum of 22″ in diameter and about as deep for pots, and the grow bags range from the 15-20 gallon sizes. I know you can grow them in 5 gallon buckets, but that is not my thing. I use quality potting mixes, usually add compost, and this year, I’m adding Espoma Tomato food with calcium because I had the Blossom End Rot issue last year. Long story there, but I want to test if this plant food will help prevent it. Whiskey barrel (1/2 size barrels) are a great visual to determine the size of pot you should use, unless it is a compact variety for patio pots that stays small, but the tomatoes on my deck are mostly indeterminate and will get large. Never use soil from the ground – it is too compact, harbors diseases and insects, etc.
This year, I have planted one of each: Fox Cherry Tomato, Cherokee Purple, Goldie Heirloom, and I need to plant a Ground Cherry, which that one is new to me. Just I have to rush to do these things for me between plant work for others. That is fine, the weather has been stupendous! Let’s hope it stays that way. Anyhow, I take lots and lots of photos if you are interested in seeing the progress, and more wild life photos – go to my page on Instagram under Container Crazy CT. I posted a few of the Luna Moth yesterday.
Well, that is all for today. Just wanted to share a quick photo or two.
Growing tomatoes definitely does NOT suck. It is one of the most rewarding aspects of summer container gardening!
I’m in the early stages of seed sowing this year, and here are some photos to share with basic tips, with all kidding aside! 🙂
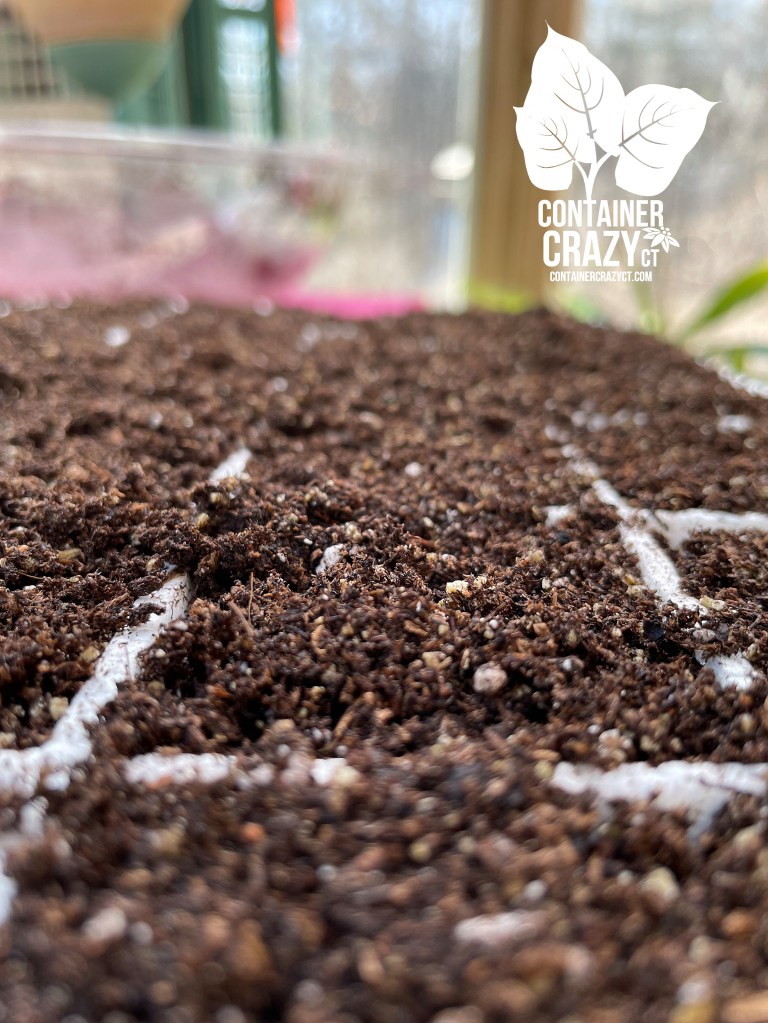
Pre-Moisten
Tip No. 1 – Pre-moisten the seedling mix
I use a clear bowl and pour a small bag of “seedling” mix into it and then add water from my watering can. Using a clean and sterilized small scoop or utensil, gently stir the mix. It is best if you are able to do this a night before to allow the mix to absorb moisture, but a few hours before is fine as well, but this step is crucial. Allow that mix to take up a bit of moisture so it won’t float out of your seed tray and also the mix sometimes needs to rehydrate before use.
Close Up of the Seedling Mix in a TrayMake a little hole
Tip No. 2 – Use a clean tool to make a tiny hole
Sometimes I have used a bamboo skewer, or you may just use your hands, I guess, but I prefer to make a tiny hole with a tool and then drop the seed into the hole with tweezers. You have the option of one seed per cell or a few seeds (and separate them later), but I tend to do one per cell in most cases. Again, make sure the tool you use is clean and I avoid reusing them unless they are easily cleaned. What I mean is after one tray, I may toss out that little plastic straw I used or put it in a recycle bin for use other than seed sowing. Be careful not to transmit things from tools. I’m referring to sowing tomato seeds in this post (and some of the hot pepper seeds).
Tip No. 3 – Seeds In Hand
Pour some seed into your hand or a paper cup as you work to drop them into the seedling mix – guess this is not really a tip but I have a good pic of me with some tomato seeds in my hand. Make sure if your hands happen to be wet to not to put an unsown seed back into your seedling packet because you will transfer some moisture from your hand to the seed to the packet. If you don’t use all of the seeds in your seed packet, store the packet in a cool, dark, dry place away from hot sun, temp flux’s, or moisture or damp conditions. And know how long seeds last for whatever you are sowing. Some seeds last 25 years, others last 2 years.
Seeds in HandsOn Seedling Heat Mats and Under Grow Lights
Tip No. 4 – Use a Grow Light
This is the first year I am using a high output energy efficient high bay fixture grow lamp. My trays are in my greenhouse BUT we get lots of cloudy days when I start to sow seeds in my area of Connecticut (usually starting in March thru May). On the cloudy days, I’ve been turning on the light. It hangs over the trays with a pendant chain which I am able to lower and rise the position of the lamp fixture by taking the chain and an S-hook to adjust it. I do not have it on a timer, I turn it on in the mornings on cloudy days, and turn it off by dinner time. It is only needed when the seeds germinate and are showing above the soil. This is a fluorescent lamp style. Tip is to watch it carefully as the seedlings grow so you do not burn the foliage as they grow higher.
Covers – Natural Sun was Hitting them in this photo one morning
Tip No. 5: Use clear coversto help maintain moisture of the seedling mix until they germinate is very much recommended, however, I tend to not do that – because I work from home, I check the trays every day at least twice a day. I look to see if some cells have dry soil (lighter in color, touch top to feel moisture if need be), while others are still are moist. I literally will carefully water only the ones that are dry, so because I am home and a plant addict, I check them often. If I was not home all day, I would be concerned about them getting too dry and go with the clear dome covers instead to help retain moisture during the phase of waiting for the seeds to germinate.
Tip. No. 6 – All same type of seeds in a tray
I made one minor error, I put tomato seeds in the same big tray in several rows and in the same tray, some hot pepper seeds in adjacent rows. Pepper seeds take a lot longer to germinate (3 weeks) because they really like very warm soil and air temperatures, while the tomato seeds germinated in five days! So now I am like, ah, I have to put the tomato side under the light. Next time, I will avoid that scenario. They only need the light when they rise above the soil. Hopefully this is making sense, LOL.
Other General Tips for Sowing Stages:
Don’t sow too early. Don’t sow too late. Know the timing. I’ve discussed in prior posts. Visit trays twice a day to monitor watering, as noted above unless using dome covers. Take photos, its fun and it allows you to see adjustment ideas for the next season. Label seed packets with a Sharpie marker if seeds are still in the packet (I put a dot on the back if I used only some of the seed and a check mark on the back if all seeds were used.) Record the date sown on the plant label and on a wall calendar or notebook. When the planting season arrives, you will get too busy. Taking notes is important. Remember that in mid-May (for CT zones), you have to harden off the seedlings outdoors for a while before you actually plant them in patio pots, grow bags, raised gardens, etc. Watch the weather forecasts. Target your weeks before based on the expected last spring frost in May (usually mid-May). Target your planting time when safe to plant outside (usually around Memorial Day, usually).
Types of Lights
I did minimal research on lights to be honest. There are several types of artificial lights for the greenhouse world. You do not need lights when the sun is shining in a greehouse for seedlings of this type, and the heat rises in a greenhouse quickly on sunny days, so you may need the alternate – a fan, or small gentle fan for your trays. Using a light should help the strength of my seedlings this year. As I’ve noted above, for many years, I did not use grow lights at all and I was successful. There are incandescent lights, high intensity discharge lights, fluorescent lights (the type I got), and light emitting diode (LED). All of these I will research when I have time I guess! LOL. Some are more expensive than others and some are hotter than others. Note: Some fluorescent fixtures are not good enough for other types of plants, but they work for seedlings with the right T strength. It is too complicated for me to go into and I’m still just learning about them so not much more I can offer on that for now, but if you do get lights, be sure you consider the placement, how you will adjust the height of them or the trays below. I read someone said they use books to raise the trays, rather than lower the light fixture but I also have a heat mat below. And I don’t want to bring books that may get wet into my greenhouse and keep dampness below the trays. Yes, I’m an*al that way – I over think it. Do research on the lights first if you have never used them, there are lots of neat setups now for indoor home growers. I just read of one that is a small shelving system perfect for apartments with lights already installed, etc. Many options out there.
My Tomato Jungle Last Year (2021)
And tomatoes do not s*ck – I was just kidding – it was a joke. Don’t slap me. Sorry, couldn’t help it.
Have a GREAT weekend!
Cathy Testa 860-977-9473 Container Garden Enthusiast Zone 6b Connecticut Dated: 4/1/2022 April Fool’s Day
Cathy Testa of Container (Garden) Crazy CT (Photo in my greenhouse by JMS Art & Photo)
Potting Mix is probably one of the most important aspects of success for growing healthy plants in patio pots. It must be a quality product. If the bag of soilless mix is damaged, not a good brand, or these days, possibly unavailable, you are in trouble.
Every single product or tool we use to grow plants (pots, trays, fertilizer, seeds, soilless mixes and specialty media, labels, etc.) has increased in prices and there are continued delays in the supply chain. This will affect all of us this year again potentially, however, it won’t stop us (because we love plants, or course! But I see it coming and if you haven’t noticed these issues, you will.)
I usually don’t make my own potting mixes for my container gardens, seedlings, or starter plants, but this year, I am highly considering it. In fact, I just read an article here, where they share a downloadable PDF file of how to make your own potting mixes. BTW, I trust sources from universities or extension services the most. By making your own mix, you are in complete control of each component. I’m guessing it may be cheaper but I am not sure until I compare apples to apples, so to speak. However, there is such an ease with opening a reliable trusted brand of professional potting mixes, if they are available and fresh.
Photo in Cathy T’s Greenhouse – Yes, that’s my hand in the mix!
Traditional pre-made potting mixes contain perlite and/or vermiculite, and peat. Good mixes are light-weight, have good water holding capacity, and mixes vary based on the specific growing needs (seeds, transplanting, bedding plants, plugs, potting up, etc.). Some mixes will have things like beneficial mycorrhizal (or biofungicides to prevent root diseases). Some will contain alternatives to peat, such as coir. Some have organic fertilizer added, and some don’t. Some mixes are pH adjusted and contain starter nutrients. This list goes on and on, and it all sounds wonderful, doesn’t it? That is if you can find it and trust it.
Photo from Cathy T’s Greenhouse
After using various bagged potting and soilless container mixes for ten years, I am able to tell when a mix is healthy the minute I opened the bag. I’ve talked about what to look out for when you buy potting mix for your container gardens, patio pots, and planters here on my blog. I still need to update that article I wrote, called “The 5 Must-Do’s for Successful Container Gardening” which I wrote a long time ago and did a brief update to it in 2019. But it still needs lots of work. Potting mixes is a big topic. I just haven’t had the time to really dive into a more extensive version of that article.
Now here we are in 2022. And I’m frustrated with the potting mix scene. I’m not alone. Lots of plant related Facebook groups have questions on potting mixes. People are frustrated because they get issues in or from the mixes (i.e., fungus gnats), and they just want good results, and so do I. They fear using the wrong type or brand, and even I have from time to time. Why? Because lately some results from “some” mixes let me down, and now with supply-chain issues, I wonder how this will impact availability and quality of mixes in 2022.
Pouring Potting Mix into a Bubble Bowl Terrarium – Cathy Testa of Container Crazy CT
Potting mixes are like a good foundation to building a house. And we all know what happened when one ingredient in concrete for home foundations became a huge issue, where houses had to be lifted and new foundation poured because house foundations were cracking and deteriorating. Well, I kind of feel this way about potting mixes. Potting mixes are the foundation to starting seeds, potting up your indoor houseplants, and building up soil mixes in your outdoor container gardens and patio pots, along with other components as needed. If one thing is wrong with them, it may lead to issues (e.g., poor drainage, insects harboring, or no moisture holding capacity). And there are many sources of potting mix brands out in the market, and it is growing, as defined in this link based on recent market analysis. The affects of COVID have impacted production and demand. It makes me wonder, what will roll out of those long awaited semi-loaded trucks, when they do arrive.
Castor Bean Seed Coming Up in Healthy Mix
For years, I had no issues acquiring the potting soilless mixes I needed, but the past couple years, eh, I’ve encountered some issues. And this year, because of all the things still impacting our supply chains overall, well, there are now potential issues with availability. This is my prediction, but we will see. I did receive a comment that orders were all back ordered a few months ago but the bottom line is lately we just can not predict what will happen next. So, my overall thought is, will potting mixes be in short-supply this year? And how will you or I manage that if so? What adjustments will need to be made? And also, remember, being flexible in the growing scene is key. I struggle with this because I want to be in control, but I’ve learned over the years, you must be flexible and strong! LOL. Because growing plants is a science and an art, and a bit of a guessing game sometimes too.
Cathy Testa Container Gardening containercathy at gmail.com Zone 6b
It’s always interesting to see new ideas in the plant world, and of course, one caught my eye recently. It is a planter preassembled with elephant’s ear tubers, boxed up for easy handling, and ready for the consumer to just water and wait for growth.
How I’ve Stored Tubers andGrow Them:
I’ve grown elephant’s ears from tubers over the years. I typically store them (the tubers only) over the winter in my unheated basement in bins with some peat to wait out winter until spring time. Because the plants are not hardy here in our winter planting zone (CT Zone 6b), I can not leave them in the ground or in pots outdoors over the winter. I dig them out of my planters (the tubers that is), clean off the soil from the tubers, and store them. Usually I am successful with opening the box in spring time to find them in tact. I’ve blogged about my process many times, search the word “overwintering” for more on that.
When I’ve Started Them:
I typically start them indoors around end of April or early May as spring is approaching. For years, I started them in my house by planting the tubers in pots with potting mix and setting them by my kitchen glass slider door. It was sufficient to get them started. Within a few weeks or so, a growing tip would appear above the soil and start to grow. When all chance of frost passed, out they went into larger planters and containers in my yard or on my deck, etc. These plants reach huge sizes (4 to 6 to 8 feet tall), so larger pots are always my aim to show them off in the right places.
Tried to Start Them Earlier:
However, last year, I wanted to try to start them earlier. I attempted to start some in March in my greenhouse (years ago, I didn’t have a greenhouse). It didn’t really work out as I had planned. My greenhouse is heated only to about 45-50 degrees F in the winter (to over winter other plants). It is a low temp because heat is a huge expense (especially this year), and elephant’s ears (Colocasia) require warmer soil temperatures (65 degrees F or warmer). They didn’t take off any faster than they would in my home, in fact, it was probably a bit slower going. They weren’t popping out of the soil and when I inspected them under the soil, some rot had started as well on part of the tubers (or bulbs if you prefer that wording). I learned a lesson, the soil needs to be warmer. I somehow overlooked a fact I knew due to being anxious to start them.
I considered maybe it was too soon to even attempt growing them earlier. What ended up happening is the potting soil remained too cold (because it was too cold in the greenhouse) and too wet because the tubers weren’t actively growing yet. Cold temps + damp soils leads to rot of the tubers. In fact, storing them is usually at a temp of 40-45 degrees F so the whole situation was it was just too cold still in my greenhouse, despite those rapid warm ups during winter days when the sun is out – the evenings were still a bit chilly.
How they Do This in the UK:
I’ve seen posts by people in the UK (via the wonderful sharing of posts on various tropical pages) usually start their elephant’s ear tubers in what they refer to as a propagator or cupboard. Terms we don’t use here in CT. From what I can tell, many of them put the tubers in plastic bags and place them in a warm spot (a cupboard or propagator) until they see some growth coming from the tuber – and then they put them into soil mix – or the ground perhaps (I’m not sure). Makes sense, they give them a head start but don’t subject them to cold wet soils. I remember asking someone one day via a comment on a post about this, what is a cupboard? If I recall, it is like a warm cabinet you have in your home somewhere to serve as a place to start tubers, or perhaps some seeds. I have some places like these (over the fridge I have a small cabinet that stays warm) or a cabinet in a corner near our heat source, which actually, I did use that cabinet to start sprouts years ago and that was one of my things then – starting and eating sprouts. Maybe this will be a location to kick start the tubers first – I may give this a try this year.)
Anyhow, I think the message here is if you start them too early in the wrong conditions, it could lead to issues, which was the case for me last year. Thus, when I saw those pre-planted tuber pots at the local big box store (just yesterday), I had some initial thoughts. I like the idea but I also know of what could go wrong with them, but I’m not saying it would go wrong (see disclaimers below!). And I also thought about what was right about these pre-planted tuber pots.
Pre-Planted Pots with Tubers
I have always been somewhat addicted to elephant’s ears because of their large showy heart shaped leaves which point down (or up as in the case with many Alocasias). They give a wonderful vibe to a space and I have used them everywhere in planters. I even hired a photographer a few years back to take photos (check her out at jmsartandphoto.com).
One year when I got into skulls, LOL! Note: The Human One is not REAL! LOL!
Elephant’s ears are just so very cool. And grow large and tall. The wave around in the wind, they create shade for plants below them, and they look good from the tops or bottoms and are relatively easy care. I just have to share another photo here of them. I typically plant some around my big red banana plant (Ensete) as well in this massive concrete planter at my home. Over time, it becomes lush and dramatic looking. I find they work in sun or shade, if more sun, more watering is required. They also make excellent thriller type plants in pots. They can even be grown in water – they are versatile plants for a tropical look and you may propagate them too.
Cathy Testa’s Large Cement Planter with a Mix of Elephant’s Ears and Other Tropical Plants
Digging them up for storing them is a fall gardening chore, but re-growing them in spring time is not so much of a chore, but I did take notice of those pre-planted tubers in pots with soil at the big box store yesterday. I didn’t see a price tag on them, and believe they were freshly delivered to display and sell so the price was not on there yet, I was curious about how much they cost.
My Take On the Pre-Planted Pots Seen Just Yesterday – Just my opinion!
Pluses: Talk about convenience. All was so well packaged and boxed up, it would be very easy to plop into your store cart and go. The pot size was good; usually I start my tubers in a one-gallon nursery pots. These black pots were bigger and nice enough to use for the summer as your planter, basic black color. The plant care information on the side of the packaging was decent, indicating they should not be planted outdoors until frost has passed (true), and to “water sparingly” and to keep the mixture “moist, not wet.” But they didn’t say why on the moisture, nor was there any botanical information on the packaging. Since I could not see the inside, not sure if more details are provided. They do not give Latin names for example, but did indicate there are 2 plants (bulbs) inside pre-planted, or that is the impression I got.
The Minuses: What are you getting inside? The top of the pot is closed off with more cardboard, and I wondered, hmmm, how big are the tubers in there? How much soil, is it half full or filled all the way, are the tubers in the soil or do you have to plant them, what does the soil look like but I bet the soil is perfectly fine as they are produced by bulb or plant producers, most likely but I kind of wished I could peek inside. And the price tag wasn’t on them yet, and I’m curious on that part as well. How much does this whole package cost?
The Timing: It depends what you have for getting these started? If you have a warm home with some place to set them down where the soil will be warm enough (see noted above), you could start to water them and see them pop up over time. But it is still February, so you would be maintaining them perhaps as a house plant all the way until the end of May when all chances of frost outdoors are passed. I did consider the “what if” you just moved them as is (don’t unpack the box, don’t water them) and keep them in your basement. Will they be okay? They probably put the tubers in there with dry soil, so nothing will happen until moisture is provided, usually. I guess I pondered that because what if you just wanted to get it but not start them just yet.
Another plus, you don’t have to go buy a whole bag of potting mix soil if you want to grow these from these planters. Everything is all set for you. Another minus, what if they get wet at the store while they sit there waiting for the purchaser? They shouldn’t but if they did, then the soil gets wet and they may start to grow, or if the soil gets wet, it could lead to soil problems, if they are not in the right temperature conditions. And another minus, it is not technically supporting the local small businesses, but we all go to these big box places from time to time, don’t we? In fact, I feel like anytime someone creative comes up with a cool plant idea, these big box places are very quick to copy it – which is good or bad, depending on who you are supporting, a local small business or plant passions overall – I won’t go there, but any how, perhaps a minus is buying this is not supporting a local grower who takes the time to grow it themselves to a proportion and health readily available at the right time. It is just a matter of opinion, give or take. A matter of timing. A matter of preference, but anyhow, innovations and new ideas are cool overall. Maybe this is not a new idea either. It was the first time I saw it though.
Anyhow, I’m sharing it cause I spotted it, and thought I’d give my thoughts! What do you think??
Cathy Testa Owner of Container Crazy CT A Container Gardener Location: Broad Brook, CT Zone 6b
DISCLAIMER INFORMATION BELOW:
1. Copyright Policy
Unless otherwise noted, Cathy Testa and Container Crazy CT are the legal copyright holder of all material on this blog and others cannot use it to reprint or publish without our written consent. If interested in sharing a post written specifically by Container Crazy CT authors, do not hesitate to contact us to inquire on more details. Note: Reblogged posts from other fellow bloggers are done if the blogger automatically allows this feature on their blog, but they are the legal owner of their written materials unless otherwise noted by the author of the featured blog.
2. Hold Harmless
All the information provided on our blog is for entertainment purposes only and we are not providing medical, legal or other professional advice. You are reading and/or using any of the information from Container Crazy CT’s blog at your own risk. Most posts are totally harmless, but do not for example, eat a poisonous plant featured on this blog, for you will be doing so at your own risk.
3. Privacy Statement
We will not sell any of your personal or contact information to another company. Will not put your information on spam lists. We are not responsible for the privacy practices of any of your advertisers or blog commenters.
4. Reserve Rights
Container Crazy CT reserves the right to change the focus on this blog, to shut it down, sell it or to change the terms of use at our own discretion. However, we highly doubt we will do so, as we enjoy writing and sharing the information of this blog to our fellow followers.
5. Advertisers and Sponsors
Container Crazy CT has recently added WordAds, yet, we are not responsible for the actions of our advertisers or sponsors. For example, when our readers buy a product of service based upon a link from this blog, you must take action with that exact company to resolve any issues, not with us at Container Crazy CT.
6. Letters to the Editor
Any letters, messages, tweets or e-mails that readers of this blog send to Container Crazy CT are shared as needed when applicable to a post, such as a “comment” entered in the Contact Form below a post or when you comment via the red icon comment box at the top right of an individual blog post. If you wish to keep your comment confidential, we will do so upon your request.
Beautiful Photo – Really Captures the Beauty below the Elephant’s Ear foliage – Cathy Testa’s Planter
I have tons of gardening and plant reference books in my home office on tropical plants, succulents, landscape designs, perennials, woody trees and shrubs, vegetables, herbs, fruits, container gardening, and more plant related topics, but I do not have many reference books specifically about annual flowering plants (such as sunflowers, zinnias, or marigolds). I guess that is because my passion with plants started with mostly large showy tropical plants, and annual flowers have always been somewhat of a staple plant to me in Connecticut, thus they are not typically the unusual types of plants I enjoy. I use annuals rarely and only when I want that pop of color in a container combination in the summer. I find annual flowers typically look tired towards the end of summer because they are fast growers and push out lots of flowers, exhausting lots of plant energy, whereas tropical plants and their flowers last well into the autumn season here in Connecticut.
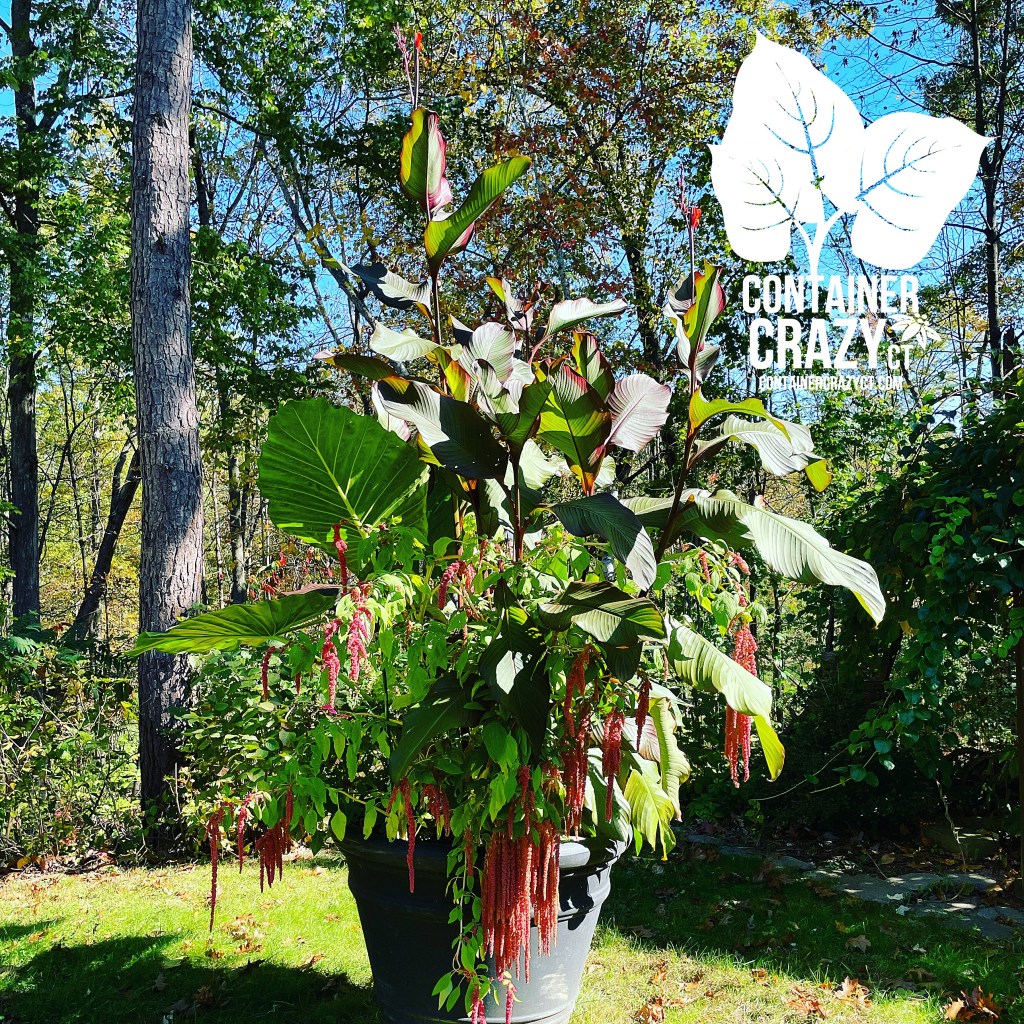
However, I discovered upon researching amaranth annual flowers (herbaceous ornamentals or a short-lived perennial in some climates), a particular species caught my eye last year in a seed catalogue. What I read in one of my books is that they are plants from the “tropics” of the Far East (per the one book I have on annuals, which is an old book!). The book indicates they are “brilliant, heavy-looking plants, reaching 3 to 5 feet tall” and grow in rich or poor soils. Another website indicates they are native to India, Africa, and Peru. In some ways, they are similar to the tropical flowering plants I already enjoy; plants from warmer regions. This is why I picked them as a candidate to sow from seed last year, plus the species I selected is a variety that grows much taller than normal, very tall, reaching 48″ tall. This would be perfect as a specimen plant with my other large showy tropical plants such as canna lilies, elephant ears, castor bean plants, or banana plants in my container gardens and patio pots.
Container Gardens by Cathy Testa of Container Crazy CT – Featuring Amaranthus caudatus
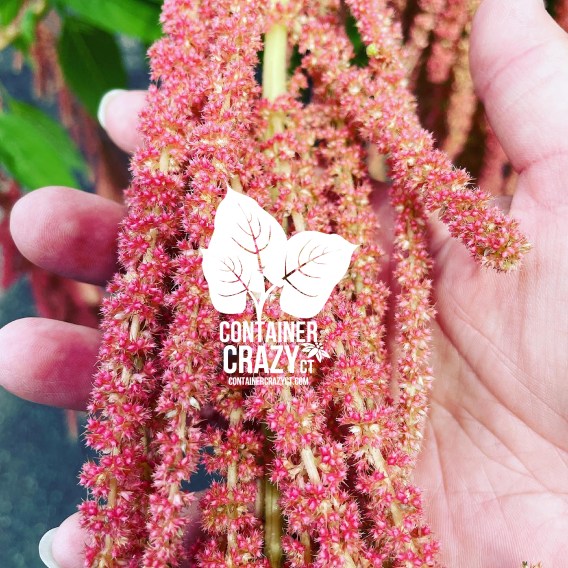
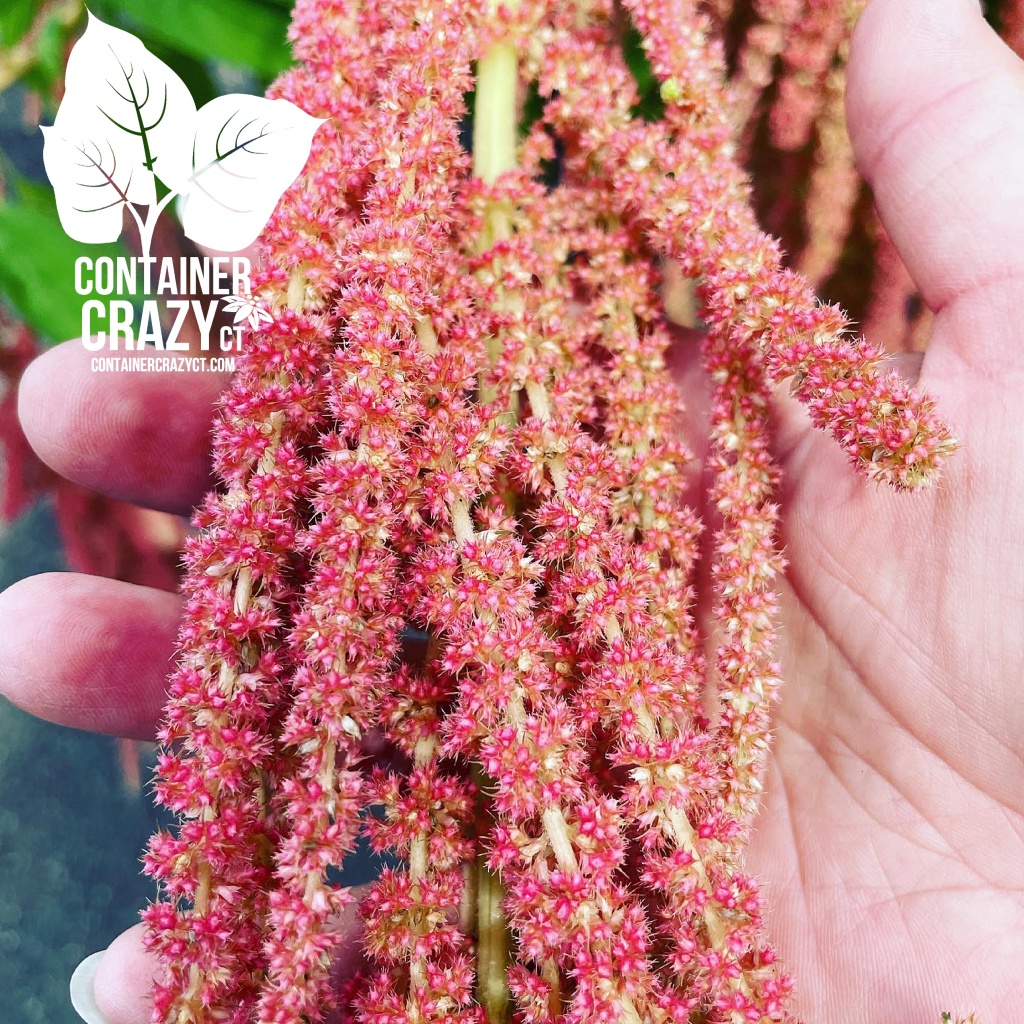
Coral Fountain Amaranth (Amaranthus caudatus) Love-Lies-Bleeding, Amaranth, or Tassel Flower
Of all the common names or flower descriptions of this plant, I guess tassel flower represents the flower form the best in my opinion of this species I selected. The plant’s large plumes (technically called inflorescences) dangle down in clusters of coral colored tassels as if they are fastened at the top of tall stalks. The flowers are fuzzy, clumpy, and resemble dreadlocks (another great word to describe their form and appearance!) They are chunky and petal-less. They resemble fountains or waterfalls in form, and may be used in wedding bouquets, as cut flowers in vases (long-lasting), and in container gardens where you wish to present a dramatic unexpected showy element. The foliage is not very large, and are a lime green lighter color on this type of amaranth, and I read the leaves are edible, but I did not experiment with that aspect, yet. After admiring the interesting aspects of this flowering annual with cool attributes, I decided to sow some seeds last year and give them a try.
Coral Fountain Amaranth – Cascading Plumes
When to Sow the Seeds
The seeds should be started indoors either at the end of March of middle of April based on our weeks before our typical spring frost timing in Connecticut (or use the appropriate 4-6 weeks before your last frost of your planting area). You may also direct sow these seeds in the ground after the threat of frost has passed (frost threat ends mid-May usually in Connecticut – check your weather and seed sowing charts). The seeds take 75 days (or about 2.5 months) from the time you transplant them to produce flowers. Starting them earlier will give you more time to enjoy the flowers which last well into the end of summer. The seeds are tiny and the packet has up to 250 seeds. That’s a lot of amaranth sowing, so use caution when sowing to not over do it.
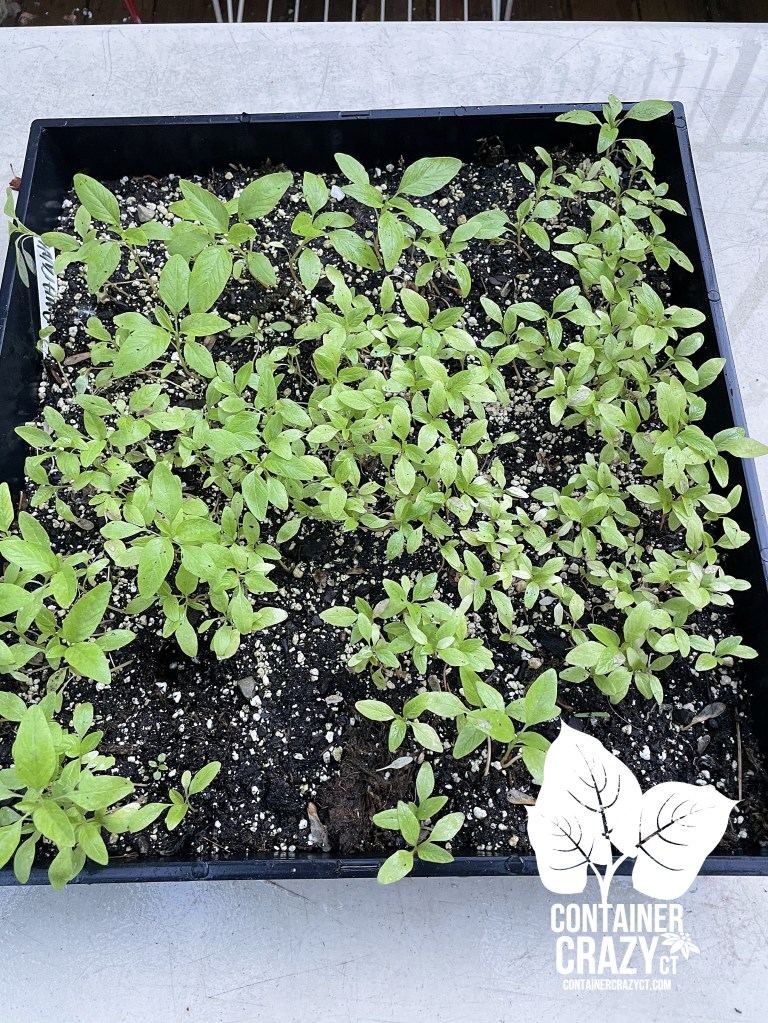
Seeds Sown in a Flat Tray
Some Sowing Problems I Experienced
However, I experienced some problems when I sowed them. I did a whole flat tray of them, and they seemed to not be really pushing growth a while after germinating, so I painstakingly put them in 2″ round mini pots one by one and thought I’d wait to see if that would help. It did, but one day I left the tray of the mini pots outside by my greenhouse and a rain gutter above rushed water down on them during a rain fall that day – pretty much destroying them all. All the tiny seedlings got stressed and the potting soil completed washed out. My bad – I’ll remember there is a gutter above problem next time, but I did manage to salvage a few seedlings and decided to put them in planters later when they were large enough to transplant after all chances of frost. I think the reason they may have been slow to grow from seed initially is because seeds germinate best at 75-80 degrees F and they need a night temperature of at least 65 degrees F after transplanting. Maybe my night temps at the time in my greenhouse were not warm enough but I am not sure.
ACK! Rain gutters heavy downpour washed out all the soil
Exposure Full Sun or Some Shade
One of the containers I planted them in is a rather large round black container in my back yard (probably at least 3 feet in diameter and about 4 feet tall). I put canna lily plants, elephant ears plants, and some of the amaranth transplants I managed to salvage in it. The seed packet indicated the plants like dry, hot conditions in full sun but will grow in partially shaded areas. The large black round pot is on the east side and gets shade part of the day. The packet also indicates the plants are drought tolerant (and may get root rot in poorly drained soils where is stays wet in the ground all the time, which was not a concern for me since I do all in patio pots and container gardens with sufficient drain holes). A drought tolerant plant is beneficial for container gardening, however, as you don’t have to worry about dragging the watering hose or watering can out there too often in the summer to water it. They are very easy to grow and tolerate poor conditions once the plants start to grow and get established, in fact, you may want to use caution with not overwatering it once it is doing well. Wet soils for this plant may lead to root rot per various sources.
An Insect was visiting some of the foliage
Use Large Pot Sizesand Sturdy Stakes
Because this species of amaranth grows very large and tall, place this plant in an area where you enjoy witnessing them cascading at the corners or edges of your patio pots. Consider taller upright planters because of how the plumes will descend down in big chunks towards the ground level. You want to be able to enjoy how they flow downwards like a waterfall without them hitting the ground. Fortunately, that was the case of my big round black pot in the backyard. As I started to see them progress, I thought about the wild and unusual form being a real show stopper if they were staggered in huge garden. The plums grow so long and become top heavy thus a good support stake is recommended when they start growing flowers. I used thinner bamboo poles which would be hidden against the stalks in the pot. The weight of the flower plumes becomes substantial as they start to grow well and large into the summer months.
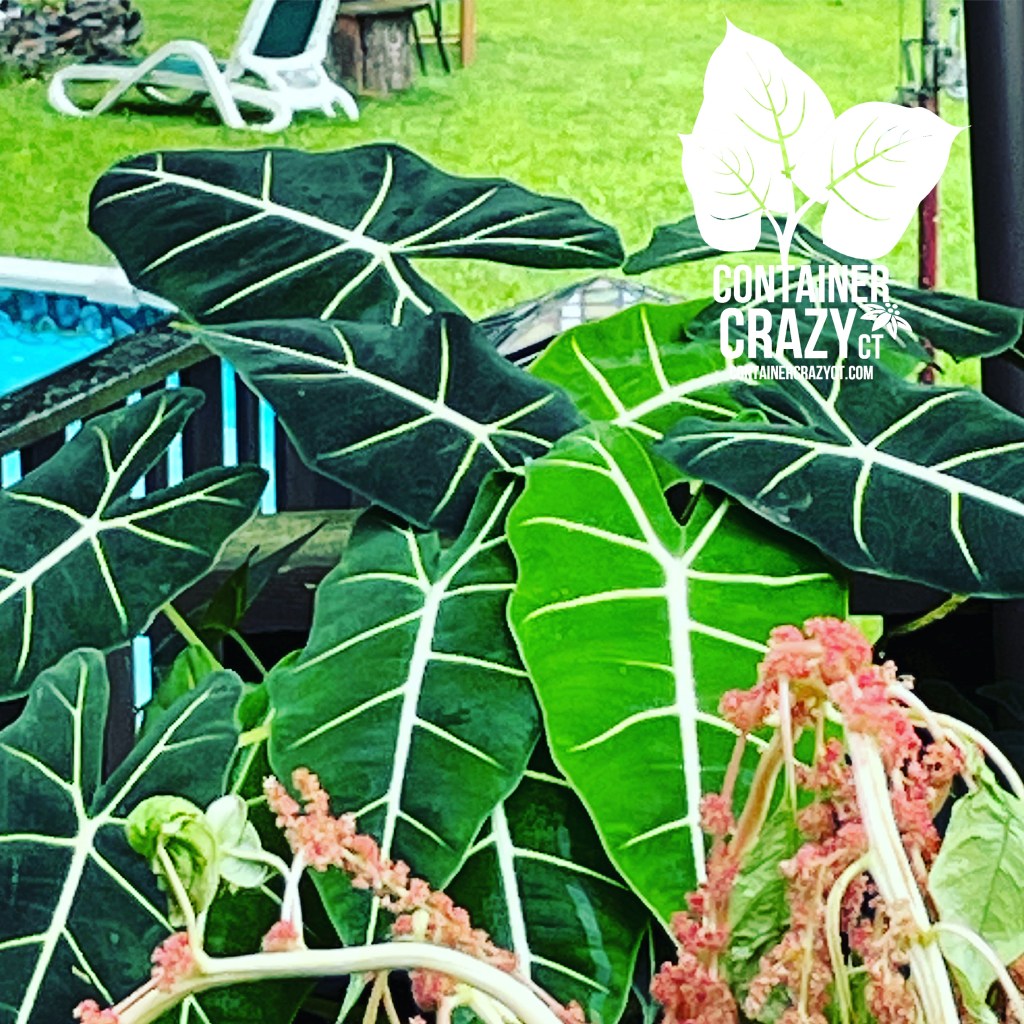
Castor Bean Plant Bottom Right with Darker FoliageCoral Fountain Amaranth (bottom) near the dark foliage of an Alocasia (above)
Companions with Darker Foliage
Consider pairing it up with plants with darker foliage and use tall plants too. The color of this amaranth’s leaves are a light lime green with an oval shape, and the flowers are a light coral color. It will show up more against a darker foliage plant, like a canna lily with plum colored foliage or a castor bean plant with the darker foliage. And consider pairing them up with other plants which are mid summer bloomers so you will get a mix of bloom colors for the look you wish to achieve in your patio pot or container gardens. I noticed hot pinks looked great with them too for contrast. Think hot pink canna lilies.
In a Vase at Cathy T’s
Used in Floral Arrangements for Weddings
I started to create a board on Pinterest last season to show what the flowers would look like, but this board is of other photos of various Amaranth plants. I discovered quite a few photos where the flowers are used in wedding bouquets and arrangements, but the only consideration I had on that is when the flowers reach maturity, they tend to drop tons of tiny little seeds. When I placed some in vases last year, it dropped lots of seeds on my outdoor patio table. I wondered how they work with those as cut flowers for floral arranging to avoid that problem (the potential mess it makes), and realized that would take some more research. I now realize you would have to harvest the flower tassels before they mature to avoid the abundant seeds in them later. The flowers plumes bloom from July to frost, and mine were full with flower plumes towards the end of the summer here in Connecticut. If you wanted to grow some for a wedding, you would want the wedding to be a summer wedding and again, harvest them before maturity so you don’t get a situation of tiny black pepper sized looking seeds falling down your wedding aisle runner. The plumes also look great in tall vases and provide a rather exotic interesting vibe in outdoor spaces. They may be used as fresh flowers or in dried flower arrangements. In fact, I saw some in a floral shop this winter and I kicked myself for not saving the plumes of my own last summer.
Bees Loved – Many Visited!
Food for You or Pollinators
Some reference books indicate they are favored by bees and that is true, I did see lots of bees visiting the tassels of its petal less flowers and took photos, and at times I would witness a bird perch on the tall thick stalks. Additionally, there is some information about how parts of the plant are edible and seeds may be used in porridge. I didn’t really look into that much however. Maybe this year when I grow them again, I will do so. The seed packet indicates amaranth are one of the most nutritious of the ancient grains. This turned out to be a stunning plant, which friends and family noticed, when they visited. I had one by my entrance stairs, and one day, my brother shouted out as he was leaving, “That plant is cool!”
When I worked at a garden center years ago, they had Knock Out Roses always in stock for sale. I recall Knock Outs were easy care, disease resistant, and great repeat bloomers, but for some reason, I can not remember exactly what made them special, other than they were really reliable compared to other fancier roses. I’d walk around looking at them at the nursery outdoors, leaning down to read the tags and smell the blooms, and always admired them, but I had never seen a compact variety of Knock Outs Roses until last year.
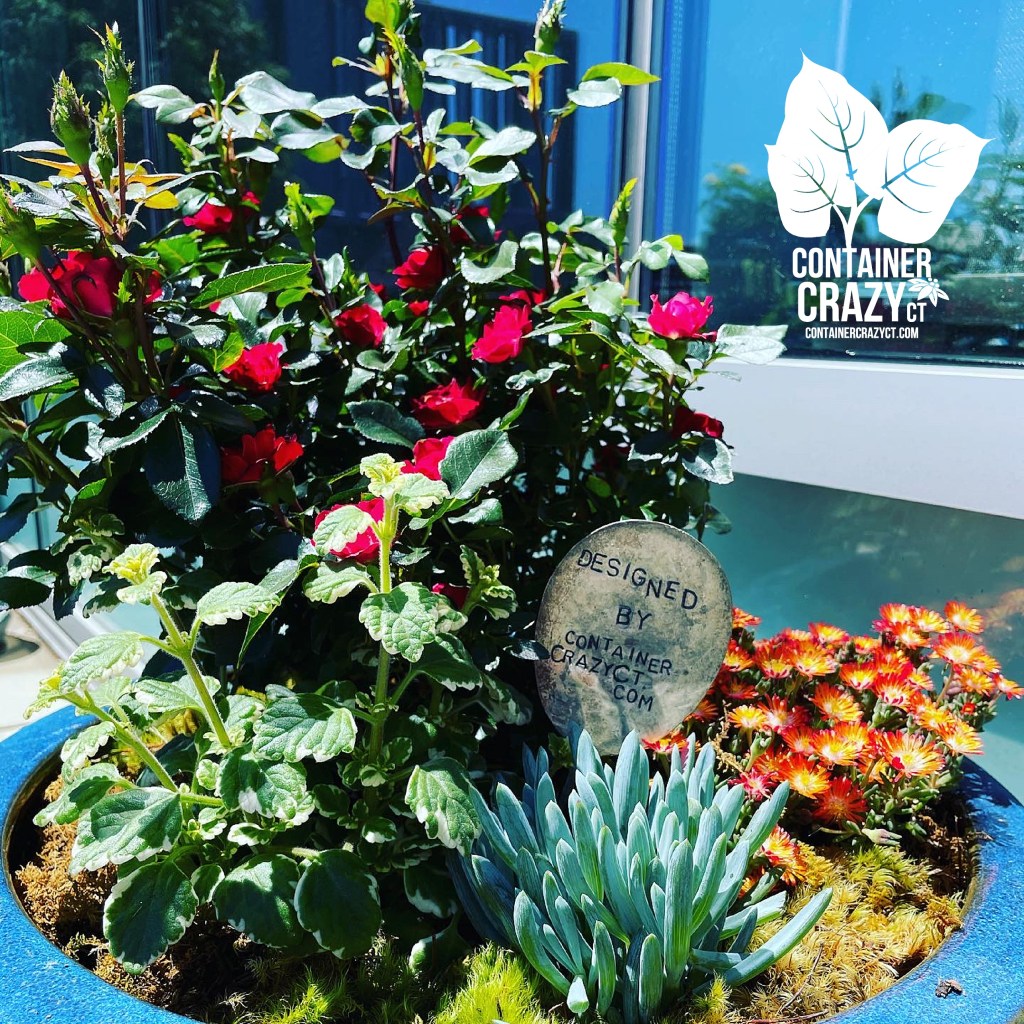
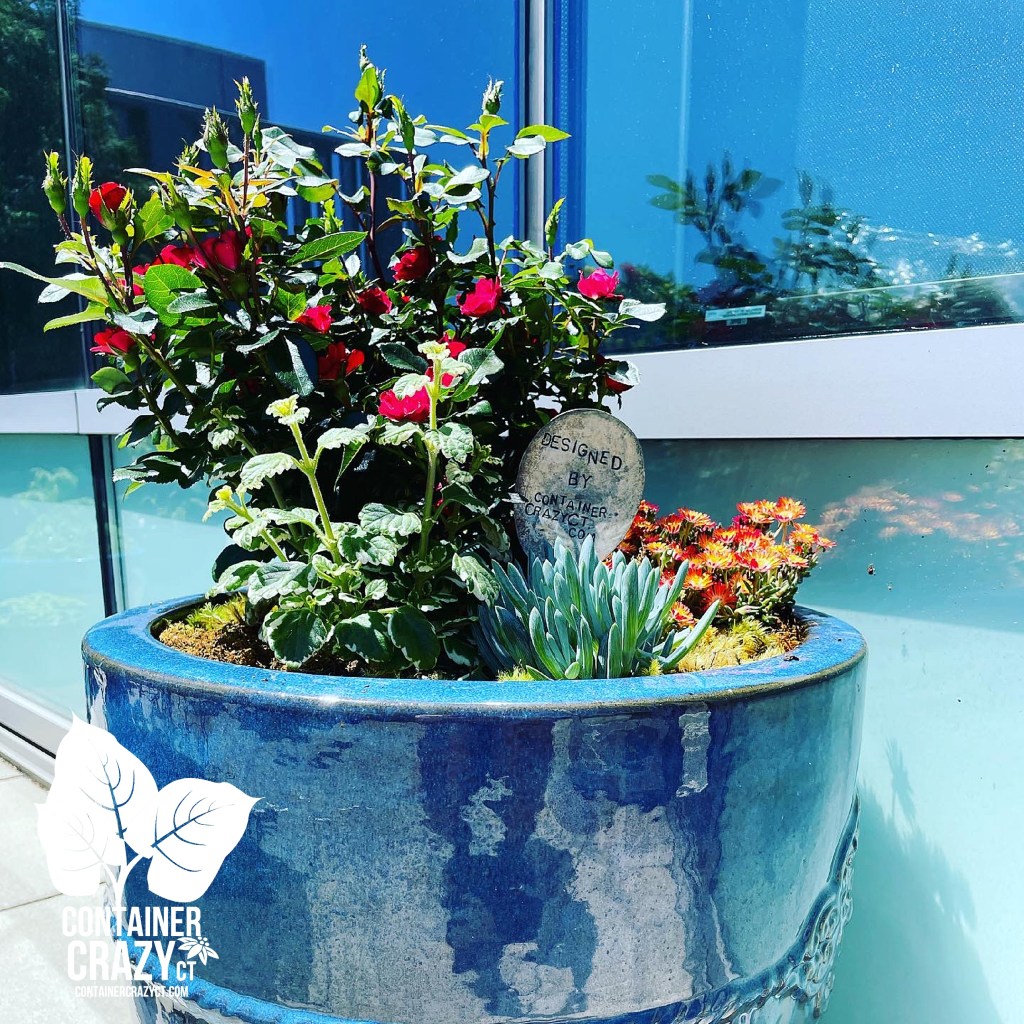
Photo 1 – Upon Planting Memorial Day Weekend – Knock Out Rose Petite with other plants
That was when I spotted the new member of the Knock Out family – last summer at a local nursery. Because I was familiar with the Knock Out logo and pots (from years ago), it caught my eye right away from a distance, and I thought, “Is that a miniature or smaller rose by Knock Out?” Long story short, I grabbed a few because the smaller new size, called Petite! Knock Out, is well suited for patio pots and container gardens for our summers here in Connecticut. I also knew that my customers would like traditional rose blooms in their outdoor planters. It would be a nice addition to the urban outdoor setting with various planters throughout the area.
Photo 2 – A Month or so Later after Planting It
The Petite Knock Out rose color is a beautiful intense deep red (their website refers to it a “fire-engine red”), and the plant’s tag indicates its mature size would be about 18″ tall, and that really is perfect for patio pots and containers, plus roses are sun lovers. These required about 6-8 hours of full sun and my customer’s site is definitely a sunny location. Another aspect is these are easy to carry to my location and plant, which is a side bonus for me as a container garden installer. And it would bloom all summer into fall (long-bloomer candidate!). What’s not to love?!
Photo 3 – Later in the Summer towards fall season – by Cathy Testa of Container Crazy CT
I usually don’t plant or play with roses too much. Some will say roses are for experts and/or I know roses may develop issues, insects, or diseases but the thought of using a smaller, more compact, or miniature rose from Knock Out didn’t scare me. As I took photos at different times, it is apparent the blooming power of this Petite Knock Out Rose plant did not disappoint. Looking at the sequence of the above photos, you can see Photo 1 – upon planting, it has many buds ready to open, Photo 2, lots more flowers opened a month later, and Photo 3 was taken at the end of the container gardening season, towards the start of fall. The flowers are still abundant right before our fall season. And the blooms retained their deep fire-engine red color. When you have very full sun situations, as in super full sun, sometimes flower colors will fade, but they did not fade on this Knock Out Petite. Take a look at the foliage as well – shiny, healthy, and no issues. No signs of trouble, thus, I and my customers’ were pleased.
Plectranthus – Flowing Over the Planter!
The Knock Out Petite retained its shape overall, did not overgrow the tall blue planter, but the trailing spiller plant next to it got rather large. Sometimes I laugh at myself, when I see how big a plant got over the course of the summer, and I have to always remind myself to restrain my plant enthusiasm and remember that some plants will grow faster and fuller than others. So next time, a more controlled spiller perhaps with this rose plant will be used.
Early in Season – Container Gardens By Cathy Testa
This Petite Knock Out Rose will give a show from the time you plant it till end of the container gardening season in Connecticut, then you may transplant it later if you wish or store the container with the rose shrub in it in your garage or basement over the winter. After my first year of using the new Petite Knock Out rose, I can’t think of any flaws with it – so it is a nice one to add to your full sun locations list. Well, one flaw, make more of these with other bloom colors. Again, it is noted as disease resistant, but that doesn’t mean it can’t get diseases. Overall, I find if you select a healthy plant to start and maintain your container gardens with appropriate watering and care, all should move along well. Container gardening is not like that of a shrub in the ground which may get subjected over the long term to issues, but anyhow, I really was happy to find a smaller rose plant perfect for container gardens and patio pots.
Container Gardens by Cathy Testa of Container Crazy CT
Plants in this tall blue planter are: Petite Knock Out Rose, Delosperma ‘Pumpkin Perfection’ (orange flowers; called Ice Plant), Senecio (succulent plant with blue foliage; called Chopsticks), and Plectranthus (white edges to leaves and a spiller habit). As far as planting requirements, full sun, potting mix for pots (I added a small amount of aged compost), and use at least a 12″-14″ diameter pot for this size plant, but in my case, I used a larger and taller pot. Go with about 16″ deep, but deeper will help those roots grow down, and use larger pots if adding more plant candidates with the rose. And oh, placement: I suggest you put the outdoor planter near a window if you are able to do so, it will allow you to see the roses from the inside too.
For more information about Knock Out Roses, click here.
Cathy Testa Container Garden Designer Broad Brook, Connecticut Zone 6b Posted: 1/25/2022 See also: www.WorkshopsCT.com www.ContainerGardensCT.com 860-977-9473 containercathy at gmail.com
Mandevillas are amazing flowering tropical plants for full sun locations in the summer in container gardens and planters, and I always enjoyed looking at them, but for some reason, I didn’t plant them very much at my own home location, until a couple years ago, when a clients’ needs to cover a wall with flowers lead me to paying attention more to mandevillas.
Perfect for walls, trellises, arbors and more…
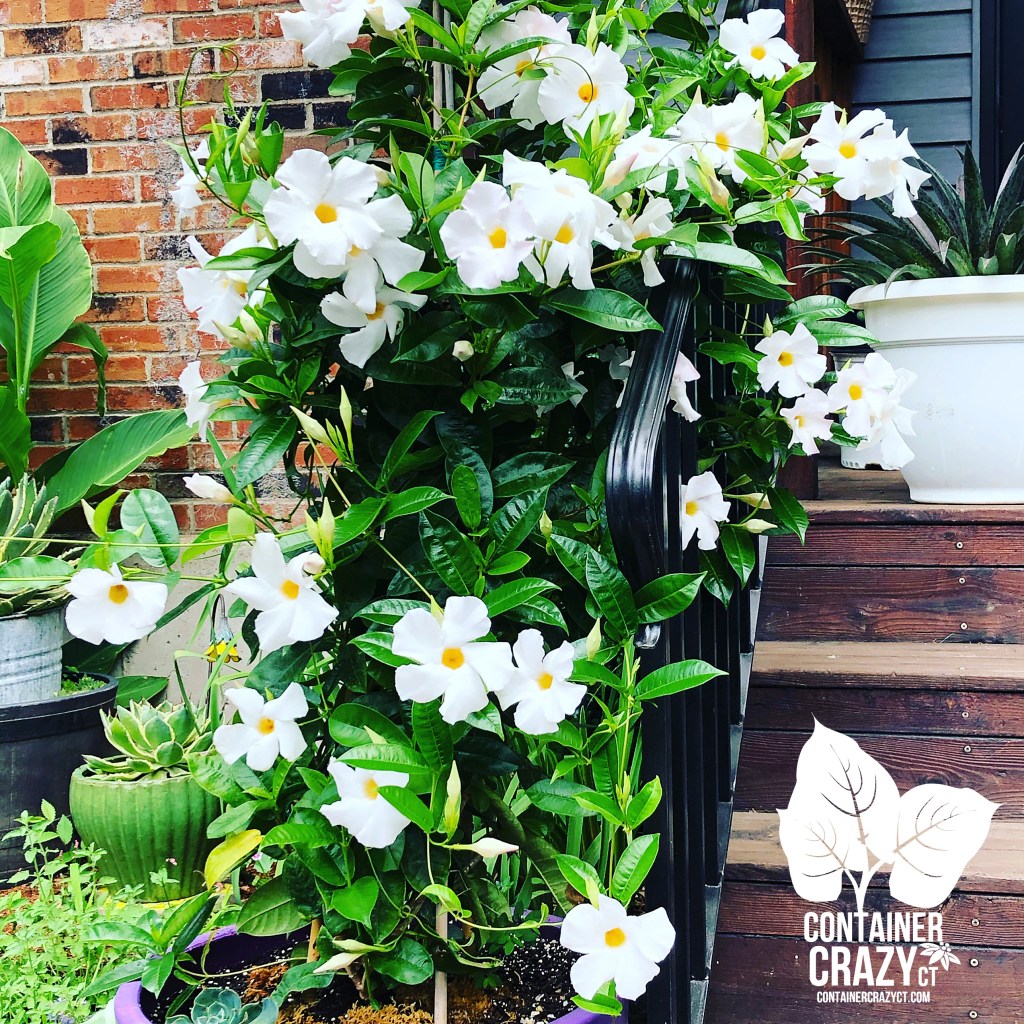
If you have an area to grow a beautiful flowering plant upwards, such as a wall, trellis, lamp post, arbor, stair railing, fence, mailbox, or in a pot with a support trellis, these plants are perfect candidates. In Connecticut, mandevillas will bloom profusely on upward growing vines with big dark greens leaves when provided enough sun and heat, and appropriate growing conditions. They work very well in containers, planters, patio pots, and don’t even require super huge pots to thrive.
Mandevilla at a Client’s Home
Above is an example of a wall located below an upper deck. The white blooming mandevilla vines were very lush and full, growing from a planter about 24″ diameter and just as deep. It was facing the sun most of the day, and it looked absolutely fabulous, reaching the top of their deck that year. These plants will twine fairly quickly onto supports with many funnel formed flowers opening over the course of the summer to fall season in Connecticut. They must be taken in before fall frosts or overwintered immediately after being touched by frost. See my “Overwintering” posts for more information on that aspect.
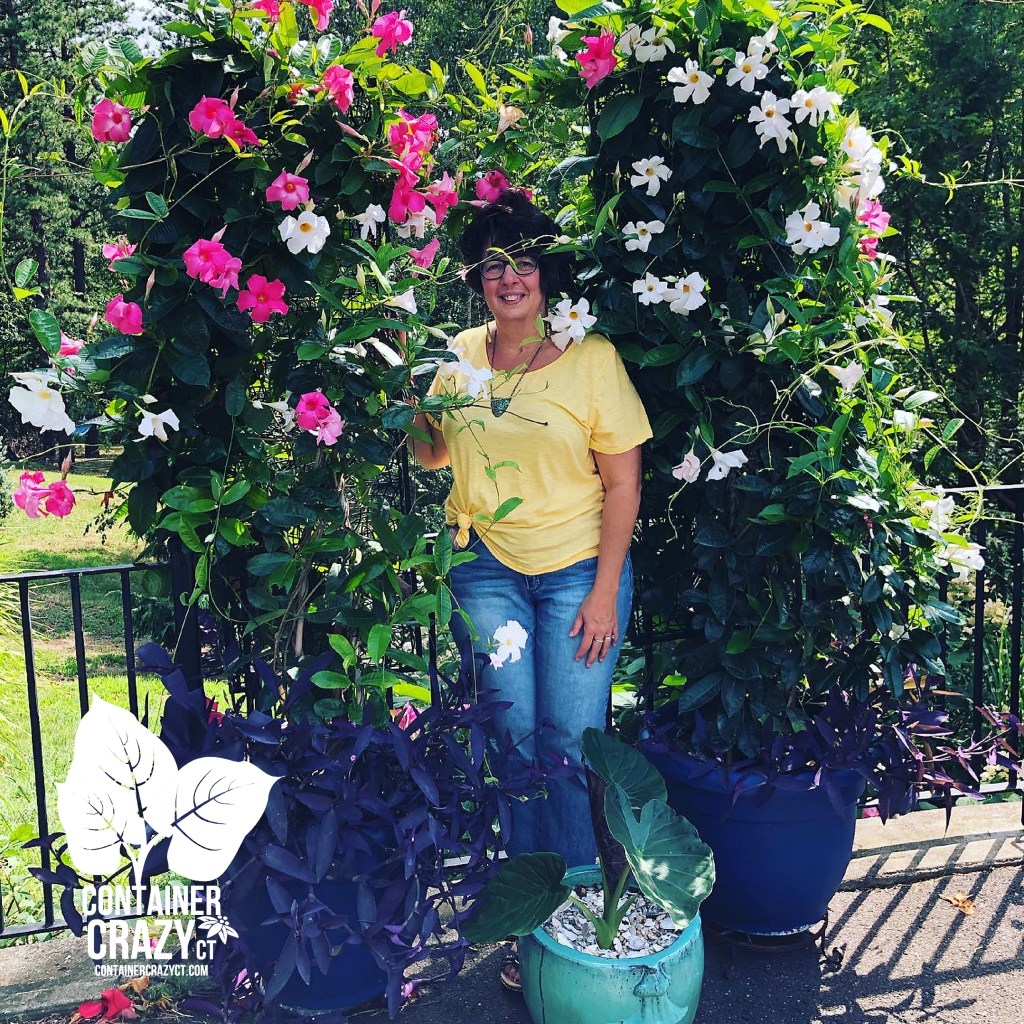
Cathy Testa with two Mandevillas at her home in Broad Brook
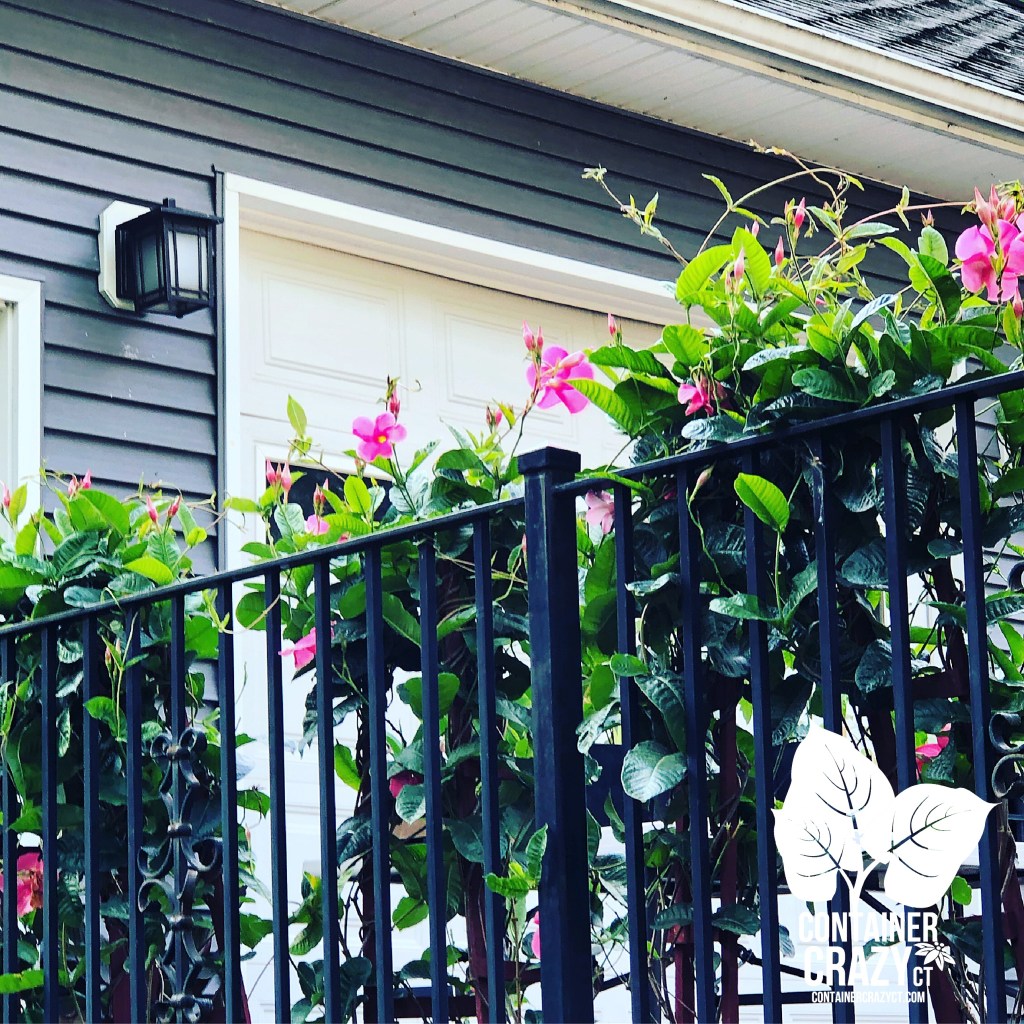
In the next photo, here I am in between two plants in blue pots at my home. The base plants (serving as fillers) are Tradescantia pallida ‘Purple Queen’ (annuals in CT). I put really tall trellises in each pot along this wrought iron fence, which is on the driveway where the plants got full sun all day and my watering hose was easily accessed. You will see they were growing taller than me and if the trellises were higher, they would keep growing up and up and up.
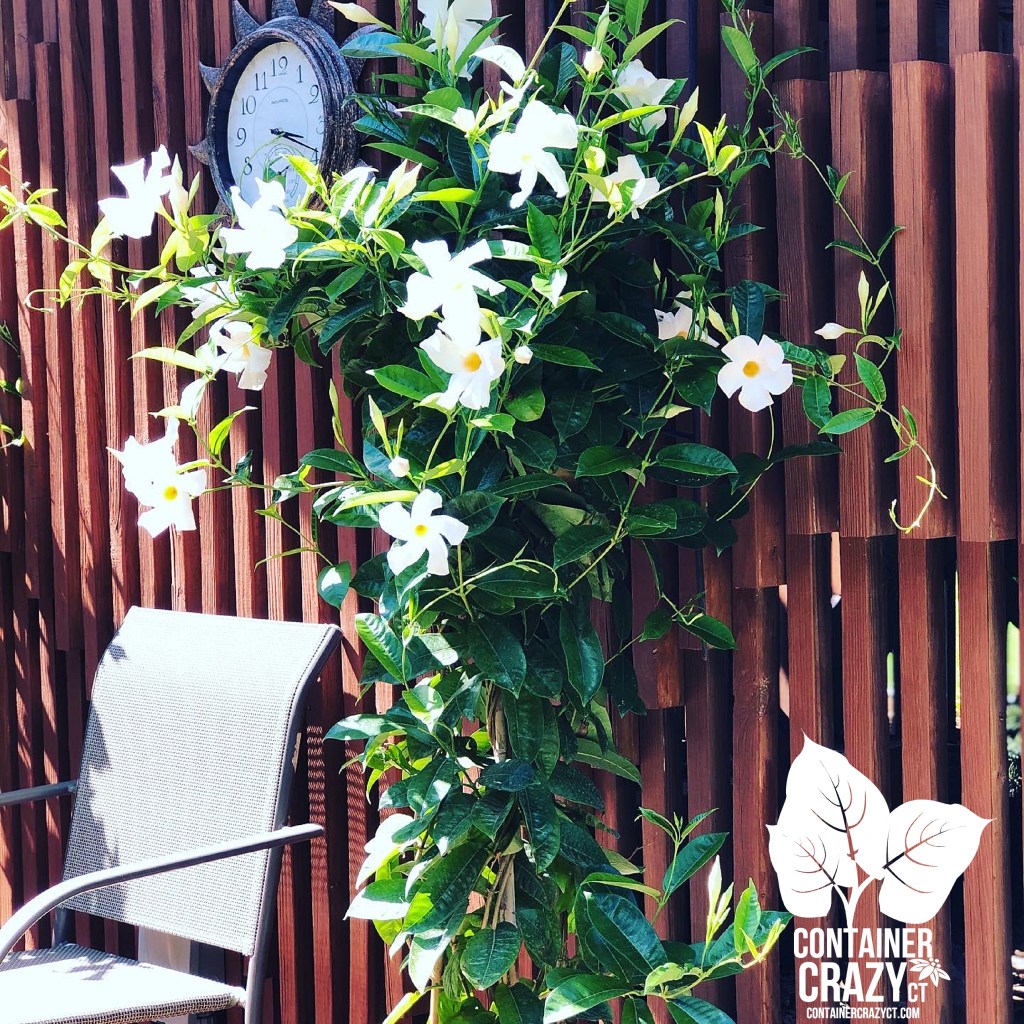
In a Pot Growing Up a Staircase Railing
And I wanted to grow one up my stair case railing to reach the overhead arch, it almost made it to the top. It helps to use garden twine to guide it along and give the vines something to reach and attach to as it twines up. The purple pot below used for it is probably about 2 feet deep, but you may grow these plants in even smaller pots. More on that later.
Side View on the DrivewayCathy Testa standing in front of a Wall Planted with Mandevilla Plants
And here is a photo of me with the mask on, primarily because I wanted to show the timing of this photo, of a wall I just planted. It wouldn’t be long for the plants to produce more blooms. It does help if you start with taller plants if you are looking to gain the affect of covering up something like the wall in this city photo. They will grow as high as the support system they can attach to. If I had a higher wall here, it would keep growing up all summer. They don’t grow as fast as morning glories, as an example. The growing pace is moderate, so if you want to get one to really show off, get the taller specimens to start with. They may be a pricy but so worth the display and enjoyment you will get by using one or more in your outdoors spaces.
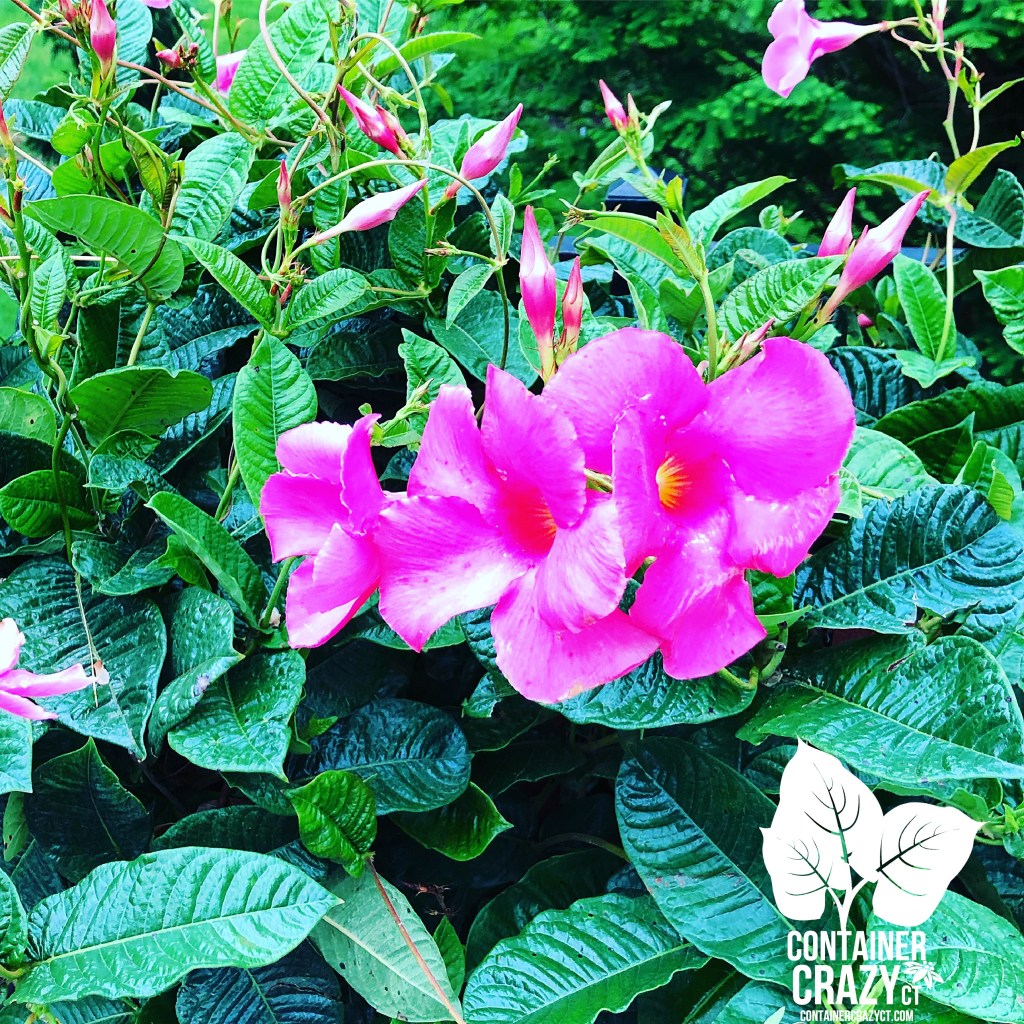
Reaching for the Heavens Gorgeous Pink Blooms against dense foliageStunning Against Blue Skies!
Moderateclimbers that keep on growing up…
Mandevilla vines will reach to the heavens, if you allow them to – they seem to never stop wanting to reach up into the skies. If you are able to acquire taller specimens to begin with, it is worth it in my book. They come in white, pinks, and reds for bloom colors. I haven’t grown the red ones yet, maybe this year will be the year.
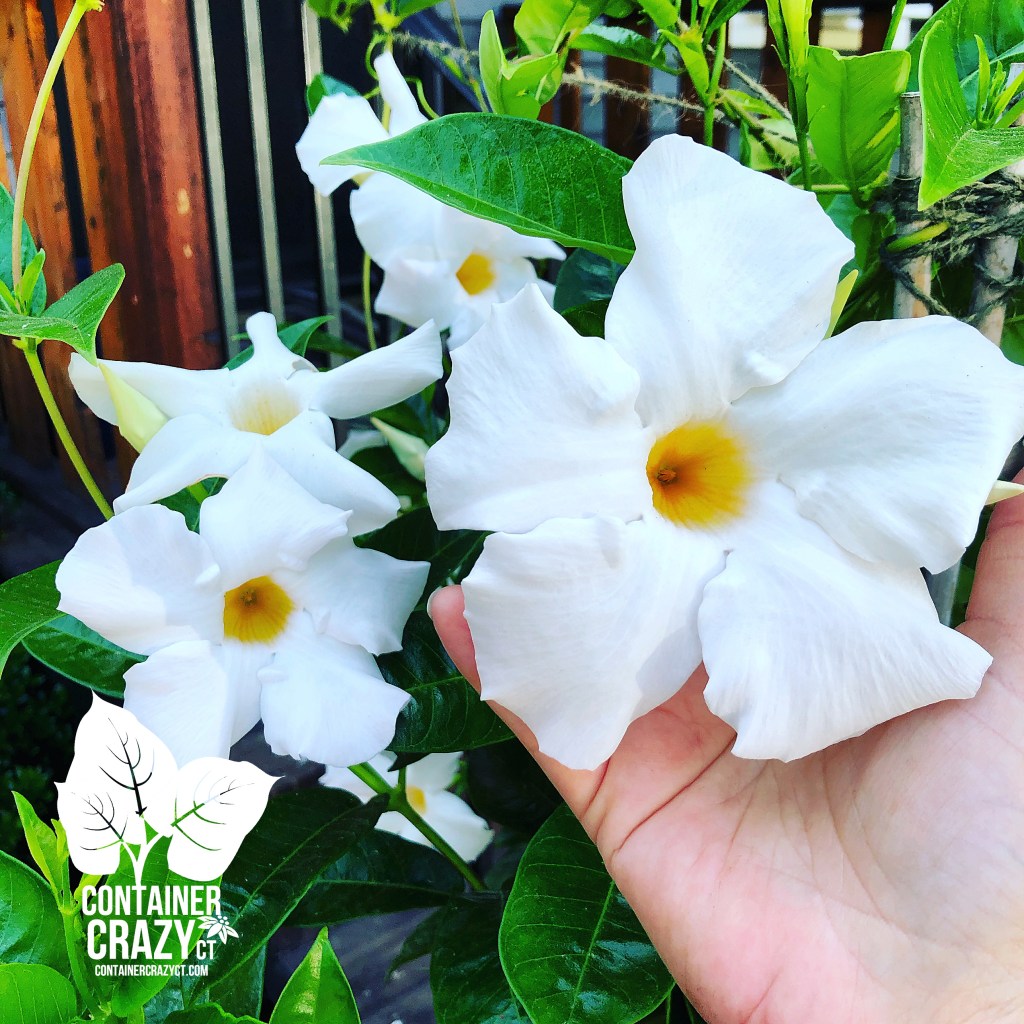
Funnel Shaped FlowersMasses of Pink Blooms
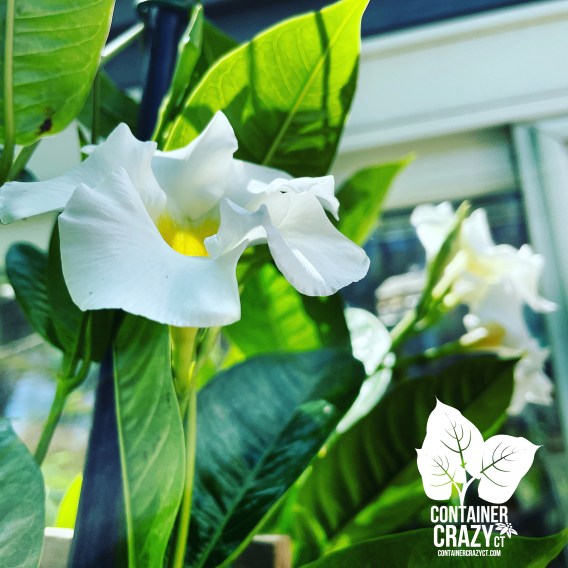
Inspecting the leaves
Some of the varieties have glossier leaves than others. The leaves on the white blooming one, in my photos, were about 4-6″ long. A good tip is to inspect the foliage when you are looking for one during out Connecticut container gardening growing season, and although you might experienced a stressed leaf or two based on when they arrived in Connecticut (cause most of them are shipped here from warmer states), they usually bounce back quickly when potted up and provided the right soil environment and sunny conditions in your planters. It is not to say they don’t suffer some minor issues, but a good tip, again, is to inspect your plants. See a healthy tall one – don’t hesitate to grab it.
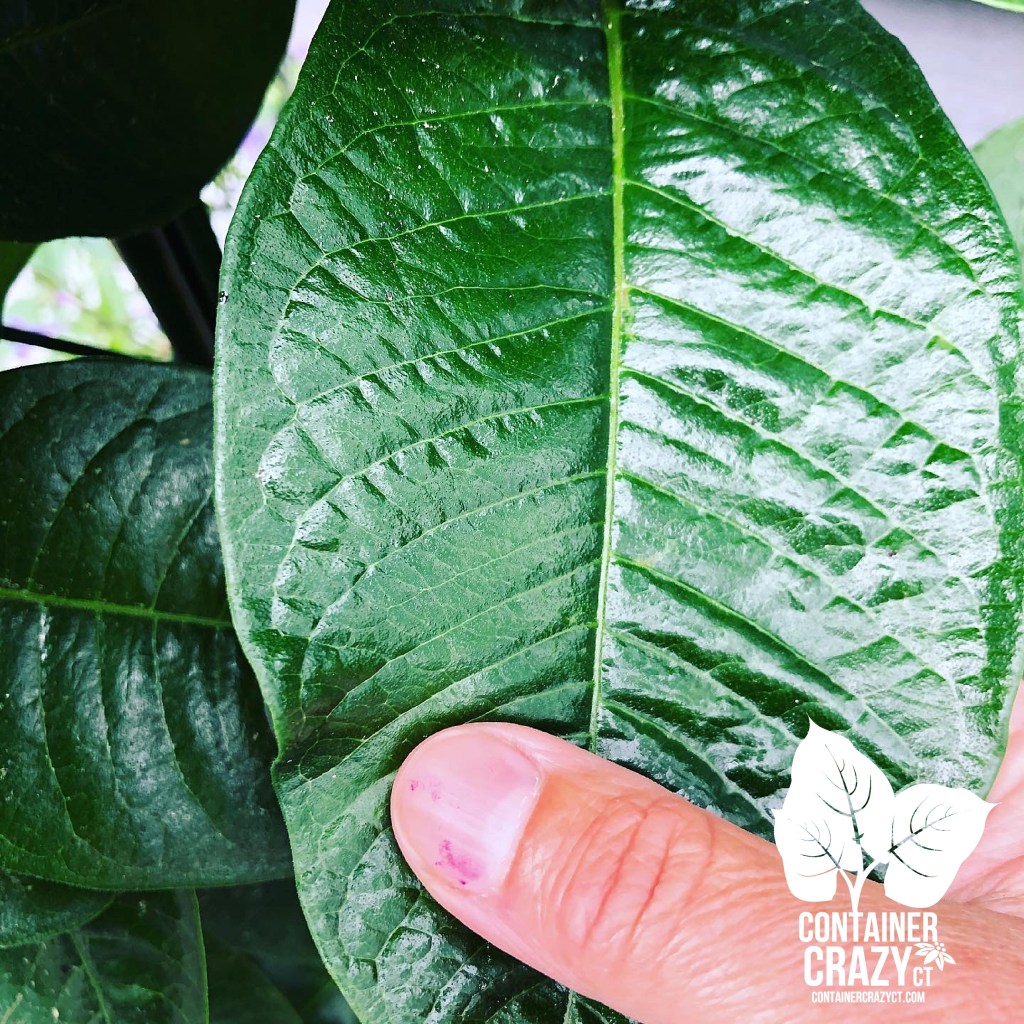
Now that is a HEALTHY A** LEAF!
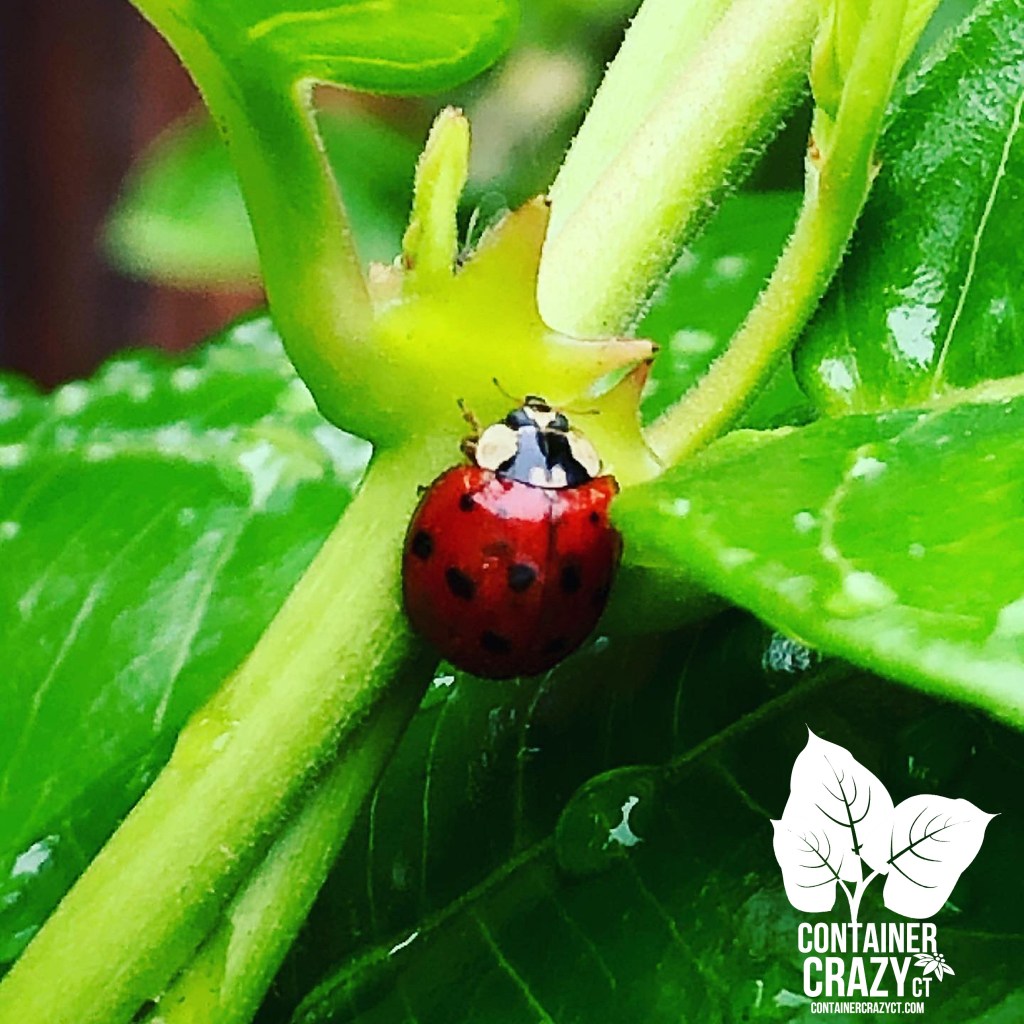
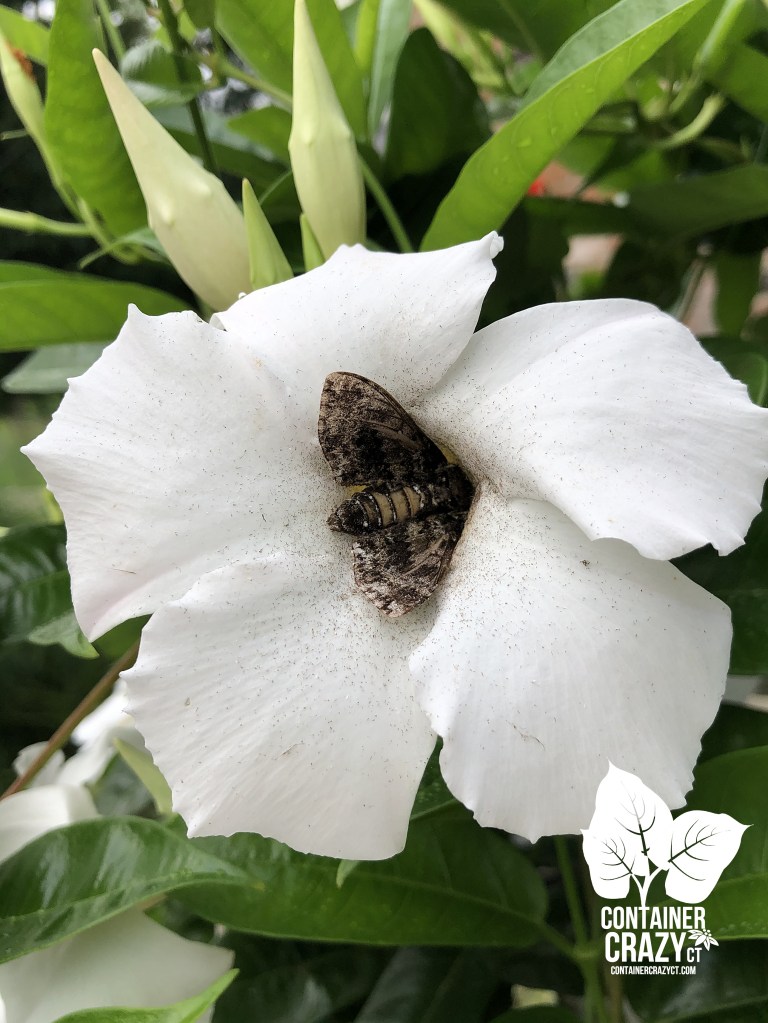
Sometimes I admire foliage of plants more than flowers, especially when they look almost perfect. Not always achievable because we are not plant Gods, but the leaves on this plant that year, wow, so shiny and healthy. To achieve good results, be sure to have well draining soil, use pots with drain holes (see my 5-Must Do’s for Container Gardening), and inspect the plant from time to time. Sometimes, during inspections, I may discover nice insect visitors, like bees, lady bugs, butterflies, and moths.
A very WELCOMED visitor – Lady Bugs are great for eating any bad bugs! Bumble Bee Heading in for a LandingBee Deep in the Tunnel Funnel Moth – Awakening from His Night Visit
Not damaged by serious pests, but bothered if conditions are not right…
So far, I have not encountered serious pest (bag bug) problems on mandevilla plants, but I do think they don’t like “inappropriate environmental stress” and things like too cold of temps, or too much wind, or neglect from not watering regularly. Those aspects will weaken them, and you should also avoid areas with high salt (maybe road side). Do not plant them in containers or your patio pots in Connecticut outdoors till well after all chances of spring frosts. So, you would plant them around the same time as you put out your warm season vegetables, like tomato plants.
Heat, sun, and well-draining soils…
The plants want heat and sun, well-draining soils, and appropriate watering. These are tropical vining plants and they don’t like the cold, so remember that on your timing in spring time. They want warmer temps at night so even if the an early spring day feels okay, the cold temps at night are not good for them in early spring before frosts. Also, for more blooms, get some bloom booster liquid or water soluble fertilizer and fertilize a couple times a month in the summer after the plants are established if you feel there are not enough blooms being produced on your plant. It is a good idea, like most tropical plants or plants indoors over the winter, to acclimate them to outdoor summer conditions.
Acclimating a Stock on My DrivewayThe In and Out Year
One year, I had to pick up my mandevillas orders earlier than normal, so I literally moved them in and out of my greenhouse during the later part of April into mid-May before planting them at a location. I didn’t want to subject the plants to cold temperatures of the evenings, but I also wanted to give them natural sunlight during the days (on good early spring days). It was a “Mandevilla Workout!” As noted above, do not plant them until around Memorial Day in our area of Connecticut (Zone 6b). They are from areas of warmth, sunshine, and moisture – so remember these 3 environmental conditions for your mandevilla plants. If temperatures drop or if you put them out too early, your plant will experience stress, leaf drop, and potential diseases later, so be sure to protect them from the cold in early spring before frosts if you pick any up early in the container gardening season in Connecticut. An occasional drop in temps in the summer is fine however if we get some freak cold (like we did last year in 2021 on Memorial Day weekend!), they should bounce back from the heat of summer, which mine did that year.
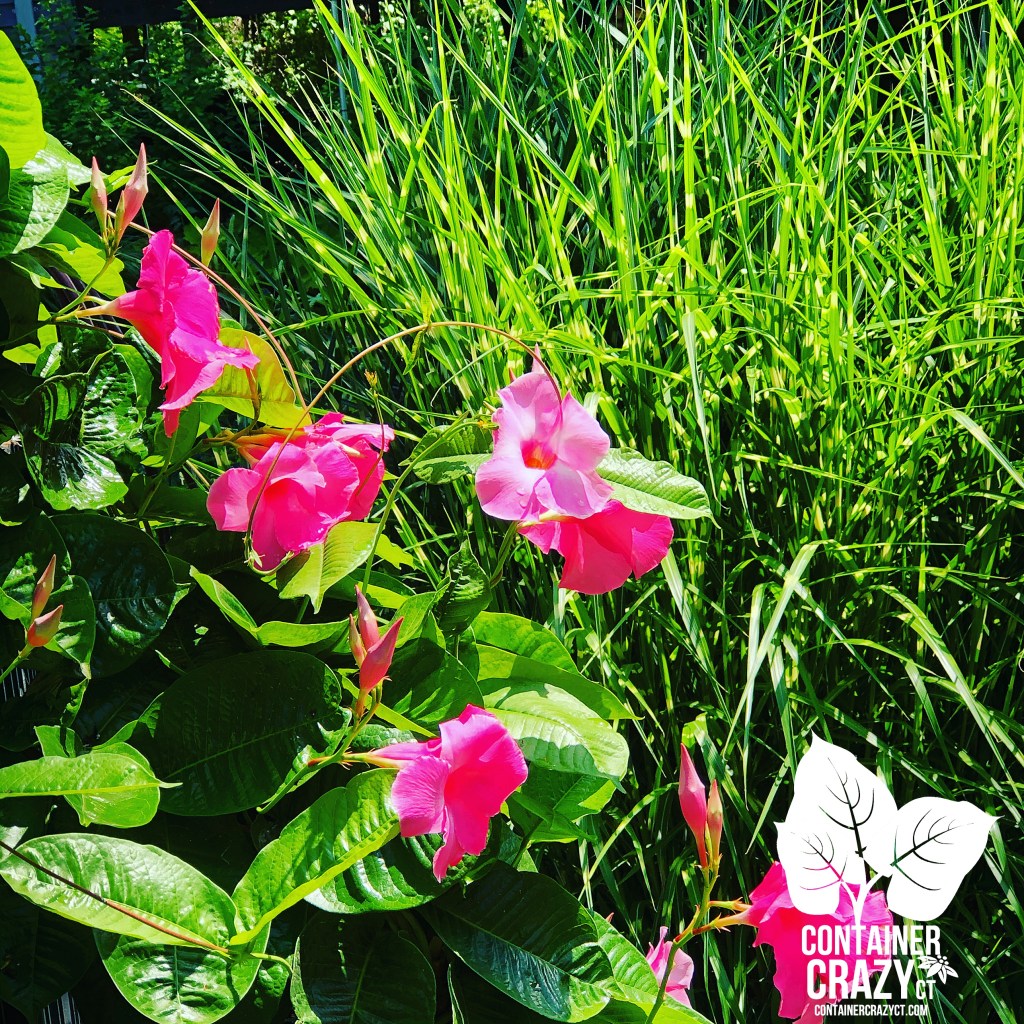
Pretty with the Ornamental Grass nearby
Of course, you may plant them into the ground but I typically do not do that. In this photo above, the pink mandevilla is in a pot below my driveway climbing up and an ornamental grass is in the background, which I thought looked lovely together as a combination.
Cathy Testa of Container Crazy CT
As you can see, mandevillas make me happy. I love planting them and watching them grow all summer long. They turned into a plant I barely gave a second glance to, to one I can’t stop admiring now. I hope you will admire them too.
Pots don’t have to be really big…
And I noted you really don’t need big pots. Sources will say keeping them in smaller pots will force the plant into growing the top part of the plant more rather than focusing on growing roots for Mandevilla. In my experiences, I’ve done both, repotting into a 22″-24″ diameter planter or inserted the nursery pots into a larger planter, but be sure to allow draining in either scenario from the base of the pots. And the soil is best on a organic side. I have amended the soil with aged compost in pots with potting mix. I tend to space them right next to each other when creating walls in big planters. However, in gardens, it is recommended to space them apart by 8″. Probably the best maintenance tip is to water them regularly and not let them dry out too much. They have thick chunky root systems, so if the pots is smaller, you may see the nursery growing pot expand as the roots are trying to move around, pushing against the sides. In those cases, I’ve used a razor knife to cut the pot off the root base before planting them.
Cathy Testa Container Garden Designer Broad Brook, CT Zone 6b All photos are taken by Cathy Testa See also: www.WorkshopsCT.com www.ContainerGardensCT.com P.S. I plan to get more mandevillas this year, if local, e-me!