Letting Go of Websites and Other Stuff

Leave a comment

I did it. Today I deleted another one of my websites called ContainerGardensCT.com. The website was primarily about my former service offerings as a plant person, such as container gardening and installing patio pots and such at people’s homes and on their balconies. It had some nice photos of plants and also a few articles, talking about what you could get for services by each season, and so forth.

As I have stated here and there, I’m technically retired, but it IS early retirement. It comes with letting go of some old passions and introducing new ones, such as our new camper adventures. I also no longer can lift heavy objects like I used to and that, with the combination of saving for travel, has reduced much of my former plant passions and work.

It is difficult to let go of my past plant writings and even more difficult to let go of my plant photos! But to maintain them at a cost online doesn’t make sense anymore, in my new early-retirement state of mind. However, like a band aid that must be torn off quickly, I deleted ContainerGardensCT.com quickly. I didn’t review the photos first or print the prior articles. I just did it quickly. Done!

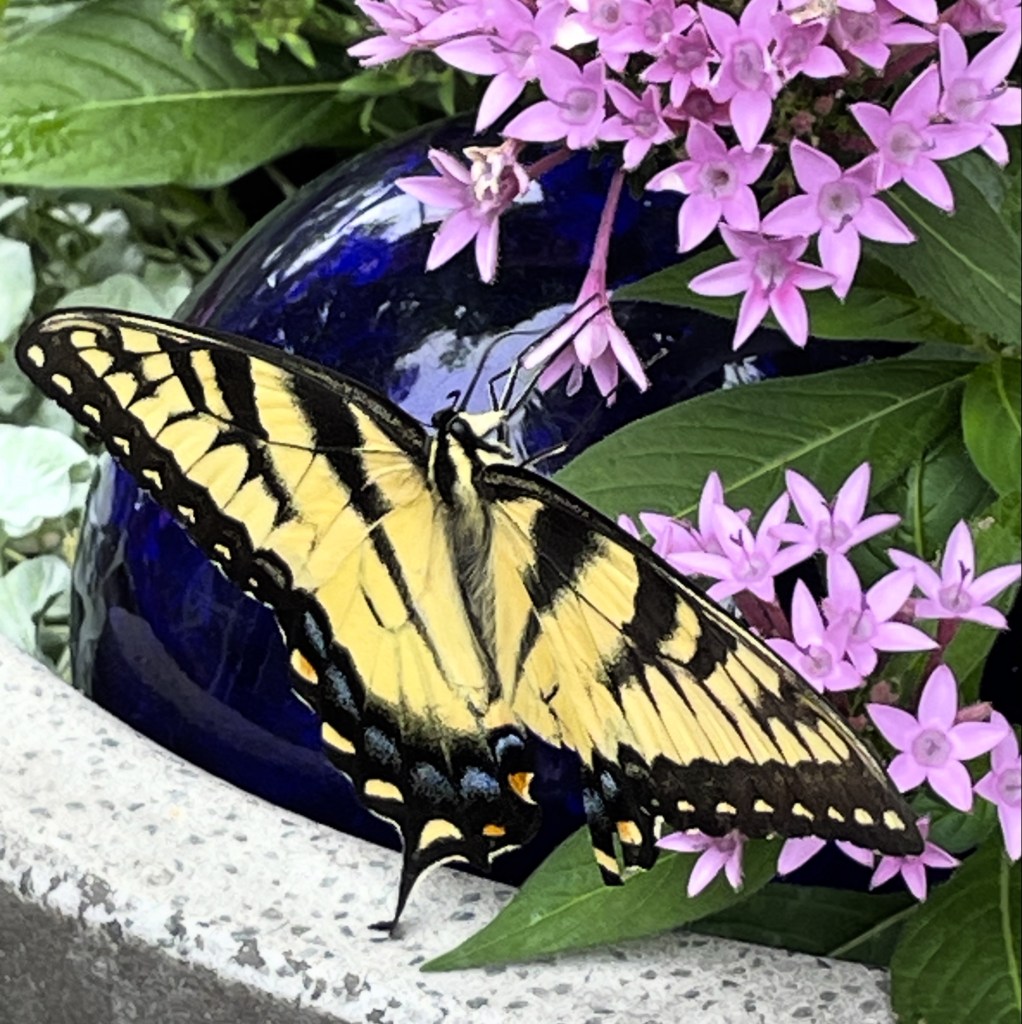
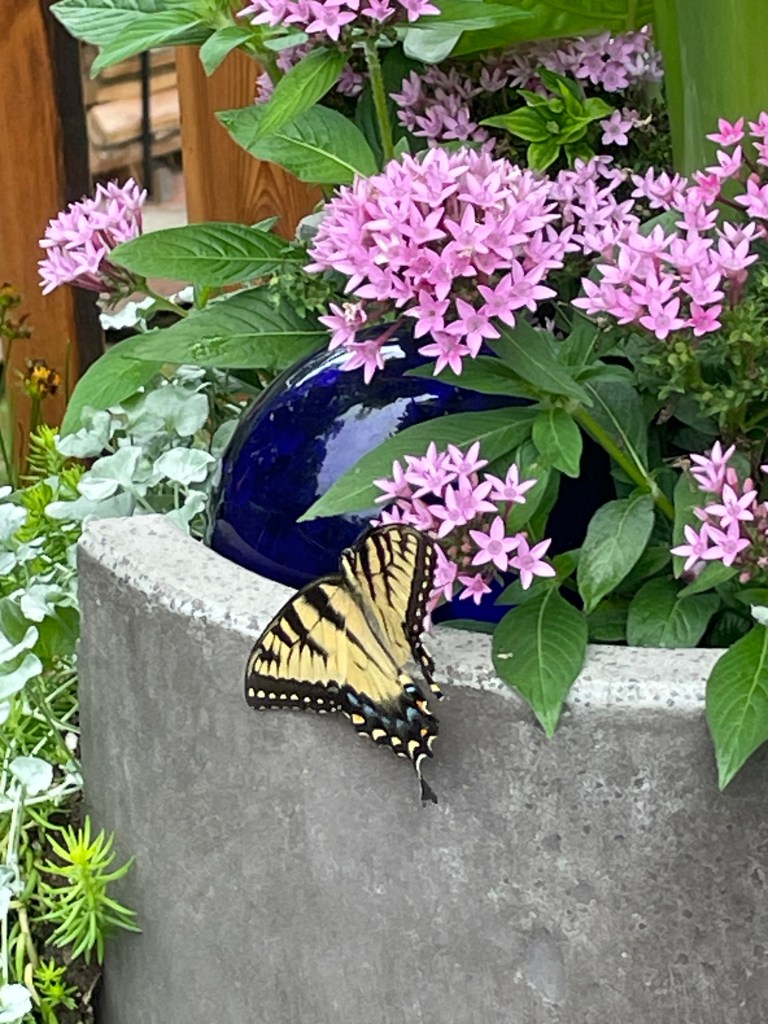
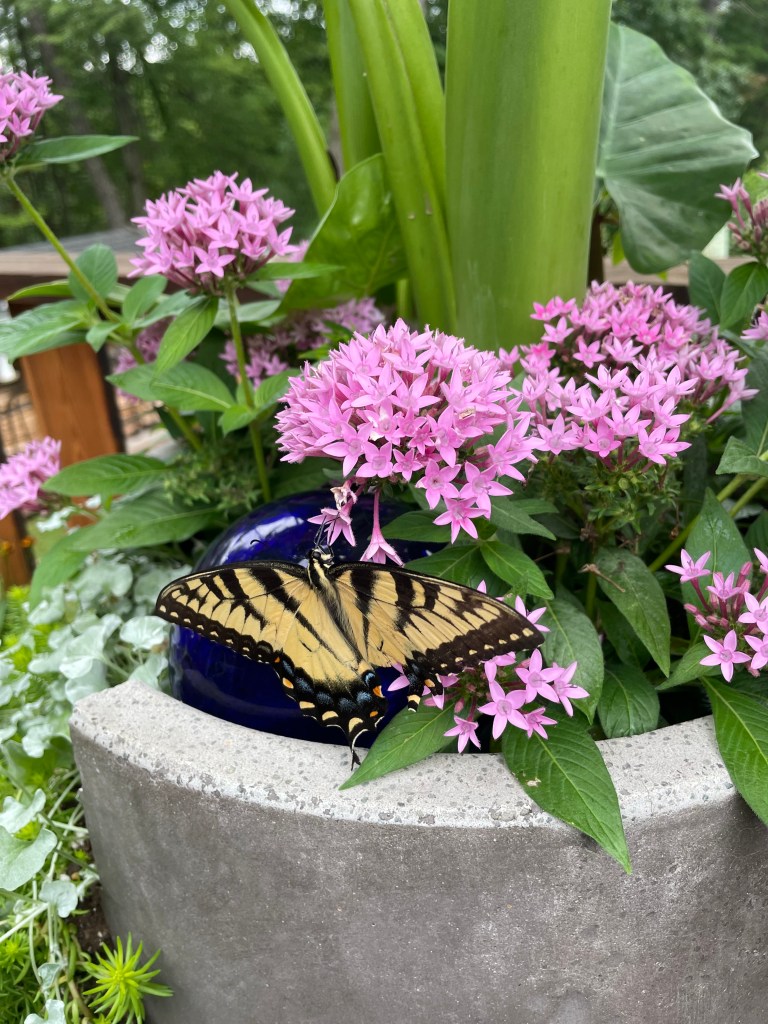
Now, I will always love nature, plants, and all the wonderful surprises which comes from admiring nature and plants, like a butterfly visiting a flower to the abundance of bumblebees that recently covered the last fall blooms of my Stonecrop Sedum (Sieboldii). I had put two of these sedums in separate hangers and picked these sedums because they are very drought tolerant, thus while away camping, I wouldn’t have to worry about them not being watered often. They are also perennials, thus saves money when I would replant them somewhere in my yard in the fall after the hanger planter season is over. Saving money is also important as an early-retired individual.

What surprised me though was about 2 weeks ago, seeing all these bumblebees all over the sedums pink blooms. They were all sleeping (not sure if technical term) and not moving in the mornings. This lasted for a good week or so. During the day, they hovered and visited, and I couldn’t even attempt to water the plants there. They were not aggressive and kind of let me be as I took photos of them in the mornings.

They’d fly over and feed and then later in the day it was a scene to see them all frozen in sleep positions. That lead me to read about how all bumblebees die at the end of the season. I did not know this! Only the queen stays alive and hibernates in the ground. It was interesting to see that many, up to 20 bees on the plants, and also a bit sad knowing this was the end of their lives. Somehow it symbolizes the tragedy that we all face someday, that day we witness others face too. Anyhow, onto the sedum…

The Stonecrop Sedum Sieboldii is a full sun perennial plant and blooms in the fall, so if you like bumblebees, this is a great plant to have around in containers or hanging baskets like I did. It also has bluish-green foliage which draped over, perfect for a hanger, and prefers well-drained soils. It’s an easy-care plant for sure. I’m happy I had gotten two of them this year. They served multiple purposes.

Anyhow, the one website (blog) I still haven’t deleted is this one which you are reading on now. Container Crazy CT is still being visited by people. I noticed it recently, mostly folks looking for information on how to overwinter their canna lily rhizomes and elephant ears tubers. I’ve written about my process of taking them out of containers around early October and storing them in my basement in boxes many, many times. Just use the search bar and type in “overwintering” or canna lilies, or Ensete. You should find them. So, this blog site I still haven’t deleted yet. It still seems useful and has lots of articles I wrote for many years.

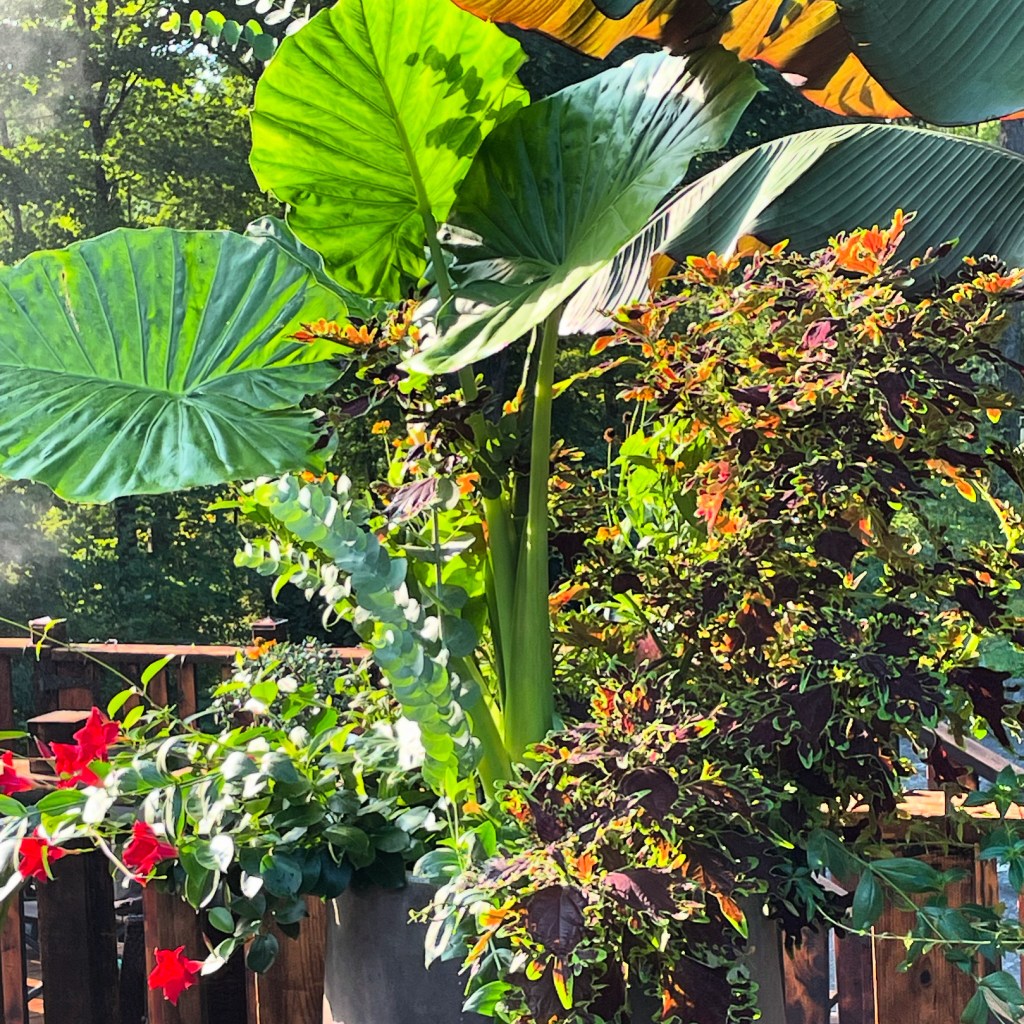
I mostly have the Alocasia elephants’ ears now. I grew only one canna lily plant from seed. Just one but it furnished a nice plant for the hummingbirds who loved the blooms in my tall patio container. And I have one big red banana plant (Ensete) which sadly it started to rot on the bottom this fall. I waited a bit too long to get it out of the soil.

We (my husband and I) went thru the process of digging that red banana plant (Ensete) out – It was on its 3rd year of growing in the summers, and it got huge! It was very heavy and when we dug it out – too wet, and it had been too cold, so it started to rot. I should have taken it out of the soil earlier, I thought to myself. Oh well, I knew I was risking it.

I told my husband to toss it in the woods after we dug it out and turned it upside down, when I saw the rot spot. He was like, “Really, this is your baby?” I had to remind him my baby Ensete was tossed 3 years ago after growing it for like 15 plus years. This one was only 3 years old, but it had grown quite a bit this season, was huge! Remember, these plants cannot stay outside over the winter here in my CT planting zone, so I always dug out my Ensete plant and stored the base (the stump so to speak) in the basement, and I did this for well over 20 years now. But this was one I just didn’t want to put away because I saw some rot and also it was soooo heavy. I don’t have the muscle power to deal with that anymore, I guess.

Anyhow, I am thinking that I may continue to use this blog site to not only write about plants, but maybe about some other things in my life and adventures. Perhaps my learnings as a new camper woman, maybe a bit about some other personal struggles, maybe I’ll write about a new craft I’ve tried, you name it. It doesn’t have to be just about plants, right?!

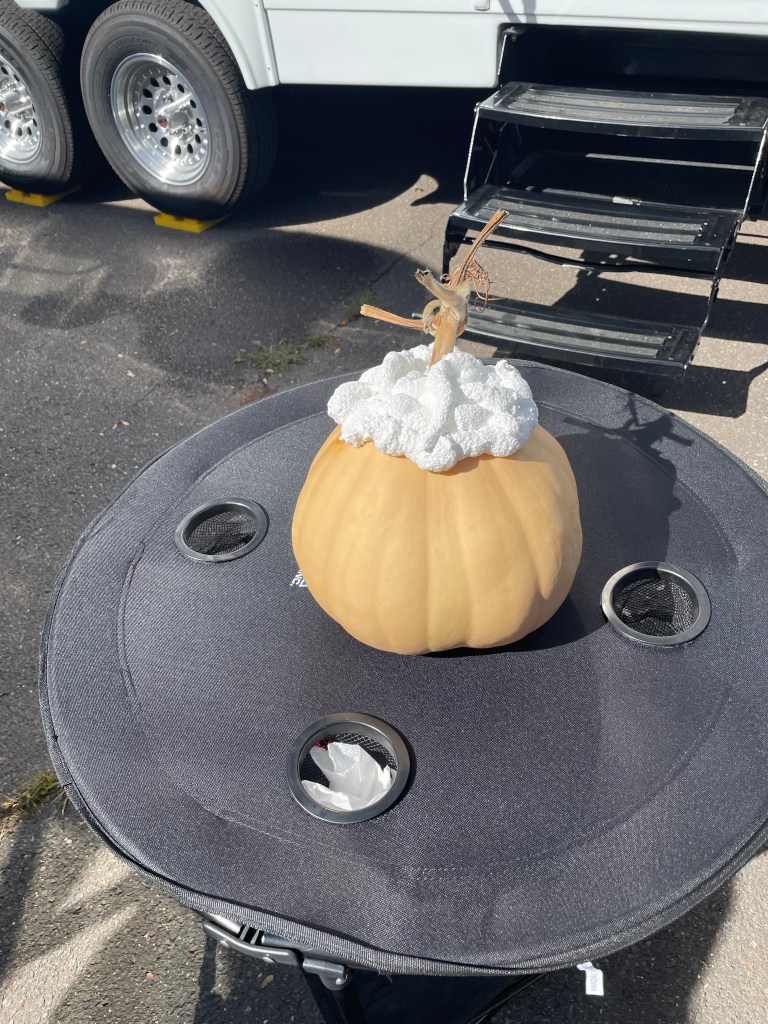
Speaking of crafts, if you know me, you know that I have created succulent topped pumpkins in the past. Well, no more succulent plants here really so I attempted to create a pumpkin topped with faux flowers. It came out pretty good for a prototype.

I used Loctite Tite Foam in a can (a product used to fill gaps and cracks). It comes out soft and then hardens. I sprayed it to the top of a pumpkin, let it set for about 30 minutes so it was a little harder but still somewhat soft, and then started inserting dry flowers (faux) and it was working!

My only HUGE MANDATE is do not use this foam product stuff without wearing gloves. OMG, if you get it on your hands or fingertips, that foam does not come off – TRUST ME ON THAT. I did have gloves on but later I tried to use some again to make a scary topped pumpkin and got some foam on my fingers – big mistake.

And note, the faux flowers and decor I inserted worked well if they were not heavy and had a stem to insert into the semi hardened foam. The foam ends up waterproofed too, so putting my pumpkin on a patio table outside was no problem. You may also spray paint the form once it is hard if you want to, but I didn’t need to on this faux flower version as all the pieces I used to decorate the top covered the white hardened foam very well when finished.

Oh, and I did grow those pumpkins in a container on my driveway this year. I got about 4 good pumpkins to play with. I love the Cinderella shape of these. They are fun to create with either faux flowers or succulents. You cannot use that spray foam for live plants or live succulents because it would kill them (too toxic for plants). See my prior blog posts about succulents on pumpkins on this blog, Container Crazy CT. Just search for “succulent topped pumpkins” if you wish to locate that prior blog post.

Well, that is my mix of topics for today. It is a little cloudy and a little chilly outside today. Somehow, I feel we are in for a cold snowy winter. Just a gut feeling I have. But this year, we plan to do a bit of time in a warmer state in late winter before it warms up here, hopefully! I may just blog about that later.

Have a good weekend,

Cathy T.
Zone 6b
Broad Brook CT
Container Crazy CT

Written on 10/24/2025

Topics: Blog Deletion, Bumblebees on a Sedum, Faux Topped Pumpkin, and more…

Rediscovering My Greenhouse: A Summer Cleaning Journey

Leave a comment

I was not in my greenhouse this spring sowing seeds or preparing other plant related things, because my husband and I retired. I tried to convince myself I could go without sowing seeds, growing things, nurturing seedlings, and propagating succulents, or whatever, I would do in my greenhouse in the spring. I decided I want to travel, so really, I won’t be here to water, coddle, care for my plant babies during the summer months. Plus, there is a cost associated with growing plants from seed such as seedling mix to nursery pots, etc. And I thought I should avoid that expense now that we are retired.

However, as the middle of summer hit, I thought this would be a good time to clean the greenhouse. What in 100-degree weather? During CT’s heat wave, you ask! Well, in the early mornings, it is a great time to hose all the dust off everything I left in the greenhouse, and it all dries very well as the heat rises to the point I can’t be in there.

This whole thing “cleaning the dust off” in the greenhouse got me daydreaming about my days in the greenhouse from years prior. Even when I close the slider door, there is a bang slam type of noise as the side of the door hits the frame, and that simple noise is something I heard repeatedly when I was in my greenhouse full time in the spring seasons. It gave me flashbacks. So did hearing the birds outside the greenhouse, seeing the trees sway outside the greenhouse, and just the simple things you experience in there when working in the quiet or sometimes with a speaker playing favorite tunes. Those moments when you are using your hands, hands in the soil, just being with the whole environment. My greenhouse was that place for me for lots of time in the spring, fall, and even winter. Usually mid-summer though, it would be just way too hot be working or playing in there.

But, I did think, well, it will be hot, I can grab the water hose, blast all, reorganize lots of stuff I had piled up here and there, and even hose down windows and doors. I started to take everything out of my antique school style lockers from spray bottles to tools, to cups, to plant labels, to bug sticky yellow traps, to scissors, magnifying glass, and anything else and hosed all the lockers down to remove dust and crime. It felt good, but it also brought lots of reminders of the projects I did in the greenhouse. For example, once, I tried stamping old spoons for a while and have a whole set of the stamp tools in the school lockers along with all my other plant related tools. It just brought back memories and made me realize the greenhouse was my true Zen woman cave. I spent lots of hours in there when sowing tomato plant seeds and it kept me busy. Then in the winters, I’d care for overwintered plants.

Anyhow, I realized I don’t think I can do without using my greenhouse. It is part of my soul. I thought about what ifs. What if I turned it into a pottery studio? But nah, I don’t want to invest in all that. What if we turned it into a place to sit and chill. Well, there is no chill in a greenhouse in the summer, way too hot. What if we covered the clear roof and made it another hang out room? Well, we don’t really need a hang out room in the summer in that heat. What if I just stored a bunch of stuff in there but then it just hit me, I truly miss it. I miss being in there working with plants. It was my thing, and it gave me a special vibe. So, I just may rethink that whole don’t use the greenhouse anymore ridiculous idea.

In the meantime, I’ll keep cleaning and sorting and removing things that I have too much of. And get it well organized so that next spring, I can sow seeds, I think. I told my husband the same, he agreed, it is my thing, and he will repair a problem in the roof for me this fall cause now he is home and can do so.

In the meantime, I just try to enjoy what I do have. I cut back on the plants in my patio pots, and went with just a few. To see empty pots or planters around my home is something I just try not to think about – and look away. LOL. I used to LOVE filling every corner of my deck with plants, but I cut back a lot. Meaning I didn’t grow as many and really tried to reduce this hobby expense.

Anyhow, the other day, changing the pace here a bit, I was sitting on a little couch near my kitchen, and I saw a big butterfly flutter by – and I thought, Oh My Gosh, is he going to my planter on the deck?! And he was – visiting the pentas annual pink flower heads and I was able to take photos of a beautiful large swallowtail butterfly. That made my day between the whole greenhouse cleaning reminiscing phase! Maybe it was a little sign. Keep going he said, don’t give up your plant greenhouse passion!

Thanks for visiting,

Cathy Testa
Container Crazy CT blog
CT location

Seed Starting Tips for Early Spring Gardening

Leave a comment

I have been reflecting on how I was very much into seed starting a few years ago, and wow, during COVID, it was a big time to sow seeds as well. In fact, I remember selling out on seed packets I had in my stock and some seed starter kits I had assembled, because people were having difficulty getting seeds mailed at that time. Everyone wanted to start seeds and drove over to my house to pick up their seed packets with masks on and I had a basket was sitting on my driveway that was cleaned for every pickup due to COVID. We’d wave to each other through my kitchen door window.

The COVID days pick up basket with seeds and seed kits.

Anyhow, there were some seeds I had started in seedling trays for indoor growing a good 10 weeks before our last spring frost date of mid-May. You see, I always used May 12th as my estimated last spring frost date here in my area of Connecticut, and some seed packets would indicate to start seeds 6 to 10 weeks or 8 to 10 weeks before the last spring frost date. Examples were Pica Chile Mix Peppers, Chives, Salad Savor, Oxheart Tomato, and Lemon Drop Peppers. So yes, in March, I was starting “some” seeds to get an early start on the whole process. Then continue in stages based on seed types, like some are sown much later.

That seems so early to start seeds in March, right? But these plants required that much time. You could pick any time between those 8 to 10 weeks for example, and 10 weeks was March 3rd, or is March 3rd. Anyhow, this would require getting my greenhouse ready with seed starting supplies out, and things like that.

Loved these trays. I also did one seed per cell. Some people might do seeds more per cell.

This year I am not into sowing seeds, and I probably would only do some pumpkins which isn’t required till later to start those seeds. They don’t require as many weeks before the last spring frost date. I don’t do as many now cause I’m technically retired and I don’t plan on being home all the time to monitor everything like I did before. Remember, seeds cannot be left alone for weeks at a time, even days, they must remain monitored, watered, warm, etc. You have to watch for problems too. If you are not tending to them, forget it.

Anyhow, seeds in the seed packets remain viable for 3 to 5 years in general if stored appropriately. There are some exceptions like parsley. So, I still do have some seed packets in my stock, but some are getting a little older. I gave some seed packets as Christmas gifts this year to family. I always had certified organic seeds in beautiful seed packets which were art packets really. I also selected easy to grow types too.

Happy me doing a selfie with a Fox Cherry tomato baby. Yup, I was obsessed. And there were two! I broke my rule – but basically you take one out later.

It’s important when you buy your seed packets to have information, and the seed company I used always provided detailed information in their seed packets and on their website. But I also created lots and lots of helpful seed starting charts with calendars and documentation to anyone who got seeds from me.

Some of the seeds which I sowed that were required in the 6 to 8 weeks before the last spring frost date were: Goldie Tomato, Cherokee Purple Tomato, and Bumble Bee Cherry Tomato – yum! Also, Mandurang Moon Tomato, Matchbox Peppers, Stone Ridge Tomato, and a big favorite was Fox Cherry Tomato! So those were sown between 3/31 to 3/17 usually.

Sowing seeds kept me busy – that is for sure. Because I worked from home, I was constantly checking on their progress, making sure the soil (seed starter mix) was at the correct moisture levels, watching the grow lights, heat mats, and greenhouse temperature. One year, I grew 400 tomato plants! Wow!

My beauties after they were in seed trays, grew larger, and then transplanted to larger pots.

I got a lot of exercise when the plants were large enough to go outside after May’s last spring frost date would occur. Hardening off plants to acclimate them by taking them outside for a few hours each day, but I also monitored them, if it got windy, I’d check if I should move them back into the greenhouse. One day I set up a time lapse camera to show me going back and forth with my tomato plants. It was comical.

For a while, I had just the bare ground to put them on but a few years later, my husband built a small wooden deck floor for me so I could work better and not fall on my face as I did one year when I took a misstep carrying a tray of tomato plant seedlings. Boom on the ground I went.

Some of the seed mixes I tried. I also would buy bulk quality soil mix too. They key is the soil mix for sure. Wrong soil, lots of problems. That is a whole other topic but buy good fresh “seedling mix” for your seeds. Don’t use crap soils.

At the 4 to 6 weeks before the last frost date, I sowed Paul Robeson Tomato, Honey Drop Cherry Tomato, Mikado Tomato, Sacred Basil, and Shishito Peppers. That was around April 14 to March 31 for sowing period. The Honey Drop Cherry Tomatoes were to die for. Everyone loved their sweet flavor. Those were addicting.

Anyhow, the sowing periods continued all the say till 3 weeks before the spring frost date, so the three weeks before was around April 21st. That is when I would sow some Tiny Tim Tomato and New Yorker Tomato seeds into the trays. By the way, I’m referring to showing seeds in the seed starter trays indoors to grow inside the greenhouse on heat mats until they sprouted, got a little bigger and then under grow lights.

I didn’t use grow lights initially when I started my sowing adventure and was successful but then I decided to invest in a grow light to make things grow better and stronger. It helped. As I always told everyone, remember the sun is hidden a lot during winter months by clouds, so you need that sunshine. On very sunny days, the greenhouse could get very warm, but the sun was lacking at times for sure.

A sunny happy day in my greenhouse! This must have been more towards April.

There were many more examples. It kept me busy in the winter months of March, where we do start to feel a bit better after January and February are over! This year I’m not into this cold weather. I tried to embrace it – even went to Quebec City for the Winter Carnival! We had a fun time freezing our butts off, but when I got home, I’m like I’m sick of the cold weather. That was enough fun freeze time for moi.

A nice view of a nice tomato plant getting larger.

Isn’t it funny how things change? Here I was a few years ago, full blown seed starter woman, and now I don’t do them except talk or write about it here. I’m sure once the weather improves, I’ll go thru my pile of left over seed packets and see if I should try one, get some seed starter mix, and place a seed into soil once again.

Here are a couple of photos of us trying to embrace winter before seed sowing season starts:

Us in Quebec City for Winter Carnival trying a maple shot that was delicious, cold, and sweet! I don’t know what made it milky, but it was creamy like. Steve loved the shot glasses made of ice.
I haven’t had maple syrup on snow (called tire in French) since I was a kid in Canada. I couldn’t eat all of this cause too sweet now for me, but I had to try some! Yummy. And fun!

Thanks for visiting!

Cathy Testa
Date of this post: 2/25/2025

By the way, as soon as I got home freezing in Quebec City, I caught a cold. Ugh. So that was a period of feeling awful, coughing, etc. It is really going around quite a bit here in CT. Come on better weather – we all need you!

More Tips:

Use fresh quality seedling mix
Read the directions on the seed packets
Look at the calendar now – some start in March
Count back the weeks from the last spring frost date in CT to know when to sow (based on packet instructions)
Watch and monitor your soil moisture and temp
Pray for warmer weather soon

Pros and Cons of DAS and Kids Modeling Clay

Leave a comment

Hello everyone,

I always had a love of working with clay and dream often of turning my greenhouse into a clay studio, but then I start to think about the associated costs (pottery wheel, clay, heat, kiln, etc.). Being retired now, those are substantial hobby costs, so I have yet to make that kind of move.

Anyhow, one day, I discovered that there are clays which do not require a kiln. Kilns are expensive (used to harden clay, like in an oven). When I discovered a kiln is not necessarily needed, my brain bulb went off, off to Amazon that is as I searched for air dry clays.

I decided to play with kids clay first. Basic modeling clay that comes in many colors. I figured, let’s see how this stuff is and play around with it. The clay comes in kit boxes with lots of colored clay in little packets and maybe some small tools. Easy to find on Amazon. I guess I really like working with my hands. I made some snowmen shapes and learned some tips as I experimented with the box of clays in many colors. It is relaxing to roll and mold around clay like this, and it was fun.

Then I discovered a more mature version of air-dry clay. It is a pure white hardening modeling clay. There is a brand called DAS Air – Hardening Modeling Clay, sold in 2.2 lb blocks on Amazon. I ordered a block and started to experiment with it after watching a few YouTube videos where crafters showed their air-dry creations.

Here’s what I ended up with and some notes on my experience so far as I compared the two types of clay.

Isn’t he cute? The kids’ kit came with the googly eyes, so I thought, hmm, let me put one and make it fun. The texture of this clay, once it is all dry, is like a marshmallow but a bit harder.

What I discovered about this modeling clay for kids is it is easy to “roll” into shapes. I actually used a white board (small size) I had to roll on while sitting in the living room watching random tv. What I discovered is putting two balls together was super easy with this clay, it just sticks together but once on, it can’t be pulled apart without ruining it.

The kid’s clay is also easy to roll, like into a sausage link or wormlike shapes. Then I wrapped it around as a scarf and added embellishments. The hat was made in a similar fashion. Making balls and log type shapes worked well with this clay versus “sculpting shapes”. One key thing is once it is attached, it can’t really be moved or repositioned, it sticks on right away.

A big plus is it doesn’t require slip (clay slurry used for joining two pieces of clay together) and scratching (or score) to put the two “balls” together, like with regular clay or the DAS clay (shown below this).

It was also super easy to insert a stick if you wanted to put your creation on a pick and insert it into holiday crafts. I think I will definitely create more sophisticated versions of these snowmen next Christmas. I also have been trying to make bunnies with this type of clay and will show those at Easter.

Now for the downfalls of this type of kid’s clay. First, it tends to bend or flop over as it dries a little, so I used a cup to make it stand upright. I discovered as it dried, it would not stand up flat – that is why you see a green disk on the bottom of my snowmen to help them stand upright. I added the disk after the snowmen was a bit drier but not completely dry. And the other down fall is this type of clay does dry out in the baggies for the rest unused clay than other clays, and then it somewhat not useful, so you have to keep it in sealed baggies or use it right away (or relatively soon, I think). Like I don’t think it will last very long once each color packet of clay is opened. I found the DAS adult version of clay to last much longer in a zip lock baggie after a block was opened. Plus, the DAS may have water added to it if too dry.

Now for the DAS Air-Hardening Modeling Clay. This is the type of things I made for Valentine’s Day. I really love how the heart bowl came out. I used basic acrylic craft paint after my creations were dry to paint on the red color. Then I remembered I had some red glitter in my stock, so I mixed that into the acrylic paint to add some sparkle.

Here’s my heart bowl before in the white dry state – I love this one the best especially after the color red was added. I saw one YouTuber show how easy it is to press fabric doilies into the clay using a rolling pin. I knew I didn’t toss those old doilies for a reason; I had a bag of doilies in my basement! Once you roll out the clay, imprint the slab, and cut it into a shape, you can put in into plastic wrap covered bowls to form a bowl shape – that is basically what I did. I let it sit in the bowl as it dried.

It was easy to make little balls and insert a hole through the middle with a wooden tool, which I am happy I thought of, cause I wanted to hang some hearts made with the DAS Air-Hardening clay. It worked great!

Luckily for me I had some red ribbons in stock to use as hangers. And with the red glitter added, they sparkle in the sunlight hanging in my windows for Valentine’s Day decor.

These two were smaller and I hung them from antique glass bottles. Cute. All were glazed after the red paint completely dried by using Mod Podge Gloss-Lustre water-based glue. Both the paint and glue were just painted on with simple craft paint brushes which is another plus because all is easy to clean off with water for the brushes and reuse (cost savings).

After the clay sat for a day or over night, I noticed it was easy to scratch my initials in the back with a wooden pick. After it was all dry (still in the non-painted white stage), I used a nail file to file off rough edges here and there – it worked out rather nicely. I saved the dust in that pan to make slip slurry and experimented with that on other projects.

I find the advantages of using this type of adult clay is it works well for “rolling out” and cutting, pressing in the dolly patterns, and making flat items. Using this clay to make sculptures, at least for me, is a bit more involved, and requires skill. And it requires the slip to join pieces together. And it takes more patience. I decided I like this type of adult DAS clay to create flat pieces.

Above is the slip I made but will talk about that later.

Another YouTuber showed how she used black pepper flakes to add texture. I thought, Ooooh, I like that! So, I did some with black pepper and glazed with the Mod Podge. They are small bowls, and I thought how cute these could be in a miniature garden in a glass bowl, or as a ring holder if you added the center part, etc. The pepper was a little messy though. Also, one thing to note is these clays are not really “water” proof or super tough like real pottery, meaning can break easily I guess.

Note I did not make the little red heart in that pepper textured bowl, I had those, but those are the types of shapes you could try to make with either type of clay with practice.

So, Here’s a Quick List of the Pro’s and Con’s of each type of clay:

DAS Air-Hardening Modeling Clay (2.2 lbs blocks):

Pro’s – Easy to roll out, cut, make impressions on, and easy to paint, easy to store unused clay in zip lock bag. Unused clay may be rehydrated with water if needed.
Con’s – Not so easy to attach pieces (need slip too), requires several days to dry between painting or coating with sealer (Mod Podge), a little more clean-up required (hand washing, tools) but not bad.

Modeling Clay Kit for Kids (24 colors):

Pro’s – Non-toxic, soft and light clay, already has color in each little block in the kit, easy to attach two pieces together (not requiring slip and scoring).
Con’s – Tends to flop as it dries, like falls over. Once you attach something, it cannot be easily “detached” if you decide you don’t like it or the position of it. Unused clay will dry out faster once a packet is opened.

For now, playing is the name of the game with these projects. It is just a winter hobby thing for fun. Creating art requires the state of play! I would say this is definitely not art, but it is a way to see if there is more potential if you wanted to perfect it. Some of the YouTubers I saw made some amazing pieces with both types of clay. You can take it as far as you like!

Cathy Testa
Date of this post: 2/22/2025
Stay safe, healthy and warm this winter!

The Art of Soap Making: A First Time Experience for Me

Leave a comment

There are many ways to make soap and my love of using handmade soaps was the reason I decided to sign up for my first class on how to make them. I’ve always been curious on what is involved in making soaps, and so this was my first window into a soap making process.

The class was held by Blessed Creek Soap and Salves (see BlessedCreek.com) online. The instructor and business owner of Blessed Creek, Jeannie, is located in Suffield, CT. Her classes are held in a large, heated barn building and I was excited this session was being offered on a Saturday in the morning hours, since I’m more of a morning person than evening person.

There are several things I enjoyed about how Jeannie set this class up. First of all, it was very informative and she provided a six page instructional booklet which she first reviewed with us in detail. Jeannie said to not be scared to learn how to make soaps, it is not difficult but it is involved (in my opinion) and you must use pre-cautions because you are handling lye and oils. This involves some chemistry.

Also, soap making involves specific supplies, proper clean up steps, and clean up products, and careful handling. I couldn’t imagine making soaps in my own kitchen because of this but maybe because I tend to be a “worrywart” is why. I’m sure once you have it down and know your steps and have mastered the perfect formula, it could be considered “not as scary” and tons of fun actually.

Another aspect I learned about soap making is there is a time element. Soaps (at least the ones we made via a basic cold process), involves curing the soaps after they are removed from the molds for 2 to 3 weeks. I thought about how keeping up with orders must require calendaring and such steps too.

Lastly, I thought about the costs associated with making soaps. God knows, everything has risen in prices! That includes the supplies to make soaps. But even though, I was very excited to learn and have a hands-on experience of soap making and I can’t wait to try my first bar in my own shower when they are fully cured.

Lye is the scary part to me (technically called Sodium Hydroxide). In part of our steps, we had to carefully pour lye into special water first (the lye is in a dry form first) and carefully stirred in to dissolve but then we had to pour that into oils later. Steps involved temperatures and careful measuring all shown in our class that day. It was pretty neat to witness all of this and then try it with proper instruction.

When Jeannie poured the lye in, an aroma took off that made me cough – I was like, WOW! I had never experienced this process before, so that was a surprise moment for me. Again, it is not technically scary, just you need to use caution, and it is interesting to see it all.

Once we got to the mixing aspects and adding fun stuff (colors etc.), I was in heaven. Doing a little dance saying, “Look at me, I’m making soaps!” We all giggled at that.

I absolutely love using homemade soaps. They usually have the best fragrances and are soft and creamy. I especially love soaps made with goat milk. I’m the type of soap buyer that once I am hooked on someone’s brand, that is who I go back to over and over again, like at farmer’s markets, etc. to get more.

The thing about making soaps is there are many choices of scents, colors, and styles, it seems endless. There are also so many molds you may use from wooden type molds to I guess silicone, and I considered what if you found some cool antique molds – how fun would that be?!

One cool thing is Jeannie showed us soap nuts! I was reading her booklet, and I missed why she brought these out in a big bag – we didn’t use them in class, but when I got home, I decided to look up the tree called Sapindus molorossi online. It appears these soap nuts (or berries or fruit?) may be used as a natural laundry-detergent. You may read more about it here. It has many other uses as well. Interesting! You learn something new every day. I had never seen or heard of these soap nut fruits before, and being a plant person, it caught my attention.

Me and my classmate decided upon using lemongrass and orange scents and colors for our first ever soaps. We each had a turn at doing all, the pouring, mixing, etc. Then we took our soaps home to set, and later slice at home and cure. I can’t wait to try a bar! I wrote the date on my calendar. Here are my lemongrass soaps in the photo below. I put them on parchment paper in a tray to cure. Not sure if this is a best way to do but I flip them over every day. They will be ready soon and smell great! So fun.

As an instructor of workshops myself on plants, I would recommend this class. I think it had a very nice balance of instruction, details and materials and a nice opportunity to be hands-on. Plus, Jeannie is a really nice person with a cool personality. When I asked Jeannie how she got into making soaps, she said she was an old hippie living off the land. Pretty cool. She also makes lotions, lip balms, scrubs, and many other skin-care products. Check her out! I took home some of her skin balms and lip balms and I am loving them! I want to try more of her classes, like the one coming up in February on lotions. Sweet.

Cathy Testa
Container Crazy CT Blog
Date of this post: 1/25/2025

Crafting for Therapy: My Pinecone Wreath Journey

6 Comments

Hi all,

It’s December 2024 – Wow! Only about 4 weeks till Christmas. Usually, in past years, I was one busy, hyper, nervous woman preparing fresh holiday greens for an upcoming huge holiday workshop during this week, but I stopped doing that during Covid year. And now I’m in a new stage of my life, being retired. I still plan to post on this plant related blog from time to time, but this year, I didn’t post that much. I was in a funk. Family drama entered during the first year of my retirement and my husband’s – such is life, sometimes timing can mess up the best laid plans. I am hoping 2025 will bring better days, but in the meantime, I do find that creating crafts is a form of therapy. So, on my sad days recently, I thought to myself, “Make something – anything. Even if it doesn’t come out good.”

When I worked on my fresh greens for those prior big holiday workshops consisting of teaching how to make wreaths, kissing balls, and other beautiful holiday items, it was my holiday too, but I was always nervous too. Will I run out of fresh holiday greens? Do I have enough for all the attendees? Will the greens last? Sometimes, I over purchased greens or holiday craft supplies like ribbons, berries, pinecones, or whatever used to embellish the wreaths and kissing balls made in workshops or for my special orders just cause of the fear of running out. So, after 20 years or so of doing my holiday workshops, I did end up with some extra “supplies” in my stock room. Thus, I could craft now by myself for another 10 years probably – LOL.

I saw one day a candy cane wreath made of pinecones on a social media feed, and I thought, hey, I have plenty of pinecones still in my stock. And I have 3 frames left in my stock shaped like candy canes. Pinecones are something I would just gather in the woods mostly. Sometimes I purchased them from a wholesale supply house if they were special, like those with silvery sparkles, or an extra touch with berries or whatever.

Thus, I made this candy cane pinecone wreath using a wire frame recently (see photo below). It was easy in ways but tricky with the hands. I just pushed some pinecones I had (faux and real) that were already batched in 3. Three pinecones wired together previously. I used two types and fenagled them thru the wire frame and then just used standard florist wire to secure. The backside of this candy cane wreath is sloppy – but I didn’t really care, cause first of all, you can’t see the back, but I also didn’t care, because I was doing “craft therapy.”

I have some of that moss in stock too – it is a dry type, and I grabbed bits of it and tucked it around. I also have some of those larger red balls and I love those and added some here and there, then added a premade curly bow. I used some glue gun glue to secure some items, but that was it.

Once I was done, I posted photos and people were kind and said they liked it! But it is not perfect. And that is okay. Gathering together with friends, making something crafty, isn’t always about being obsessed with decorating your home for the holidays. It is sometimes used to heal the soul, to heal what may be off for your holiday season. I know that sometimes, in my workshops, I would sense someone that may not have been totally festive – something was off, maybe they were sad, maybe they were lonely but when we all got together to craft together, it tends to make you focus on something else and it is art therapy! It allows your mind to be distracted, to focus on something other than disturbing or upsetting thoughts. It can help you. It is art therapy, and I hope you get some of your own therapy time in too if you need some!

P.S. Someone asked me if I put the white touches (frosted look) on the pinecones myself, which I did not, but you can do that – just grab a sponge, put some white paint on it, and roll the pinecone across it and let it dry.

Love, Cathy T
ContainerCrazyCT.com
Located in East Windsor, CT
Currently retired

Date of Today’s Post: 12/3/24, Tuesday

Fall is Here; Overwinter Plants Soon

Leave a comment

Wow! It’s been a very long time since I’ve written a plant related blog post. Times have changed for me since entering the world of early retirement. It is difficult to have as many plants as I have had in the past because of the care involved, and my goals have changed. To travel means needing care at my home for plants while I’m away, and this is not always possible, so I cut back on having lots and lots of plants. And I also tried to focus on drought tolerant plants, so they won’t need as much watering when I’m away on travel.

I didn’t plant as much either to reduce care needs. But I still have the very serious addiction of needing plants on my deck at home. And to save money, another retirement requirement, I want to still overwinter plants as best as possible to reuse them next year in the summer again.

I have written many times how I’ve stored my red banana plant (Ensete) and Canna Lily rhizomes, and elephant ear tubers (both Alocasias and Colocasias) but it bears repeating my basic steps to remind those who ask this time of year.

Frost Expected Soon

A frost is expected later this week on Thursday, 10/10/24, this year. Tropical plants may be touched by frost if you are storing the underground parts (tubers, rhizomes, corms, etc.), but if you want to store the plant in its pot, it is best to move it before frost, so the foliage doesn’t get damaged, stressed, or destroyed from the chills. Move them in tomorrow or the next day, before the frost hits.

Agaves Disassembled

I also move in Agaves as best as possible into my home, but space is limited. I no longer heat my greenhouse (again to save money for retirement fun), so that option is out. In the past, it was no problem to store my Agaves in my low-temp greenhouse over the winter, so they just barely hung on. And then return them outdoors the next summer, but now I have to move them inside the home.

A few of my agaves got very crowded in their pots because of the side shoot babies which had been forming, so my tactic for taking care of those was to take the agave out of its pot, remove all the babies by carefully tugging them away, trying to keep roots if possible, and then placing the babies in mason jars filled with water to sit for a while. This will encourage new roots. Then for the momma agave, I pruned some roots and remove soil quite a bit to fit it into a smaller pot and then move them inside the home in a space I have by my indoor slider. Done!

The baby agave plants may look a little tattered or uneven but give it time. Soon these will have fresh roots, I’ll replant them into very small appropriately sized pots and let them grow. The shape will be normal over time, and they can grow as big as my big agaves have. This particular agave is Kissho Kan. These plants inside the home of the winter are kept on the dry side, barely watering, and in some sun by either my bedroom or kitchen slider doors. They are easy to overwinter if you have the space.

Agaves in mason jars with water above photo

Alocasia Tubers

I still have to work on my Ensete and other big pot on my deck, but I managed to take apart one of the alocasias in a smaller pot. I cut off all the foliage first, then dig out the base with roots if possible, and some will have the brown papery covering on the tuber area whereas the smaller sides shoots often do not, either way, I store the alocasia tubers in my basement in boxes with just paper wrapped around them or as a bed (like crunched up newspapers). They can go a bit on the dry side and I make sure to have some slits or air holes in the boxes used to store them. This works fine in an unheated basement that does not go below freezing. Colocasias (elephant ears) are stored a bit more on the moist side by using peat as a bed material in the box. Before moving them into boxes (either plastic or just your basic cardboard boxes), I leave the tubers to sit in the sun for a week or days for a while. I don’t put them in immediately. I may even leave them to dry some on a table in my basement if it becomes too wet outdoors due to rain etc.

These plants (the alocasias) can grow very very large, and the tuber gets bigger and bigger each year. I still have quite a few of those to do. The next two days will be sunny so that helps. The alocasia plants have the elephant ears where the tips point upwards to the sky. Regular elephant ears (Colocasia) point downwards. I didn’t do any of the regular ones this season. I’m kind of hooked on the alocasias.

This planter above is my next project. I have to say the alocasia is paired with the most beautiful Coleus Limewire. It is so huge right now; it will be sad to cut it down! It has done wonderfully has a filler plant with the tall alocasia. The burgundy foliage edged with lime green was just stunning when hit by the sun, and the plant was tiny when started, now it is huge! You can also see there is a eucalyptus plant stuck in there, first year I’ve tried one. It is super tall right now and I’ll probably give the plant to my niece. She likes the smell of those plants, but I find the smell disagreeable. However, while it is living in the pot, I haven’t smelled that scent, guess it is when it is cut down.

I took this photo this weekend so I could have a reminder of how large this Ensete (red banana plant) grew this season, which is only year 2 of it. I stored it last year, and it shot up a lot this year with growth, and I have to remind myself to plant it in the larger planter next year, because it fell over twice during windy storms here – thankfully the pot/planter did not crack! I was trying to encourage my black cat to pose with me, she wasn’t having it – she wanted to walk around the deck. Her name is Mini and she is our treasure pet! We just love her. She never bothers my plants, it is like she knows, they are important to me, just like she is.

Anyhow, tomorrow I will start to take these apart and store them and will show the steps but here’s some links from prior posts about the processes I have followed with success.

Please note: Years ago, I would put moist peat with my Alocasia tubers, but no longer. I use paper for those, and it works better. That is for the Alocasias specifically. (For Canna Lily rhizomes, I use peat, and for Colocasia regular elephant ears, I use peat).

Hope this is helpful.

Enjoy your day!

Cathy Testa
Broad Brook/East Windsor, CT
Date of this post: 10/7/2024

Saying Goodbye to A Blog

2 Comments

Today I did it – I clicked the button to not renew my subscription to another blog I maintained, called Workshopsct.com. It will officially expire on 2-29-24. This site was used to announce my workshops a few years ago, and most recently, my service offerings from things like my creative Succulent Topped Pumpkins to Summer Watering Services. I have officially closed my small plant related business, but I am always here to offer tips on container gardening, plants, and hobbies. Thus, for now, this site, called Container Crazy CT, is staying.

I think one of the hardest things to let go of is all my amazing photos of plants, many of which were showcased on WorkshopsCT.com. I’m addicted to plant photos – probably because I’m a visual person type of person. I love reviewing my photos and thinking about the story behind each container garden creation, or a nature situation like spotting of a butterfly or other cool insects and also looking back on photos of many types of plants, flowers, herbs, succulents, cacti, tropicals, tomatoes, and even weeds at times! LOL.

Anyhow, saying goodbye to a blog is not easy for me so I’m doing it in steps. First to go is Workshopsct.com, and next will probably be my 3rd blog about container gardening services, called Container Gardens CT. But, again, this blog, for the time being is staying. I’ve been writing on it for over 10-15 years, I’ve lost count! Below is a photo of the screen shot of workshopsct.com, just for the heck of it.

Enjoy the rest of your weekend! Cathy T of Container Crazy CT
Today’s date: 1/14/2024

Balsam and Base Greens in Holiday Wreaths

Leave a comment

When I held holiday wreath making workshops, I referred to greens that are primarily used in the wreaths, as “base greens.” I felt that these greens are your standards and used for much of the filler material. Another term I created was, “premium greens.” Those were the more pricy and floral quality greens used to create accents in your wreaths or holiday kissing balls.

A mixed greens wreath with base and premium greens

The base greens were usually Balsam, Douglas fir, yew and pine. So far in my series of recent posts here on Container Crazy CT’s blog, I have covered yew, holly, salal lemon leaf, and boxwood. Of these, I considered the boxwood, lemon leaf and holly more along the premiums. Yew makes an excellent base which I also covered in a prior post.

Base Balsam Greens on a Big Outdoor Table

When you make a holiday kissing ball, you need a lot of greens. Having the base greens in supply made that happen. It is also true for fresh greenery holiday wreaths. The base greens are the bulk, and the premium greens are the decor and special touches. It takes a combination of these to make a beautiful creation for the holidays. The base greens were typically the less expensive greens while the premium greens were pricier. And a lot of places do not make wreaths with premium greens, sticking with the balsam only or balsam wreaths with some special touches, like adding holly or pine.

Base Greens on a Table

At first, when I held my wreath making workshops, I let everyone go hog holiday wild with grabbing greens from large outdoor tables. Some of the tables and shelves were in a wooden outdoor shed and other greens were piled on a table. I would monitor if the base greens were running out and restock as needed during the workshop. Steve helped me with this task as well. In the beginning, I had to see if my estimates worked. No one handed me this information so I always had a bit of panic that I could run out but fortunately, we usually had plenty.

Me between two piles of base greens

That was part of the fun, but one year, an attendee took a ton of the premium greens, and one type of the premiums were no longer out there on the tables for others. This made me consider how I had to portion things out a bit more the following season, so it was fair to all attendees. I even had a friend help me to make sure attendees would take what was allotted per person. She stood there reminding everyone of that as they came out to get their greens. We began to affectionately refer to her as the “greens police.”

Various Greens on a table in the Greens Shed

For me to portion everything out for 35 to 40 attendee’s prior was just too much work, so I really liked just putting all the greens out for everyone to enjoy. Over time, I learned which greens held up the best and which could dry out faster. Some of that was nature’s choice. Depending on the climate and weather of the region where greens are obtained from, some items may have not been available or in the best condition. This is the nature of working with plants in general. No guarantees. I also didn’t want to dry out the greens by precutting big branches of the balsam or other bases, which typically came in big bundles, so fresh cuts are best to help retain the moisture. The attendees brought their own pruners and would cut to the sizes needed as they worked to make their wreaths or kissing balls. There was no way I could do that work before hand, plus I think it is part of the process and as you cut your branches, it smells so good too. The aroma of all the greens would permeate our workshop room.

Base Greens

Also, portioning everything out, would be required probably the night before and I never set up the greens the night before, because I didn’t want to expose them to the elements such a wind out in the greens shed. My husband, Steve, and I would get up very early the morning of the workshops and move all the greens to a staging outdoor open shed. It was usually cold, our hands froze, but I am so lucky he was as cheerful as me in doing this process. He hooked up his trailer to his old tractor, loaded up the stock I felt we needed, and I would work fast to get all setup before everyone arrived. I was also excited too – because it was fun, but it was also a timing thing that required coordination. I used paper plates to make signs so the attendees would know which greens the base bulk were to use, and which were premium greens. There was a set amount each person was to take. I used tables and shelves, along with bins and buckets to put everything out in time.

Steve and Cathy – 2019 – The last workshop we held, and we made it a celebration! Ironically, this was the year before Covid arrived too.

I think one of the best compliments was when a friend recounted attending one of my first wreath making workshops, and she said to me that when she walked out to the greens shed area, it was like a manger with the wooden structure and all the beautiful greens lined out. I decorated the structure somewhat. It was festive and got everyone into the holiday spirit. I used to say, this is my holiday. Also, my husband gave up that wooden structure for us – the attendees of my workshops. He had built it hold his firewood, but he allowed us lots of space to use it as the greens shed. That was very generous of him.

Large Mixed Greens Wreath

It was the perfect outdoor structure to setup all the individual greens for the attendees to take. We worked indoors to make our wreaths, but our greens supply was outdoors. Some years it was cold, other years, it was actually warm! One year, we wore t-shirts and didn’t even need to cover up with hats or scarves. But overall, it was always a good day with decent weather conditions, I lucked out on that. I worried about snowstorms creating a problem for my workshop sessions, but those never happened or were the type of big winter snowstorm to not stop a bunch of enthusiastic happy ladies ready to join their family and friends at my wreath making workshops.

Cathy T (me!) the year we wore t-shirts at my Wreath Making Workshop!

Steve and I would always finish up setting up only minutes before the first attendees would arrive, then the fun would begin! This was a holiday tradition we held for 15 years. I do miss it and I’m sure my former attendees do as well. But, alas, the time had come to move on. In the meantime, I started making some holiday ribbon wreaths this year, quite spontaneously and that has been fun, but it will never be like making a fresh wreath or holiday kissing ball, but it sure is a great substitute! At least for this season.

Stay tuned as I go over things to know about using more base greens next in my series of posts!

Have a great day,

Cathy Testa
Container Crazy CT
Broad Brook, Connecticut

Mixed Greens Wreath

Boxwood in Holiday Wreaths and Kissing Balls

Leave a comment

Do you know what the word Buxus is? It is the genus name for boxwood. It’s one of the easier botanical names to remember. Anyhow, boxwood evergreen shrubs have rounded or obovate shaped leaves, on slender green stems. It is a dense evergreen shrub used in landscapes and commonly available at nurseries. It is also a greenery available from floral suppliers or retail locations at nurseries during the winter to make festive arrangements such as fresh greens wreaths and holiday kissing balls.

As with most evergreen shrubs, there are many varieties or cultivars available of boxwood. Some have more narrow leaves and others have oblong leaves. For example, common boxwood (Buxus sempervirens) has elliptic or ovate to oblong leaves. Because I am a plant person, I notice the differences in the leaf shapes on boxwoods more so probably than a typical person. The leaves are small and glossy on both sides of the leaves usually, and in arrangements for the holidays, the leaves retain their dark green glossy color very well. Boxwood greens add a nice textural and color element.

I’ve written about the benefits of using boxwood in wreath making before on this blog. For example, there is no sap to contend with as with balsam. After a while, your hands get very sticky when making many fresh holiday wreaths, so that can be a benefit. Also, the boxwood bunches or stems are light weight. I liked using them to make boxwood only holiday kissing balls because of this feature, as other kissing balls would get terribly heavy when I did a mix of greens to create them.

Prior post about boxwood above

As far as a quality green, I like boxwood on the greens list. It tends to give a classy look to a wreath or kissing ball. Used alone or with a mix of other greenery, it works very well. In my mind, it is a nice benefit or not sure of the word, but a higher-end type of greenery to use and if you can afford it, I say do it!

A holiday kissing ball made with boxwood greens only.
Wreath by Cathy T with Boxwood and Magnolia Leaves
Boxwood ready for a workshop

Typically, the boxwood I would order was packed in boxes or burlap bags, and they were always fresh and good looking. To keep them hydrated, if I felt they needed it, I would take a bucket or bin like the one shown above, fill it with water and drop the boxwood tips and stems into the water to soak them for a bit. Then I would shake off the excess water after they had a good soaking (maybe about 15 minutes or so). I would shake the bunch and then lay them on beach towels to somewhat drain.

As mentioned in my prior posts, the greens need to be kept cold. In the florist trade, it indicates the boxwood greens should be in a cooler at a temperature between 36 degrees F to 41 degrees F. Anyhow, I kept them in the waxed coated boxes or the burlap bags in an unheated garage. However, if I soaked them in water to rehydrate, sometimes I would just place them in a bin after the excess water was removed. Again, rehydrating them was not often needed.

Boxwood on a Wreath by C Testa (with Lemon Leaf shown also)

Another nice aspect about using boxwood is the stems are very sturdy. I would recut the stem ends to a bit of a point to insert into kissing balls center ball foam easily. BTW, you may also rehydrate boxwood before use by recutting the stem ends and inserting them into vases of water, but I usually did not do that or need to. As noted above, if there was a need to rehydrate them, I’d do the soak method in water in a tub for a bit then dry them out a bit so they would not be repacked soaking wet. Outdoor weather like snow or sleet did not bother the look of the greens either once they were in a wreath outside.

For a couple years, I offered boxwood in my box of greens mixes. These boxes of greens were for people who wanted to make their own wreaths at home. Included were many other fresh greens such as balsam or Douglas fir, Salal lemon Leaf (prior post), yew, silver fir, berried juniper, holly, and more. I never harvested boxwood from my own shrubs or others, but these shrubs are common in the landscapes, so if you happen to have a big enough shrub stash of them, they can be harvested from to add to your holiday wreaths. Typically pruning boxwood is done in the spring but taking some minor cuttings for your arrangements is usually harmless for winter decorations.

Of all the greens I would order, boxwood was usually the highest price on the list. Therefore, I did treat it as a quality green to use with a mix of greens, but if I had some left over or someone wanted a boxwood only wreath or kissing ball, I would charge accordingly. The price was worth it because boxwood is an elegant green that makes your arrangements look classy, in my opinion.

Wreath made by C. Testa with a mix of greenery. Boxwood accents shown.
Wreath by C Testa with Yew, Lemon Leaf and Boxwood
Boxwood Only Wreath by C Testa

Another nice aspect of using boxwood is it was a faster assembly as shown above on this wreath with only boxwood. It would take a lot less time than bunching various greens together.

Boxwood Only Holiday Kissing Ball

Snips and tips of boxwood greens are nice in vases or other holiday decorations. For example, if you wanted to make a snow scene in a glass bowl, the cuttings can be used in there and last a long time with no odd scent. And as mentioned good color retention. I really can’t think of any downfalls of using it. I would rate it higher as a good quality type of green to use and hopefully you will have the opportunity to do so in your own holiday arrangements!

Cathy Testa
Container Crazy CT
Broad Brook, CT

Boxwood is a wonderful and classy green to use in your holiday wreaths.