Counting the Final Hours til the Evergreens Class Begins

Leave a comment
Bitstrips: Source for Image

Bitstrips: Source for Image

The rain and sleet rapped on my window and helped me to sleep all evening, but this morning our loud cat meowed and woke up my mind.  Darn it, now I’m awake at 5:30 am.

Well, guess I’ll load some wood in the woodstove, get a cup of coffee going, and relax for a bit before going outside later this morning! Of course, I have to wait for the sun to rise.

The weatherman said last night, the sun would shine by noon and this light dusting of snow will naturally melt away.  Perfect, I thought.  In fact, could it be any more perfect?

For the past 4 years, I’ve organized this event – and every year, the weather has cooperated on the day of this class. The snow one year lightly fell right on queue.

I’ve considered maybe I get too obsessed about this event – seriously – can one go overboard?  Perhaps, but I do this for my friends, passionate clients, and those who appreciate the efforts.  And it is a great way to meet “new” friends and socialize.  Plus, you know what, my husband enjoys it too.  I truly believe he loves that I get into the spirit of decorating this time of year.

So I guess I’ll recoop my zzz’s after this week.  For those in the business supplying greens, trees, holiday decor, florist items, and more – they are very very busy this time of year.  And they do it all for their customers.  Why?  Cause we all love the season, and couldn’t image life without it.

And look who stole my spot in the bed.  My cat Hunter.  He is a male cat, he is loud, and if you enter a room he is sleeping in, within minutes he leaves to find another spot to sleep.  He is impatient.  (Get your rest buddy, cause you know what, there will be some activity here later!)

My cat Hunter.  He is a screamer - meows very loud when he wants something.

My cat Hunter. He is a screamer – meows very loud when he wants something.

Cyou soon!  Cathy Testa

Barbed Wire Wreaths and Bows for the Holidays

2 Comments

My Evergreen Creations Class being held tomorrow will include various decorations for my attendees to dress up their Kissing Ball, Wreath, Candle Centerpiece, or Mailbox Swag – whichever item they choose to make in the class.

And, I can not imagine not adding bling, glam, or organic decor to a holiday creation made with a mix of fresh evergreens for it would not make it complete.

However, sometimes less is more.  Like in this photo below, Dianne, my good friend, and also a class attendee, showcased wreaths and bows made from barbed wire on her horse barn one year.

Decor for Evergreens_0009

There was a major snow storm that day when we visited her home – but we made it anyways, because we knew her event would be worth the trip!

She had setup a big fire outside to keep us warm, or we could sit in her cozy home filled with holiday touches and friends.  Either way, we had a great time and made it home safely with our four wheel drive truck when it was time to head out.

One of the best parts of decorating for the holidays is adding your own unique style to your items. In Dianne’s case, she is really into the horse and animal world, and it shows at her cozy dwellings. She had some curtains hanging from vintage styled wooden horse apparel, old wooden crates filled with fresh evergreens and decor, and touches of classy country in her home.  I remember feeling honored we were part of her holiday event, and especially wanted to capture the mix of barbed wire wreaths on her barn wall in a photo, even if it was snowing like heck outside.

As you can see, the wreaths were simple with little decor – which worked, especially with her beautiful barn as the backdrop to the barb wire arrangement.

But in other case, more is more – you may have a style of maxing it to the fullest with decorations! Or, you may have a color theme in mind to suit your home. For example, this year I ended up with some candy cane colors in one room.  And — of course, the organic and natural decor, the brown and tans of pine cones, pods, raffia, dried mushrooms or fruit, with a splash of gold, red or white to add just that bit of that must needed holiday sparkle is another style.  Who can resist bright red or gold berries on a wreath or candle centerpiece?!  All of these types of decorations will be available at my class tomorrow for the attendees.

Decor for Evergreens_0006

And per the weatherman, we will have a light dusting of snow in the morning, which I think is just perfect.  It makes the day feel like the holidays are approaching.

Thankfully it is not a major snow storm like we experienced when we went to my friend Dianne’s house that year.

Decor for Evergreens_0004

See you all tomorrow ladies.  One more day til the annual “Evergreen Kissing Balls and Holiday Creations Class.”  Get your crafty juices warmed up – we will be creating soon.

Written by Cathy Testa

Can Holiday Decorations Soothe the Soul?

4 Comments

Decor for Evergreens_0007I was on a bit of an unexpected natural high yesterday.  I visited my parents for a couple hours where I could pause and spend some time with them in my day.  My Mom and I took a walk and we talked about holiday activities coming up and discussed other general family stuff.

Both of my parents are extremely supportive of any efforts their children take on, and they know I get excited this time of year because of my Evergreen Creations Class. So we were chatting about that too.

As the sun shined on us, and my Mom and I giggled about some of her jokes, I thought, “This is a moment.” We were in a great mood, it was unexpected to have such a nice day to walk outside this time of year, and I guess, just the general feeling of an overall good spirit was with us.

In fact, when I had arrived to the house, my Mom was listening to a tape of French music sent to her by my Aunt Lucie.  And when I heard my Aunt’s recorded voice over the tape speaking well wishes to my Mom, I almost cried.  It was just so sweet how my Aunt did that for her.  I guess the tape was done awhile ago but I had never heard it before.  Aunt Lucie use to live with us when we were very young.  We thought she was our older sister at first, we were so little.

But shortly after we started walking down the path to the land outback my parents’ home, my Dad arrived on his tractor.  He jumped off and joined us for a stroll. I asked him if he had a recommendation on hearing aids for a friend.  His reply was that there are some on the market that are expensive and don’t work well which is great because he can’t hear Mom.  Ironically, my Mom laughed hysterically at this.  This was a good thing.  All three of us were in sync.

So after visiting them, I went home with a big smile and was on a natural high as I was working on activities for my class on Saturday, but when I went inside the house to my laptop, I received sad news of friends having to attend funerals this weekend. And not just one friend, but four had recent losses in their families.

We also had a tragedy in our town where a car accident occurred on Rt 5 this week. The accident held up traffic for over four hours.  We all read in the newspapers that a life was lost in the accident.  These sad moments make us pause and remind us others go through difficult times during the holidays – and to also remember to cherish every good moment we experience in our own lives, for life can be short.

So one moment, I was happy and the next moment reflecting on sadness of others.  It was almost identical to last year.  I was getting ready to head over to the winter farmers market in Ellington to sell holiday decor.  But suddenly, I heard the news over the television of the Sandy Hook Tragedy.  I couldn’t believe my ears that day last year, and immediately, my happy bubble burst at that very moment.  Feeling sad, I proceeded to the market, but I wondered if I should cancel. It seemed odd to be selling holiday goodies when people were suffering as they heard the sad news of losses, great losses.

At the market, there were many children attending with their parents because it was held in a fitness center building with recreation for kids.  This was an unexpected surprise to me.  I didn’t think there would be so many kids there that evening.  Many kids skipped and jumped over to my table, looking over the holiday items, and there were lots of giggles and smiles.  So at that point, I felt a little relief.  The decor was giving them some happy holiday spirit.  Of course, they were unaware of the tragedy which just occurred that day, but I am sure the parents there were well aware, we all were.

While this post was also unexpected, it just got me thinking, can holiday decorations soothe the soul?  I think yes, it brings cheer, but also remembrance of past and present.  It perhaps brightens your surroundings even if you happen to be sad due to reflecting on someone or something you may be missing at this time of year.

In fact, yesterday, my Dad said, “Mom must be in a good mood, she is decorating a tree this year.” In some recent years, she didn’t feel like dragging out the tree and decorations, but this year is different.

This is good, I thought.  Very good.

Then I told Dad, “I’ll come by with some decorations later.”

Decor for Evergreens_0003Written by Cathy Testa

Using Zip Ties to attach Deco Mesh Ribbon to your Decorating Projects

3 Comments

Mesh ribbon is incredibly easy to use and attach to your mechanics by using zip ties (a.k.a., cable ties).  You can use pipe cleaners (as an alternative) instead of the zip ties, but zip ties secure the ribbon tightly at each puff or bunch, which makes the pulling and tucking more efficient as you work to create your design for a wreath or swag.

The zip ties also work well for attaching ornaments because they slide easily into the ornament hooks.  The size you want to get is at least a 3-4″ length for the zip ties, or you can go longer, and just cut the tail ends off at the end of your project.

Zip ties will last for years, where I think pipe cleaners can wear a bit over time.  And if you want to take apart your project later (for whatever reason), zip ties are easily cut with sharp scissors or pruners.

PROJECT No. 1: Wreath with Candy Cane Mesh Ribbon:

  1. 13″ Round Wreath
  2. Zip Ties (3-4″ lengths, white colored)
  3. Deco Mesh Ribbon (rolls usually come in 20″ widths and apprx. 20-30 ft.)
  4. Sharp scissors or pruners
  5. Ornaments (3 red holiday ornaments used with a snowman head for this project)
  6. Another type of ribbon if you want to add more to the design

Decor Mesh Ribbon_0001

The key here is to bunch the starting end of your ribbon by gathering it, and then using a zip tie to secure it to the wreath.  In this first step, you want the bunched starting end to be “tightly” secured to your wreath frame.  Pull the zip tie closed and then move down the ribbon to gather your next attachment point.

Decor Mesh Ribbon_0002

Bunch the starting end first tightly.  Then grab another zip tie and attach it to your wreath frame.  When selecting your zip ties, consider the color of your ribbon.  Since this is a white and red, I used white zip ties so they won’t show.

Decor Mesh Ribbon_0003At regular equal length intervals (about 4 or 6″ apart), gather your next bunch.  You do not need to cut the ribbon at any point as you are working from your roll.  But what is key, is as you move to the next zip tie, do not tighten it as you did with the starting point.  Attach the gathered end in you hand to the wreath with the zip tie.

Attach it, but do not fully tighten the zip tie closed – because you may want to slide other items under the zip ties when decorating with embellishments later.

Decor Mesh Ribbon_0005The photo on the left shows the front of the wreath.  As you move around the wreath frame, equally spacing each bunch and gathering with a zip tie, remember to finish off with leaving “tails” for the bottom of the wreath.

The photo on the right above shows the back side.  Do not cut off the zip tie tail ends until you have completely finished adding additional decorations.

Decor Mesh Ribbon_0004

Decor Mesh Ribbon_0006

I decided to grab a finer ribbon to add a little softness of white.  As you can see, just slide the ribbon through the loose zip ties.  This ribbon was a little difficult because it kept catching and snagging on the mesh ribbon, but I managed to get it done all the way around the wreath.

Decor Mesh Ribbon_0010

Next was adding some bright red ornaments and a snowman head I picked up from a craft store.  Use a zip tie to connect 2 of the red ornaments together, then attach the 3rd ornament to the two.  The reason to do them this way is if you bunch all three with one zip tie, and then tighten, it can pull apart the ornament hook.  It fits better when you put two ornaments together with one zip tie, then add the third to your bunch.  Grab another zip tie and attach it to your wreath at the base.  The snowman head was attached by using a zip tie to attach the tip of his hat to the wreath.  After all done adding your preferred decor, go around to tighten every zip tie and cut off the tail ends of them.

Decor Mesh Ribbon_0008

Decor Mesh Ribbon_0007Much more could be added to this wreath to bling it up or add more whimsy, but I decided to just keep it like this for now.

PROJECT NO. 2:  Swag with Big Bow using Mesh Ribbon

Next was creating a bow with a stick swag, using 3 zip ties and one piece of the deco mesh ribbon at about 3 ft. length. You can literally use any kind of stick, vine, or metal mechanics to attach mesh ribbon easily.  The product is pliable, bunchy, and showy.  I still haven’t figured out how to fix the frayed ends where the ribbon is cut, but I saw recently that using a lit candle to lightly burn the ends of a ribbon may help this problem – this is to be tested later.  I will let you know how it works, but I imagine you have to be super careful – mesh ribbon product is flammable.

Decor Mesh Ribbon_0009This is the stick swag I decided to use to attempt a bow creation with the mesh ribbon.

Decor Mesh Ribbon_0011

Basically I did a big puff first, smaller one in the center, and then big puff again.  It came out rather “who-vill-ish” and I wasn’t sure if I liked it – but my husband said he did, thus it got hung up on the wall in the same room with my other candy caned themed items.  When start to feel crafty again, I may add more bling to these but this is how I started them.

P.S.  You don’t need a 30 ft roll of this material to do these two projects, but I guarantee, you will end up using the rest of the roll as you learn to create with the mesh ribbon.  Give it a try!  For more ideas, click HERE.

Decor Mesh Ribbon_0012Cathy Testa

Two of My Favorite Side-Dish Recipes for Tday: Part II

3 Comments

As promised, here are the photos taken as I cooked up my two favorite side-dishes for Thanksgiving – as posted earlier this week for the Cranberry-Pear Chutney recipe and the Sauteed Mushrooms with Garlic.  See HERE to get the list of ingredients and steps.

Cranberry-Pear Chutney recipe requires fresh cranberries, but of course!

Tday Recipes_0014

Love that red color.  And as noted in my prior posting of the recipes, the smell and popping noise as it simmers is wonderful.  What could be easier than putting cranberries in your pan with water and the brown sugar.  Talk about easy!  And if you have any cranberries left over that you did not use for the recipe, they can be used in decorating – double-usage, love that too.  I took photos of the nutrition information as well.

Tday Recipes_0015

Brown sugar. The recipe calls for 1.5 cups but I used one cup to cut down on the sugar.  And I buy the light sugar type.  I like the taste of tart versus sweet, so to me, it is better with less sugar for the taste factor as well.  There are enough sweet flavors at Thanksgiving during dessert!

Lime juice.  I realized this morning, I forgot to add the lime juice!  I hope it doesn’t mess up my recipe, we’ll see later.  The other ingredients (pear, raisins, jalapeno) are mixed in after simmering the cranberries in water with the brown sugar.  They are pear, jalapeno, and white raisins.

Tday Recipes_0012

Its kind of interesting – REDS and GREENS.  Just like Christmas!

Tday Recipes_0004

I’m the type of cooker that likes to chop all and put them into bowls before I toss them into my recipe.  Not sure why, but here is the photo I took of those 3 ingredients above (pear, jalapeno, raisins) all chopped and ready for the pan.

Tday Recipes_0006

Tday Recipes_0008

The bowl I used when done is a …oh gosh, what do they call these?  Well, I like it is raised up cause it helps on a table to have it elevated, so it doesn’t take up a lot of space with all the other Thanksgiving Day dishes on the table.  Put this in the fridge over night, and chilled it is wonderful with roasted turkey as a side-dressing served cold, and on left overs – yummy on left over turkey for sandwiches!

For the SAUTEED MUSHROOMS WITH GARLIC RECIPE:

Tday Recipes_0013

Sno-White and Baby Bella are the types I typically use.  I used a total of 6 packages (3 of each) this year, but in the past, I’ve used up to 8 or even 15 to make a huge batch for large groups at Thanksgiving.

Tday Recipes_0009

As noted on the recipe posted this week, I also use lots of garlic – 6 cloves chopped up, and olive oil to get them started.  Then add the mushrooms in batches, later add fresh-squeezed lemon juice to moisten it if it looks dry.  This is the MIL secret, the lemon juice keeps it just right as it simmers slowly.

Tday Recipes_0011

Tday Recipes_0010

I forgot to take a photo of the final image of the mushrooms all cooked up…, but you get the idea.  Oh – also, I forgot to mention in the prior post of the recipes, I toss this often as it simmers slowly, moving the juices and garlic around. until it is done.

Enjoy – let me know what you think if you decided to give these recipes a try – they are both Make Ahead types which can be refrigerated and warmed up for your Thanksgiving Meal.

CLICK HERE FOR RECIPE

Cathy Testa

Mini Snowman in a Jar with Buffalo Snow

1 Comment

When babysitting my nephew, it hit me that I should keep some of the baby food jars on hand for an upcoming project – but I didn’t know what that project would be.  Perhaps the jars would be used to store some small items, or maybe I’d make a candle holder out of them, or they could have just ended up in my supplies for a long-time and not be used.

However, because my holiday decorating and fun juices are still flowing, I decided to create little decorations by using them to house a mini snowman.  These little decors could be easily used as ornaments (just attach a string on the top to hang) or as seating nameplate holders at a holiday table.  Whatever the use, sometimes its those “little” embellishments that are the most fun.

Mini Snowman Jar_0005

Here are the items used:

  1. Buffalo Snow (found in bags in retail stores)
  2. A miniature snowman florist pick
  3. Small baby food jars (find a new Mom!)
  4. Chenille wired pipe cleaners (12″ lengths used)
  5. Glue gun with glue sticks
  6. Red berries
  7. Golden metal leaf (or other fun small decor)
  8. GooGone Spray Gel
  9. Snips to cut pieces
  10. Tweazers as a tool

Mini Snowman Jar_0001

The first step was to tear off the label from the baby food jar and clean them in soapy water.  To remove the remaining sticking material holding on the label, I used a product called GooGone Spray Gel which removes sticky or gummy materials from surfaces. Just spray it on the glue, let it sit for a minute, and use a cloth to rub it off.  It works pretty good.

Mini Snowman Jar_0002

Cut the pick off the bottom of the snowman so he can stand level in the jar.  With a dab of glue from the heated glue gun, apply him to the bottom of the jar and hold in place for a few minutes.  After secured, take bits of the Buffalo Snow and place it gently around the miniature snowman.

From there, it was pretty straight forward, adding the little red berries and a metal jewelry gold leaf decor by just putting a dab of melted glue on the ends and pressing it into the Buffalo Snow in the jar.  I used a pair of tweazers for areas difficult to reach with my fingers.

Mini Snowman Jar_0003

Using a 12″ piece of Chenille pipe cleaner, I decorated the top cover a bit.  To do this, be sure to put the cover onto the jar first, it is easier to work with this way.  Apply some heated glue around the cover’s rim (being careful to not allow the glue to drip onto the glass), and press the pipe cleaner around it.

After I was all done, it occurred to me how much easier the whole process would be if I turned the jar upside down and put all the materials on the inside of the jar cover.  This kind of reminds me of a snow globe homemade style.  This time I glued everything onto the inside of the cover, and then placed the jar over it.

Mini Snowman Jar_0006

I decided to create mini candycanes with my left over pipe cleaners.  Taking one end and bending it over a nut cracker and then snipping the other end for the desired size.

With a dab of glue, it was easy to put the miniature candy cane into the Buffalo Snow.  It stood up with no problems.

Tip: Be sure you avoid placing the front of the snowman facing a seam in the glass jar.

Mini Snowman Jar_0007

I feel like there should be something on the top to finish this little decor off.  Maybe a mini green tree, or a holder to insert a name tag if this were to be used for table settings.  As usual, there can always be more added.

Mini Snowman Jar_0008

FYI:  For my class attendees reading this post, the miniature snowmen will be available at the December 7th class!

Cathy Testa

Mini Snowman Jar_0004

Mini Snowman Jar_0003

Two of my favorite side-dish recipes for Thanksgiving Dinner

4 Comments

Tomorrow will be my cooking day, but I have it easy because my sister is hosting our Thanksgiving celebration, and my only chore is whipping up two side-dish recipes which are always a big hit with my family.

The first is a Cranberry-Pear Chutney recipe I found in the Real Simple magazine a few years ago.  The other is Sauteed Mushrooms with Garlic which I learned from my mother-in-law many years ago as well.  Both are extremely easy to do, fast, and yummy – And pair well with roasted turkey.

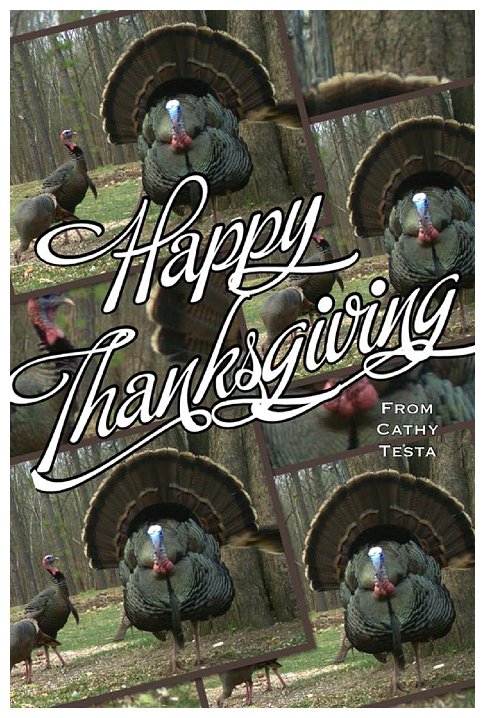
Before I begin, here is a collage I made of a turkey photo we captured last year under our bird feeders.  To see more about these wild turkeys visiting in my Connecticut yard, click HERE for a previous post.

turkey_0001

Recipe No.1: CRANBERRY-PEAR CHUTNEY

Makes 8 servings (I think it makes plenty more, for up to 12-15 people, because you only really need it as a side dressing to your roasted turkey. You take a scoop and that is usually enough on your plate.)

Total time: 25 minutes (hands-on and cooking – it is fast and easy, and smells great when cooking on the stove!)

“The sweet and spicy heat in this savory chutney makes it perfect for roast turkey.  It’s also great on leftover-turkey sandwiches.” – Real Simple.

I agree!  It has a very slight kick to it because of the jalapeno in the recipe.

Ingredients:

  • 4 cups fresh or frozen cranberries (I’ve always used fresh for this, and I got fresh organic cranberries at Whole Foods yesterday sold in the clear bags.)
  • 1 1/2 cups brown sugar, tightly packed (Probably the only bad part of the recipe cause that’s a lot of sugar.  I cut this down, you don’t have to have it that sweet and it is still delicious – especially if you like the taste of fresh tart cranberries.)
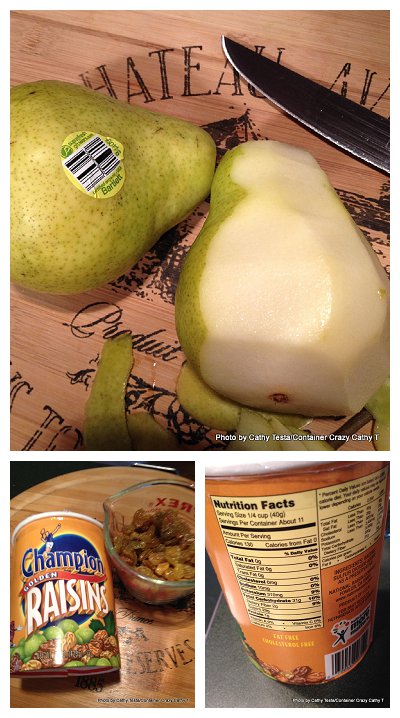
  • 2 Bosc or Asian pears (peeled and cut into small dice (2 cups).  (I never really pay attention to the type of pears, just pick the ones that are firm and fresh looking and it works just fine.)
  • 1 jalapeno, seeded and minced. (Don’t rub your eyes when you are cutting it up – as I did one year – big mistake! Remember to wash your hands after mincing it).
  • 1 cup golden raisins
  • 2 tablespoons lime juice (Whenever possible, use fresh limes versus the stuff in the bottle).
Steps:

In a large saucepan, heat the cranberries, brown sugar, and 2 cups of water over medium-high heat to boiling. Simmer, stirring occasionally, until the cranberries start to pop and release juices, about 10 minutes.  (I love the popping noise as the cranberries start to crack open, and the scent begins to release as well, which is very cozy in the kitchen.)

Add the pears, jalapeno, raisins, and lime juice and simmer for another 5 minutes. (EASY PEASY!)

Remove from heat.  Cool.

Cover and refrigerate up to 2 days ahead. (Another reason I love this recipe, you make it ahead, it is better that way, tastes wonderful with your roasted turkey, and the left-overs.)

The deep red color, sweet and tart flavor with a hint of heat, and wonderful scent of this recipe is a keeper in my recipe book.  Don’t forget to serve it in a pretty, glass or clear dish to make it look wonderful too.

Recipe No. 2: MIL’s SAUTEED MUSHROOMS WITH GARLIC

My mother-in-law has taught many of her recipes to me – all of them are easy, have a secret ingredient or style, and always taste spectacular.  Years ago, I suggested she teach cooking classes because she is so good at cooking and baking.  And she finds recipes that are easy requiring limited ingredients.  She has a knack for that.

So, here’s one side dish I learned from her.  It is super easy and requires literally only 3 main ingredients (unless you count the bottle of wine my mother-in-law stated you must open when you start cooking anything for the holidays.  Oh, she also taught me to take my time enjoying the wine and the process of cooking.)

Ingredients:

  • Chopped fresh garlic (My husband’s family is Italian, so I use a lot of cloves in this recipe, 5 to 6 chopped; sometimes more.  Depends how many mushrooms you want to cook up.)
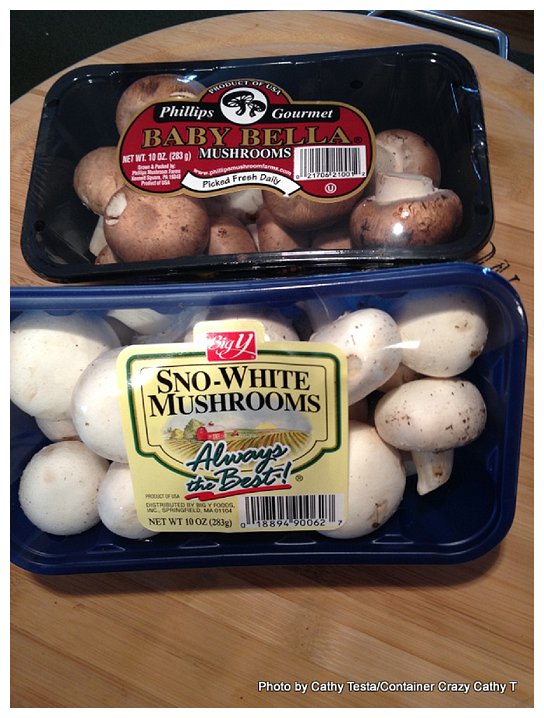
  • 5-6 packages of button mushrooms, wiped clean (FYI, the only alteration I’ve made to this recipe is I don’t buy only the white type of button mushrooms, I add those brown ones (called?, I’ll check and add to this post after tomorrow, my cooking day).  I will use at least 3 packages of each type of mushrooms used, if serving a really large group.  Sometimes more – guess you have to judge for your group.)
  • Lemon juice (fresh preferred, get like 2 fresh lemons)
  • Extra virgin olive oil (1 Tablespoon approximately)

Steps:

Slowly warm up the olive oil in your pan on low, add the chopped garlic and saute lightly.  (One of the first things I learned from my MIL is to not to allow the pan to get too hot because it will burn the garlic; this was years ago when I began cooking her recipes for my hubby.  She taught me to take it easy, don’t panic, and enjoy. Open the wine first, sip, then begin your cooking.  Another thing she always did was buy “fresh” herbs for her recipes – and this does make the big difference, of course.)

Add the chopped mushrooms.  (I chop them them into large pieces after cleaning and trimming the stems.  I don’t slice the mushrooms in thin pieces.)  Add a batch of the mushrooms in the pan and start tossing them around with the garlic, always on low or low-to-medium heat.  As they reduce in size, add more of the mushrooms.

SLOWLY sautee the mushrooms in the pan.  If they look dry, cut that fresh lemon you bought in half, and squeeze a bit of its juices over the mushrooms to moisten them. Keep the heat on low and simmer slowly.

When I say this saute recipe is slow, I mean take your time, let it slowly cook, not quickly and it can take an hour. Finish the wine as you wait.

So, when it looks all done with the yummy juices, transfer the mushrooms with juice to a container if you are taking it to your family Thanksgiving Dinner and let cool.  (When I get to my host’s home, I use a chafing dish with the warming candle to serve it but be careful the dish doesn’t get real hot, just warm it enough.)

Everyone devours these mushrooms.  And again – its extremely easy to make both of these recipes above ahead and refrigerate until you head out for your dinner.

Enjoy Everyone.  I’ll post photos later as I cook these up tomorrow.

Cathy Testa

How to Make Snow Balls with Buffalo Snow

3 Comments

The spirit of holiday decorating has hit me early this year.  This is the first time ever I have both Thanksgiving and Christmas decorations up at the same time. Part of this was due to the weather being relatively comfortable the past few weeks, except for yesterday, which was very cold and windy.  Putting outdoor lights up on a warm and sunny day is much more pleasant, so I did that before this cold hit us.

And of course, the other reason I started decorating early is because of my upcoming Cathy T Class on December 7th (you know which one).  Plus Thanksgiving is a little later this year, so time will be limited right after, at least for me, to get decorating tasks done.

So this weekend’s project was creating snowballs with Buffalo Snow.  It was easy and fun to do, and here are the items you will need if you would like to give this a try:

  1. Glue gun with glue sticks
  2. 3-4″ wooden green florist picks with wired ends
  3. Buffalo Snow (sold in craft stores in bags)
  4. Styrofoam balls (various sizes)
  5. 4″ zip ties (cable ties)

First step is inserting the florist pick through the center of your Styrofoam ball.  I used a 1″ ball for my first project. After it is inserted, bend the wire end of the pick to form a hook to be used as your attachment later to whatever item you wish to put the snowball on.  In my case, it was attached to a grapevine snowman’s hand.

snowballs_0001

Get your glue gun warmed up.  I always set my glue gun into an aluminum tray because it drips when it is hot.  At first, I applied the glue to the ball, but once that glue gets really hot, it can actually melt the ball somewhat, so later, I started applying the glue to individual pieces of Buffalo Snow. (See below).

IMG_1676

It helps to have small portions of the Buffalo Snow ready on the table as you keep adding pieces of it to your ball.

snowballs_0002

After the ball is completely covered, I was puffing and patting it.  It reminded me of making meatballs.  Where you have the ball in your hands and roll it, but instead of rolling, I was shaping it with just pats and pulls here and there until I felt it had a nice shape.

snowballs_0006

After I had the ball done, I put it on my snowman using the wire and a zip tie to attach it to the hand of my snowman.  After I was done, another crafty idea hit me. Why not create a few different sizes of these snowballs or puffs to hang from the ceiling?

snowballs_0005

So that was project #2:

  1. 3 balls or 5 balls of various sizes.  The largest in the photos is a 5″ ball, smallest is 1″.
  2. Same materials as above (glue gun, sticks, florist pick with wire, buffalo snow)
  3. 12″ lengths of chenille pipe cleaners (as hangers, or you could use ribbon or decorative string too)

snowballs_0007

Again, I got my pieces of Buffalo Snow set aside.  First insert the florist pick into the center of the ball.  Start attaching the pieces until the ball is completely covered.  Pat, puff, and pull here and there until you feel the ball is the right shape or fluffed look.  Be sure to play a holiday CD while crafting – it makes it more magical!

IMG_1679

Attach the chenille pipe cleaners to the wired end.  Connect the pipe cleaners to form different lengths to hang the balls from the ceiling in a staggered pattern.  After I completed three different size balls, I decided to hang them.

IMG_1682

They looked rather “Whoville’ish” because of their whimsical nature and the candy cane pipe cleaners.  At this point, I decided 3 was good enough, and didn’t do the other two.  However, this set the tone of the rest of my decorations in this room.  Part of why I love to do some crafting during the holidays especially.  As you work and play, the ideas start to pop into your head!

IMG_1685

Hope you will have some time during or after Thanksgiving to get your craft juices going too.

Cathy Testa

P.S.  I know the balls aren’t “perfect” but I’m not Martha Stewart either.  😉

Squirrel Collecting Acorns.

Leave a comment

Love Wilden Marsh Nature Reserve Photos, and this one is timed appropriately as we approach our gatherings of goodies during the Thanksgiving Season, so are the little wild animals out there preparing for winter. Cathy T

Unknown's avatar

Love Wilden Marsh Nature Reserve Photos, and this one is timed appropriately as we approach our gatherings of goodies during the Thanksgiving Season, so are the little wild animals out there preparing for winter. Cathy T

View original post