Mesh ribbon is incredibly easy to use and attach to your mechanics by using zip ties (a.k.a., cable ties). You can use pipe cleaners (as an alternative) instead of the zip ties, but zip ties secure the ribbon tightly at each puff or bunch, which makes the pulling and tucking more efficient as you work to create your design for a wreath or swag.
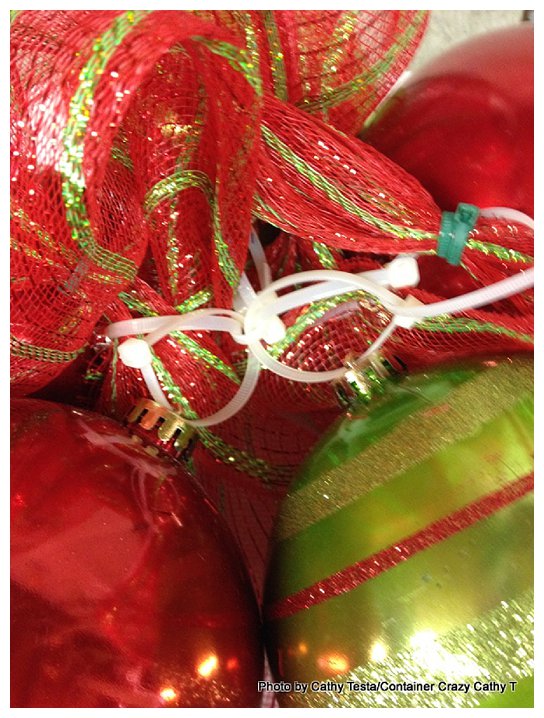
The zip ties also work well for attaching ornaments because they slide easily into the ornament hooks. The size you want to get is at least a 3-4″ length for the zip ties, or you can go longer, and just cut the tail ends off at the end of your project.
Zip ties will last for years, where I think pipe cleaners can wear a bit over time. And if you want to take apart your project later (for whatever reason), zip ties are easily cut with sharp scissors or pruners.
PROJECT No. 1: Wreath with Candy Cane Mesh Ribbon:
- 13″ Round Wreath
- Zip Ties (3-4″ lengths, white colored)
- Deco Mesh Ribbon (rolls usually come in 20″ widths and apprx. 20-30 ft.)
- Sharp scissors or pruners
- Ornaments (3 red holiday ornaments used with a snowman head for this project)
- Another type of ribbon if you want to add more to the design

The key here is to bunch the starting end of your ribbon by gathering it, and then using a zip tie to secure it to the wreath. In this first step, you want the bunched starting end to be “tightly” secured to your wreath frame. Pull the zip tie closed and then move down the ribbon to gather your next attachment point.

Bunch the starting end first tightly. Then grab another zip tie and attach it to your wreath frame. When selecting your zip ties, consider the color of your ribbon. Since this is a white and red, I used white zip ties so they won’t show.
 At regular equal length intervals (about 4 or 6″ apart), gather your next bunch. You do not need to cut the ribbon at any point as you are working from your roll. But what is key, is as you move to the next zip tie, do not tighten it as you did with the starting point. Attach the gathered end in you hand to the wreath with the zip tie.
Attach it, but do not fully tighten the zip tie closed – because you may want to slide other items under the zip ties when decorating with embellishments later.
 The photo on the left shows the front of the wreath. As you move around the wreath frame, equally spacing each bunch and gathering with a zip tie, remember to finish off with leaving “tails” for the bottom of the wreath.
The photo on the right above shows the back side. Do not cut off the zip tie tail ends until you have completely finished adding additional decorations.

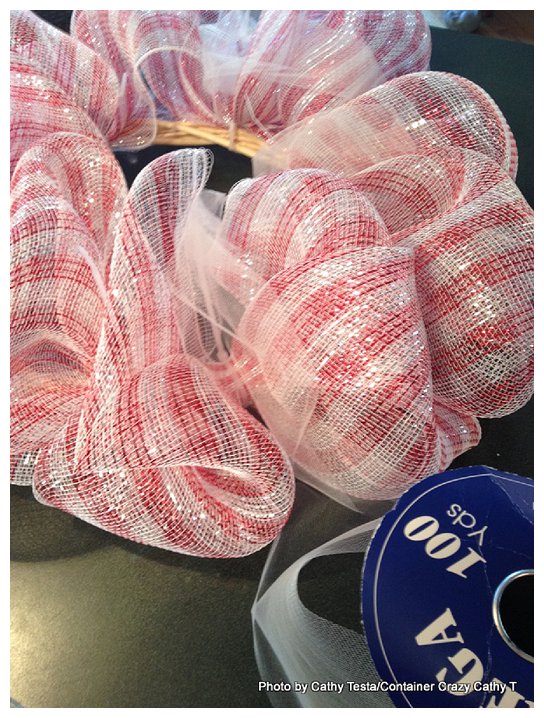
I decided to grab a finer ribbon to add a little softness of white. As you can see, just slide the ribbon through the loose zip ties. This ribbon was a little difficult because it kept catching and snagging on the mesh ribbon, but I managed to get it done all the way around the wreath.

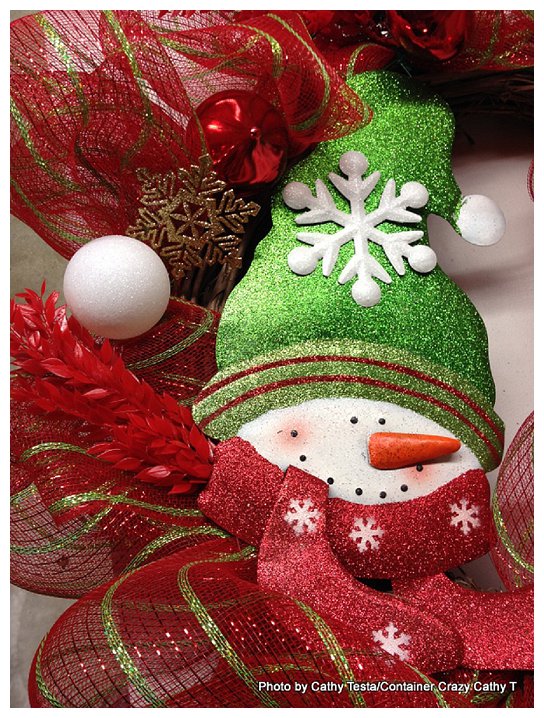
Next was adding some bright red ornaments and a snowman head I picked up from a craft store. Use a zip tie to connect 2 of the red ornaments together, then attach the 3rd ornament to the two. The reason to do them this way is if you bunch all three with one zip tie, and then tighten, it can pull apart the ornament hook. It fits better when you put two ornaments together with one zip tie, then add the third to your bunch. Grab another zip tie and attach it to your wreath at the base. The snowman head was attached by using a zip tie to attach the tip of his hat to the wreath. After all done adding your preferred decor, go around to tighten every zip tie and cut off the tail ends of them.

 Much more could be added to this wreath to bling it up or add more whimsy, but I decided to just keep it like this for now.
PROJECT NO. 2: Swag with Big Bow using Mesh Ribbon
Next was creating a bow with a stick swag, using 3 zip ties and one piece of the deco mesh ribbon at about 3 ft. length. You can literally use any kind of stick, vine, or metal mechanics to attach mesh ribbon easily. The product is pliable, bunchy, and showy. I still haven’t figured out how to fix the frayed ends where the ribbon is cut, but I saw recently that using a lit candle to lightly burn the ends of a ribbon may help this problem – this is to be tested later. I will let you know how it works, but I imagine you have to be super careful – mesh ribbon product is flammable.
 This is the stick swag I decided to use to attempt a bow creation with the mesh ribbon.

Basically I did a big puff first, smaller one in the center, and then big puff again. It came out rather “who-vill-ish” and I wasn’t sure if I liked it – but my husband said he did, thus it got hung up on the wall in the same room with my other candy caned themed items. When start to feel crafty again, I may add more bling to these but this is how I started them.
P.S. You don’t need a 30 ft roll of this material to do these two projects, but I guarantee, you will end up using the rest of the roll as you learn to create with the mesh ribbon. Give it a try! For more ideas, click HERE.
 Cathy Testa