Mini Snowman in a Jar with Buffalo Snow

1 Comment

When babysitting my nephew, it hit me that I should keep some of the baby food jars on hand for an upcoming project – but I didn’t know what that project would be.  Perhaps the jars would be used to store some small items, or maybe I’d make a candle holder out of them, or they could have just ended up in my supplies for a long-time and not be used.

However, because my holiday decorating and fun juices are still flowing, I decided to create little decorations by using them to house a mini snowman.  These little decors could be easily used as ornaments (just attach a string on the top to hang) or as seating nameplate holders at a holiday table.  Whatever the use, sometimes its those “little” embellishments that are the most fun.

Mini Snowman Jar_0005

Here are the items used:

  1. Buffalo Snow (found in bags in retail stores)
  2. A miniature snowman florist pick
  3. Small baby food jars (find a new Mom!)
  4. Chenille wired pipe cleaners (12″ lengths used)
  5. Glue gun with glue sticks
  6. Red berries
  7. Golden metal leaf (or other fun small decor)
  8. GooGone Spray Gel
  9. Snips to cut pieces
  10. Tweazers as a tool

Mini Snowman Jar_0001

The first step was to tear off the label from the baby food jar and clean them in soapy water.  To remove the remaining sticking material holding on the label, I used a product called GooGone Spray Gel which removes sticky or gummy materials from surfaces. Just spray it on the glue, let it sit for a minute, and use a cloth to rub it off.  It works pretty good.

Mini Snowman Jar_0002

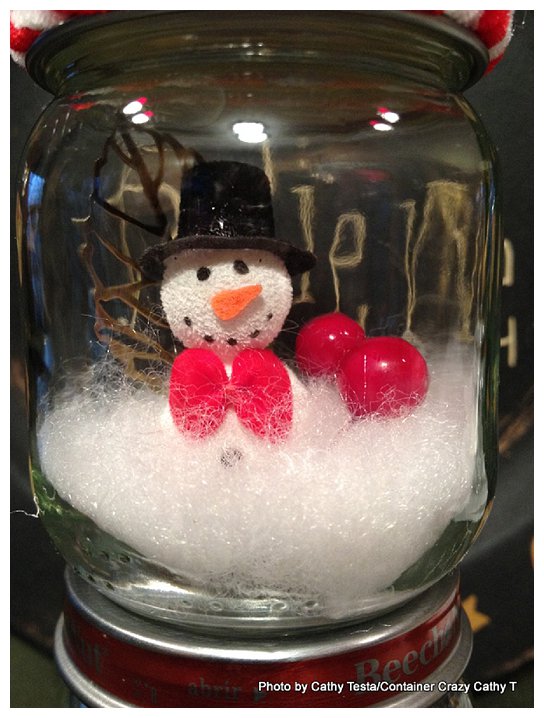
Cut the pick off the bottom of the snowman so he can stand level in the jar.  With a dab of glue from the heated glue gun, apply him to the bottom of the jar and hold in place for a few minutes.  After secured, take bits of the Buffalo Snow and place it gently around the miniature snowman.

From there, it was pretty straight forward, adding the little red berries and a metal jewelry gold leaf decor by just putting a dab of melted glue on the ends and pressing it into the Buffalo Snow in the jar.  I used a pair of tweazers for areas difficult to reach with my fingers.

Mini Snowman Jar_0003

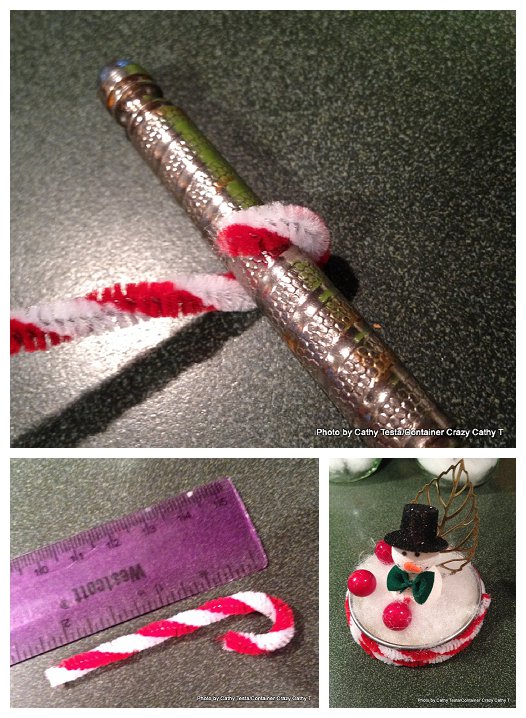
Using a 12″ piece of Chenille pipe cleaner, I decorated the top cover a bit.  To do this, be sure to put the cover onto the jar first, it is easier to work with this way.  Apply some heated glue around the cover’s rim (being careful to not allow the glue to drip onto the glass), and press the pipe cleaner around it.

After I was all done, it occurred to me how much easier the whole process would be if I turned the jar upside down and put all the materials on the inside of the jar cover.  This kind of reminds me of a snow globe homemade style.  This time I glued everything onto the inside of the cover, and then placed the jar over it.

Mini Snowman Jar_0006

I decided to create mini candycanes with my left over pipe cleaners.  Taking one end and bending it over a nut cracker and then snipping the other end for the desired size.

With a dab of glue, it was easy to put the miniature candy cane into the Buffalo Snow.  It stood up with no problems.

Tip: Be sure you avoid placing the front of the snowman facing a seam in the glass jar.

Mini Snowman Jar_0007

I feel like there should be something on the top to finish this little decor off.  Maybe a mini green tree, or a holder to insert a name tag if this were to be used for table settings.  As usual, there can always be more added.

Mini Snowman Jar_0008

FYI:  For my class attendees reading this post, the miniature snowmen will be available at the December 7th class!

Cathy Testa

Mini Snowman Jar_0004

Mini Snowman Jar_0003

How to Make Snow Balls with Buffalo Snow

3 Comments

The spirit of holiday decorating has hit me early this year.  This is the first time ever I have both Thanksgiving and Christmas decorations up at the same time. Part of this was due to the weather being relatively comfortable the past few weeks, except for yesterday, which was very cold and windy.  Putting outdoor lights up on a warm and sunny day is much more pleasant, so I did that before this cold hit us.

And of course, the other reason I started decorating early is because of my upcoming Cathy T Class on December 7th (you know which one).  Plus Thanksgiving is a little later this year, so time will be limited right after, at least for me, to get decorating tasks done.

So this weekend’s project was creating snowballs with Buffalo Snow.  It was easy and fun to do, and here are the items you will need if you would like to give this a try:

  1. Glue gun with glue sticks
  2. 3-4″ wooden green florist picks with wired ends
  3. Buffalo Snow (sold in craft stores in bags)
  4. Styrofoam balls (various sizes)
  5. 4″ zip ties (cable ties)

First step is inserting the florist pick through the center of your Styrofoam ball.  I used a 1″ ball for my first project. After it is inserted, bend the wire end of the pick to form a hook to be used as your attachment later to whatever item you wish to put the snowball on.  In my case, it was attached to a grapevine snowman’s hand.

snowballs_0001

Get your glue gun warmed up.  I always set my glue gun into an aluminum tray because it drips when it is hot.  At first, I applied the glue to the ball, but once that glue gets really hot, it can actually melt the ball somewhat, so later, I started applying the glue to individual pieces of Buffalo Snow. (See below).

IMG_1676

It helps to have small portions of the Buffalo Snow ready on the table as you keep adding pieces of it to your ball.

snowballs_0002

After the ball is completely covered, I was puffing and patting it.  It reminded me of making meatballs.  Where you have the ball in your hands and roll it, but instead of rolling, I was shaping it with just pats and pulls here and there until I felt it had a nice shape.

snowballs_0006

After I had the ball done, I put it on my snowman using the wire and a zip tie to attach it to the hand of my snowman.  After I was done, another crafty idea hit me. Why not create a few different sizes of these snowballs or puffs to hang from the ceiling?

snowballs_0005

So that was project #2:

  1. 3 balls or 5 balls of various sizes.  The largest in the photos is a 5″ ball, smallest is 1″.
  2. Same materials as above (glue gun, sticks, florist pick with wire, buffalo snow)
  3. 12″ lengths of chenille pipe cleaners (as hangers, or you could use ribbon or decorative string too)

snowballs_0007

Again, I got my pieces of Buffalo Snow set aside.  First insert the florist pick into the center of the ball.  Start attaching the pieces until the ball is completely covered.  Pat, puff, and pull here and there until you feel the ball is the right shape or fluffed look.  Be sure to play a holiday CD while crafting – it makes it more magical!

IMG_1679

Attach the chenille pipe cleaners to the wired end.  Connect the pipe cleaners to form different lengths to hang the balls from the ceiling in a staggered pattern.  After I completed three different size balls, I decided to hang them.

IMG_1682

They looked rather “Whoville’ish” because of their whimsical nature and the candy cane pipe cleaners.  At this point, I decided 3 was good enough, and didn’t do the other two.  However, this set the tone of the rest of my decorations in this room.  Part of why I love to do some crafting during the holidays especially.  As you work and play, the ideas start to pop into your head!

IMG_1685

Hope you will have some time during or after Thanksgiving to get your craft juices going too.

Cathy Testa

P.S.  I know the balls aren’t “perfect” but I’m not Martha Stewart either.  😉