

Category Archives: Uncategorized
Got My Christmas Groove On Early!
4 Comments
Do you like to start decorating early for the holidays, like I do?
Maybe you have gotten your tree already – or are planning to do so over the long Thanksgiving weekend?
Perhaps you dusted off your holiday outdoor lights and started untangling them?
If it wasn’t for my Holiday Workshops in early December, where we make kissing balls, wreaths and candle centerpieces with fresh evergreens, I am not sure if I would be as motivated to start “this” early, but because I am excited for the upcoming class – I have started much of my holiday decorating endeavors early.
I’m getting my Christmas Groove On!
I’m proud that I setup most of the holiday outdoor lights on my own, with ladder and all – and even set them up on timers!
And my kitchen, bathroom, craft workshop, and even my bedroom spaces are adorned in some kind of holiday cheer or theme.
Last week, I made my first candy cane wreath to test out the steps as this is a new feature in my class this year.
Every day, I am thinking of what I should do next?

When my hubby, Steve, comes home from work – he looks around and says, “It’s Christmas here already!” but I don’t think he minds.
He gets into the spirit as much as I do.
Reasons to do things early
Sometimes I tell myself I should stop decorating or I will have a boat load of un-decorating to do after the holiday season comes to a close, but there are some advantages of doing things early.
#1: PATIENCE
You will have more patience for that string of lights you put up on an arbor in a risky situation, like standing on a ladder which isn’t level, and then the lights won’t work after you are all done. Even though you tested them just a half hour before. Ack. More time equals more patience. At least for me.
#2: WARMER TEMPERATURES
You feel the sun on your face and the warmer temperatures than you may experience if you waited til mid-December to do outdoor decorations. The fingers are not as frozen and cheeks not as red – it can be a great time to get decorating done before our first snow fall arrives.
#3: HOUSE CLEANING
You get the house cleaning, which you were suppose to do in spring, done now and discover you have more dust bunnies than imaginable. So now you have a head start and it doesn’t feel as taxing to clean, clean, clean. Especially the dreaded shower glass.

It also allows you to dream a bit of Christmases of the past, while searching for left over wrapping paper you thought you had, which is something I thought of just today – because I have a big prize to wrap for my upcoming holiday workshop. Guess now I have to go out to get some – doing things early can sometimes enable dealing with less crowds at the stores too.

Doing things early also gives me time to consider what type of festive libation to offer – Should it be pomegranate or cranberry based? After all-it must be red to match the theme, right?
My mind starts to get carried away as I consider rimming the drink glasses with green or red coated sugar, or contemplating how to make big decorative chunks of ice with my jelly molds.
Where does this early planning and dreaming end?
Don’t forget “Pinterest!”
![]()
We start browsing pinboards of holiday ideas and next thing you know we are attempting a new crafting idea.
It just never ends, and somehow, that is okay because being festive is sharing the love of enjoying the holidays together – and for many of us, decorating our special spaces indoors and outdoors is a big part of that.
Thanksgiving at Present
However, Thanksgiving is only 2 days away. Soon, we will be with our family and friends enjoying a big meal. Probably most of us are thinking about grocery shopping and our recipe lists. Today, I’m making my cranberry relish from scratch which is popular with my family. We all have our favorites.

It is time I get back to the present. The reality that we are to enjoy Thanksgiving this weekend first and foremost!
A time where we are thankful for all that we have – and for all our blessings.
A time for being with family and eating an abundant meal.
The Santa hat will just have to wait.
Happy Thanksgiving everyone. I’m thankful for all of you!
Cathy Testa
http://www.ContainerCrazyCT.com
860-977-9473
containercathy@gmail.com

Container Crazy CT is located in Broad Brook, CT
A Walk in the Garden – A Blog to Follow
4 Comments
John Viccellio from Stallings, North Carolina is the author of a blog titled, “A Walk in the Garden.” I never met John in person, but I’ve been enjoying his blog posts for quite some time.
He regularly posts photos of cut flowers collected from his gardens which are arranged in vases. Actually, I believe his wife is behind the vase selection and arrangements. He refers to her as his Arranger, and she does a wonderful job.
In addition to the various vase photos on his blog, John writes about plants growing in his North Carolina gardens. From time to time, I’ve admired the plants he is growing which I wish I could grow here in my Connecticut yard.
However, John’s planting zone is a tad bit warmer than mine. He is in a zone 7 area, and I reside in 6a. But not is all lost, as some of the plants he can grow easily in his area are candidates for container gardens or patio pots in mine if they are not winter hardy here.
Vitex agnus-castus (chaste tree)
One day, I spotted a gorgeous photo of a chaste tree growing in John’s gardens via his blog posting. He had them ‘arranged’ in a vase and the soft blue to violet colors of this plant, along with its long narrow blue-green leaves situated like fingers from a central point, caught my attention and admiration. I don’t know why, but plant lovers just fall in love with certain plants, and this is one I’ve always liked.
I don’t see this plant (technically a deciduous shrub which can grow to the size of a small tree) offered for sale here in Connecticut often. They are hardy to planting zones 6 to 9 (or zones 5-9 depending on which plant reference you look up), so they are considered, what I call semi-hardy in our planting areas because they do not hold up well during harsh winters.
If the winter is not harsh, I guess your chances are better. Also, where they are planted matters in regards to the soil and exposure because they prefer full sun and well-drained soils. Bottom line is the plant will die back (dies to the ground) in severe winters. Its roots may survive to regrow the following season if all goes well.

Chaste Tree Cuttings by A Walk in the Garden blog
The only other time I’ve seen a beautiful specimen of the chaste tree was when I toured a Connecticut garden via the Connecticut Horticultural Society’s programs. It was growing in Steve Silk’s amazing gardens amongst other trees and shrubs on his property in Farmington, Connecticut. Steve is a former newspaper photographer, travel writer and was managing editor at Fine Gardening magazine. He held the role of President for the society for several years.
Steve also has cool tropical plants in container gardens staged in various areas on his property, which is why I was happy to be seeing his gardens that day during the tour. But as I walked his yard, I remembered spotting the chaste tree and running my fingers along the plant’s foliage, again thinking how I wish I had one of these trees. I should have asked Steve how he managed to keep one growing in his garden due to it being a bit sensitive to our winter climate.
Of course, an alternative option, when desiring a specimen that is not totally cold hardy here is growing them for enjoyment in your container gardens during our summers and then overwintering them if possible in frost free places in the fall and winter. Many times semi-hardy plants will survive this way.
I can envision this chaste tree right now growing in a large container garden, and would pair it up with other plants showing off soft color tones, like pink, soft yellow, or other blue to violet flowering plants. If you browse John’s blog, A Walk in the Garden, you will see the other color of flowering plants he put near his chaste tree in his garden, some were hot pinks which worked well.
This deciduous shrub is a long summer bloomer, and as John noted on his blog post, it can be deadheaded for re-bloom later in the season, which he has done for twenty years on his plant. It was a grown from a second generation cutting from its parent at his Aunt Martha’s home in Chatham, VA.
Muhlenbergia capillaris (pink Muhly grass)
Then there was another day when John posted the pink Muhly grass photo from his gardens. Oh my God, I thought. I just LOVE that grass, and wish I had one here. The photo was especially beautiful because of how the sunlight captured the bright to soft pink colors of this fine textured ornamental grass in his garden, and I especially like how delicate this perennial ornamental grass looks and feels. Again, depending on which source you look up this grass, it is hardy to zone 6 or zone 5.

John noted that its a native, so his climate is ideal for its growth.”In October it was glorious,” he wrote, “…as the sun seemed to ignite its pink seed clusters.” I couldn’t agree more, it is electric – Just look at his photos!

Photo by John Viccellio
Ah, I thought as I read his words and admired the photos he posted, I can imagine this vision on a fall day. Selecting a spot where the sun would hit it would be ideal in the landscape or garden, or again – in a container garden or patio pot. I can envision it in a cobalt blue pot, can’t you?
One day, on a day which some bloggers call, “Wordless Wednesday” – John posted two photos of his pink Muhly grass with no words or text because, it was “wordless” Wednesday, and it was enough to see just the photos, let me tell you – this grass is captivating.
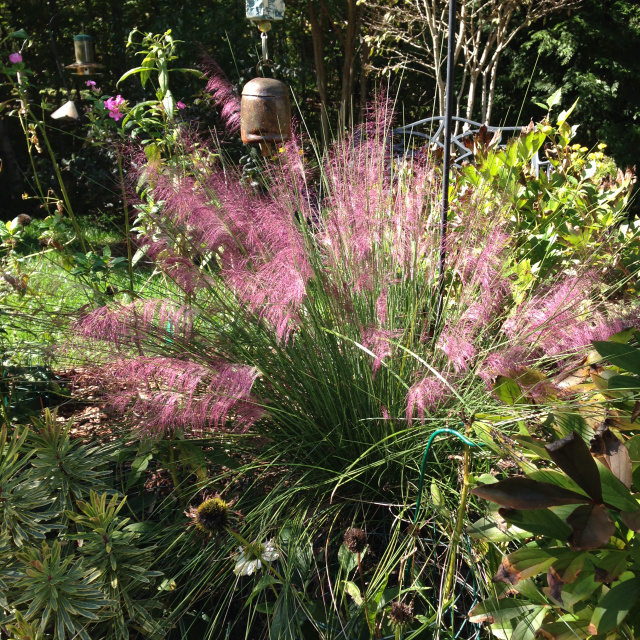
A Walk in the Garden blog shares beautiful photos of the grass growing in their gardens.
John has been kind to follow my blog, and I follow his – but I really don’t remember who discovered whose blog first. So, recently I asked him to answer these following questions as a fellow follower – and wanted to share his blog site with my readers so they may enjoy his gardens too.
Why do you blog?
“I started the blog almost two years ago coincident with my self-publishing of my first (?) garden book (Guess What’s in My Garden!) in hopes that it would spur sales of the book. Over time, however, I began to respond to a number of garden memes out there (and photography), and that has been pretty much the direction I have been going. It is fun, and am getting to know folks all over the world. I have been thinking a lot about how I can get more info about the book into the posts and perhaps spur a few more sales. I have spoken at several garden clubs this past year, and that has gained me some blog followers and a few sales. I love the involvement I have now with fellow gardeners and fellow bloggers around the world.”
What attracted you to Container Crazy CT’s blog?
“I was attracted to your blog for several reasons. I realize you are using it as a vehicle to support your business, and I have enjoyed seeing your business related posts. It’s just a bit far for me to sign up for some of your workshops. I also have liked your hands on posts (e.g., pot arranging, etc.). Your warm personality shines through what you write and present…I can sense your smiling.”
What is your favorite plant or way of gardening?
“I have lots of favorite plants…particularly iris, peonies and azaleas…but my favorite way of gardening (because of our soil) is raised beds. I also very much enjoy creating things for the garden…stone walls, trellises and clematis poles that I have designed and constructed.”
Thank You for Your Service
And by the way, John Viccellio is a retired U.S. Navy Veteran – so, in addition to thanking him for his online contributions, gardening style, and demeanor expressed on his blog regularly, I’d like to pass on a sincere thank you to John for his service to our country in honor of Veteran’s Day which was two days ago on Wednesday.
Cathy Testa
www.ContainerCrazyCT.com
860-977-9473
containercathy@gmail.com
Be Thankful. Be Creative. Be Colorful, and Just Be! Giving Thanks.
2 Comments
Thank You to All Followers
November is the month of being “thankful” for all we have in our lives. I would like to express here my heartfelt thanks to you, my fellow followers. To the friends and family who inspired me to follow my dreams, to the bloggers out there reading and liking my posts and sharing their passions, to the mysterious rocks stars (fake or not) taking an interest in little ol’ me, and to the people in the plant world providing me with great networking opportunities, and to the artists offering their talents as guest speakers, and to many, many more, I say today, Thank you. Thank you also for posting your reviews and testimonials.
Current Followers
This morning I was looking over my stats on my blog. Currently, I have 73 WordPress followers, a total of 522 Facebook Friends liking my pages, 60 email followers, and 197 Twitter followers. It wouldn’t be right to say I have a total of 852 followers because some are the same people on one or the other platform, but roughly its somewhere about 600+ people.
I’ve always said too, it’s not the number of, but the passion of the followers which truly counts – and people who follow this site enjoy container gardening, art, and plants probably as much as I do. Each and every one of them is important to me because of their similar passions and interests.
Followers of this blog receive an update in their WordPress Reader (which is a special background page for WordPress users), via email, or both depending on their settings each time a new post is added. For social media, they are notified of posts in their feeds.
Getting new content quickly (as it is posted) is beneficial, especially for hot topics and new workshops on the horizon being offered by Container Crazy CT.
 WordPress Followers
WordPress followers have a blog of their own on WordPress, as opposed to followers which may be from Facebook or Twitter. As noted above, they get notified in their “reader” when they follow another WP site.
Sharing is caring in the world of bloggers and blogging, so one of my goals is to share posts by my fellow WP followers on this blog on a routine basis to spread the love and the information, as they share similar knowledge, ideas, interests, tips, and more. Thank you WordPress Followers – I’m following you too!
Facebook Followers
For my connected social networking services (such as Facebook or Twitter) through my blog’s publicize feature, it shows that I have 301 followers on my Facebook page for Cathy T’s Landscape Designs page, which means there have been a total of 301 Page Likes for it.
Cathy T’s Landscape Designs’ page is where I originally started my business about container gardening and garden designs, among other services. It is the official name of my business, but over the years, my services focused on all things container gardening and exotic tropical plants, and a bit less on landscape designs.
This is why I also have a Container Crazy CT Facebook page, which more suits what I currently offer in the world of container gardening and hands-on workshops. This page has a total of 221 Page Likes as of this writing, and seems to be growing.
If I could only merge the two Facebook pages together for a total of 522 Page Likes! Some are the same people, but no matter, it is all good – and it warms my Facebook soul to have them participate on my posts with their comments about their container gardening passions too.
Thank you Facebook Friends – Love hearing from you and seeing you every day.
Email Followers
Currently, my Container Crazy CT site has 60 email followers. These primarily consist of clients, workshop attendees, artists or bloggers, networking contacts, and anyone else out on the web that came across my blog and decided they wanted to keep in touch by receiving a post each time it is published.
If you want to receive instant notifications as they are posted, this is a great way to not miss a thing, especially upcoming speaking engagements at garden clubs and the workshops offered related to combining nature with art or container gardening.
Thank you email friends – I know how email can pile up – and I hope you enjoy receiving the updates regularly!
 Twitter Followers
As of today, I have 197 followers on Twitter. A big thrill was when Martha Stewart started following my Twitter feed last winter. And, recently, Dr. Allan Armitage started following me too. Both are rocks stars in their field of work and study.
While it may not be the “real” Martha, and maybe Dr. Allan Armitage has a helper for his social media feeds, it is cool to me – especially because Martha is in the world of all things fun for design and crafts, and the Dr. Allan Armitage is a Horticultural specialist. These two facets are what I love in my world of business offerings, that is combining nature with art.
If it isn’t really them, I still will enjoy fantasizing that it is. If it is really them – Thanks!!!!

Sincerely,
Cathy Testa
www.ContainerCrazyCT.com
860-977-9473
containercathy@gmail.com
To see more reasons why you should follow this blog, check out this former posts on “Five Reasons Why You Should Click Like, Share or Comment.“
Oh and Don’t forget my Instagram and Pinterest pages. More on these later!


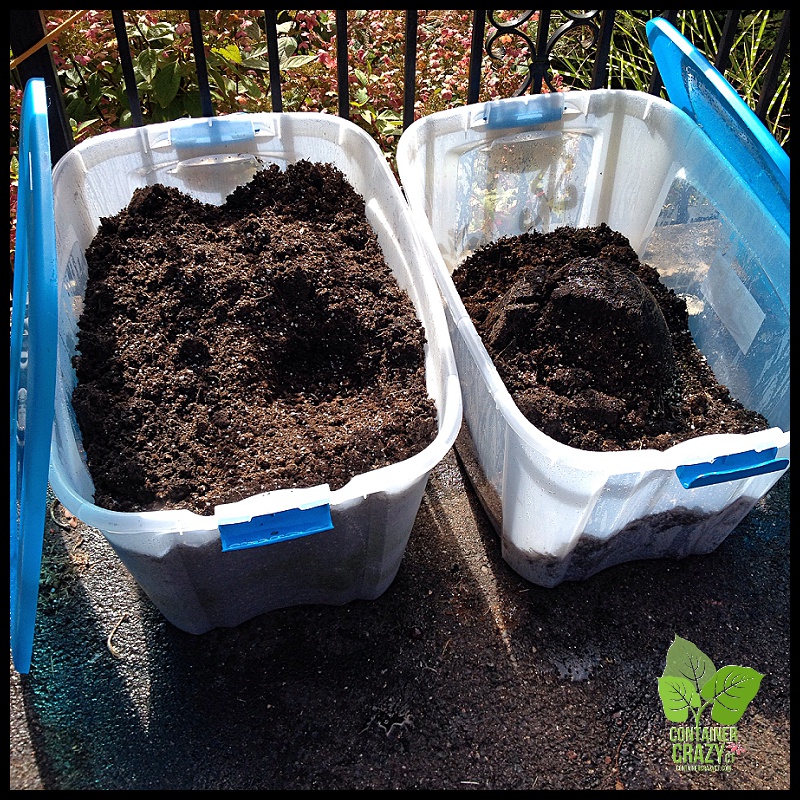
Recycle Potting Mixes – A Quick Tip
5 CommentsPotting mixes used in containers and patio pots doesn’t have to go to waste. When dismantling your pots in Autumn, save it to put in the bottom 1/3 of your big pots next spring and top it off with FRESH soilless mix or potting mix. Or transfer the soil to your garden beds to be recycled that way. It doesn’t have to go to waste! Just a tip for the day. Enjoy your fall weekend everyone, Cathy T.
Cathy Testa
http://www.ContainerCrazyCT.com
860-977-9473
containercathy@gmail.com
How to Overwinter Tropical Hibiscus
Leave a commentA friend recently asked me on Facebook if she can take her tropical Hibiscus inside to go dormant over the winter, and it reminded me of a post about this many years ago – Here it is below.
I would like to add that basically the answer is yes. They may be moved inside as a houseplant by a sunny window, OR these plants may be stored in the basement (unheated) where it remains cool, dark, and not below freezing. You keep the soil on the dry side (limited watering over the winter months). Most tropical Hibiscus are hardy to at least 45 degrees F. Watch out for pests such as aphids or white fly. You may want to have an organic spray handy if you spot any on them after moving them in – look at the underside of the leaves to inspect.
Don’t confuse the tropical Hibiscus with those which look similar but are hardy. Some people get confused, as noted on this blog post from years prior.
For example, some types of Rose-of-Sharon shrubs have similar looking flowers which folks have confused with a tropical, non-hardy Hibiscus plant.
There are “perennial, hardy Hibiscus” plants too – which usually have dish plate size flowers. One example is Hibiscus ‘Kopper King’ hardy in zones 4-9. These may be left in the ground over the winter outdoors in Connecticut planting zones.
If you are not sure which type you have, and want me to take a look, text me a photo! Cathy T
In late August, I took a photo of the blooms on a tropical Hibiscus growing as a standard in my brother’s backyard by his patio. He and his girlfriend planted it this year. It has been growing beautifully all season.
- Standard: For those of you who are not familiar with the term standard, it means a plant that has been trained into a tree-form shape. I’m not sure why they call it a standard; seems like it should be called a tree-form plant. A newbie would never use the word standard to search for information about how to grow a plant into a standard, which ends up looking like a topiary. The plant sits as a beautiful round form on the top of a small tree.

- Tropical Hibiscus

My brother’s Hibiscus has a twisted 3 branched trunk instead of a single trunk or stalk. These are commonly found in nurseries and give…
View original post 961 more words
My Take on Self-Watering Pots
12 Comments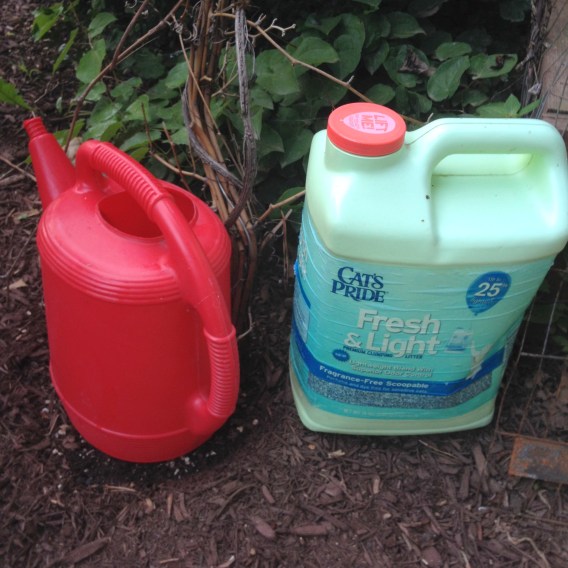
I have often made the comment during my container gardening workshops and demonstrations that if you don’t like to water, leave this presentation immediately. I actually love to water my container gardens and patio pots. Yes, a bit nuts to hear by some folks, but to me it is relaxing. It allows me to take a moment to enjoy the plants’ features and feel the sun on my shoulders. Not only do I like the whole watering routine, I also realize the importance of water to the plants’ internal functions and growth processes.
Water is the primary component used during photosynthesis when water is split into hydrogen and oxygen by the energy of the sun. Water is also used to transport nutrients, cool the plant, expand its cells, and maintain turgor pressure. And YOU, my container gardening workshop attendees and gardening friends, are the person that will provide water to the soil so our plants’ roots can take up the elements so essential for all this beauty to begin and grow in your container gardens in the summer. Without your watering process, a plant in a container garden and patio pot cannot internally manufacture its own food – a function that only plants can perform on this earth. Sound like a big responsibility? If it is too big for you…well, there are some options.
As shown at my annual May Container Gardening Workshops, there are some tricks used to “reduce” watering routines for your pots needs, but there has also been self-watering pots out there on the market for some time now for people who, UNLIKE me, despise having to water their plants in the summer months. Or, they may not have much time to “relax, enjoy the plants’ features, and feel the environment” due to their busy workday schedules – after all – it does take some time to water container gardens – but its worth it, isn’t it?
As one attendee told me after the summer season was over, watering her plants on her deck felt like a part-time job – but she surely enjoyed the big, lush plants which grew large in her pots all summer. To enjoy your container gardens as focal points throughout your outdoor surroundings is a mental boost to your day. Watering may just force you to stop and take it all in after your work day. It can be a forced relaxation moment in some ways. Now, back to the self-watering pots…
What are Self-Watering Pots?
Self-watering containers and pots have a reservoir of water in the base of the pot. A disk or platform partition is inserted into the pot about 1/3 of the way down with the soil resting above the disk. A fill tube allows you to top off the water as needed which goes below that disk in the base of the pot. Sound easy, huh? Yet, I have to admit, I am not a big fan of self-watering pots, partly because – as I mentioned – I enjoy watering plants, and because there is something about the water ‘not draining’ freely from self-watering pots through the bottom, and through the soil, which disturbs me. After all, do you like the feeling of damp feet when you are wearing shoes that don’t quite breathe correctly?
I don’t think plant roots like that feeling either (damp feet) which can occur with “some” self-watering pots. The theory is the disk prevents the roots from penetrating into the water reservoir below the disk, but in my curious mind, I wonder. I’ve seen roots creep where they want to go – nature finds a way, but again – I have not researched this like a scientist – it is just my intuition that the roots may try to go below that disk and hit pure water, and stop growing.
What happens when things are too wet? We humans may develop a foot fungus and stinky feet, and run to the drug store to get athlete’s foot powder. But plants, well, in containers and patio pots, their little roots aren’t going to be able to leave to get powder or more air. They are trapped. This is very unlike roots of plants growing in the ground where they can travel, plus they also have a larger mass of soil to help out the situation. Thus, my concerns about self-watering pots continue to ponder me. Here are some of my concerns:
Salt Build-up
Salts – Fertilizers are basically salts (in chemical form, as I remember my professor emphasizing in class). When applied near water, salts will move gradually towards the area where it was applied. This dilutes the fertilizer and distributes it. If tender roots are close to the fertilizer when too much fertilizer is applied, water is ‘drawn from the roots,’ and nearby soil (water in the roots and water in the soil moves). Plants can dehydrate when we apply too much fertilizer because of reverse osmosis where the water will move out of the plant’s roots, and this is why we use caution to apply fertilizers in the garden and pots in correct amounts, at the right time, etc.
In containers, salts can sometimes be a problem if they don’t leach out of the pot and end up building up in the pot (which doesn’t happen if you follow Container Crazy CT’s 5 Must Do’s for Container Gardening). You need to use good soilless mix with proper pore space, have drain holes in the base of your pots, and not over apply fertilizers.
Water should drain through the soil. It just makes sense. Also, it is a good practice and healthier for the plants, if you allow the soil to dry out a bit between watering applications so the soil has a chance to breath. Keeping the soil constantly wet is not good (unless it is a bog plant or native to a wet habitat or environment). Just like soggy shoes would bother our feet after a long walk in the woods, so will roots be bothered by overly wet soil for a long period of time.
A note on Winter Watering
In the winter, by the way, watering container gardens which you have moved inside as a houseplant is greatly reduced because the plant’s growth usually slows down if you place the pot in a sunny but cooler temperature inside the house. And those pots which you put in your unheated basement to go dormant are watered only when the soil goes dry – water very sparingly, as discussed in my “Storing Tender Tropical Plants” demonstration last weekend. Winter watering is greatly reduced in most cases.

Too Much Rain
Rain Falls
Rain – If you have self-watering pots outside in the summer, without a plug which enables drainage, and you get lots and lots of rain, the pot actually starts to form a pond on the surface of the soil because the excess water has no place to go. It goes up as the soil gets waterlogged. Now your plants are floating in a muck as the water rises to the top, and you’re not too happy either because you have to go outside in your muck boots and rain coat to relieve the plant by removing the plug in the weep hole in the side or bottom of the pot so the water under the disk may drain out. You may even have to tip the pot to the side to drain out more excess water. When we drink too much, what happens to us? We get messy too. We topple over or lean; the same thing happens with plants. They’ll wilt and eventually – if they drink too much – well, you know what happens there. They die or suffer such a bad hangover, they don’t quite recover, start to get diseases, rot, etc. One alternative solution, other than calling a rehab center, is to use plants that drink responsibly. Those which don’t require too many libations – as we discuss when we talk about drought tolerant plants, or just face it – water our plants ourselves to control and maintain an appropriate balance of watering applications.
Oxygen to Breath
Oxygen – Plant roots need oxygen to take up water. A perfect soil gives plant roots oxygen for respiration, pore structure, nutrients, and even distribution of water. When water is sitting in the base of a pot and the roots hit pure water, they will not grow there due to lack of oxygen. This reduces the root mass for the plants above to thrive. I like to give my plants what I refer to as a ‘full spa treatment’ by providing a good, if not great amount of soil volume by using large pots – something I go over in my Container Garden Workshops every May. They will be happy and thrive, grow large and lush, and full in BIG pots. Also, remember self-watering pots have a disk in the bottom. This reduces the amount of soil allowed in the pot above the disk because it is partitioned off. In small pots, the soil volume can be cut in half as compared to big pots. This greatly reduces space for the roots to grow and roots are important – very important to successful growth of your plants above the soil. It also causes a perched water table situation – an area roots seldom penetrate where root problems start due to lack of air, oxygen, etc – I try to explain the perched water table in my workshops as best I can to my attendees so they understand how small pots reduce the impact and vigor of plants. After they hear what I have to say on the subject, they go out and get that big pot – and let me tell you, they are impressed with their results.
The Fill Tube
In self-watering pots, there is a fill tube attached, and I don’t like it. Call me picky, but this is another reasons why I feel a bit leery about self-watering devices because there is no “spa” once the growing spaces are reduced – and we all know, everyone, even plants, enjoy a good spa environment. The fill tube is cumbersome basically. It is like a straw. I’m not going to fill a little straw to water my plants, ugh.
Drainage is Key
Drainage – As water enters your pot from your watering wand or rainfall, it moves through pore spaces in the soil and between soil particle’s tiny spaces. As it enters, it pushes air out. If air is not replaced over a long period of time, the plant roots will lack oxygen needed to thrive. Some water is used by the plant, and some will drain out through the mandatory drain holes in the bottom of your pots. It is one of Container Crazy CT’s 5 Must Do’s – drainage holes. If there are no drain holes, as with self-watering pots, some air is not replaced, in my humble opinion and experience. Too much water is not a good thing, nor is too little watering – it is a balancing act. Excess water causes the roots to suffocate because the pore spaces are filled with water. Basically drainage holes plus your commitment to watering correctly provides a balance. Some self-watering pots have “weeping holes” to help alleviate potential water build up as noted above. I suspect this “draining issue” is why the weeping holes were added to self-watering pots in the first place. Are they self-sufficient now? I don’t know – I need to keep researching, but I do know that I don’t want to take a plug out of a pot every time it rains – I only like to uncork wine bottles. Now, I see maintenance, watching if the soil gets too wet, and maybe I’m just anal. So, I’ll stick to just watering it myself.
Watering container gardens correctly and using the right soil-less potting mixes has provided me with the ultimate success in growing lush, bold, and beautiful container garden plants. In fact, I don’t always fertilize my containers and they are spectacular. My theory is: a) I water them, b) I use big containers with drain holes for large soil mass, and c) I use the right soilless mix, and of course, d) I love them (maybe a little too much).
Gravel at the Base of a Pot?
I remember thinking that putting gravel in the base of a pot for drainage was not really a good idea because it gets all clogged up eventually with little debris or bits of soil going into it over time, water then doesn’t drain there, roots don’t grow into that area because it gets too wet. Soon enough science later backed up this suspicion by announcing the old practice of putting gravel in the base of pots is not really beneficial. It can impede drainage. Roots won’t grow into that wet area at the base of the pot, thus it reduces the full spa treatment. So, take this as just my opinion on self-watering pots, and if I change my mind – I will update my findings here on this blog. I am sure someone will argue the point with me – and I fully admit I need to know more – but I also have heard some folks say they like self-watering pots, but I haven’t seen their plants though either. Are they healthy, lush, and thriving?

Planter with succulents by Cathy T
We all Need to Drink Responsibly
Lastly, there are always the options of using plants that drink responsibly such as succulents, some herbs, ornamental grasses, some shrubs like Junipers, or cacti. Drought tolerant plants require less watering, which not only saves you watering time, but helps the environment by reducing water usage – which is big today – no one likes waste. And if you are not a fan of dessert scenes or rock gardens, add things like soil moist to your potting mix, which is discussed in Container Crazy CT’s annual May workshops as well. Rain barrels may be placed on your deck too to obtain free water for watering your patio pots. You may focus on shade tolerant plants that require less water routines versus the hot, sun-loving types. And shade cloths can be used on extremely hot days in your greenhouses or growing rooms, or patio umbrellas on your deck during the hottest sunniest days of summer to cast some shade over plants to reduce watering needs. But I say, if you love beautiful plants in container gardens – then love watering them too.
Cathy Testa
containercathy@gmail.com
860-977-9473
To hear more about pot types, see this page: Container Garden Pot Types.
Pimping Pumpkins with Nylon and Bling-Bling
Leave a commentThis post received a lot of attention last October – so if you haven’t decorated your pumpkins yet – and don’t like the art of carving, here are some wonderful alternatives.
Note the stick-on bling decor held up well but some started to peel off when the sun heated them up – so I would recommend some adhesive or even some very small push pins to secure them onto the pumpkins.
I loved the nylon covering for pumpkins because they are reusable. I stored mine with my Halloween decor – however, we did some carving last Sunday, meaning my husband and I.
Carving pumpkins was so much fun – I decided in 2016 – I’m going to offer a fun workshop of “Carving and Flower Stuffing of Pumpkins” early in October. It will be posted on my blog under the “Nature with Art” class programs in 2016.
All will be here for attendees – pumpkin selections, carving tools, and fresh flowers if you prefer to fill them with flowers for your table!
Only two more weeks until Halloween – have fun out there, and be safe.
Cathy Testa
 The past week’s weather prompted me to start decorating for “Falloween,” the period where it may feel a tad bit early to put out your scary Halloween decorations, but not too early to begin decorating with pumpkins, gourds, cornstalks, mums, and other goodies.
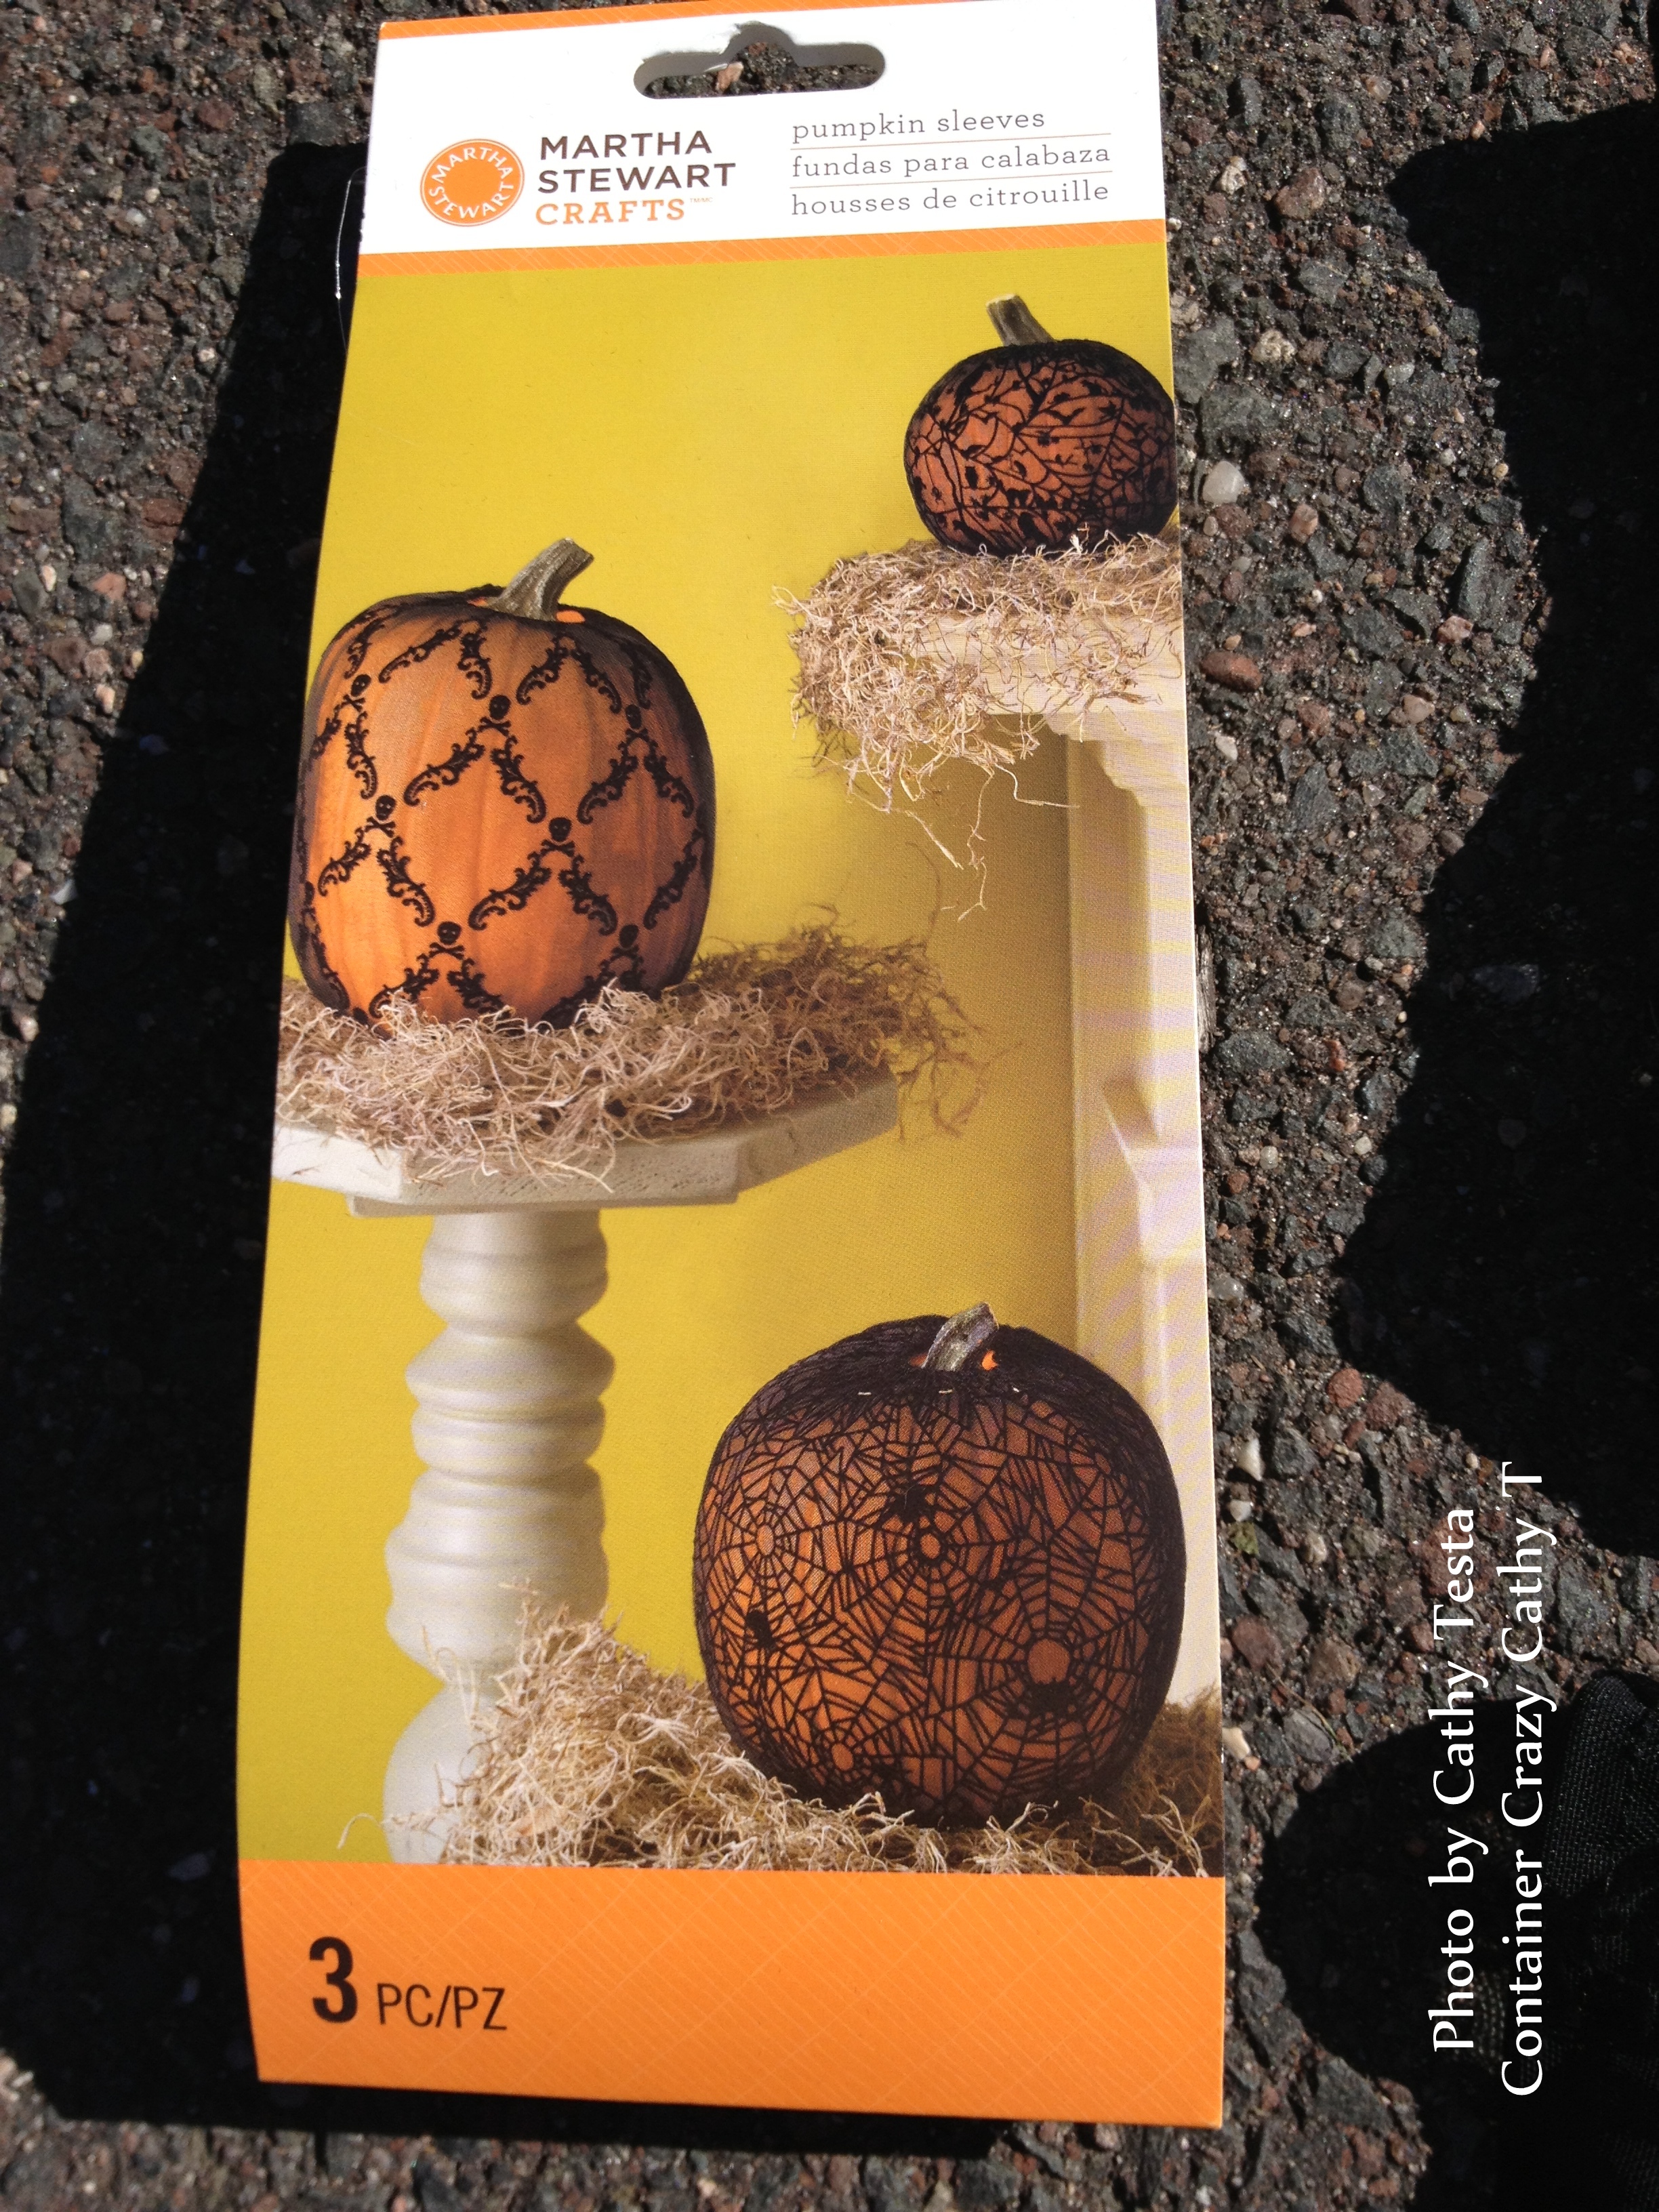 So I decided to go with the easy packaged Martha Stewart find called “pumpkin sleeves” discovered at a local Michaels craft store. When I tried looking up instructions, because there really wasn’t any on the package, I could not locate this item on the Martha Stewart website.


Not a bother – because it was very easy. Just slip it over and secure the ends. At first I used small rubber bands to gather the ends on the bottom and top, but later discovered a draw string for the top end of the sleeve. However, I still found the rubber band trick to secure it tightly worked better.
View original post 298 more words
The Mystery of the Missing Sea Pumpkin
Leave a commentThis spring, I got into seed starting. I don’t sow seeds often really, I generally go for liner or starter plants, but this year it just kind of happened because I had more growing room to do so.
Comstock Ferre in Old Wethersfield, Connecticut is a great place to get various seeds. One afternoon, I decided to go browse their amazing selection. If you haven’t been there yet – they have loads of various seeds in big wooden displays – it kind of feels like a candy store as you look thru each tray or drawer.
Of course, I had to go for the unusual plants. I purchased seeds for a climbing spinach for example which sold out at the market this season because it was interesting. It is called Malabar. I also got various types of lettuce seeds and seeds for unusual plants like giant castor beans.
One particular seed packet which caught my attention were seeds of Italian sea pumpkins from Chioggia (Squash Marina di Chioggia). The seed packet is labeled by Baker Creek Heirloom Seeds from Mansfield, Missiouri. The pumpkins are a blue-ish color and shaped like turbans, so I thought – cool, I want to try these.

Pumpkins and Gourds in Pots
My attempt of growing them in containers failed.The pots were not large enough, the soil dried out too fast, and the animals visiting my deck ate all the flowers! But before the hungry critters munched on them, I enjoyed the plant’s bright vivid yellow flowers very much, and so did the bees. One plant was situated near some blue flowering Plumbago trailing from another patio pot. The blue flowers next to the yellow pumpkin blooms were bright and pretty.


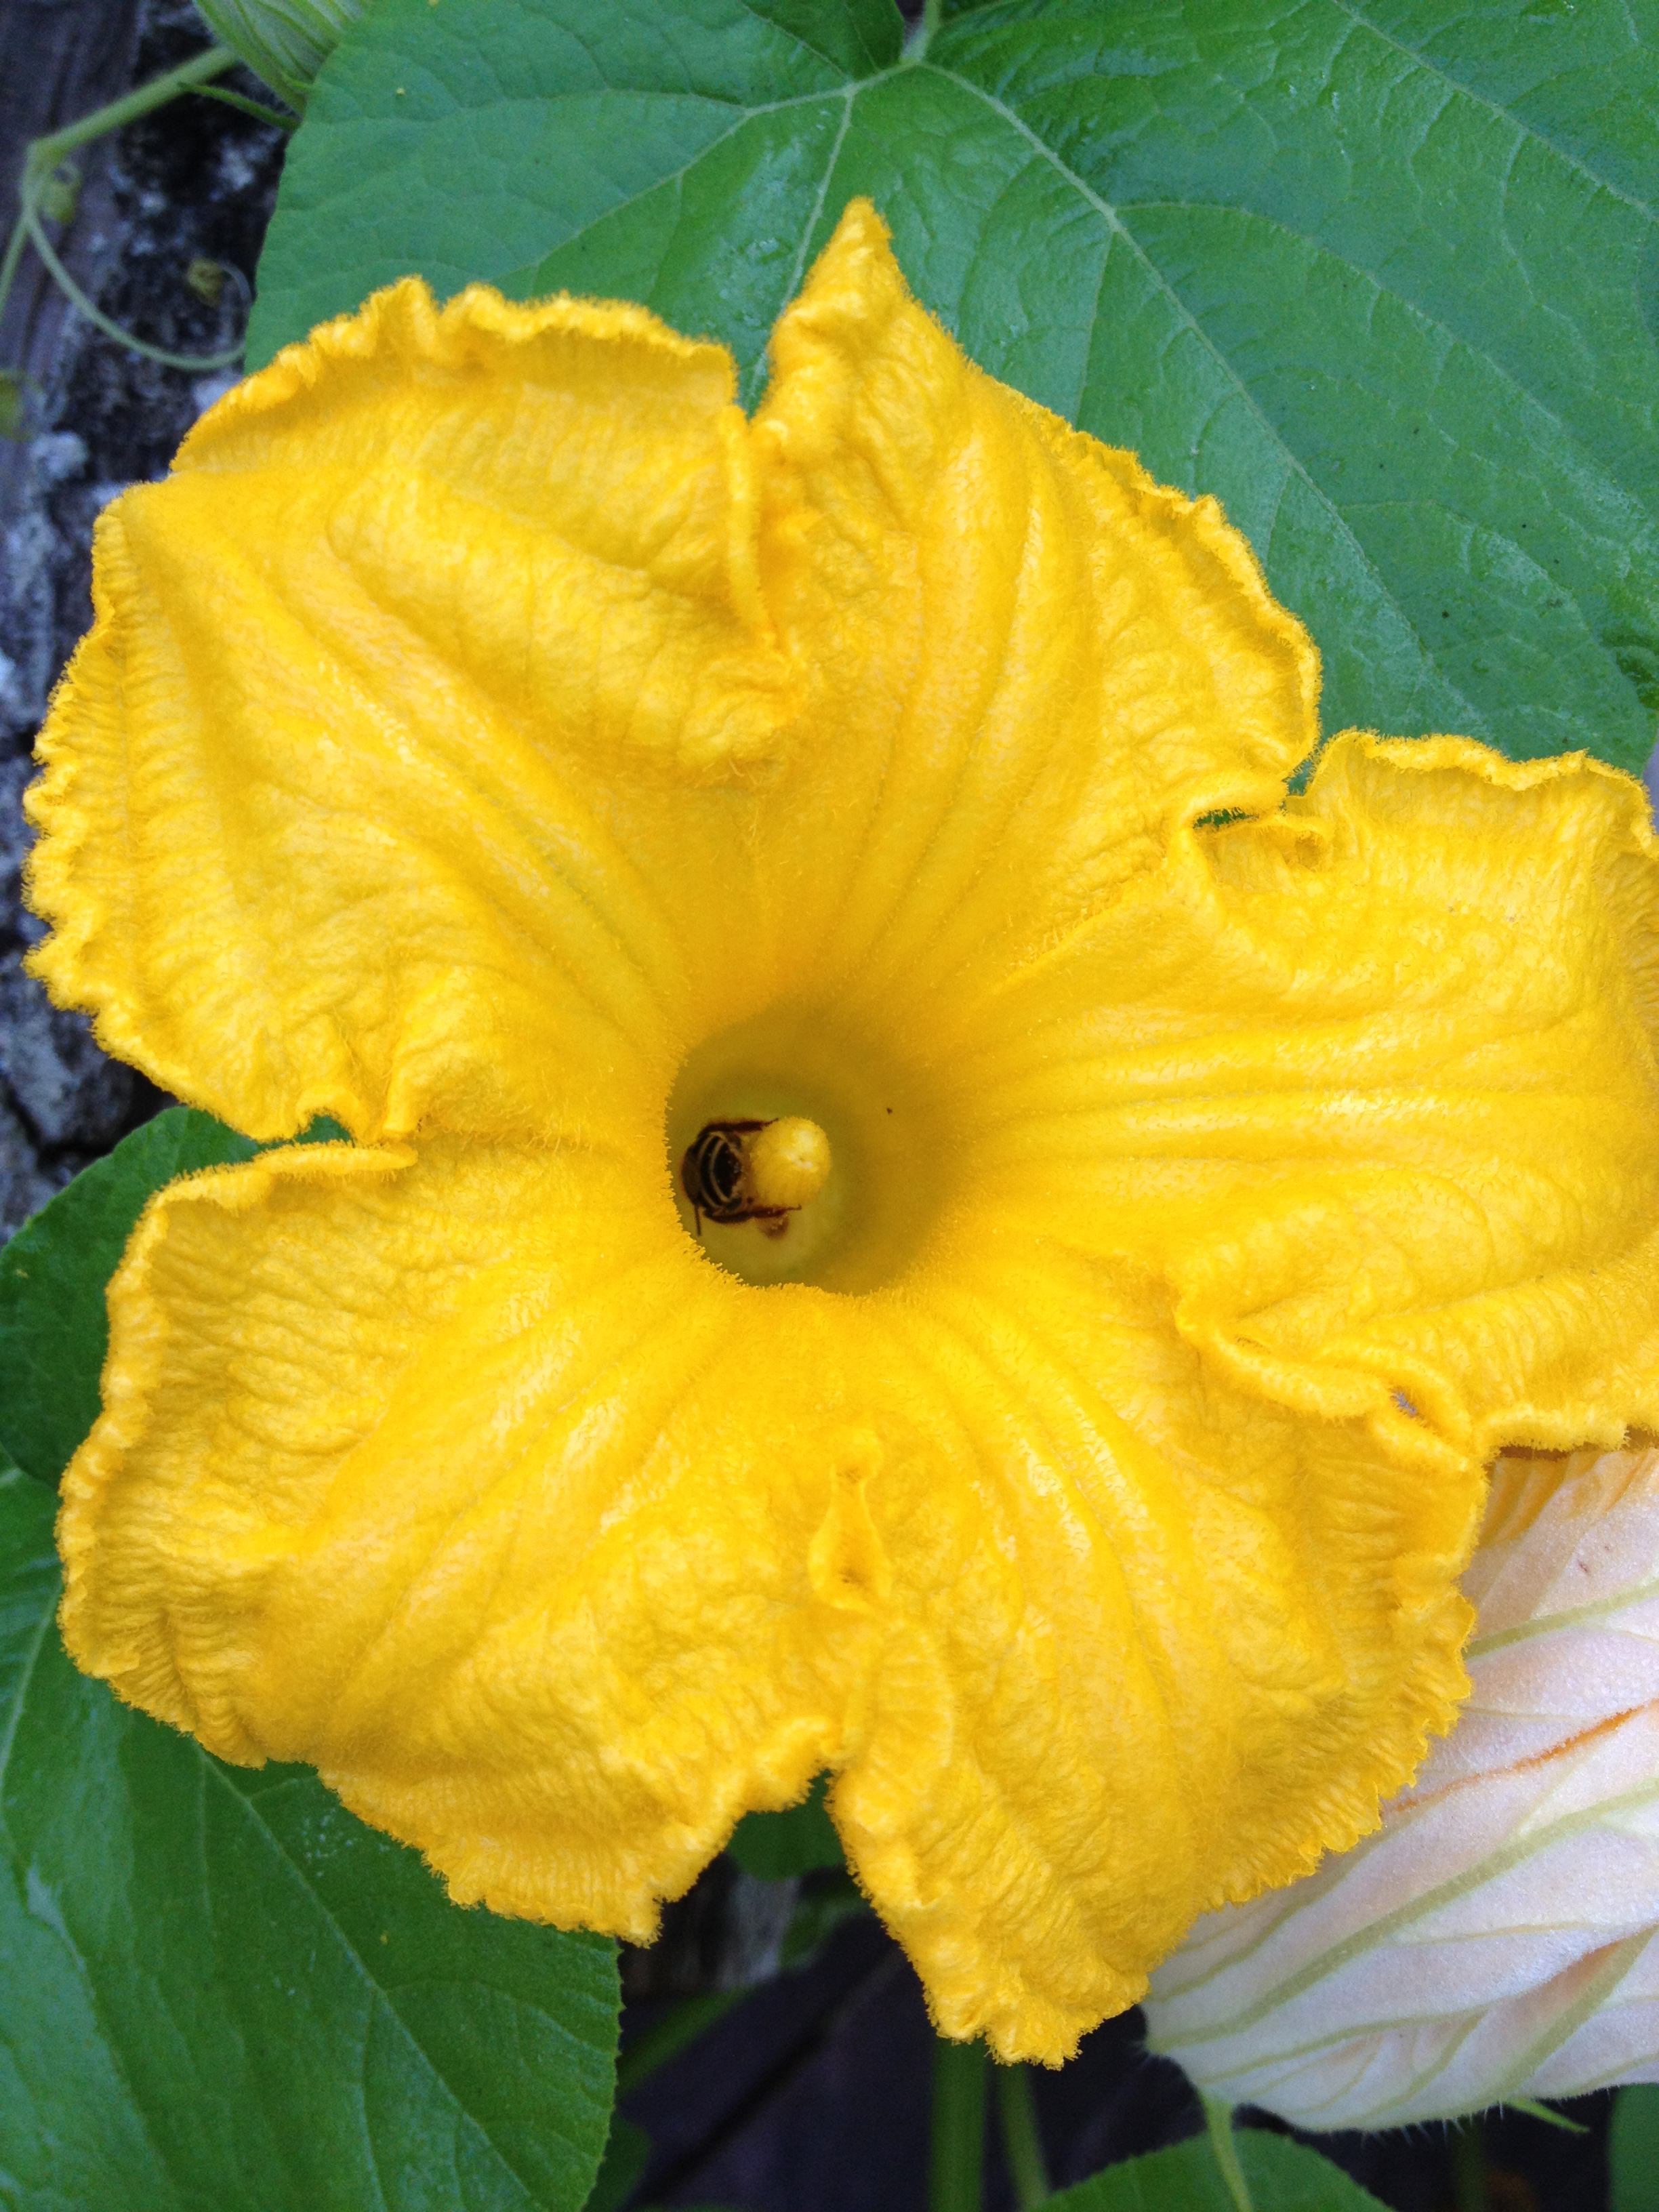
Flowers of pumpkins and gourds – so vivid and bright yellow – a delight for my eyes!
By mid-summer, the pumpkin plants in my patio pots got powdery mildew on the foliage – so later, after it was getting worse, I decided to cut them all down and give up growing them in my patio pots.
Luckily, I had also given two seedlings plants to my Dad in early June from my success of growing them from seeds. He has an exceptional vegetable garden and I told him about the pumpkins and asked he grow a few in his gardening space. He said he would take only two seedlings because they take up a lot of space in the garden, which most people know – pumpkin and squash vines spread.
This month, he and my Mom took me to their garden on separate occasions to see two of the sea pumpkins which started growing and are hidden below the large leaves on one plant. It took a little while to locate them.
I think they are BEAUTIFUL. One is especially pretty with a center pattern, and the other is a lighter green color.

Sea pumpkins in my father’s garden, August 2015
This whole process made me think how I could never master a big vegetable garden like my Dad does (because I’m too lazy and prefer gardening in containers and patio pots), but how I loved growing plants from seed and sharing them with him to grow in his garden. In fact, growing plants to share, sell, or put in containers is truly my passion, well, if you know me, you know this.
Back to my father. He grows amazing vegetables every season, even as he approaches his mid-80’s. He’s an incredible inspiration and probably why I am fascinated by plants and nature. When we were kids, he didn’t explain much to me on the how to’s – he would just hand me a packet of seeds and say, “Put these in the holes in the soil.”
I remember, and I think I wrote about this before, how big his hands were and how tiny mine were, and thinking at that moment, “No wonder Dad is asking me to sow the seeds, his hands are too big to handle them.”

Bert, my Dad, in the garden getting some fresh goodies for me.
We never lacked fresh food in summers when we were growing up. And because I live only a few miles from my parent’s home, I have the pleasure of seeing them routinely when they quickly come by my house to drop off some tomatoes, blueberries, zucchini, cucumbers, etc from Dad’s garden. This is truly a blessing. Each and every time I bite into a fresh tomatoe from a garden, it flushes warm feelings of my Dad’s tomatoes and his love of growing them into my soul.
My Mom told me I could have the two sea pumpkins growing when they are ready – which kind of surprised me cause she likes them too. My brother, who lives next door, asked me what type of pumpkin they are as well and if they are good for eating and baking. He’s admiring them also.

The especially pretty one in the garden
This week my Mom called me to say the pumpkin (the especially pretty one) has gone missing. My reply was she must be having trouble spotting it because of all the foliage. When I saw my Dad a day later, I asked him if the pumpkin is really missing, and he replied that he couldn’t find it either.
Geesh, I thought – “Who would take that pumpkin?!” Seriously. An animal couldn’t have dragged it away, it is getting rather large now.

Another shot – Sea Pumpkin in my Father’s Garden on August 2015
I texted Jimmy, my brother, that evening. He texted back that he would check for me. He grows some of his vegetable plants in Dad’s garden too, so he is out there daily when harvesting his peppers.
He was able to locate the sea pumpkins and said if they had gone missing, he wouldn’t know who took them. I was relieved he found them, and excited to hear from Jimmy the vines grew another ten feet. As my Dad noted to me earlier in the season, pumpkins take up a lot of space. His plants are growing healthy and strong.
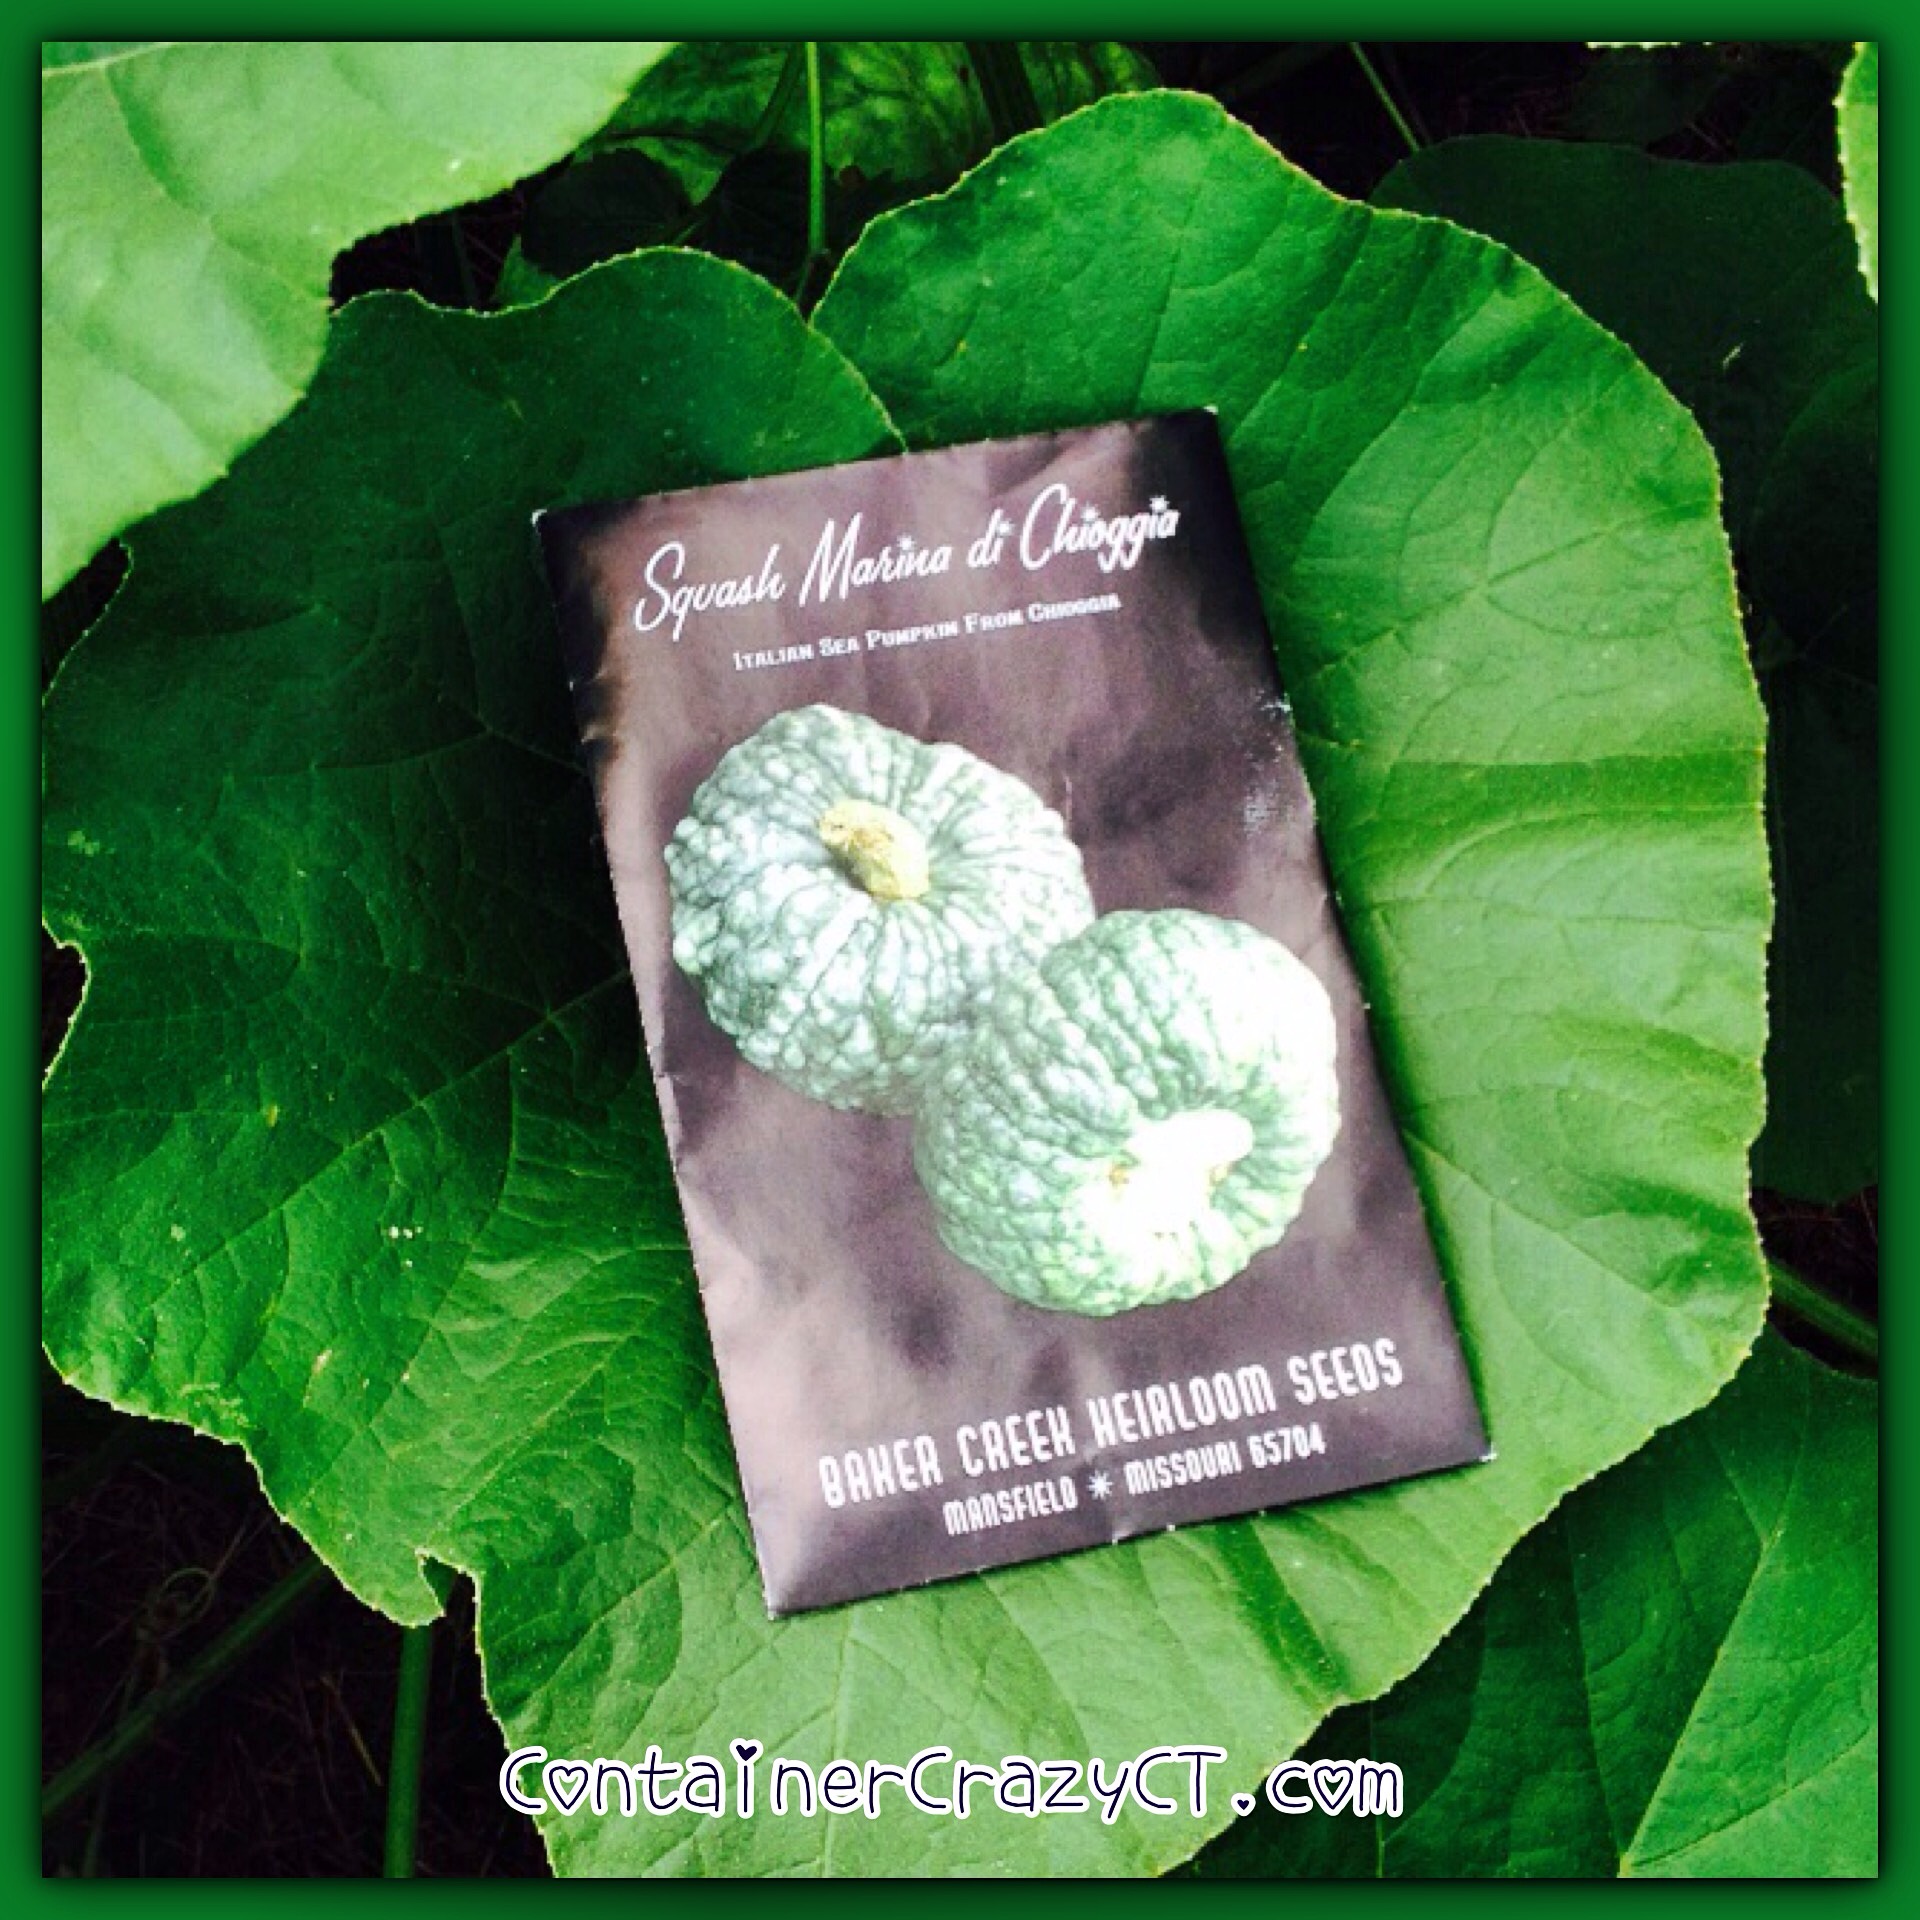
I placed the packet on the leaf
This pumpkin is noted on the seed packet label as one of the most beautiful and unique of all squash and “a perfect variety for market gardeners.” And it is edible, but I think I will be keeping them for display as part of my autumn decorations. The fruit will weight about 10 lbs each when they are ready.
By the way, my father said there are plenty more flowers on the two plants, so there should be plenty more pumpkins coming – so long as they don’t go missing again.
Cathy Testa
860-977-9473
containercathy@gmail.com

Me in Dad’s hay field – He had some help this year with baling the hay – we usually have square bales – but this year they are round, so I had to take a photo…
Next Up: Free Pond Tour on August 15 – Hosted by ContainerCrazyCT
Leave a comment
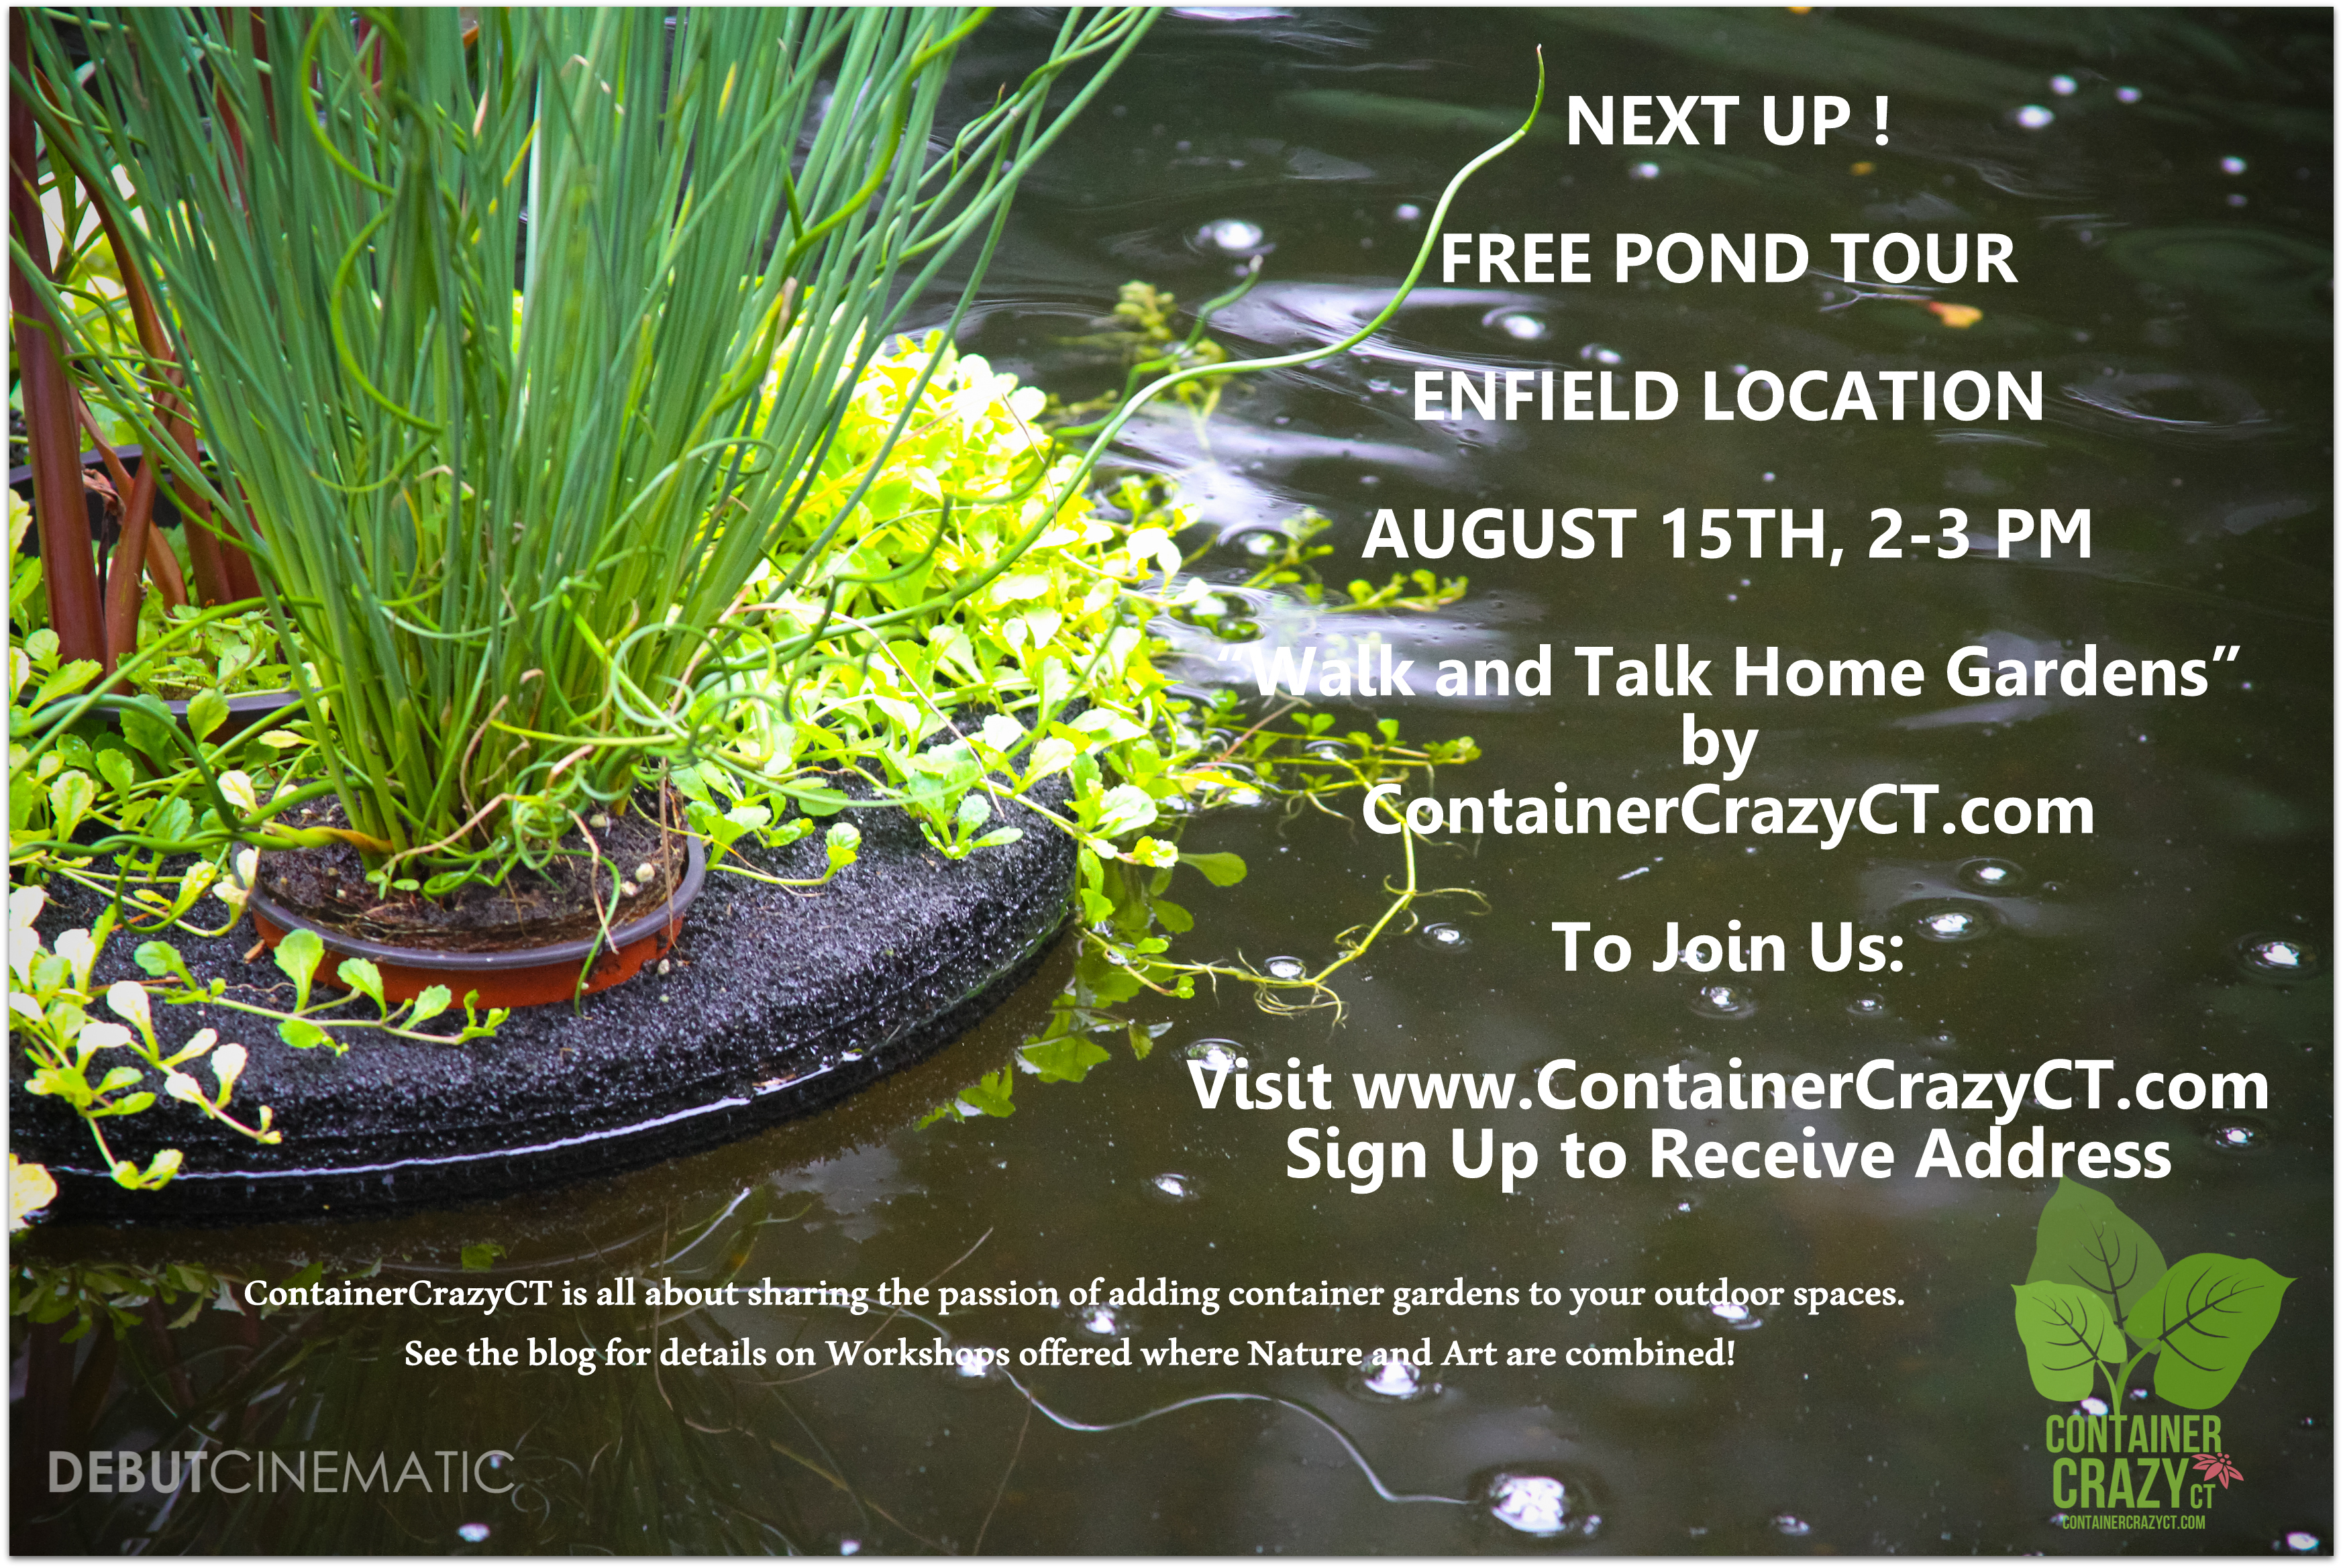
PLEASE NOTE: THIS TOUR IS BEING CANCELLED DUE TO WEATHER PREDICTION OF RAIN AND DUE TO LOW SIGN-UPS. WE HOPE TO OFFER IT ANOTHER TIME HOWEVER. THANK YOU FOR UNDERSTANDING! CATHY T
It is hard to believe July is half over – or half full depending on how you look at it – but this is also a good time to remind everyone of the free “Walk and Tour Home Garden Tour” scheduled on Saturday, August 15th at 2-3 pm. We will be visiting a homeowner’s beautiful pond gardens and hearing a bit of how she acquired new bee hives for the first time.
These featured tours are designed to be very informal, and a way to share and learn from everyday homeowners with a particular plant or gardening passion. Our host, Rhonda, will share with us how she created her pond gardens, what plants she uses, and other tips based on her personal experience. Come see her ponds, fish, plants, and enjoy an hour walk and talk at an Enfield, CT location.
If you wish to join us – Please sign up via the Contact Form located under the “Nature with Art Class Programs” menus on this blog. We will send you the address once we receive your info – or you may email: containercathy@gmail.com.
Don’t forget to click on the menu bars above showcasing ContainerCrazyCT’s services and container garden workshops offered seasonally.
Thank you – Cathy T
