Easter is on April 5th this year, 2026. Although it is still 2 months away, I recently thought about some Easter creations. I made them with plants and moss a few years ago.
You can use sheet moss, Spanish moss, reindeer moss, mood moss, sphagnum moss, or faux moss. In my examples below, I used two or three types of natural live moss.
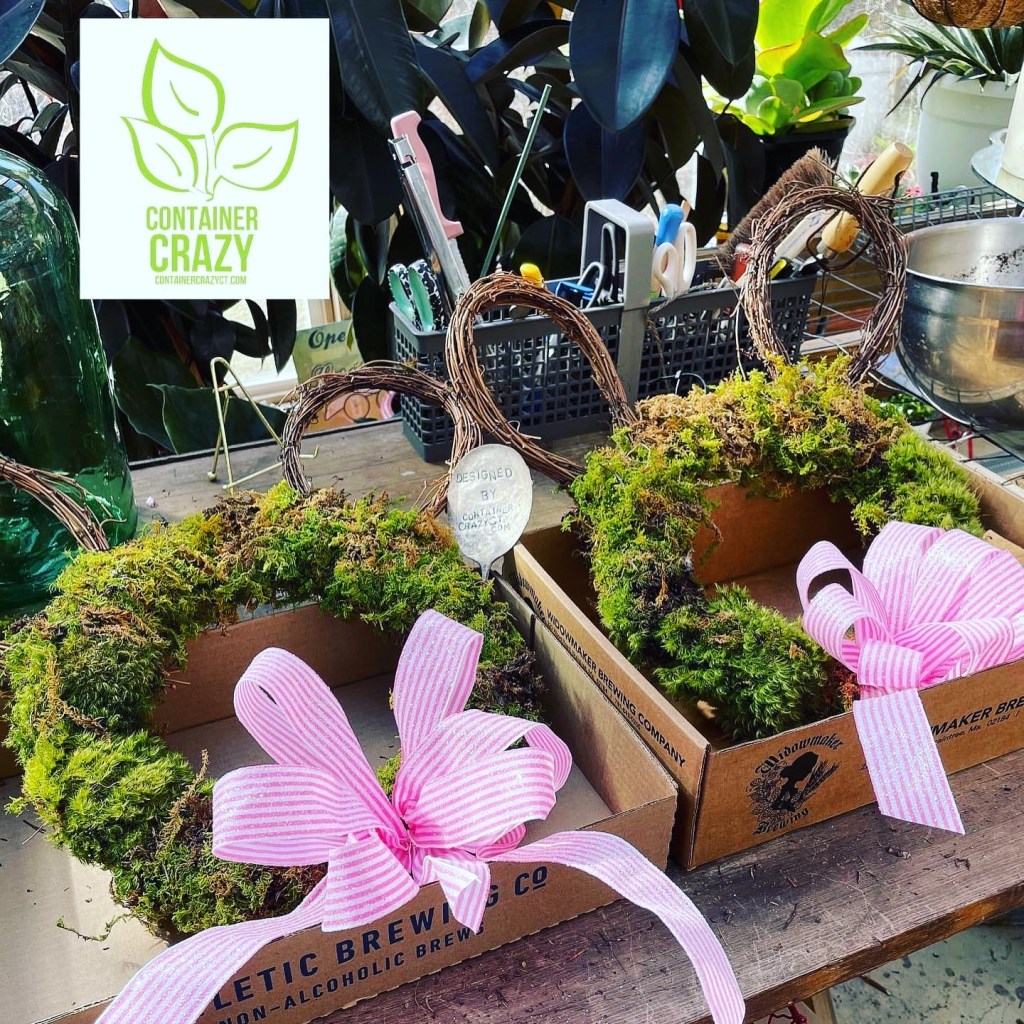
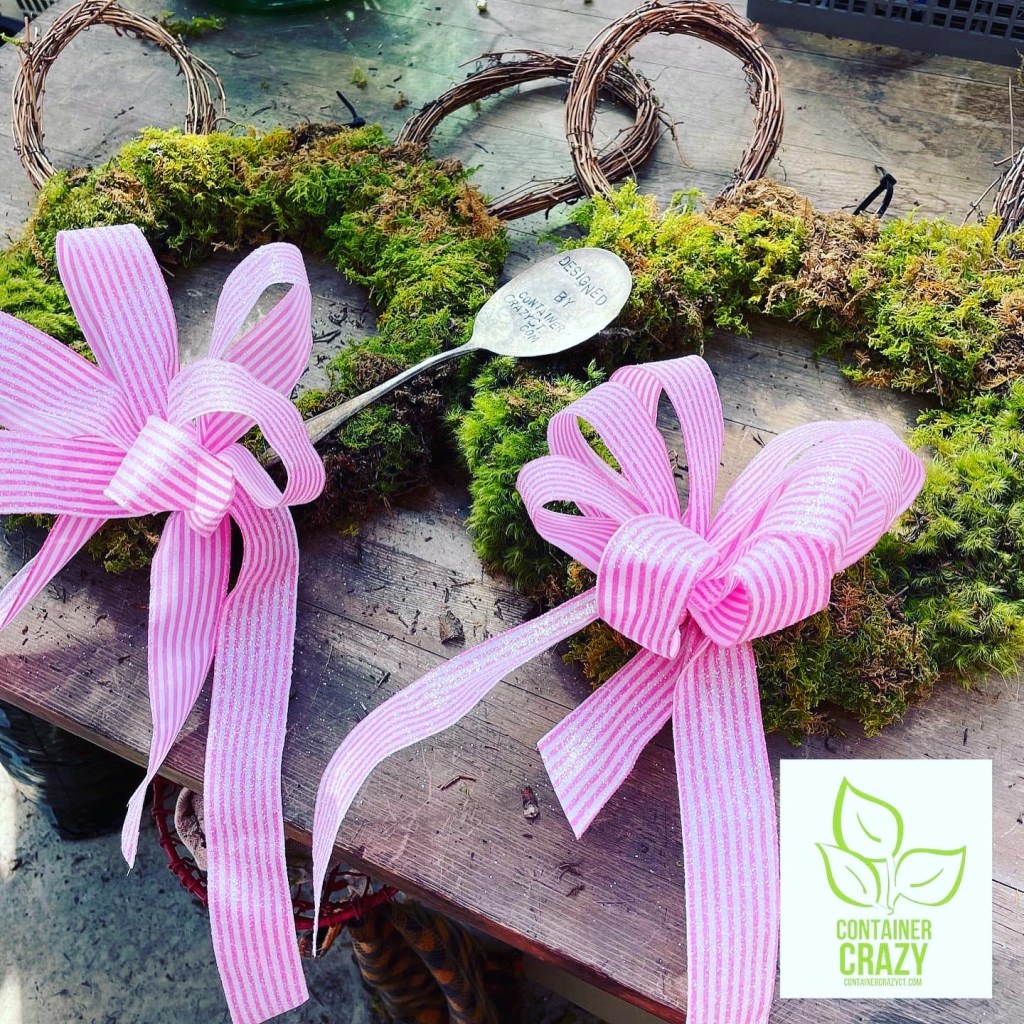
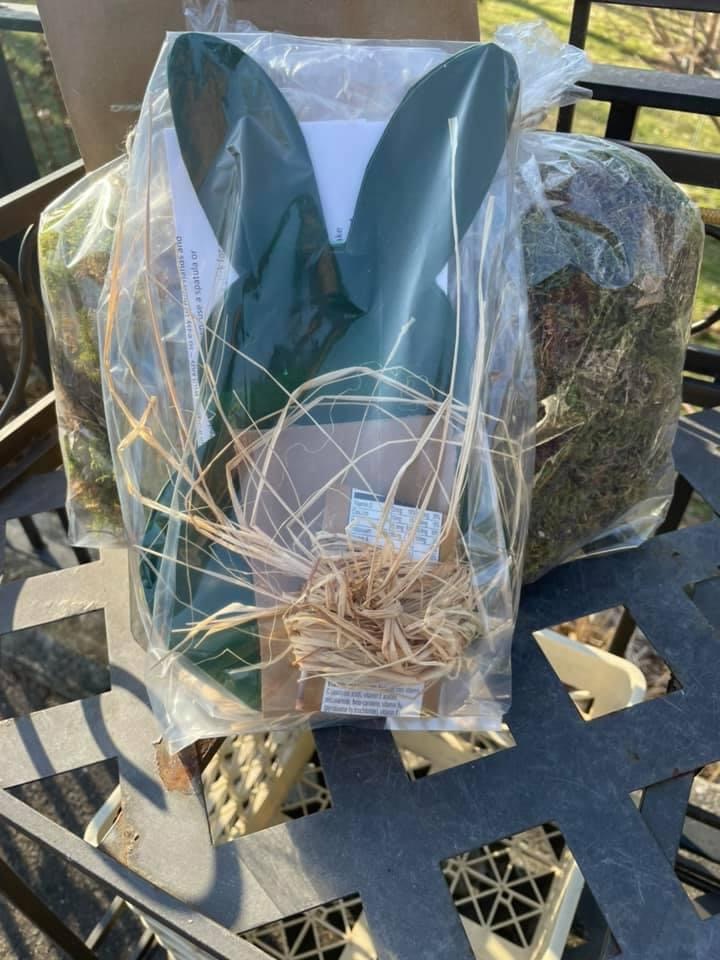
Easter Moss Wreath with Grape Vine Bunny Ears
Round Metal 12″ Wreath Frame
Natural Moss (different types)
Natural Grape Vine Twig Garland
Green florist wire
Ribbon
Making this wreath was rather easy. It does make a mess though because the moss will scatter bits here and there. I made them in my greenhouse. The moss was live natural moss I had in my stock. Moss can be kept in cardboard boxes in a cold environment, like an unheated garage. Some florists keep moss in their florist coolers. The wire wreath frame was in my stock from prior years of making holiday wreaths. I also had some florist wire from before. And the grape vine twig as well. At first, I didn’t know how to make the bunny ears, and the grape vine came to mind. Attaching the moss with the florist wire by just repeat wrapping is simple. The grape vine was bendable to I attached it to the wire frame as well.
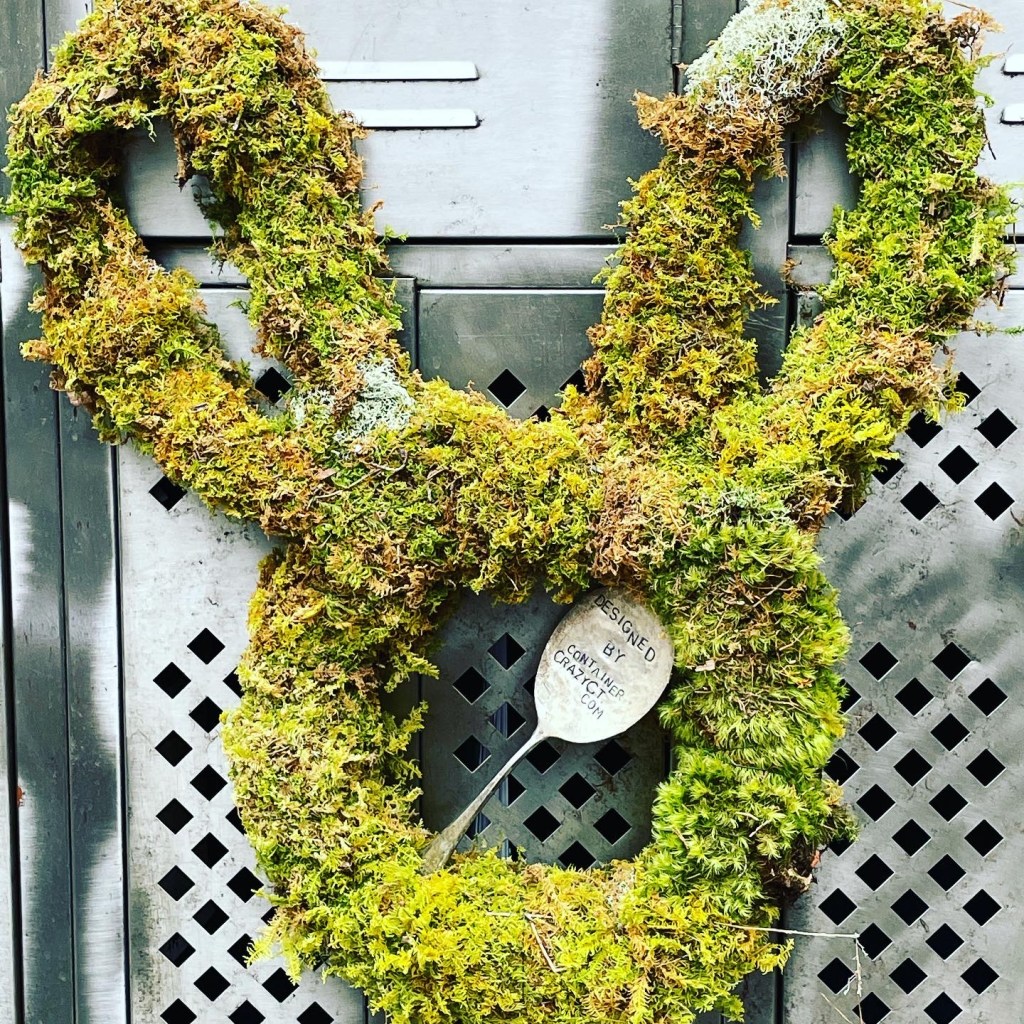
I attempted to make bunny ears by using coat wire hangers and bending them into the bunny ear shapes. It worked too but was more time consuming. I preferred the grape vine ears instead.

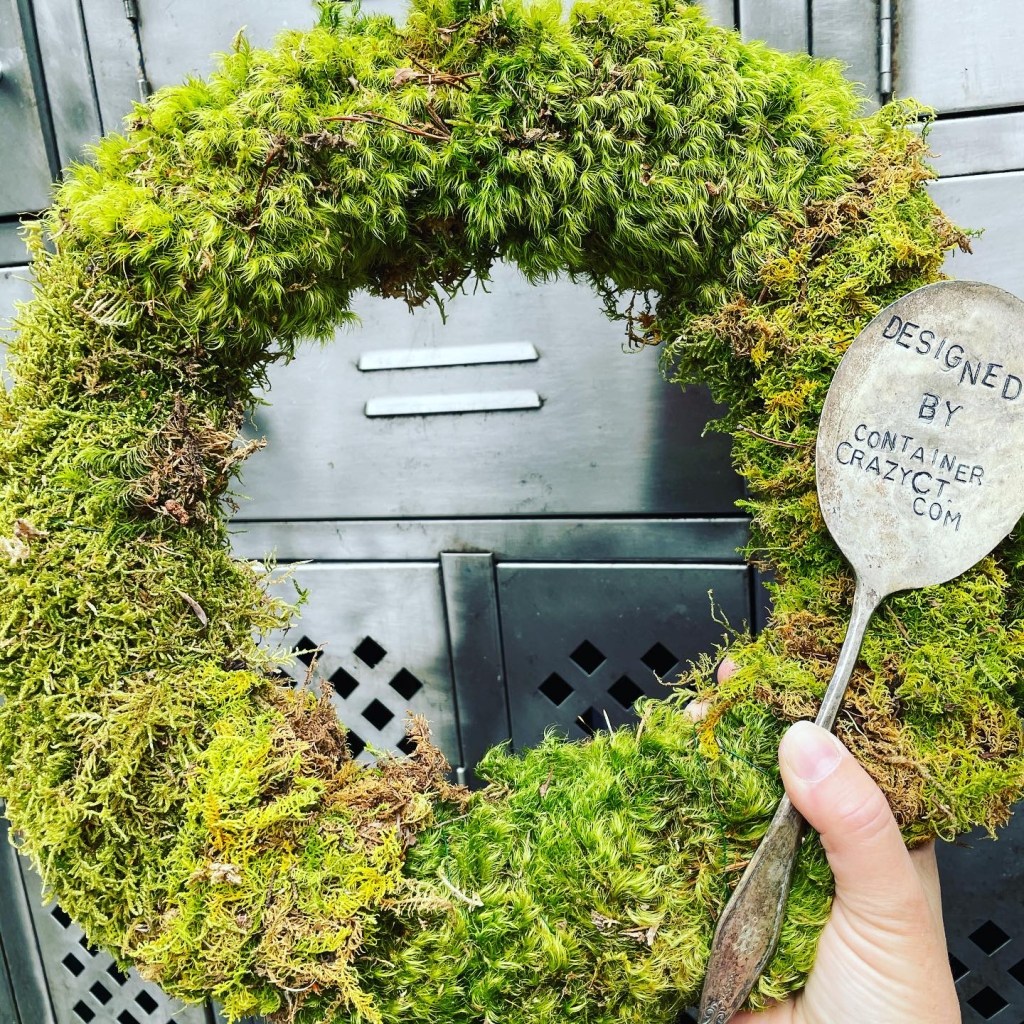
I also like the look of just a simple natural moss wreath. There are actually several different types of mosses used in the wreath made shown above. Moss gives me a feeling of just enjoying nature. It is earthy, has an almost like soil smell, and pliable. If the moss needed a little moisture, just lightly spray it with a water bottle sprayer. Outdoors it lasts for months if not indefinitely. The moss on the one in the photo above was a combination. It included mood moss, which is wavy looking, and sheet moss. Sheet moss pulls apart in pieces. It works well to wrap a piece or section of it around the metal wreath frame. Then using florist wire, I just wrapped the florist wire around the tops. The florist wire, which was green, disappears as it gets pushed into the moss somewhat.
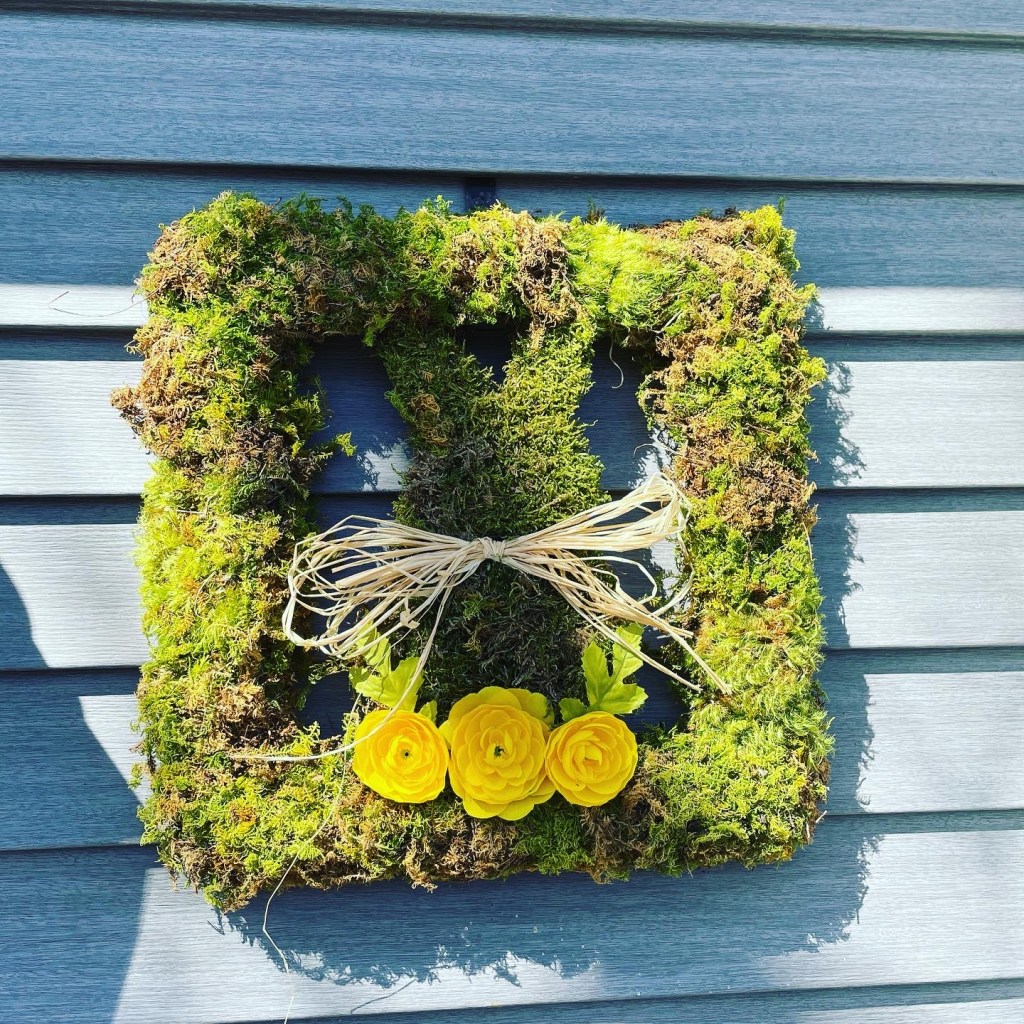
Square Wreath with Bunny in the Center
Square Double Rail Metal Frame
Natural Moss (different types)
Faux flowers
Green florist wire
Raffia ribbon
Cardboard (used either an empty cereal or beer box)
This one was made on a square wreath frame. In the center, I made a bunny. I cut a bunny shape using cardboard and used glue gun glue to glue moss over the bunny shape. It was rather easy and then I attached it in the center. The yellow flowers are faux material. It came out rather cute. The bow was made with natural raffia ribbon.
Next, is a bunny cut out project fun and simple to do with kids.

Bunny Sticks with Moss
Sheet moss
Glue gun with glue sticks (or other type of glue)
Raffia ribbon
Cardboard (used either an empty cereal or beer box)
Popsicle sticks
Green spray paint
Another crafty bunny idea was these moss bunny cutouts. I thought how this is an easy and fun project to do with kids. First, I cut the bunny shapes out using cardboard. I found that beer cases, like Budweiser beer boxes really worked well. It was easy to cut shapes with that type of cardboard. Or you can use empty cereal boxes. Wooden Popsicle sticks were used as the stick part. Then these can be inserted into things like potted plants or whatever. Again, I had natural raffia ribbon on hand to make the bow for the bunny’s neck area.
That year I decided to make kits with all the components to sell. I had spray painted the bunny cutouts with green spray paint. This helped to hide the print of the cereal box. I left the other side bare. It was a very easy and fun craft to do with kids. Use your imagination. Add eyes or a bunny tail!
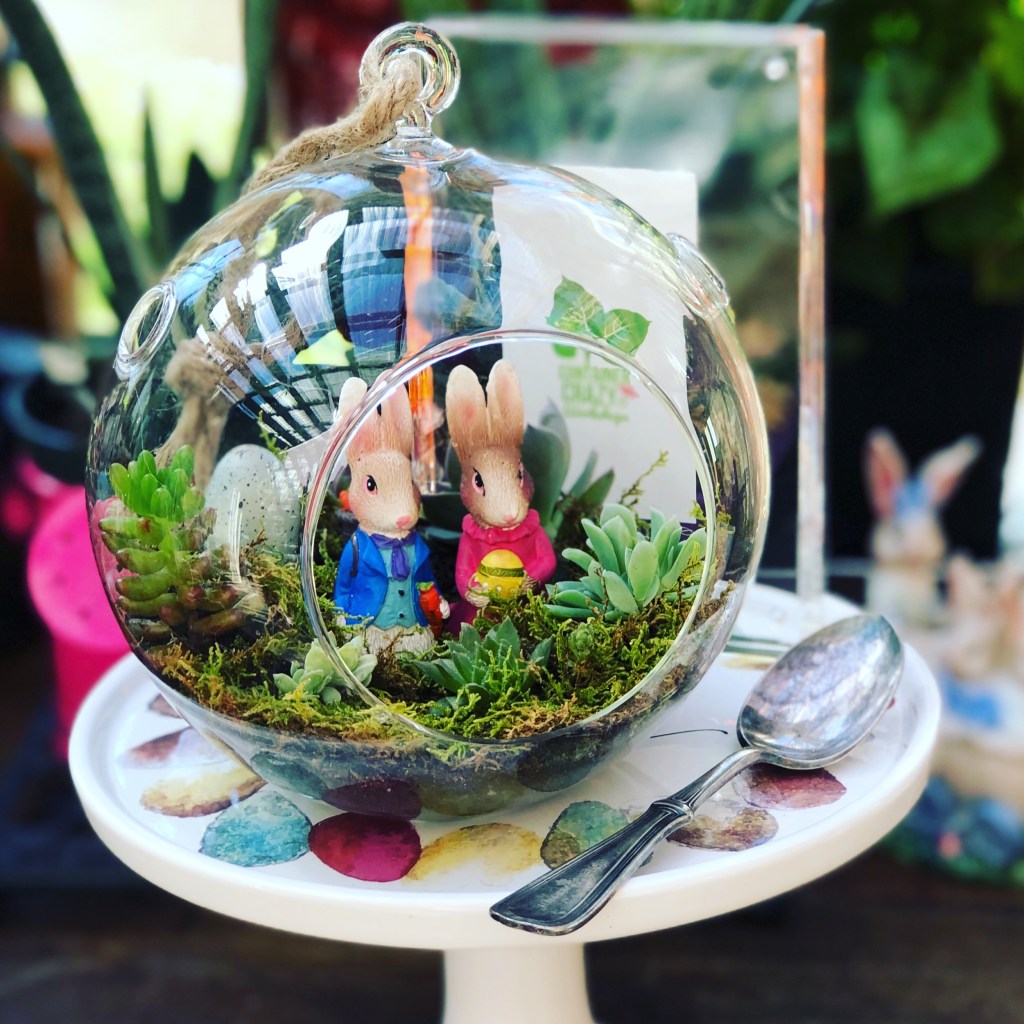
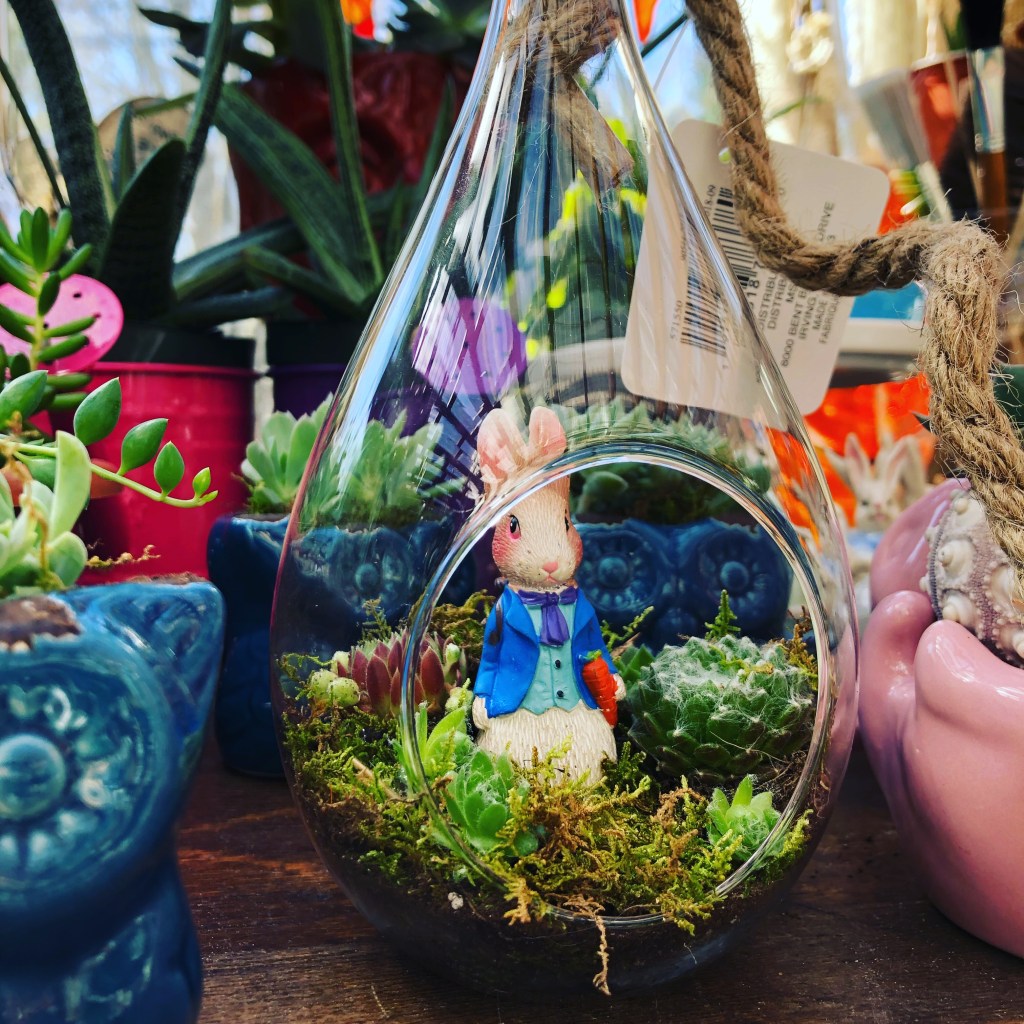
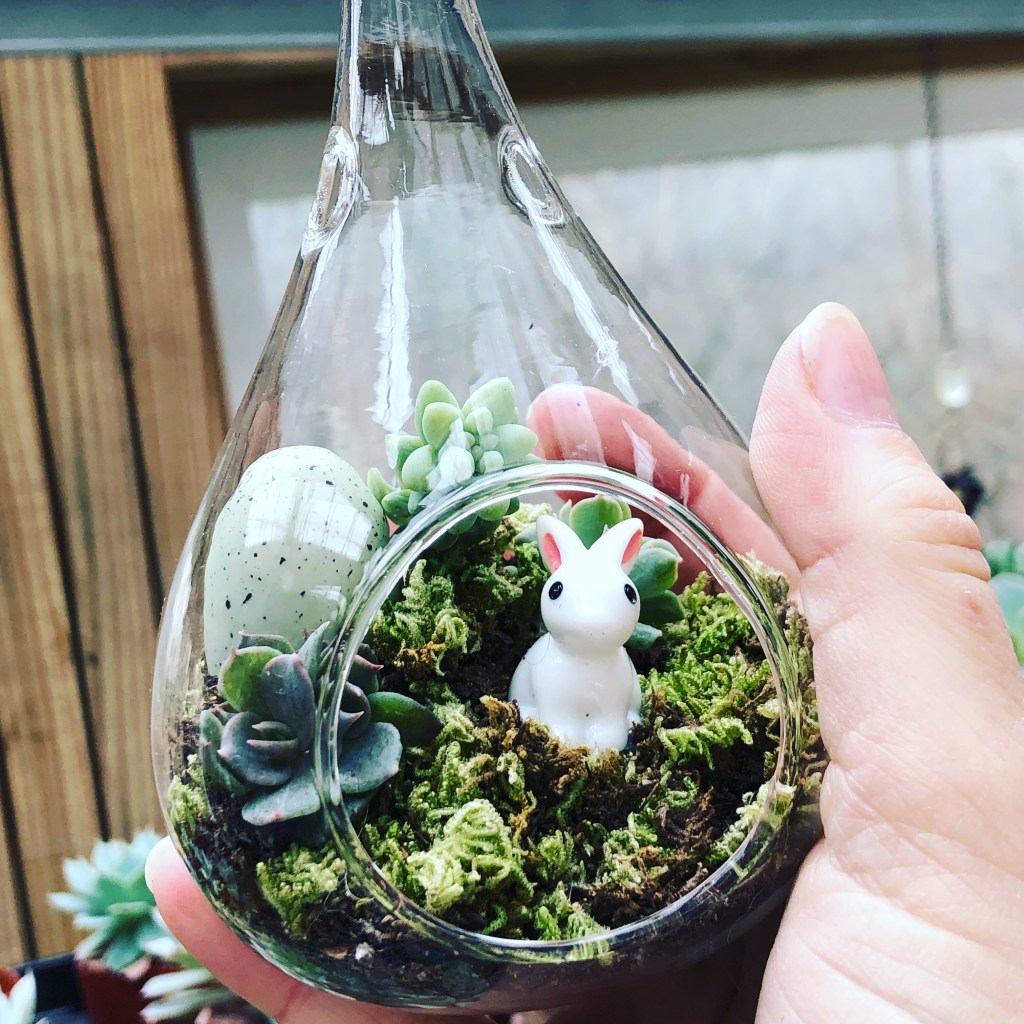
The next project is hanging glass globes.
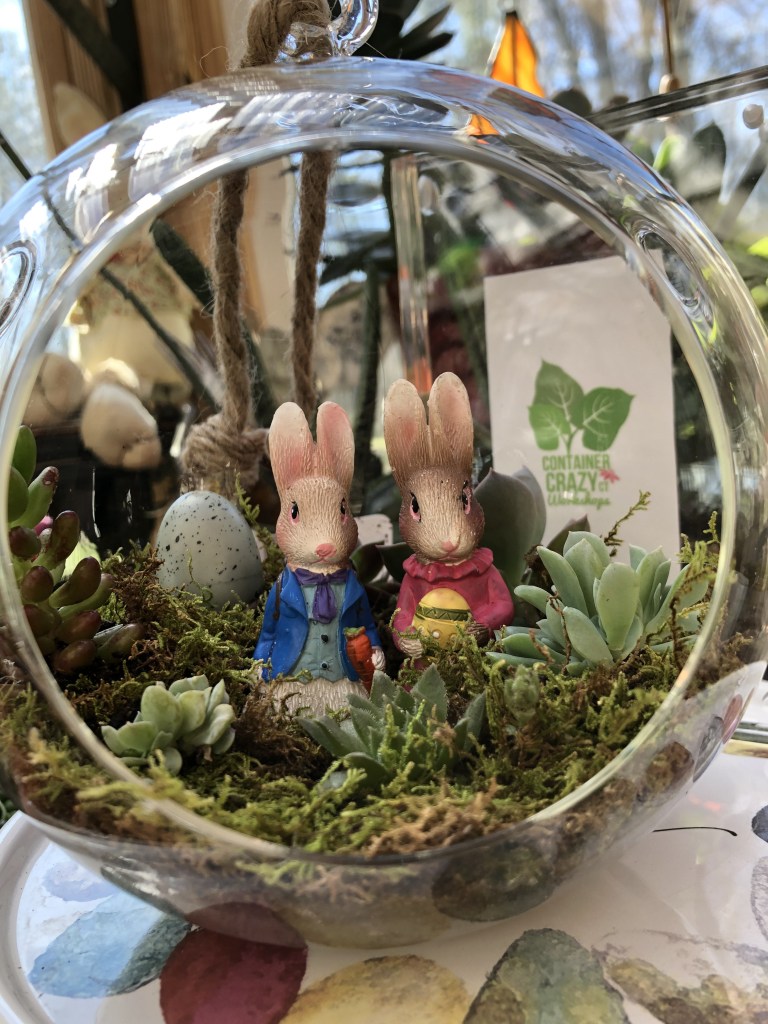
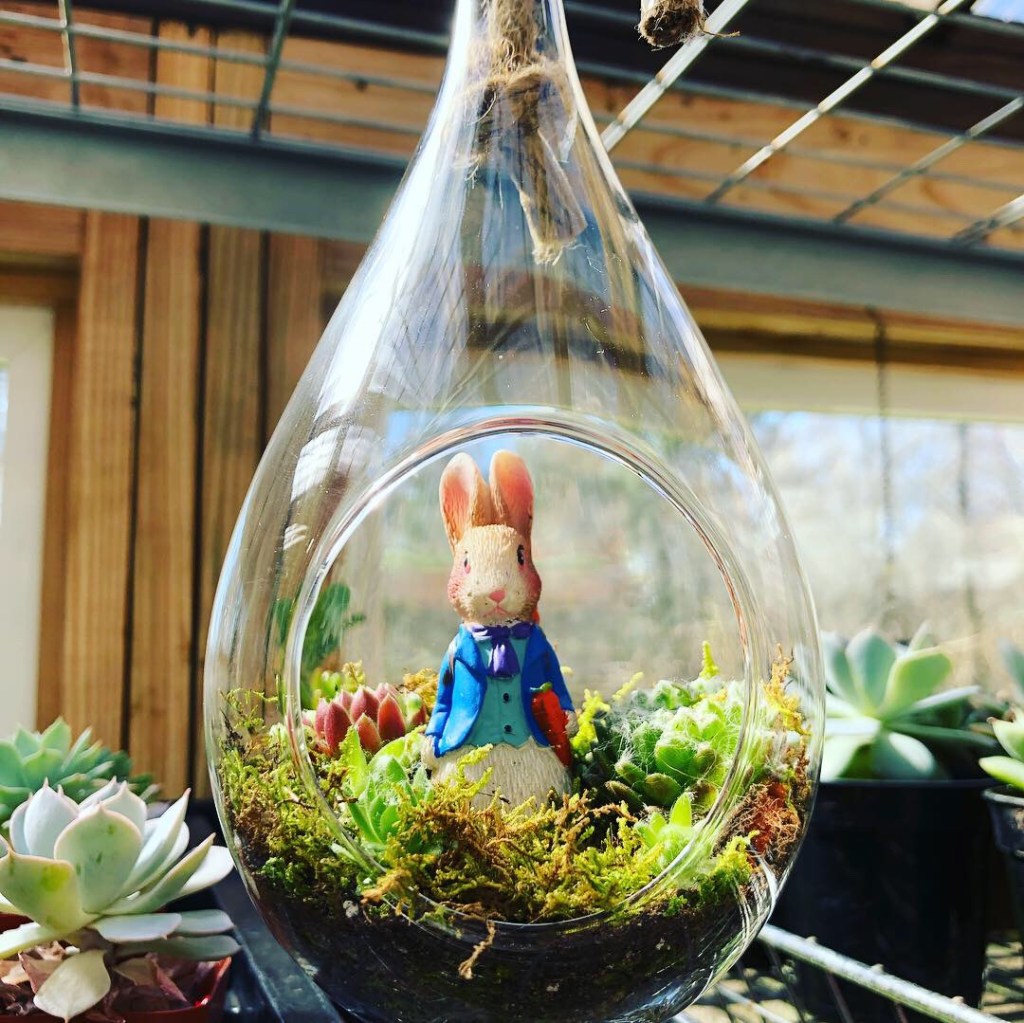
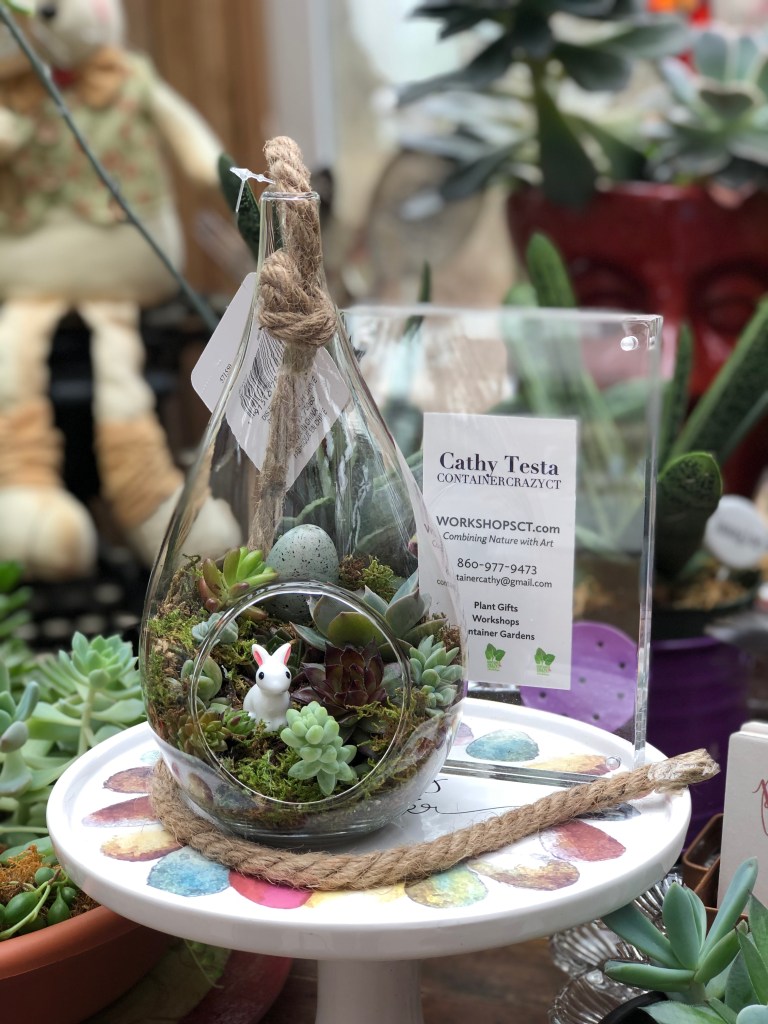
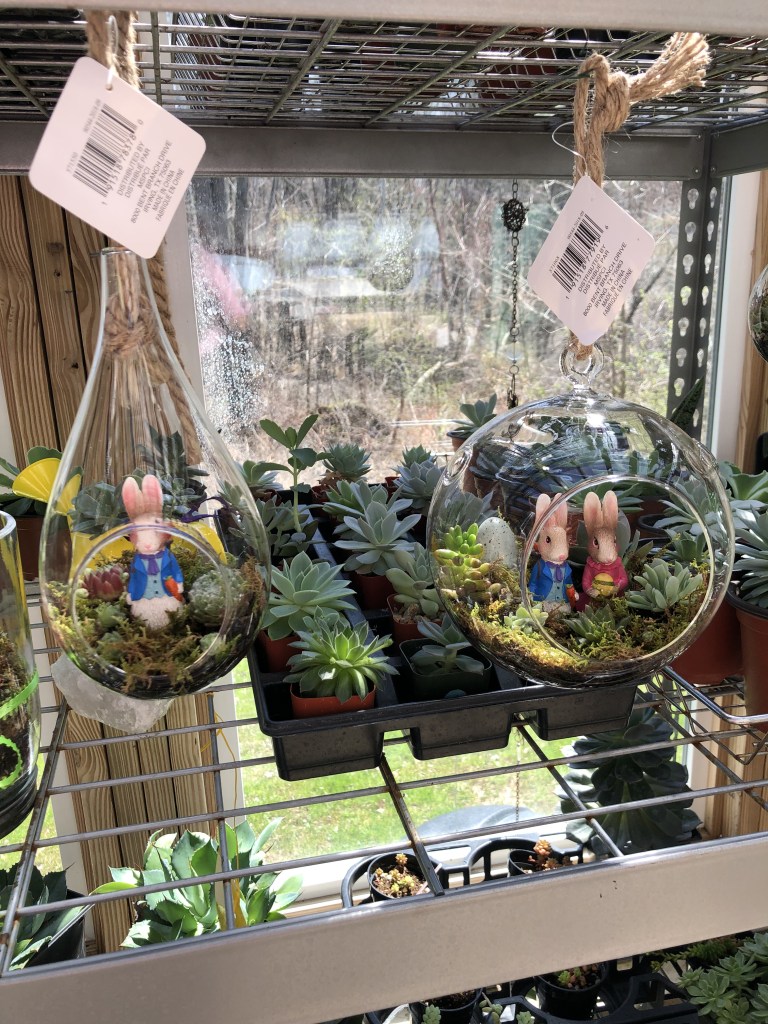
Hanging Glass Globes with Succulents and Bunny Figurines
Natural moss (recommend any type except Spanish or Faux Mosses)
Hanging Glass Globe
Decorative small bunny figurines
Faux decorative Easter eggs
Live plants (hens and chicks, jades, donkey tails, echeveria, or other succulents)
Potting soil (small amount recommended)
Activated horticulture charcoal (optional)
Glue gun with glue sticks (optional)
Round wooden craft like disk (size of a quarter, optional)
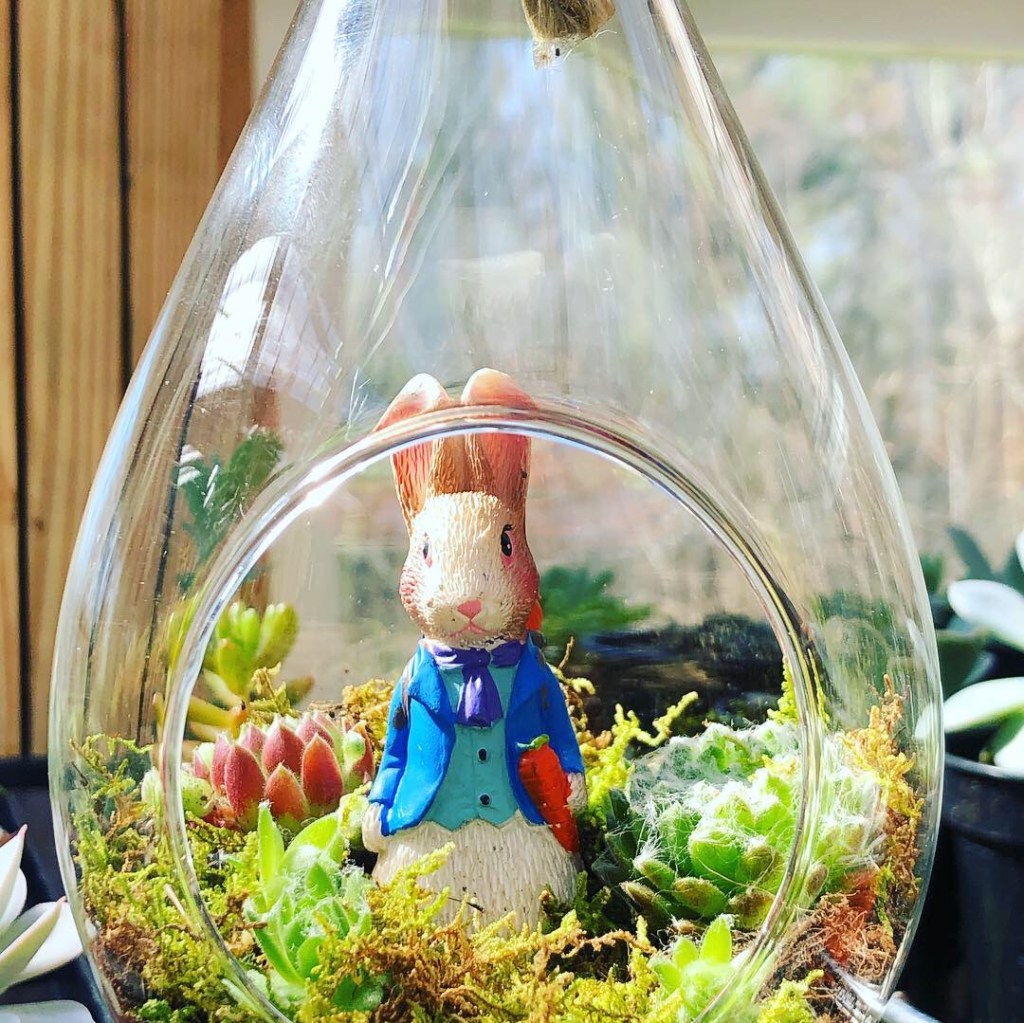
Before you start, be sure your decorative bunny figurine fits into the hole of the glass globe. Succulents can live in natural moss. The roots will naturally grow into the moss and the bit of potting soil below it. The activated horticulture charcoal, which is infused with oxygen, helps absorb odors. It is an optional item. If you don’t have any, don’t worry too much about it. But if you decide to use the charcoal, place a little bit of it over the well-draining potting mix before the moss layer.
The round wooden disks I mentioned in the items list are the size of a quarter coin. I used them to glue my bunnies onto. This helps stabilize them. I used some glue gun glue to attach it to a disk. Then I inserted it into the hanging glass globe. I do not recommend dry mosses that tend to rot which is what I feel Spanish moss does. Spanish moss may be green or light tan brown and it looks stringy. When it gets wet, it tends to stay too wet for the succulent plants. I prefer the other types of natural living mosses like sheet moss, mood moss, or others noted above.
The moss is the next step, tucking it around the bunny and onto the potting soil. Then comes adding the tiny succulent plants. Most of these were cuttings or really small hens and chick plants (Sempervivums). If you think the plant won’t stay in place, add a tiny dab of glue gun glue underneath. This will help secure it.
In this example next, I acquired tiny little bunny decor. So cute!
Are these little, tiny bunnies adorable or what? It made the project so cute. The nice aspect of these hanging glass globes is they function like mini terrariums. The succulent plant will grow very slowly. Once you are done with the Easter decorating season, you can remove all if you wish.
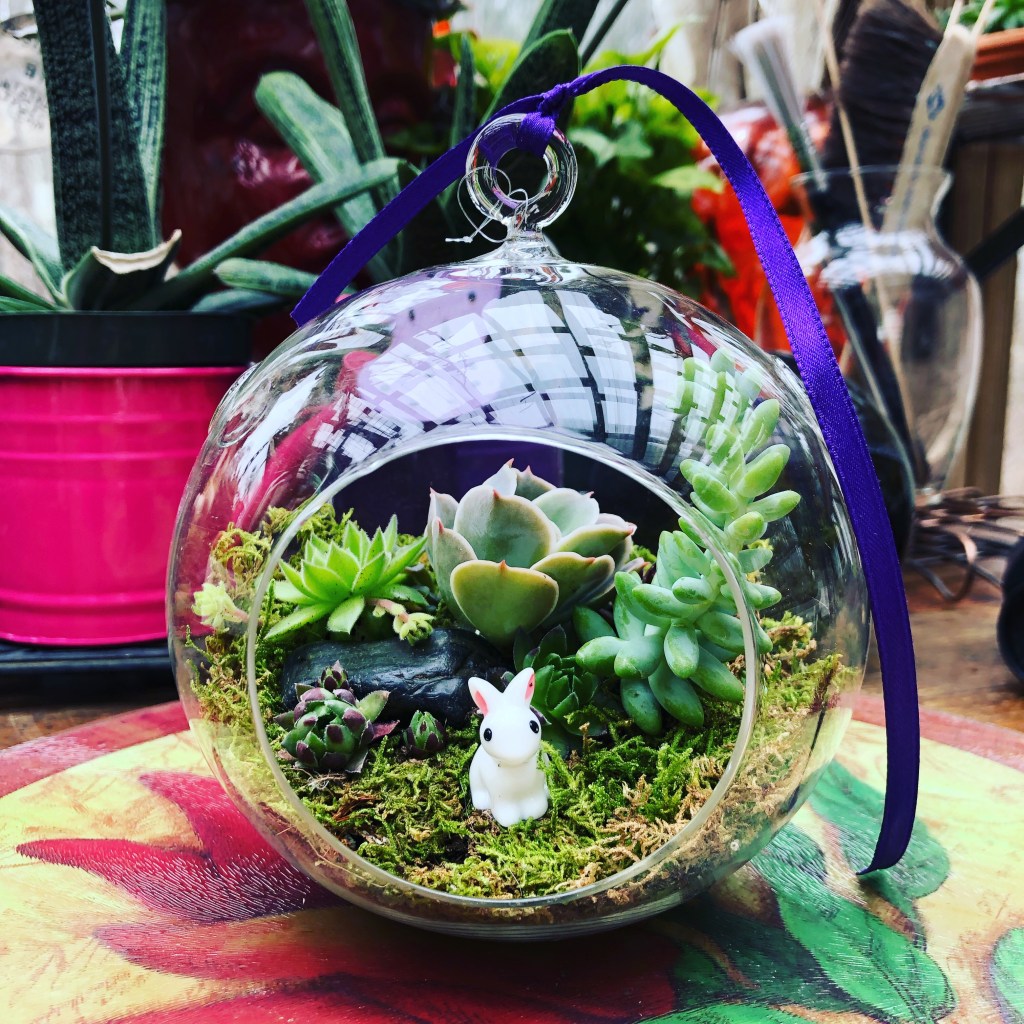
Add items you have on hand. Perhaps you have some nice stones or twigs to add. A pretty ribbon to hang it with or twine. You are only limited by your imagination. These make adorable gifts for your Easter dinner hostess. Every once in a while, add a tiny bit of moisture to the moss and let it dry between. You do not need to water it often. Only enough for the tiny root hairs of the small succulent plants. I’m talking less than a shot glass of water. Less is more with smaller hanging glass globes. I do not recommend spraying the moss with mists of water, it will only get the glass stained. The idea is minimal damp moss at times. If you wet it too much, things will rot.
Sometimes maneuvering my fingers into the globes was difficult. Tweezers or long bamboo like sticks can help. Use them to position items as needed. Once completed, hang them in indirect sunlight inside the home and away from super cold drafts. Remember, when including live plants, glass vessels are like mini environments. The open hole allows for air, and you will lightly water the moss at times. Don’t overdo the watering. If you happen to put too much water in there, carefully tip your glass globe to drain it out. Allow the moss to completely dry between watering cycles. Succulents can go for weeks without water.
The next project is making a centerpiece with live perennial plants.
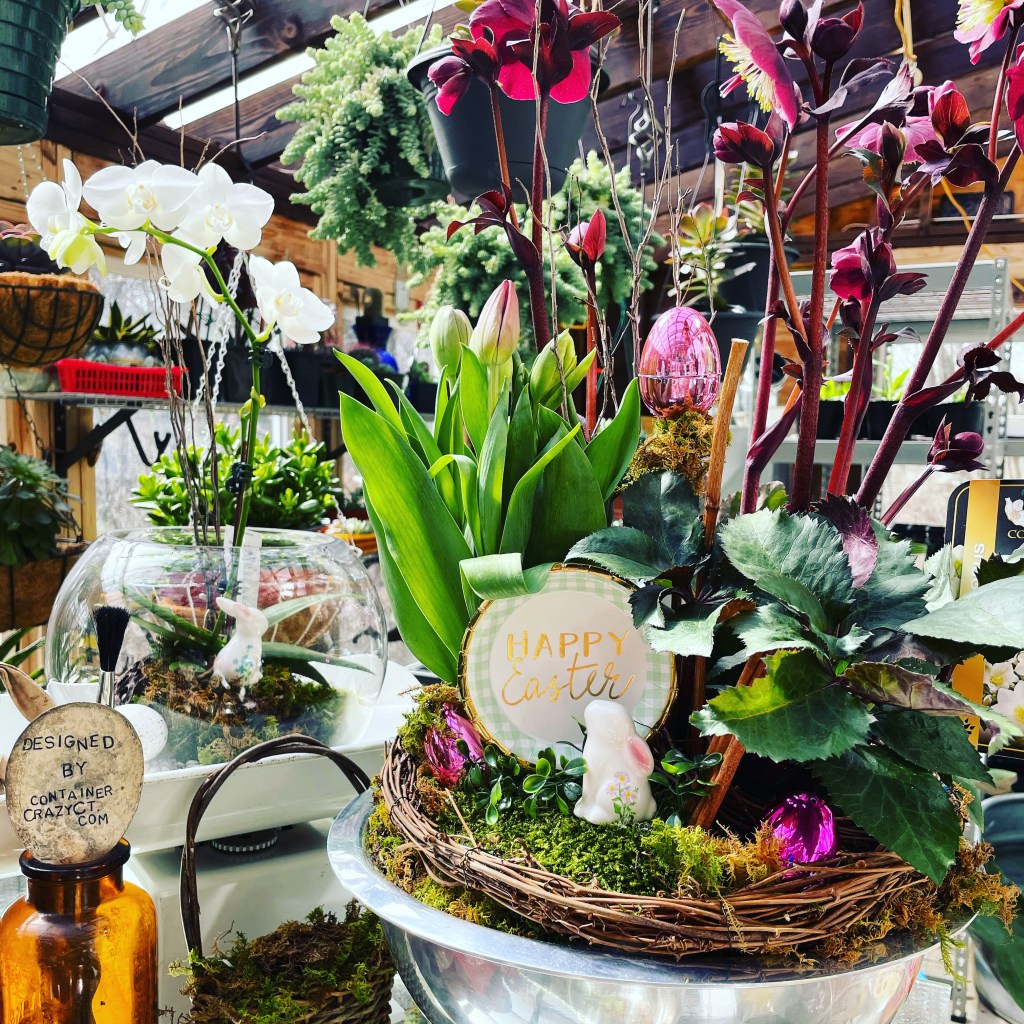
In the background, you can see a terrarium fishbowl. Just like the hanging glass globes, the base components are important. Use the potting mix (well-draining types), activated horticulture charcoal, and live moss. A drainage layer, like pea gravel is beneficial as well below all of that. You can see I put a live orchard in the glass fishbowl terrarium. The pea gravel is important when using larger plants to allow for drainage in the vessel you use.
The last project shown is a big silver bowl with two plants. One is a Helleborus perennial. You start to see these at nurseries and stores during Easter time. Also commonly available are tulips. I just tucked each of these live plants into the silver bowl in their original growing nursery pots. Then, I used moss to cover that up. Then the fun part is just adding your own Easter decoration. By the way, the perennial (common name is lenten rose) takes partial to full shade and flowers March thru April. The leaves are evergreen and will stay green outdoors. They are one of the earliest perennials to bloom. They are also deer resistant.
Hopefully this post inspired you for the Easter season to come. Go get your supplies now so you can enjoy making them before the season arrives.
Cathy Testa
Date of this post: 2/10/2026
Cathy had a small business focused on container gardening. Today she and her husband are retired. They like to go camping so camping topics are being added to this blog site. Also, Cathy likes making holiday decor and is sharing some of her creations here as well. Some with plants and some without! Thank you for visiting.