WALK & TALK HOME GARDENS GROUP – New!

2 Comments
Photo Attribution Below

Photo Attribution Below

Hi Everyone,

It occurred to me one day as I was walking around my yard with my sister in law how many little tidbits we shared with each other about plants and gardening just in general conversation. The same situation occurred when I was at my sister’s house recently checking out how she was starting her vegetable garden again for the season.  And of course, walking and talking about plants happens when visiting friends’ homes too.

So many of us, whether new to gardening or experienced, have ideas and tips to share when we feel open to do so and are having spontaneous conversations about what we have done in our yards and with our gardens or container gardens.

So this spring season of 2014, I’m kicking off an “informal, no pressure” type of group for anyone interested to “Walk & Talk Home Gardens.”

And I’m happy to report, two volunteers have already offered to have an hour at their home, which I’m internally grateful!

The Kickoff Dates:

  • First date is June 7, Saturday, 2:30 pm (Wethersfield, CT)
  • Second date is July 26, Saturday, 10:00 am (Enfield, CT)
  • Third date — to be announced — the theme will be “A Shady Nook”.
  • See Garden Club Talks for information on these two kickoff dates.

The Ground Rules:

We want to keep this simple and no pressure – so we are instituting some ground rules, and here they are:

#1 – Perfect or Pathetic

We truly don’t care if you have a showcase garden or one that is small and untidy – SERIOUSLY.

There are way too many times when I’ve met homeowners, gardeners, or professional gardeners, where people instinctively criticize their gardens.  It is a gardener’s bad habit.  They see a little fault and point it out. I do it too!

So please, if you have even the smallest of space, don’t hesitate to offer an hour at your home.  And if you have an exceptional garden, don’t think you have to spruce it up – which is what I’ve seen done so many times for professional garden tours, when in my opinion, their gardens are already perfect.

“This group is not a garden tour – it is a walk & talk chat opportunity.”

Maybe you have a recommendation on where to get seeds you have tried in your garden, perhaps you came up with some trick in the garden no one has seen before, or you tried a new plant.

We all have techniques we’ve tried out – and it is fun to talk about it. So much can be learned in one statement of something said while walking around with no pressure!!

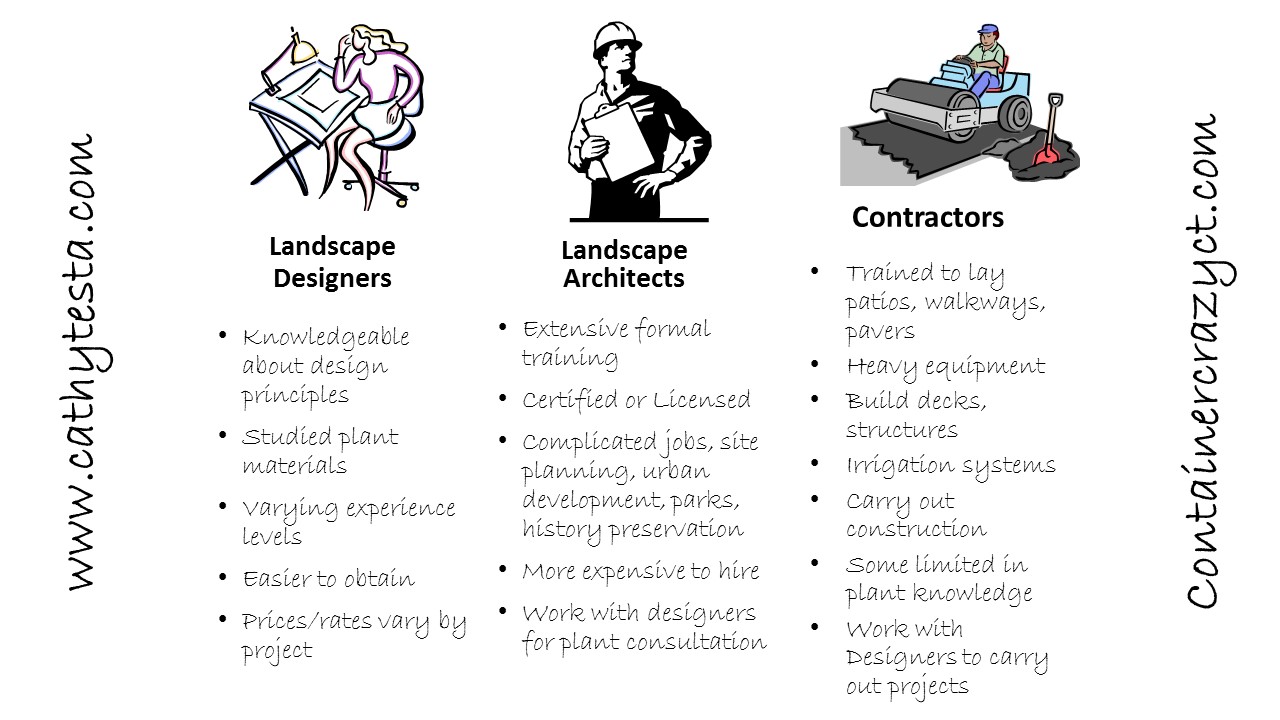
Oh by the way, this group is for any type of gardening and of course, container gardening too.

Maybe you had some recent work done to your yard.

For example, last year a friend told me how she removed huge boulders with the help of her uncle and they totally cleared her yard which is now open.  Some of the cool things they did was create stone furniture with the salvaged boulders – and she had such an experience to share because she worked on the project with her hired help.  Any type of situation is doable for this group – even those “under construction” or not finished.  And if you do have an amazing wonderful garden, these are on the list too.

#2 – Only One Hour

As a host – you only need to commit one hour of time – and we are even going to go as far to say, if you have an emergency, a scheduling dilemma, or whatever – you have the right to change or cancel your hour.  Of course, we want to avoid changes to the schedule because there are only 5.5 months of gardening to enjoy – but we want this to be flexible and no pressure.  We all have very busy schedules and understand that sometimes things come up we can not control.

#3 – No Food Required

If you are a host – you do not need to put out lemonade or anything during your hour – we don’t want any pressure on your part – you are already showing us a part of your world and that is enough.  Let’s keep this informal and simple. No work on your part – I know how hard this is to do because I like to put out goodies when I have people at my home, but we don’t want any kind of expense on your part, or pressure. It’s optional.

#5 – Confidentiality & Respect

A confidentiality form will be signed by attendees – Just Kidding!  But because this is for enjoyment, not for “expertise” or “judgement,” we ask that you respect the homeowner’s property and keep in mind these walk and talks are not about someone showing you a perfect situation, but to have a nice time and see some tips.

To Attend:

There are no fees, but we would like to know a count of who plans to attend.

So to sign up:

Once you have indicated you would like to join the hour, the Walk & Talk home address will be sent to you.

To Volunteer:

Call me at 860-977-9473 and I can explain more – please do not hesitate to do so.

It’s a great way to meet friends and share for fun.

Thank you so much,

Cathy Testa
www.cathytesta.com
ContainerCrazyCT.com
860-977-9473
containercathy@gmail.com

Photo Attribution:  “Garden Gate with Flowers” by debspoons, courtesy of FreeDigitalImages.net


Questionnaire for the Tween Considering Horticulture and Plants as a Future Career

Leave a comment

I provide small garden designs for homeowners, container gardens installs for homes and businesses, and offer garden talks and classes at various locations on horticulture topics, and sometimes sell plants, garden art, and container gardens at farmer’s markets. It’s a job I love to do and feel very lucky to enjoy, especially this time of year when May arrives. So, I thought why not share a questionnaire I completed for a Career Day at a middle school.  I attended the event along with other small business people to share what and how we do our jobs. If you are a tween or young student considering the world of horticulture as a future career – this may be of interest to you, or if you are a teacher wanting additional information about this career choice for your students, here it is.  Feel free to ask for more details.

Questionnaire

Be Respectful

How do you deal with difficult customers? – The rule stands!  The Customer is Always Right.  NO customer is difficult –they are presenting you with a challenge, make it fun and solve what it is they need; ask more questions to clarify; and also show them your knowledge and expertise, and they will learn to calm down if they are nervous or difficult when they see you have the experience and knowledge behind what you do.

If you supervise/manage people, what additional skills do you need?  — To be a leader, you must have excellent personality skills and organizational skills, sometimes people are born with these traits, and some styles cannot be learned.  To motivate your staff is key and the key is to also know what drives them — and each person has different ways they want to be rewarded. It could be pay, praise, or other things like that.

What makes a place a great place to work? – When you feel valued as an employee, are listened to, can contribute your knowledge and skills, – and anytime you do something that is like a HOBBY for a job – you will feel like every day is “not work”, but fun!  I love what I do, it is not work most times because I enjoy it so much. Think about something you do today as a hobby, and think if it could be a career.

Be Responsible

What can happen should you make a mistake?  — Easy, correct it immediately as soon as you know, apologize, learn from it and move forward.

What happens if you don’t work the hours you are expected to work?  — You get fired or let go.  You can’t treat a job like it is a game.., it is your responsibility to follow whatever guidelines a business establishes for their employees.  Basically failing to show equals failure.  Never forget, there is always someone else in line that can do the job you are taking advantage of – so if you don’t show up – someone else will.  If you like your job, respect the rules.

Be Productive

What education/job training do you need for your position?  –– See my handout – definitely horticulture, botany, knowing the plants are a must in the field of horticulture.  And learning or having a natural artistic ability is very important for design – it is a science plus an art.  I knew I had to learn the plants, how they grow, nutrients, soil, and the plants themselves – you cannot talk about plants if you don’t know their botanical facts and features.

What skills do you need for your job?  — Organizational skills, the hort world is fast paced, short season, in winter it is inactive or at rest, so you must be on-top of your game during the busy seasons, or you lose out on making money in the seasonal time frame. Business and financial management is also key if you want to start your own business.  And personal/interpersonal skills, plants are usually planted “by people” and thus you have to deal with people.  Introverts are not usually good designers for landscapes, you need to be able to talk with and understand your customers and clients.  You also need to use technology, applications, and take the time to read new materials or reference information about plants, marketing of plants, and any new news on things out there – say an invasive bug is out there on trees, you have to know to help solve clients problems with their plants as part of the job.  You need to know how to answer questions – because when designing, it isn’t just about the design, it includes the health of the plants, how they grow, etc.  Knowing how to do taxes and setting up your business legally is another skill you have to learn.

How are you measured on your productivity?  — I have my own business, so my productivity is based on results, how much I sell and also I tend to stay focused every day, and don’t let home distractions get in the way of my daily work for my business.

How frequently do you go for additional training?  – Probably every quarter – taking classes via things like Uconn conferences every winter, reading A LOT on my own via design books and plant references, reading a lot of blogs and college resource/reference databases on plants.  There are so many plants out there – you could learn one every single day and still not know them all by the time you die!  Seriously, it is almost like being a doctor having to know about all the diseases out there – the list is endless.  I took a 2-year Horticulture degree first, then gained good experience at nurseries, then went off on my own to do designs, then took the MASTER GARDENER program and I attend a lot of sessions at The CT Horticultural Society (FREE TO STUDENTS, CHECK IT OUT: WWW.CTHORT.ORG) and through other hort organizations and go to lots of big garden shows.

What skills do you use in your job that would surprise people? – This is a tough one to answer, I guess for me, surprising is that I had to learn how to hitch a big trailer to my big truck and how to unload materials from it and as a woman, some of my friends are surprised when they see me show up using equipment or power tools – this field of horticulture is expanding in the woman world, lots of women run big equipment for install jobs now, where years ago, it was mostly men contractors out there.  So if you are female, do not let that stop you!  It is an equal opportunity hort world!

What am I learning now that will be helpful for me in this career field?  –– Technology.  There are so many new gadgets coming out – all the apps now for iPhones really help to quickly reference information about plants, bugs on plants, diseases on plants, and tools like the color wheel app that may be used to select beautiful color combinations for your garden designs, I believe you – the younger generation of students – will be the ones teaching us older hort people because you are faster at learning the technology than we are!  Landscape programs are really useful too.  I just loaded the Square Up program in seconds the other night to accept credit cards when I sell plants at farmers markets for example, the technology moves at warp speeds, keeping up with it is the latest new thing I’m learning.

Be Safe

What can happen should you make a mistake?  — Harmful plants such as invasive can be a big problem if planted in someone’s yard, you have to know if a plant can creep and literally take over the whole landscape – that could be a big issue.  Also, Call Before You Dig, warning clients of proper procedures before they plant is critical.  Knowing your limitations and expertise, knowing how to direct clients to specialists in certain aspects of landscaping, such as hardscapes, paver, building materials, for example.  If you make a mistake, someone can get hurt so do your research first and advise appropriate to your clients.  Design does have risks, especially if there are building materials, ground problems in the area, water runoff to rivers is critical, you have to know if you could pollute a water source with fertilizers or underground pipes, stuff like that.

Do you have any security/safety measures in place?  — I don’t handle installations so my risk is limited.  If I had a crew, I would get the appropriate insurance and licensing.  It is critical to protect yourself in the event someone gets hurt on the job, etc.

Handouts


Slide1 Slide3 Slide2

Presentation

Cathy Testa Career Fair Hort and Plant World PDF File.  For the complete presentation, contact Cathy Testa at containercathy@gmail.com or 860-977-9473.   Written by Cathy Testa

Upcoming Events:

Don’t forget to check out Cathy T’s Container Gardening Class on May 24, 2014 in Broad Brook, CT.  See also Cathy T’s Garden Talks.

Please share or join this blog by entering your email on the sidebar, you will get updates via email and special offers or coupons of upcoming classes as a Cathy T blog follower!

← Back

Thank you for your response. ✨

Top Photo Attribution: “Student icons set” By digitalart, published on 24 July 2011 (Stock Image – image ID: 10051001)

Happy Easter Everyone – Hope It’s Hopping!

Leave a comment

 Photo by Cathy Testa

Photo by Cathy Testa

Isn’t this bunny adorable?!!  I spotted him (or her?) at the Ellington Farmers Market last summer and snapped this picture – too cute.

Easter weekend is almost here and many of us are excited to spend time with our families, so this post is to say, “Enjoy Your Easter Weekend” — and let it warm up so we can sit outside during the weekend’s activities.

Our April is coming to a close soon, and May will be here – when we will be busy as bunnies in our gardens!

 Photo Courtesy of FreeDigitalImages.net

Photo Courtesy of FreeDigitalImages.net

Cathy Testa
ContainerCrazyCT.com
http://www.cathytesta.com
860-977-9473
containercathy@gmail.com

5 Things You Can Do Right Now to Get Ready for Spring!

7 Comments

#1 Go to the Flower and Garden Show this week in Hartford, CT

Go to the flower and garden show in Hartford, CT being held this week starting Thursday, Feb. 20th. Just walking into the building will get your senses thinking about spring and less about snow as you see, hear, smell, and experience the plants and plant offerings by the many exhibitors.  I plan to go – probably on Friday.  Got the day off?  Want to join me, just email me at containercathy@gmail.com.  There is parking adjacent to the convention center.  After parking, find your way through the parking garage to the main entrance and take the escalators up to the show floor. Don’t forget to visit the seminar speakers on the floor above the show floor too.  Food and wine is available at the show each year, and check in with your local nurseries before you go for tickets – they often offer discounted tickets by a couple bucks.  If you can’t make it during a week day, no worries – it runs through the weekend, and the weather is looking warmer by Friday.

#2 Visit Cathy T’s new Pinboards on Succulents and Tropicals

Why?  Because in May, Cathy T is offering a fun class on how to make container gardens with succulents, and will be having a Tropical Talk too.  To get inspired about this first annual BIG CONTAINER GARDEN PARTY to be held on Broad Brook, CT, visit her new pinboards right now, note the date on your calendar, and register today.  These pinboards will get you at least thinking about upcoming fun of creating beautiful containers for your outdoor spaces in the spring and summer. The possibilities are endless in the style and ways you can mix up plants for the season.

To learn more details about this class, see the pages listed under Cathy T’s Classes or under Container Gardens on the menu of this blog.  Share the information too with any local friends interested.

#3 Scout Containers for the Upcoming Season

Now could be a very good time indeed to think about containers or patio pots for not, only Cathy T’s BIG CONTAINER GARDEN PARTY (class) in May, but in general for your container gardening coming up in a matter of a month of so!  We may have snow right now, but it will begin to melt as soon as temps warm up – so why not rummage your own stock of goodies, or start looking for unique containers at the flower show this weekend?? – and of course, the tag sales that kick off in the spring. It is when you least expect it that you find a vintage item, a repurposed pot, or something sitting in your garage or basement right now that can be a container in spring and summer – old fancy shoes or pumps – heck, before tossing them, think – could this be a great container for succulents at Cathy T’s class?  I think yes!

#4 Think about Attending Other Garden Related Conferences

Did you know there is a great ELA conference next week in downtown Springfield, MA for plant enthusiasts and ground huggers?  Well, I say ground huggers in a very loving way – the focus at this conference is usually on natural horticultural practices and sustainability.  Is there any other kind?!!   The speakers at this conference are highly educated and the attendees inspiring for many are hort people in the business, but this doesn’t mean an avid gardener expanding their knowledge base and horizons can not attend too. If interested, visit their website for all the details. There is parking near the conference location, and places in downtown to eat if you want to adventure beyond the cafe onsite at this conference.  Do something different, and give this conference a try, or don’t forget other flower shows going on, such as the Rhode Island show (held same time as Hartford’s) or Boston show in March or UCONN’s Garden Conference in Storrs, CT.  You will be amazed how inspiring it can feel to attend a conference you haven’t tried before – you may not know what’s out there – but if you go – it surely makes you more ready for spring!  And many are in locations where you can adventure into the city and enjoy other places of interest if you make a weekend out of it, or stay overnight.

#5 Start some Seeds indoors, or Force some Pretty Bulbs:

Herb Seeds (Photo by Cathy Testa)

Herb Seeds (Photo by Cathy Testa)

It may feel too early to start seeds, but heck if you pot up a few herb seeds in your home or grow an Amaryllis bulb, like I did recently inside the home – you start to feel inspired for the growing days of spring ahead when you see the bulb’s flowers open, or see the seeds popping up in the soil.  So go to your local supply shop, get some seed starting potting mix and a couple packets of seeds, put them in some pots, place by a sunny window sill, and watch it grow.

Photo by Cathy Testa, Panical Hydrangea Covered in Snow

Photo by Cathy Testa, Hydrangea Covered in Snow

Or if that doesn’t suit your fancy, get bundled up, walk your property and take some photos of plants in the snow covered with icicles, fluffy snow, and enjoy the shadows against the snow cast by branches.  This cheers me up and hopefully will do so for you.  By the way, if any of your shrubs are toppling over due to the weight of sticky snow, it is a good idea to gently shake the excess snow off the branches so they don’t break or bend too harshly.

Happy Monday Everyone,

Cathy Testa

2013 in Review of this Blog

2 Comments

The WordPress.com stats helper monkeys prepared a 2013 annual report for this blog.

Here’s an excerpt:

The concert hall at the Sydney Opera House holds 2,700 people. This blog was viewed about 27,000 times in 2013. If it were a concert at Sydney Opera House, it would take about 10 sold-out performances for that many people to see it.

In 2013, there were 142 new posts, growing the total archive of this blog to 266 posts. There were 956 pictures uploaded, taking up a total of 2 GB. That’s about 3 pictures per day.

The busiest day of the year was December 7th with 256 views. The most popular post that day was Three Easy Ways to Use Mesh Ribbon for Holiday Decorating.

https://cathytesta.wordpress.com/2013/12/07/counting-the-final-hours-til-the-evergreens-class-begins/  —>This was the post on your most popular recent day of December 7th, 2013.

Attractions in 2013

These are the posts that got the most views in 2013.

How did they find this blog?

The top referring sites in 2013 were:

  1. facebook.com
  2. pinterest.com
  3. cathytesta.com
  4. twitter.com
  5. cthort.org

Some visitors came searching, mostly for petasites japonicus, moss topiary mannequin heads, sansevieria, picea glauca conica, and musa basjoo.  This means people like to learn about plants – so this blog will focus more on plant topics in 2014.  Be sure to visit – look under “The Plants” link above in 2014 for more soon to follow.

Where did they come from?

Most visitors came from The United States. Canada & The United Kingdom were not far behind.  Why the Canada – perhaps the many relatives of Cathy T?  Why the UK – because Cathy T likes reading about gardeners in the UK and they’ve noticed Cathy T’s blog too.  Pretty cool, reach the world via blogging!

Who were they?

The most commented on post in 2013 was Cultivating a Future Farmer at Local Farmers Markets on this blog.

Most Active Commenters Are:

And most importantly, Cathy Testa’s 5 most active commenters on this blog, “Container Crazy Cathy T“, continue to be Bonnie (another blogger for CT – check her site out!), Dianne T, Gwennies Garden, Joyful Reflections Photography (love her photography work too!), and Jenny (another fellow blogger).

A BIG HUGE THANK YOU FOR ALWAYS PROVIDING SUPPORTING AND FEEDBACK – KEEP IT COMING! 🙂

Thank you to all!

Thank you to my followers, clients, friends, gardening buddies, and family.  If you are a former or future class attendee of Cathy T’s offerings, remember by clicking FOLLOW BLOG VIA EMAIL (see right menu list), you will receive coupons for future events.  Big event coming up in May 2014 is the “THE BIG CONTAINER GARDEN CLASS” in Broad Brook, CT.

To sign up, see the CLASSES links at the top of this blog or email containercathy@gmail.com.

Happy New Year.  Let’s hope 2014 continues to bring us growing opportunities in our lives and gardens.

Cathy Testa

QUIET TIME

2 Comments

Evergreen Creations_0036

May your Holiday be as Sparkly as Your Ornaments 

All will be quiet on the “Container Crazy Cathy T” blog until 2014 arrives  

In the meantime:

Enjoy. Peace. Love. 

Be Safe and Merry,

  Cathy Testa

The Unexpected Advantages of Using Boxwood to Make Wreaths

4 Comments

There is no doubt mixing various fresh evergreens cuttings, snips and tips makes a beautiful wreath or kissing ball.  It will add texture, color differences, and scents to your holiday creation – but using a single green, such as Boxwood, is also stunning because it creates a classic look and is easier to assemble, taking less time if you are in a hurry.  And using Boxwood has some other unexpected advantages.

Six Advantages of Using Boxwood:

  1. No sap = No sticky hands
  2. Elegant dark green color = Classic look
  3. Faster Assembly = No need to wire batches
  4. Lighter weight = Easier to hang
  5. Easy to re-hydrate = If dry after harvest
  6. Can be Preserved = Lasts forever

Minor Downfalls:

  1. No fresh scent like Pine or Balsam
  2. One of the more expensive greens to buy
  3. May yellow a tad over time if gets wet outdoors

Evergreen Creations_0035

To make, you will need:

  1. Snips or pruners
  2. Green florist wire
  3. Boxwood greens (4-6″ cuttings)
  4. Wreath frame (13″ and 9″ used here)
  5. Ribbon (1.5″ width used) and ornamental decor
  6. Green zip ties (cable ties)
  7. Holiday background music (and perhaps a glass of wine)

Evergreen Creations_0025

Steps:

Prepare your batches of the boxwood greens first, cutting them at equal lengths.  About 6″ tips were used.  One of the other benefits, not mentioned above, is usually the boxwood pieces are full so you can easily get good cuttings of a decent fullness per each stem.  For the 16″ wreath, about 12-15″ pieces are needed.  The more you use, fuller the wreath.  It is easier if you get them all lined up a ready before you start attaching to the wreath frame.  For the 9″ wreath, about 8-10″ pieces are needed.

Evergreen Creations_0026

Wire the first piece of boxwood to your wreath frame with the florist wire.  Tightly secure to the wreath frame.  Once attached, move the wire down the wreath to the next position.  You may have to twine the wire between the first batch and second batch on the wreath, but this is optional.  It just makes the wire more smooth as you continue.

Be sure to put the next batch over the stems of the first batch so they are hidden well, and do not show.

Do not cut the wire as you work.  Keep the roll going as you move across the wreath frame.

Continue around the wreath, spacing equally each boxwood piece, and being sure to cover the prior batches stems each time.

When you arrive to the final batch where you started on the wreath frame, tuck the last batch under the first batch to hide the stems.

Evergreen Creations_0027

Back Side:

This part is optional, but if you wish to hide the back part of the wreath frame, preserved Spanish moss works well.  Heat up your glue gun and melt the glue on the back.  Attach bunches of the moss around the back side.  You could also attach felt, or some other decorative material.  Because this frame is not green, it showed up a bit but still worked very well.

Evergreen Creations_0028

Bow:

Attach a piece of ribbon to the top of the wreath (about 10″ long).  Make a bow and string the ribbon through one of the loops on the bow then pull tightly closed to attach the bow.  This will attach the bow, and create a place to attach a hook on the back.  You can either attach a hook to the bow ribbon on the back side, or attach a hook by using several zip ties.  The hook can be attached in the beginning or at the end – because sometimes you will find one position of the wreath looks best after it is finished.  Or if you have a place where it doesn’t look full, you may want to position the bow there to hide it.

Evergreen Creations_0029

Evergreen Creations_0032

Decor:

Go crazy or simple.  For this wreath, some simple weather proof small decor apples were picked in and a dab of hot glue was put on the back side to secure each apple.

Cluster glittery ornaments right under the bow to hang in the center.  Use a zip tie or wire to attach them to the base of the ribbon.

Because the Boxwood greens are a nice dark green, bright red looked amazing against this dark green color, so a bright red ornament was selected, along with two green ornaments.  On the smaller matching wreath, only one red ornament was included.

Evergreen Creations_0030

Matching Wreath:

A second smaller wreath was made to match the first.  This will be adorable for the recipient of these wreaths.  And because the Boxwood greens is simple, having a second smaller wreath adds that special touch.

Evergreen Creations_0031

Evergreen Creations_0033

Re-hydrating or Preserving Boxwood Greens:

If you have harvested your Boxwood greens and they appear a bit dry, you can rehydrate them by soaking in water for about an hour, and then lay them out to dry on towels.  Do not assemble the greens when wet – this will cause rot.

And did you know?  You can preserve boxwood greens!  Here is a link on the technique:  Preserving Boxwood Greens by CraftingRebellion blog.  Also, boxwood can be treated with Wilt-pruf to reduce drying of the greens prior to assembly.

Written by Cathy Testa

Evergreen Creations_0034

Bottling Intoxicating Scents of Fresh Evergreens by Making Potpourri

3 Comments

Sweeping up the floor of my classroom after an Evergreen Creations Class, a thought occurred to me.  I should collect some of the smaller cut pieces which fell to the floor to make potpourri.

And it was then I remembered, I picked up some mason jar covers at a Vintage Bazaar this summer with a precut pattern in them. They will be perfect.

Using some mason jars I had in stock, I filled the jars with bits and pieces of the greens. It was amazing how quickly the scent permeated from the jar.

Most people enjoy the scent of freshly cut evergreens – especially because it brings back memories.  Scent being one of the most powerful to remind you of something from the past.

The Cornell Cooperative Extension has an article on their website which states the feeling of evergreen aromas perfectly.

“Of all the memorable aromas of the holiday season, nothing evokes its spirit like the perfume of fresh-cut evergreen. Every species of conifer has its own slightly different complex of terpenols and esters that account for that “piney woods” perfume. While all natural Christmas trees share many of the same aromatic compounds, some people develop a preference for the smell of a certain type of tree, possibly the one they remember from childhood. Even if it turns out that using a polyvinyl chloride Christmas tree is more eco-friendly than using a natural one, no chemistry lab will ever quite match the fragrance of fresh pine, fir or spruce in the living room.” – Paul Hetzler, Cornell Cooperative Extension of St. Lawrence County

Evergreen Creations_0012

Items used to make Homemade Evergreen Potpourri:

  1. Mason Jars
  2. Mason Jar Covers with Holes in the top
  3. Snips or pruners
  4. Decorative Ribbon
  5. Preserved Moss
  6. Pine cones
  7. Holly berries
  8. Fresh evergreens bits and pieces

The steps are pretty straight forward.  Gather up small snips and clips of evergreens, and put them into the mason jar.  Make sure the cuttings are not wet because they will rot.  Make sure the mason jar is not wet inside either if you washed it in soapy water prior.

Evergreen Creations_0015

Add some preserved moss to the top for a decorative look or to eliminate any potential spillage from the cover of needles.

Evergreen Creations_0014

Speaking of needles, got some on your table that fell off?  Put those in the jar too.

Evergreen Creations_0013

Add a couple cones to make it pretty.  Perhaps a snip or two of holly with the red berries as well.  I also placed one item on top of the preserved moss, like a single holly leaf.

Evergreen Creations_0016

Cover it with a cover that has holes so the scent will release.  Add a decorative ribbon or tinsel wire and perhaps an ornament.

Evergreen Creations_0017

Keep in a cold place until you give to a friend, use as a table setting pieces, or put in a room to enjoy right away.  Again, I set one down at one point after it was finished and realized as I was sitting there the scent was strong right away.  I don’t think scented oil is required, but it is an option if you want it to last past the holidays.

Evergreen Creations_0022

Open Studio Days

That same day, as I bottled up these cute and highly scented potpourri jars, a new friend, Cathy, attended my Open Studio Days, where by appointment you get the valuable one-on-one opportunity to learn how to make an evergreen Kissing Ball, wreath, candle centerpiece or other items for the holidays.

Cathy called me up to inquire about my sessions and how they work.  When I asked how she heard about my classes, she said she noticed some kissing balls hanging at a house in another town, but had never seen them in her area.  She wondered how they were made, and so she Googled it, and found my appearance on the CT Style television program when I talked about making them last year.

Homemade items are big on Cathy’s list – and I couldn’t agree more.  She said it is so much more valuable and special for so many reasons.  They are well-made (with love) and unique.  This is absolutely true with kissing balls.  Each and every one made in my Evergreens Creations Classes are one of a kind.  And mixed with lots of various evergreens creating amazing textures – and yes, of course, evergreen scents!

So while Cathy worked on her kissing ball, I made a small wreath.

Here’s are the items I used to make the small wreath:

  1. 10″ grapevine wreath
  2. 2-3″ cuttings of mixed evergreens (pine, juniper, balsam, and more)
  3. green florist wire (on a roll)
  4. green zip ties (cable ties)
  5. pruners
  6. ribbon

Start by cutting your greens and batching them together with florist wire.  Use about 3 snips of evergreens for each bundle.

Evergreen Creations_0018

Remember to lay the most decorative green on the top layer, as done with the blue berried juniper, so it shows up on the wreath.

Set your bundles aside.  You will need at least 8 bundles.  Each is twined at the stem end with green florist wire, wrapping around several times so they are well secured.

Evergreen Creations_0019

Attach the first bundle to your wreath with a zip tie.  Why, you may ask – a zip tie and not the florist wire?  Well, I feel it is really secure that way as the starting point.  And the zip tie is easily threaded through the grape vine.  Sometimes it is easier than using the wire.

However, if you decide to use wire instead.  Attach it to the grapevine for your first bundle.  Keep the wire attached to the wreath as you continue around the wreath to attach your pre-cut evergreen bundles.  You don’t have to stop to cut wire for each bundle.

Evergreen Creations_0021

As you attach each bundle of greens, be sure to position it to cover the zip tie or wire of the previous batch.

I started using my roll of green florist wire to continue.  Keeping the wire attached to the wreath frame and winding it over the frame as I moved to the next batch of greens.

Evergreen Creations_0022

In between working on my little wreath, I would stop to help Cathy cut greens for her kissing ball.  She was proceeding very well and had lots of questions.  This is when I realized having the Open Studio Days enables more individual attention for the student versus the large class held on the first weekend in December.

The large class is lots of fun, and it will remain in session every year – but should you be the type of person wanting more quiet time and some personalized help, the Open Studio days, following the Evergreens Creation Class, is your best option.

Cathy and I spent 3 hours – yes 3 hours chatting and discussing upcoming holidays as we created.  After Cathy was all done creating her kissing ball, we decided on a sparkly gold wide mesh ribbon.  It went on the top with tails on the bottom.  The tails included gold cord which made it more dramatic.  This set the color decor theme for her kissing ball.

We picked out small round gold ball ornaments to attach on the needles and a few decorative florist picks.  And, we also added a new item I had in my decor stock called, golden rain.  It is beautiful, thin long strands of sparkling gold which hangs from a central long pick.  Inserting it on the top of the ball to drip over the sides really finished off the look.  We both just loved it.

Evergreen Creations_0023

Cathy considered adding some golden bows, but when she asked if she should, I told her no – I thought it was just right and too much might be overdoing it.  She agreed.

I think Cathy will be the talk of the town, because she said none of her neighbors have kissing balls.  When the outdoor lights hit that ball, the sparkling from the golden decor will evoke the feeling of the holiday spirit, just as scents of the evergreens will do.

Enjoy your weekend everyone!

P.S.  The evergreen potpourri jars make great hostess gifts – and you may be a recipient soon. 😉

Cathy Testa

Evergreen Creations_0020

Learning More at Evergreen Holiday Creations Classes

2 Comments

And I was the learner!

Holding classes on how to make Evergreens Creations has been fun, challenging, exciting, nerve racking, and more – but I didn’t expect that I would learn so much from the attendees in addition to teaching them.

Over time, every year, as I continue to expand this class in December, I find I learn something new – whether it is how one makes a bow a special way, or how a person may consider using a new tool for their creations, or in one case recently, the husband of an attendee brought along some heavy wire to show me how it can be used for hooks in the kissing balls.

Evergreen Creations_0008

Here it is in the above photo.  It is actually used for electric fencing.  It is easy to cut, bend, and very strong.  So next year, I will take the suggestion and try to find this material to be used as hooks for the Evergreen Holiday Kissing Balls.  He gave me a couple pieces to test out, so we will see.  I did like how easy it was to bend, and it beats cutting wire coat hangers and straightening them out.

Evergreen Creations_0009

Skip and his wife, Cindy, attended an Open Studio Day this week where anyone can sign up by appointment to make an Evergreen Creation in my classroom with my instruction and theirs (LOL).  When Cindy asked if her husband could tag along, especially because of the driving in the snow that day, I said, “Sure.”

And I also learned something else by having a hubby here with a first-time attendee.

He was available to help Cindy with the snips and cuttings of various fresh evergreens.  And as you can see, he did that with a big smile.

I had an “Ah-ha moment.”  Maybe husbands should attend my classes to help their wives. Former and ongoing attendees know by the end of class, your hands can be sticky and worn out from all the tips needed to make a kissing ball.

Evergreen Creations_0010

This time of year, I end up with cuts, sore spots, and difficult to remove sap on my hands from all the various evergreens used in my classes and for custom orders.

My hands get tired.  Maybe that is why I have such a darn hard time trying to make bows using the old fashioned twist and turn method for bow making.

Cindy told me she has made beautiful bows for many of her friends in years past, but due to some troubles with her hands, she no longer can make them that way.  I have difficulty with my hands too when doing the floral technique of bow making with the pinch, twist, turn method.  I never seem to be able to keep in tight in my hands either.

So during my classes, I share a trick on how to make bows with a simpler method.  This is what the bow ends up looking like.

Evergreen Creations_0011

It is suitable, and you can make two, then bunch them together to make it a bigger bow if you want to, or just create the one – but they ain’t as elaborate as they could be or should be.

I especially love the BIG huge bows on the Ellen Degeneres show.  I just twittered her this morning to ask she show us how they make those gorgeous bows which sit on top of the big gift boxes she displays during her 12-Day Giveaways.  Like yah, I doubt she will find my request in her millions of tweets.  But that would be sweet if she did – after all she always helps those in need – Help Ellen, I can’t make a big pretty bow.  Well, of course, there are bigger things in life to worry about – but this time of year, big bows are a must-do, right?  Ellen, won’t you show us how you make those bows on the show?  Pleeeaase.

In the photo above, you can see I also create tails for the bottom of the bow.  Attaching them to a green florist pick with the wire is helpful and then I just insert it into the bottom of the big ball at the end.  This really finishes off the look.

During my annual Kissing Ball Making Class, one of my regular attendees, Maryse, is an excellent bow maker.  So I asked her if she could help some of the attendees make bows which she gladly did for me.  She also tried out a bow making device, but found it cumbersome, so for now, I’m still struggling with bow making – but I will say this – I think the mesh ribbons are way easier to use to create big fluffy bows.

The mesh ribbon material seems to puff easily no matter what – so I have been using this more often.  Yesterday, I created a big fully bow with it for a mailbox evergreen swag.  Photos on that later.  See my earlier post on how to use mesh ribbon three different ways.

Mesh Ribbon Projects_0019

Everyone seems to like my bubble bunch with mesh ribbon hung at my door.  An attendee told me she was going to make one at her house.  I forgot to ask her to send me pictures of it when done – I want to see – and perhaps she will add something new to it to share.

While Cindy and Skip were here making a kissing ball, we talked a lot about farming, property in our town, common friends we know in the area, and more –  but this was the first time we met.  And ironically, they live on the street I grew up on.  When I asked about where their house was exactly on the street, I told them – Oh yes, I know that house – you put out two big pots at the end of your driveway every year.  I absolutely love them because the plants are flush and full – and colorful.  “Coleus, right?” I asked.

Cindy responded, “Yes.”  I have been admiring those two big pots for many years.  Sometimes, I have slowed down to see the plants, and always thought it was Coleus.  So you see – it was fate.  She found me via my postings on my classes, they came here, we met and now I see a long-lasting friendship forming.

By the way, there is another session today scheduled at 2:00 pm to learn how to make a kissing ball.  You around?  Want to join us? Just call, or call for a specific time at your convenience for a personal appointment.

Thank you, Cathy Testa

Open Studio Days – Making an Evergreen Creation – by Appointment

Leave a comment
Photos by Cathy Testa

Photos by Cathy Testa

A Reminder.

Open Studio Days are available this week.

By appointment, over the next three days, you can make your own Evergreen Creation and take it home for the holidays.

You pick the time – After work or during the day.

Just Call to Inquire for your individual time slot.

This is a great opportunity and will be your last chance this week to make an Evergreen Creation and

Take it Home

Just in Time for the Holidays.

See this flyer for more details:

OPEN STUDIO DAYS Evergreens

Feel free to contact Cathy Testa at 860-977-9473 for questions

containercathy@gmail.com