
Sweeping up the floor of my classroom after an Evergreen Creations Class, a thought occurred to me. I should collect some of the smaller cut pieces which fell to the floor to make potpourri.
And it was then I remembered, I picked up some mason jar covers at a Vintage Bazaar this summer with a precut pattern in them. They will be perfect.
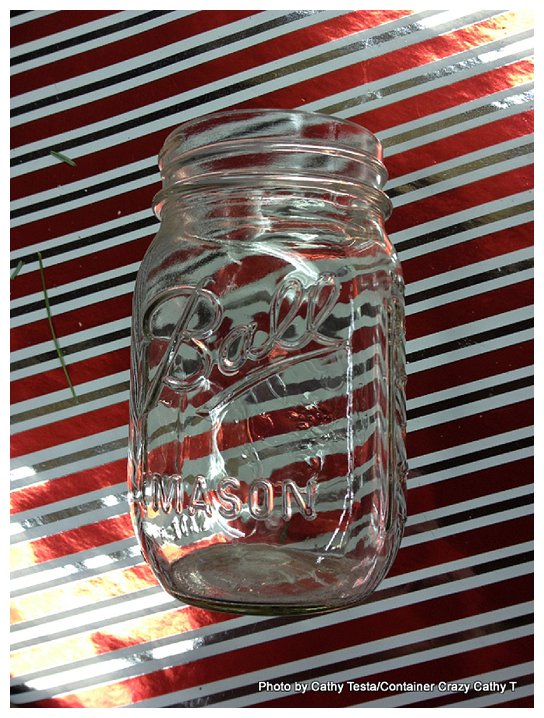
Using some mason jars I had in stock, I filled the jars with bits and pieces of the greens. It was amazing how quickly the scent permeated from the jar.
Most people enjoy the scent of freshly cut evergreens – especially because it brings back memories. Scent being one of the most powerful to remind you of something from the past.
The Cornell Cooperative Extension has an article on their website which states the feeling of evergreen aromas perfectly.
“Of all the memorable aromas of the holiday season, nothing evokes its spirit like the perfume of fresh-cut evergreen. Every species of conifer has its own slightly different complex of terpenols and esters that account for that “piney woods” perfume. While all natural Christmas trees share many of the same aromatic compounds, some people develop a preference for the smell of a certain type of tree, possibly the one they remember from childhood. Even if it turns out that using a polyvinyl chloride Christmas tree is more eco-friendly than using a natural one, no chemistry lab will ever quite match the fragrance of fresh pine, fir or spruce in the living room.” – Paul Hetzler, Cornell Cooperative Extension of St. Lawrence County

Items used to make Homemade Evergreen Potpourri:
- Mason Jars
- Mason Jar Covers with Holes in the top
- Snips or pruners
- Decorative Ribbon
- Preserved Moss
- Pine cones
- Holly berries
- Fresh evergreens bits and pieces
The steps are pretty straight forward. Gather up small snips and clips of evergreens, and put them into the mason jar. Make sure the cuttings are not wet because they will rot. Make sure the mason jar is not wet inside either if you washed it in soapy water prior.
Add some preserved moss to the top for a decorative look or to eliminate any potential spillage from the cover of needles.
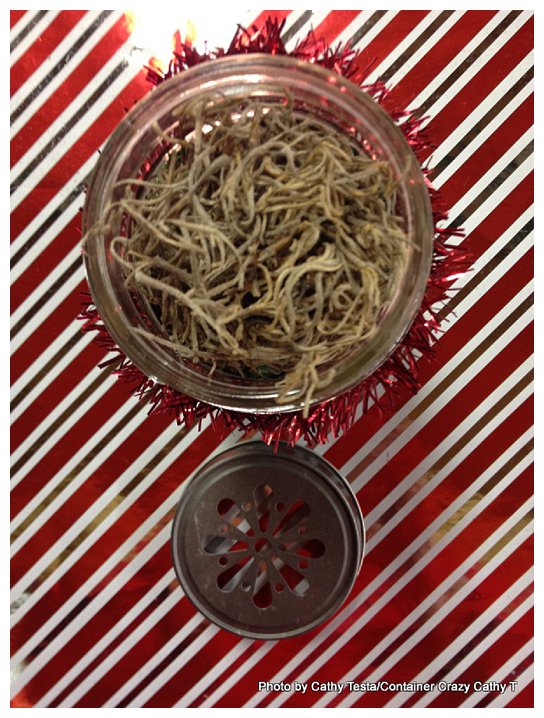
Speaking of needles, got some on your table that fell off? Put those in the jar too.

Add a couple cones to make it pretty. Perhaps a snip or two of holly with the red berries as well. I also placed one item on top of the preserved moss, like a single holly leaf.

Cover it with a cover that has holes so the scent will release. Add a decorative ribbon or tinsel wire and perhaps an ornament.

Keep in a cold place until you give to a friend, use as a table setting pieces, or put in a room to enjoy right away. Again, I set one down at one point after it was finished and realized as I was sitting there the scent was strong right away. I don’t think scented oil is required, but it is an option if you want it to last past the holidays.

Open Studio Days
That same day, as I bottled up these cute and highly scented potpourri jars, a new friend, Cathy, attended my Open Studio Days, where by appointment you get the valuable one-on-one opportunity to learn how to make an evergreen Kissing Ball, wreath, candle centerpiece or other items for the holidays.
Cathy called me up to inquire about my sessions and how they work. When I asked how she heard about my classes, she said she noticed some kissing balls hanging at a house in another town, but had never seen them in her area. She wondered how they were made, and so she Googled it, and found my appearance on the CT Style television program when I talked about making them last year.
Homemade items are big on Cathy’s list – and I couldn’t agree more. She said it is so much more valuable and special for so many reasons. They are well-made (with love) and unique. This is absolutely true with kissing balls. Each and every one made in my Evergreens Creations Classes are one of a kind. And mixed with lots of various evergreens creating amazing textures – and yes, of course, evergreen scents!
So while Cathy worked on her kissing ball, I made a small wreath.
Here’s are the items I used to make the small wreath:
- 10″ grapevine wreath
- 2-3″ cuttings of mixed evergreens (pine, juniper, balsam, and more)
- green florist wire (on a roll)
- green zip ties (cable ties)
- pruners
- ribbon
Start by cutting your greens and batching them together with florist wire. Use about 3 snips of evergreens for each bundle.

Remember to lay the most decorative green on the top layer, as done with the blue berried juniper, so it shows up on the wreath.
Set your bundles aside. You will need at least 8 bundles. Each is twined at the stem end with green florist wire, wrapping around several times so they are well secured.

Attach the first bundle to your wreath with a zip tie. Why, you may ask – a zip tie and not the florist wire? Well, I feel it is really secure that way as the starting point. And the zip tie is easily threaded through the grape vine. Sometimes it is easier than using the wire.
However, if you decide to use wire instead. Attach it to the grapevine for your first bundle. Keep the wire attached to the wreath as you continue around the wreath to attach your pre-cut evergreen bundles. You don’t have to stop to cut wire for each bundle.

As you attach each bundle of greens, be sure to position it to cover the zip tie or wire of the previous batch.
I started using my roll of green florist wire to continue. Keeping the wire attached to the wreath frame and winding it over the frame as I moved to the next batch of greens.
In between working on my little wreath, I would stop to help Cathy cut greens for her kissing ball. She was proceeding very well and had lots of questions. This is when I realized having the Open Studio Days enables more individual attention for the student versus the large class held on the first weekend in December.
The large class is lots of fun, and it will remain in session every year – but should you be the type of person wanting more quiet time and some personalized help, the Open Studio days, following the Evergreens Creation Class, is your best option.
Cathy and I spent 3 hours – yes 3 hours chatting and discussing upcoming holidays as we created. After Cathy was all done creating her kissing ball, we decided on a sparkly gold wide mesh ribbon. It went on the top with tails on the bottom. The tails included gold cord which made it more dramatic. This set the color decor theme for her kissing ball.
We picked out small round gold ball ornaments to attach on the needles and a few decorative florist picks. And, we also added a new item I had in my decor stock called, golden rain. It is beautiful, thin long strands of sparkling gold which hangs from a central long pick. Inserting it on the top of the ball to drip over the sides really finished off the look. We both just loved it.

Cathy considered adding some golden bows, but when she asked if she should, I told her no – I thought it was just right and too much might be overdoing it. She agreed.
I think Cathy will be the talk of the town, because she said none of her neighbors have kissing balls. When the outdoor lights hit that ball, the sparkling from the golden decor will evoke the feeling of the holiday spirit, just as scents of the evergreens will do.
Enjoy your weekend everyone!
P.S. The evergreen potpourri jars make great hostess gifts – and you may be a recipient soon. 😉
Cathy Testa


Love the idea of the potpourri mason jar! And the smell is wonderful! We have an artificial tree, mainly because I like to put it up at Thanksgiving and keep it up til’ SuperBowl. (I know, I know). My husband typically snips some evergreens from outside that I arrange in a vase with a big red ribbon, just so I can have that fresh evergreen smell.
Reblogged this on Container Crazy Cathy T and commented:
Last year, I made up a few of these adorable mason jars with fresh cut evergreen pieces and bits – and am re-sharing as an idea for hostess gifts, or even table name place seating idea. A fun idea and easy to do! Cathy T
Pingback: The Future is Fresh | MM Wintergreens Inc.