The Best Greens to Use in Holiday Wreaths

Leave a comment

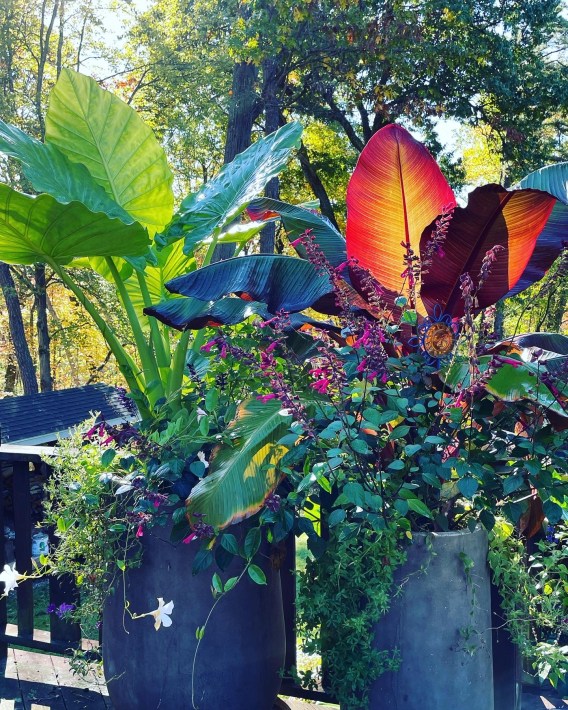
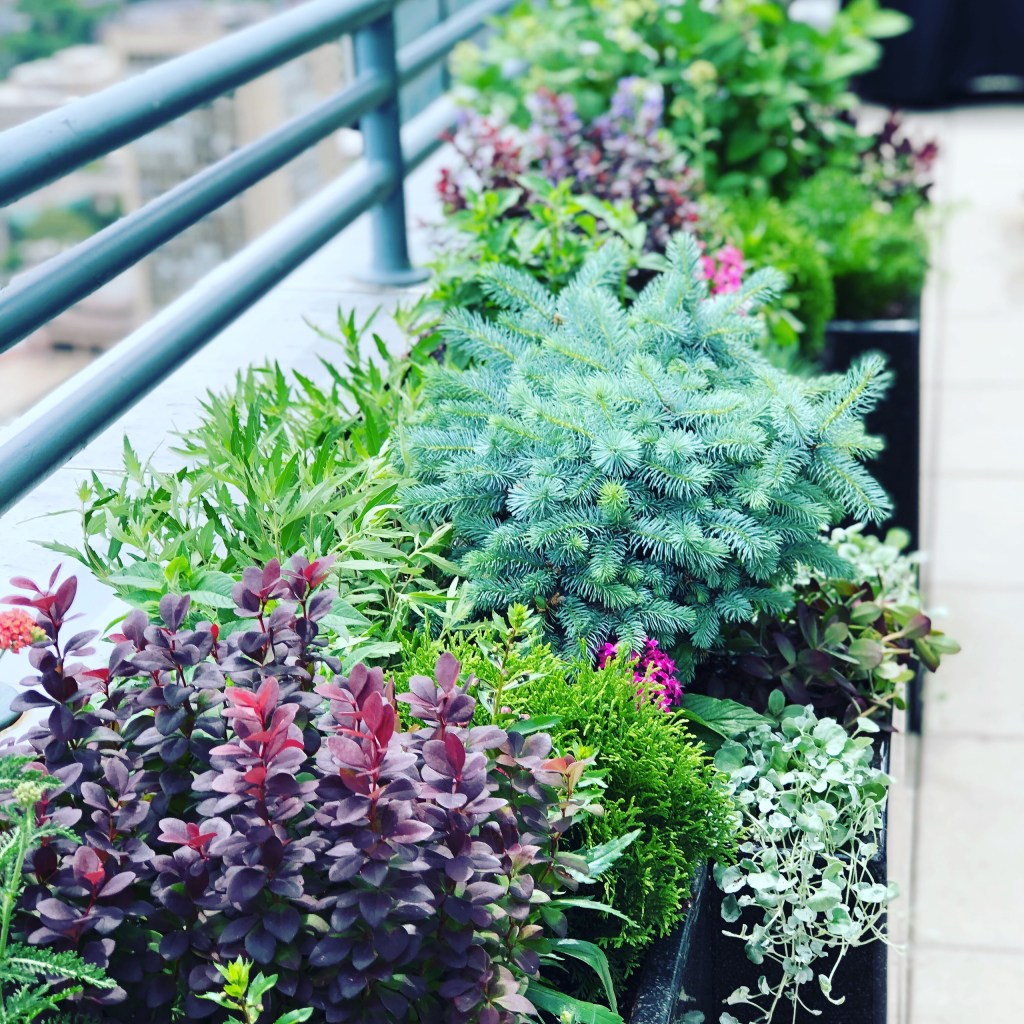
In my opinion, there are some greens which are better than others, but what really makes a wreath absolutely beautiful is using a “mix” of fresh greenery in the holiday wreaths.

When I first started working with fresh greens, I had no clue how to prep them, what they required to store well prior to creating wreaths, and which would be best to use.

Fresh greens will dry out thus getting them too early is not a good idea, so the timing is key. Like almost anything in the horticulture world, your items are perishable. I always waited until right after the Thanksgiving holiday to pick up my green’s orders to start making custom wreaths.

In order to reduce the loss of needles or drying out the greens, they must be stored in cold temperatures in boxes or some in plastic. Some of the boxes should be lined with plastic, while others are stored in boxes coated with wax inside. In general, all greens of all types gathered for holiday wreath making should not be exposed to winds, harsh sun, or even cold cement floors, which can draw out moisture. Some kinds may be laid out on tables, but key is storing them in cold and dark inside locations until ready for use.

Some greens, if a bit dry, may be rehydrated by cutting stems and setting them in vases or buckets of water, or even dunked in buckets of water, but some should not be treated that way. Others I would sometimes rinse with water from my hose outside in wagons, or let the snow fall on them in my driveway as they sat in wagons for a bit of moisture exposure, but then other types of greens should not get wet. If stored wet, they can turn yellow or rot. It depends on the type of greenery.

Learning how to handle the greens and which looked best and worked well in wreath making was something I learned by researching, experiencing, and testing various greens from balsam fir to berried juniper. I always took notes each year on how well the greens held up and would notice which performed better than others.

In this post, I want to share some tips with you on how to best prepare and use various greens in your wreaths. I will go over 15 different types in a series of posts. As I mentioned, I loved using a wide mix of greens to have full, fully, and textured creations. The contrasts of greens and various textures made the wreaths absolutely beautiful.

Let’s begin!

Holly

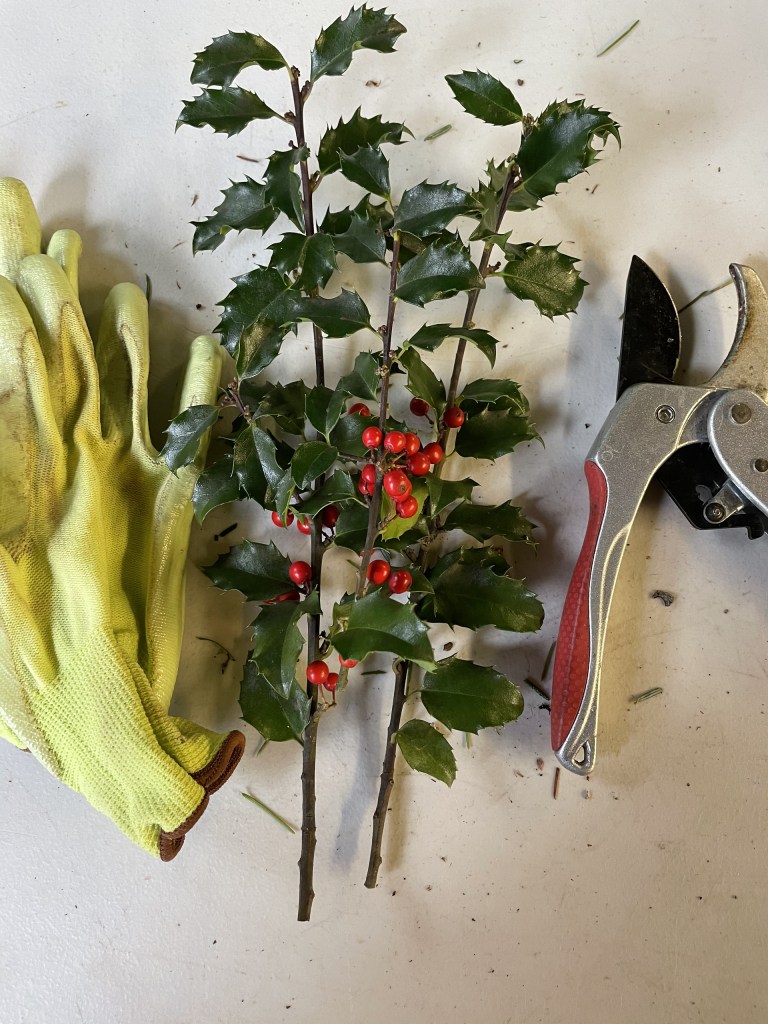
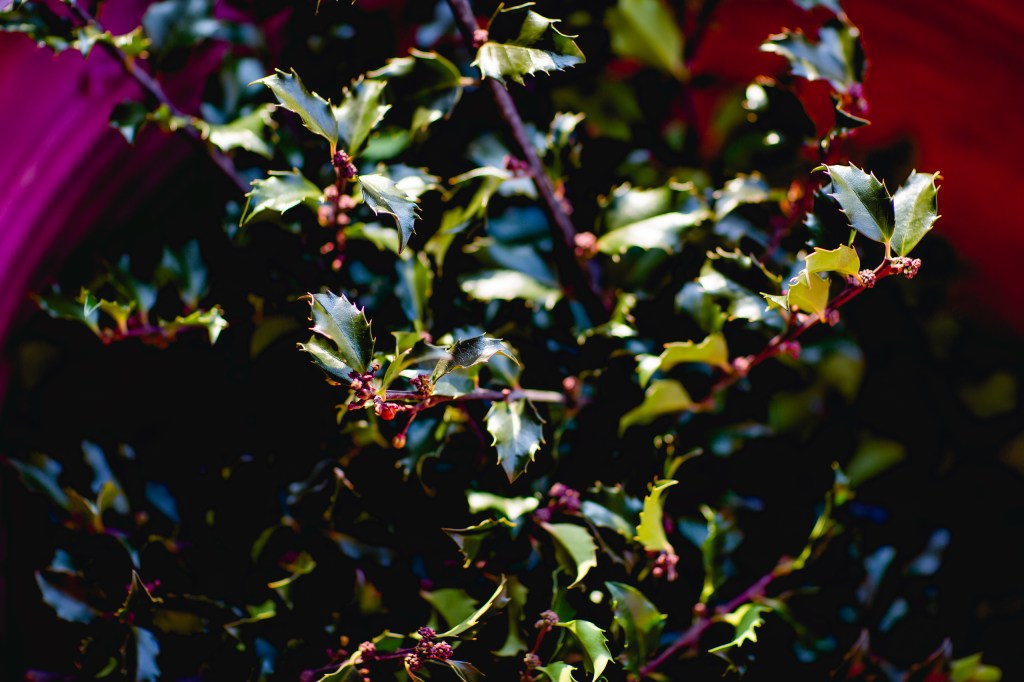
Evergreen holly is no doubt one of the type of greens people love in their holiday decorations. Their attached bright red berries stand out and they are the essence of Christmas memories. However, one downfall of holly is that it will turn black if wet and hit by frost or freeze. And handling them repeatedly when making wreaths can be painful due to the spiny edges of their leaves. However, holly is easy to insert into wreaths, sturdy, and provides a nice deep green with the red berries to the wreath with the mix of other tones of green colors, but holly is not super full or fully. That is fine, but just something to note about using holly. If it doesn’t get wet and frozen, it will last a very long time in a wreath until it kind of dries out. When they do dry out, however, they still retain the leaves on their sturdy stems for a long while.

Holly bushes, (Genus Ilex), are simple evergreen plants with dark green leaves and there are many cultivars available in our part of Connecticut to plant into your landscape. Many people have evergreen holly shrubs or trees readily available to prune from for their Christmas decorating from their own yards or landscape beds. But take note, these shrubs can suffer in the landscape from winter dry out from winds or water-loss when the ground is frozen, but otherwise, they are relatively easy to grow, taking part-shade or sun locations. And they can get rather large over the years too.

Every year, two of my friends offered to come take cuttings of their holly shrubs for my wreath making but I also ordered holly from a supplier too. I have a neighbor who generously offered her big, huge holly shrub to take from. It was gigantic. I’d quietly walk over with my wagon and pruners to take cuttings. It was always a type of annual pre-holiday ritual.

Her yard has lovely plants in her various gardens, and it was nice to take long holly stems with red berries and load them into my wagon. I was sure to do this only about 3-4 days before my wreath making workshops to have the best freshness. Sometimes, I would see a praying mantis case attached to a branch and leave that one be. Her holly shrub got rather large over the years where the top was not reachable without a ladder, so I never was able to get that high to cut them. I always methodically thought about taking cuttings to improve the outer shape and form of the plant. It was generous of her to offer cuttings.

My brother also offered to stop by his holly bushes one year to take cuttings for my workshops. He has a rather large expansive open back yard. The sun was shining on me that day when I went as it was a beautiful blue sky cold day. His holly shrubs are on a little slope. I sat on the ground taking cuttings. No one was home and it was a quiet, brisk, and sunny with a slightly cool air about. I remember thinking how wonderful his property was. Serene, quiet and peaceful. After I was done getting cuttings from his hollies, I laid on the ground next to the shrubs on the slope and faced the sun and sky above and felt the sun’s warmth on my face. There was something magical about my harvesting adventures.

Pruning evergreen hollies in the fall or winter however is really not the best time to do so. It should be pruned in the early summer for your typical landscape maintenance routines. Pruning them in winter exposes the stem’s ends to cool temperatures but only taking a limited amount in the winter didn’t detrimentally impact the shrubs. In fact, if my own hollies in my yard get out of shape, I wait to take top cuttings before the holiday wreath making process for my wreaths, or to gather to put in vases as holiday decoration.

If you decide to plant some evergreen hollies in your landscape, be aware that “some” types of holly plants require a male and female plant to set the beautiful red berries. If you decide to plant one for the first time, inquire about this at your local nursery. Female hollies produce the red berries and I believe you probably need only one male holly shrub to achieve success. Another consideration is pets, as some say the red berries are toxic to pets. I never had this issue here cause my adorable cat does not touch my plants but be aware holly berries can fall off and even leave a red mark on your hardwood floors if they get squished when you happen to step on one.

As I noted, the only downfall to holly is the leaves can turn totally black if wet and hit by frost. So, when you store them in a box with plastic, be sure you are not storing them wet. Freshly cut, when possible is best too, so you reduce the time is no longer attached to a shrub or tree and starts to lose some moisture. And storing them in plastic enclosed in a box is best done when the holly is cold. Loosely store them in the plastic too. They do not have to be tightly packed, but always in a cold room. An unheated garage is perfect.

In my workshops, I referred to holly as a specialty green to use in our wreath making – one to use as an accent in your creations. One year, I obtained a variegated type of holly with green and white leaf margins from a supplier, it was amazing, and I just loved it. It was so beautiful. It provided a more professional look to the wreaths, and it also felt and looked luxurious, at least I thought so. However, it was fairly pricy and not always readily available from the supplier, so if you decide to plant a shrub, consider the variegated types as well.

One last thought, I have read that holly is ethylene sensitive. If exposed to ethylene, the leaves and fruit will fall off. I never had to worry about that much. Ethylene is produced from some types of ripening fruit so businesses storing fruit or ripening produce with plants must be aware of this sensitivity. If you are running a business and holding holly with other plants or fruits, there are products out there to treat plants for this. I remember a grower talking about this when we went on a field trip during my college days. We walked into a huge freezer or maybe it was a fridge and he talked about the concern of ethylene. People in the floral industry are also those who are probably ethylene experts but for homeowner harvesting plants for wreath making it is most likely not an issue to worry about.

Overall, I did not have issues with harvesting, prepping it, or keeping any type of evergreen holly cuttings and stems fresh for my holiday making workshops. It was a bit pricier though and since we used it only as an accent, I started to remove it from my list of the 15-20 types of greens I would obtain. Often times, workshop attendees brought a little of supply of their own holly cuttings to use. Fortunately, as mentioned above, it is an easy type of evergreen shrub to obtain from our local nurseries. Sometimes I wish I had the forethought to plant all the types of plants used in wreaths in a big field and we could have a harvest party for the holidays! I have quite the imagination.

Stay tuned for the next post on the next greenery on the holiday list!

Thank you for visiting.

Cathy Testa
Located in the Broad Brook section of East Windsor, CT

High-Rise Winter Holiday Decorating

Leave a comment

I thought it would be fun and helpful to go over some of the successes and fails of creating a holiday scene on a high-rise balcony. Unlike the typical home scenarios, fresh greens cannot be literally stuck into soil in a planter. Usually that is all takes hold greenery very well in a pot to dress it up, however, this would not work on a high rise due to the strong winds. The winds are strong enough to blow off heavy furniture. Furniture had to be bolted down or locked down literally with cables. I had to get creative with the mechanics to ensure all the holiday decorations would remain in place within the greenery of the planters and wreaths.

Not only did I have to think through how to secure everything up there on a high-rise exposed to all the winter elements, but I also had to consider how to get it all up there without damaging items. Luckily, my hubby became my winter assistant. I would spend weeks ahead picking out decor items, creating fresh large wreaths, estimating greenery needed for all the planters, and organizing all in boxes so we could work efficiently out in the cold during the installations.

Each year, I created a new color theme for these clients, and this particular year, it was blues and silvers. Believe or not, those very thin curly silver sticks stayed in place fairly well, they did not fade and keep their glittery charm, but I didn’t just shove them in there, I secured them with heavy-duty florist wire too. Same with the silver pinecones. Wire did the trick, and it wasn’t too difficult to secure those two items in the greenery on the wreaths.

However, the ball ornaments, well those were tricky. First, they have to be shatter proof ornaments (fortunately, commonly available). I started with trying to glue them to wooden dowels but that didn’t hold too well because glue can crack in the cold. Later I realized, these have to be wired thru the actual ornament. So, for each one, I used a heat-type soldering gun tool to make a small hole on each side of each ornament (by each side of where the ornament typically has a round hook), and then threaded thick florist wire through each ornament. That worked. You can sometimes find ornaments with the wires securely attached but even still, the wind was so brutal at times, I needed to make sure the ornaments would not fly away outside. I looked into obtaining a very large and long sewing needle to help with the threading of the wire thru the two holes. The needle helped greatly to get the wires thru the two holes and then attach it to the frame on the back through the greenery.

One year, I used these thicker curved stick things – what are they called? I can’t remember! I’d have to look up my notes, but when I spotted them, I thought how cool! These could be used natural or painted silver. So, using spray paint, I sprayed some silver to match this theme and left some natural brown. I thought they were so cool and could be put into planters on the balcony an upright element.

However, later, after the winter season was over, I discovered when these got wet from the snow, they totally flop over! If you look to the left, by the outdoor chair, you will see those curly sticks flopped right over. The moisture penetrated the curvy sticks and made them just flop over. So this natural element was a fail, unfortunately.

When the snow covered these installations of holiday features, it added a magical feel to the high-rise during the winter months. They can see all of it thru large windows. It is surely better than looking at just nothing. I know the clients loved it because they told me so every year. And when we started adding some solar powered lights – wow, so pretty at night. The lights worked perfectly so long as they had a sunny day prior to charge them. There is no power out there, so it was fun to add some twinkle to all.

One year, I thought, you know I’m going to collect some birch and use those. Well, it took a while for me to think of using rebar (like the rebar used in foundations). It worked so great. The rebar is super strong, can be pushed or hammered into hard soil (most times, the soil was somewhat frozen in the planters) and the birch is natural and can take the outdoor elements! So, this was a theme that season, of birch, silvers, and blues.

Steve, that Elf Helper of mine, cut the rebar to my desired lengths, and we inserted them into the base of the birch pieces. They were heavy at first as the birch logs were not totally cured or dried out – so imagine we took these up and carried them in to use on the balcony. I really liked how these worked out, and if desired, could be reused the next season. Once they were pushed into the soil, it was very secure.

As a side bar, another big thing to think about on a balcony is the weight of everything. There are limits and so there is not only the total securing of items from elements, but the weight and of course, the look! Fortunately, these clients loved natural looks of things and so do I. BTW, we did not end up reusing these as we did a different theme the following Christmas.

Here’s a photo of the Birch logs before a big snow fall. They were very secure and with the lights at night, pretty! You can see the wreaths there and those are very large wreaths I made. Steve would step up on the planters to install them and my heart skipped a beat every time. We tried to use super big zip ties or cable ties to secure the larger wreaths but sometimes those snapped from the cold, so we ended up using thick wire. Steve had his technique down. I could not have done this part without him. And he is actually afraid of heights, so he never looked to the right at the view 38 floors below. Fortunately, the heights never bothered me up there – I loved the whole scene every time I was doing installations. To see the skyline, hear a hawk go by, and just the overall feel of the scene above and beyond was inspirational.

I so wished those thicker curly sticks had worked though – I really liked the natural feel of them as it adds a bit of height to the fresh greens I installed below. Wooden drift like decor trees worked out well – they can hold up to the outdoor various winter elements and I would secure them using rebar. As I did with the twig bundles you see near the wooden tree in this photo. Remember though, it was never as simple as just stick things into soil, like I would do with these types of decorations on the ground level at my home or elsewhere. Everything really needs to hold super well or risk damage or flying away. I would envy those installers of holiday pots and decor as they just stood there sticking stuff in the soft soil on Instagram feeds, because I couldn’t do it that way.

Pinecones weren’t too tricky to wire on. Greens were wired on greatly to secure them also. The steps I took to make items for a balcony that high up were more involved and required the hours prior. After making several wreaths for this winter job, I would place them up on tables in my garage and admire my work. Then go wash my hands that reached dry state from all the greens, gloves, and working in the cold, you name it. I loved every single minute, however. My passion for the greens and creating drove that part! Passion drove me to do it all.

One year, I had this idea of using round shapes and putting lights on them. I had acquired old antique rings and used those in the center with some wooden wavy white sticks and the dripping down solar lights. This was a year prior I think of the install above. Notice the wreaths are smaller. I started to realize the bigger wreaths were a better look overall. This theme was silver, white, natural, and magnolia leaves were used as well. Along with the shrubs and added greenery. I secured the three round wire rings with bent u-shaped rebar which was pounded in and the wiring of them together side by side helped as well.

This image above is at my house where I was in the midst of creating the wreaths – here they are without decor yet. I liked using magnolia leaves, but they were a bit pricey. I started to use lemon leaf (photo below) more so. Lemon leaf held up very well along with the mix of fresh greens such as balsam, fir, pine, and many more types of greenery. Each was hand-made by me, and I like the full fluffy look to wreaths.

In this photo of my Elf Helper with the wreath I made, the theme was green, cobalt blues, silvers and keeping it simple. Simple is good cause of all the wiring and securing required. Anything natural, from the natural world worked well. In this photo, you can see those silver open shell-like pods. What are they called? I don’t know but I scored those one year and I literally burned a hole thru them to secure the wire, they were hard like wood. I wasn’t the best bow maker, but I have a technique that worked well enough. Fortunately, the bows did well on the high-rise, with long tails to blow in the wind. They stayed in place and added a little touch of the theme’s color.

I wanted more of those driftwood brown trees used here, but I could not locate any more, and was able to acquire the off-white ones. Those worked really well. They can take the elements, don’t fade, and look nice. This particular year, we left center shrubs in from the fall in tall planters around the balcony perimeters, and I got smart with creating what I called “pot toppers” with various fresh greens and heavy-duty wreath frames, which I had to pull over the shrub. You cannot imagine what my “Crazy Cathy T” mind came up with! I was like, how do I get these over the shrubs without damaging the shrubs? Lots of measuring and then I used a pillowcase. Funny, huh? I put a pillowcase over the shrub and then pulled the pot topper over it to place on the rim of the tall planters. It worked really well. And the pot toppers stayed in place.

So many considerations took place on mostly how to make sure things don’t fly away. Each year, I came up with new ideas, out of the box thinking, and creativity. I hope the wiring of the ornaments and rebar will help you if you have a high-rise opportunity and want to decorate it for the holidays.

Thank you for visiting,

Cathy Testa of Container Crazy CT
I live in the Broad Brook section of East Windsor, CT.

FYI, this year I am not making my greenery wreaths, but I have been creating ribbon wreaths as noted in the prior post. Here’s a photo of one I created below recently for a customer!

Date of this post: 11/13/2023

Holiday Ribbon Wreaths

Leave a comment

Every year, for the last 15 years, I am in the midst of planning my orders and supplies to make holiday wreaths with “fresh greenery,” but this year, I am not making those. It is time to move to new items so I spontaneously started thinking about making wreaths with ribbon I have in stock!

Here are the first three I made. I’m happy with the results and have started taking some orders. I wanted to post it here on my blog because so many of you are here – but I also have a detailed post about this on my www.WorkshopCT.com site, or you can find me on Facebook or Instagram under the handle of Container Crazy CT.

I think these are all about the color mix. I can’t take credit for the winter blues one – as the customer picked out her own ribbon and I love what she picked with the blues, silvers, soft blues, etc.

Each is made with wired ribbon only and are fun to make! I really didn’t even know I’d be making these until it just popped into my head and I’m glad I am making them – it gets me into the holiday spirit, especially because this year, I will miss out on my luscious, wonderful greens!

My plants have been taken in too! Before all of this ribbon crafting, I took all my container garden plants, patio pot plants, and succulents, etc. into my home. That kept me busy for a month, but I took my time too. I get more aches and pains now from lifting and I need to be careful. But, somehow, I think I will always find the strength to have plants on my deck.

I posted how I store my Ensete (red banana plants) and Alocasias (Upright elephants ears) here on a prior post. Those are all in their boxed storage beds now in my basement. I do check on them in a couple months to make sure nothing is rotting and looks good. I didn’t store any canna lily rhizomes this year. I think as I get older, less is more – but it is a plant addiction, so you know, sometimes I have to do these things too even when I think it is so much work! The payoff is regrowing them in the spring.

I also took in all my succulents and agaves and found a spot wherever I could in the home. I watch them carefully for any signs of insects – so far so good! I also GREATLY reduce watering on these – in fact, I will let them go a whole month at least before a bit of watering starts for these winter warriors hanging it out for the months of winter. They are pretty easy to care for during the winter.

I still have a mess in the garage to clean up – as always, but in the meantime, I am happy to make a wreath or two – for those interested, just DM or text me – information is on WorkshopsCT.com.

Thank you –

Cathy Testa
East Windsor/Broad Brook, CT
An avid plant lover, especially of those in containers and patio pots, and also a bit of the artsy craft side comes out during various seasons! Like the holiday time!!!

Plant Take Downs – Alocasia and Ensete

1 Comment

Yesterday I started the process of taking down my tropical Alocasia and Ensete plants from my container gardens and patio planters at home. It was a nice sunny day, and it is much more pleasant to work on them in the fall when the weather is not cold or too wet. These tropical plants must be removed and stored over the winter because they do not tolerate our cold winters here in Connecticut in pots and planters.

Here’s a photo of the plants I took out of the planters.

October 17, 2023 – Base of Alocasia plants (Upright Elephants Ears) and One Ensete (red banana plant)

And here are my tools:

Tools Typically Used

Garden Sheers, Hori Hori Garden Knife, Kitchen Serrated Bread Knife, Pruners, Trowel, and Small Shovel.

Cutting off the foliage and stems

Cutting back the foliage is the first step and is relatively easy to do. Using the garden sheers or the kitchen serrated knife works perfect. I recorded several videos of me doing this and posted them on my Instagram page as well as my Facebook pages under Container Crazy CT if you wish to see how I used the tools to cut all the foliage back. Here are the links:

https://www.instagram.com/containercrazyct/

https://www.facebook.com/containercrazyct

For the Alocasia (upright type), I cut off all the leaves with stem (petioles) attached about 6 to 9 inches from the base of the plant. After getting all the foliage off and tossing the items into the compost, the next step is to dig out the base of the plant. This is the area where the corm is at the base (often covered with furry looking or papery material and has the roots attached at the bottom), and up to where the petioles grow from and up to the green part of the plant. Sometimes you will see little round suckers forming at the bottom of the base. For the purposes of this post, I’ll refer to the whole thing as the “base of the plant.”

Base of Alocasia’s above
Base of Ensete (red banana plant) photo above

The components of the Ensete (red banana plant) are a little different than the Alocasia (upright elephant ears) because it does not form a corm per say as the Alocasia does. It is basically like a big stump, with the roots at the bottom. When I cut the leaves off the Ensete, notice I use a knife and cut away from the plant base to avoid nicking or damaging the trunk. Technically, it is called a pseudo-stem formed by the leaf bases but for ease of writing this blog post, I call it the base or the trunk when it comes to the Ensete (red banana plant).

Dig out, Upside Down to Drain, Air Dry

In both cases, the fleshy material can be damp and contain some water so after I dig them out, I lined them up upside down to allow water to drain before laying them on a table in the sun for a few days to dry out some more. If the weather is rainy, I move these into the basement to dry out on a table.

I will trim the roots somewhat so there isn’t as many roots as possible to deal when they are stored in a box. The boxes I use are cardboard with air holes made in them with a knife – slits basically. In a prior post, I talked about how I store the upright Alocasias differently than the regular elephant ears. In my experience, these upright elephant ears store better in a dry and dark state versus a damp and dark state.

I allow the plants to air dry and then I place the base (as shown above) inside a cardboard box that will not allow any light in, and I put the box in a cool, dark place in my basement. I will check them in a few months to see how they are doing. Storing my upright Alocasias this method worked very well last year.

In years prior, I had stored most of my tropical plant bases in plastic bins, with air holes drilled in the top covers, and in some slightly moist peat. This worked well for my Canna Lily rhizomes and regular elephant ears, but I started to see rot on the upright Alocasias and learned dry storage was better for those types of tropical plants. Either way, if you discover the bases are rotting in the boxes, it is best to toss them out. And try again next year.

Now back to how I dig them out of my planters.

The Hori Hori knife is my go-to tool first. I basically stick the knife straight down into the soil and dig around it (the base of the plant) to cut the roots under the soil. I’m careful not to hit the corm or any part of the plant below but I can hear the roots crack as I saw around them with the Hori Hori knife. Sometimes that is all it takes. If that doesn’t get it out, I use a small shovel to dig more around the plant and then I rock the base back and forth with my hands and eventually it comes loose from the soil.

Timing

You can do this process before or after CT’s fall frost, but again, when it is cold wet and frosty, sometimes the corms will start to rot in your pots, so I like to do this “take down” process before things are mushy and wet. It always works for me. I usually do this mid-October when are days are cooling down.

I do brush off or use a leaf blower or just my gloved hands to remove the soil around the roots and the base of the plant base as much as possible. By the way, gloves are mandatory for me – the sap from these can make your hands itch and it is difficult to wash off – so I always wear gloves.

Collapsible Bin – Very Handy

My sister-in-law gave me this bin this year and wow, I wish I had this for years prior. It is so handy. I toss all the foliage in there and toss into the compost.

Check the bases later

As noted above, I will check on the stored boxes of these periodically. Here’s a post I did last March when I check on them and they were doing well. You can see I used newpapers to make a bed for them and how the green is slowly fading on the photo below and eventually it goes dry.

Prior post in March when I looked at the bases.
October photo of two of the planters (left Alocasia; Right Ensete)

As you can see, the flowers around the two tropical plants are starting to fade. The Salvias were still blooming (purple flowers), and I will miss those very much because two hummingbirds fed from them all summer. A bee or two was still visiting the blooms as well this month. They were so tall and beautiful. The White mandevilla was still offering some last blooms and the petunias faded pretty much. But the two tropicals still steal the show all the way into our fall season – why I love them so much.

The Ensete (red banana plant) on the right is a new one this year. I had stored a base of an Ensete for over 12-14 years but last year, I lost it, so I scored a new one this season. The Alocasia plants are from an original I got about 4 or so years ago and each year I get more from the pups and the repeat storing of the original. They are tricky to get growing in the spring though – and take a while to start from dormancy, but so worth it. Once they take off – they grow big.

Storing container plants is a way to save money and keep a plant growing larger as the base gets bigger each season. It’s a bit of a process but it went well yesterday for me. I’ve written my steps many times and just use the search bar to locate the posts.

Thank you for visiting.

Cathy Testa
Broad Brook, CT

Bringing In Some Plants for Winter

Leave a comment

In Connecticut, many plants we use and display in our container gardens and patio pots will not survive the winters here, and must be handled by taking them in as houseplants or storing them by digging out tubers if they have tubers, corms or rhizomes, such as tropical plants like Canna Lilies, Elephants Ears, etc.

I’ve started some of this overwintering setup process already this year. This year, I mostly have agaves, cacti, and succulents to take inside as houseplants candidates. Some of them are rather large and this is becoming like a jigsaw puzzle in my home, because I’m taking them into the house instead of my greenhouse this winter. I don’t want to pay for the heat for my greenhouse – it is becoming too costly. So, I’m literally back to how I used to store plants when I was first into playing with plants over 20 years or so ago!

Pick and Choose the Best Plants to Take Inside

The process of picking and choosing which are worth taking into the home is interesting. I have literally stared at a giant agave and thought, Hmmm, where could I fit this? I’ve rearranged my small home office so a table has space for some plants by a window. And I put many smaller succulent plants (like in 3-4″ pots) in the kitchen garden window over my kitchen sink that faces south. I even moved a small couch from my kitchen sitting area to fit plants under a window facing west there too. Plant people will do anything for their green babies, like a complete furniture rearrangement to make space by a window.

I see people asking all the time on gardening Facebook group pages, what do I need to do to move in this plant? Sometimes it is a tropical Hibiscus plant, other times it is a traditional houseplant they had outdoors, or perhaps it is a giant Canna Lily plant. Everyone has their suggestions, like dousing them with a dish soap liquid combo, or other methods, like putting them in a garage and doing a bug bomb routine, and someone said they even put theirs in paper bags and spray them with insecticide and let that sit for a day to kill any bugs. Are these methods good? Well, if it works for them – perhaps. Not sure about the bag method, however. But you will try anything to take in a plant for the winter and keep it growing or stay dormant so you may use it again next year outside in the summer months here in CT.

My Ground Rules for Taking Plants In:

I, however, use certain “ground rules” for which plants are selected to be brought into the home for the winter. And here are my rules:

The soil must be dry (as dry as possible).

For succulents, cacti, or agaves, I make sure the soil in the pot has dried out – so they were either kept under a patio umbrella (if there’s been rain) or brought into more sun to help dry out the soil on sunny days recently. I make sure the pot is draining very well, even have tipped a pot on its side and let water run out, and I look at the soil to inspect it. If possible, I may tap the plant out of the pot and inspect the roots and just kind of look over if there are any critters in there. Or rotting roots. Dry soil reduces the potential for soil born insects, I find. And cacti, succulents, and agaves do not need lots of moisture in the winter. So before taking them in, I make sure the soil is as dry as possible. We have had a mini summer episode this week for weather, so it is good right now to try to get the soil dry if possible, so I’m doing that now. Rain is coming Saturday. I want to take them in before that.

Blow any Debris off the Plant

I have a small leaf blower and I will use that – especially for Agaves since their leaves are stiff and can take the blowing of air, to remove any debris. Leaves from trees sometimes fall on them and get stuck between the leaves of the plant. A leaf blower is perfect this this – it may blow away a spider or two as well, but spiders are usually good bugs, however, if you have a fear of spiders, you probably want them gone before taking the plant indoors. I cut off any bad or damaged leaves of plants after this. What I’m trying to do is remove any potential for something to cause issues. Some insects feed on decaying plant material, so getting rid of anything decaying on the plant is a must. A vacuum may be another handy tool, and also look under leaves of plants for anything lurking.

Washing the Outside of the Pot

I use soapy dish water to very thoroughly clean the outside of the pot. I want to make sure I’m not bringing along any debris, dirt, or maybe something unseen. All of this is done to prevent bringing in trouble, like hidden insects or any kind of lurking problem. It is a precaution of sorts. But worth doing.

Selecting Best Location Possible Inside

It is tough if you don’t have a glass house, but there are some places I know my plants could make it. Some of my medium sizes agaves went inside the bedroom by the slider. It is Southeast, it will get some sun, just enough to hang in there. I put the mini succulents in the kitchen garden window but remember that window gets cold in winter, but most succulents or cacti can take “some cold”. On good days, I am sure to open the little side windows on the garden window to give the plants air circulation. I also put some on a table in my home office which faces north. I’m not sure if that is going to work though, but I may get a small grow light and try that location. That window and room is colder, but not as cold as an unheated greenhouse would be. However, there are some succulents that actually are fine with less sun so those will go in the office. My bathroom small window works for a couple plants. Plants that don’t need a lot of sun and like humidity from the bathroom shower may go on a little table there.

Spraying Plants with Houseplant & Garden Insect Killer

This I do with only some. If a plant has a bug issue and I see it – and it is bad, it doesn’t make the selection list at all to bring inside. It is too much of a risk to increase and spread. If I may suspect a tiny problem; I may lightly spray the plant before bringing it in to try to treat it. Garden Safe is one I have used. But I truly don’t do this too much. Look at the bottle label on the back, make sure it is a safe product for your particular houseplant candidate (some products should not be used on particular types of plants), and do that outside before you bring it in. Again, I avoid plants with problems, and usually I don’t have too many big issues because I coddle my plants in the summer as well. Many people use insecticidal soaps or horticulture oils, etc. Ask your local nursery person for a good product or browse those sold in stores, but read the label on the back, open it up and see if any plants should not have that spray on them.

Giving Plants Away

I select the people I give my plants to with as much carefully thought-out consideration as I do with which plants come into my home. My sister-in-law has a beautiful big glass living room, and she has a green thumb. I just gave her one of my huge Jades. She was thrilled. I have given her plants before, and she always keeps them thriving for years. It makes me feel good when I see the plants in her home, but I also have that tang of jealousy, like, wow, I gave that one away?! But like I said, my house is small. And she truly does take good care of them.

Overwintering Saves Money for Next Season

Overwintering plants is a way to save money and also is a method to keep your treasured long time plant companions going for years. It also adds beauty inside your home. And life! But probably the biggest concern people will have been insects and the correct place to put your plant so it can make it. A room with absolutely no light may not work for the houseplant candidates. It depends greatly on the type of plant and the temperature too in the house. If you keep a room totally unheated, that can stress a plant. But that room may be perfect for tubers you are storing in boxes, for example. I will go over tuber and storing of corms and rhizomes again soon.

I have a rather large Agave which I’m currently trying to figure out where to fit it. It has matured so much over the years; it is huge and heavy! I noticed one day ants going to the base of the large pot. I thought, uh-oh. I won’t move that one in the house without potentially taking it all together out of the pot and removing all the soil – what a chore, and it can be dangerous due to their spines. I’m still contemplating this one. Should I try to sell it? It’s a monster! What will I do? I don’t know.

Other methods:

There are other ways to capture some of the parts of the plants like taking off-sets or cuttings of annuals or even some succulents will have off-sets or plants on the stalks, seed gathering for other types of plants, etc. And storing tubers or rhizomes of tropical plants which I will most likely cover here again, but I also have many posts from years past on this on this blog. Use the search bar to search for them. But right now, I’m focused on my agaves, cacti and succulents for this post.

Keep your Inspection Hat On!

Finally, once you have decided to keep a plant and take it indoors, keep your inspection hat on. Look over the plants every few weeks or even every few days initially. If you see a problem, act on it before it spreads. Reduce watering greatly for cacti, succulents, and agaves. They don’t need water much during the winter.

Thank you for visiting!

Cathy Testa
Plant Blogger
Connecticut
Date: 10/4/2023, Warm sunny weather this week but rain and cold on Saturday!

I have a post from 2013 on how I stored my Big Red Banana Plant (tropical plant). It is sometimes difficult to search for, so I’m linking it here below for those asking:

Storing My Big Red Banana Plant

Photos related to today’s post:

My Kitchen Garden Window – Mix of smaller cacti, agave, succulents (South facing)
Prized Agaves (Southeast) Bedroom
A mix of Succulents – By Kitchen Slider (Southwest spot in the house)

Self-Watering Pots Rock on a High Rise

Leave a comment

Self-watering pots, those with a reservoir area at the base of the pot to hold water for the roots, were not high on my list in regard to usefulness. I had tried them at home on my deck outside and I found that I didn’t like them for several reasons, such as, they tend to get overwatered when it rains and stay in a flooded state (unless you use the drain plug to release the overload of water), they don’t allow air to circulate well when waterlogged, and things like that. In fact, several years ago, I actually wrote a post about how I just didn’t like self-watering pots. I felt they were not good for plants! See that prior post below:

Post above from 2015. Wow, times have changed.

Boy, did I change my mind when I experienced using self-watering pots on a high-rise balcony. On the high-rise balcony, which I tended to for five years for clients’ plants in various pots and some self-watering pots, the environment is so different, I guess you could say, the environment has big weather extremes. And because one of those extremes is intense heat and strong sun, the self-watering pots (they were actually long planter boxes) did not stay flooded after a rain fall for long. The sun and heat dried them out much faster than self-watering pots I used at my home at ground level or on my deck.

A big environmental or climate consideration on a high-rise balcony for the plants was the extreme heat and full-on sun (as I refer to it – sun that is full on and intense). On some days, in the middle of fall, or even winter, it was like being on the beach up there on a balcony so high up if the sun was out. On hot summer days, I would have to make sure I worked on the balcony during the period of day when the sun passed by and there was shade from the buildings so I wouldn’t roast, but that was not often doable. Let’s just say, it gets very hot at times, almost unbearable, so plants which tolerate drought and heat were critical as well. To clarify, this was 38 floors up on the top of a building in a city exposed to all elements from sun, wind, etc.

Because of the environmental extremes such as sun (and wind), trying to keep the soil moist for the plants was more of a job for my clients. They would have to carry water out from inside their penthouse. By hand, with buckets! There was no outside water source, so my big fear was will they water enough? And they did fortunately. Otherwise, the plants would be toast from the extreme sun and heat.

However, with self-watering pots, some of that was solved. My clients actually had two long planters that were self-watering pots before I came onto the scene. When they pointed them out to me, I didn’t say much because I always felt those planters were problematic (as noted above in my prior post from many years ago), and I believed in watering plants in pots yourself. But I was the fool in this case, because I learned quickly, those self-watering planters were winners on a high-rise. So, for those who may be doing some urban gardening, take a look at self-watering pots. They may be very helpful to use if you have plants that require moisture and also if you have intense sun (and wind) on your open balcony up high.

Let me explain why. If the rain fall was abundant, the fact that the sun was so strong and hot after at times, the soil would dry out. The water would not stay in there and flood the planters, like they did at my home after a rain fall. It would be the same exact weather at my house and theirs but due to being up so high, the planter would not stay waterlogged. Waterlogged soil will rot the roots or kill them. It was working out, especially for herbs. Herbs can take dry soils usually, but they do need moisture at times. I started to fall in love with their long self-watering planters.

I learned lots of lessons by working on a high-rise thru experience. I also have knowledge on plants and which were tolerant of conditions, drought tolerant, loved heat and full sun, but I still had lots to learn and plants to test out. In the case of self-watering pots, I discovered that they rock on a high-rise balcony.

The self-watering planters did need to be stored for the winter, however, which I offered as part of my services. I would wash them well, store them and return them in the spring with fresh soil and fertilizer. It was working out and they still have those planters today – those were a very good idea, and an excellent investment.

Pots and planters have special considerations on a high-rise which is another thing I will write about, and I had to find solutions. I’m kind of an out-of-the box thinker – AT TIMES … so I got really creative when during the first year there, which I will write more about later. Weight for example is a big factor. Again, it is not like pots near the ground, there were weather considerations all the time.

Plants that I felt did very well in their self-watering long planters were herbs. I did try smaller compact type of patio cherry tomato plants one year, but they kind of fell over from the winds, so that did not work where the long self-watering planters were positioned near the railing. However, herbs did very well in these. Some herbs in general can take dry soils – herbs like rosemary, for example. Later, I ended up acquiring some tabletop pots which were also self-watering and started to use them with succulents on their high rise as well. Those worked out well also. Succulents do not like soggy soils, so when it rained so much that it flooded the pots, it was fine because the sun and heat would dry them out fairly quickly. Or you can drain them if need be. It was just working out so much better than I would have thought.

A couple things I did was I added some small pea gravel in the base where the reservoir holds the water to weigh down the planters. As noted above, due to extreme winds on a high-rise, I was concerned the planter was not heavy enough. I also used standard potting mix with slow-release fertilizer. And sometimes, I top-dressed the top of the soil with either pea gravel, mulch, or moss, however, it was not really needed but I liked that “finished off” look to add some style to planters.

Here are some photos. I know I have more, but it takes a while to locate them. When I find them, I will add to the next post. I rather enjoyed taking them the planters to my greenhouse to clean for the winter and replant in the greenhouse to deliver in each spring. I felt they were kind of Zen. The herbs would grow three times the size at their balcony – I know I have photos of that but will have to share them when located! It always amazed me how much the plants grew when I would return for a fall change out. Balconies are wonderful places to have a full blow herb garden if you have enough sun, which this place did.

Self-Watering Long Planters with Various Herbs
Self-Watering Tabletop Planter with Succulents Above

Thank you for visiting,

Cathy Testa
Container Crazy CT
Blogger in East Windsor, CT

One more photo below!

High Rise Gardening

5 Comments

Back in 2019, I received a voicemail from a gentleman, and he was looking for a gardener for his balcony. I immediately felt a certain tone in his voice. Something about the phrases he used and his professional manner in his voicemail to me made me feel this would be a call worth returning. And, my friends, it was.

It led to quite the adventure of planting not only one but two high rise balconies for five years, located on the very top floor of a building in Hartford, CT. It’s a good thing I do not fear heights, because if you did, you would not be able to look over the railing at the scenes far below. It can make a person with a fear of heights queasy.

There’s something special about working in a high-rise urban situation. The background city sounds are constant, but they are not the typical sounds I hear at my home, which is filled with birds and maybe a slight sound of road traffic. On a high-rise, you hear sirens, distant constant highway background noises, an occasional high-flying hawk, and air sounds. I liked that. It is not overpowering, just there and didn’t bother me. In fact, because I have tinnitus, I rather liked the background city sounds. It drowned out my tinnitus and also the enjoyment of working in this special place, made me not focus on tinnitus either! Plus, the views were enough to not even think about the background noises.

I also liked how you are up there overlooking the world, and no one knows you are. It is a really neat and inspiring situation. One time, when working on their planters, two helicopters flew right near there, as if a pair flying together. I thought, can they see me here, and I even wondered if it was the president. I had read he visited an area in CT that day.

And after a few rounds of plantings, I started to see bees. Usually, a solo one or two. One time, the client heard a tree frog in the planters. They could not locate it, but they were amazed, and so was I! He either hitched a ride on one of my nursery pots, or could it be possible he climbed up that high?! The balconies are 38 floors up! I always liked pressing that PH button in the elevators, I have to admit.

I thought, gee, I so wish I landed this opportunity when I was younger. I was very excited to work for these clients and their balcony gardening projects, and yes, it was all very large planters the full length of the balconies. Fortunately, they referred me to another couple in the same building, so had two wonderful sets of clients and wonderful planting scenarios.

Probably the best part of it all was the upmost appreciation for my planting work and craft by these clients. I was told often that I was an artist. Can you imagine how that felt? It was wonderful and meaningful to me. And their flexibility, as they fully understood this planting situation is unique and has special challenges. They were always, always polite and understanding because things unexpected can happen on a high-rise situation with plants. I knew it would be challenging yet extremely fun and rewarding for a plant person. Plus, I liked their style. Both had their own unique style, and it was fun to think about how to best meet their needs in that regard as well.

Working on a high rise has many challenges. Try – no water sources outside. Extreme winds that will shred plants. Cold temperatures when I did winter installs. And in the summer, extreme heat. I had a lot to learn and research. And, not to mention, going up and down constantly in an elevator. I am lucky I am a thinker about organization because you have to organize all to be efficient in those situations. And I got to witness how plants respond differently in a high-rise balcony situation in planters, pots, and spaces. Plant colors are different when experiencing extreme heat, they grew to amazing large sizes in some cases, which blew me away. I would plant a small herb and it would reach the size of a shrub by the end of summer. It would shock me sometimes, like wow, they love this sunshine and heat! I read somewhere you could not grow tomatoes on a high-rise, NOT! You sure can and they were wonderful.

I thought it would be a great idea to talk about the plants which worked well in these situations and what didn’t work so well on a high-rise. And write about my high-rise balcony gardening adventures. I actually had trouble finding good books on balcony gardening. I could write one of my own I guess, but I choose to use my blog, here on Container Crazy CT, to write about scenarios I encountered in a series of posts.

It begins today!

Sneak Peak of a Row of Big Square Planters
A tapestry of succulents in long square planters – Loved how this came out in year one!

I’m not sure exactly where to start but these two images above are sneak peeks of two of the many planters. The first is client number 1 and after much thought and questions, I ended up putting together a mini garden and I loved how the deep plums accentuated it. And for the other photos, it was a mix of succulents. Some grew two to three sizes larger in one summer. It was amazing. I will write about these and many other planting arrangements as I do my series of posts upcoming!

More later!

Cathy Testa
Container Crazy CT
Date of post: 9/12/2023
Location of Photos: Hartford, CT
My Location: Broad Brook, CT

Growing Pumpkins – Round Two

Leave a comment

This is my 2nd year trying to grow some Long Island Cheese Pumpkins and I started them a bit too early again. They were ready by mid-August, and I’d prefer them to be ready by mid-September. Anyhow, they are just fine sitting on a table with no blemishes and curing for a week or two in the sun. I use them primarily to decorate for autumn but maybe I’ll get into growing more of them next year as a food source for winter soups and Thanksgiving pies!

The Long Island Cheese Pumpkins resembles a wheel of cheese in shape and the color is very pale compared to ordinary orange pumpkins, but I like these for the shape. The seeds for these may be directly sown into a garden or large pot or started early indoors. I started these indoors in early to mid-May of this year, and last year, I had started them indoors in mid-April. It seems early May was still a tad bit too early. So, a new date is noted for 2024.

Because squash, which this pumpkin is technically a squash, grow really fast, they should not be started earlier than 3 weeks before spring frost. It takes about 98 days till they are ready. Anyhow, if they arrive earlier than your needs, just let them cure in the sun for a week or two. Cured squash will store all winter. They are pretty cool in that regard. And because they last a long time, they are perfect for the succulent topped pumpkins I usually make to display in the home thru Thanksgiving time.

This year, I grew them in two places. One in a super big pot on my driveway and one in a large square planter on my deck. The one on the driveway worked out well because I take garden twine and help them run up the twine along a wrought iron fence. The tendrils quickly grasp on various places on the fencing, and they hang on. By having them on a twine like this, the pumpkins do not touch the ground so there is less chance of any rotting from sitting on a wet surface and no blemishes. Also, no animals messed with them. That could be because they were somewhat hidden by a background of other plants.

The one on my deck sprawled out on to the deck floor and then I let it hang over the edge of the deck. I got only one pumpkin on that one, but it was cool to see it hanging in the air, so I helped it stay put by using a hanger. Anyhow, the one on the driveway got 4 pumpkins. I’ve been just kind of experimenting and having fun with them. As I learn, maybe I’ll get into growing more next year.

One of the nice benefits of pumpkins is their huge beautiful yellow flowers – which the bees absolutely adore. Some mornings, I’d find up to 4 bees in one flower buzzing away. If you want to help pollinators, plant some pumpkins!

Pumpkin on the left (tomato plant on the right)
Pumpkin hanging from deck above.
Sitting on a table to cure for a couple weeks.

You can see the color difference in the last photo above. I kind of determined when to pick them by the firmness of the rind and also looking at the stem, but I was somewhat guessing too. Plus, the plants started to look a little worn, so I figured it was time to cut them loose around mid-August.

I watered the plants regularly with generous amounts of water, but I did not fertilize except one time with a liquid feed. The soil had compost in it in the pots. The plants prefer full to nearly full sun, and the one on the deck didn’t get as much sun as the one on the driveway. Oh I said the animals didn’t bother the pumpkins, but some of the leaves got munch off once, maybe by a brave rabbit. Brave because my cat is an excellent rabbit hunter.

I plan to do more research on pumpkins because for some reason I’m interested in them! Maybe because it seems they don’t get bothered much if provided a safe place to grow. Wish me luck for next year – I hope to have more harvested.

Have a good weekend,

Cathy Testa
Broad Brook, CT

Watering Services

2 Comments

Just a reminder, I offer watering services for your plants during the heat of summer. Focus is on container gardens, patio pots, window boxes, hanging baskets, raised garden beds, and anything grown in pots. I also water community garden plots. I do not handle newly installed landscaping areas or trees recently planted.

If you are in need and are local to or near my area, reach out by contacting me. I’d be happy to provide more information and availability with an information sheet detailing all. While we had a great deal of rain, the hot days are coming! It is nice to return from your vacations knowing your precious plants are not going to suffer while you are gone. Plants put out the most blooms and focus on fruits in the height of summer, which is why watering and care is so important when you are away.

I also offer help with monitoring your plants for any problem insects as well while you are away. They are best caught early, and this is part of the service when watering and I’ll pick up mail or other items for you too. When plants become stressed and thirsty, it signals pests to attack. Keeping up with your watering and come home to beautiful, lush plants!

Thank you and enjoy this beautifully sunny day,

Cathy Testa
Container Crazy CT
860-977-9473 (Texts welcome. I’m also on Facebook under Container Crazy CT. DM’s welcome!)
containercathy@gmail.com

Located in the Broad Brook section of East Windsor, CT. References provided upon request.
See also http://www.WORKSHOPSCT.com for more service listings.

Date of this post: 7/11/2023

Cathy Testa’s ABOUT Section.

Camping and Plants – Acadia National Park

Leave a comment

Camping is a new adventure for me and my hubby, Steve. We decided to buy a small camper last year. It was quite spontaneous, somewhat. We got a bit tired of the airline scene and thought, we could give this a try.

Steve really was all for it – but I panicked a little after he signed the dotted line and thought, is camping for me? Well, long story short – I absolutely love it. You are surrounded by nature, you are forced to relax and chill, and it is a fun adventure each time we try a new place. As one of his friends said, “Camping is just plain fun.” And it is and has been so far.

It got me thinking about plants too. On our most recent journey, to the Acadia National Park area, I saw plants here and there and welp, I decided to blog today on what I spotted.

Acadia National Park

Steve was the one who picked the Acadia location. Because I knew there are lots of nature things to do there, from hiking to kayaking, I wanted to make sure we could find hiking trails and know where to go, so I picked up a book by Hilary Nangle about the Acadia National Park area and it was quite helpful. She provides maps, tips and locations for hiking and kayaking, eating, etc. She divided the book into chapters about Mount Desert Island, Schoodic Peninsula, Blue Hill Peninsula, Deer Isle, Ellsworth and Trenton and more towns.

Our first little camper! You can see my basil on the table brought from home for my cooking.

Trenton, Maine

Trenton is where we stayed at a place called Wild Acadia Camping Resort. It is near towns like Ellsworth and Bar Harbor, and we liked the location. Originally, we picked this location because it has a kid’s zone, but we are kid-less, so it was more around the thought that my younger sister might meet us there with her kids. But that didn’t happen this go around, anyhow, we did like this little campground. One of the best amenities was a new barn they have complete with wonderful bathrooms, showers (coin operated), laundry and even a sink area for doing dishes for the campers. I thought it was just beautiful. They did have flowers barrels outside but stupid me, I didn’t take a photo, but it was several barrels of petunias out front.

Barn with showers and bathrooms

Every morning a crew cleaned this new barn, and I was very impressed with it – we got lucky! I had no idea this was there, and it is new. So are two new cabins they were in the process of building. They also have tents sites and RV sites. Some more in the wooded area in the far back than others. The kids’ zone is in the front entrance areas. I liked that our site was in the back by the barn.

Anyhow, that was our home base and we enjoyed it. Unfortunately, it was cool, misty weather the whole week with rain, but it was never a downpour or total rainy day. We had breaks of sun one day, and we were never rained out of sitting by a fire at the campsite, thankfully!

Planter outside of a Store in Ellsworth

Ellsworth and Bar Harbor, ME

One day we met up with my sister, Lisa and her husband to have BBQ at a place called Mainely Meat BBQ at 15 Knox Road in Bar Harbor. It was very good and had an excellent vibe with a brewery next door. That was fun and after we decided to go to Ellsworth and do a little quaint store shopping. As Lisa and I walked store fronts, I spotted this planter above with a Coleus (with the bright lime green edges around wine-colored centers), Sweet Potatoe Vine (with the dark chocolate color), and a trailing fuzzy foliage plant (having a brain fart on the name at the moment – I’ll update!). I paused to take two photos. What a lovely combination, I thought! I loved how all three plants intermingled well together. And whomever was watering and caring for it was doing a nice job – all was very healthy. We shopped the stores here and I really liked several of them, from cool clothing to artsy finds. Worth a stop on a rainy day.

Update: The trailing silver fuzzy plant in the combination above is called: Helichrysum petiolare ‘Silver’

Roses along a shore path behind Bar Harbor Shops

Bar Harbor Area

My husband and I walked the Bar Harbor area as well on another slightly rainy day. There are several shops and restaurants. Down one side street off Main Street is a larger parking place, so we parked there and took a walkway shore path along the back that is lovely. We packed some snacks and a blanket, so we sat there admiring the views and watching boats for a while. Beach roses scented the area for us. We watched sea kayakers go by, there is a town pier to checkout, and a really nice Inn facing the water along the shore path. In the old days, we would stay in an Inn like that – but these days we are campers! LOL. And of course, there are shops and pubs. The shops had lots and lots of t-shirts and sweatshirts. Lots of trinket shops whereas Ellsworth had more artsy shops, at least I thought so.

Not Cimicifuga Plant! This is a Black Lace Elderberry!

Along the road to the parking area, where we started our walk the shore path, was a very impressive Elderberry plant. In my prior post, I mis-identified it as Cimcifuga. Their foliage is similar, and I was super tired when I wrote my blog post yesterday, ooops! I realized my error this morning. Either way, it was one of those that I knew the plant, but my brain fog made me forget the name at the time and later. Must be getting old! LOL.

Crabapple Tree at Lamoine State Park Beach

Lamoine State Park and Beach were not that far from our camping place, so one day, I said, let’s go look at it – maybe it is a nice place to camp next time we come out this way. They charge $6 per person to enter the area beach area, and because it was rainy or wet like weather, the place was pretty much void of people. There were a couple of people fishing and a few just kind of looking at the views like we did from the beach. It has a big vast ocean view, and I noticed this tree as we stood at the beach. I believe it is a crabapple. Anyhow, the beach area is not huge, and neither was the parking, so I can imagine when sunny and busy, it may be tricky to get a spot there. It has a boat launch too. There was also the state park with campsites area, however, we were not allowed to go there so we could not see how it was set up. Apparently, the state park area is 55-acres. I was disappointed to not be able to drive thru to see how it was setup.

My homegrown basil
Yummy pasta creation with Gorgonzola Sauce

After several days of grilling food, we really had a hankering for some pasta by our fire at the campsite. I had purchased some Gorgonzola Cream Sauce from Difiore’s in Ellington and made up this quick recipe with my basil, of course. I cooked the small sized brussel sprouts in a little bit of olive oil and tossed them around for a while. The were frozen in a bag, and then I added the yummy sauce, some white wine, and angel-hair pasta that was pre-boiled, and wow, I have to say, it was just delicious! Maybe it was that sauce and the fact it was like a cool fall wet day; we gobbled it up!

Lively Lobsters!

We also had lobsters, of course, while in Maine – and found this place from the book I referenced above. Wow, it did not disappoint. Nothing like fresh lobsters while viewing views of the pier and ocean, and boats. This place was 12 miles from our campsite location and worth the drive. It is called Beal’s Lobster Pier at 182 Clark Road, Southwest Harbor area.

We did tons and tons of other activities, from walks to browsing areas. Two favs of the week were the drive to Schoodic Point and Peninsula of Acadia National Park. And hiking Ocean Path starting at Otter Cliffs on the one sunny day we had. Those were amazing sights to see. We did not eat and only sit by campfires but the weather prevented us from some hikes and kayak plans. There’s always next time!

I hope to take more photos on the next camping adventure and continue sharing it with you. I think it will become a new hobby for me.

Thanks for visiting!

Cathy Testa
http://www.ContainerCrazyCT.com
Located in Broad Brook, CT
Date of this post: 7/10/2023
Location of Camping: Trenton, Maine