Green Zebra Tomato – Toss them with Cilantro for an Amazing Treat

Leave a comment

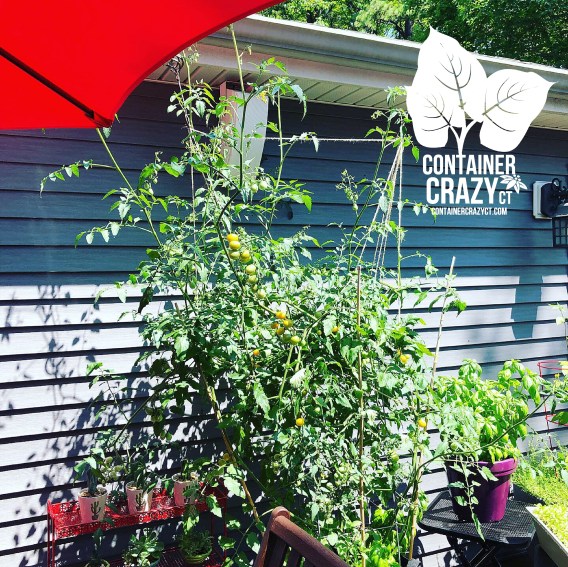
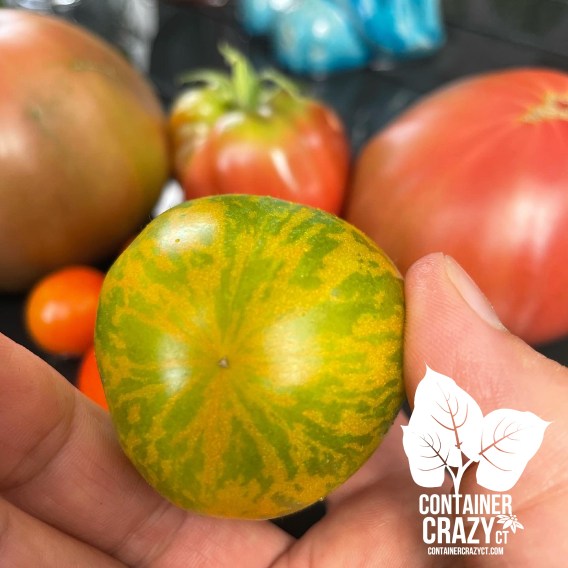
Green Zebra: Tangy flavor; green color to green and yellow striped colors as they ripen, medium sized round fruit (about the size of a tennis ball), and a good long yielder. Indeterminate so it grew to about 7 feet tall and keeps branching out further. My plant on my deck still has fruit hanging on it as of this date, August 25, 2022.

Planted with: Professional potting mix by SunGro with “Espoma Tomato-Tone with Calcium added” to soil upon planting (Tomato-tone is a dry fertilizer powder mixed into the soil; comes in a bag) and I also fertilized the plant later in the summer, maybe once or twice with Espoma tomato food (liquid feed) with a 1-3-1 NPK ratio (comes in a bottle and mixed with water) as needed.

Cherry tomato on the left. The GREEN ZEBRA ON RIGHT IN FABRIC GROW BAG at the start of the planting.

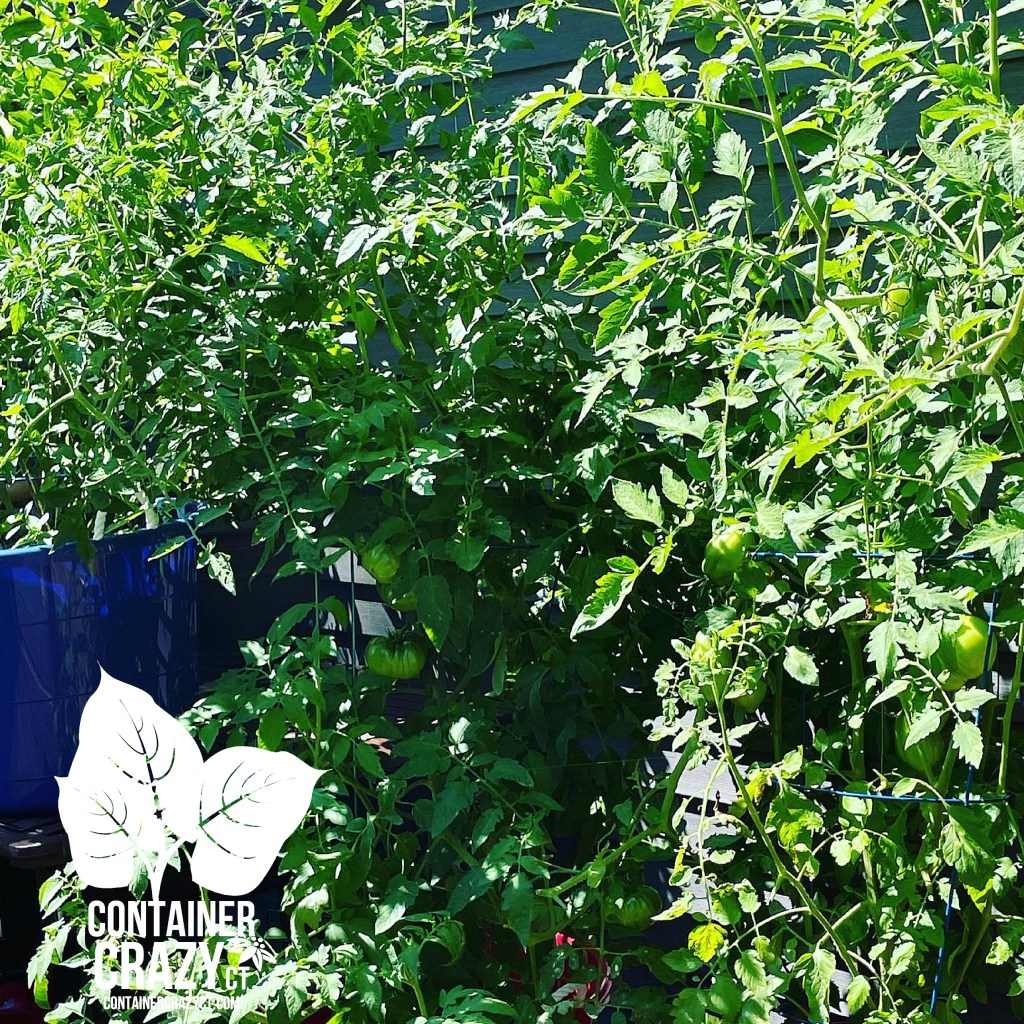
Planted in: A black fabric grow bag (I believe it is the 15 or 20 gallon size) and placed on the east end of my deck facing south, bag located against the house. The plant has reached the gutters and expanded so much, it looks like a Christmas tree from the inside of my house by the end of August. I kind of get a chuckle when looking at it right now.

The Green Zebra plant is way over to the right of the chair in this photo by the door which is barely visible!

Taking Notes: When I planted my tomato plants here, I made notes of the potting soil used and fertilizer upon planting as noted above. In my other planters, I added compost to the base of the pot and mixed it in somewhat, but I did not add compost to the Green Zebra fabric grow bag components. The Green Zebra fruit never got the dreaded blossom end rot, and another bonus – it did not get munched on by squirrels or chipmunks, which I’m guessing maybe because they are green and not red, thus less visible to them as a sneaky snack. Lastly, as noted, it is still holding some fruit while my other tomatoes like the Cherokee Purple and Goldies are done fruiting now.

Fruit is ready to eat at this stage of coloring

When to pick it: For the folks who bought the Green Zebra plants from me in spring time, a couple texted me to ask when they should pick them? I responded with, “The packet says when soft to the touch,” but what I found is the flavor was better when I saw the yellow stripe coloring within the green color of the fruit.
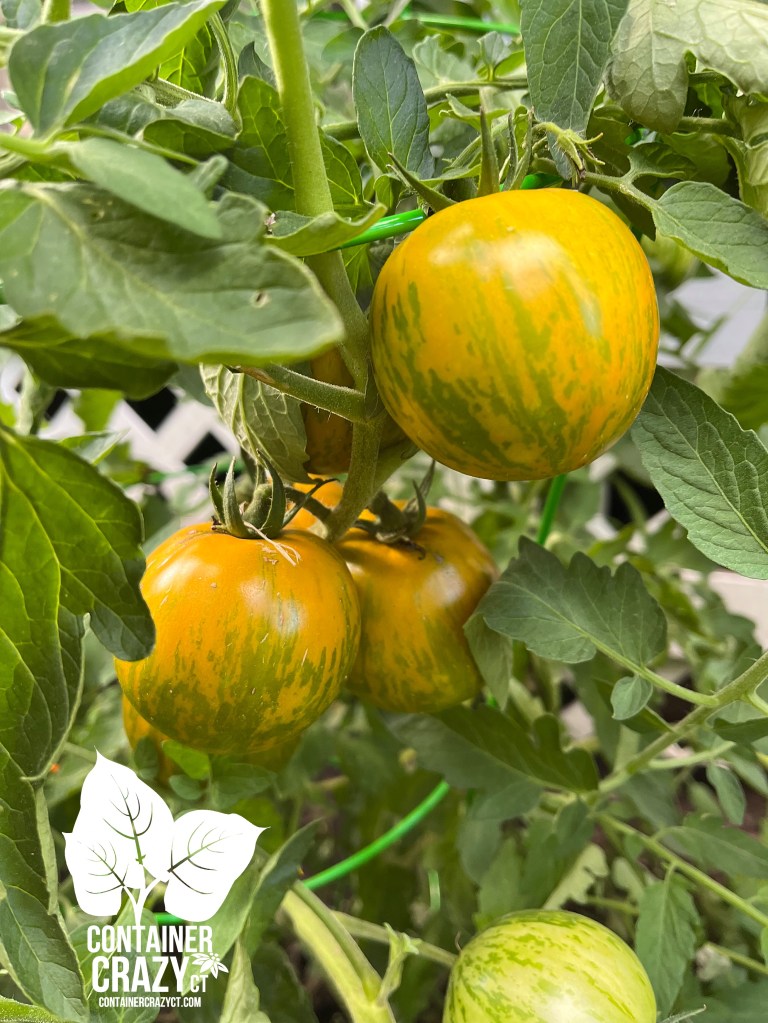
Clusters of the Green Zebra tomatoes on the plant 2022

Pruning: The packet also indicates to prune it to have no more than 3 main branches for a healthy harvest, but I pruned it just to reduce the size a bit and started to attach twine to light fixtures and other things on the deck and would take branches and train them along the twine. It looks rather messy and silly, but that is how I roll. I like it – it adds a jungle affect to my deck and this is fine with me. I was happy the plant experienced no major issues, no blossom end rot on the fruit, no bites from critters, and no blemishes or blight on the leaves.

Color before it starts to get some yellow tones

Size of Fruit: I did expect in my mind to have bigger fruit but most of them didn’t grow larger than a tennis ball. Maybe one or two about the size of a baseball. All smoothed skins, soft to the touch when nearing ready to pick, no blemishes, and rather interesting patterns made it a fun one to try. I like putting tomato slices on pretty plates and adding slices of mozzarella or other red tomatoes. This makes a colorful appetizer! Oh, and many of the fruit produced in clusters too on the Green Zebra plant. They start off looking a bit like cherry tomato clusters but grow much larger than cherry tomato fruit.

Comparing to other tomatoes (At first, I was picking the Green Zebras too early).

Its Unique Flavor: Now, for the true test! The flavor. My husband will eat any tomatoes of any kind. He loves tomatoes. And he slices, gobbles, and grabs as many as he can and approved of the taste of the Green Zebra. (He also asked me one day why they weren’t turning red yet so I reminded him these are green new ones I was trying out this year for the first time.).

As for myself, I did think it was “tangy” and I just wasn’t sure how to use them other than adding them in for a beautiful color affect with cheeses and or with red tomatoes, but then one day, I decided to toss them with chopped up fresh cilantro and a couple small cherry red tomatoes, and OMG! That is when I decided these are a keeper on my list. The flavor with the cilantro was very delicious. And by this point, the tomatoes were the juiciest too. Some people don’t like the flavor of cilantro but I absolutely love cilantro and this was the best taste to me with these tangy juicy tomatoes. Perfect as a salsa too or to put on taco’s on taco night!

Green Zebra Tomatoes with Chopped Fresh Cilantro and a few small red cherry tomatoes.

I probably won’t take down this plant for another few weeks but I’m starting to feel like I need to say good-bye to the other indeterminate plants with no more blooms or fruit. My cherry tomatoes are still producing and turning red right now and I’ll write about those later. Hope you are still enjoying your Green Zebras too if you got some from me!

Cathy Testa
Container Crazy CT
Blogging today
Other websites:

http://www.WorkshopsCT.com

http://www.ContainerGardensCT.com

Also on Instagram and Facebook under Container Crazy CT

Located in East Windsor, CT

Looking for a Purple Flowering Plant that Climbs Quickly? This is it.

2 Comments

Picking up a couple vining Hyacinth Bean ‘Ruby Moon’ plants in 4″ small pots from a nursery was a nice little find this season for me.

I was first intrigued by the trifoliate leaves with purple veins. I like when foliage offers touches of colors to serve as color echoes in container gardens. I also had never grown these before and thought they would make a nice candidate as something different to try this season in my container gardens.

Hyacinth Bean ‘Ruby Moon’ or Lablab (Dolichos) is a vining annual in my Connecticut planting zone (CT Zone 6b) and the plant tag indicates it would produce striking vines with ornamental seed pods, flowers, and foliage. It should be planted in full sun and provided with support for the quickly climbing vines.

If you are looking for an vining climbing plant with purple bloom colors, this is a wonderful candidate. It grows up to 10-20 feet and mine easily climbed a trellis inside a big planter at 7-8 feet tall, making the trellis invisible by now (mid July). The vines continue to reach up, looking to grow higher. Additionally, I read this plant continues to showcase its attributes into the early fall season, so it is a long (and tall!) performer.

Birds were perching on the trellis pole quite often until it became invisible due to the growth of the Hyacinth Bean plant covering the trellis, and I loved seeing them against the pink-purple flowers. Its turned out to be one of my favorite combinations this season. The stalks of the flowers are purple as well.

I included a Pink Pentas annual in the lower base of the same planter, a elephant ear bulb, two Canna lily plants to the side (one yellow with red specks blooms, and another variety with red blooms), and tucked in a Original Pink Mandevilla (bushy with limited vining), and also a little blue ornamental grass behind it. The pot is rather large with a big soil volume and it is my favorite combination this season. I water it every day, although, I read the Hyacinth bean plant is rather drought tolerant.

Yellow Bloom Spike coming up on the Canna Lily

Every day, as I leave my driveway, I look at it. It is also visible from my couch in the living room. In addition to seeing the birds visit it (when the trellis was visible), I sometimes witness little butterflies flutter by it – and hummingbirds zoom past this big planter to my hummingbird feeders. The hummingbirds probably will visit the Canna Lily blooms soon, they are opening right now.

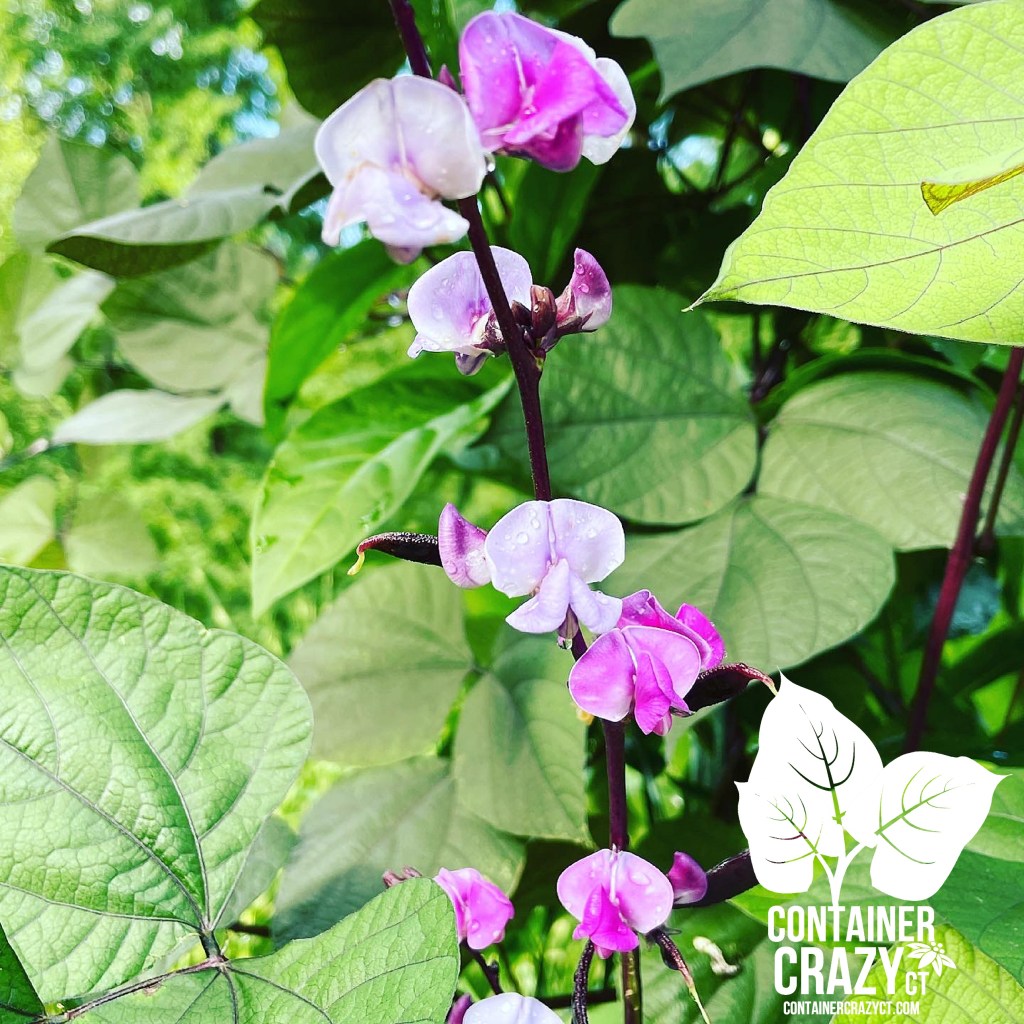
Flowers arrive first followed by these beautiful dark purple beans. My sister-in-law, Vicky, would adore this plant because purple is her favorite color. I read that the beans may be harvested after they turn brown to save the seeds to sow, which I will do for sure for growing from seed next spring. Oh, and the tag indicates this makes a nice cut flower as well for its unique-ness!

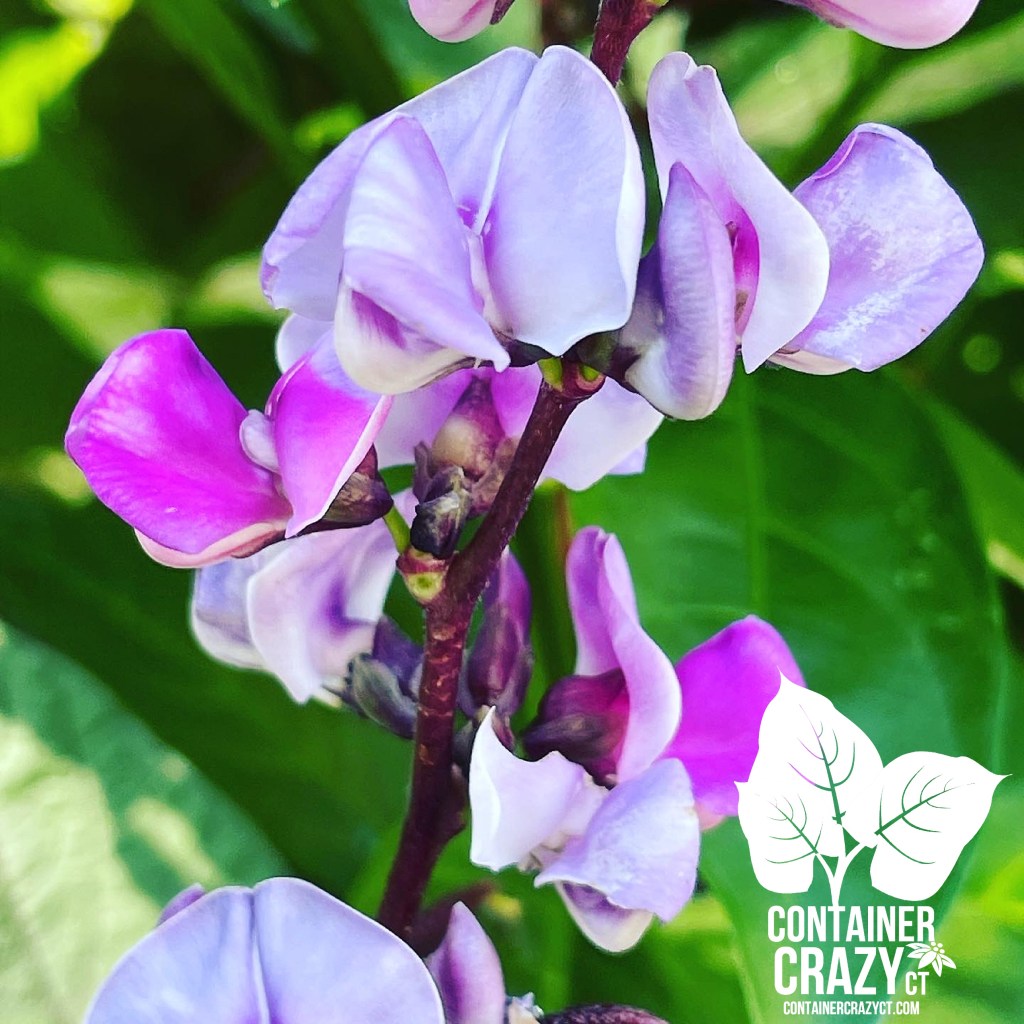
Hyacinth Bean ‘Ruby Moon’ – Purple Flowers

Upon researching this plant, it seems it is edible (the beans, that is) but with a specific cooking process required, thus, it is really for its ornamental value rather than edible benefits. I won’t go into the edible information here because I specifically bought it to try something different for a flowering climber type plant, and because it is a rapid climber.

I did not encounter any insect issues on this plant, which was either luck or a bonus. A plant I had next to it, a purple blooming Datura, in another pot got many holes in the leaves by an insect however, and I just cut it down yesterday because I could not take the look of all that leaf damage anymore on the Datura sitting next to my gorgeous bean plant with no issues.

Vines are Reaching high!

If you are looking for a rapid climber, easy care, and purple color tones, this is a good one to use. I’m so glad I spotted it in a nursery, which was out of town, when I was trying to locate something different. Think purple colors around it or contrasting colors to make it pop (like the green leaves of the Canna Lily). I think you will enjoy it too, and also, remember, this grew from a very small plant into a giant – so it was not a big expense to buy this plant!

Have a great weekend,

Cathy Testa
Container Crazy CT
Container Garden Designer
Plant Enthusiast
Blogger
containercathy at gmail.com
860-977-9473
On Facebook and Instagram under Container Crazy CT

Thank you for visiting.

Orange and Blue Flowers

Leave a comment

What a pretty combination, don’t you think?

Orange and Blue Flowers

Well, technically the tall plant has purple flowers but it is close enough! I love how it looks with the vivid oranges of the straw flowers on the right in the photo above, and the plant to the left is a Chinese Lantern plant (Physalis alkikengi), which will produce orange lantern like shaped flowers in mid-summer to fall.

Chinese Lantern plants are perennials in our area and I’m looking forward to the vibrant, papery seedpods, later in the season, or I should say, my customer will. I have not used this plant before, but it is a spreader, so beware if you want to try it in the gardens of the ground because it is a vigorous plant in open areas. It is best planted in containers even in the ground to manage the roots and spread.

Baptisia australis

The tall upright plant, with intense blue-purple flowers, is a False Indigo (Baptisia australis), which has always been one of my favorite plants. The blooms are showy, upright, and a beautiful indigo-blue. Shaped like pea like flowers. This is a perennial and does well in containers as well. When I put these three together, I thought, wow, I just love how it looks and even from viewing it from the indoors from the window is so pretty.

Another bonus about the False Indigo plant (upright thriller in this combo) is that it attracts butterflies, and is deer resistant should you plant it in a garden, but in this case, I didn’t have to worry about deer, it is located on a balcony in full sun. This plant is a zone 4-9 plant and will bloom most of the summer. Later, the Chinese Lantern will provide a show of orange. It is nice to add plants that bloom at different times to keep the showy orange and blue display going into the fall season.

I also used similar colors with a blue dish garden and wonderful Calibrachoa hybrid plants.

Cobalt Blue Dish Garden

These dainty but powerful annual plants, Calibrachoa, are so useful in sunny situations as well. One is called “Dreamsicle” and more on the orange side, but I also added another called “Tropical Sunrise” that has a mix of the orange, peach colors in the blooms. It is just lovely. Plus they stay on the shorter side (6-12″) which is nice when used on a table for outdoor dining so you don’t block views of your guests while eating. These annual plants may take part-sun also.

Blue and orange are opposite on the color wheel so they work very well together (complementary colors). I had to just share a couple photos of these to brighten up my page (due to my last post being about snakes!).

Enjoy your Friday. Looks like we are in for gorgeous weather this weekend!!

Cathy Testa
Post date: 6/3/2022
Container Crazy CT
Broad Brook, CT
06016
Zone 6b

Oh, by the way, as noted on my www.WorkshopsCT.com page, I am offering watering services this year.

Nature All Around

Leave a comment

One of the wonders and benefits of growing lots of plants and being surrounded by woodlands in my yard is the invitation of wildlife. This year, I’ve seen lots of snakes, so, if this is not your thing, brace yourself, because one made it’s way into my greenhouse!

Garter snake – harmless, I believe!

I’m not too afraid of snakes but I definitely don’t want to find one in a pot I’m carrying in my hands! Fortunately, this guy made it out safely when I left the greenhouse’s screen door open just a crack. I think they found their way in via a drain (they, yes, there was a ring neck snake in my greenhouse this winter as well).

I felt badly that it would not survive in there because I do not have mice or slugs in my greenhouse, nor a source of water, so I’m glad this guy found his way out. In fact, he was drinking water from the rims of pots – so I knew he was thirsty. It took a while. I had to leave him alone to travel across the floor to the screen. He had his face right against the screen and I was like, “Dude, slide to the right to the opening!” Finally, he did.

Luna Moth 2022
Luna Moth Side View

Then, just yesterday, I spotted a beautiful Luna Moth on a shrub on my driveway at 7:30 am. What a sight. I’ve seen them before, but this one was absolutely perfect, so I rushed out to take a photo or two. What a sight – they are just beautiful.

We have two huge groundhogs and lots of rabbits in the yard now. This is typical. And of course the squirrels and I’ve seen a chipmunk spying at my pots already. The list goes on and on. It is a wild life jungle. We even have five huge blue heron nests in the woodlands. I can hear them make their bird calls when they arrive. I am in tune with the sounds of these animals in my surroundings. And there have been quite a few hummingbirds this season. They zoom up to my flowers, pop around, investigate, and I have my hummingbird feeders in various places.

It is just wonderful to watch the wildlife, but it is also tricky because I have to watch them from getting my tomatoes later this year on the deck (that is for the chipmunks and squirrels). I want to build a huge garden enclosed some day in my yard, but that is a huge project for a later date/year.

Fox Cherry Tomato 2022

I plant all my tomato starts in large pots and fabric grow bags. Usually a minimum of 22″ in diameter and about as deep for pots, and the grow bags range from the 15-20 gallon sizes. I know you can grow them in 5 gallon buckets, but that is not my thing. I use quality potting mixes, usually add compost, and this year, I’m adding Espoma Tomato food with calcium because I had the Blossom End Rot issue last year. Long story there, but I want to test if this plant food will help prevent it. Whiskey barrel (1/2 size barrels) are a great visual to determine the size of pot you should use, unless it is a compact variety for patio pots that stays small, but the tomatoes on my deck are mostly indeterminate and will get large. Never use soil from the ground – it is too compact, harbors diseases and insects, etc.

This year, I have planted one of each: Fox Cherry Tomato, Cherokee Purple, Goldie Heirloom, and I need to plant a Ground Cherry, which that one is new to me. Just I have to rush to do these things for me between plant work for others. That is fine, the weather has been stupendous! Let’s hope it stays that way. Anyhow, I take lots and lots of photos if you are interested in seeing the progress, and more wild life photos – go to my page on Instagram under Container Crazy CT. I posted a few of the Luna Moth yesterday.

Well, that is all for today. Just wanted to share a quick photo or two.

Have a great week!

Cathy Testa
Zone 6b
Connecticut

Hardening Off Tomatoes 2022

2 Comments

This week’s weather in my part of Connecticut is fantastic. My tomato babies will love the heat in the greenhouse from the sun and the breezes flowing thru the doors and vents. I am not, however, putting my tomato plants outdoors yet too much because it has been very breezy and windy. I use caution because I don’t want to dry out the delicate tomato start leaves.

This time of year is very busy for plant business people so I don’t really even have that much time to write this am, but as I sip my coffee no. 2, I wanted to post a quick hello and a pic or two. When the breezes subside, I will be rotating out my tomato starts in groupings this week to harden them off (acclimate). I try to avoid full sun and place them on trays where there is some shade from a nearby dawn redwood tree (a tree very useful because it looses its needles in the winter (thus, no shade is cast during winter on my greenhouse) but gets the needles growing now so it provides the shade I enjoy for my hardening off of the tomato plants.

If you put your tomato plants out in full sun immediately from your indoor growing environment, it will burn the leaves and white patches will appear on the leaves afterwards (usually you will see it the next day on the leaves). So I always do shade, part shade, part sun and luckily I have that available. I also use tables, shelves, and it becomes a little crowded, but in addition to focusing on hardening off the plants in non-full sun locations at first, I make sure things are spaced inside and out to allow air circulation around the plants. This helps prevent diseases on the leaves or other issues.

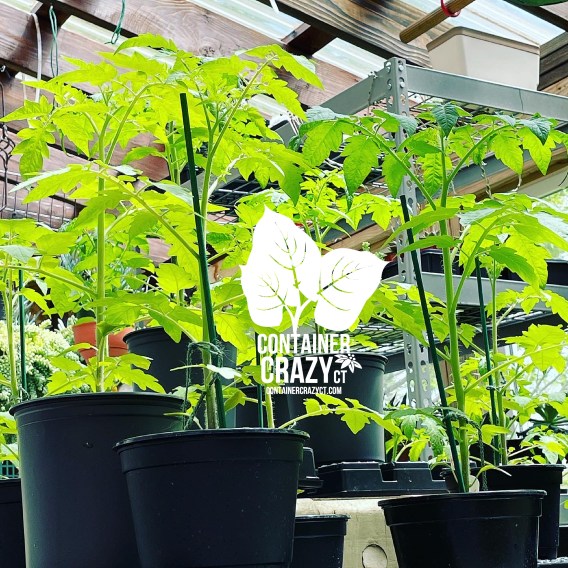
Some of my tomato starts are ready to be potted up and I usually do some to one gallon pots as needed. Others are still okay in their smaller pots, but if they start to lean, I know it is time to twine them to a small wooden stake.

Most of my plants are spoken for now, but I believe I still have some of the wonderful heirloom Cherokee Purples available. And Ground Cherries, those are still small and I’m not sure why, but I have faith they will perform when the time is right. This is the first year I am growing the Ground Cherries from seed. They are like hot pepper plants apparently, they really need heat to grow well from seed. I discovered the ground cherries last year, they taste like pineapple!

Ground Cherries from a site I visited last year in New Hampshire – inspired me to try them this year!

Well, this is all I can write for today, I have to get out there, get plants watered, out and then off to a site to prep for planting later this month. BTW, I wait to put my tropical plants and tomatoes/warm season vegetables in their permanent outdoor pots and or grow bags till Memorial Day. Hardening off is taking place now on good days with sun and not too windy or cool conditions. And I will rotate them out in groupings. Plus they still need to grow some. So happy about the great weather to do all!

Have a great day and week! Enjoy this weather!!

Cathy Testa
containercathy at gmail.com
860-977-9473
Broad Brook/East Windsor, CT
Zone 6b
Container Gardener
Plant Enthusiast
Nature Lover!

Seedlings and Transplanting

Leave a comment

I started to transplant seedlings from my seed tray into small pots yesterday. It was a very sunny warm day and a pleasant time to work on this, but it did take me half the day to complete, and I cut back on the amount of seeds I have sown as compared to last year.

Seedling Tray as of 4/11/22

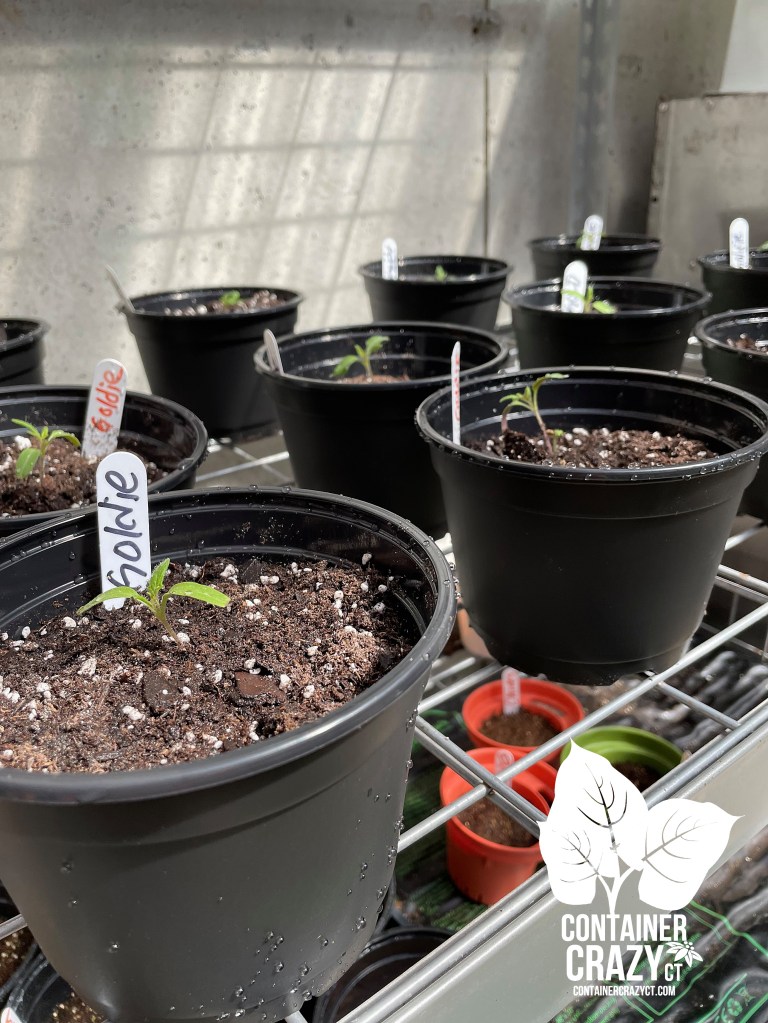
Most instructions or reference books will indicate to transplant once the first true leaves have developed. Above is a photo of the stage at which I transplanted them yesterday. Usually, I wait a bit longer for those two top true leaves (above the cotyledons) to be a bit larger, but I had time to work on this and will be away from my greenhouse for the next few days. It will be sunny for a day or so and the temps will rise so putting them into bigger pots will help to reduce moisture loss or chances of soil dry out while I am not here to attend to moisture monitoring. (Tip: Water your seedling tray so the soil is moist before removing the seedling to transplant into a pot.)

Into Potting Mix

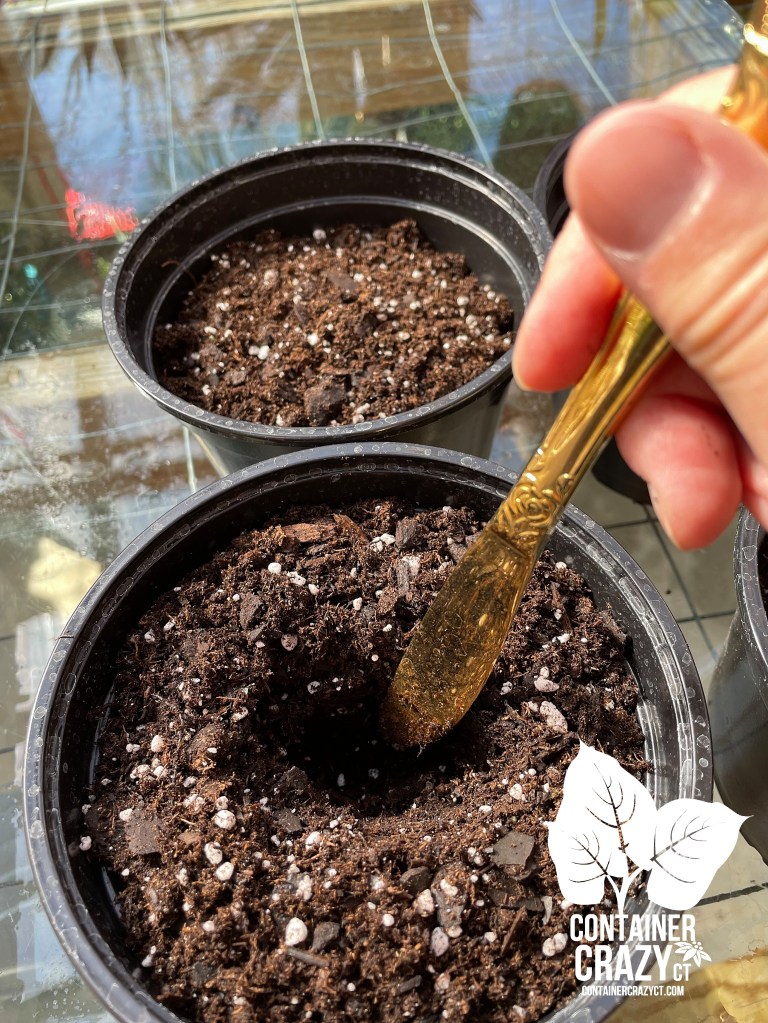
I used 5-6″ round pots and added fresh slightly pre-moistened potting mix (not seedling mix) and I used a clean golden knife to make a hole to insert the seedling into. I’m probably over cautious and handle all with care as to not damage the small seedlings. The golden knife was from a utensils set I received as a gift over 30 years ago – yes, as a wedding gift. The funny thing is I never really liked the gold color so I stored the set – and now they are used as gardening tools for me in the greenhouse. I can’t remember who gave that set to me. They would be surprised to know I’m using them this way today.

Seedling Size as of 4/11/22

I make a nice pocket to insert the seedling into the round pot. I do not fertilize at all at this point. The seedlings’ roots are still very fine and tender. I tend to not fertilize at all until a month later. Some recommendations will say to start fertilizing with half-strength with soluble plant food. I don’t do this at this stage. They will be able to stay in these pots for a 2-3 weeks, I think. I’ll keep you posted as I go along. It really depends on the amount of sunshine we get for growth results. (Tip: Remember, it still can snow in April – it did on 4/16/21).

On a table

I put some of them on a table set in the middle of my greenhouse and others on table racks. (Note: I do not recommend leaving on the glass like I did above, it is better to have air circulation below the pot as well as above, in my opinion. But sometimes I run out of space.) These are Cherokee Heirlooms above. Again, I usually wait till the seedlings are a bit larger but I had the time to do the work yesterday, so I got it started.

Fox Cherry Tomatoes

I also have quite a few Fox Cherry (yummy!!) tomatoes potted up (transplanted) as well. They are looking nice. I’m sure when we get more sunny weather, these will pop up rather quickly in growth. (Tip: If a seed shell is still stuck to the tip of a leaf, use a spray bottle to mist some water lightly on the seed, and it will remove easily.)

Liking the Look of My Foxes!

You can use seedling mix if you wanted to, but I tend to use potting mix at this stage. I handle them carefully, not pulling by the leaves but gently inserting the golden knife into the seedling tray cells and pushing up the root area as I remove them to put in the black pots. Sometimes I will bury the tomato plant just a little deeper. The stem has tiny hairs that turn into roots, but it is not necessary to do this (plant deeper) if you don’t want to. If your seedlings are leggy and stretchy however, this can be helpful.

Goldie Heirlooms

I sowed these for the first time last year, the Goldies! See photo below. We had too much rain last year when they were outside, but I am hopeful this year will be better for these babies. I am careful to not over water them right now, because they are so tiny and tender right now, I don’t want any rot to set in at the base of the stem. Good air circulation on hot days in the greenhouse is helpful. If the sun is out and the temps rise quickly, vent the doors, and turn on a light fan. It is important to not make the soil soaking wet, and checking them often. At least I do.

Last year’s Goldie!

Well, just a short post for today. We are getting rain all morning, up to 1 pm, then will be sun this afternoon, some of tomorrow will be sunny too. Bring on that sunshine. My new little tomato starts need them.

Remember, if you are local and interested in some of my tomato starter plants in mid-May, get on my list. I am not growing as many as last year, due to trying to conserve expenses (pots, soil, etc).

Thanks,

Cathy Testa
Zone 6b, CT
Broad Brook/East Windsor, CT
containercathy at gmail.com
860-977-9473
www.WorkshopsCT.com (products)
www.ContainerGardensCT.com (container designer)
http://www.ContainerCrazyCT.com (blog)

Cherokee on a Plant in 2021

Growing Tomatoes Sucks

3 Comments

Ha! Ha! April Fools!

Growing tomatoes definitely does NOT suck. It is one of the most rewarding aspects of summer container gardening!

I’m in the early stages of seed sowing this year, and here are some photos to share with basic tips, with all kidding aside! 🙂

Pre-Moisten

Tip No. 1 – Pre-moisten the seedling mix

I use a clear bowl and pour a small bag of “seedling” mix into it and then add water from my watering can. Using a clean and sterilized small scoop or utensil, gently stir the mix. It is best if you are able to do this a night before to allow the mix to absorb moisture, but a few hours before is fine as well, but this step is crucial. Allow that mix to take up a bit of moisture so it won’t float out of your seed tray and also the mix sometimes needs to rehydrate before use.

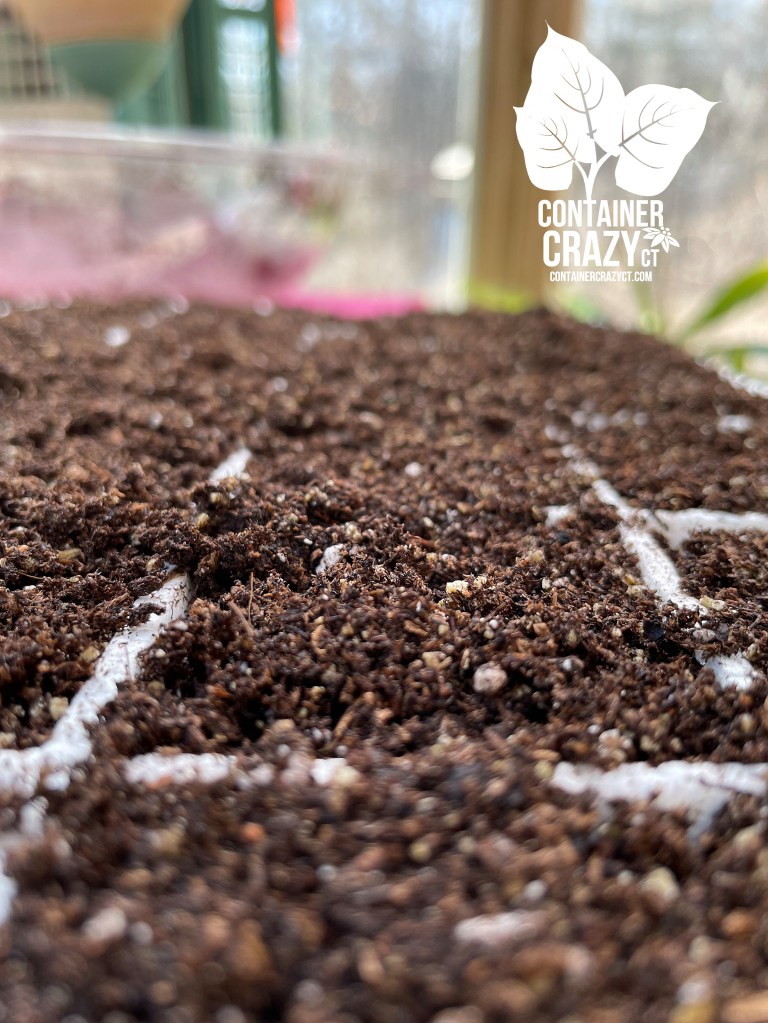
Close Up of the Seedling Mix in a Tray
Make a little hole

Tip No. 2 – Use a clean tool to make a tiny hole

Sometimes I have used a bamboo skewer, or you may just use your hands, I guess, but I prefer to make a tiny hole with a tool and then drop the seed into the hole with tweezers. You have the option of one seed per cell or a few seeds (and separate them later), but I tend to do one per cell in most cases. Again, make sure the tool you use is clean and I avoid reusing them unless they are easily cleaned. What I mean is after one tray, I may toss out that little plastic straw I used or put it in a recycle bin for use other than seed sowing. Be careful not to transmit things from tools. I’m referring to sowing tomato seeds in this post (and some of the hot pepper seeds).

Tip No. 3 – Seeds In Hand

Pour some seed into your hand or a paper cup as you work to drop them into the seedling mix – guess this is not really a tip but I have a good pic of me with some tomato seeds in my hand. Make sure if your hands happen to be wet to not to put an unsown seed back into your seedling packet because you will transfer some moisture from your hand to the seed to the packet. If you don’t use all of the seeds in your seed packet, store the packet in a cool, dark, dry place away from hot sun, temp flux’s, or moisture or damp conditions. And know how long seeds last for whatever you are sowing. Some seeds last 25 years, others last 2 years.

Seeds in Hands
On Seedling Heat Mats and Under Grow Lights

Tip No. 4 – Use a Grow Light

This is the first year I am using a high output energy efficient high bay fixture grow lamp. My trays are in my greenhouse BUT we get lots of cloudy days when I start to sow seeds in my area of Connecticut (usually starting in March thru May). On the cloudy days, I’ve been turning on the light. It hangs over the trays with a pendant chain which I am able to lower and rise the position of the lamp fixture by taking the chain and an S-hook to adjust it. I do not have it on a timer, I turn it on in the mornings on cloudy days, and turn it off by dinner time. It is only needed when the seeds germinate and are showing above the soil. This is a fluorescent lamp style. Tip is to watch it carefully as the seedlings grow so you do not burn the foliage as they grow higher.

Covers – Natural Sun was Hitting them in this photo one morning

Tip No. 5: Use clear covers to help maintain moisture of the seedling mix until they germinate is very much recommended, however, I tend to not do that – because I work from home, I check the trays every day at least twice a day. I look to see if some cells have dry soil (lighter in color, touch top to feel moisture if need be), while others are still are moist. I literally will carefully water only the ones that are dry, so because I am home and a plant addict, I check them often. If I was not home all day, I would be concerned about them getting too dry and go with the clear dome covers instead to help retain moisture during the phase of waiting for the seeds to germinate.

Tip. No. 6 – All same type of seeds in a tray

I made one minor error, I put tomato seeds in the same big tray in several rows and in the same tray, some hot pepper seeds in adjacent rows. Pepper seeds take a lot longer to germinate (3 weeks) because they really like very warm soil and air temperatures, while the tomato seeds germinated in five days! So now I am like, ah, I have to put the tomato side under the light. Next time, I will avoid that scenario. They only need the light when they rise above the soil. Hopefully this is making sense, LOL.

Other General Tips for Sowing Stages:

Don’t sow too early. Don’t sow too late. Know the timing. I’ve discussed in prior posts.
Visit trays twice a day to monitor watering, as noted above unless using dome covers.
Take photos, its fun and it allows you to see adjustment ideas for the next season.
Label seed packets with a Sharpie marker if seeds are still in the packet (I put a dot on the back if I used only some of the seed and a check mark on the back if all seeds were used.)
Record the date sown on the plant label and on a wall calendar or notebook. When the planting season arrives, you will get too busy. Taking notes is important.
Remember that in mid-May (for CT zones), you have to harden off the seedlings outdoors for a while before you actually plant them in patio pots, grow bags, raised gardens, etc.
Watch the weather forecasts.
Target your weeks before based on the expected last spring frost in May (usually mid-May).
Target your planting time when safe to plant outside (usually around Memorial Day, usually).

Types of Lights

I did minimal research on lights to be honest. There are several types of artificial lights for the greenhouse world. You do not need lights when the sun is shining in a greehouse for seedlings of this type, and the heat rises in a greenhouse quickly on sunny days, so you may need the alternate – a fan, or small gentle fan for your trays. Using a light should help the strength of my seedlings this year. As I’ve noted above, for many years, I did not use grow lights at all and I was successful. There are incandescent lights, high intensity discharge lights, fluorescent lights (the type I got), and light emitting diode (LED). All of these I will research when I have time I guess! LOL. Some are more expensive than others and some are hotter than others. Note: Some fluorescent fixtures are not good enough for other types of plants, but they work for seedlings with the right T strength. It is too complicated for me to go into and I’m still just learning about them so not much more I can offer on that for now, but if you do get lights, be sure you consider the placement, how you will adjust the height of them or the trays below. I read someone said they use books to raise the trays, rather than lower the light fixture but I also have a heat mat below. And I don’t want to bring books that may get wet into my greenhouse and keep dampness below the trays. Yes, I’m an*al that way – I over think it. Do research on the lights first if you have never used them, there are lots of neat setups now for indoor home growers. I just read of one that is a small shelving system perfect for apartments with lights already installed, etc. Many options out there.

My Tomato Jungle Last Year (2021)

And tomatoes do not s*ck – I was just kidding – it was a joke. Don’t slap me. Sorry, couldn’t help it.

Have a GREAT weekend!

Cathy Testa
860-977-9473
Container Garden Enthusiast
Zone 6b
Connecticut
Dated: 4/1/2022 April Fool’s Day

Places I’ve Put My Tomato Plants in Containers at My Home

Leave a comment

When my husband and I searched for our house, many moons ago, I was absolutely sure I wanted a house with some property. I grew up on a farm in East Windsor, CT and I knew I liked having space around my home, but never in a million years, would I have imagined how much I would enjoy the spaces and land as much as we have over the past 30 or so years.

When I get my tomato plants ready to put in pots, grow bags, or containers, I have some choices on where to place the containers around my home.

The Driveway

Driveway Area

The driveway area located between our garage and house is fairly large. Never would have I thought when we had a wrought iron fence built that it would be a great place to line up tomatoes in pots later in life. The warmth of the paved area is great for keeping the soil warm for the plants, the wrought iron fence serves a bit as a protection from wild animals on the back side, and the garden hose from the house’s outdoor faucet is close enough to reach the potted tomato plants for daily watering in the summer months.

Upon Planting

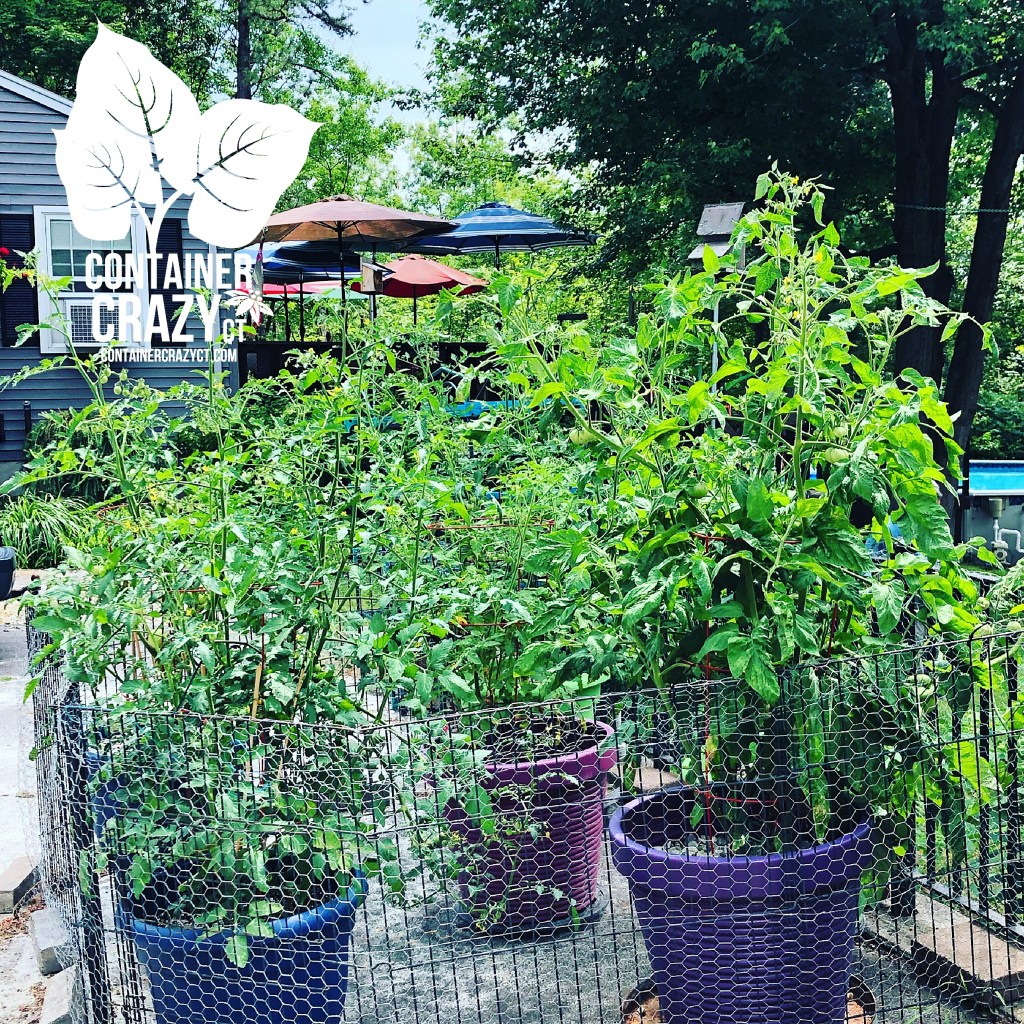
I think the first year that I lined up the pots with tomato plants on this driveway space area, I didn’t need any fencing around it, but the wild animals learned. They (squirrels or chipmunks) started to discover this was “the sweet spot” and thus, the following years, I had to put chicken wire around the pots to protect the fruit from the little critters. The chipmunks were particularly a nuisance one year, because they would creep up and sneak in by going on the backside. The chicken wire I used was attached to a large dog pen portable cage I picked up somewhere. It worked, somewhat but it was a pain to open and close it to get to the fruit at times.

Driveway, Plants Surrounded by Chicken Wire attached to a Dog Pen Fence

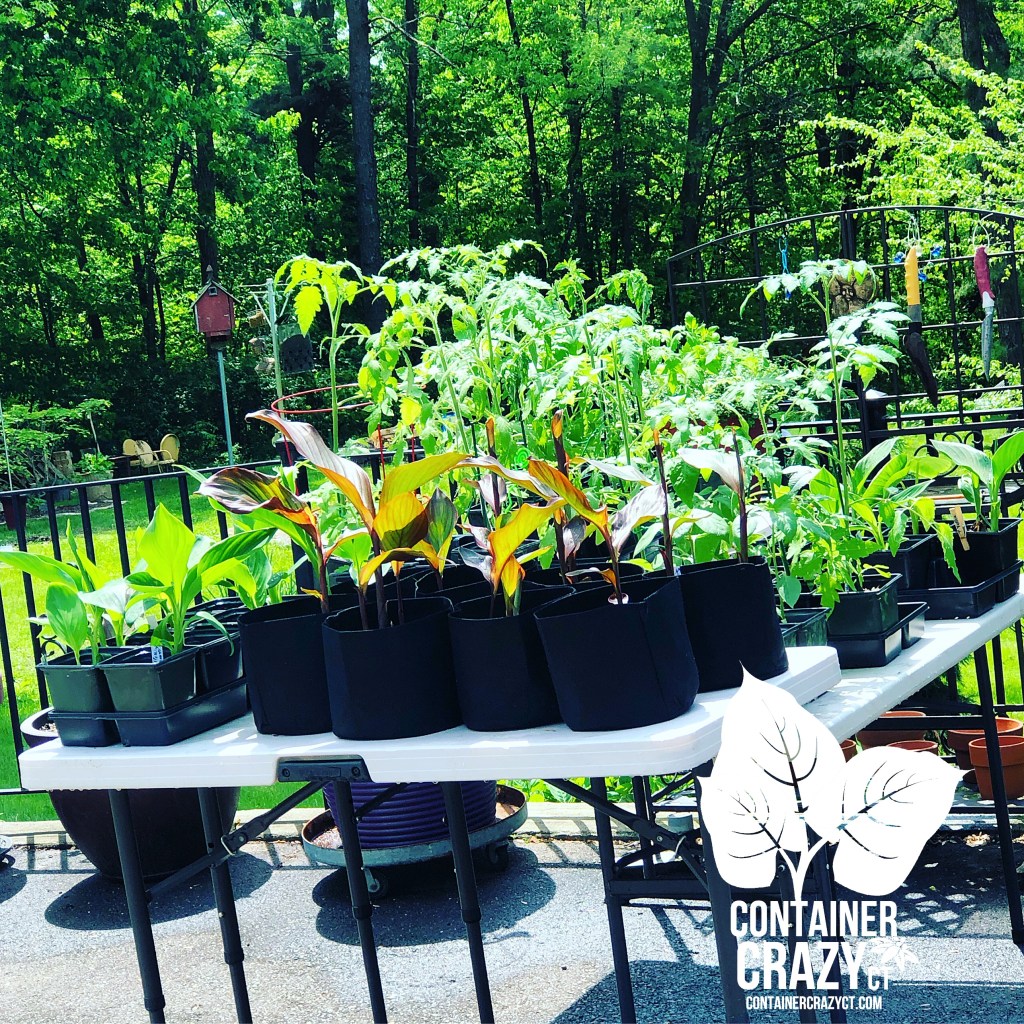
Turns out back then, the driveway area between the house and garage served as a great place to also harden off my tomato plants before planting them in bigger pots. The paved area is level and a great surface to place portable tables there, so again, I could keep the critters away by elevating my starter plants, and for ease of transporting them daily, as I would move them back and forth sometimes from the inside to the outside each day to acclimate them before their permanent home in a large pot.

Hardening Off Tomato Plants on a Table along with some other plants

The Deck and Deck Tables

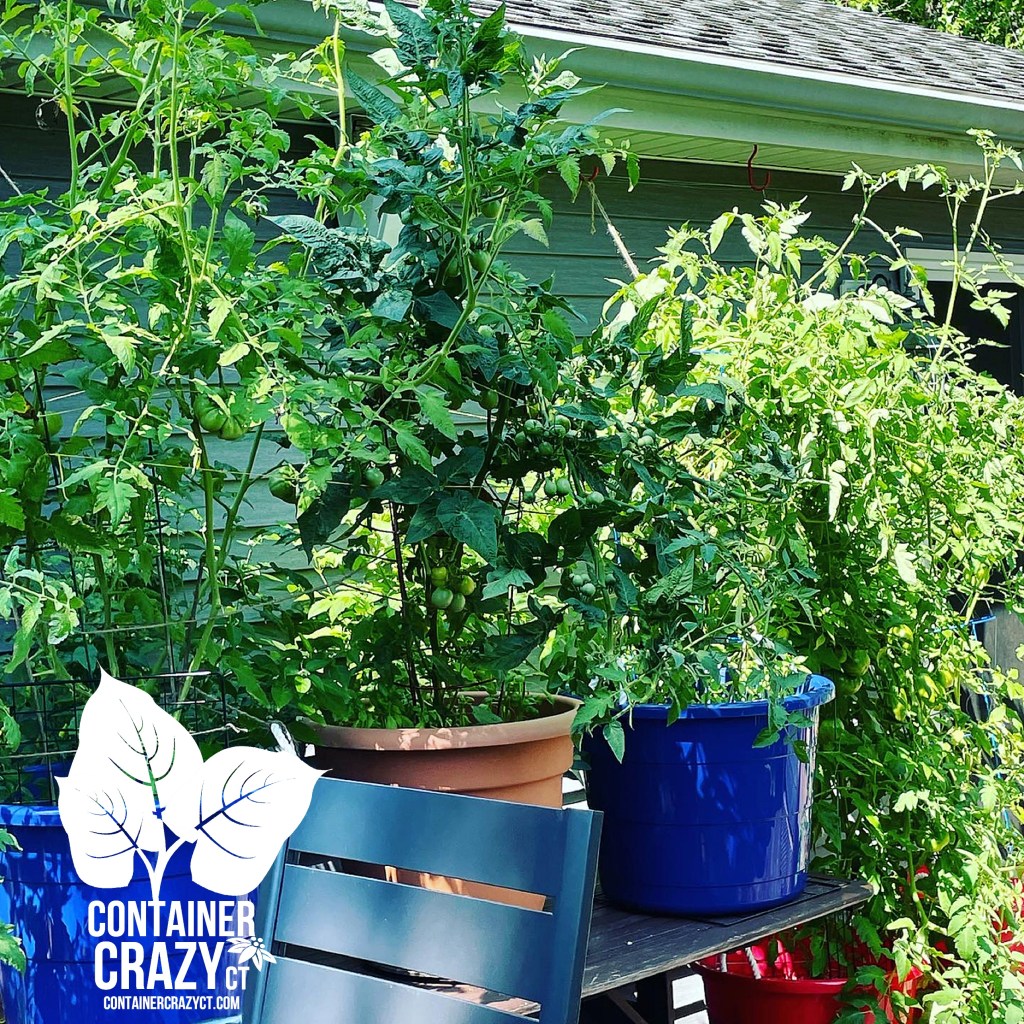
I knew when we built a wooden deck along the back side of our ranch style home that it would be immediately filled with flowers in patio pots, and it was, but later in life, I started potting up tomato plants and herbs as well. The deck is nice because fresh tomatoes are within reach of our kitchen area. Plus if any wild animals wish to investigate, which they do, such as squirrels, I’m close enough at times to yell at them to get lost. Last year, I decided to put some of the tomato plants in big tubs on an old deck table. I wanted to try to see if it would help from the investigating squirrels. It kind of did. We didn’t have the best weather last year for tomatoes (too much rain) but they were so beautiful and large before we started getting harsh rain storms with damaging winds, etc. Anyhow, using the deck table on the deck was a nice place to put some of the pots. Some of the pots are also on the deck floor.

Because the indeterminate tomato plants will grow taller and taller, I came up with a strategy to take garden twine and s-shaped hooks and train them up to the house gutters. It looks rather messy but heck, it works. I guess I don’t mind the jungle feel of tomatoes on my deck. We can just walk by and grab ripened ones anytime we wish. And yes, I did sit in that cozy deck chair and admire my plants from time to time. That makes them grow better. Didn’t you know that? LOL.

Tomato Plants on the Deck

North Side Area by Garage

To the north side of our garage, where our leaching field is located under the ground, is a nice flat open space. Years ago, I considered putting a hoop style greenhouse there because it gets full sun all day but that area gets very hot. There are no shade trees and the lawn bakes there. You can see the grass is usually dry as a bone on this area in the photos below. I didn’t end up putting a hoop style greenhouse there, and I’m thankful because it would get too hot in summer. I could imagine it having to have fans on all the time and things would bake. Plus, often it is not a good idea to build over leaching fields.

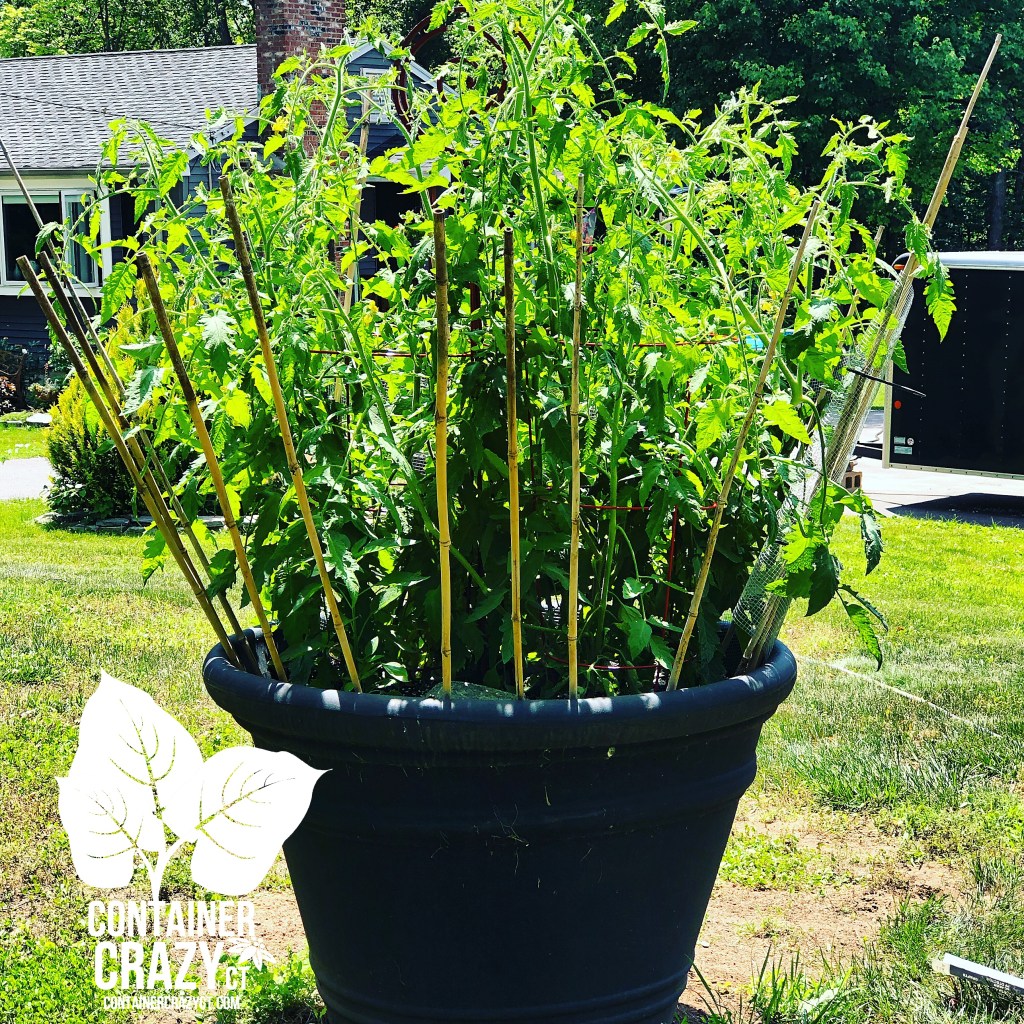
Anyhow, one year, I put a rather large black pot there with an Oxheart tomato. The plant grew so large, I wrapped hard wire fencing around it with bamboo poles. The bamboo poles were inserted into the inside of the rim of this large pot that is about 4 feet tall. It worked great – the critters could not climb up the large black pot (because it is large and not easily grabbed onto) to get to the amazing huge Oxheart tomatoes.

Inserting the Bamboo Poles
Before I decided to line the bamboo poles around it

I used to drag a very long garden hose up to that area and actually set the hose in the big black pot and let it run for a bit to water it. I developed tennis elbow from doing this here and everywhere for other containers on my property (always too many! LOL), so this area was not the best for watering routines. However, it was probably one of the best spots for keeping animals away. I think the pot’s height and the fact nothing was around it, maybe the animals felt threatened in that area (unprotected) but it definitely kept them out. However, to get to the gorgeous huge 3 lb sized Oxheart tomatoes once they were ripe, I had to get on a step stool to reach down into the plant and carefully grab these huge tomatoes. It was tricky, but worth it.

Zip Ties used to Secure the Hard Wire Fence Material to the Bamboo Poles
Look at the lawn area – burnt and dry

No matter where I put the containers with tomatoes around my home, I still envision an enclosed garden area in my backyard surrounded by a beautiful white fence with a gate and arbor entrance. Alas, my husband says, that will have to wait until he retires because he never has time to build it. We get lots of wild animals in our backyard, so any fruiting plants must be protected. It would have to be carefully protected with fencing all around and I envision it filled with those square raised beds. Ah, that would be tomato heaven.

Last Year, 2021, On the deck by my bedroom slider

Cathy Testa
Container Crazy CT
Zone 6b
Thanks for visiting!

Patio Umbrellas on the deck offers shade as needed
Welcome to the Jungle!
Plants around the Patio Table – Adds Ambiance!

Will We Be Short on Potting Mixes again This Year?

Leave a comment
Cathy Testa of Container (Garden) Crazy CT (Photo in my greenhouse by JMS Art & Photo)

Potting Mix is probably one of the most important aspects of success for growing healthy plants in patio pots. It must be a quality product. If the bag of soilless mix is damaged, not a good brand, or these days, possibly unavailable, you are in trouble.

Every single product or tool we use to grow plants (pots, trays, fertilizer, seeds, soilless mixes and specialty media, labels, etc.) has increased in prices and there are continued delays in the supply chain. This will affect all of us this year again potentially, however, it won’t stop us (because we love plants, or course! But I see it coming and if you haven’t noticed these issues, you will.)

I usually don’t make my own potting mixes for my container gardens, seedlings, or starter plants, but this year, I am highly considering it. In fact, I just read an article here, where they share a downloadable PDF file of how to make your own potting mixes. BTW, I trust sources from universities or extension services the most. By making your own mix, you are in complete control of each component. I’m guessing it may be cheaper but I am not sure until I compare apples to apples, so to speak. However, there is such an ease with opening a reliable trusted brand of professional potting mixes, if they are available and fresh.

Photo in Cathy T’s Greenhouse – Yes, that’s my hand in the mix!

Traditional pre-made potting mixes contain perlite and/or vermiculite, and peat. Good mixes are light-weight, have good water holding capacity, and mixes vary based on the specific growing needs (seeds, transplanting, bedding plants, plugs, potting up, etc.). Some mixes will have things like beneficial mycorrhizal (or biofungicides to prevent root diseases). Some will contain alternatives to peat, such as coir. Some have organic fertilizer added, and some don’t. Some mixes are pH adjusted and contain starter nutrients. This list goes on and on, and it all sounds wonderful, doesn’t it? That is if you can find it and trust it.

Photo from Cathy T’s Greenhouse

After using various bagged potting and soilless container mixes for ten years, I am able to tell when a mix is healthy the minute I opened the bag. I’ve talked about what to look out for when you buy potting mix for your container gardens, patio pots, and planters here on my blog. I still need to update that article I wrote, called “The 5 Must-Do’s for Successful Container Gardening” which I wrote a long time ago and did a brief update to it in 2019. But it still needs lots of work. Potting mixes is a big topic. I just haven’t had the time to really dive into a more extensive version of that article.

Now here we are in 2022. And I’m frustrated with the potting mix scene. I’m not alone. Lots of plant related Facebook groups have questions on potting mixes. People are frustrated because they get issues in or from the mixes (i.e., fungus gnats), and they just want good results, and so do I. They fear using the wrong type or brand, and even I have from time to time. Why? Because lately some results from “some” mixes let me down, and now with supply-chain issues, I wonder how this will impact availability and quality of mixes in 2022.

Pouring Potting Mix into a Bubble Bowl Terrarium – Cathy Testa of Container Crazy CT

Potting mixes are like a good foundation to building a house. And we all know what happened when one ingredient in concrete for home foundations became a huge issue, where houses had to be lifted and new foundation poured because house foundations were cracking and deteriorating. Well, I kind of feel this way about potting mixes. Potting mixes are the foundation to starting seeds, potting up your indoor houseplants, and building up soil mixes in your outdoor container gardens and patio pots, along with other components as needed. If one thing is wrong with them, it may lead to issues (e.g., poor drainage, insects harboring, or no moisture holding capacity). And there are many sources of potting mix brands out in the market, and it is growing, as defined in this link based on recent market analysis. The affects of COVID have impacted production and demand. It makes me wonder, what will roll out of those long awaited semi-loaded trucks, when they do arrive.

Castor Bean Seed Coming Up in Healthy Mix

For years, I had no issues acquiring the potting soilless mixes I needed, but the past couple years, eh, I’ve encountered some issues. And this year, because of all the things still impacting our supply chains overall, well, there are now potential issues with availability. This is my prediction, but we will see. I did receive a comment that orders were all back ordered a few months ago but the bottom line is lately we just can not predict what will happen next. So, my overall thought is, will potting mixes be in short-supply this year? And how will you or I manage that if so? What adjustments will need to be made? And also, remember, being flexible in the growing scene is key. I struggle with this because I want to be in control, but I’ve learned over the years, you must be flexible and strong! LOL. Because growing plants is a science and an art, and a bit of a guessing game sometimes too.

Cathy Testa
Container Gardening
containercathy at gmail.com
Zone 6b

Five Random Plant Photos and The Story Behind Them

3 Comments
Cactus in Tin Cans

This was back in 2019. I used a hammer and nail to pound little drain holes in the base of the soup cans (easy peasy!), and put a cactus plant in each. I had started to do letter stamping on the cans’ sides prior for fun. These just ended up on a wood shed floor and a photographer (JMS Art & Photo) took photos of it when here taking other photos of my plants that day. Note: Only downfall of the cans is they start to rust – but that could be a good thing if you like a rustic look.

Table in the Greenhouse

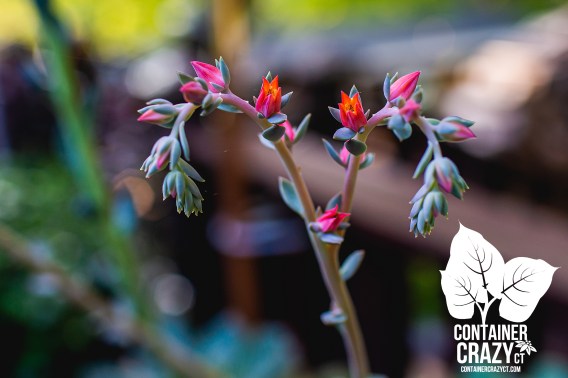
I know that every square inch of my greenhouse should probably be used for plants only, but I can’t help myself. I like creating a mix of vintage or antique things to put around my plants. The table is a very old small draft table a retired engineer gave away for free one year (actually his daughter posted it for free) so I went to get it. The typewriter in the background was from my husband’s uncle’s typewriter shop. The vintage fan is from a farm in Vernon, which I picked up as part of their tag sale one summer. But of course, what is the most impressive is that succulent plant and the way the flower stems grew. It is such a beautiful photo, again by JMS noted above.

Succulent Blooms in Summer

Speaking of succulent blooms, here’s a beautiful photo of one which was outdoors in summer. It was growing in the shape of a heart! Hummingbirds visit these blooms a lot. They like them, so take note, succulent flowers are great for your little hummingbirds in summer and they last a very long time on long tall stems. This bloom was actually growing from a hanging basket filled with succulent plants, so the flowers were high up and the hummingbird was fun to watch.

Castor Bean Seed Pods

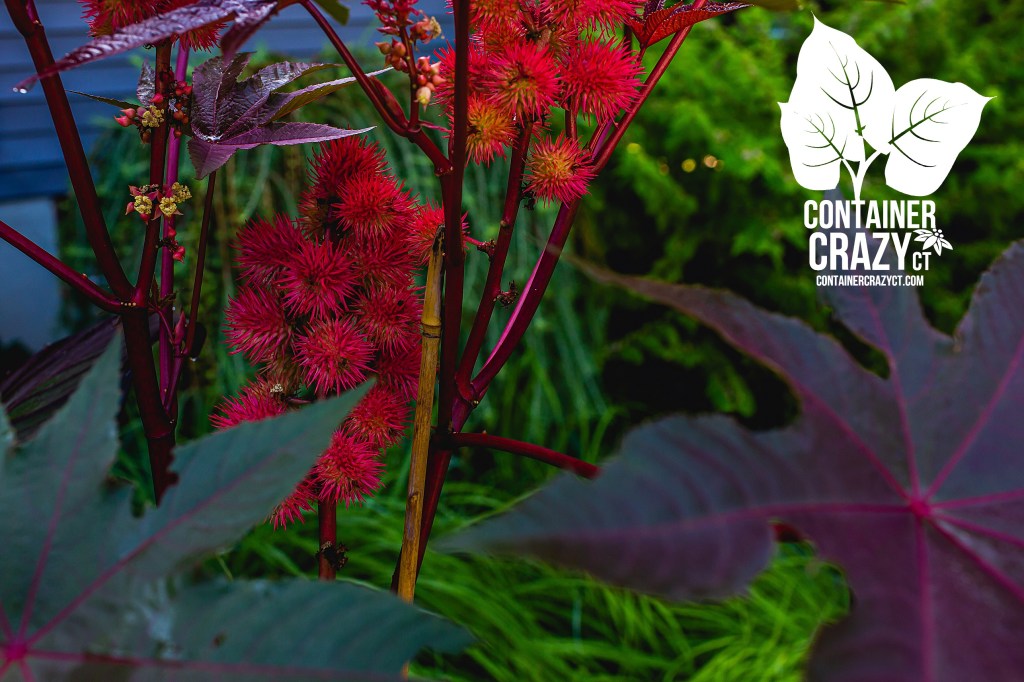
Castor bean plants are easy to grow from seed. I wrote about this plant and an artist’s depiction of them too via this post. This variety has red stems, reddish foliage, and red round seed pods which are spiny. You wait to harvest them at the right time when the seeds inside are mature, and crack the pods open. Gloves are recommended as the spines can be a nuisance when cracking open the seed pods. Keep your seeds over the winter and sow in the spring. These plants grow super tall and huge. I probably will sow more seeds this spring again. They make a tropical affect in the garden.

Morning Glories

Another photo by JMS (noted above). I love the way she captured the shadow of the morning glories growing along my garage wall. I wrote about morning glories last month, see here. Plants offer many artistic benefits and one being the way plants’ foliage and flowers capture light or twine and grow – this is why I am obsessed with plant photography!

Well, just 5 random photos to share today!

Hope you enjoy them.

Have a great weekend.

Cathy Testa
860-977-9473
containercathy at gmail.com
Container Garden Designer
Plant Enthusiast
Blogger
Broad Brook, CT 06016
Zone: 6b
Written: 2/18/22