Cathy Testa of Container (Garden) Crazy CT (Photo in my greenhouse by JMS Art & Photo)
Potting Mix is probably one of the most important aspects of success for growing healthy plants in patio pots. It must be a quality product. If the bag of soilless mix is damaged, not a good brand, or these days, possibly unavailable, you are in trouble.
Every single product or tool we use to grow plants (pots, trays, fertilizer, seeds, soilless mixes and specialty media, labels, etc.) has increased in prices and there are continued delays in the supply chain. This will affect all of us this year again potentially, however, it won’t stop us (because we love plants, or course! But I see it coming and if you haven’t noticed these issues, you will.)
I usually don’t make my own potting mixes for my container gardens, seedlings, or starter plants, but this year, I am highly considering it. In fact, I just read an article here, where they share a downloadable PDF file of how to make your own potting mixes. BTW, I trust sources from universities or extension services the most. By making your own mix, you are in complete control of each component. I’m guessing it may be cheaper but I am not sure until I compare apples to apples, so to speak. However, there is such an ease with opening a reliable trusted brand of professional potting mixes, if they are available and fresh.
Photo in Cathy T’s Greenhouse – Yes, that’s my hand in the mix!
Traditional pre-made potting mixes contain perlite and/or vermiculite, and peat. Good mixes are light-weight, have good water holding capacity, and mixes vary based on the specific growing needs (seeds, transplanting, bedding plants, plugs, potting up, etc.). Some mixes will have things like beneficial mycorrhizal (or biofungicides to prevent root diseases). Some will contain alternatives to peat, such as coir. Some have organic fertilizer added, and some don’t. Some mixes are pH adjusted and contain starter nutrients. This list goes on and on, and it all sounds wonderful, doesn’t it? That is if you can find it and trust it.
Photo from Cathy T’s Greenhouse
After using various bagged potting and soilless container mixes for ten years, I am able to tell when a mix is healthy the minute I opened the bag. I’ve talked about what to look out for when you buy potting mix for your container gardens, patio pots, and planters here on my blog. I still need to update that article I wrote, called “The 5 Must-Do’s for Successful Container Gardening” which I wrote a long time ago and did a brief update to it in 2019. But it still needs lots of work. Potting mixes is a big topic. I just haven’t had the time to really dive into a more extensive version of that article.
Now here we are in 2022. And I’m frustrated with the potting mix scene. I’m not alone. Lots of plant related Facebook groups have questions on potting mixes. People are frustrated because they get issues in or from the mixes (i.e., fungus gnats), and they just want good results, and so do I. They fear using the wrong type or brand, and even I have from time to time. Why? Because lately some results from “some” mixes let me down, and now with supply-chain issues, I wonder how this will impact availability and quality of mixes in 2022.
Pouring Potting Mix into a Bubble Bowl Terrarium – Cathy Testa of Container Crazy CT
Potting mixes are like a good foundation to building a house. And we all know what happened when one ingredient in concrete for home foundations became a huge issue, where houses had to be lifted and new foundation poured because house foundations were cracking and deteriorating. Well, I kind of feel this way about potting mixes. Potting mixes are the foundation to starting seeds, potting up your indoor houseplants, and building up soil mixes in your outdoor container gardens and patio pots, along with other components as needed. If one thing is wrong with them, it may lead to issues (e.g., poor drainage, insects harboring, or no moisture holding capacity). And there are many sources of potting mix brands out in the market, and it is growing, as defined in this link based on recent market analysis. The affects of COVID have impacted production and demand. It makes me wonder, what will roll out of those long awaited semi-loaded trucks, when they do arrive.
Castor Bean Seed Coming Up in Healthy Mix
For years, I had no issues acquiring the potting soilless mixes I needed, but the past couple years, eh, I’ve encountered some issues. And this year, because of all the things still impacting our supply chains overall, well, there are now potential issues with availability. This is my prediction, but we will see. I did receive a comment that orders were all back ordered a few months ago but the bottom line is lately we just can not predict what will happen next. So, my overall thought is, will potting mixes be in short-supply this year? And how will you or I manage that if so? What adjustments will need to be made? And also, remember, being flexible in the growing scene is key. I struggle with this because I want to be in control, but I’ve learned over the years, you must be flexible and strong! LOL. Because growing plants is a science and an art, and a bit of a guessing game sometimes too.
Cathy Testa Container Gardening containercathy at gmail.com Zone 6b
I have tons of gardening and plant reference books in my home office on tropical plants, succulents, landscape designs, perennials, woody trees and shrubs, vegetables, herbs, fruits, container gardening, and more plant related topics, but I do not have many reference books specifically about annual flowering plants (such as sunflowers, zinnias, or marigolds). I guess that is because my passion with plants started with mostly large showy tropical plants, and annual flowers have always been somewhat of a staple plant to me in Connecticut, thus they are not typically the unusual types of plants I enjoy. I use annuals rarely and only when I want that pop of color in a container combination in the summer. I find annual flowers typically look tired towards the end of summer because they are fast growers and push out lots of flowers, exhausting lots of plant energy, whereas tropical plants and their flowers last well into the autumn season here in Connecticut.
However, I discovered upon researching amaranth annual flowers (herbaceous ornamentals or a short-lived perennial in some climates), a particular species caught my eye last year in a seed catalogue. What I read in one of my books is that they are plants from the “tropics” of the Far East (per the one book I have on annuals, which is an old book!). The book indicates they are “brilliant, heavy-looking plants, reaching 3 to 5 feet tall” and grow in rich or poor soils. Another website indicates they are native to India, Africa, and Peru. In some ways, they are similar to the tropical flowering plants I already enjoy; plants from warmer regions. This is why I picked them as a candidate to sow from seed last year, plus the species I selected is a variety that grows much taller than normal, very tall, reaching 48″ tall. This would be perfect as a specimen plant with my other large showy tropical plants such as canna lilies, elephant ears, castor bean plants, or banana plants in my container gardens and patio pots.
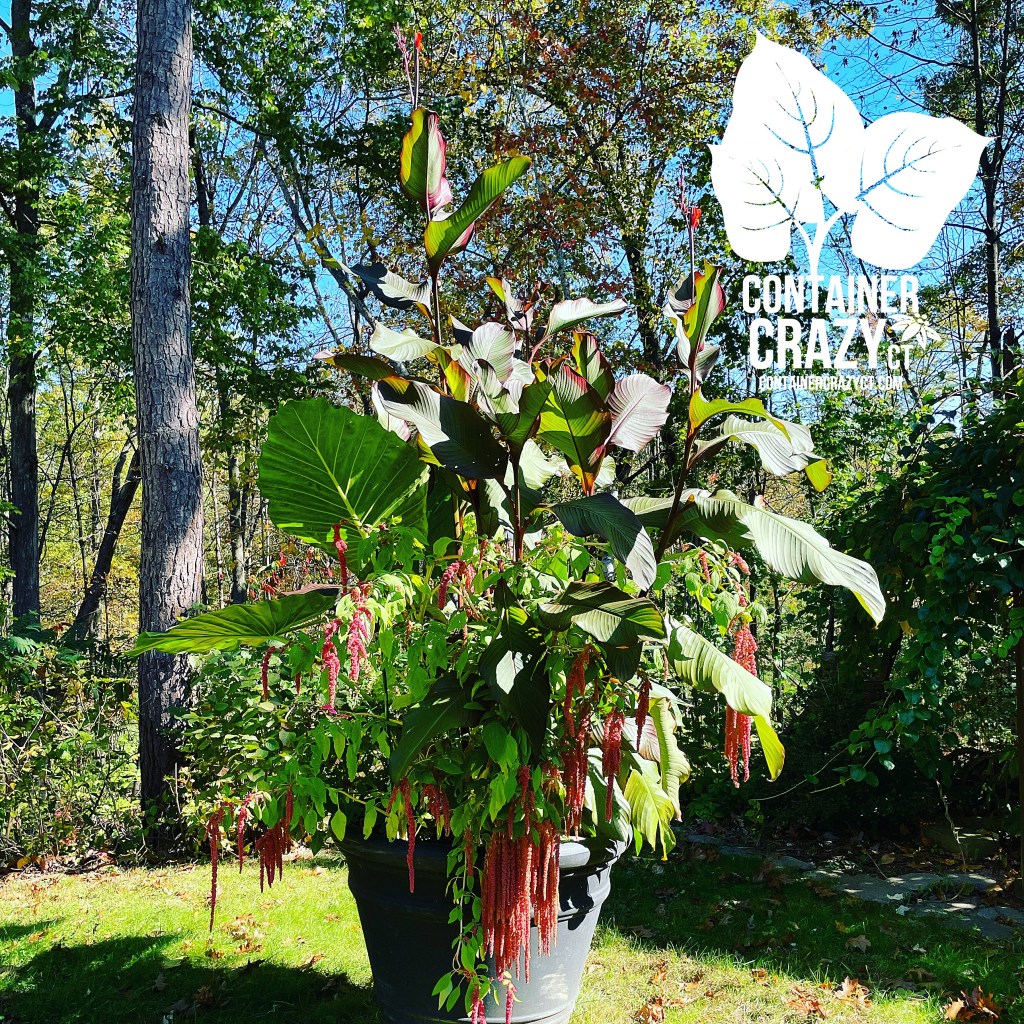
Container Gardens by Cathy Testa of Container Crazy CT – Featuring Amaranthus caudatus
Coral Fountain Amaranth (Amaranthus caudatus) Love-Lies-Bleeding, Amaranth, or Tassel Flower
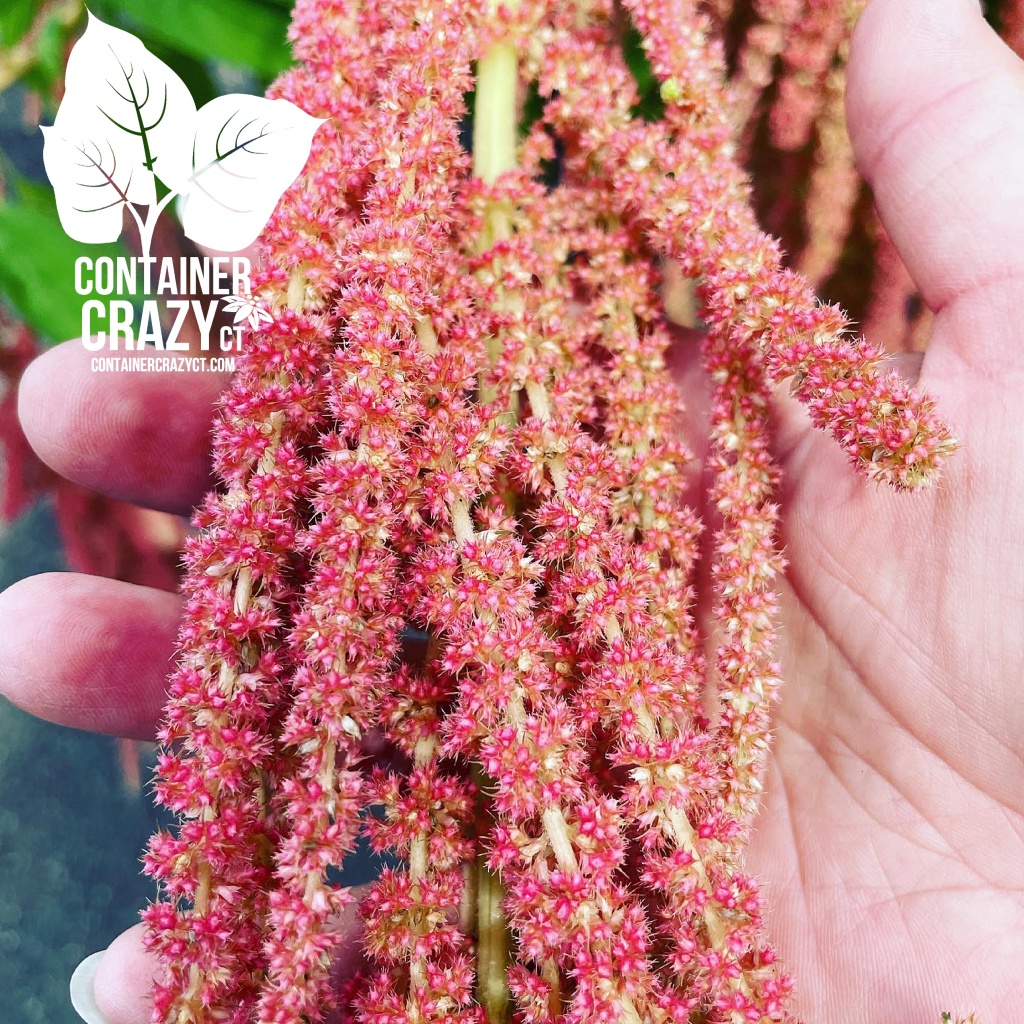
Of all the common names or flower descriptions of this plant, I guess tassel flower represents the flower form the best in my opinion of this species I selected. The plant’s large plumes (technically called inflorescences) dangle down in clusters of coral colored tassels as if they are fastened at the top of tall stalks. The flowers are fuzzy, clumpy, and resemble dreadlocks (another great word to describe their form and appearance!) They are chunky and petal-less. They resemble fountains or waterfalls in form, and may be used in wedding bouquets, as cut flowers in vases (long-lasting), and in container gardens where you wish to present a dramatic unexpected showy element. The foliage is not very large, and are a lime green lighter color on this type of amaranth, and I read the leaves are edible, but I did not experiment with that aspect, yet. After admiring the interesting aspects of this flowering annual with cool attributes, I decided to sow some seeds last year and give them a try.
Coral Fountain Amaranth – Cascading Plumes
When to Sow the Seeds
The seeds should be started indoors either at the end of March of middle of April based on our weeks before our typical spring frost timing in Connecticut (or use the appropriate 4-6 weeks before your last frost of your planting area). You may also direct sow these seeds in the ground after the threat of frost has passed (frost threat ends mid-May usually in Connecticut – check your weather and seed sowing charts). The seeds take 75 days (or about 2.5 months) from the time you transplant them to produce flowers. Starting them earlier will give you more time to enjoy the flowers which last well into the end of summer. The seeds are tiny and the packet has up to 250 seeds. That’s a lot of amaranth sowing, so use caution when sowing to not over do it.
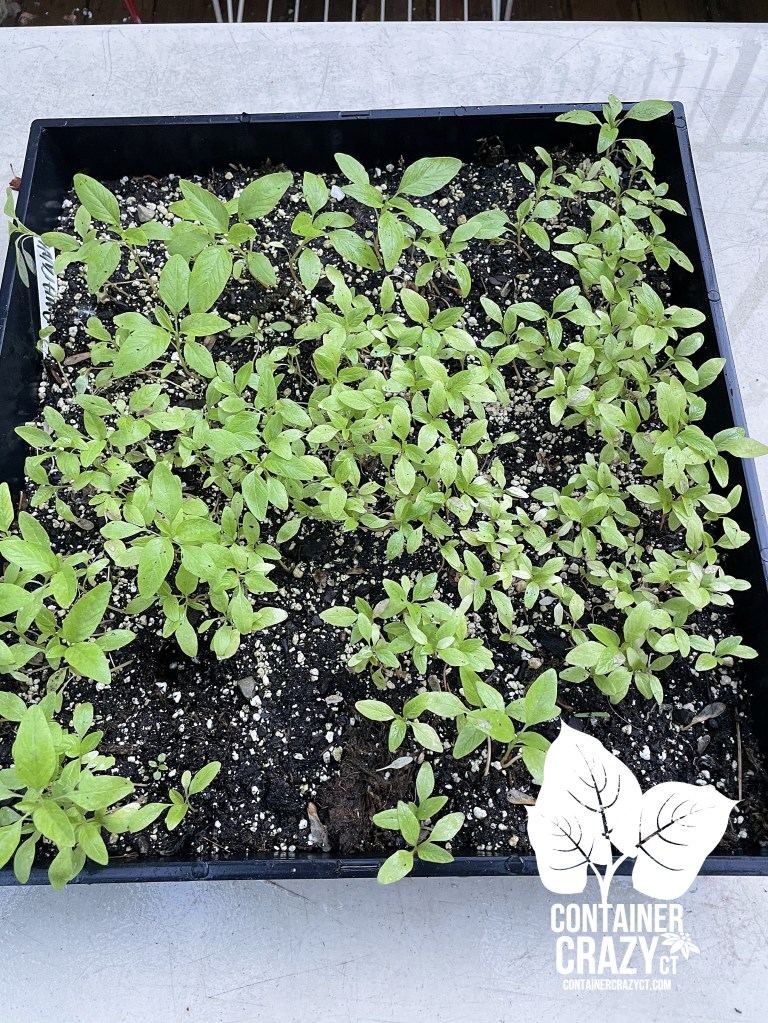
Seeds Sown in a Flat Tray
Some Sowing Problems I Experienced
However, I experienced some problems when I sowed them. I did a whole flat tray of them, and they seemed to not be really pushing growth a while after germinating, so I painstakingly put them in 2″ round mini pots one by one and thought I’d wait to see if that would help. It did, but one day I left the tray of the mini pots outside by my greenhouse and a rain gutter above rushed water down on them during a rain fall that day – pretty much destroying them all. All the tiny seedlings got stressed and the potting soil completed washed out. My bad – I’ll remember there is a gutter above problem next time, but I did manage to salvage a few seedlings and decided to put them in planters later when they were large enough to transplant after all chances of frost. I think the reason they may have been slow to grow from seed initially is because seeds germinate best at 75-80 degrees F and they need a night temperature of at least 65 degrees F after transplanting. Maybe my night temps at the time in my greenhouse were not warm enough but I am not sure.
ACK! Rain gutters heavy downpour washed out all the soil
Exposure Full Sun or Some Shade
One of the containers I planted them in is a rather large round black container in my back yard (probably at least 3 feet in diameter and about 4 feet tall). I put canna lily plants, elephant ears plants, and some of the amaranth transplants I managed to salvage in it. The seed packet indicated the plants like dry, hot conditions in full sun but will grow in partially shaded areas. The large black round pot is on the east side and gets shade part of the day. The packet also indicates the plants are drought tolerant (and may get root rot in poorly drained soils where is stays wet in the ground all the time, which was not a concern for me since I do all in patio pots and container gardens with sufficient drain holes). A drought tolerant plant is beneficial for container gardening, however, as you don’t have to worry about dragging the watering hose or watering can out there too often in the summer to water it. They are very easy to grow and tolerate poor conditions once the plants start to grow and get established, in fact, you may want to use caution with not overwatering it once it is doing well. Wet soils for this plant may lead to root rot per various sources.
An Insect was visiting some of the foliage
Use Large Pot Sizesand Sturdy Stakes
Because this species of amaranth grows very large and tall, place this plant in an area where you enjoy witnessing them cascading at the corners or edges of your patio pots. Consider taller upright planters because of how the plumes will descend down in big chunks towards the ground level. You want to be able to enjoy how they flow downwards like a waterfall without them hitting the ground. Fortunately, that was the case of my big round black pot in the backyard. As I started to see them progress, I thought about the wild and unusual form being a real show stopper if they were staggered in huge garden. The plums grow so long and become top heavy thus a good support stake is recommended when they start growing flowers. I used thinner bamboo poles which would be hidden against the stalks in the pot. The weight of the flower plumes becomes substantial as they start to grow well and large into the summer months.
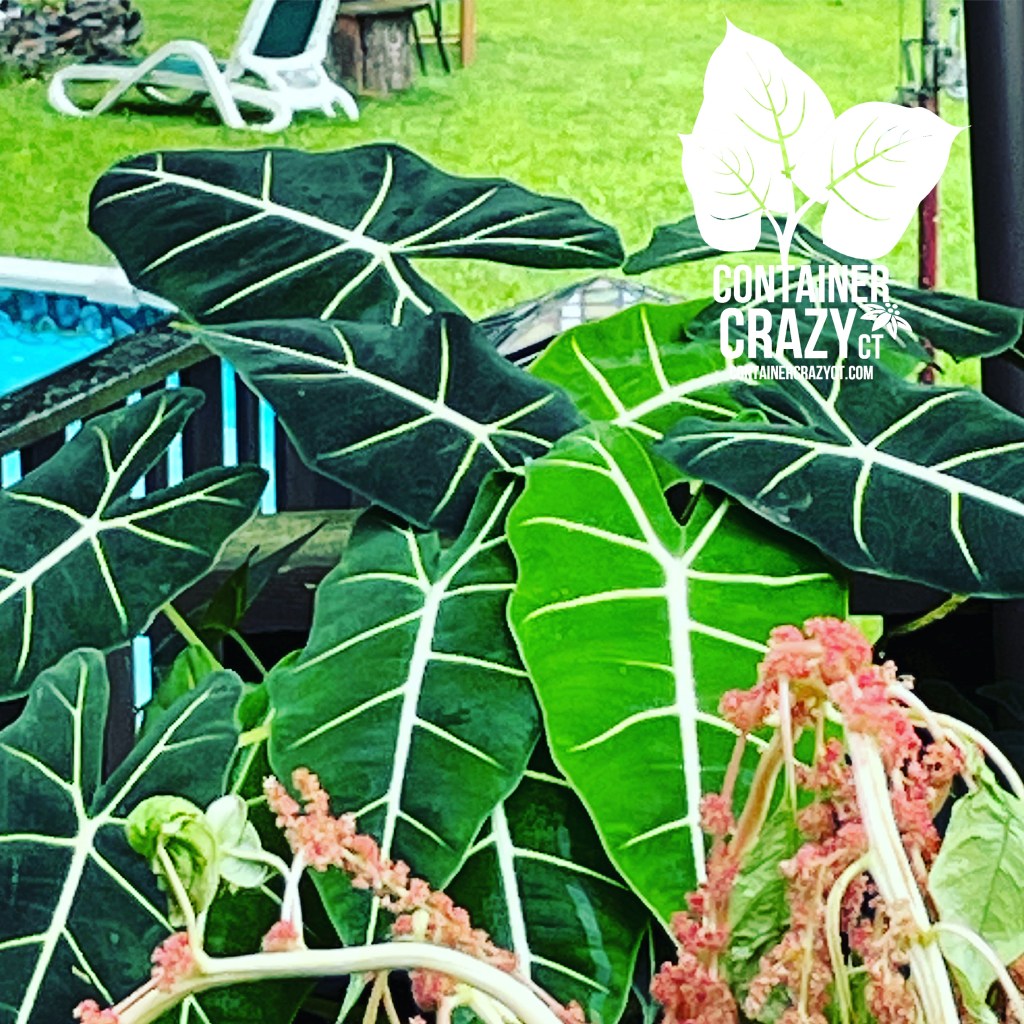
Castor Bean Plant Bottom Right with Darker FoliageCoral Fountain Amaranth (bottom) near the dark foliage of an Alocasia (above)
Companions with Darker Foliage
Consider pairing it up with plants with darker foliage and use tall plants too. The color of this amaranth’s leaves are a light lime green with an oval shape, and the flowers are a light coral color. It will show up more against a darker foliage plant, like a canna lily with plum colored foliage or a castor bean plant with the darker foliage. And consider pairing them up with other plants which are mid summer bloomers so you will get a mix of bloom colors for the look you wish to achieve in your patio pot or container gardens. I noticed hot pinks looked great with them too for contrast. Think hot pink canna lilies.
In a Vase at Cathy T’s
Used in Floral Arrangements for Weddings
I started to create a board on Pinterest last season to show what the flowers would look like, but this board is of other photos of various Amaranth plants. I discovered quite a few photos where the flowers are used in wedding bouquets and arrangements, but the only consideration I had on that is when the flowers reach maturity, they tend to drop tons of tiny little seeds. When I placed some in vases last year, it dropped lots of seeds on my outdoor patio table. I wondered how they work with those as cut flowers for floral arranging to avoid that problem (the potential mess it makes), and realized that would take some more research. I now realize you would have to harvest the flower tassels before they mature to avoid the abundant seeds in them later. The flowers plumes bloom from July to frost, and mine were full with flower plumes towards the end of the summer here in Connecticut. If you wanted to grow some for a wedding, you would want the wedding to be a summer wedding and again, harvest them before maturity so you don’t get a situation of tiny black pepper sized looking seeds falling down your wedding aisle runner. The plumes also look great in tall vases and provide a rather exotic interesting vibe in outdoor spaces. They may be used as fresh flowers or in dried flower arrangements. In fact, I saw some in a floral shop this winter and I kicked myself for not saving the plumes of my own last summer.
Bees Loved – Many Visited!
Food for You or Pollinators
Some reference books indicate they are favored by bees and that is true, I did see lots of bees visiting the tassels of its petal less flowers and took photos, and at times I would witness a bird perch on the tall thick stalks. Additionally, there is some information about how parts of the plant are edible and seeds may be used in porridge. I didn’t really look into that much however. Maybe this year when I grow them again, I will do so. The seed packet indicates amaranth are one of the most nutritious of the ancient grains. This turned out to be a stunning plant, which friends and family noticed, when they visited. I had one by my entrance stairs, and one day, my brother shouted out as he was leaving, “That plant is cool!”
These photos motivate me to sow and grow again in 2022. I know we experienced some rough wet summer weather (as noted in my prior post) last year, but photos are what prompt me to grow again. Let’s hope we have a good growing season this year!
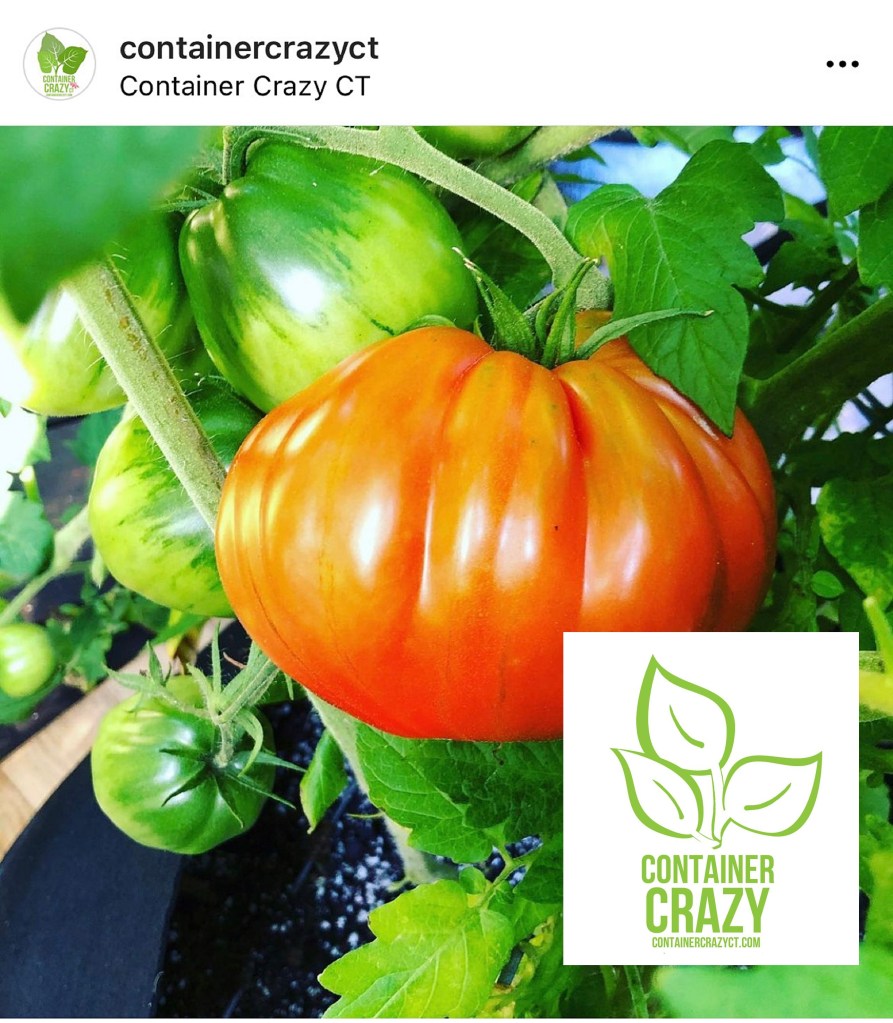
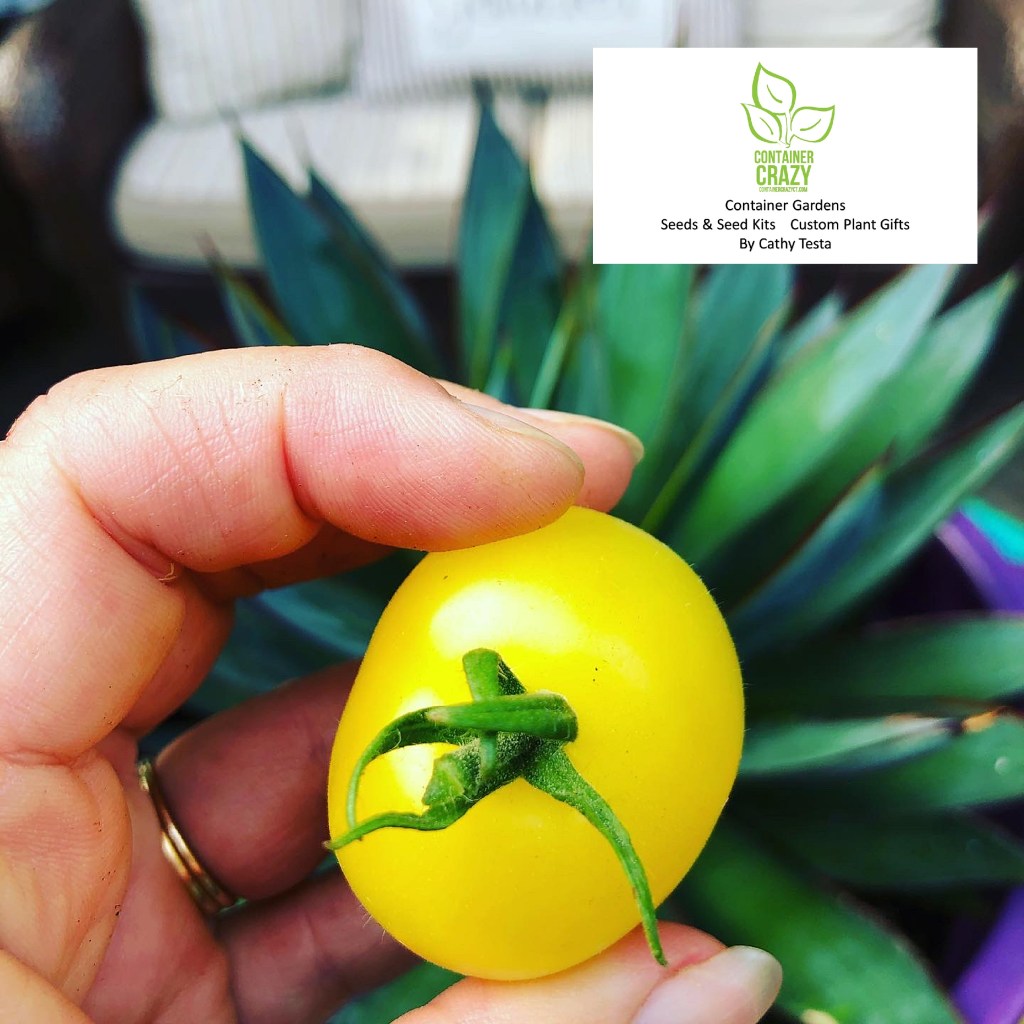
Goldie Tomato – an Heirloom
Nothing pleases me more than when a person who purchased a starter plant from me sends or texts me a photo as they start their harvest, such as in this photo above, sent by Shannon. Doesn’t that plate of fresh Goldie tomatoes make your mouth water?! I am planning to grow these golden delicious heirlooms again in 2022.
I also add a new tomato or two to my sowing and growing list for each season and will be providing that list to my regulars or post it on www.WorkshopsCT.com soon.
Paul Robeson Tomato – 2021
This photo of a tomato, with a bit of a purple hue, sliced up on a white plate was taken by me last summer. It is the Paul Robeson tomato with orange, green, and purple hues. It produces large sized fruit and the fruit resists cracking. I plan to sow some of these seeds as well this year. Another keeper on my list. And I pray for better weather so I can eat more of these this summer!
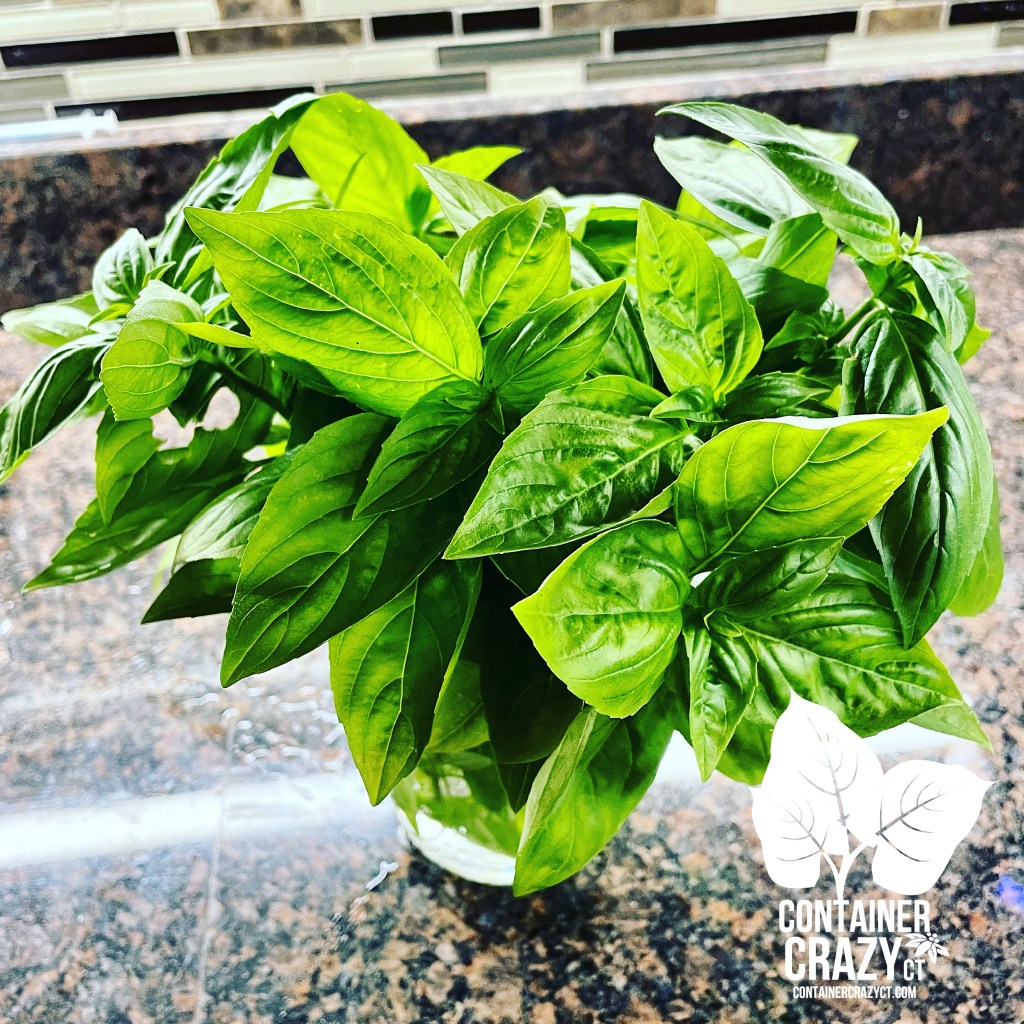
Basil 2021
An an absolute must to repeat sowing again are the basils. OMG, how can one have a fresh home-grown tomato sliced up on a plate without fresh basil leaves? I can smell it now – almost!
So in January, as I write this, on 1/13/2022, I have decided on which I will sow again and have ordered my new varieties for sowing. Check! Seed ordering done!
On winter days like today, with soft white fresh snow falling, many of us start daydreaming about the seeds we will sow in a few months, and perhaps start planning out our key sowing dates, as well as ordering various supplies for starting our seeds.
Starting Seeds Indoors
Starting seeds indoors is something I’ve been doing for a few years now for warm season vegetables (tomatoes, hot peppers, and some herbs), and every year, I like to try new varieties or heirlooms. I’ve been successful with using my greenhouse to grow my seeds indoors, along with using appropriate supplies and soil mixes, and providing care (watering, monitoring, etc.) without the use of grow lights, however, this year, I think I’m ready to take the plunge and experiment with supplemental lighting.
Types of Lights
This post will not explain what you need, what type of lights you should get, or any of that, because I will be in the midst of researching and starting with just testing out one system of lights above some trays of seeds in a couple months in my greenhouse, however, I can tell you why I feel I should turn on the lights over my trays of seedlings for the first time this year.
Because it will improve the results – I think…
With a greenhouse, you have lots of advantages, such as space, heat, and “natural” sunlight. However, many winter days are cloudy and cold, with not much sunlight at all in the months of February and March (March is usually about when I start my warm season vegetable seeds). Cloudy days limit growing progress, but it won’t stop progress. I have been able to grow my seedlings fairly well but it does slow things down not having sufficient sunlight every day.
Heating Mats, Nursery Pots, Soil Mixes, and Labels…
I thought, because I’ve invested so much already by investing in using the heat mats for seedling trays and everything else, not to mention the cost to heat a greenhouse, why keep on spending? But, in the world of gardening, you always seem to be getting another item to improve your growing processes. I decided I would purchase one of the fluorescent lights sets to hang over the trays during germination and help the plants once they start to grow. My thought is I will only use the lights when the days are cloudy. On sunny days, I’ll allow the sun to warm up the greenhouse and provide the natural sunlight for the plants.
Seeing Lights in Greenhouses
I remember walking into a very large nursery up north once, and they had lights all hanging above, and thinking, hmmm, they use supplemental lights. From what I’ve been reading, the lights should be placed about 3-6″ above the seedling trays once they germinate, but you have to watch you don’t burn anything when you move them this close to the trays. I will be doing so and monitoring how the plants look. There are signs to pay attention to if the lights are too close, which I will know, because I’m accustom to monitoring plants.
Baskets of Herbs I Grew without Supplemental Lights
Are Lights Needed to Succeed?
Some people will argue that you most definitely need artificial supplemental lights to succeed with growing seedlings indoors, but I’ve always argued that is not 100% true. I’ll let you know what I think after my first season trial with supplemental lights for my seedlings. But, I have done it without supplemental lights for years, so you can do it, but using the lights will improve the seedlings health overall. I’ve used heat mats to help keep the soil warm in the greenhouse, and adding lights may give the seedlings an extra boost. It may take them from normal to champion status. Kind of like training an athlete. Improving each time.
Types of Lights
There are fancier and more modern light options out there beyond the fluorescent types, but I’ve decided I will take baby steps this year. I want simplicity, ease of hanging them, plug in style to an outlet, and give the lights a try. I’ve just ordered the system, and some more nursery pots because I know I’ll go thru them light crazy. Then I decided I need more labels, and the supplies list begins!
Light to Germinate
Most of the seeds I grow require light to germinate (some seeds require darkness), and they need light to grow well once they have germinated in order to grow strongly. Using a greenhouse really helps of course, and/or using the fluorescent lights will improve the results – but if you use both a greenhouse and supplemental lights – it should be awesome, I hope. As long as all other factors are done appropriately along the way, such as using good seedling mix, accurate timing of starting seeds before the frost dates, and monitoring. I usually check my seedlings every day once they germinate.
Plants Produce Their Own Food
Plants use light to produce their own food. If light is not available after they germinate, they are slower growing, they may be stretchy looking from reaching for sunlight, but once natural sunlight is provided on sunny days, if they experienced a day or two of clouds, they tend to rebound very quickly in a greenhouse setting. Plus a greenhouse gets very warm on sunny days! Once I use the new supplemental lights on the cloudy days, I should see them be stronger than ever before. Stay tuned as I share my progress.
Cathy Testa containercathy at gmail.com Broad Brook, CT Zone 6b Area
Is there such a thing as a storm proof tomato? I thought of this after several strong rainstorms here in my area of Connecticut. My dwarf plants and compact tomato plants did not get any damage from the winds.
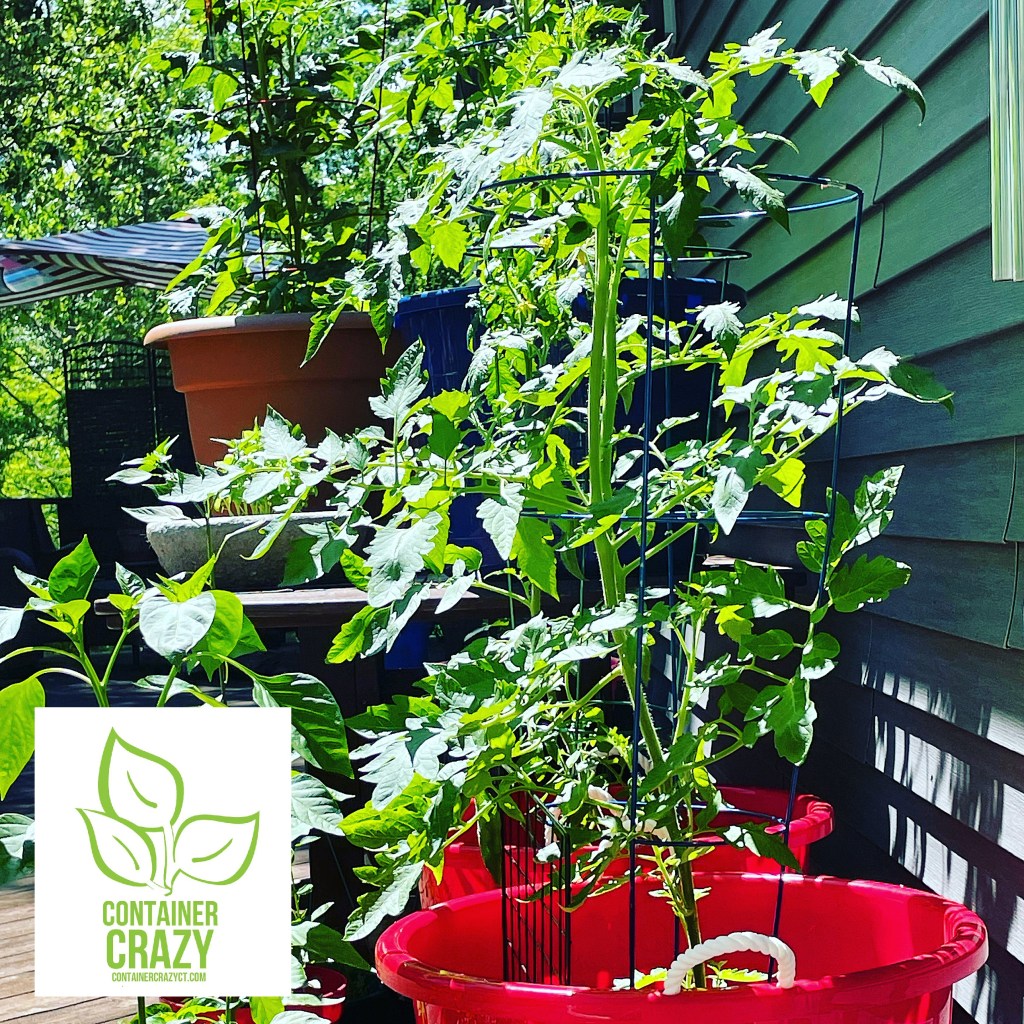
Cathy T’s Deck 2021 – Tomatoes before storms, early in the season
I put tomato plants on a table this year. My thinking was squirrels would be less likely to jump up if they were a little higher. And I placed a couple pots on the deck floor (red ones shown above) as well. The strategy somewhat worked, along with the fact my cat roams this area, but something did damage my plants besides the rainstorms experienced earlier, because I would find tops bent. I think a squirrel got onto my roof and jumped down onto them.
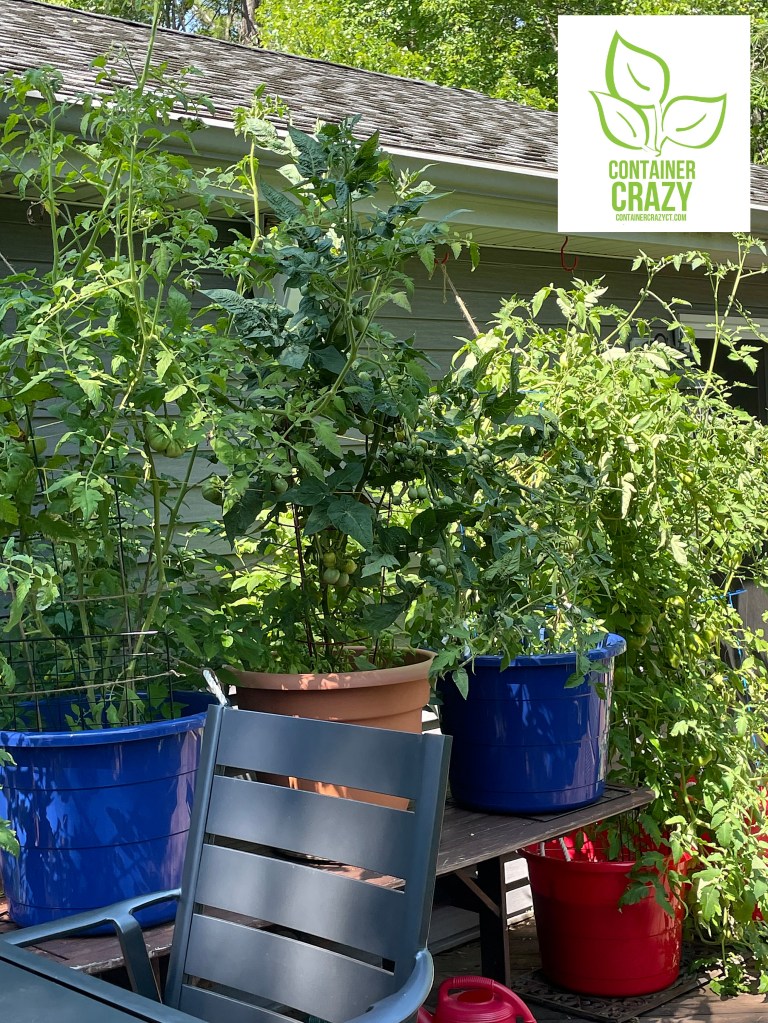
Before storms and before damage from squirrel jumping onto them!
I placed three tomato plants towards the front of the table, two heirlooms and one dwarf in the center. Behind those big pots are two compact Tiny Tim tomato plants. They did not get any damage and are loaded with tons of green tomatoes.
A few Tiny Tim tomatoes ripening first week of August 2021
Tiny Tim Tomato plants are a perfect small container or patio pot size. They grow small grape-like fruit and are much smaller than typical cherry tomato fruit sizes. The plant grew perfectly, no blemishes on the foliage, and lots of green tomatoes forming, but due to our rainy season, it is taking a while for them to ripen. I am hopeful however, each bite counts.
Tiny Tim Plant
The seed packet indicates this variety will struggle if planted directly into the earth. It is perfect for small containers (mine pot is 14″ diameter and 11″ deep) and it grew perfectly. This one is great for window boxes or to put on a table as a centerpiece. Great with children too. I would have been eating these earlier in the season, but our weather reduced ripening quickly. Placing them behind the big pots helped to hide them from potential tomato robbers too.
Mandurang Moon Tomato
The other tomato plant which survived windy rainstorms was the Mandurang Moon Tomato, which is a dwarf, but certainly doesn’t look that way in the photos. It has grown quite tall, about 4.5 ft or so, but it did get toppled over by a squirrel jumping on it from my house roof top. I have to trim back some trees by my deck so they don’t have a way to get on the roof.
Color of Mandurang Moon Tomato Fruit
The color of these Mandurang Moon’s are a very pale yellow. The plants are disease resistant and the stem is very strong. The stem on dwarfs are thicker and this helped it from being bent by any windy rainstorms this season. Again, lots of fruit for a while now but not ripening very quickly due to our poor weather. Hopefully we still have a chance at some sunny weather to keep things warm for our tomato plants (technically it is time and temp, not necessarily sun to help them ripen).
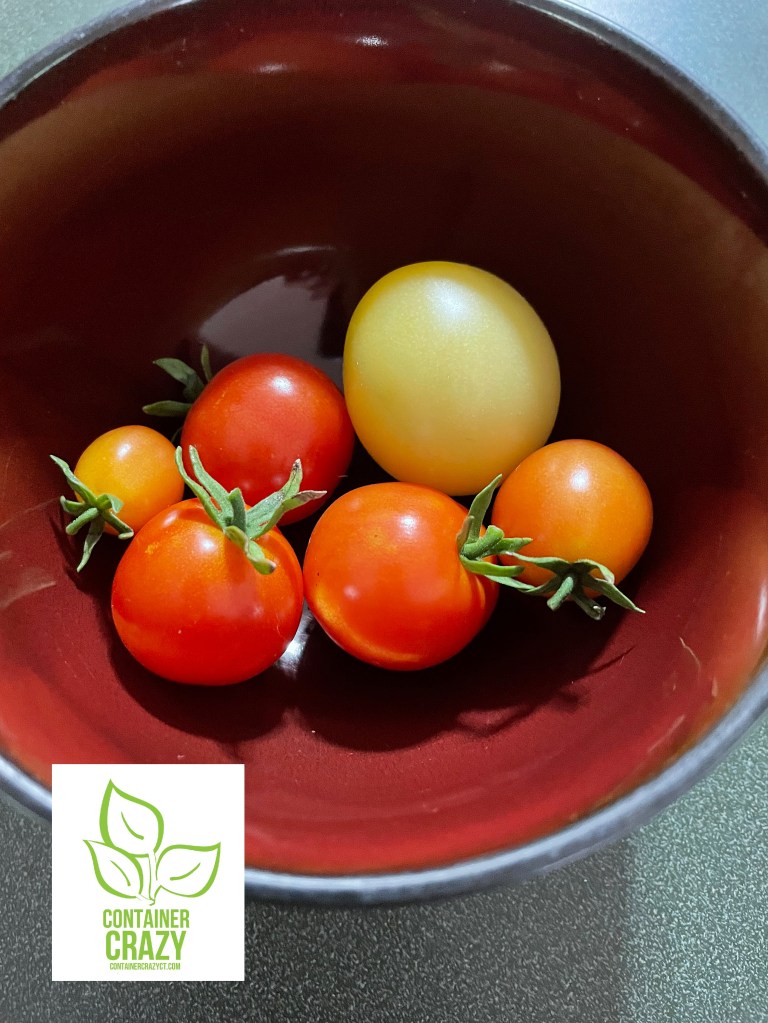
Every bite counts
It’s been disappointing to not have many ripened fruit (yet), but every bite counts. Above is a photo of the Tiny Tim and Mandurang Moon fruit. Nice snackers.
Green Tomatoes
It is a little heartbreaking to see all these fruits on my plants stay green. I just noticed one on my Stoneridge turning this week. Maybe there is still hope. Above is either the Goldie tomato (heirloom with sweet golden flesh – usually!) or the Cherokee Purple – I can’t remember which when I took this photo.
A friend’s Cherokee Purple
I’ve been worried that this year’s bad weather will discourage my tomato plant buyers next year, but one person sent me this photo of her Cherokee Purple starting to ripen. She told me their plants are huge and she is pleased. That was good news because this year, I grew a lot of starter plants! I love doing so and plan to do so again next year, providing everyone will still be interested!
My Growing 2021
I’m not kidding when I say, I think I grew about 400 tomato plants this year! Crazy! But most of them sold and I think I tossed out about 30 (after offering them out for free to any non-profit like garden places). I just could not keep up with them, so I will have to cut back a bit next season, if I can.
Ancho Poblanos Peppers
This was the first year I attempted growing a mix of peppers – one of which is Ancho Poblanos. It is amazing the rich shiny deep black color which evolves from the prior stage of green color. I just placed a few on my grill one day while also cooking some chicken, and they were so delicious! I am excited about these and plan to grow more of these from seeds next season.
Grilled Ancho Poblanos 2021
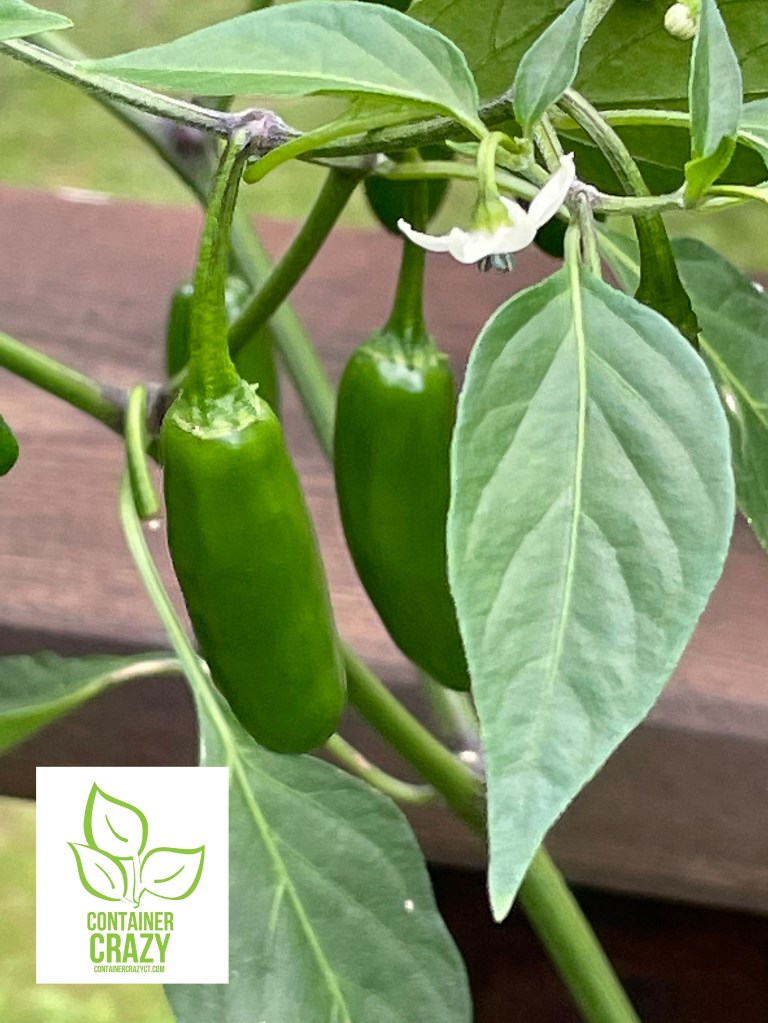
I also like to grow hot pepper plants, which I put some of the Matchbox Peppers in the same pot with my Tiny Tims. And I grew Serranos for the first time this season in small pots. One small plant is loaded with the Serranos – all green right now. I have to figure out the best way to preserve them. Still wondering when they will turn red, but the plant is healthy.
Lots of Serranos on the plant – still green (8/6/21)Stoneridge Tomatoes
My Stone Ridge tomato plant has lots of big fruit now too – about 2 are just starting to change color. I am not sure how the flavor will be as it seems all is behind schedule this season. The plant is extremely tall (over 6 ft) and still producing flowers. It can grow to 8 feet tall and is a big indeterminate plant.
Growing in Spring
So, this year’s lesson, the dwarf and compact plants survived the gusty rain storms, but the rain fall slowed down the ripening of our tomato fruit. Mother Nature never ceases to provide a new twist on the season’s challenges. She keeps us in check always!
Have a great weekend!
Cathy Testa Container Gardener and Installer Grower of Tomato Starts Blogger Kayaker (when not busy!) Plant Gift Creator
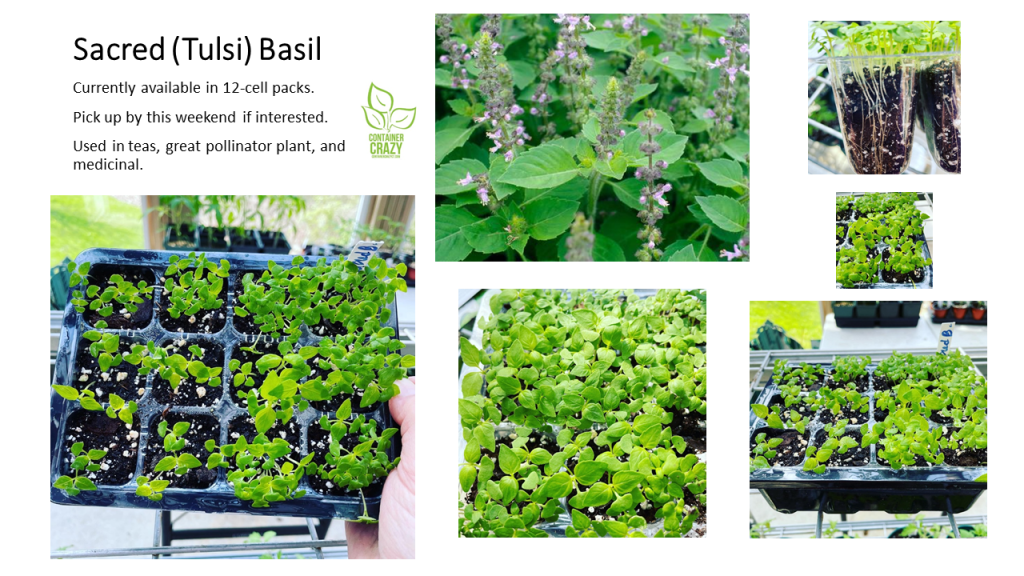
Last year, I sowed some sacred basil seeds for the first time. It is also known as Tulsi or Holy basil. Latin name: Ocimum tenuiflorum (Ocimum sanctum). I thought it would be an interesting plant to offer my clients for their herb gardens. However, I discovered not too many people of my circle of plant lovers were familiar with Tulsi basil. And neither was I.
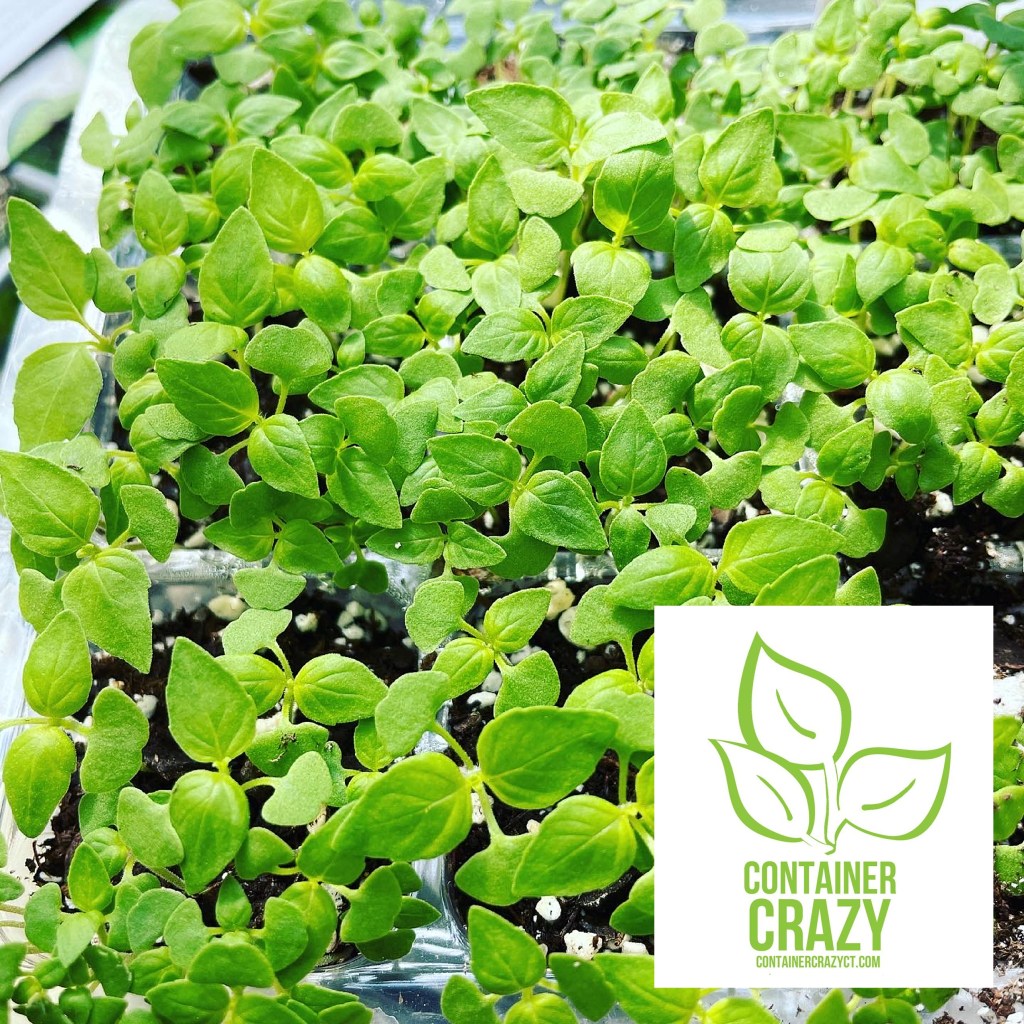
Fast Grower
What I discovered is it is a fast grower from seed. It wasn’t long before it would fill my pots or cell trays when I started them from seed. It also has an unusual fragrance, even when it is small and just sprouting from the soil in my seedling trays. The seed producer describes it as, “Pretty, heavenly-scented basil used in teas and Ayurveda.” The seed must be sown early indoors or may be directly sown into gardens.
Attracts Beneficial Insects
I did grow some on a balcony garden last season and it grew lovely and lush in a large pot. I also grew some in my containers at home around a couple tomato plants. Wow, I was stunned at how beautiful, large, and lush the plants grew. I also grew some in big pots on my driveway, and every single time I went by those plants while they were blooming, bees were visiting them constantly. I thought, hmmm, this is a good pollinator attractor. Also, herbs tend to attract beneficial insects, which also helps your garden. The blooms last a long time and the plant stands firm, upright, bushy, and full. I thought if I could I would line my driveway with them and let the bees go crazy enjoying those blooms.
Long-Lasting Blooms
The blooms remind me of catmint, a soft blue. I can’t find the darn photo of when it was lush and full on my driveway, but let me assure you, it grows tall and bushy. If you look up the plant online, you will see it in gardens and find many people describing it’s benefits as a tea. It is similar in growth to regular basil but it grows much faster, as I witnessed in my own pots. It has a strong flavor and scent. You may add it to your water but chewing it directly, I read at least on one site per my research, should not be done. It is that strong.
Dried for teas
Tulsi basil can be dried and saved for months. Something I wanted to do – but did I? No, cause I was too busy tending to plants. LOL. But bottom line, if not for teas, I think it makes a splendid container plant, garden plant (perhaps on a border), and is easy to grow. If you want a full, lush, tall plant in a container, this is the one. I think it was about 1.5 feet tall, if I remember correctly. And I could envision it as a big stand or as a border along a walkway, just covered with bees. It is a long-lasting plant as well, all the way into the fall, it performed wonderfully.
Summer growers
Basils are grown outdoors in hot weather and struggle if it is still cool spring outdoors. You should wait till all chances of frost have passed and when the temps are right for basils. Don’t rush this one outdoors in early spring. They prefer well-drained soils and full sun, and a little shade is okay too. I always plant various basils in my herb planters on my deck every year. I can’t tell you the amount of times I snip from it. It is heaven. Why not mix up your selection of basils and add Tulsi basil to it?
Health benefits
See the links posted below of the various health benefits and research about this plant. The last link has information on how to make the tea.
Well, that is my Tulsi talk for the day! I still have some seed packets available if interested, please let me know. Also, if you know of a really good site that shows how to use, prepare, and store this type of basil, I’d love to hear about it. I can not find much about it in my current herbal books in my home office.
Usually I start hardening off my tomato starts in mid-May, but when a good weather day comes along in April, as it will today per the weather stations last night on tv, I will begin my tomato exercise program where I pull some trays from the greenhouse and put them outdoors to get some natural sunlight during the day.
Today’s weather in CT (4/28/21) is predicted to be mostly sunny, in the mid-70’s by mid-afternoon, and sunny for the first part of the day, followed by clouds in the afternoon.
per my iPhone app
Location
Years before, I had a slope to deal with and placed them on the ground, now I have a small deck floor area which makes everything level. This helps tremendously. I will put them on portable tables, bins turned over, the wood floor, and on shelves I may have picked up here and there at tag sales or as road side finds. I also have a small drafting table outside which is usually in the greenhouse. It makes a perfect potting station for me. When not being used for potting things up, I put trays on that too.
Flats on a turned over watering bin
Weather
Big factor! If it is too windy and cool, I won’t put them out. I also use my weather app on my iPhone. I find this is the most reliable source of hour to hour weather predictions. I also bring a patio umbrella to the area so it is not direct sun for the delicate tomato leaves. And make sure that umbrella is stable. The last thing you want is for it to fall over from wind on your delicate plants! There is a big tree near this staging area, but remember, the trees are not leafed out yet so why I get the umbrella setup as well.
Timing
It is about 47 degrees F outside right now as I write this and cool, with rain from last night. I’m not going to put them out this morning, I’m waiting till it warms up a bit. I’m just particular that way – my tomato plants are my babies! So time of day is just as important as the location and predicted weather for the day.
Care
How your seedlings are cared for is super important this time of year. Spending months prior, seeding the seeds, monitoring the growth, carefully watering the seedlings, and inspecting all along the way. The last thing you want to worry about is damaging them during the hardening phases outdoors. So, I am sure to select the bigger of the seedling plants to go outside and I limit it to only a couple times a day. This makes for a great exercise program, going in and out of the greenhouse, bending and lifting trays, reorganizing only to move it all back inside a few hours later.
Hardening Off – Cathy T’s tomatoes on a long tray
Hardening OffWeeks
Usually the best time to start hardening off seedlings is a week or two before when you plan to transplant them into your container gardens, grow bags, patio pots, or gardens. This will acclimate the tender plants gradually for a couple hours every day. However, as noted above, this year, I’m doing some of this early on good days only and carefully monitoring them. I won’t do this on a day that I am not here to watch over them (literally, LOL). It is very important to make sure the place where you do this process outdoors is protected, to do this on non-windy days, and away from any potential problems.
Watering
Another important factor is to make sure you are watering appropriately, monitoring what is drying out, and pay attention to watering needs while hardening off plants. Watering is a tricky thing. You get a sense of how to balance the dry cycles (where the soil gets the oxygen it needs for the roots) and moisture cycles. Watering plants is best in the mornings, but you also don’t want to over water them. After a while, you get a sense of what is working and how the plants respond. It is definitely a science and an art. It also can be intuitive if you have a green thumb or are obsessed with plants, or it is an exact science. In fact, some big growers actually weigh the plants at different parts of the day and do this all by exact numbers and creating graphs! As for myself, I sometimes will observe if the soil looks dry on the top, feel the tray or pots for their moisture weight, know when I last watered, and in some cases, may take a seedling out to look at the roots and moisture. You want the moisture to be lower so the roots grow downward (versus wet on the top of the soil profile, which would not encourage downward root growth).
Plant Size
Some of my plants are in 5″ squares and others are still in 3″ round pots. I typically select only the larger seedlings for hardening off a bit early. The more delicate small ones I would not risk doing this early. It also helps to give the plants some natural air circulation by placing them outside in a protected location. I’m actually still potting up seedlings, even some which are still in the seedling starter trays. So, there are several different sizes and stages to my seedlings.
Showing Roots
I feel especially impatient this year because it felt like a long winter. I can’t wait to put all my plants outdoors permanently but we must hold back. If you try to cross the finish line too early, you risk all the hard work you put into starting the plants from seed in the first place. But hopefully all goes according to plan with no problems so you can look forward to eating big yummy juicy fresh tomatoes, like this one shown below from last year!
Tomato Plant Growing on Cathy T’s deck last year
Thank you for visiting. Please feel free to ask questions.
Cathy Testa 860-977-9473 containercathy@gmail.com Container Garden Designer Small Time Grower One-Woman Owned Business Plant Enthusiast Location: Broad Brook, Connecticut Post dated: April 28, 2021
My last post, before today’s post, was titled, March is a big sow month – well, to follow on from that, April is a BIG GROW Month.
I have many tomato seedlings started from seeds and growing now, and the more warmth, sun, and good days of April we get will increase their sizes over the next 3-4 or 5 weeks of indoor growing in the greenhouse before they are transitioned outdoors for a few hours to harden off and then ready by end of May.
End of May is my target date for planting the tomato starts in containers, because to me, it is the safest and warmest time. Memorial Day is the key date. And I truly can’t wait. I’m overly anxious this year, it was a long winter. I hated February, Ugh. Now it is April – yahooooo. That means weather will improve, we can be outdoors more, I’m cleaning up my perennials and shrubs outdoors, and I am checking on my starter plants daily, potting some up, all that jazz.
I spend time cleaning the greenhouse floors of debris, taking tables down to the greenhouse outdoor areas to prepare for when seedling will go outside for some real sunshine, and inspecting everything, but it is also still a waiting month. I so want to put all my nice tropical plants outdoors, but we can still get cold snaps. It requires patience. Sometimes I can’t take it – LOL.
This Connecticut weather is nutso sometimes. As we know, it snowed just last week. Yup on Friday. It melted fast – thank God. And tomorrow will be 70’s degrees, which will mean my greenhouse temps will rise fast tomorrow and I’ll be opening the side manual vent, and putting on small fans, etc. But then overnight, it can get cold just a couple days later. It is nutso! I know I said that already. LOL.
I still have not removed the bubble-wrap, which covers my auto-fan in the greenhouse up at the top on one wall, because I don’t want cold air to blow in on the cold snaps. I have to say, taking care of plants in a greenhouse, is a daily, if not minute by hour operation! Why they call it a “nursery.” And April is a big month of getting things growing more – as the warmer temps and more sunny and longer sun days improve.
April this month thru mid-May is a big grow month. I will little by little have more patience as I watch the seedlings grow larger and I pot them up. I can smell the tomato plants now when I’m in the greenhouse and brush against them. That familiar scent that says summer is coming.
In fact, the sun is out right now as I type this – so I have to keep this short cause I have a bunch of heirloom tomatoes I need to pot up today. They are ready for step two.
March is a key time to start sowing many warm season vegetables seeds in order to give them enough time to grow indoors before they are safely moved outdoors in mid-May.
I started sowing many seeds yesterday, and had to caution myself a few times to not over do it, which is easily done when you get on a roll. Because every seed you sow will need to be potted up at some point between now and May, you must ensure you don’t waste time, energy, and effort – as well as supplies, like seedling mix, etc.
It is important to remember, March is a big sowing seeds month. It is really when you start to hit some of the early seeds, like some hot peppers, which may be started between the 8 to 6 weeks before our spring frost date in Connecticut.
I will be sowing seeds now thru end of April for all kinds of plants. I still have some seed packets available. If you are local, and are considering sowing some of your own or want to sow with kids as a day project, now is a good time to reach out. Again, mostly seeds for tomato, cherry tomato, hot pepper plants, some herbs (parsley, thyme, basil, chives) and a speciality flower.
Other things I’m tending to is looking over some of my prized plants. And updating my WorkshopsCT.com site with current availability. Also, I’m planning out my container install game plans. And thinking spring!
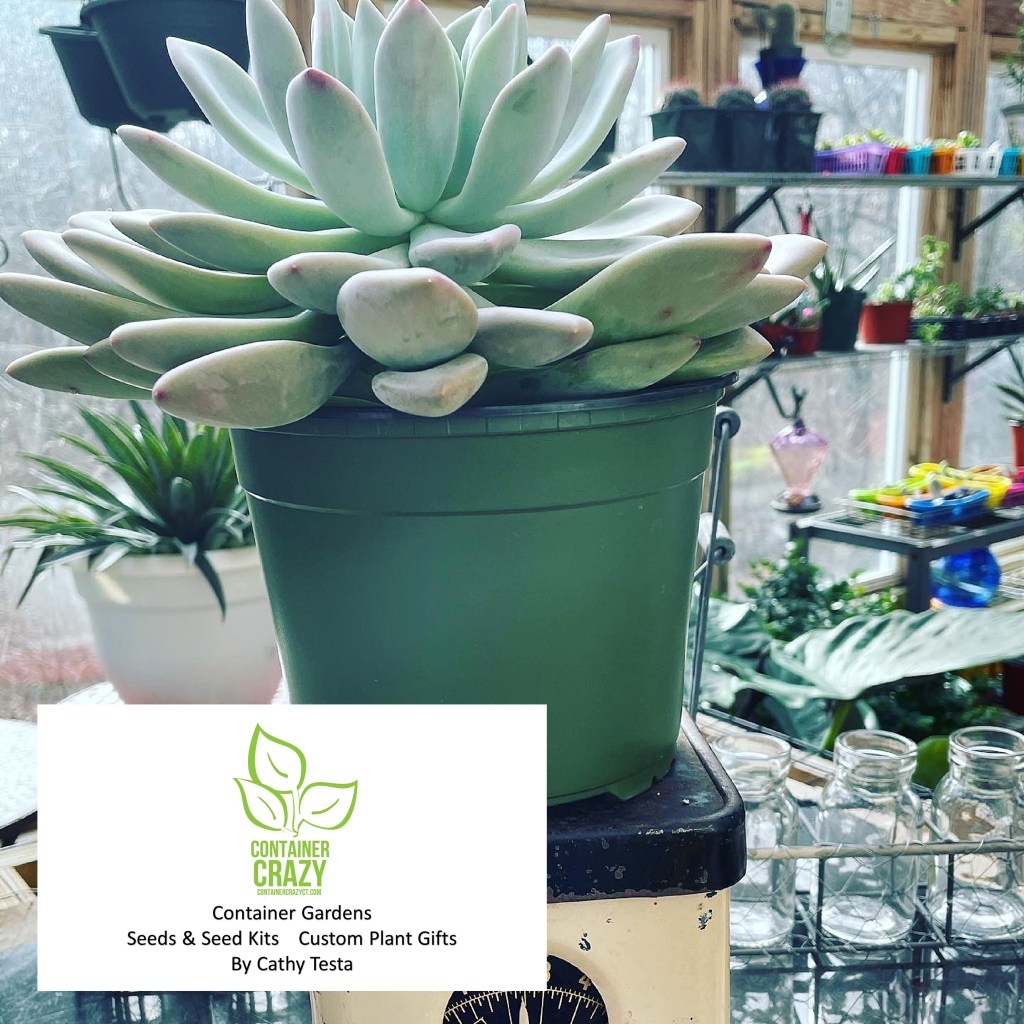
A big Succulent!
We had the most gorgeous week last week, some days where we didn’t need a coat on for a period of time. The sun was just glorious and helped to push along some of my early sprouted seeds. But, I know that we get a “flash type snow storm” every March usually. In fact, last year, I wrote the words COVID with a sad face in the snow on my steps in March.
Last Year March 2020
While we need to still be patient, March is a key sow month. Time to pay attention to your calendars, consider getting your seeds now before it is too late if you haven’t done so already, and clean up supplies.
Seed Packets
Some things I’m thinking of getting for myself this year are Rain Barrels. I like the look of urn rain barrels and it is a great resource for on the go watering around the home. Another item I think I may acquire is a portable hose reel for my job sites, where it can quickly connect to an indoor tap, or perhaps a leakproof carrying type watering bag to carry water. A bag that may be rolled up like a tote. Good for me for my off site jobs because I usually have to put a lot into my truck, the more portable, the better.
Anyhow, I just wanted to do a super quick post about how March is a month to pay attention. Time to get those birdhouses out and get ready. Spring is coming but winter may show its face one more time!
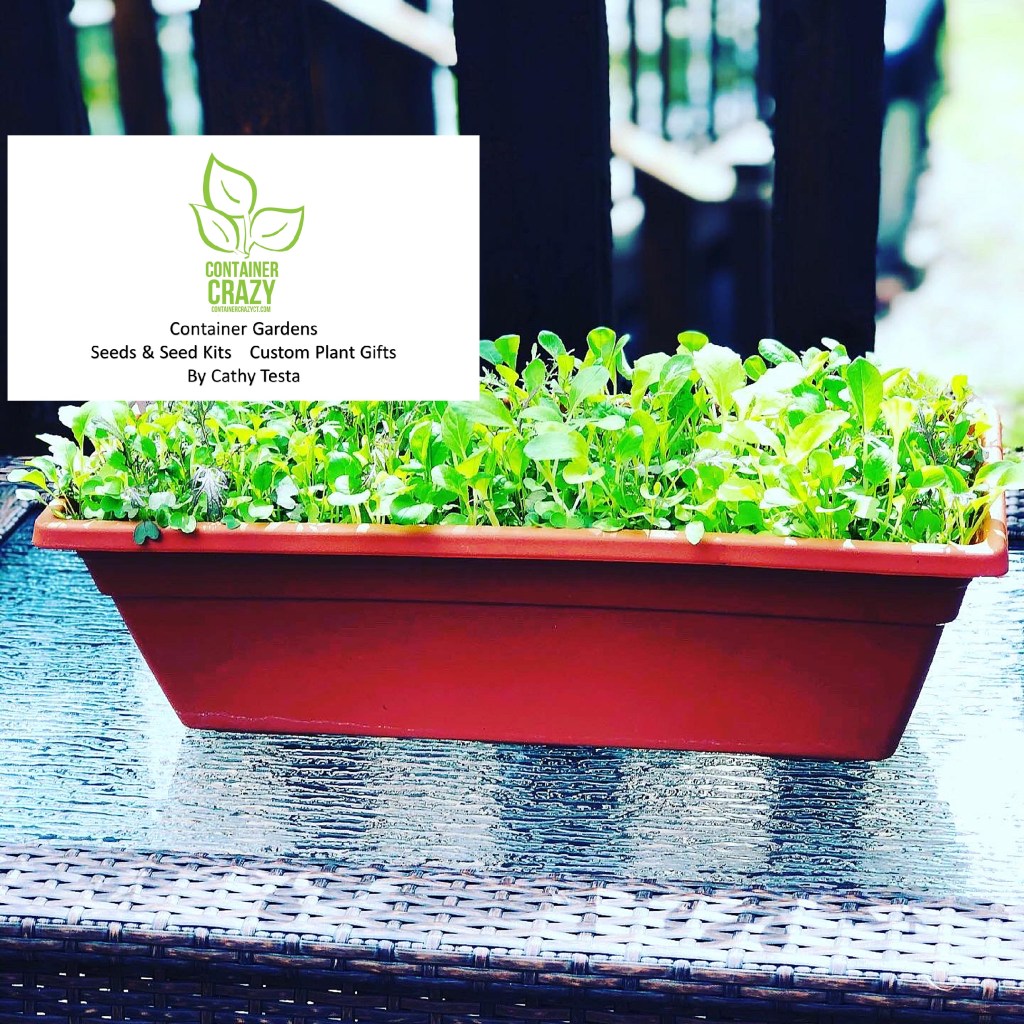
Soft and fresh tender lettuce leaves were something I cherished from my father’s garden when I lived at home growing up. My mother made a homemade dressing with light white cream and some fresh chopped up dark green chives. She would toss the freshly picked and cleaned lettuce leaves with her easy made dressing and it was the most refreshing, light, and airy salad bowl you could eat. I think I most enjoyed the tenderness of the leaves. Soft and fresh, full of flavor, and nutritious. The slightly oniony taste of her dressing from the chives would cling and drip from the leaves as I happily munched a bowl of the greens. No need to add anything else, always delicious.
One of the easiest seeds to grow
Lettuce mixes are one of the easiest seeds to sow and grow. However, they do not perform well when it is super hot outdoors in the middle of summer, so you may pause during that time, but they are perfect to grow in the cooler times of the season, starting in early spring and again in the fall during the cooler weather. It won’t be long before I start sowing some directly in my pots and watch them grow.
Sow directly in window boxes
Usually I sow lettuce mixes or greens in smaller sized window baskets, hanging baskets, or in bowl shaped containers. Once they start growing a bit, I will sometimes set the container outdoors on sunny days to get fresh air and wonderful sunlight. They tolerate the cold, as long as you don’t leave them out wet and it is freezing outdoors. If the leaves are wet and the temperatures are below freezing, they may get damaged. Otherwise, they are fine in the cooler temperatures of early spring.
I usually set them outside on a small deck table and there have been times I did this when there was still snow on the ground. Then I will take the container back indoors overnight usually. However, in early spring, they may be left outdoors if desired. When I’ve done this, I definitely noticed the lettuce leaves perked up and enjoyed the cooler weather. Think of it like how you enjoy the crunch of a cool salad from the refrigerator. The cold temperatures do not harm the plants as it grows.
Cool season vegetable
Cool season vegetables, which lettuce is one of them, are sown and grown in the spring and fall. They may also continue to grow in summer but if it gets super hot, they may taste bitter. In fact, I think I remember some bitter tasting lettuce moments from my father’s lettuce at times in the summer. But we always were given the option to keep eating them if we wanted to, and that was a good thing. However, the preferred taste was during the cooler seasons.
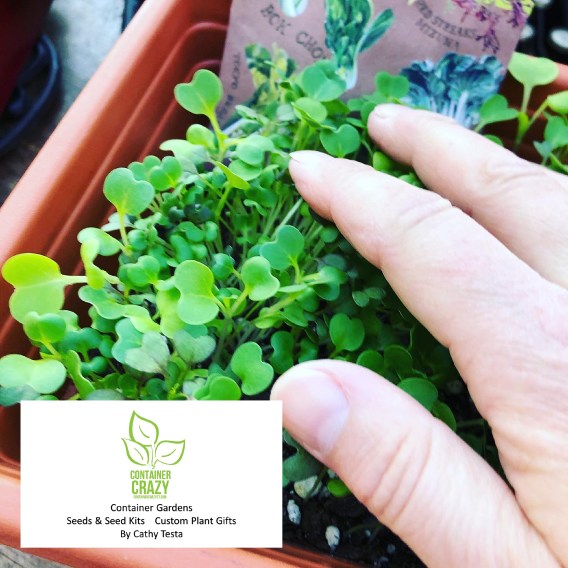
If you are new to sowing seeds and want something that is easy, give lettuce mixes a try. You literally can scatter the tiny seeds over the top of your seedling or potting mix and cover them with a light amount of soil mix, and then watch them grow. As seen above, the tiny seedlings were starting to appear and because my greenhouse is more on the cooler side, there was no need for heating mats or a very warm spot to get them going, like you need with other types of warm season plants. Starting them indoors in my greenhouse is something I’ve done often and then, as noted above, moved outdoors as the spring temperatures started to go more from winter to spring. I harvest the lettuce leaves at a baby stage or when they get larger to make a fresh salad. Either is fine and they will continue to grow.
This year, I ordered more of the seed packets of a salad lettuce mix and I am offering the packets for sale as well as my kits. If you decided on the lettuce mix choice, I recommend you also try to pick up some window pots or bowl shaped pots to grow the seeds in as it is so easy compared to transplanting. Just make sure the container you select has drainage holes or that you will drill them into the base. If reusing a pot from last year, be sure to wash it thoroughly as noted in my prior blog posts before sowing any seeds in it. But pretty much, any container of at least 6-12 inches deep is recommended.
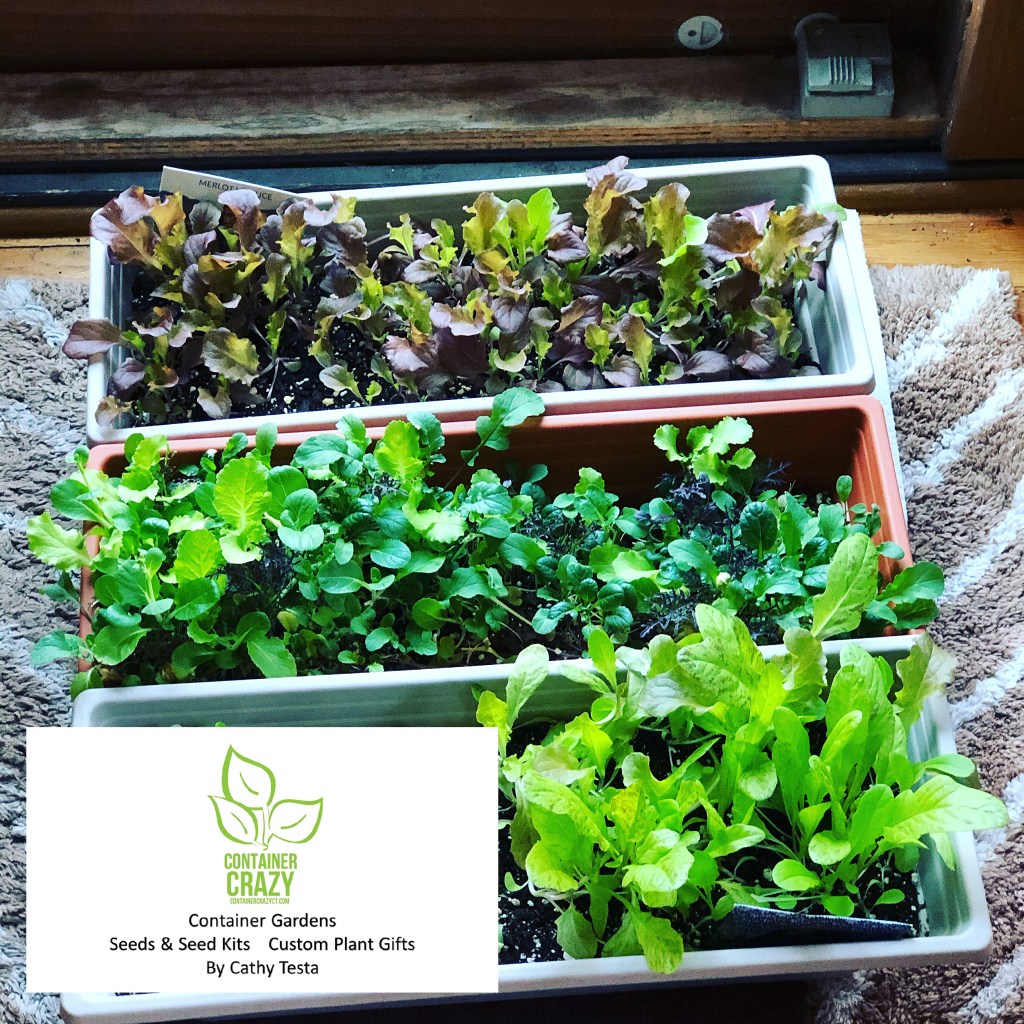
The mixes are pretty too
I also find lettuce mixes to be very pretty and ornamental in containers and patio pots. The seed packets I have available this season has several varieties of greens and it creates a mix of flavors, textures, and colors. Some greens may be lightly sautéed in pan if desired. Tossing them with some garlic is yummy. Eating lettuce mixes or greens when they are young and tender is the best time. In fact, plain old lettuce or head lettuce is not that tasty, it is the green leafy plants which add the flavor and texture. As you can see in the photo above of a mix I had a couple years back, the lettuce is speckled with dark plum tones. I love the look of that lettuce!
May sow direct in the gardens too
Lettuce mixes also may be sown in succession (repeatedly) and you get plenty of seed in one packet – up to 500 seeds! So if you are careful with sprinkling just the right amount directly into your containers, you may repeat the seed sowing process or sow many containers at a time. And of course, you may directly sow lettuce seeds into raised beds or the gardens of the ground. Shown above is a lettuce mix my friend, Dianne, grew last year. Just look at the deep merlot color of the lettuce sown directly in her raised bed. Wow, impressive. Every time I’ve directly sown seeds in containers, the seeds sprout and start growing and fill the container quite easily. It will be time in just a few weeks, early March, to start this up and I am looking forward to doing so. If you prefer sowing into gardens, you may start the seeds indoors and transplant as soon as the ground in your garden is workable. If there is a freeze after it sprouts, you protect them with a covering. It is best to avoid sowing midsummer as the seed does not germinate well in the hottest parts of the season, and again the flavor is better in cooler seasons.
Seed packets for sale
As noted above, I have seed packets available of a greens lettuce leafy mix and will provide details to anyone interested. The packets may be purchased individually or with a seed sowing kit. I am offering free delivery of the kits in my area of Broad Brook, CT for the next couple weeks. If you are not local, you may request a mailing of the seed packet with a mailing fee applied. But sooner or later, the supplies will run out so I recommend doing so soon. Plus, I will be busy in March sowing and growing my seeds too. And, oh by the way, I invite purchasers to my private Facebook page where I will sow all the seeds I offer and this helps beginners as well. You will see how to sow them and get growing tips all season. Hope you will join me this season. All the details about the kits are on my site called, www.WorkshopsCT.com.
Thank you for visiting and please share this with your friends. See the share links are below.