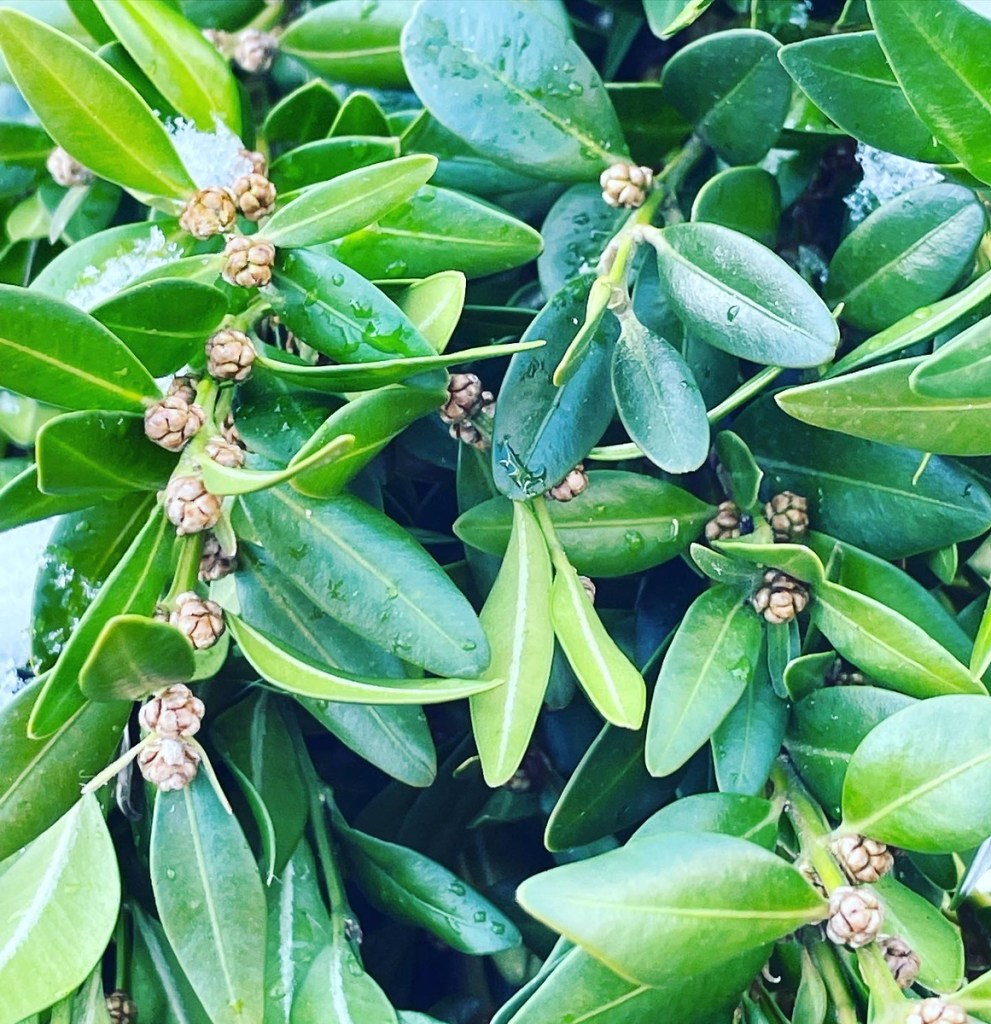
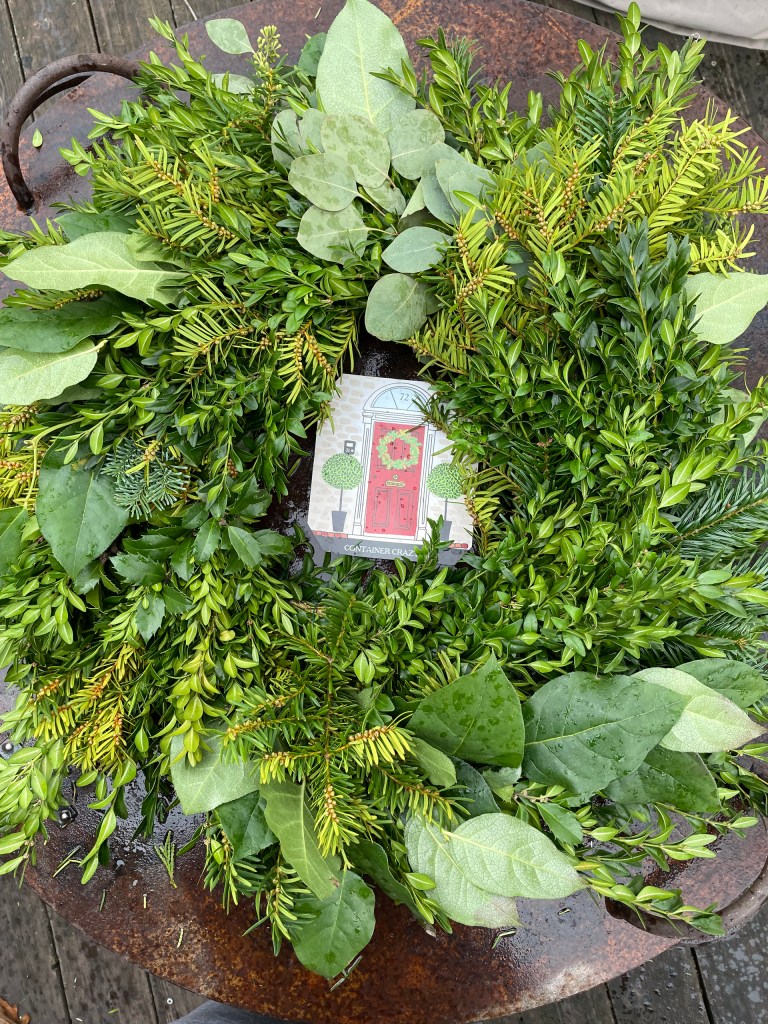
Do you know what the word Buxus is? It is the genus name for boxwood. It’s one of the easier botanical names to remember. Anyhow, boxwood evergreen shrubs have rounded or obovate shaped leaves, on slender green stems. It is a dense evergreen shrub used in landscapes and commonly available at nurseries. It is also a greenery available from floral suppliers or retail locations at nurseries during the winter to make festive arrangements such as fresh greens wreaths and holiday kissing balls.
As with most evergreen shrubs, there are many varieties or cultivars available of boxwood. Some have more narrow leaves and others have oblong leaves. For example, common boxwood (Buxus sempervirens) has elliptic or ovate to oblong leaves. Because I am a plant person, I notice the differences in the leaf shapes on boxwoods more so probably than a typical person. The leaves are small and glossy on both sides of the leaves usually, and in arrangements for the holidays, the leaves retain their dark green glossy color very well. Boxwood greens add a nice textural and color element.
I’ve written about the benefits of using boxwood in wreath making before on this blog. For example, there is no sap to contend with as with balsam. After a while, your hands get very sticky when making many fresh holiday wreaths, so that can be a benefit. Also, the boxwood bunches or stems are light weight. I liked using them to make boxwood only holiday kissing balls because of this feature, as other kissing balls would get terribly heavy when I did a mix of greens to create them.
As far as a quality green, I like boxwood on the greens list. It tends to give a classy look to a wreath or kissing ball. Used alone or with a mix of other greenery, it works very well. In my mind, it is a nice benefit or not sure of the word, but a higher-end type of greenery to use and if you can afford it, I say do it!
A holiday kissing ball made with boxwood greens only.
Wreath by Cathy T with Boxwood and Magnolia Leaves
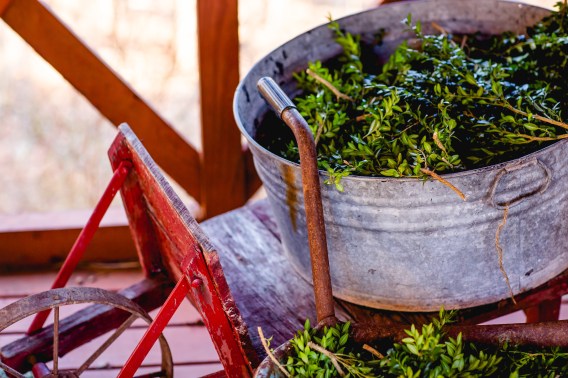
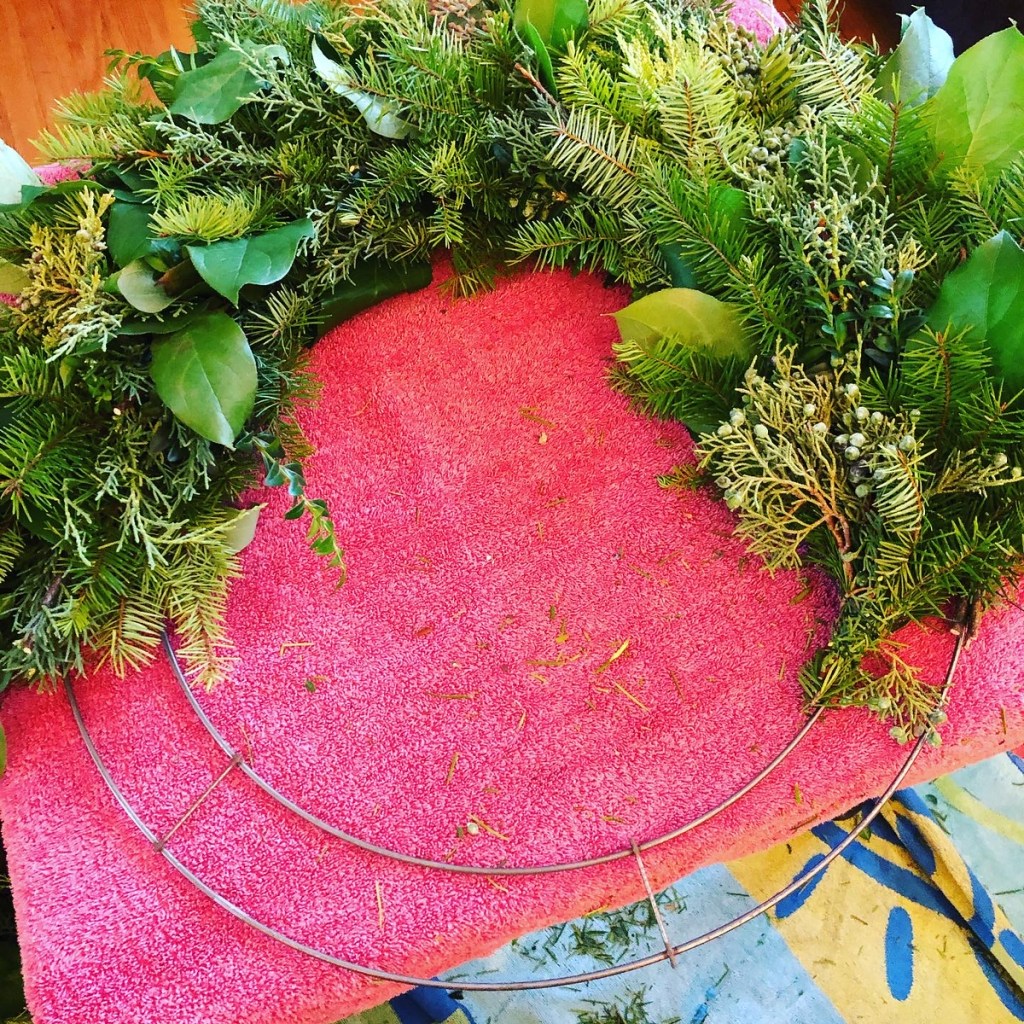
Boxwood ready for a workshop
Typically, the boxwood I would order was packed in boxes or burlap bags, and they were always fresh and good looking. To keep them hydrated, if I felt they needed it, I would take a bucket or bin like the one shown above, fill it with water and drop the boxwood tips and stems into the water to soak them for a bit. Then I would shake off the excess water after they had a good soaking (maybe about 15 minutes or so). I would shake the bunch and then lay them on beach towels to somewhat drain.
As mentioned in my prior posts, the greens need to be kept cold. In the florist trade, it indicates the boxwood greens should be in a cooler at a temperature between 36 degrees F to 41 degrees F. Anyhow, I kept them in the waxed coated boxes or the burlap bags in an unheated garage. However, if I soaked them in water to rehydrate, sometimes I would just place them in a bin after the excess water was removed. Again, rehydrating them was not often needed.
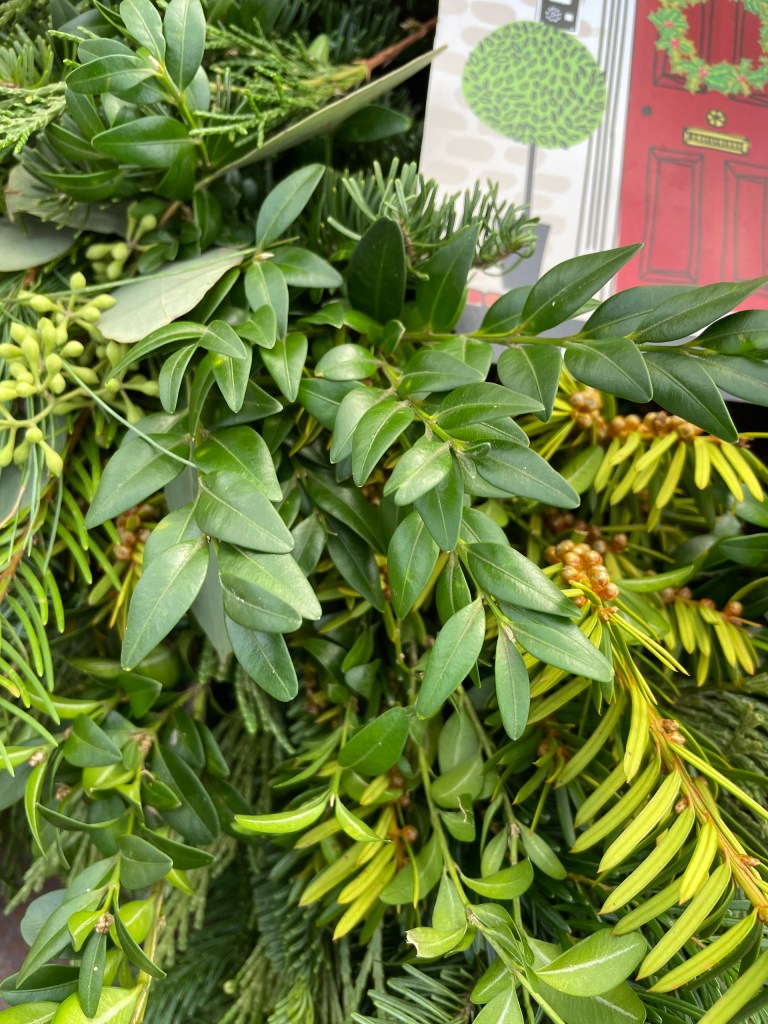
Boxwood on a Wreath by C Testa (with Lemon Leaf shown also)
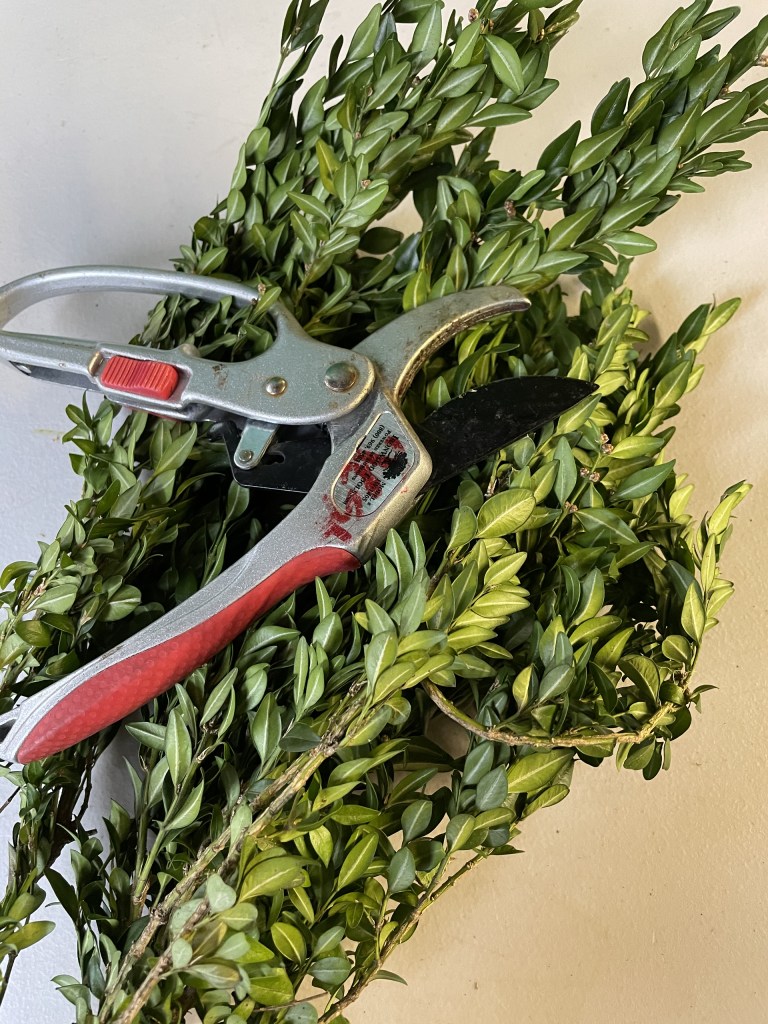
Another nice aspect about using boxwood is the stems are very sturdy. I would recut the stem ends to a bit of a point to insert into kissing balls center ball foam easily. BTW, you may also rehydrate boxwood before use by recutting the stem ends and inserting them into vases of water, but I usually did not do that or need to. As noted above, if there was a need to rehydrate them, I’d do the soak method in water in a tub for a bit then dry them out a bit so they would not be repacked soaking wet. Outdoor weather like snow or sleet did not bother the look of the greens either once they were in a wreath outside.
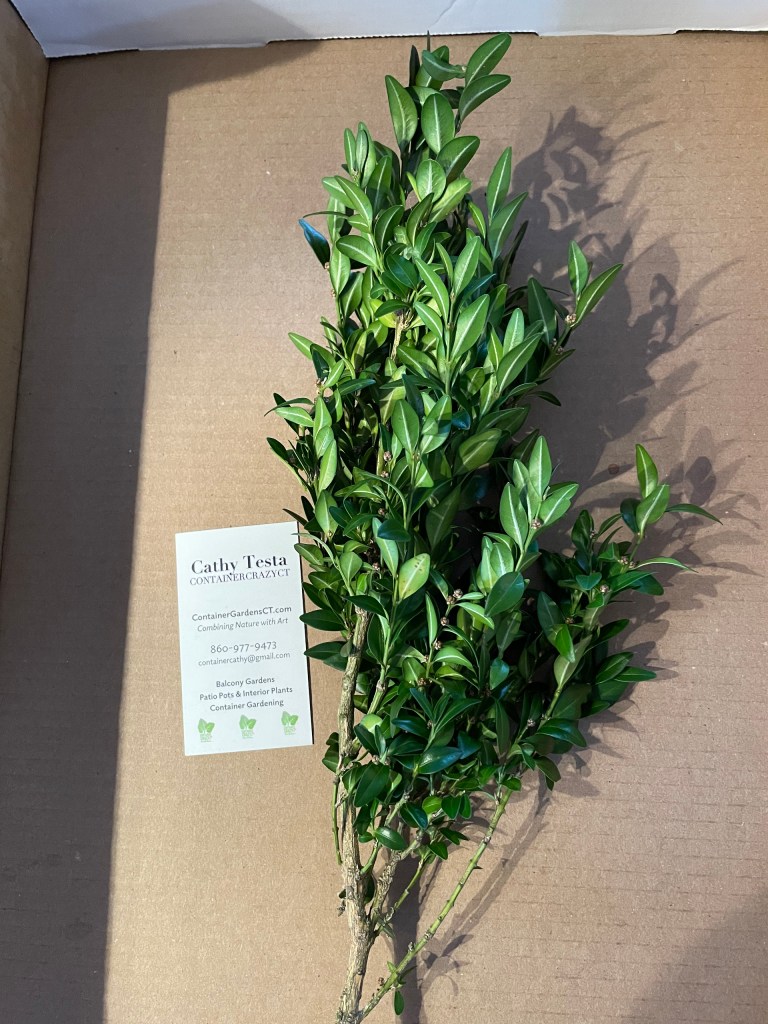
For a couple years, I offered boxwood in my box of greens mixes. These boxes of greens were for people who wanted to make their own wreaths at home. Included were many other fresh greens such as balsam or Douglas fir, Salal lemon Leaf (prior post), yew, silver fir, berried juniper, holly, and more. I never harvested boxwood from my own shrubs or others, but these shrubs are common in the landscapes, so if you happen to have a big enough shrub stash of them, they can be harvested from to add to your holiday wreaths. Typically pruning boxwood is done in the spring but taking some minor cuttings for your arrangements is usually harmless for winter decorations.
Of all the greens I would order, boxwood was usually the highest price on the list. Therefore, I did treat it as a quality green to use with a mix of greens, but if I had some left over or someone wanted a boxwood only wreath or kissing ball, I would charge accordingly. The price was worth it because boxwood is an elegant green that makes your arrangements look classy, in my opinion.
Wreath made by C. Testa with a mix of greenery. Boxwood accents shown.
Wreath by C Testa with Yew, Lemon Leaf and Boxwood
Boxwood Only Wreath by C Testa
Another nice aspect of using boxwood is it was a faster assembly as shown above on this wreath with only boxwood. It would take a lot less time than bunching various greens together.
Boxwood Only Holiday Kissing Ball
Snips and tips of boxwood greens are nice in vases or other holiday decorations. For example, if you wanted to make a snow scene in a glass bowl, the cuttings can be used in there and last a long time with no odd scent. And as mentioned good color retention. I really can’t think of any downfalls of using it. I would rate it higher as a good quality type of green to use and hopefully you will have the opportunity to do so in your own holiday arrangements!
Salal lemon leaf is a widely used green in the florist industry, but I didn’t know it. I was first introduced to it by my contact at a florist supply house when I asked, “What other greens hold up well that I can add to my greens list for the holidays?” She mentioned Salal.
Salal – Oval Green Leaves Shown above with other greens
Salal lemon leaf is packaged in bundles with rubber bands. Each stem holds several oval shaped green serrated leaves at the growing tips grouped in an alternating pattern. At first glance, I thought, “Wow, these are beautiful.” I definitely wanted to get some, and so I did.
As I read that linked post above, I didn’t realize it grew by rhizomes and I’ve never seen a picture of this plant in its natural state. Apparently, it grows like an understory plant in the forest. It is noted under the botanical name, Gaultheria shallon. It the florist industry, it is listed and commonly known as Salal Lemon Leaf.
Salal is a wonderful alternative, in my opinion, to holiday magnolia leaves. They have a similar shape, but they do not have the thickness or the brown color on the undersides of the leaves like magnolia leaves do, but they are a very pretty glossy green color, and are smaller sized. Apparently, if you rub the leaves together, they smell like lemon from what one website indicated, but I’m not sure on that. I never noticed any scent or fragrance from the leaves.
Salad used in a Holiday Pot Creation by C Testa
They come packed with the rubber bands and bunched in boxes lined with plastic. Sometimes wet newspaper was wrapped at the stem ends to hold some moisture, and sometimes I would remoisten paper towels to wrap on the ends too, but overall, this plant really held up well prior to use, and on wreaths and in holiday kissing balls, and after. I also discovered that it holds up pretty well in vases of water too by recutting the stem ends, because one year, I had some left over and set them in a vase of water.
Salal Lemon Leaf in Vase of Water
I referred to salal lemon leaf in my workshops as a “premium green.” They are pricier than other greens obtained for wreath making and are used more in floral design. It is not a green commonly seen in traditional wreaths sold in the retail settings and stores. As I began to work with salal more each holiday season, I discovered more about it that I loved. Using salal lemon leaf became a real pleasure to me. I think they are gorgeous.
One year, for the heck of it, I thought about spraying silver paint on them. To my amazement, the silver held on quite well outside. I don’t recall if it rained or snowed a lot that year though, but I was a bit surprised the spray paint did not wash off the lemon leaves.
The stems of the salal are very long and somewhat hard but flexible, but they were strong enough too, if you wanted to carefully insert some into a kissing ball, it would penetrate the Styrofoam or florist foam ball with ease, so long as you don’t jam it in there. I would hold the tip of the stem closely at the bottom and push it into the ball for holiday kissing balls here or there. I like the look of wreaths and kissing balls with a mix of greens so this was always a special touch added.
Kissing Ball with Salal and Other Fresh Greens by C Testa
Salal lemon leaf looks gorgeous in wreaths. I suppose you could make a whole wreath with just salal, but it is pricy, so to me it was a beautiful accent plant to use to add those special touches on the hand-made wreaths. Each bundle comes with many stems, and I would keep them stored as bundles before each use.
As with my other holiday greens, a cold room is best for storage before use, like an unheated garage. I also put a tarp over the boxes. I guess that was my method to ensure they stayed as cold as possible and avoided any direct sunlight from garage windows, but in the floral industry, these are kept in florist coolers.
I never “treated” them with any products to maintain freshness but there may be some out there, I am not sure. It wasn’t needed overall for my holiday creations. The leaves also, to my pleasure, held up very well in the windy conditions for a couple balcony high-rise clients I had. They did not break off which is so important because the wind is very extreme on some days in the middle of winter on the top outdoor balcony floor of a 38-story building, and so I was so pleased this green was good to use in my big wreaths which hung on a wall outside.
I always mix various greens together but at one of my workshops, a lady put a batch of salal on her wreath and alternated batches with other greens. It came out lovely and here’s a photo of her holding her wreath from that workshop, which one of my last workshops for fresh greens wreath making – a celebration year (2019). The year before COVID arrived.
I also sold boxes of various holiday greens and added stems of salal to the mix. One year, a lady made garland with her greens box for her stair railing at her home and shared this photo with me. I thought it was just beautiful and a very useful way to highlight this florist quality green.
I felt salal stood out well in the various wreaths I made. I kind of fell in love with this product and really felt it was a wonderful and long-lasting item to offer. I know all the women, and sometimes men, who attended my workshops loved using it too. I would tell them to disperse the salal lemon leaf in places on their wreath to serve as an accent. It also worked well in holiday pots as shown above in this post.
Salal in a Wreath by C Testa
I never really experienced anything bad about using it or storing it – so long as you received it fairly fresh from your floral supplier. It would sometimes have a smell in the box that would remind me of stem rot, so I was always sure to check on it – make sure it was okay, not too damp in the box at the stem ends and staying fresh. Overall, it was the case and never an issue. I never misted the leaves and kept those dry and cold in the boxes when stored before use.
Salal in a wreath by C Testa
Salal lemon leaf made the wreaths, kissing balls, garland, and holiday pots look more professional and luxury style in my opinion, so it was a keeper on the fresh greens list every year. I’m glad it is one I asked about early on! Hope you will use it too in your creations.
Thank you for visiting and Happy Thanksgiving to you!
Cathy Testa Located in East Windsor/Broad Brook, CT Date of Post: 11/23/2023
Making a Wreath by C Testa
Salal Lemon Leaf Photo by C Testa
Stay tuned as I will continue to go over the various fresh holiday greens used in wreaths. So far, I’ve covered Yew, Holly, and with this post, Salal. See prior posts for more information. I hope you are enjoying this upcoming holiday season.
Note: I am making Ribbon Holiday Wreaths this year for sale – see my www.WorkshopsCT.com page for information or visit me on Facebook or Instagram under Container Crazy CT name. Thank you – Cathy T
Yew (Taxus) is a needled evergreen shrub or tree used in landscapes. It is not really sought after these days, but when my parents were young, it seemed everyone used yew shrubs as foundation plants or as hedge plantings for property boundaries. They have a slow to medium growth rate and don’t experience many insect problems. They keep their dark green needle color year-round and can take moist sandy soils, but the soil must be well-drained. Locations suited for them are shade or sun. So as a shrub in the landscape, they are versatile. However, they were not often used in wreath making. Until I started to do so when I thought about how well they retained their green needles. From a distance, they almost look like balsam fir needles, and they mix well with other types of greens when making holiday wreaths.
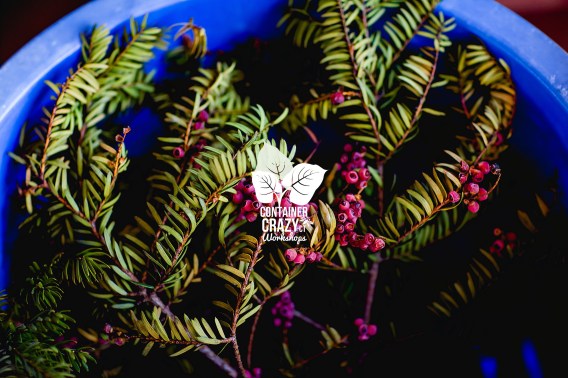
Fleshy red arils over the hard small seeds
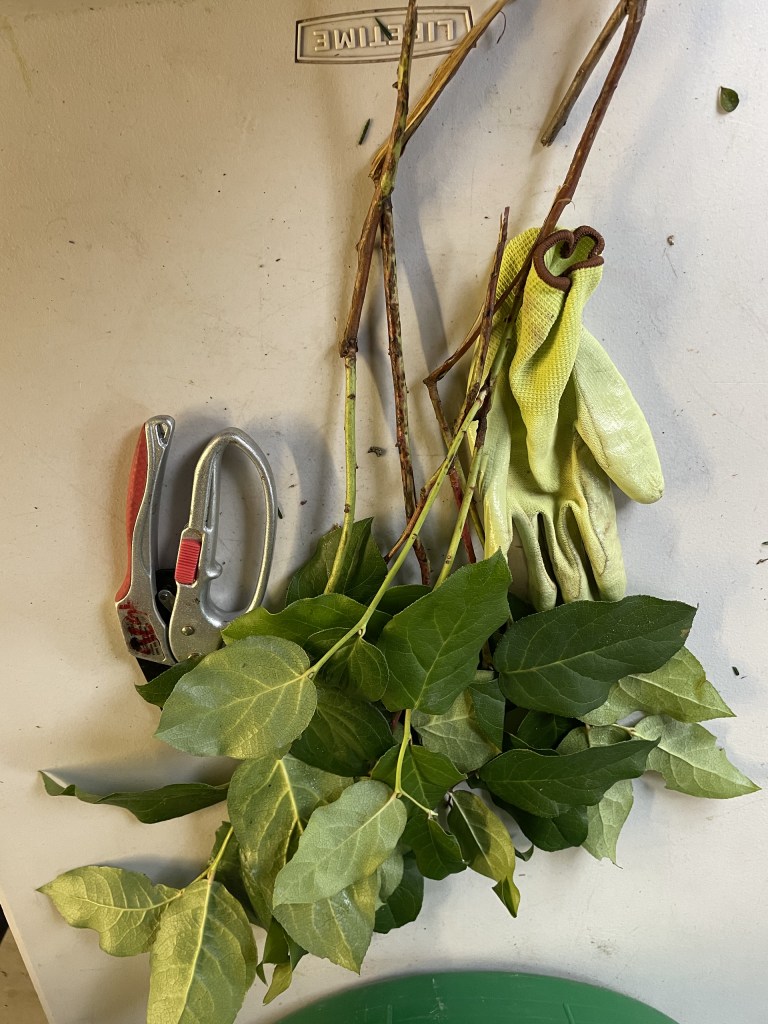
My Dad has a stand of yew trees on his property behind his house. They’ve been there so long; they are about 20 or so feet high. If I were to guess, they are probably 60 years old, but I am not sure! Some of the branches are thick enough to require a handsaw or chain saw to cut down. For the most part, I obtained my various holiday fresh greens for wreath making from a supplier, but I also noticed my dad’s yew trees were huge and offered a nice filler type greenery for wreath making. One year, I asked him, “Hey Dad, may I take some cuttings from your old yew trees for my wreath making workshops?”
He was sure to respond yes, and Mom didn’t mind either. My Dad has a thing for cutting down trees, although we did not cut the yew trees down, we just cut big limbs or branches every year for my wreath traditions. He’d meet me there as I drove my truck down his farm dirt road which runs behind his house and park it near the yews. The trees may have been shrubs at one time, but now they were full grown trees and very healthy. The towered up high and were full of green needles.
Opening the trunk bed of my pick-up truck, I’d always be sure to watch my footing because usually the road near these yew trees is either muddy, mucky or frozen, depending on the weather. He loved cutting down branches for me and I would point to this or that one as a good candidate because it would be a full branch of dark green needles. I was always excited to get these green harvest goodies from his big three yew trees on his farm. It excited me because I felt yew would make an excellent filler in wreaths and kissing balls. These greens served as a back-up green for me too. It also felt like a Christmasy tradition doing this process every late November or early December.
We kind of kept our tradition of the harvesting from his yew trees a secret. LOL. Mom knew of course, and so did my brother who lives there, but pretty much it was our little secret of harvesting yew for my wreaths. The needles of these evergreen trees and shrubs are a little glossy, short, there is no sticky sap to deal with, and I could gather quite a lot for my uses. As he would start his chainsaw, I would have my pruners or loopers ready to clip off anything undesirable. I’d load up the good full branches into my truck bed after he’d toss them on the ground. He had his job and I had mine. The truck bed would be completely full most times until I was satisfied I had enough. I always feared running out of greens at my wreath making workshops for the holidays, so this was also serving as a wonderful back up of dark fresh greens. Sometimes I’d even piled some branches into the back seat of my truck in addition to the truck bed.
Yews didn’t seem to be a popular green for holidays however, and I don’t think suppliers even offered them as a greens option or variety for wreath making. In the old days, my parent’s days, yews were planted in the landscapes quite a lot. I think for my generation, yews seemed to be out of favor and a bit old fashioned, but these evergreen trees or shrubs don’t really have many problems. No big insect issues, no smell, but they do have toxic properties from what I read in my reference books and online. You may think the berries (actually seeds covered with red fleshy material) are toxic, but I believe it is the seeds within the fleshy red fruit that are a problem, that’s if you or an animal eats them. (Other interesting tid-bits I read about yews is a chemical from them was used to treat ovarian cancer and that Robin Hood used the branches to make bows and arrows – Interesting!) But perhaps the toxic principles are why they were not harvested as a green to use in wreaths.
I think years ago, they may have been used a lot in landscapes around commercial buildings, as hedges, or whatever because other than some pruning, they were maintenance free. If you look at some older type buildings, you may spot old yew shrubs, likely at huge overgrown sizes, somewhere near them, or maybe in a parking lot areas on the middle islands, etc. But today, I just don’t see them very often at homeowner’s properties, and if they are there, it was planted many years ago.
As for the stand of yew shrubs my dad has, they grew so tall, they were more like trees and those trees gave me a nice gift every season. The gift of the greens but also the gift of being with my dad, just the two of us, chatting between cuttings and the sound of his chainsaw. We didn’t stay out there long because it was typically cold out. Once I felt satisfied I had enough, we’d put the tools away. He’d quietly walk away back to the house down his backyard dirt road, and I’d drive off to my house to prep them for the wreath making and workshops. When I got back home, it was just plain fun for me to put these in bins. It made me happy. I am not sure how to explain that – the whole process felt good – because it became a holiday tradition of sorts. We all love holiday traditions.
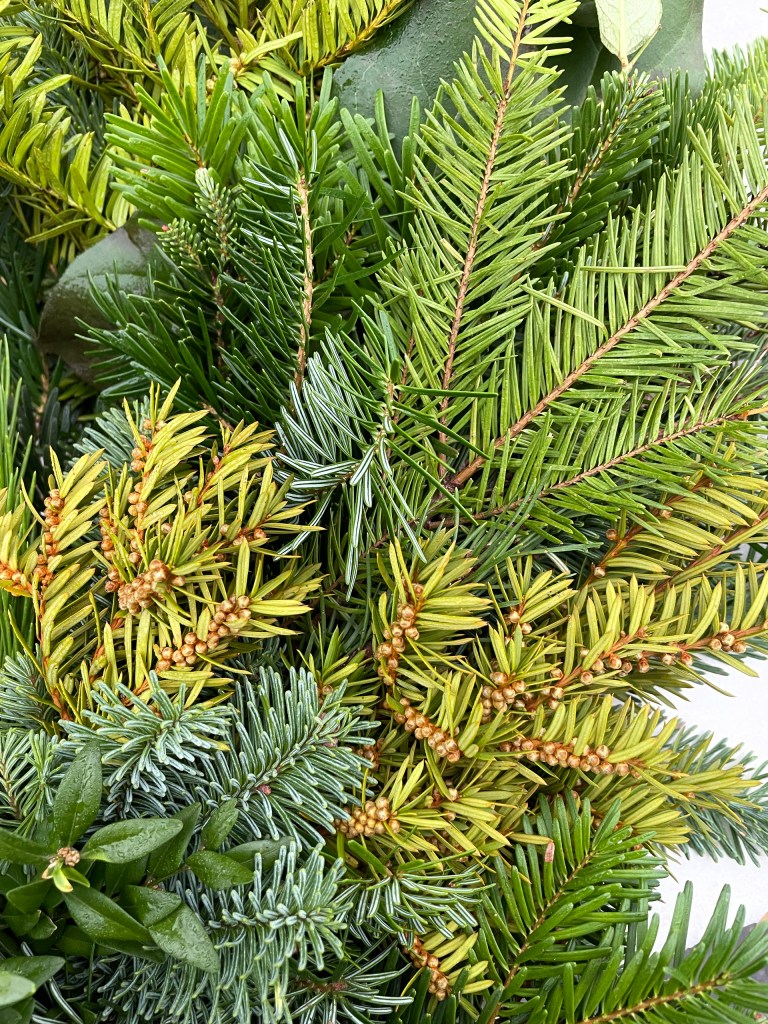
As it turned out, this harvesting and cutting ritual actually helped his old yew trees to produce more foliage each year. I was fearing that someday we would take too many cuttings of it, and it would eventually look bare, but that wasn’t the case. Yew shrubs and trees can be pruned severely and frequently. Some people shear the yew shrubs into shapes, things like that. You will notice in the photos above, some of the cone shapes by the needles are a golden color, while other times, the pink, red fleshy material was around the seeds (on the female cones).
As far as wreath making goes, yews offered what I called a filler. Sometimes you need a lot of greens to create a full wreath (and you need even more to create a holiday kissing ball) and having this needled type of dark green evergreen filler from my dad’s trees, rather than purchasing more of another filler greens such as balsam and boxwood, helped reduce some expenses for me. It also served as a backup green. I always feared I’d run out at the workshops, and this was a good stock of filler. They hold onto their needles very well and last a very long time. As I’ve noted in prior posts, what makes a beautiful wreath is a mix of greens because you get various textures of green colors and yew also has a lighter underside color to the needles. Can you see the yew in the photos above? The yew helped to fill it in as with all the other greens we had on hand to use.
It is possible people don’t like to use them in their landscapes because they are toxic. My handy reference book indicates the foliage, bark, or seeds, are toxic to people and to all classes of livestock. The fleshy red berries (known as arils) are not poisonous, but the seeds inside which are very small are from what I know. This was interesting to read because my dad’s yew trees are on his farm! He had cows for years, but they were not in the backyard area where these trees stand by the road which leads further back to where the cows roamed the property by the river and in the fields. I wonder now if my dad knew this toxic issue about his yew trees and will have to tell him when I see him this week. He did not have any yew shrubs in the fields where the cows were, so that’s a good thing. I also read they are “not” toxic to deer – go figure! We all know deer like to roam evergreens and have at them in some landscapes.
Undersides shown above on Yew stems next to Lemon Leaf (on far left)
I also liked using some of the taller yew branches to insert into large planters with the other mix of greens when creating holiday decor. The branches with reddish to brown bark are firm and strong, so it was useful for that aspect, serving as a center tall thriller. These yew greens experienced no problems if they get wet or frozen. I realized that yew was just overlooked but very useful. Yew has a nice dark green color with a bit lighter green on the underside of the needles and they had a nice fine texture too. They were not difficult to work with.
There are tons of cultivars of yew shrubs and trees. They have or had many purposes from foundation plantings to topiaries, even bonsai. They do not have serious diseases or insect issues from what I know. And lastly, these greens held up very nicely before and even after use. I would put them in a huge bin with the stem or limb cut ends facing down in the bins and fill the bottom part of the bins with water to keep them hydrated, and again, as noted in my prior post, I put them in the cold garage. The needles “never fell off” even after the workshops were long over and weeks went by. When I had some left over, there wasn’t a needle on the cement floor of the garage. Even if the water in my big bin froze, it did not negatively impact the stock I had collected. Later, I would put the left-over branches in the woods for the deer to have should they find them.
One year, I dressed up in my holiday gear wearing a red Santa hat and red festive jacket and recorded a video of me showing all of the green types I had for the upcoming workshops, and I talked about yews. I noted that not many people use yew greens in their wreaths, but I do. Later, I saw a nursery person showing off yew too. I thought, “Did she see my video and then gather some up too?” Perhaps! Why not so long as you know about the toxicity part.
One thing is for certain, I will miss this annual harvesting tradition with my dad. I’m not doing my wreath workshops anymore and not making greenery wreaths for the first time in 15 years. While we worked to gather up these greens, we’d have quick chats after the chainsaw stopped and I always cherished these quick chats, but it was also cold out usually and we’d feel it. Then we’d decide we were done chatting in the cold. It is something I just felt was a nice experience just for us. I didn’t even take a picture of us out there – which I think I should have. If you should decide to use some yew, please let me know your thoughts.
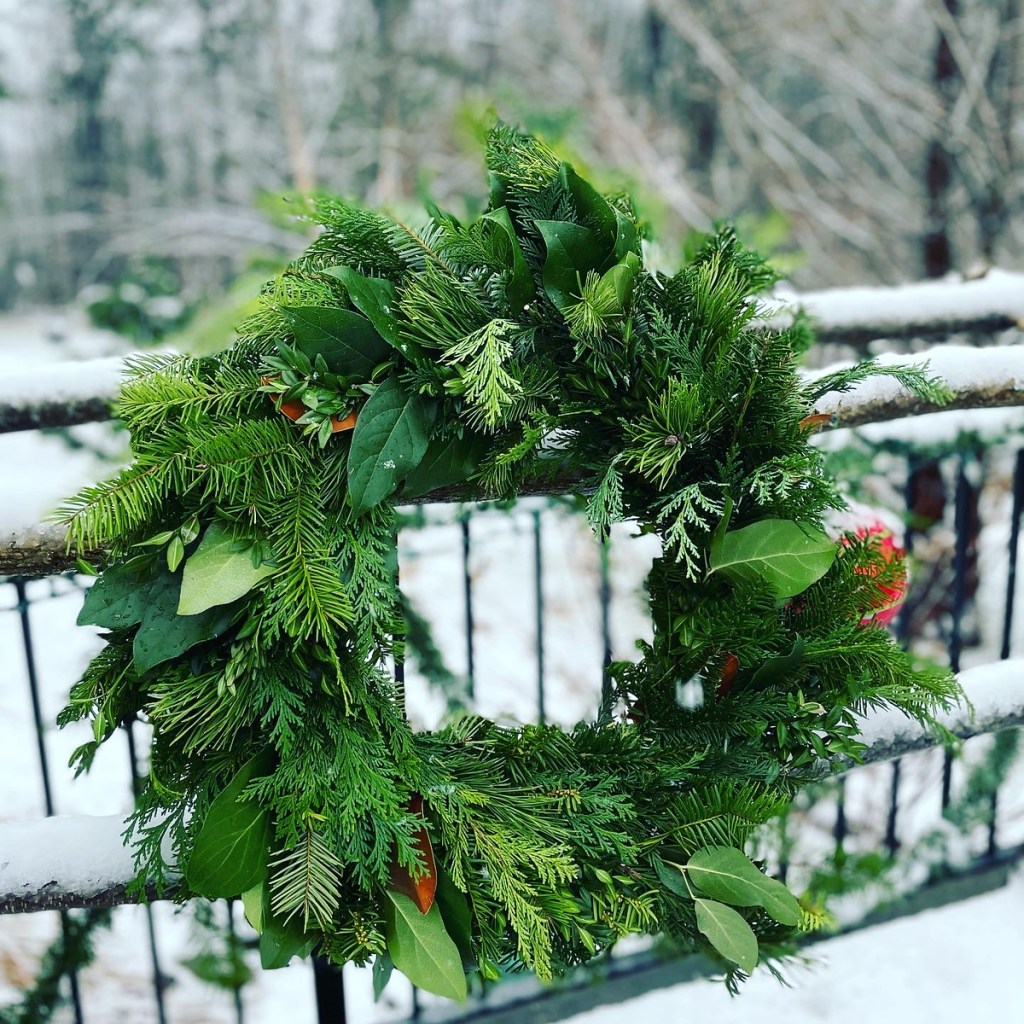
In my opinion, there are some greens which are better than others, but what really makes a wreath absolutely beautiful is using a “mix” of fresh greenery in the holiday wreaths.
When I first started working with fresh greens, I had no clue how to prep them, what they required to store well prior to creating wreaths, and which would be best to use.
Fresh greens will dry out thus getting them too early is not a good idea, so the timing is key. Like almost anything in the horticulture world, your items are perishable. I always waited until right after the Thanksgiving holiday to pick up my green’s orders to start making custom wreaths.
In order to reduce the loss of needles or drying out the greens, they must be stored in cold temperatures in boxes or some in plastic. Some of the boxes should be lined with plastic, while others are stored in boxes coated with wax inside. In general, all greens of all types gathered for holiday wreath making should not be exposed to winds, harsh sun, or even cold cement floors, which can draw out moisture. Some kinds may be laid out on tables, but key is storing them in cold and dark inside locations until ready for use.
Some greens, if a bit dry, may be rehydrated by cutting stems and setting them in vases or buckets of water, or even dunked in buckets of water, but some should not be treated that way. Others I would sometimes rinse with water from my hose outside in wagons, or let the snow fall on them in my driveway as they sat in wagons for a bit of moisture exposure, but then other types of greens should not get wet. If stored wet, they can turn yellow or rot. It depends on the type of greenery.
Learning how to handle the greens and which looked best and worked well in wreath making was something I learned by researching, experiencing, and testing various greens from balsam fir to berried juniper. I always took notes each year on how well the greens held up and would notice which performed better than others.
In this post, I want to share some tips with you on how to best prepare and use various greens in your wreaths. I will go over 15 different types in a series of posts. As I mentioned, I loved using a wide mix of greens to have full, fully, and textured creations. The contrasts of greens and various textures made the wreaths absolutely beautiful.
Let’s begin!
Holly
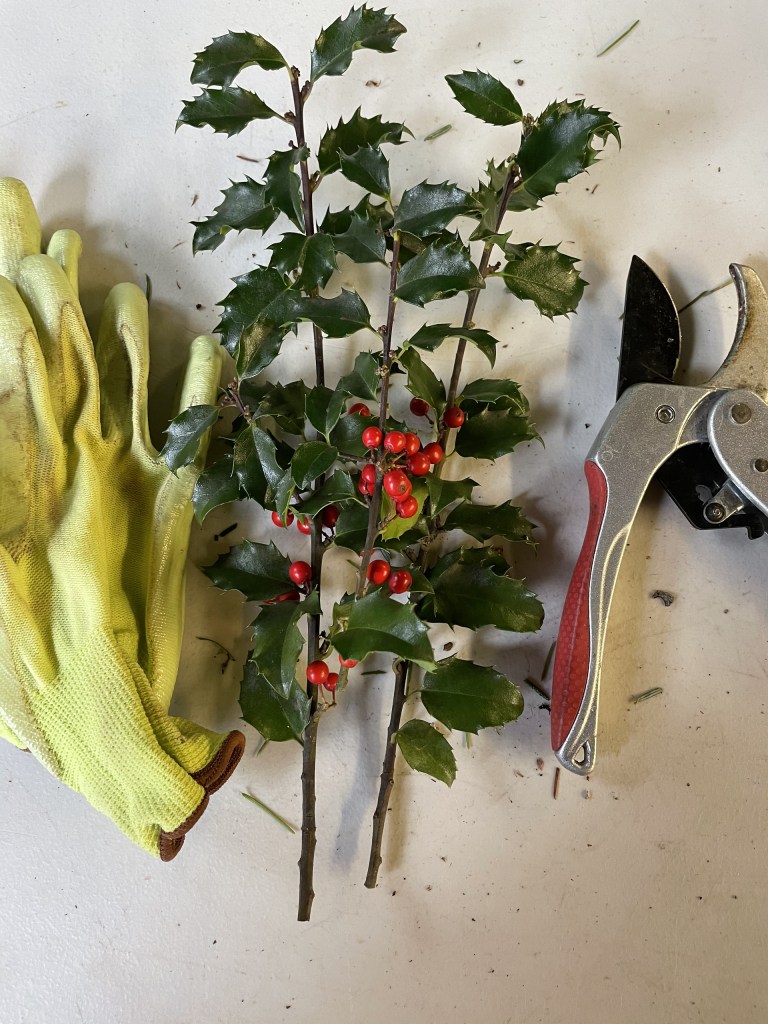
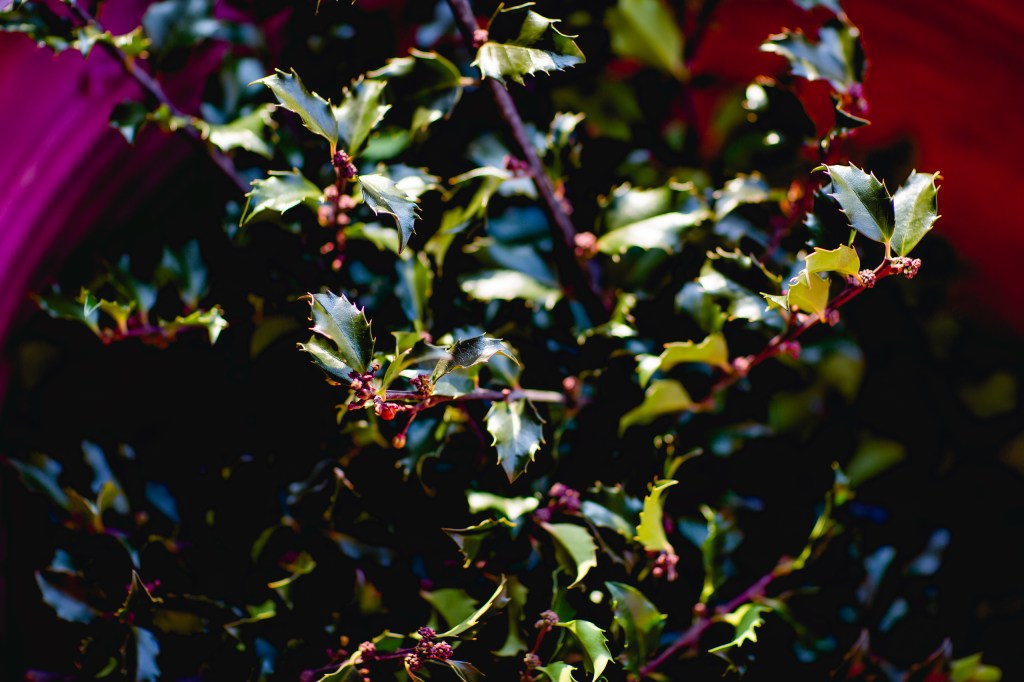
Evergreen holly is no doubt one of the type of greens people love in their holiday decorations. Their attached bright red berries stand out and they are the essence of Christmas memories. However, one downfall of holly is that it will turn black if wet and hit by frost or freeze. And handling them repeatedly when making wreaths can be painful due to the spiny edges of their leaves. However, holly is easy to insert into wreaths, sturdy, and provides a nice deep green with the red berries to the wreath with the mix of other tones of green colors, but holly is not super full or fully. That is fine, but just something to note about using holly. If it doesn’t get wet and frozen, it will last a very long time in a wreath until it kind of dries out. When they do dry out, however, they still retain the leaves on their sturdy stems for a long while.
Holly bushes, (Genus Ilex), are simple evergreen plants with dark green leaves and there are many cultivars available in our part of Connecticut to plant into your landscape. Many people have evergreen holly shrubs or trees readily available to prune from for their Christmas decorating from their own yards or landscape beds. But take note, these shrubs can suffer in the landscape from winter dry out from winds or water-loss when the ground is frozen, but otherwise, they are relatively easy to grow, taking part-shade or sun locations. And they can get rather large over the years too.
Every year, two of my friends offered to come take cuttings of their holly shrubs for my wreath making but I also ordered holly from a supplier too. I have a neighbor who generously offered her big, huge holly shrub to take from. It was gigantic. I’d quietly walk over with my wagon and pruners to take cuttings. It was always a type of annual pre-holiday ritual.
Her yard has lovely plants in her various gardens, and it was nice to take long holly stems with red berries and load them into my wagon. I was sure to do this only about 3-4 days before my wreath making workshops to have the best freshness. Sometimes, I would see a praying mantis case attached to a branch and leave that one be. Her holly shrub got rather large over the years where the top was not reachable without a ladder, so I never was able to get that high to cut them. I always methodically thought about taking cuttings to improve the outer shape and form of the plant. It was generous of her to offer cuttings.
My brother also offered to stop by his holly bushes one year to take cuttings for my workshops. He has a rather large expansive open back yard. The sun was shining on me that day when I went as it was a beautiful blue sky cold day. His holly shrubs are on a little slope. I sat on the ground taking cuttings. No one was home and it was a quiet, brisk, and sunny with a slightly cool air about. I remember thinking how wonderful his property was. Serene, quiet and peaceful. After I was done getting cuttings from his hollies, I laid on the ground next to the shrubs on the slope and faced the sun and sky above and felt the sun’s warmth on my face. There was something magical about my harvesting adventures.
Pruning evergreen hollies in the fall or winter however is really not the best time to do so. It should be pruned in the early summer for your typical landscape maintenance routines. Pruning them in winter exposes the stem’s ends to cool temperatures but only taking a limited amount in the winter didn’t detrimentally impact the shrubs. In fact, if my own hollies in my yard get out of shape, I wait to take top cuttings before the holiday wreath making process for my wreaths, or to gather to put in vases as holiday decoration.
If you decide to plant some evergreen hollies in your landscape, be aware that “some” types of holly plants require a male and female plant to set the beautiful red berries. If you decide to plant one for the first time, inquire about this at your local nursery. Female hollies produce the red berries and I believe you probably need only one male holly shrub to achieve success. Another consideration is pets, as some say the red berries are toxic to pets. I never had this issue here cause my adorable cat does not touch my plants but be aware holly berries can fall off and even leave a red mark on your hardwood floors if they get squished when you happen to step on one.
As I noted, the only downfall to holly is the leaves can turn totally black if wet and hit by frost. So, when you store them in a box with plastic, be sure you are not storing them wet. Freshly cut, when possible is best too, so you reduce the time is no longer attached to a shrub or tree and starts to lose some moisture. And storing them in plastic enclosed in a box is best done when the holly is cold. Loosely store them in the plastic too. They do not have to be tightly packed, but always in a cold room. An unheated garage is perfect.
In my workshops, I referred to holly as a specialty green to use in our wreath making – one to use as an accent in your creations. One year, I obtained a variegated type of holly with green and white leaf margins from a supplier, it was amazing, and I just loved it. It was so beautiful. It provided a more professional look to the wreaths, and it also felt and looked luxurious, at least I thought so. However, it was fairly pricy and not always readily available from the supplier, so if you decide to plant a shrub, consider the variegated types as well.
One last thought, I have read that holly is ethylene sensitive. If exposed to ethylene, the leaves and fruit will fall off. I never had to worry about that much. Ethylene is produced from some types of ripening fruit so businesses storing fruit or ripening produce with plants must be aware of this sensitivity. If you are running a business and holding holly with other plants or fruits, there are products out there to treat plants for this. I remember a grower talking about this when we went on a field trip during my college days. We walked into a huge freezer or maybe it was a fridge and he talked about the concern of ethylene. People in the floral industry are also those who are probably ethylene experts but for homeowner harvesting plants for wreath making it is most likely not an issue to worry about.
Overall, I did not have issues with harvesting, prepping it, or keeping any type of evergreen holly cuttings and stems fresh for my holiday making workshops. It was a bit pricier though and since we used it only as an accent, I started to remove it from my list of the 15-20 types of greens I would obtain. Often times, workshop attendees brought a little of supply of their own holly cuttings to use. Fortunately, as mentioned above, it is an easy type of evergreen shrub to obtain from our local nurseries. Sometimes I wish I had the forethought to plant all the types of plants used in wreaths in a big field and we could have a harvest party for the holidays! I have quite the imagination.
Stay tuned for the next post on the next greenery on the holiday list!
Thank you for visiting.
Cathy Testa Located in the Broad Brook section of East Windsor, CT
I thought it would be fun and helpful to go over some of the successes and fails of creating a holiday scene on a high-rise balcony. Unlike the typical home scenarios, fresh greens cannot be literally stuck into soil in a planter. Usually that is all takes hold greenery very well in a pot to dress it up, however, this would not work on a high rise due to the strong winds. The winds are strong enough to blow off heavy furniture. Furniture had to be bolted down or locked down literally with cables. I had to get creative with the mechanics to ensure all the holiday decorations would remain in place within the greenery of the planters and wreaths.
Not only did I have to think through how to secure everything up there on a high-rise exposed to all the winter elements, but I also had to consider how to get it all up there without damaging items. Luckily, my hubby became my winter assistant. I would spend weeks ahead picking out decor items, creating fresh large wreaths, estimating greenery needed for all the planters, and organizing all in boxes so we could work efficiently out in the cold during the installations.
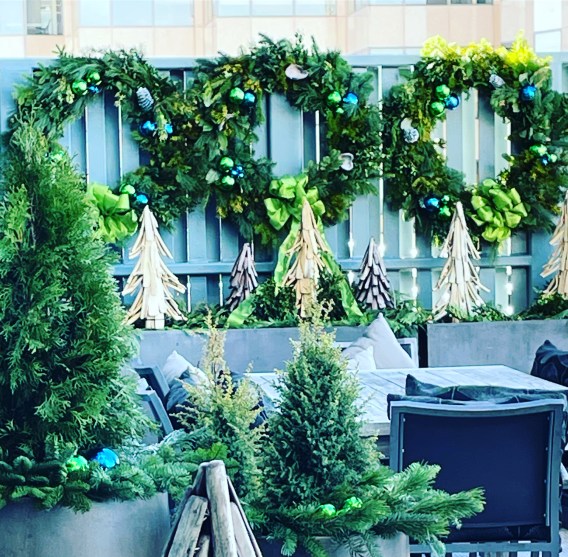
Each year, I created a new color theme for these clients, and this particular year, it was blues and silvers. Believe or not, those very thin curly silver sticks stayed in place fairly well, they did not fade and keep their glittery charm, but I didn’t just shove them in there, I secured them with heavy-duty florist wire too. Same with the silver pinecones. Wire did the trick, and it wasn’t too difficult to secure those two items in the greenery on the wreaths.
However, the ball ornaments, well those were tricky. First, they have to be shatter proof ornaments (fortunately, commonly available). I started with trying to glue them to wooden dowels but that didn’t hold too well because glue can crack in the cold. Later I realized, these have to be wired thru the actual ornament. So, for each one, I used a heat-type soldering gun tool to make a small hole on each side of each ornament (by each side of where the ornament typically has a round hook), and then threaded thick florist wire through each ornament. That worked. You can sometimes find ornaments with the wires securely attached but even still, the wind was so brutal at times, I needed to make sure the ornaments would not fly away outside. I looked into obtaining a very large and long sewing needle to help with the threading of the wire thru the two holes. The needle helped greatly to get the wires thru the two holes and then attach it to the frame on the back through the greenery.
One year, I used these thicker curved stick things – what are they called? I can’t remember! I’d have to look up my notes, but when I spotted them, I thought how cool! These could be used natural or painted silver. So, using spray paint, I sprayed some silver to match this theme and left some natural brown. I thought they were so cool and could be put into planters on the balcony an upright element.
However, later, after the winter season was over, I discovered when these got wet from the snow, they totally flop over! If you look to the left, by the outdoor chair, you will see those curly sticks flopped right over. The moisture penetrated the curvy sticks and made them just flop over. So this natural element was a fail, unfortunately.
When the snow covered these installations of holiday features, it added a magical feel to the high-rise during the winter months. They can see all of it thru large windows. It is surely better than looking at just nothing. I know the clients loved it because they told me so every year. And when we started adding some solar powered lights – wow, so pretty at night. The lights worked perfectly so long as they had a sunny day prior to charge them. There is no power out there, so it was fun to add some twinkle to all.
One year, I thought, you know I’m going to collect some birch and use those. Well, it took a while for me to think of using rebar (like the rebar used in foundations). It worked so great. The rebar is super strong, can be pushed or hammered into hard soil (most times, the soil was somewhat frozen in the planters) and the birch is natural and can take the outdoor elements! So, this was a theme that season, of birch, silvers, and blues.
Steve, that Elf Helper of mine, cut the rebar to my desired lengths, and we inserted them into the base of the birch pieces. They were heavy at first as the birch logs were not totally cured or dried out – so imagine we took these up and carried them in to use on the balcony. I really liked how these worked out, and if desired, could be reused the next season. Once they were pushed into the soil, it was very secure.
As a side bar, another big thing to think about on a balcony is the weight of everything. There are limits and so there is not only the total securing of items from elements, but the weight and of course, the look! Fortunately, these clients loved natural looks of things and so do I. BTW, we did not end up reusing these as we did a different theme the following Christmas.
Here’s a photo of the Birch logs before a big snow fall. They were very secure and with the lights at night, pretty! You can see the wreaths there and those are very large wreaths I made. Steve would step up on the planters to install them and my heart skipped a beat every time. We tried to use super big zip ties or cable ties to secure the larger wreaths but sometimes those snapped from the cold, so we ended up using thick wire. Steve had his technique down. I could not have done this part without him. And he is actually afraid of heights, so he never looked to the right at the view 38 floors below. Fortunately, the heights never bothered me up there – I loved the whole scene every time I was doing installations. To see the skyline, hear a hawk go by, and just the overall feel of the scene above and beyond was inspirational.
I so wished those thicker curly sticks had worked though – I really liked the natural feel of them as it adds a bit of height to the fresh greens I installed below. Wooden drift like decor trees worked out well – they can hold up to the outdoor various winter elements and I would secure them using rebar. As I did with the twig bundles you see near the wooden tree in this photo. Remember though, it was never as simple as just stick things into soil, like I would do with these types of decorations on the ground level at my home or elsewhere. Everything really needs to hold super well or risk damage or flying away. I would envy those installers of holiday pots and decor as they just stood there sticking stuff in the soft soil on Instagram feeds, because I couldn’t do it that way.
Pinecones weren’t too tricky to wire on. Greens were wired on greatly to secure them also. The steps I took to make items for a balcony that high up were more involved and required the hours prior. After making several wreaths for this winter job, I would place them up on tables in my garage and admire my work. Then go wash my hands that reached dry state from all the greens, gloves, and working in the cold, you name it. I loved every single minute, however. My passion for the greens and creating drove that part! Passion drove me to do it all.
One year, I had this idea of using round shapes and putting lights on them. I had acquired old antique rings and used those in the center with some wooden wavy white sticks and the dripping down solar lights. This was a year prior I think of the install above. Notice the wreaths are smaller. I started to realize the bigger wreaths were a better look overall. This theme was silver, white, natural, and magnolia leaves were used as well. Along with the shrubs and added greenery. I secured the three round wire rings with bent u-shaped rebar which was pounded in and the wiring of them together side by side helped as well.
This image above is at my house where I was in the midst of creating the wreaths – here they are without decor yet. I liked using magnolia leaves, but they were a bit pricey. I started to use lemon leaf (photo below) more so. Lemon leaf held up very well along with the mix of fresh greens such as balsam, fir, pine, and many more types of greenery. Each was hand-made by me, and I like the full fluffy look to wreaths.
In this photo of my Elf Helper with the wreath I made, the theme was green, cobalt blues, silvers and keeping it simple. Simple is good cause of all the wiring and securing required. Anything natural, from the natural world worked well. In this photo, you can see those silver open shell-like pods. What are they called? I don’t know but I scored those one year and I literally burned a hole thru them to secure the wire, they were hard like wood. I wasn’t the best bow maker, but I have a technique that worked well enough. Fortunately, the bows did well on the high-rise, with long tails to blow in the wind. They stayed in place and added a little touch of the theme’s color.
I wanted more of those driftwood brown trees used here, but I could not locate any more, and was able to acquire the off-white ones. Those worked really well. They can take the elements, don’t fade, and look nice. This particular year, we left center shrubs in from the fall in tall planters around the balcony perimeters, and I got smart with creating what I called “pot toppers” with various fresh greens and heavy-duty wreath frames, which I had to pull over the shrub. You cannot imagine what my “Crazy Cathy T” mind came up with! I was like, how do I get these over the shrubs without damaging the shrubs? Lots of measuring and then I used a pillowcase. Funny, huh? I put a pillowcase over the shrub and then pulled the pot topper over it to place on the rim of the tall planters. It worked really well. And the pot toppers stayed in place.
So many considerations took place on mostly how to make sure things don’t fly away. Each year, I came up with new ideas, out of the box thinking, and creativity. I hope the wiring of the ornaments and rebar will help you if you have a high-rise opportunity and want to decorate it for the holidays.
Thank you for visiting,
Cathy Testa of Container Crazy CT I live in the Broad Brook section of East Windsor, CT.
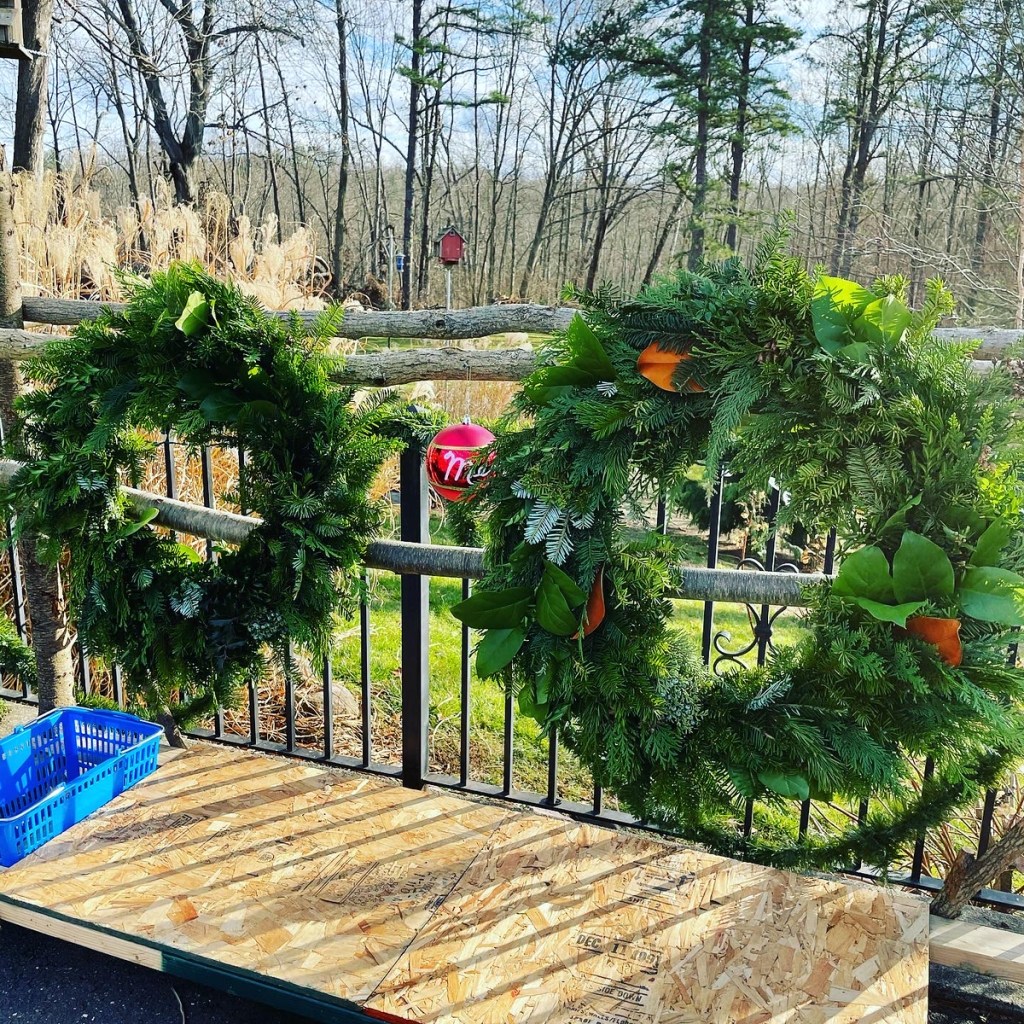
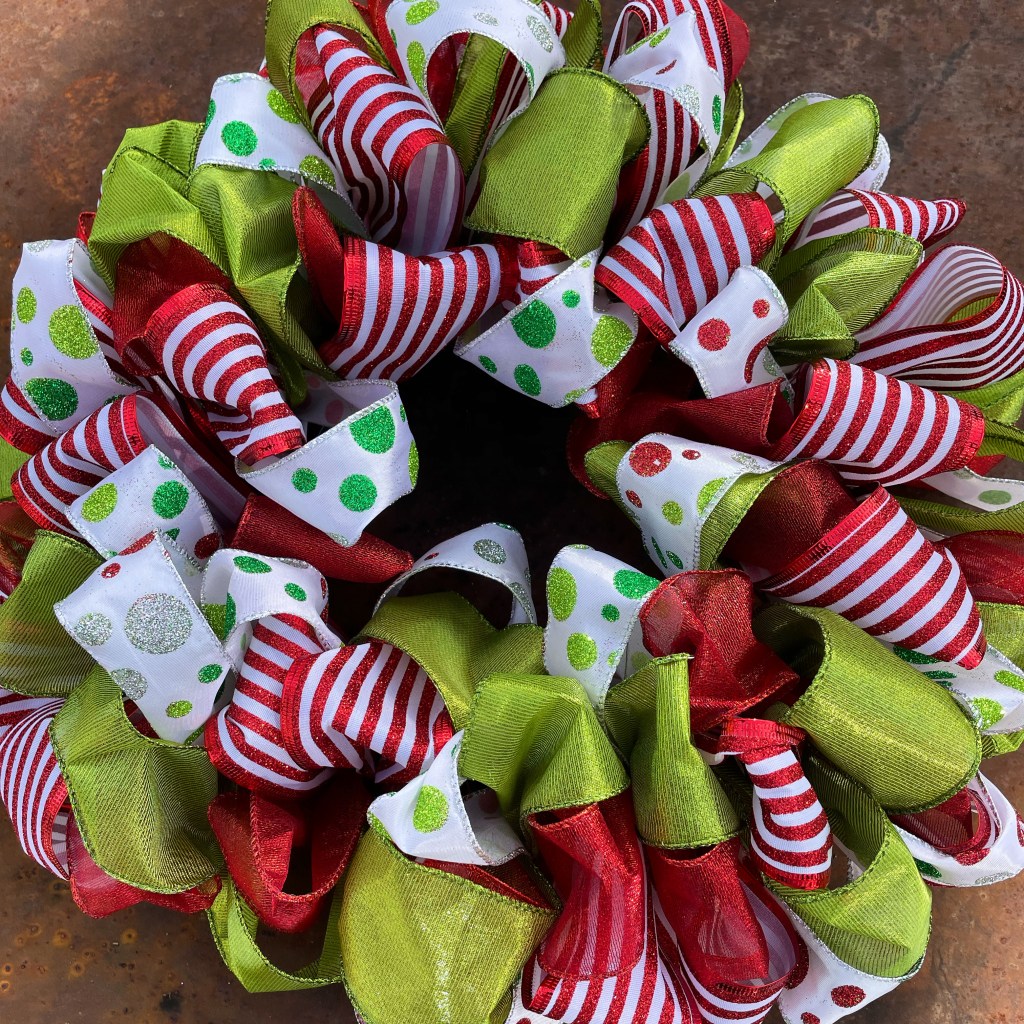
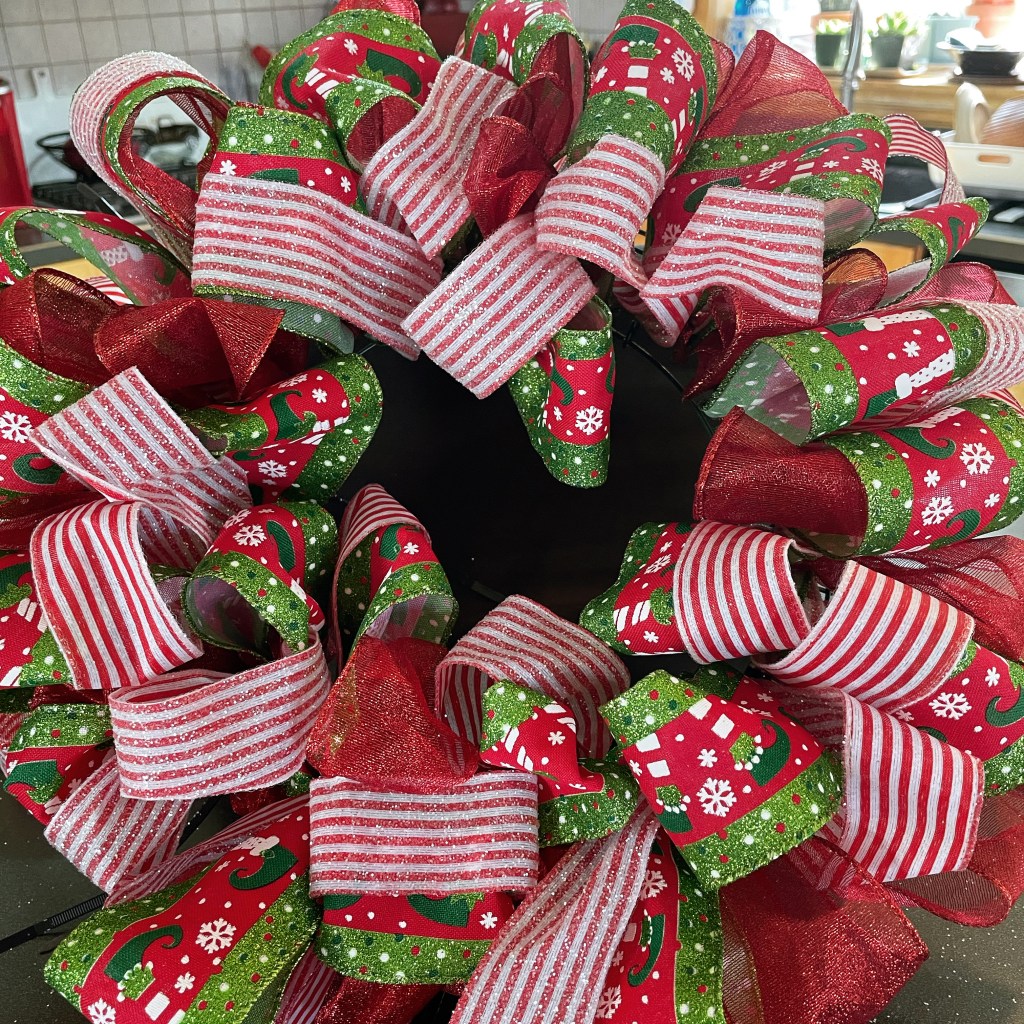
FYI, this year I am not making my greenery wreaths, but I have been creating ribbon wreaths as noted in the prior post. Here’s a photo of one I created below recently for a customer!
Every year, for the last 15 years, I am in the midst of planning my orders and supplies to make holiday wreaths with “fresh greenery,” but this year, I am not making those. It is time to move to new items so I spontaneously started thinking about making wreaths with ribbon I have in stock!
Here are the first three I made. I’m happy with the results and have started taking some orders. I wanted to post it here on my blog because so many of you are here – but I also have a detailed post about this on my www.WorkshopCT.com site, or you can find me on Facebook or Instagram under the handle of Container Crazy CT.
I think these are all about the color mix. I can’t take credit for the winter blues one – as the customer picked out her own ribbon and I love what she picked with the blues, silvers, soft blues, etc.
Each is made with wired ribbon only and are fun to make! I really didn’t even know I’d be making these until it just popped into my head and I’m glad I am making them – it gets me into the holiday spirit, especially because this year, I will miss out on my luscious, wonderful greens!
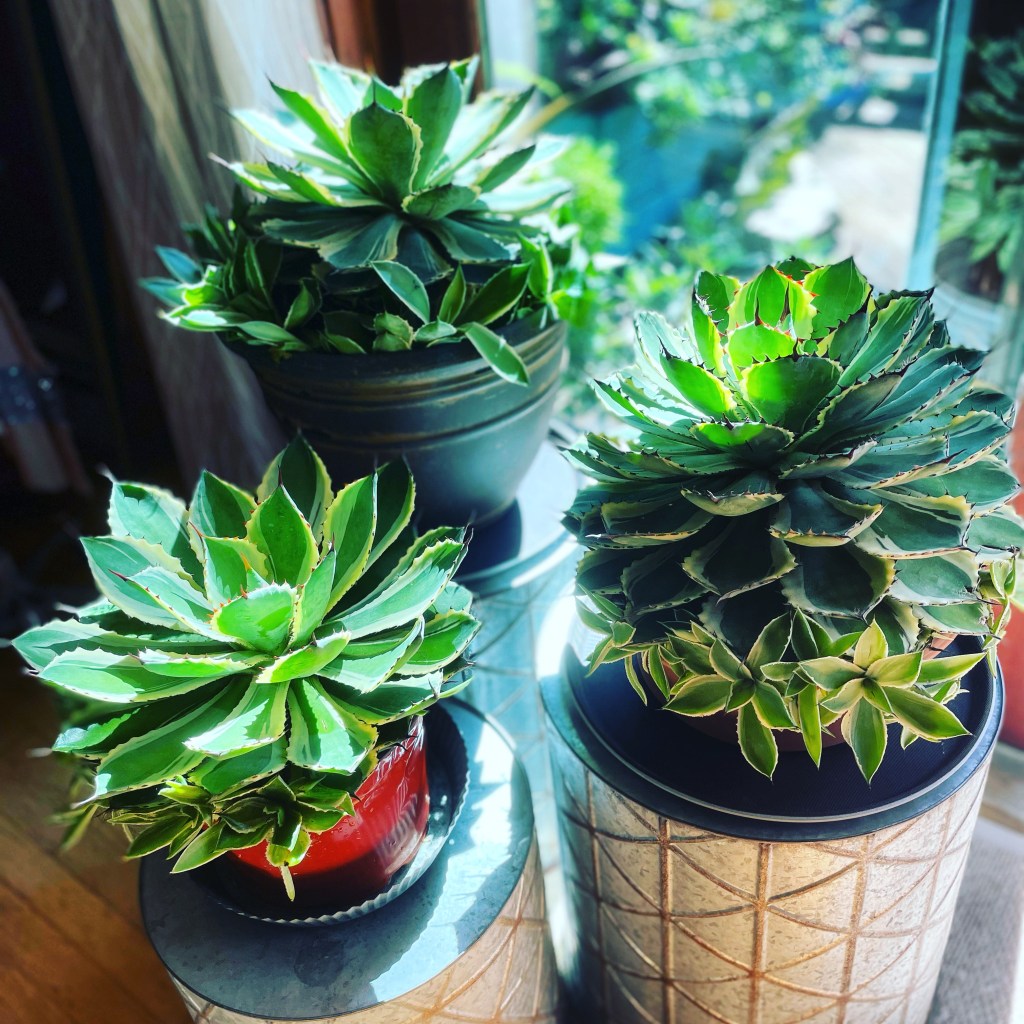
My plants have been taken in too! Before all of this ribbon crafting, I took all my container garden plants, patio pot plants, and succulents, etc. into my home. That kept me busy for a month, but I took my time too. I get more aches and pains now from lifting and I need to be careful. But, somehow, I think I will always find the strength to have plants on my deck.
I posted how I store my Ensete (red banana plants) and Alocasias (Upright elephants ears) here on a prior post. Those are all in their boxed storage beds now in my basement. I do check on them in a couple months to make sure nothing is rotting and looks good. I didn’t store any canna lily rhizomes this year. I think as I get older, less is more – but it is a plant addiction, so you know, sometimes I have to do these things too even when I think it is so much work! The payoff is regrowing them in the spring.
I also took in all my succulents and agaves and found a spot wherever I could in the home. I watch them carefully for any signs of insects – so far so good! I also GREATLY reduce watering on these – in fact, I will let them go a whole month at least before a bit of watering starts for these winter warriors hanging it out for the months of winter. They are pretty easy to care for during the winter.
I still have a mess in the garage to clean up – as always, but in the meantime, I am happy to make a wreath or two – for those interested, just DM or text me – information is on WorkshopsCT.com.
Thank you –
Cathy Testa East Windsor/Broad Brook, CT An avid plant lover, especially of those in containers and patio pots, and also a bit of the artsy craft side comes out during various seasons! Like the holiday time!!!