Checking in on My Alocasia Corms and Tubers

2 Comments

About two weeks ago, I decided to check on my stored corms and tubers of my Alocasia plants. They are stored in my basement in cardboard boxes over the winter months from about October until April.

I stored them differently this fall because last year, the corms/tubers had some rot spots on them when I took them out in springtime to replant them. The new storing process I used in the fall of 2022 was documented in my prior post below on this blog site.

Post from October 2022 of how I stored my Alocasia corms and tubers for winter above.

Mid-Winter

In late February, of this year, 2023, I decided to check in on the stored tubers and corms. And I’m happy to report that they are doing well. No rot spots. The change I made was to not use peat, use newspaper, and use mesh bags to insert the corms/tubers into individually and put in a cardboard box (instead of a plastic bin). I also cut air holes into the sides of the cardboard boxes.

Largest one – when I stored it in October (photo above).

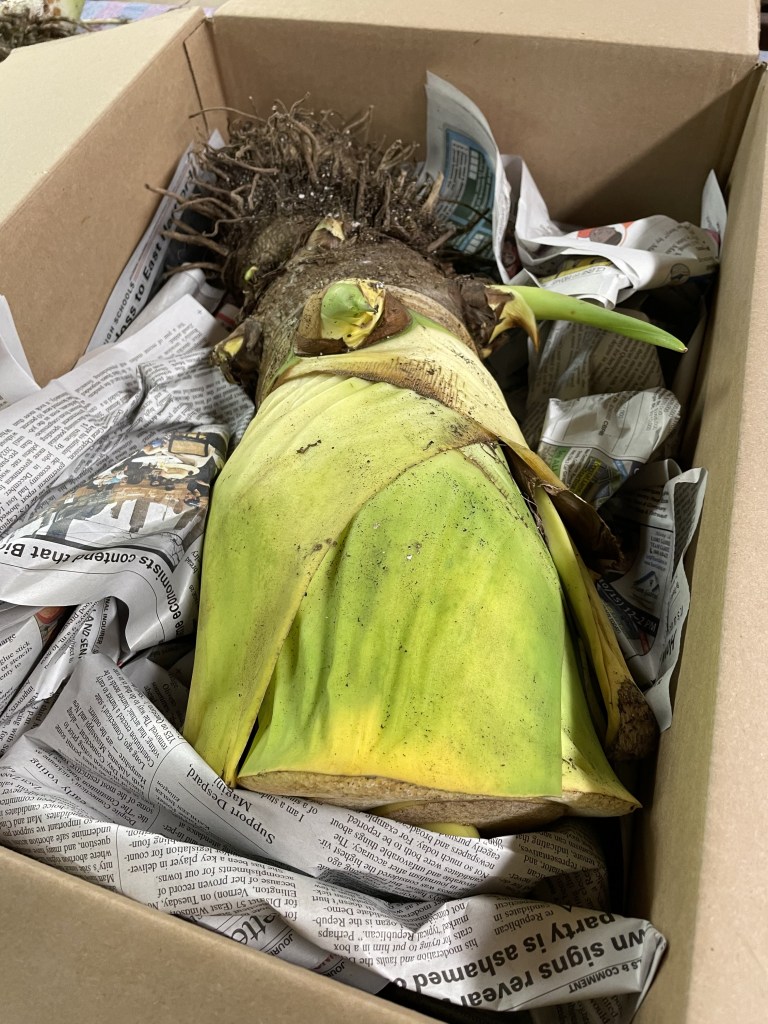
The cardboard box used.

Appearance of the largest Alocasia tuber in February 2023 (5 months since storing).

As you can see from the photos above, the tuber of my largest Alocasia now has a papery covering. There are no rot spots and there is a bit of green, showing signs of life – it is doing well. This one, due to its size, would not fit into a mesh bag, so I just laid it on top of the newspaper. You will also notice when comparing the photo from October and the photo from February, the whole tuber shrunk a bit as it dried out, which is fine and normal.

Close Up Photo (Feb 2023)
Smaller tubers (October 2022)

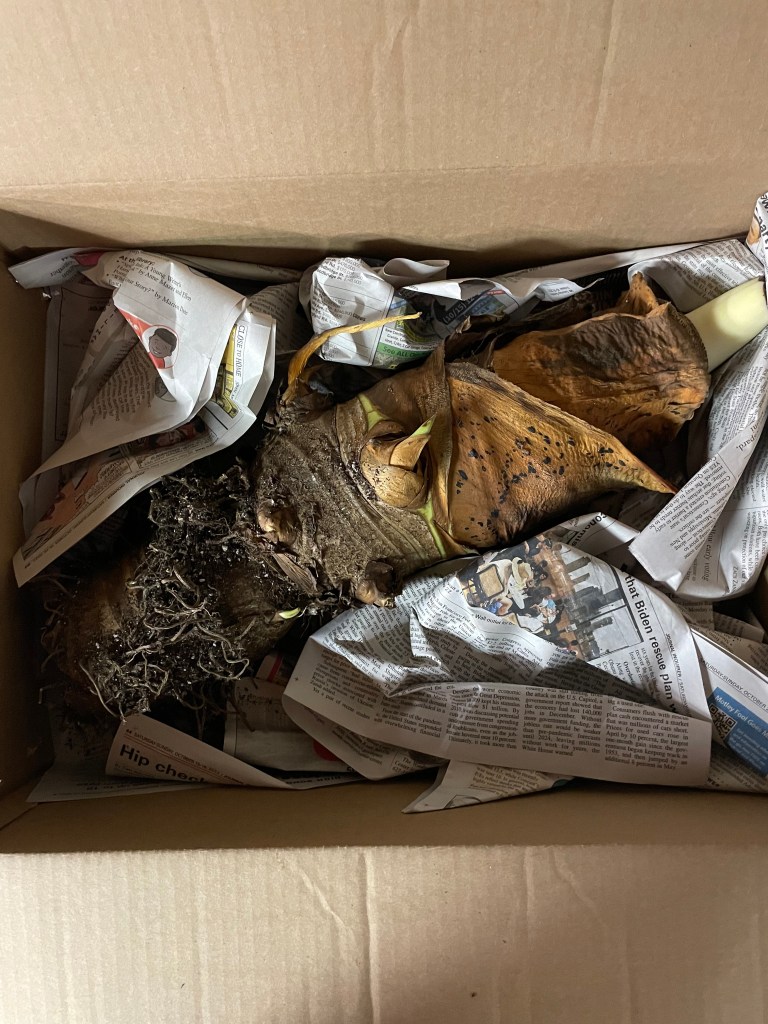
The photo above is of smaller tubers and corms which I had dug up in the fall. These are still green, and I laid them out for about a week to dry out more in the fall, removed all the soil debris, and inserted those which would fit into mesh air hole like bags, and then placed them in a smaller box, with newspaper padding around, and loosely closing the box to allow air circulation, in addition to making some air slits in the side of the boxes.

Smaller tubers in this box
Mesh bags shown on the right in this photo

I’m happy all looks fine so far. The place where I stored them is in my unheated basement that does not go below freezing but is cold during the winters. This year, we have had a mild winter thus far. Thus, the basement may be a little warmer than usual. I’ll look forward to when I can take these out in April or maybe May to get started in small pots to induce growth and then transition them yet again to my containers in late May to enjoy all summer.

Inserted into Mesh Bags, then placed in cardboard boxes in the fall season.

How it Grows

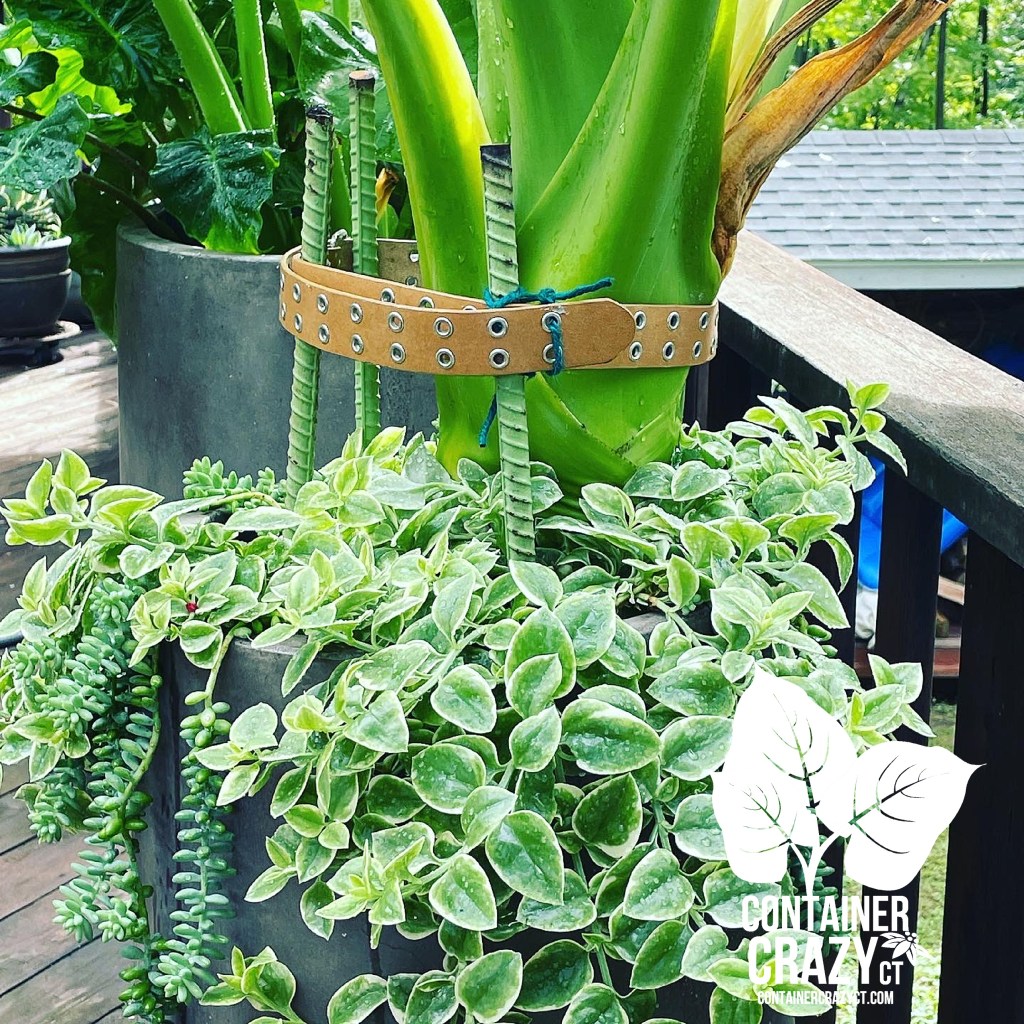
This photo shows a few years back. The plants are starting to grow and gives you an idea of the Alocasia’s form. This one grows upright and is a jumbo variety.

In the first couple years, the size of the plants did not grow as large as later as the tuber/corm grew larger and larger. As you can see in the next photo, the height of the leaves are taller.

Every summer season, I use different fillers plants. This particular jumbo Alocasia is so worth saving and regrowing. It seems to become more dramatic every year.

The stalks of the leaves are usually about 3 feet long along with the leaves growing 3 feet too.

The plant usually looks like this in the fall season, when I’m getting ready to cut it down and dig it out. I’ve documented the process many times.

Post when I took some of the plants out of a larger planter.

Shown above are various posts as I overwintered the tubers and corms of my Alocasia plant (and plants as a result of more tubers over time). The process I used before, with peat and bins, had worked perfectly for other plants such as Canna Lily rhizomes and Red Banana Plant bases, but for this type of Alocasia plant, it seems better to store them more in a dry state, the way I showed above in the paper and in cardboard boxes, etc.

I hope this helps anyone out there who stores their tubers and corms over the winter. I’m in CT planting zone 6b. Our winters are becoming warmer due to global warming here in CT, and this year has been particularly mild. We got a snow fall this week but we haven’t plowed our driveway once yet – its been warm enough some days to work outside and other days, a bit chilly. We have not snow showed yet and it is March!

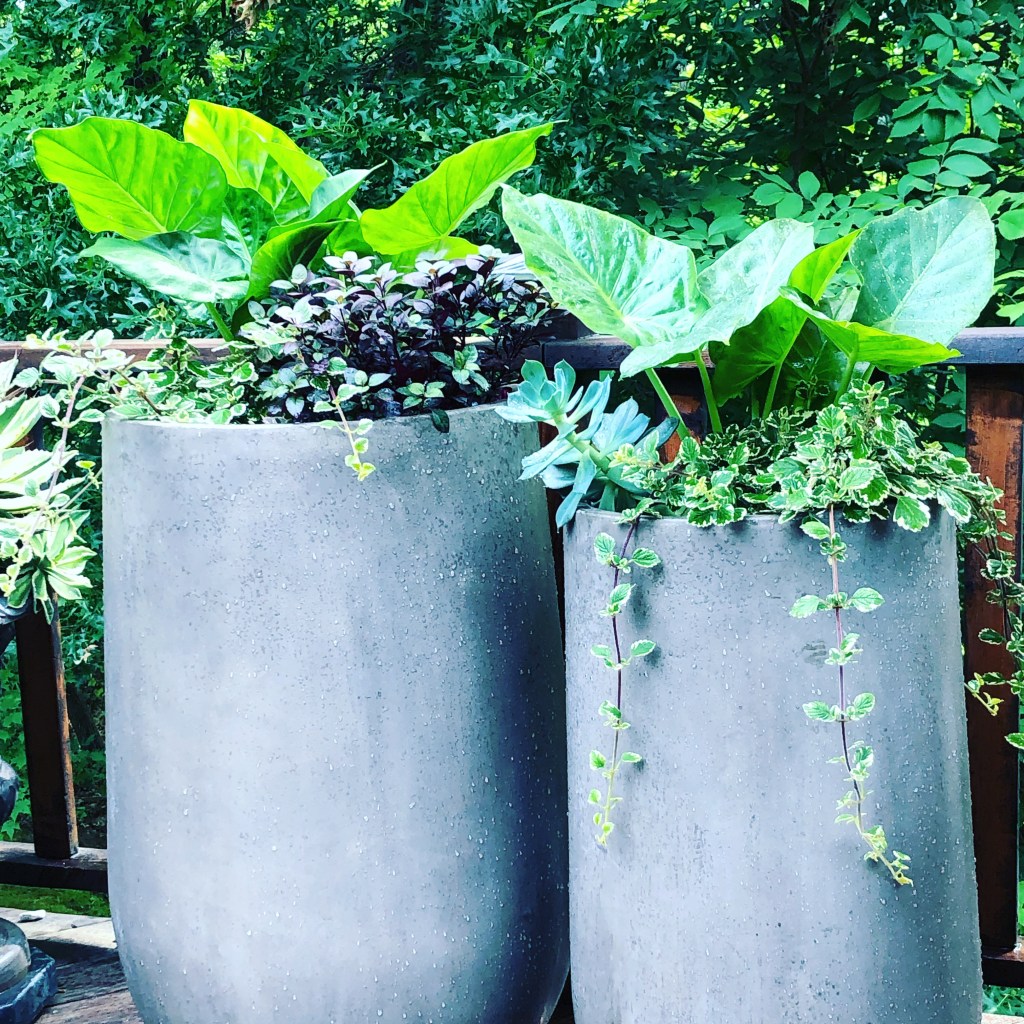
Upright Jumbo Alocasia

I purchased my first tubers of this type of plant in 2018 or 2019. These types of elephant ear plants love sun and do fine in partial shade as well. They are dug out in fall and replanted in my container gardens every spring (after spring frost), as soon as it is warm enough outdoors – usually around Memorial Day. I start them in small nursery pots inside to get started and it easy to keep them growing well each season. Because this plant is tropical, it can’t be left outdoors through our winters or freezing temperatures. In the fall, you can let frost hit the tops or cut them down before fall frost. It turns out storing them in paper has worked better to keep them dry and safe. This plant grows up to 72 to 92 inches tall. I plant the tubers about 4-5″ deep and enjoy their dark green glossy upright leaves all summer. They are a real showstopper if someone hasn’t seen them before. I think the mistake I made was I treated these the same as my Canna Lily rhizomes and red banana plant bases, but it is handled somewhat differently. Live and learn – that’s the life of plant enthusiasts!

Thank you for visiting.

Cathy Testa
ContainerCrazyCT.com
Broad Brook, CT
WorkshopsCT.com
ContainerGardensCT.com

Helping an Upright Elephant Ear Plant Stay Upright

9 Comments

When I saw that my biggest of my upright elephant ear plants was leaning to the side, I was very concerned because of a strong windy rainstorm predicted to arrive in Connecticut last Friday (8/26/22).

I decided to water the soil deeply in the planter even though we were expecting lots of rain with this storm because I felt the wet soil would stabilize the planter better and help to prevent it from toppling over. Then I kept my fingers crossed.

The day after the rainstorm, I looked it over and it was fine. It did not topple over but it was still leaning quite a bit and I had to think of a plan to stabilize it and help it grow upright. This was the first time I ever had to do this with an Upright Alocasia elephant ear plant, but luckily an old belt came to mind and I had some rebar available. This is what I did.

Helping an Upright Elephant Ear Plant Stay Upright

I’m not sure why I decided to plant the largest of my tubers in the smaller planter anyhow. I think maybe I was considering that it will grow very tall in smaller planter, and the taller planter would look nice with the huge elephant ear leaves sitting on top of their long stalks next to the lower planter to the side of it. Next year, I will make a note to plant it in the larger of the two planters I typically use each season for these Upright elephant ear plants. The rebar and belt seems to be working as a splint of sorts. As you can see from this above photo, the base of the plant is super thick and becoming heavy. I also remember, I probably didn’t plant the tuber deep enough. I was concerned about some rot experienced when I took them out of storage this spring.

Taking Out the Tubers From Winter Storage

Every year, in spring, I take out my elephant ear bulbs/tubers from the basement where I overwinter them in plastic bins (with drilled air holes in the bin covers) in peat. But this year, some tubers were damp and even parts were starting to rot. This has never happened before in the 10 plus years I’ve stored the tubers, bulbs, rhizomes, etc. of various tropical plants (Canna Lily, Elephant Ears, Red Banana plants, etc.) over the winter months here in CT. The basement stays above freezing but it does not have any heat so it stays cold enough usually to keep all the tubers in a dormant state.

Why did they go soft this time? I don’t get it – is it climate change, did the basement stay warmer than usual, it is because I stacked the plastic bins on top of each other (in the past, there was a shelf there and I stacked the bins on shelves), or was it the peat I used, which was a different brand? Maybe it was COVID. I decided COVID must have changed the whole pace of life? Did someone steal my green thumb?

Anyhow, I found the tubers of some of my upright elephant ears (the largest of the elephant ear type plants I replant every season) which were plastic bins inside plastic mesh bags (similar to what you may see in a grocery store) and laid “on top” of the peat (rather than in or buried in peat), did better. Maybe these types of elephant ear tubers are better stored dry? But some of those even had rots spots but not enough to not use them. I decided to cut off some rot spots and go for it.

Timing of Over Wintering Tubers

In thinking about it this morning, I remembered now, I decided to dig up and store the tubers from the plants on my deck a little earlier than normal, around mid to late September, in order to get a head-start on my various plant related tasks and work. Maybe I stored them too early? It is often recommended to wait till the plants get touched by frost and then take them down to store. This usually means the tubers will sense the cold temps and cooler soil, and go into a dormant state. Thus, this year, I will wait till October to pull the plants from the planters, chop the foliage off the top, and store the tubers. And I also will keep them more on the dry side for this particular type of elephant ear plant, as I wish not to risk loosing them again.

2022 Photo

Precious and exotic large lush plants

If you were to ask me when I started to fall in love with big plants, I am not sure I can remember when – it was years ago. In fact, when I went on my honeymoon over 31 years ago, I was fascinated by the big lush foliage of the tropical like areas of the Hawaiian island(s). We even ventured off a long, dirt road once and found a tremendously large elephant ear plant and people accused me of photoshopping the image. I stood next to it and was in awe, not afraid of snakes or whatever might be lurking below my feet!

2020 Photo

Reusable Year after Year

Another wonderful feature of using tropical plants (not hardy to CT and must be stored in winter), is the fact they are used year after year. With having good luck with my storage technique for so many years, it baffled me as to why I had some back luck with storing them this year (i.e., the rot spots). Anyhow, the photo above was when I planted the same bulbs/tubers in 2020. I think I had purchased the tubers of these in 2019 or 2018. They are also super easy to care for once they start growing in the planters outdoors, with relatively no problems, and with this year’s tropical heat all summer, they loved it. They tend to get the most full and larger by this time of year and into the fall season. Another bonus to growing them is they last all the way till end of October. BTW, they do get flowers and I successfully grew one plant from seed I collected last year. I made a baby from the seed of this plant for the first time ever. I’ll write about that some other time.

Taking Care of Them In-Season

I pretty much do nothing more than consistently water the elephant ear plants in their patio pots and containers, as they do appreciate good moisture. I also will cut off any bad leaves (because I don’t care for ratty looking leaves), and I might do a water soluble fertilizer application once or twice a season, but often times, it is not needed. I put slow-release fertilizer into the potting soil mix in the spring upon planting as well. In most planters, I use fresh potting mix for planters, but in really big planters, I usually remove the top of the soil portion and add fresh soil. I also fill the base of the planters with foam sometimes to reduce soil usage if it is a super large planter. This also helps reduce the weight of the planter if you wish to move it around. And most importantly, I admired the plants often which I think they notice.

Where to Place Them Outdoors

One side bar, be aware if you plant these big leaves next to any pointy tipped plants, such as agaves or cacti, as I did once, realize that as the leaves of the elephant ear plants move around in the winds, they may bang against the agave leaf tips, causing holes and damage to the elephant ear plant’s leaves. But other than that, you want them placed where they are showy, do not lean like mine did this season, and anywhere there is dappled sun or part-shade. They can also take full sun but more watering is required. Some days, during the heat waves this 2022 season, I opened a shade umbrella next to the planters to offer some relief of the late day sun, however, even that became an issue because the leaves got so large and tall, the umbrella was hitting the leaves as I opened the umbrella. A larger planter is best because of the shear size of the plants. My planters are hip height and the plants are towering over my head now at probably 6 feet tall with 3 feet wide leaves. It is magnificent.

Years prior – Stunning Photo taken by a Pro Photographer

Storing Technique for Winter

As I’ve written about several times on this blog, I typically store my bulbs, tubers, rhizomes for various tropical plants in low-level bins with peat slightly covering them, but I will adjust my process for these Upright Elephant Ear plants. The bulbs get larger over time and the bigger the bulb, the bigger the plant. Often, you will find side shoots forming, as I showed in a prior post when I separated them before. Here’s a photo from last year when I took the plants apart. Unfortunately, I lost some of these due to the rot situation I noted above. I document the whole process every year, so you may use the search bar on the right side of this site to locate past writings of how I store them.

I look forward to using these plants every season. I wish I could plant them on the high-rise balconies I service but they would bounce around too much in the wind up there, and require lots of water, especially during hot drought seasons, so they are not feasible there. If I could I would totally surround my yard with these big leaved showy exotic looking plants, I would. They make me think of escaping to another place, another world, and don’t we all enjoy that from time to time? Plus my cat loves to sit under the shade cast by the big, sometimes huge, showy leaves of these upright elephant ear plants. Cute thing – my 5 year old nephew told me he could see the leaves growing on them when they were moving in the winds, which I thought was so adorable. Maybe he will become a plant lover like me!

Well, that’s all for now. I hope you find this post amusing. When I take these plants down for the winter, later in October, I will be sure to show my process as I always do. And hopefully I won’t have any scares next spring like I did this spring. I actually lost the largest of my red banana plants this season. It was too rotted to plant and I had to bow my head and think, “Whelp, you gave me many years of happiness. Guess this year was just one of those gardening learning experiences, yet again!”

Thank you for visiting,

Cathy Testa
Container Gardening Fanatic
http://www.WorkshopsCT.com
http://www.ContainerGardensCT.com
http://www.ContainerCrazyCT.com
Located in Broad Brook/East Windsor, CT