As mentioned in a prior post on this site, I started playing with air-dry clay to make holiday decorations. It is more about crafting therapy for me. I find working with my hands, even on simple crafts, allows my mind to relax. I suffer from tinnitus (ear ringing) and when I’m focused on something else, it relieves my symptoms at times.
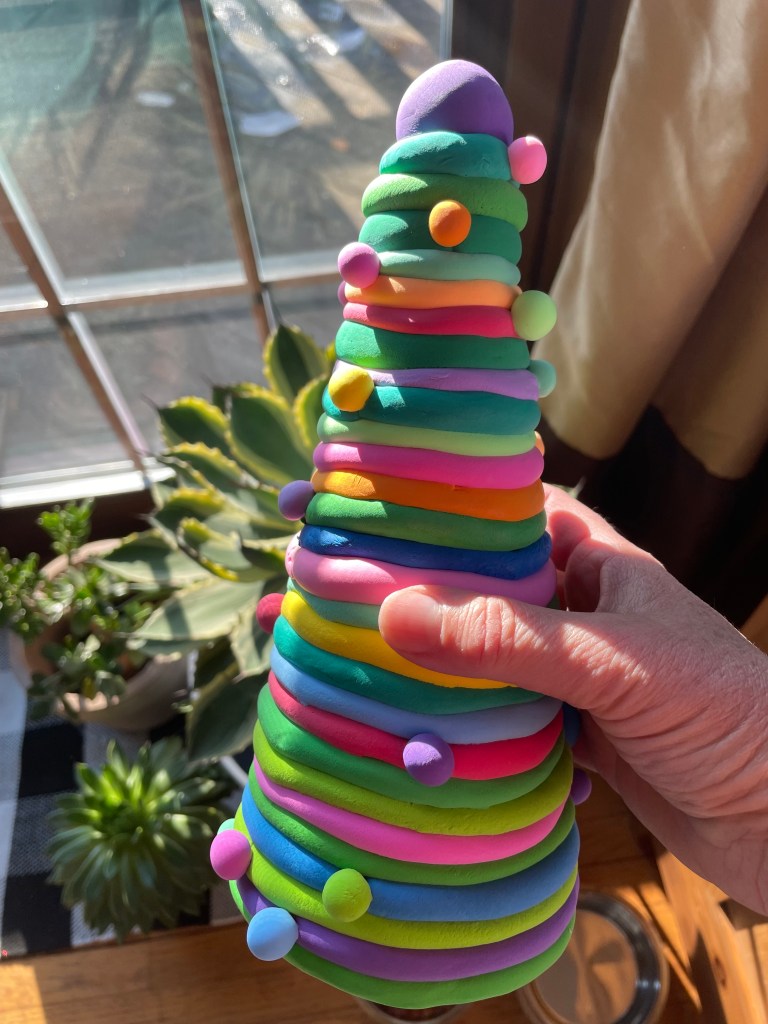
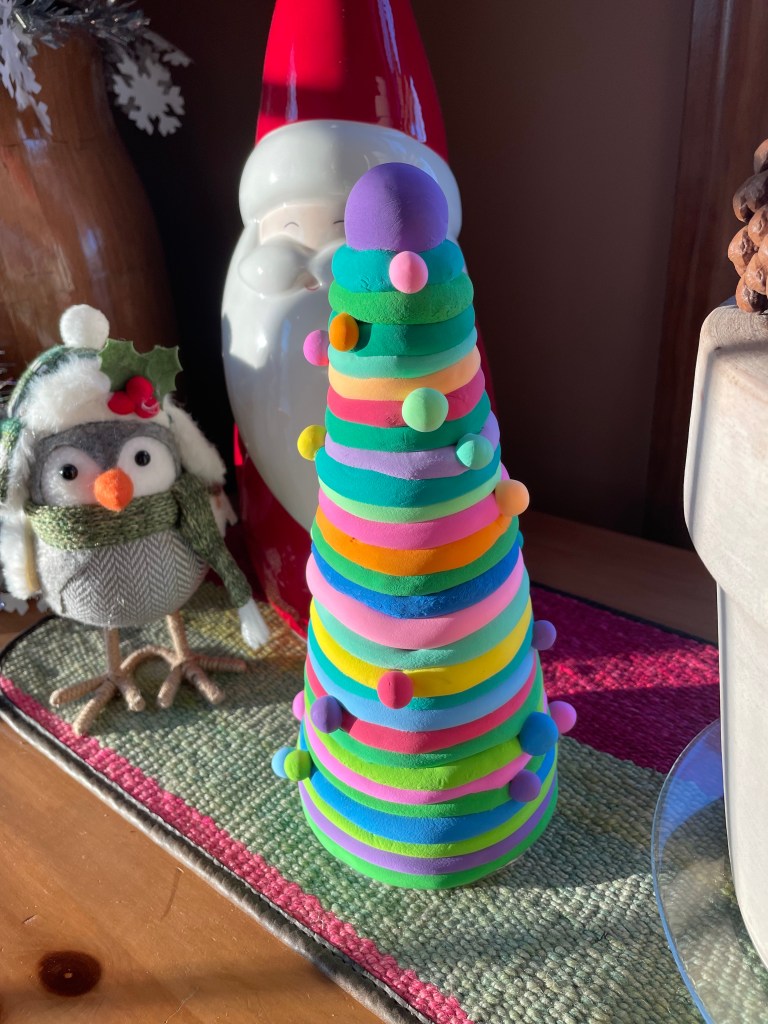
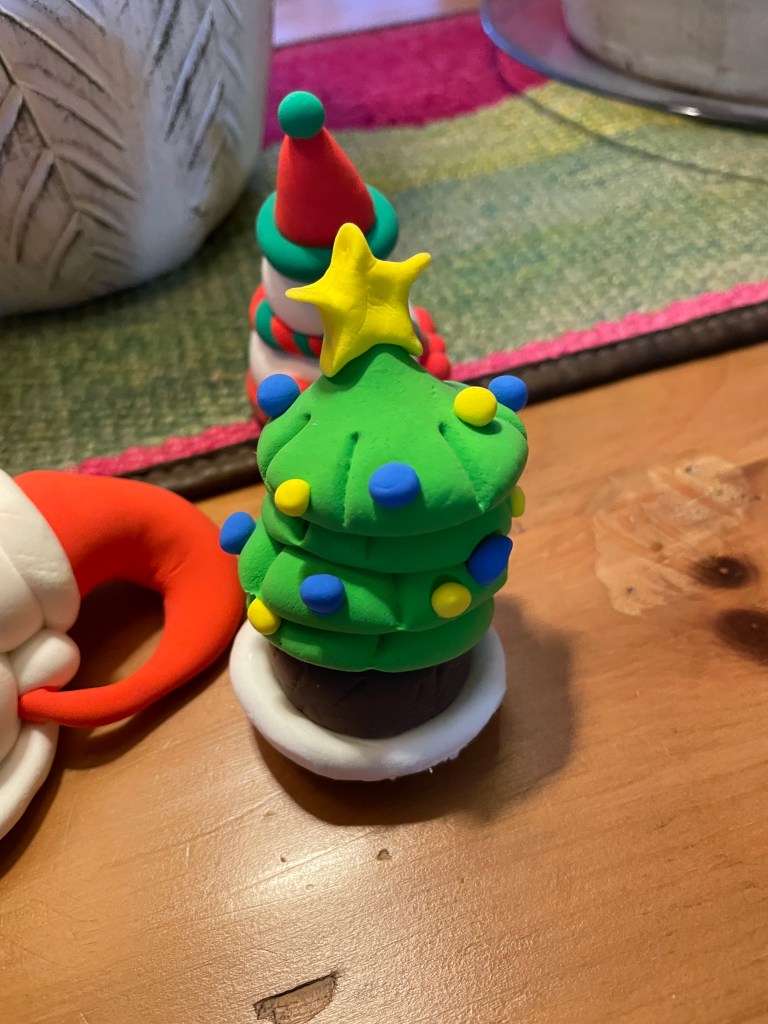
One fun creation was this holiday tree I made which is festive and fun. The colors are bright and vivid. It was an experiment and rather easy yet very fun to make!
Air-dry clay can be found on Amazon of course, like almost everything else! This one is labeled as:
36 Colors Magic Clay Nature Color DIY Air Dry Clay with Tools as Best Present for Children Toy for Kids.
It arrives in little packets of 36 different colors. The packets, more like pouches, are 0.45 oz each. They are plastic packets which seal on the top to help the clay from not drying out. The clay is light and is not baked after making something with it. It naturally dries to what I think feels like a hard foam of sort. It was about $8.99 to get the magic clay, as they called it.
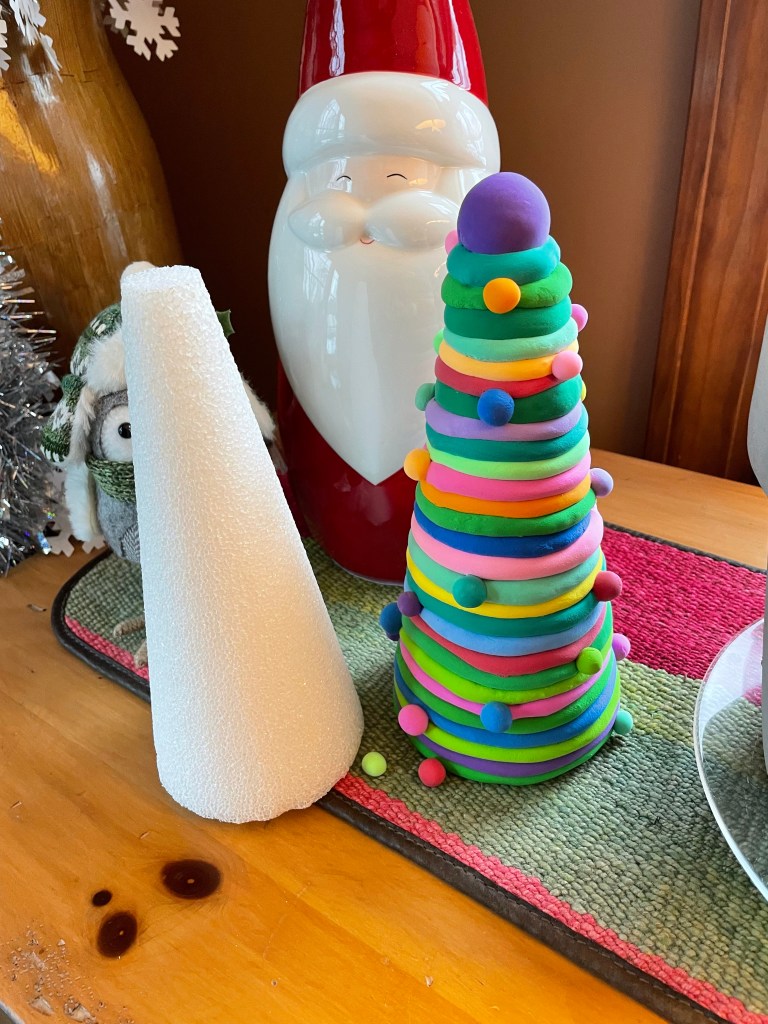
This is what I made with the clay recently. I like the colors. Festive, fun, and “Who-ville” like in my mind! I decided to use a Styrofoam cone center. I wrapped the cone in plastic wrap and began to create.
I selected colors one by one. I thought I should place a type of green color between each vivid color. Working from the bottom up. I would take clay out of the packet. I rolled it into a worm-like shape. Then I wrapped it around the foam. Remember, the foam also was wrapped in plastic wrap.
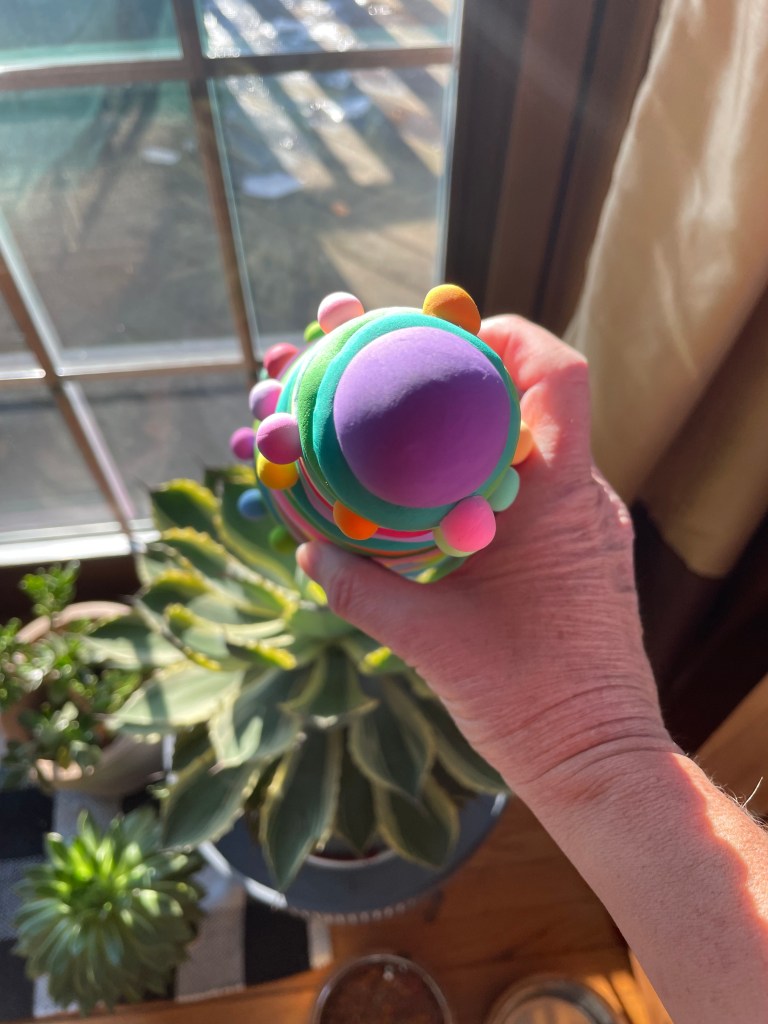
I connected the worm-like shape to form a ring around the foam for each layer. The ends were going to be attached. This would leave a line at the connection point. I decided to make that line at a different place for each “ring.” This way, I could add a little ball over that line. Hopefully this is making sense. I didn’t want each ring’s connection point to have a line all the way up. They should not be in the same place on the tree.
When I got to the top, I put a ball on top to finish it off. Each ring rolled out on a board before applying it to the cone was therapeutic to me. I put on a holiday movie and just enjoyed the whole process. Again, I worked from the bottom up.
Air dry clay dries slowly. I have found when I made other three-dimensional items, they flop as they dry. The idea of using the foam center as a mold was to keep the tree upright as it dried out.
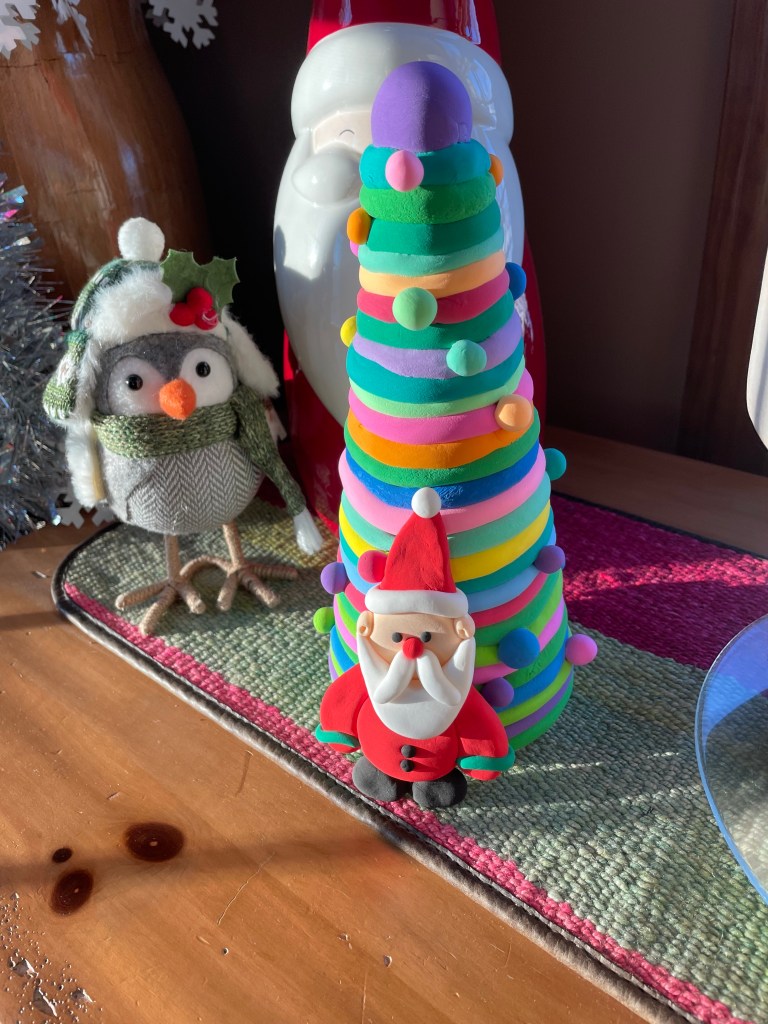
I let the air-dry tree stay on the foam center for about two full days. I started to contemplate adding my other little ornaments I made. These include the Santa. I decided not to add them to the air-dry clay tree.
The flat ornaments I made of the Santa, stocking, and gingerbread man were fun to make too. In the end though, I think I loved making the festive funky color tree the best! I ended up making the other items (the Santa, stocking, gingerbread man) into ornaments to hang on my tree.
The last step of the tree was to remove the foam center. I gently tugged on the plastic wrap and eventually it came out. The center inside the tree was still damp. It slowly dried and the tree did not flop. If you put plastic wrap on the foam, leave a tail at the bottom end. This ensures you can grab it by the plastic wrap to pull it out of the air-dry clay tree. If tugging at the plastic wrap does not work. Take a tool to poke up the foam form on the bottom to try to grip it out.
As I worked on the tree, I started to add the balls for each ring. This was done to cover where the worm-like rings connected. Don’t wait too long to add the balls. It is best to add them while the clay is still damp so it sticks.
Here is the underside of the tree. This was another easy craft to make. The key is using colors that work together. And just enjoying the process.
I discovered a very simple method to make pretty holiday balls using a Styrofoam ball and holiday ribbon! I wish I had discovered it earlier. I would probably have many of them to put on my Christmas tree.
Supplies needed:
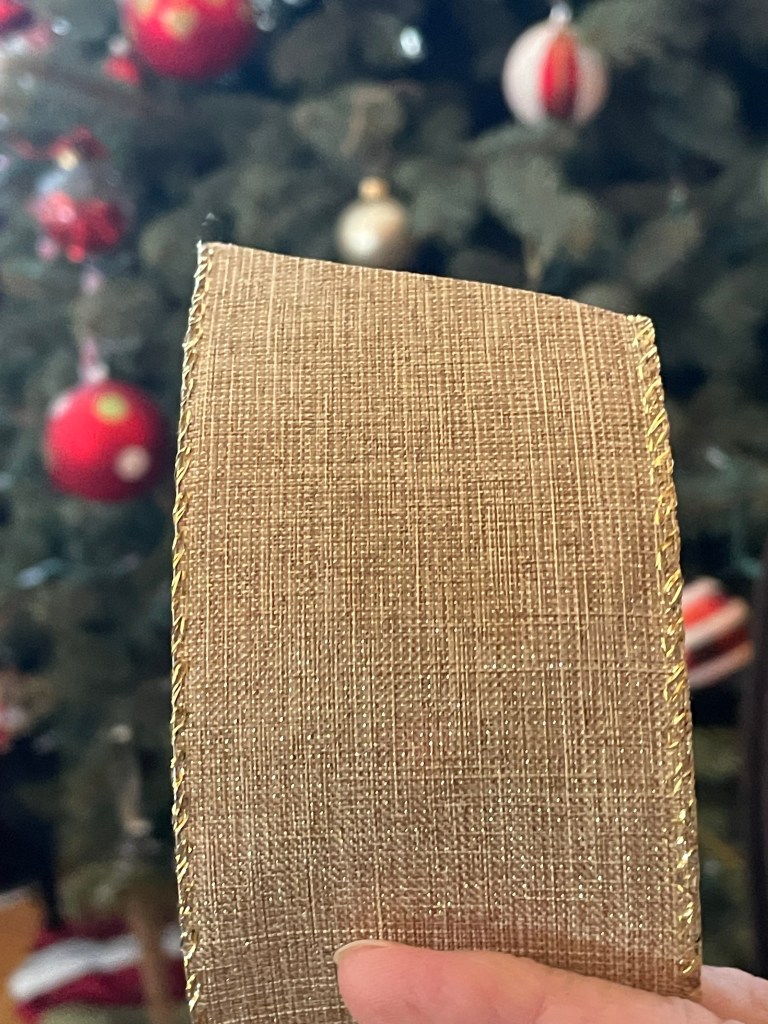
5″ Styrofoam ball or bigger if you wish Holiday ribbon (I used 2″ wide solid gold ribbon) A wooden dowel like tool with pointy end (a bamboo skewer would work) Sharp scissors 1 piece of twine (3″-4″) to make a loop to hang
Video:
At the very end of this post is a video showing how I inserted the ribbon pieces. Scroll down to see.
Steps:
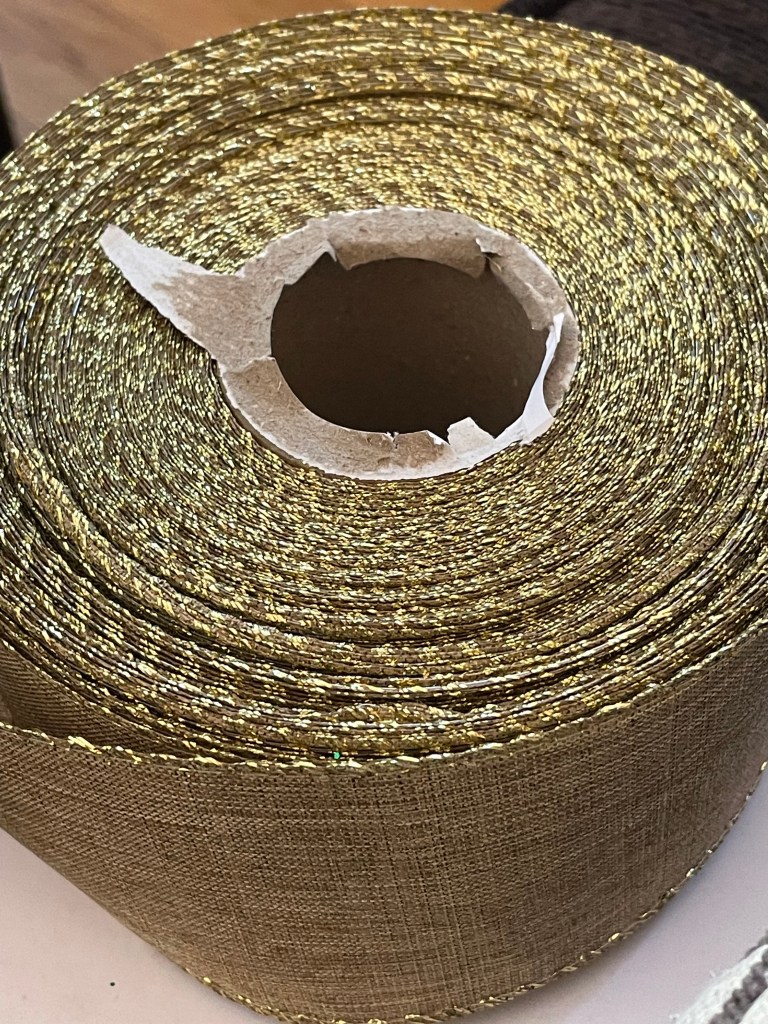
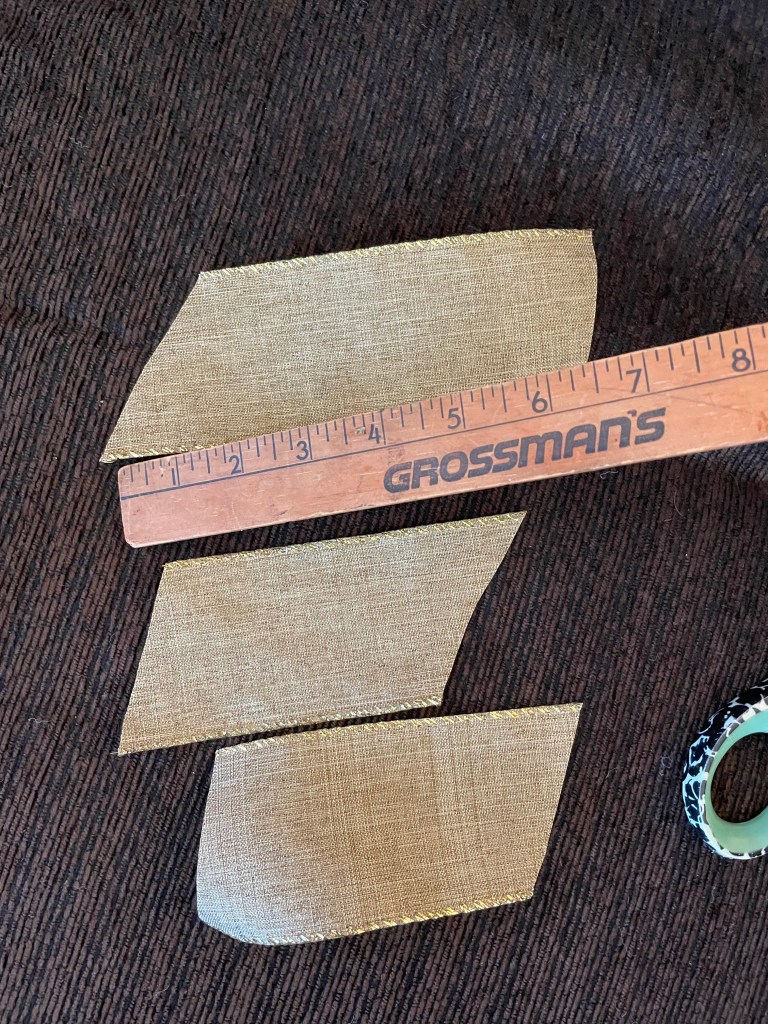
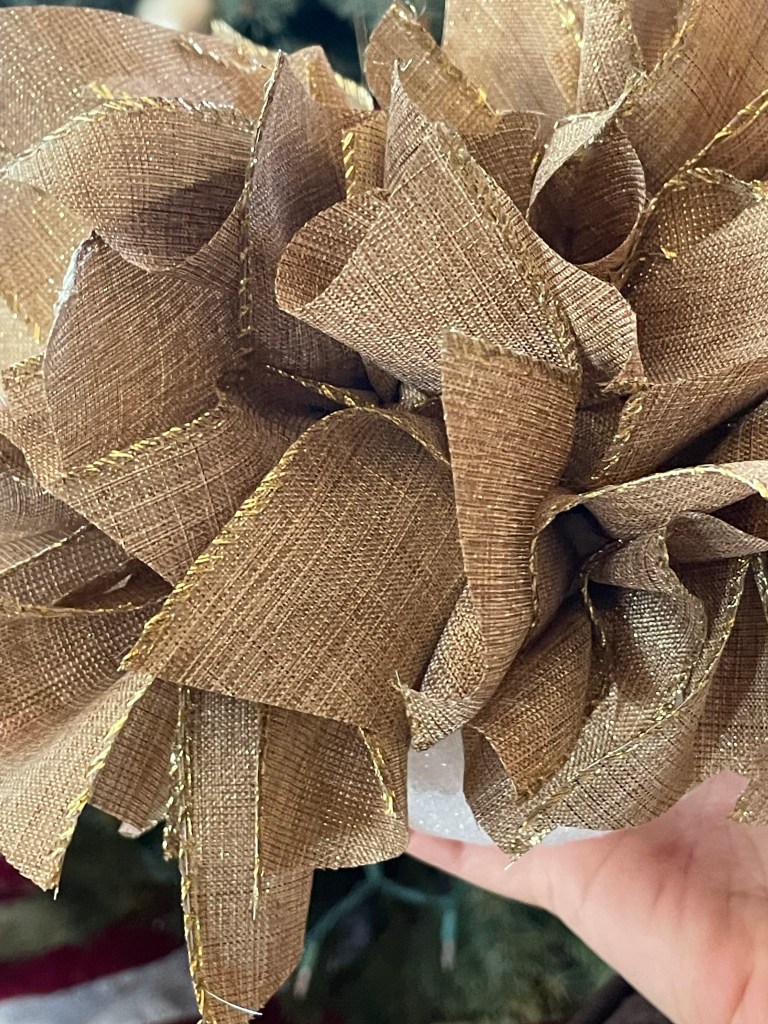
Cut the ribbon into pieces (see below). I went with between 5-6″ lengths. I believe I cut at least 60 pieces from the ribbon roll I had on hand. I wanted to do red, but my red ribbon on hand was shear and shiny. I knew the “white Styrofoam ball” would show through sheer ribbon. Cloth pieces can be used as well, but using ribbon for me was super easy. I grabbed a roll of the solid gold ribbon I had in my craft stock. I used sharp scissors to cut pieces 10 at a time.
Golden Ribbon above on a roll. It was wired ribbon, but I don’t think wired ribbon would be required.
View of the 2″ wide ribbon
View of the ribbon pieces. I cut the pieces on an angle on the ends. Also, I suggest you keep all the ribbon cuttings the same size so make a uniform ball.
Next step is getting the 5″ Styrofoam ball. And having your wooden dowel tool ready. I had some florist like long plant sticks on hand with one end is pointy. Trying to think of tools you already have on hand. For example, I think a bamboo skewer would work. Basically, anything that is somewhat long and has a pointed end. I don’t think anything “metal” would be good, it would poke thru the ribbon.
Take a piece of ribbon and push the center of it into the ball using the wooden tool. The tool does not poke thru the ribbon. Just pull the dowel tool away when you sense the ribbon piece is secure in the ball.
I believe I used at least 60 pieces of ribbon to cover the entire ball. I kept inserting each piece near the next until the ball was completely covered.
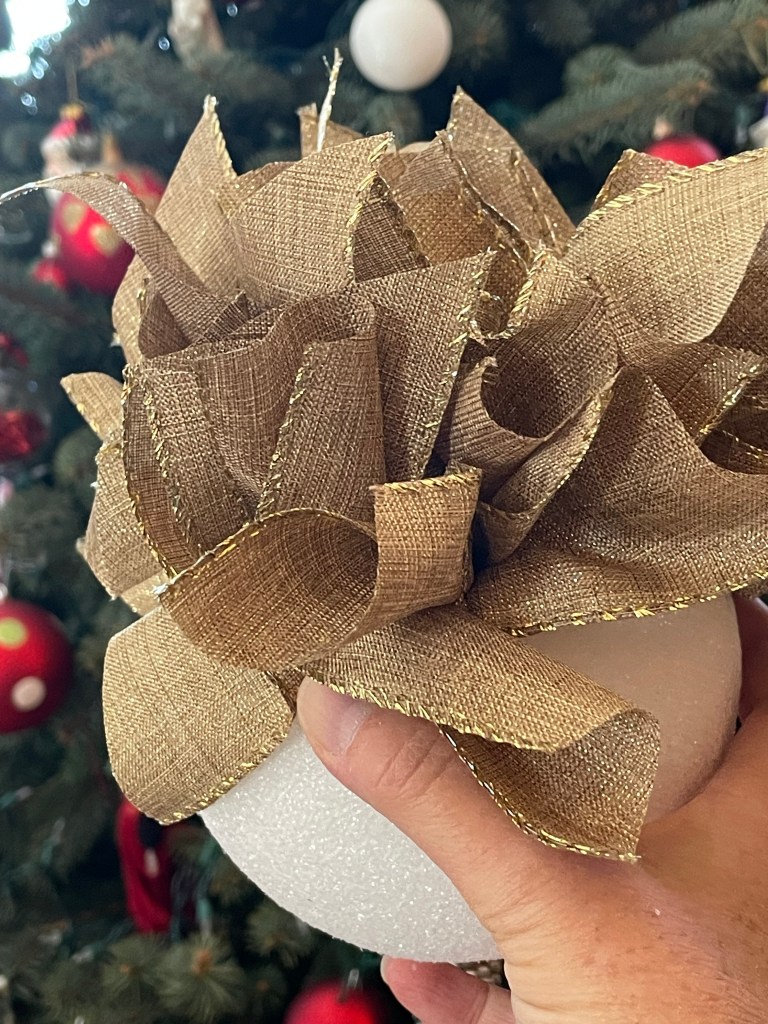
When you get to a place where you would want a piece of twine to hang it, make a loop with the twine and tie it together and put it with the ribbon to push it into the ball.
When you completely finish covering the ball, it looks like this.
You could imagine if you made several of these, you could put them in places in your tree to make it a nice design. As I mentioned before, I wanted to make red balls, but I didn’t have the red ribbon on hand.
Nice material can be used. If you had some type of cloth and cut that into pieces. It’s pretty easy to do. A a bit time consuming but I was enjoying it – to me it is Craft Therapy!
I ended up hanging the gold ribbon ball I made and it looks cute. There are possibilities with this craft item. They can be tied together like garland if you made several. They may be hung from a chandelier. Any color can be created.
Hope you give it a try!
Cathy Testa Container Crazy CT Date of this post: 12/19/2025
Using the dowel, insert each piece of ribbon by pushing it into the ball.
Last year, I started playing around with air dry clay and making things with it for fun. No stress. Just a way to use my hands and play with clay.
Recently, this year, I made a few items and thought I’d share how it all went. First, I purchased packaged clay on Amazon. (BTW, I get no kickbacks from sharing thoughts on Amazon products, it is just FYI).
It was air dry clay for kids with six molding designs. This basically means a set of different colored clay portions came in six separate envelopes. They were nicely packaged. It had a little card to help you figure out how to design what is shown on the front. Here’s a photo of one to make a little wreath.
I liked the envelopes because if you have any clay left over, you store it in the package/envelope.
The instructions included in the packages were pretty basic. It was just a little card to show steps, but it was easy to understand. It had all the right holiday colors like red, green, white, etc. to make the item depicted on the front of the package.
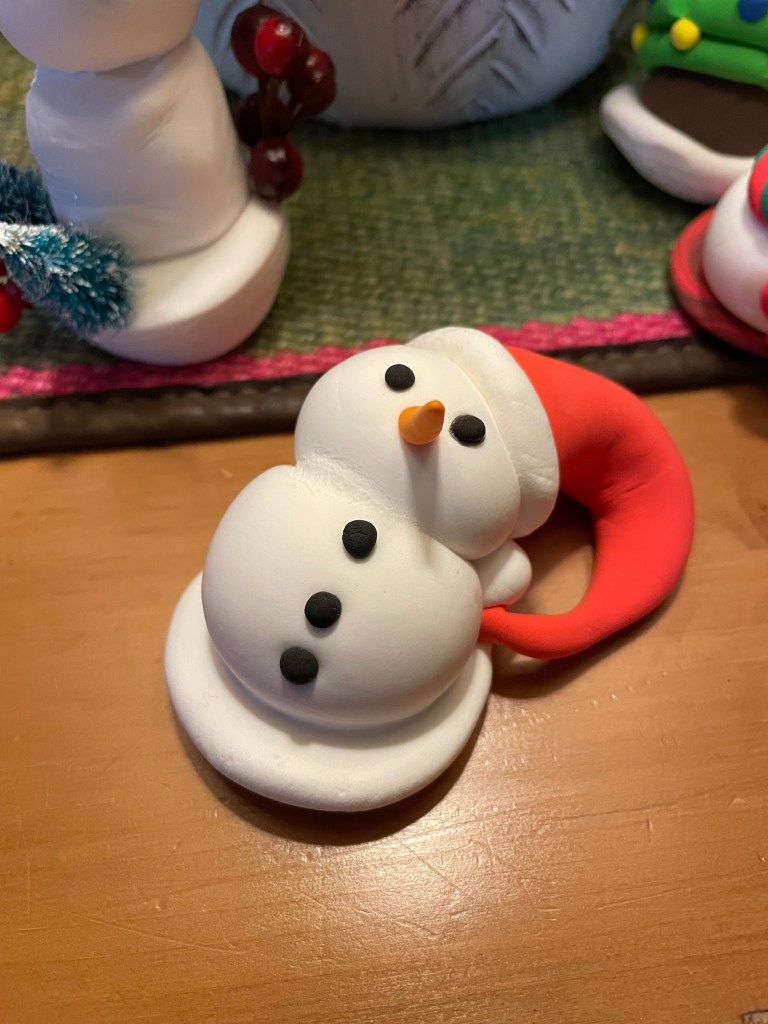
What I have discovered with air dry clay is that it can flop. It is a little frustrating. I’ll make an item, like a snow man. As it dries, it starts to lean or flop.
In fact, my snowman started to turn into a melting snow man. Not literally melting, but you see below in the first photo how it is all the way over, like Mr. Snowman had a bender the night before.
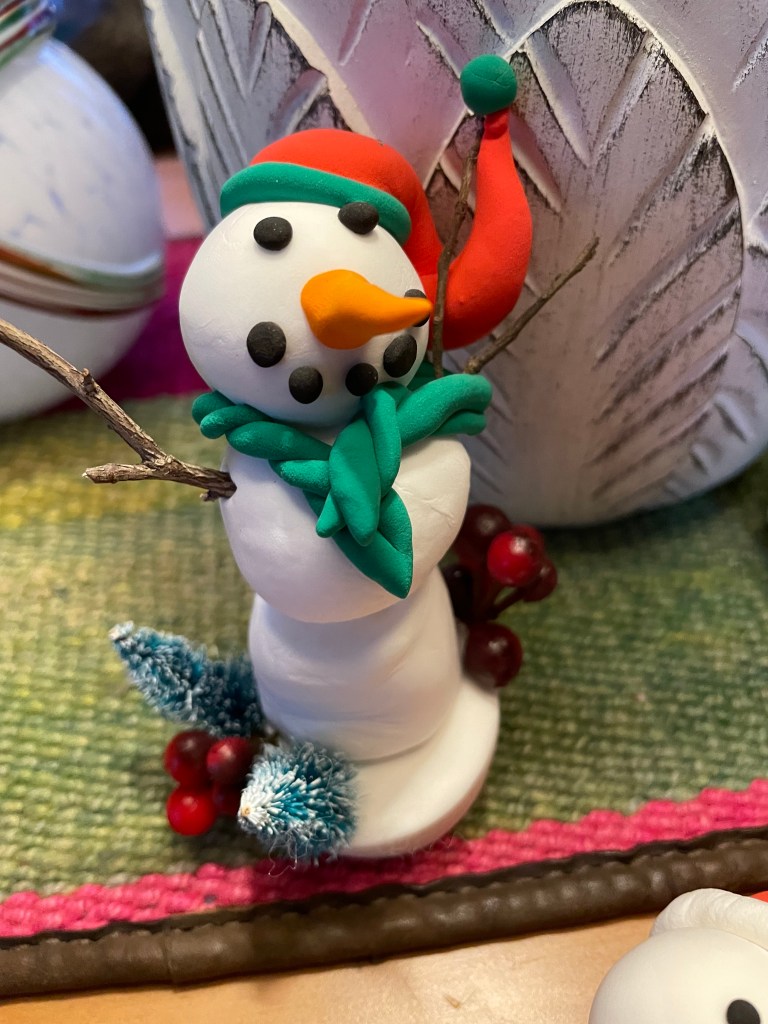
The snowmen I ended up making were all different. I didn’t follow the package’s formula or design for the snowmen. I was just playing around with it. Adding little embellishments is easy as well, just stick into the clay like the mini trees and berries.
Here’s a tree I made where I did follow the design packet’s instructions. But again, it started to lean as it dried. The clay is soft and when it dries completely, it feels like a hard marshmallow texture.
The clay was leaning all the time. I thought, “Well, let me try to make some flat items instead of three dimensional.”
I really like how the flat creations came out. They look like Christmas cookies or even fondant cookies that would go on a cake. In fact, if a little kid was around, I would need to be careful. They would think it was a real cookie and take a bite!
This is when the fun started to kick in for me. I want to make more and will do so. I’m just trying to think of how to use them. I really don’t want to make ornaments, too traditional. Maybe they would look cute attached to something. Maybe I should make a fake cupcake and put it on the top – like a dessert! Or a fake cake?
Anyhow, that is about it for this post. These types of simple crafts would be fun to do with kids. The instructions are basic. The cleanup is easy.
Tips on the clay – once something is attached, it is not easily removed off. If you wet the clay and rub it, it will smear the color. You don’t want to do that. Any unused clay also needs to stay in an enclosed package to not dry out. It is best to use the clay relatively quickly because eventually it will dry out.
Anytime you hear about someone visiting Niagara Falls, the question of which side is better to view the falls comes up. Discuss it with friends who have not yet been there or have been. “Is the US side or the Canada side better?”
Well, when we picked our 2nd camping adventure, we picked the US side, primarily because we had seen the Canada side many years ago on a non-camping trip. We looked for campgrounds not far from the falls and found a place called Branches of Niagara Campground Resort.
We stayed at Branches of Niagara in September of 2022. Since then, the campground’s name has changed to HTR resorts. The address is 2659 Whitehaven Road, Grand Island, NY. It took us about 8 hours to get there from our home location in CT. But the campground is only about 8-10 miles from the falls on the US side which was perfect for us.
It was a rainy trip on the road. It was quite an adventure for us as new travelers. We were pulling our 16-foot travel trailer with our older truck. We were so excited to be going. Nothing was going to stop us.
Because it was September, there were not too many campers at the campground – just a few – maybe like 6. The pool was closed but the pool area looked very nice and is well set-up. There is a fishing pond, and the grounds were very nice with lush green lawns. There are also some cute cabin rentals at this campground. It is a well-maintained place, and nothing looked old or worn out while we were there.
We were new to camping so we had no idea, but they didn’t give us the best site. It was number 71 on the map. My husband recalls it wasn’t completely level. It was good enough for us because we were newbies on the camping scene. It was a smaller site in an odd space. The bathroom was directly across from this site, which was handy. We have a bathroom in our small camper as well.
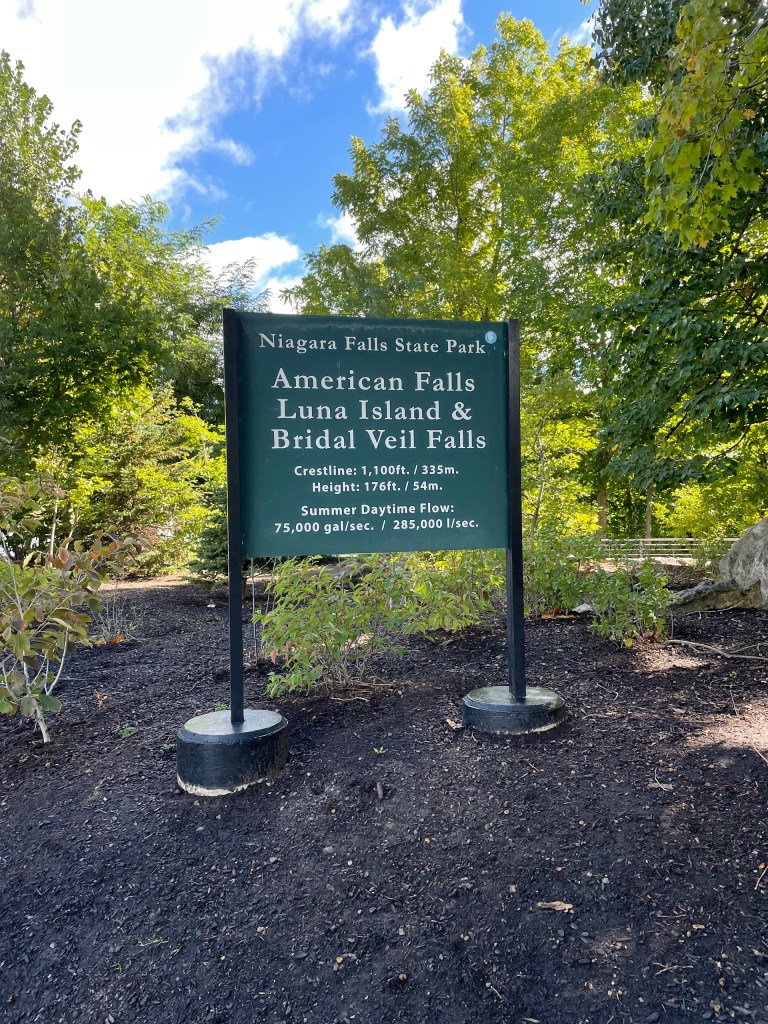
We couldn’t wait to go see the falls on the US side the day after our arrival. It was about 10 miles from the campsite to the falls park on the US side. We prepared for the day by making sure we wore good shoes and a sweatshirt with rain jackets. It had been mostly cloudy and rainy on our travel up to the campground. However, when we went to go visit the park, it turned out to be a beautiful sunny day. I was so thankful for that.
To be honest, I was sold on the US side of viewing the falls immediately because you can get so close to the water views. There are a couple parking areas on the US side on Goat Island, and I think we were in parking lot 3. We kind of just winged it and parked and then found the trail and followed it. It was so much fun. You can spend the whole day following the trail here. And you can get very close to rushing falls. We loved it. There are many spots to stop and check out various views of the rushing waters.
We came across a seating area and things like that. We did bring a small bag pack of snacks and stopped to eat where there were some tables and I think they sold food there, but we didn’t check that out at that time.
Look how close we were on the US side to the rushing waters. It was a thrill to be that close. While the Canadian side has many benefits, you really can’t get this close to that view shown above in the photo I took.
This was another area you reach while following the paved trails. You can see how lovely it is. It is a spot you want to just gaze for a while.
You can see the observation tower across this water view. However, for me, being so close to the fast-moving waters was bliss. Hearing the rushing sounds of it felt amazing.
I could share lots more photos of our walk on the trail. I’ll save them for when you go visit the falls yourself. There are many points to stop. You can take in the views and feel the misty rainfall from the falls. I’m sure there were things we missed too because we just winged it for the day.
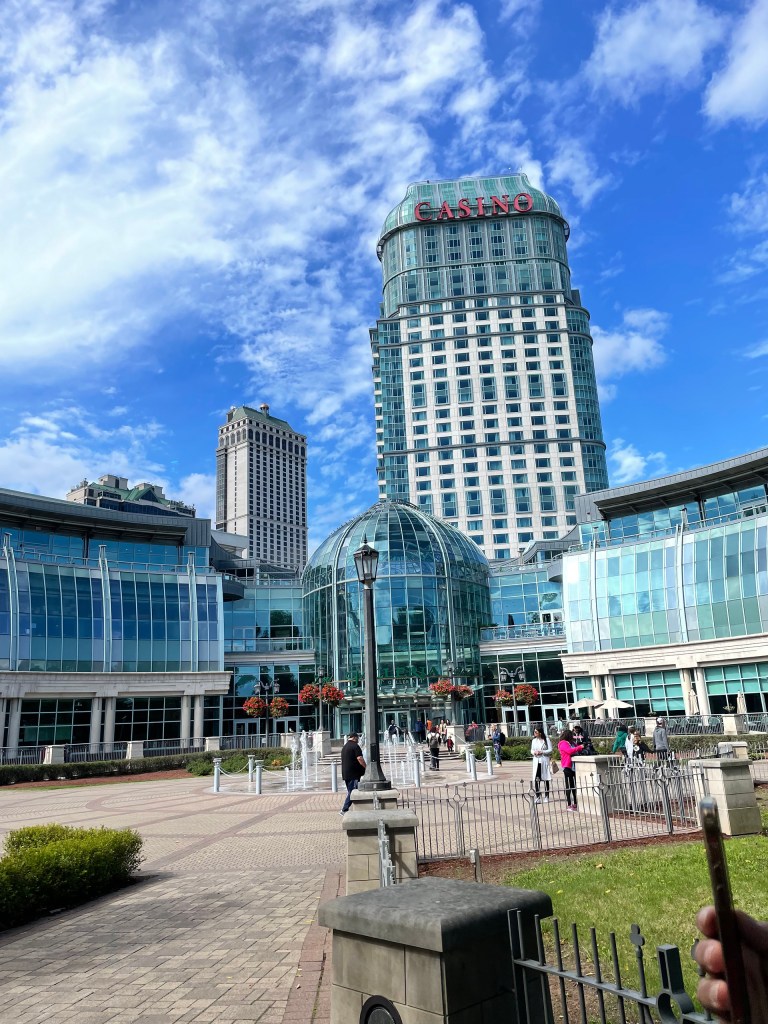
The next day, we did go over to the Canada side. I did think ahead to have our passports handy. It was easy to cross over a bridge to get there thru customs. The Canada side is more hectic. There is a casino and more restaurants, and lots more people.
As I mentioned before, we had been there on the Canada side many years prior. We didn’t do the walk along the falls on the Canada side. Nor did we venture to the wine trail. We are “been there, done that” type of people and like seeing new things. We had explored the whole Canada side of the falls many years ago, doing a boat ride and visiting the casino, and having dinner at the top of a building, stuff like that.
Canada side above photo with the view of the casino and other buildings. When we exited here, we saw a nice view of the falls on the Canada side. But there are walkways below this area to view the Canada side of the falls. The trip happened back in 2022, which was 3 years ago. It is difficult to recall everything. Let’s just say we had a pleasant time.
The campground was a great location for us. We ate at two places nearby. One was called Griffon Gastropub on Military Road. I recall it wasn’t too thrilling. And another place was called the Brickyard Pub and BBQ in Lewiston, NY which we liked.
I would say in regard to the campground, it was a very nice place. We’d go back in warmer weather months. We actually used the heat in our camper because it was very cool at night that visit. We had full hook ups, and it was a clean place with full bathrooms. It was also a quiet place in September.
Hope this helps you visit. You may decide to see Niagara Falls in the US. You could also choose to visit Canada. You can do both like we did!
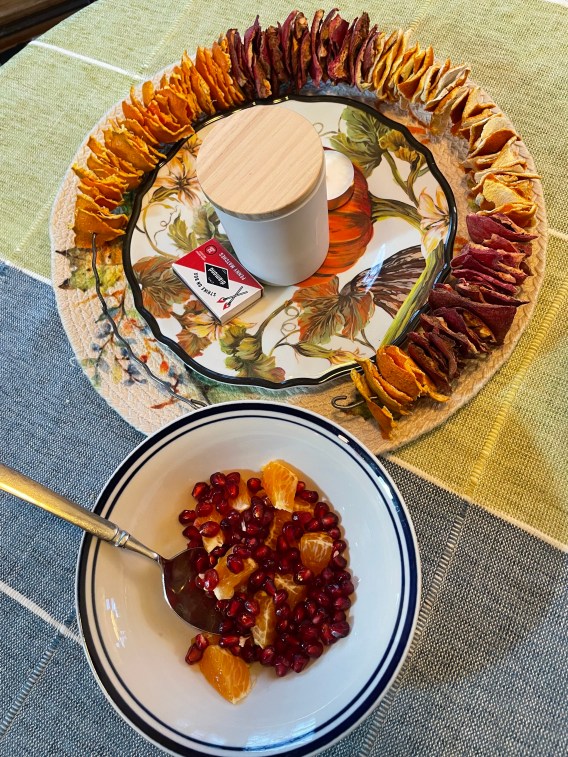
I discovered a way to make a cute wreath with citrus peels. I saw a lady do this on a social media feed and thought how cute the wreaths looked, mostly for fall and Thanksgiving season, however. Also, it is kind of neat because using citrus peels is like recycling something that would have ended up in the trash or compost.
Another bonus is my husband really enjoys eating citrus fruits. And this time of year, pomegranates are in the grocery stores, so I used those as well. The darker red peel color worked really well against the colors of the oranges, clementines, even grapefruit. You could use limes or lemons as well.
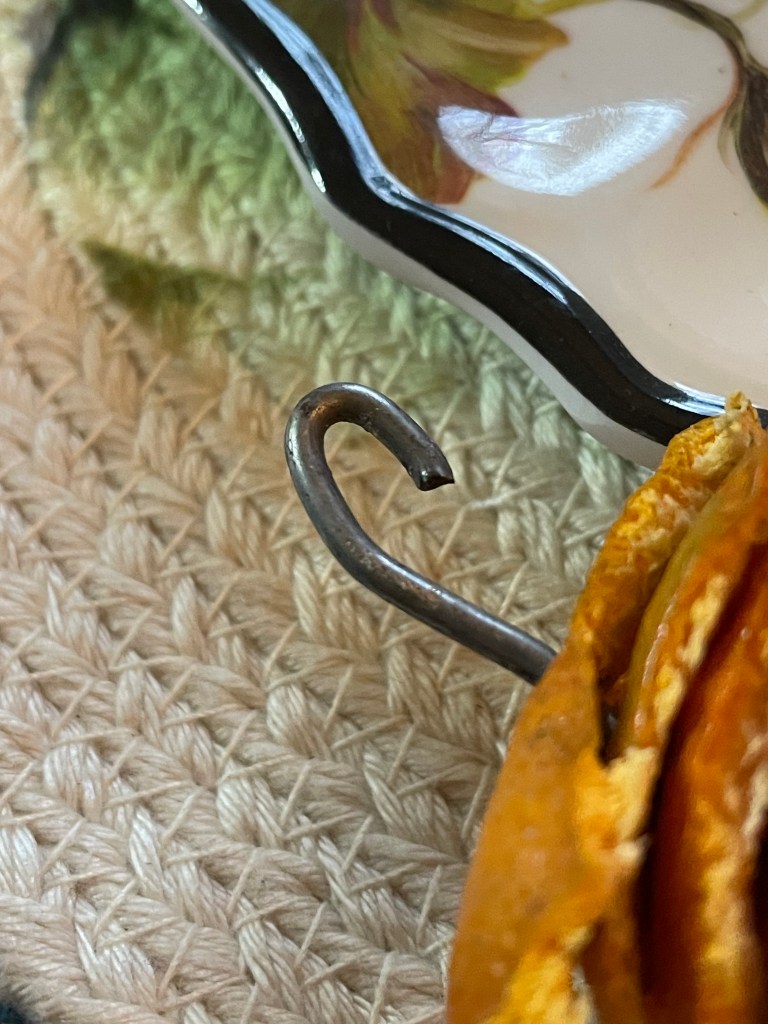
It is super easy, and I happen to have crimped single wreath rings in my stock of craft supplies, but this could easily be done with a clothing wire hanger cut and formed into a circle. I had my husband cut my crimped wire frame so I could push the peels onto my wreath frame, and I got underway.
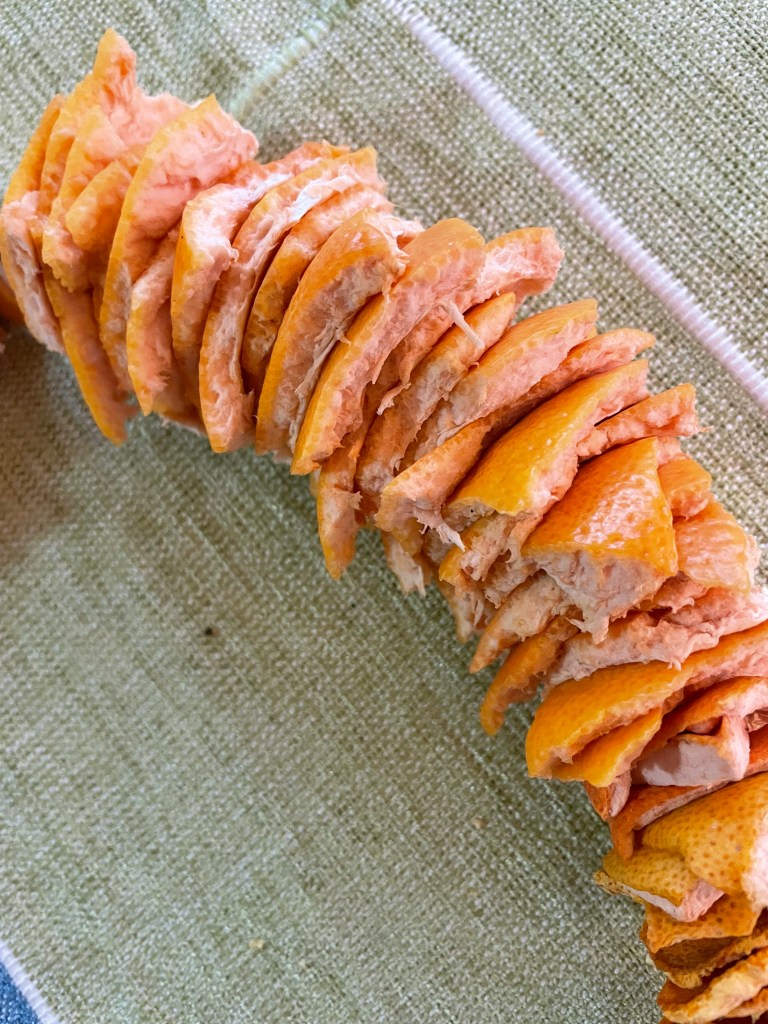
Anytime he or I had an orange or other citrus fruits as a snack, I asked him to save the peels. Then I tore them into pieces. It doesn’t matter the shape or size of the torn pieces. Can be random.
Above you can see the pomegranate peels, and I believe next to it is the grapefruit peels. It sure did smell good when I pushed the grapefruit peels onto the wire.
I did like grouping them, so all the peels were facing the same direction as it added more color.
In this photo above, I did some back-to-back and didn’t really like it – I preferred all the same direction to add more color so all the peel-colored sides face the same direction as they were stacked on.
This was when I finished. I just needed to add a bow. I think this is a great wreath to make for Thanksgiving. And they probably would be adorable in an even smaller wreath size. I think this was a 10″ wreath frame size. There are so many decorative options with this – could do some embellishments if you liked for fun.
My husband made this loop at one end and then made a little hook on the other to reattach the frame ends together when done putting all the peels onto it.
There are the pomegranate seeds and a clementine also used. They were yummy together – and pretty colors. It just takes a while to collect all the peels. I would just keep them in a bowl and then try to attach them to the frame rather quickly before they were too dry.
I forgot to take a pic of the bow part and now it is stored away since we are onto Christmas decorations. But this was an easy, affordable, and creative little craft project. I recommend wearing gloves because the wire started to blacken my hands while working on it – due to probably the acid of the citrus – I don’t know.
It dries naturally and smells nice while it does so. I suppose you could add essential oils on it later to add more fragrance to it.
Cathy Testa
Date of post: 12/6/2025
And PS – sorry I didn’t post this sooner. Making this in early November is best timing. Good one to remember for next year.
When we took our very first camper out for the first time, it happened to fit well with a trip my younger sister had planned to Lake George, NY with her family. She mentioned a campground called Moose Hillock and it is in Fort Ann, NY near Lake George.
It was in mid-June of 2022, and it turned out it was going to be a very hot and humid week during our first camper adventure. No worries, luckily our new adorable retro looking little 16-foot camper has excellent air-conditioning, and the campground’s website indicated it had a huge, heated pool.
My sister was also staying there for her family vacation with her two young boys and husband with their 5th wheel camper. She was excited to learn we had purchased a camper at an RV show in the winter so we arranged to do our first venture out to Moose Hillock where she and her husband would be there to assist us if needed.
I did feel overwhelmed when I first started searching for campgrounds online. There are so many to choose from and being a planner, I really like to research, but I quickly learned, there are so many that it would be difficult to pin down which place to select for our first camping adventure.
On top of that, I learned campgrounds have rules and many of them all listed on their websites. It made me go cross eyed reading them all – pages of them. I remember thinking, “Holy Moly, these places have so many rules. Will I like camping?”
It didn’t take too many future trips to realize rules are more about just being a really good camper person, doing the simple things like not being noisy after posted quiet hours and picking up your trash, or not walking through neighbors’ sites, and keeping your dog under control, etc.
I don’t have a dog, but my sister does. When she was walking her dog the day we arrived to Moose Hillock, she saw us at our camper site setting up. She walked over and said, “I promise, I didn’t intend to show up immediately, but I was walking my dog and saw you.”
You see I had told her before we left, “Please don’t run over right away. I’m so new to this camping thing, I want at least an hour to setup our camper inside while Steve, my husband, would setup everything outside”.
Rosalie continued off to walk her dog after a brief hello, and I was excited to unpack all the boxes I had staged on the floor in the camper into the camper’s cabinets. It turned out to be a good system for this smaller sized camper, and I did the same routine every time we traveled with it.
Moose Hillock surprised me because I had absolutely no idea there were campgrounds more luxury style. This pleased me right away. You see, when we got our first little camper, it was quite spontaneous at an RV show. And I really was concerned about if we made the right decision. I knew I don’t like flying anymore, for obvious reasons, but would I like camping? I really never liked tent camping the few times we did that years ago when much, much younger.
When I saw the pool at Moose Hillock with a rock wall of skulls and waterfalls with a slide for the kids, I was impressed. I thought to myself, “My gosh, this competes with pools I’ve seen at luxury hotels.” I was really impressed with the abundance of lounge chairs around the pool area, the clean bathrooms, and the pool itself.
My nephews loved that we were there to join them in the pool too. My husband is a kid at heart and had no qualms about going down the big pool slide right after my nephews did – and repeatedly. It was fun to watch them having such a good time. I was even a bit disappointed that Steve and I had booked a steamboat tour on Lake George that day because we were having so much fun enjoying the beautiful big clean pool on a hot and humid June day.
Another bonus about this campground is the fact it is very close to Lake George, and lucky me, there was a wine festival happening the week we were there. Steve and I attended that on the next day while my sister and her husband stayed at the campground to enjoy the resort’s amenities. She and I are 13 years apart in age, and Steve and I really enjoy visiting an area’s features while she prefers to stay at the campground filled with amenities and fun for the kids. Make sense.
Regardless of camping styles and goals, we all enjoyed the private sites at Moose Hillock. Each site is lined with trees on each side of the site, and each has a big firepit with large rocks. One big rock on the back side and a few on each side. This was another surprise to me. I just had no idea it would be this nice.
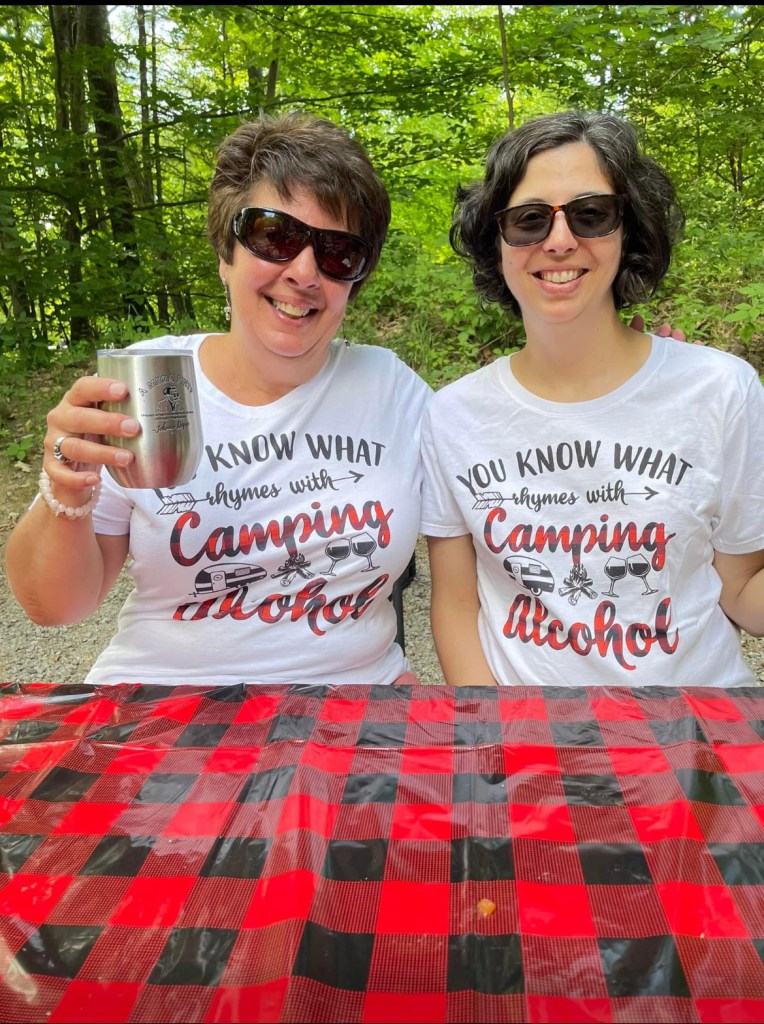
Again, one of the fun parts was my nephews really enjoyed visiting us at our site, making popcorn with Steve and roasting marshmallows. To honor our first camping trip with my sister’s family, I got her and I matching t-shirts. I had decorated my camper with the whole black and red classic tartan plaid theme, and even our t-shirts matched. She loved it!
We visited them at their site too. It was so fun. It really kicked off our trip and first adventure, and I knew we would have many more. Moose Hillock was a perfect choice for us beginners.
To recap, the things I really liked about Moose Hill lock are:
Big private sites with trees on each site Amazing massive clean pool with nice lounge chairs Being close to Lake George and doing things like the steamboat ride and wine fest Big firepit to make amazing camping fires at night The rv style to this campground
And unique to us – being able to enjoy our very first camper trip with my sister and her family.
I did it. Today I deleted another one of my websites called ContainerGardensCT.com. The website was primarily about my former service offerings as a plant person, such as container gardening and installing patio pots and such at people’s homes and on their balconies. It had some nice photos of plants and also a few articles, talking about what you could get for services by each season, and so forth.
As I have stated here and there, I’m technically retired, but it IS early retirement. It comes with letting go of some old passions and introducing new ones, such as our new camper adventures. I also no longer can lift heavy objects like I used to and that, with the combination of saving for travel, has reduced much of my former plant passions and work.
It is difficult to let go of my past plant writings and even more difficult to let go of my plant photos! But to maintain them at a cost online doesn’t make sense anymore, in my new early-retirement state of mind. However, like a band aid that must be torn off quickly, I deleted ContainerGardensCT.com quickly. I didn’t review the photos first or print the prior articles. I just did it quickly. Done!
Now, I will always love nature, plants, and all the wonderful surprises which comes from admiring nature and plants, like a butterfly visiting a flower to the abundance of bumblebees that recently covered the last fall blooms of my Stonecrop Sedum (Sieboldii). I had put two of these sedums in separate hangers and picked these sedums because they are very drought tolerant, thus while away camping, I wouldn’t have to worry about them not being watered often. They are also perennials, thus saves money when I would replant them somewhere in my yard in the fall after the hanger planter season is over. Saving money is also important as an early-retired individual.
What surprised me though was about 2 weeks ago, seeing all these bumblebees all over the sedums pink blooms. They were all sleeping (not sure if technical term) and not moving in the mornings. This lasted for a good week or so. During the day, they hovered and visited, and I couldn’t even attempt to water the plants there. They were not aggressive and kind of let me be as I took photos of them in the mornings.
They’d fly over and feed and then later in the day it was a scene to see them all frozen in sleep positions. That lead me to read about how all bumblebees die at the end of the season. I did not know this! Only the queen stays alive and hibernates in the ground. It was interesting to see that many, up to 20 bees on the plants, and also a bit sad knowing this was the end of their lives. Somehow it symbolizes the tragedy that we all face someday, that day we witness others face too. Anyhow, onto the sedum…
The Stonecrop Sedum Sieboldii is a full sun perennial plant and blooms in the fall, so if you like bumblebees, this is a great plant to have around in containers or hanging baskets like I did. It also has bluish-green foliage which draped over, perfect for a hanger, and prefers well-drained soils. It’s an easy-care plant for sure. I’m happy I had gotten two of them this year. They served multiple purposes.
Anyhow, the one website (blog) I still haven’t deleted is this one which you are reading on now. Container Crazy CT is still being visited by people. I noticed it recently, mostly folks looking for information on how to overwinter their canna lily rhizomes and elephant ears tubers. I’ve written about my process of taking them out of containers around early October and storing them in my basement in boxes many, many times. Just use the search bar and type in “overwintering” or canna lilies, or Ensete. You should find them. So, this blog site I still haven’t deleted yet. It still seems useful and has lots of articles I wrote for many years.
I mostly have the Alocasia elephants’ ears now. I grew only one canna lily plant from seed. Just one but it furnished a nice plant for the hummingbirds who loved the blooms in my tall patio container. And I have one big red banana plant (Ensete) which sadly it started to rot on the bottom this fall. I waited a bit too long to get it out of the soil.
We (my husband and I) went thru the process of digging that red banana plant (Ensete) out – It was on its 3rd year of growing in the summers, and it got huge! It was very heavy and when we dug it out – too wet, and it had been too cold, so it started to rot. I should have taken it out of the soil earlier, I thought to myself. Oh well, I knew I was risking it.
I told my husband to toss it in the woods after we dug it out and turned it upside down, when I saw the rot spot. He was like, “Really, this is your baby?” I had to remind him my baby Ensete was tossed 3 years ago after growing it for like 15 plus years. This one was only 3 years old, but it had grown quite a bit this season, was huge! Remember, these plants cannot stay outside over the winter here in my CT planting zone, so I always dug out my Ensete plant and stored the base (the stump so to speak) in the basement, and I did this for well over 20 years now. But this was one I just didn’t want to put away because I saw some rot and also it was soooo heavy. I don’t have the muscle power to deal with that anymore, I guess.
Anyhow, I am thinking that I may continue to use this blog site to not only write about plants, but maybe about some other things in my life and adventures. Perhaps my learnings as a new camper woman, maybe a bit about some other personal struggles, maybe I’ll write about a new craft I’ve tried, you name it. It doesn’t have to be just about plants, right?!
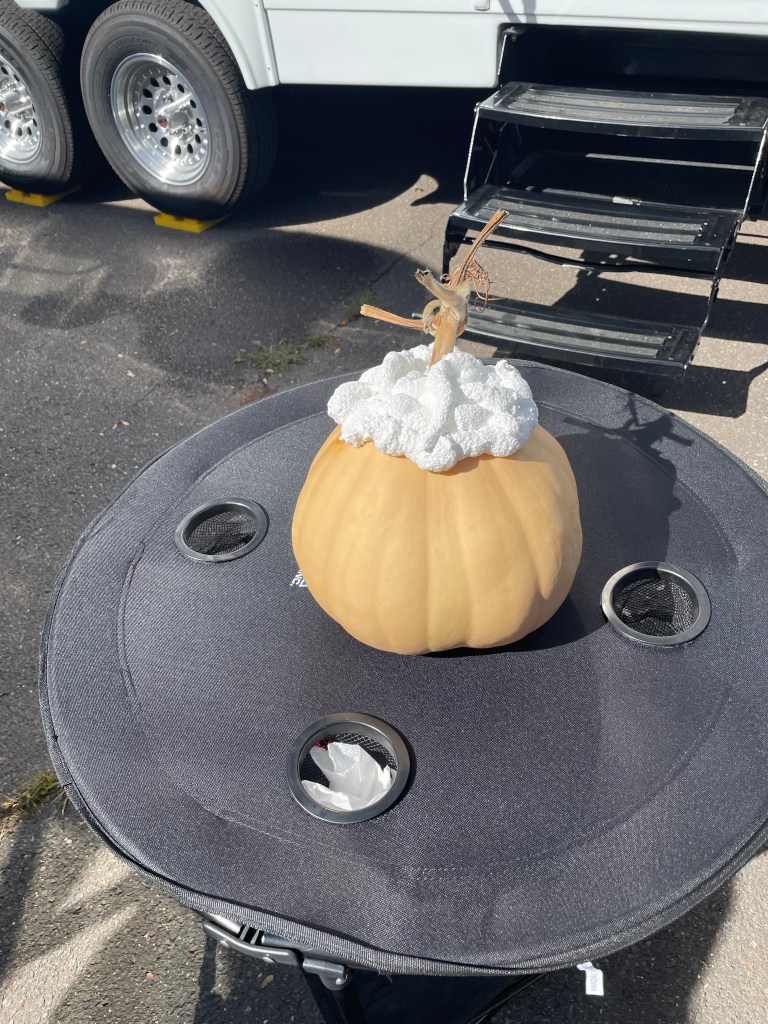
Speaking of crafts, if you know me, you know that I have created succulent topped pumpkins in the past. Well, no more succulent plants here really so I attempted to create a pumpkin topped with faux flowers. It came out pretty good for a prototype.
I used Loctite Tite Foam in a can (a product used to fill gaps and cracks). It comes out soft and then hardens. I sprayed it to the top of a pumpkin, let it set for about 30 minutes so it was a little harder but still somewhat soft, and then started inserting dry flowers (faux) and it was working!
My only HUGE MANDATE is do not use this foam product stuff without wearing gloves. OMG, if you get it on your hands or fingertips, that foam does not come off – TRUST ME ON THAT. I did have gloves on but later I tried to use some again to make a scary topped pumpkin and got some foam on my fingers – big mistake.
And note, the faux flowers and decor I inserted worked well if they were not heavy and had a stem to insert into the semi hardened foam. The foam ends up waterproofed too, so putting my pumpkin on a patio table outside was no problem. You may also spray paint the form once it is hard if you want to, but I didn’t need to on this faux flower version as all the pieces I used to decorate the top covered the white hardened foam very well when finished.
Oh, and I did grow those pumpkins in a container on my driveway this year. I got about 4 good pumpkins to play with. I love the Cinderella shape of these. They are fun to create with either faux flowers or succulents. You cannot use that spray foam for live plants or live succulents because it would kill them (too toxic for plants). See my prior blog posts about succulents on pumpkins on this blog, Container Crazy CT. Just search for “succulent topped pumpkins” if you wish to locate that prior blog post.
Well, that is my mix of topics for today. It is a little cloudy and a little chilly outside today. Somehow, I feel we are in for a cold snowy winter. Just a gut feeling I have. But this year, we plan to do a bit of time in a warmer state in late winter before it warms up here, hopefully! I may just blog about that later.
Have a good weekend,
Cathy T. Zone 6b Broad Brook CT Container Crazy CT
Written on 10/24/2025
Topics: Blog Deletion, Bumblebees on a Sedum, Faux Topped Pumpkin, and more…
I was not in my greenhouse this spring sowing seeds or preparing other plant related things, because my husband and I retired. I tried to convince myself I could go without sowing seeds, growing things, nurturing seedlings, and propagating succulents, or whatever, I would do in my greenhouse in the spring. I decided I want to travel, so really, I won’t be here to water, coddle, care for my plant babies during the summer months. Plus, there is a cost associated with growing plants from seed such as seedling mix to nursery pots, etc. And I thought I should avoid that expense now that we are retired.
However, as the middle of summer hit, I thought this would be a good time to clean the greenhouse. What in 100-degree weather? During CT’s heat wave, you ask! Well, in the early mornings, it is a great time to hose all the dust off everything I left in the greenhouse, and it all dries very well as the heat rises to the point I can’t be in there.
This whole thing “cleaning the dust off” in the greenhouse got me daydreaming about my days in the greenhouse from years prior. Even when I close the slider door, there is a bang slam type of noise as the side of the door hits the frame, and that simple noise is something I heard repeatedly when I was in my greenhouse full time in the spring seasons. It gave me flashbacks. So did hearing the birds outside the greenhouse, seeing the trees sway outside the greenhouse, and just the simple things you experience in there when working in the quiet or sometimes with a speaker playing favorite tunes. Those moments when you are using your hands, hands in the soil, just being with the whole environment. My greenhouse was that place for me for lots of time in the spring, fall, and even winter. Usually mid-summer though, it would be just way too hot be working or playing in there.
But, I did think, well, it will be hot, I can grab the water hose, blast all, reorganize lots of stuff I had piled up here and there, and even hose down windows and doors. I started to take everything out of my antique school style lockers from spray bottles to tools, to cups, to plant labels, to bug sticky yellow traps, to scissors, magnifying glass, and anything else and hosed all the lockers down to remove dust and crime. It felt good, but it also brought lots of reminders of the projects I did in the greenhouse. For example, once, I tried stamping old spoons for a while and have a whole set of the stamp tools in the school lockers along with all my other plant related tools. It just brought back memories and made me realize the greenhouse was my true Zen woman cave. I spent lots of hours in there when sowing tomato plant seeds and it kept me busy. Then in the winters, I’d care for overwintered plants.
Anyhow, I realized I don’t think I can do without using my greenhouse. It is part of my soul. I thought about what ifs. What if I turned it into a pottery studio? But nah, I don’t want to invest in all that. What if we turned it into a place to sit and chill. Well, there is no chill in a greenhouse in the summer, way too hot. What if we covered the clear roof and made it another hang out room? Well, we don’t really need a hang out room in the summer in that heat. What if I just stored a bunch of stuff in there but then it just hit me, I truly miss it. I miss being in there working with plants. It was my thing, and it gave me a special vibe. So, I just may rethink that whole don’t use the greenhouse anymore ridiculous idea.
In the meantime, I’ll keep cleaning and sorting and removing things that I have too much of. And get it well organized so that next spring, I can sow seeds, I think. I told my husband the same, he agreed, it is my thing, and he will repair a problem in the roof for me this fall cause now he is home and can do so.
In the meantime, I just try to enjoy what I do have. I cut back on the plants in my patio pots, and went with just a few. To see empty pots or planters around my home is something I just try not to think about – and look away. LOL. I used to LOVE filling every corner of my deck with plants, but I cut back a lot. Meaning I didn’t grow as many and really tried to reduce this hobby expense.
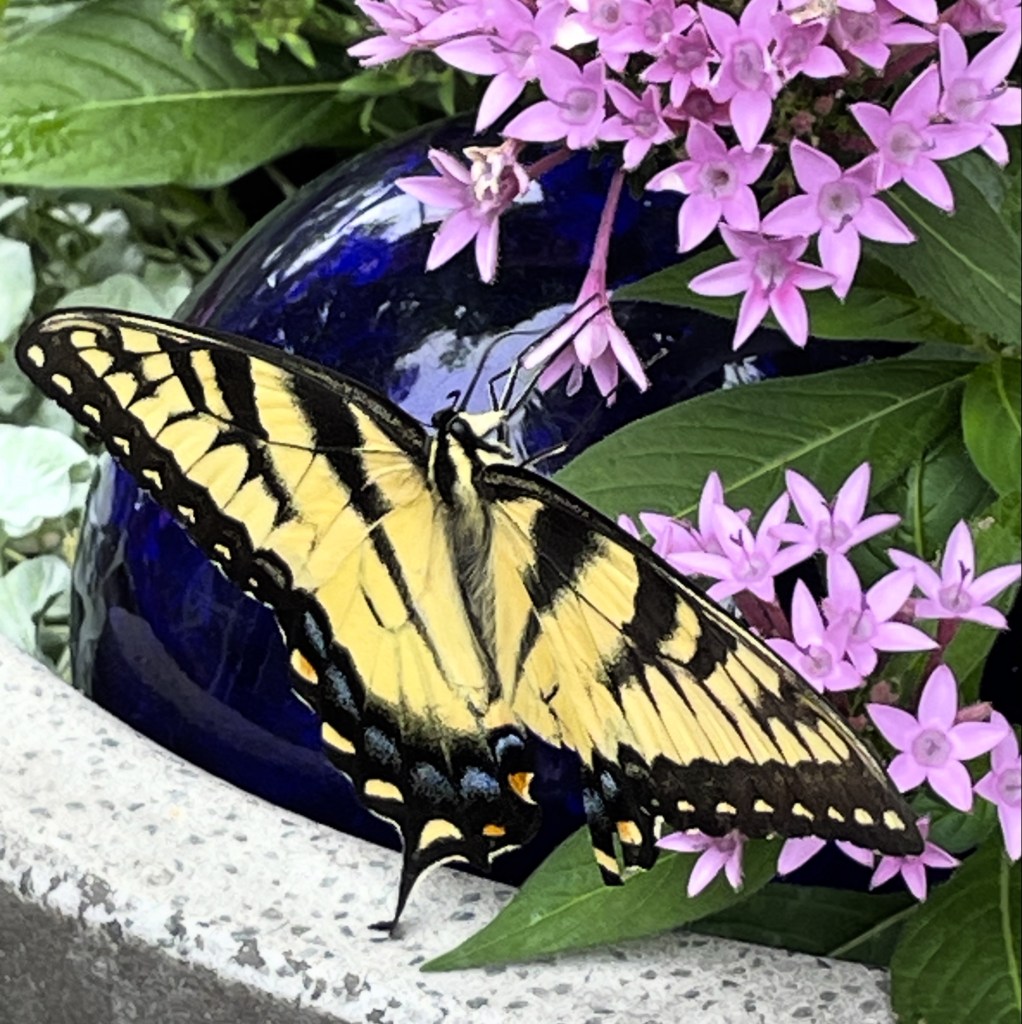
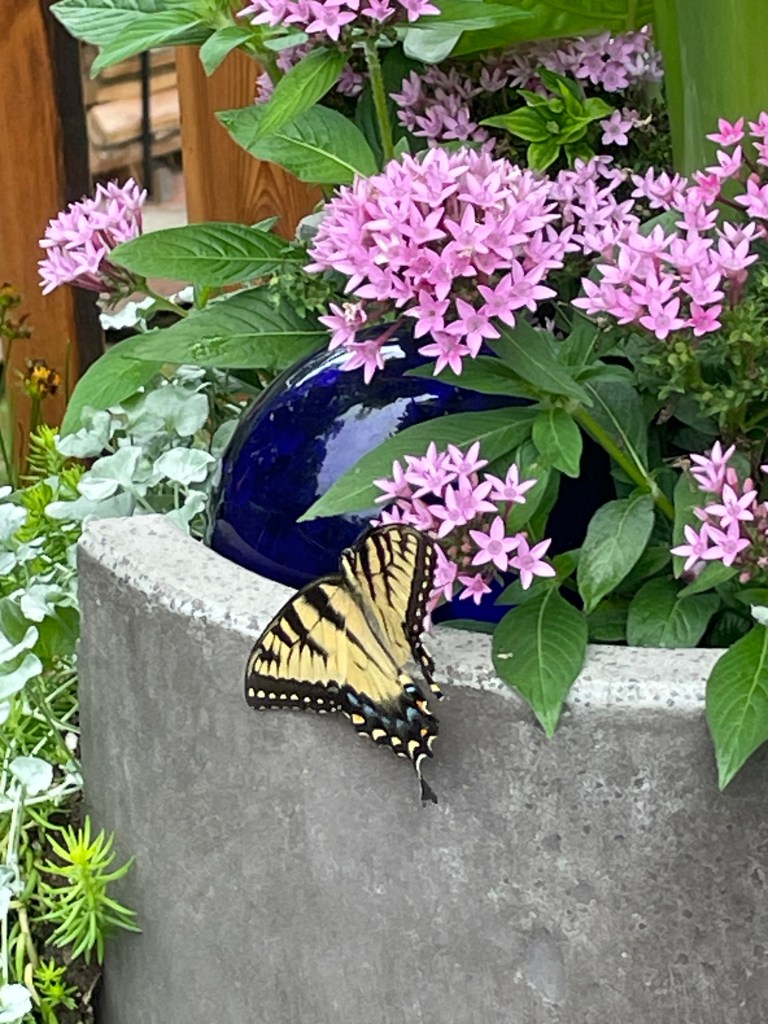
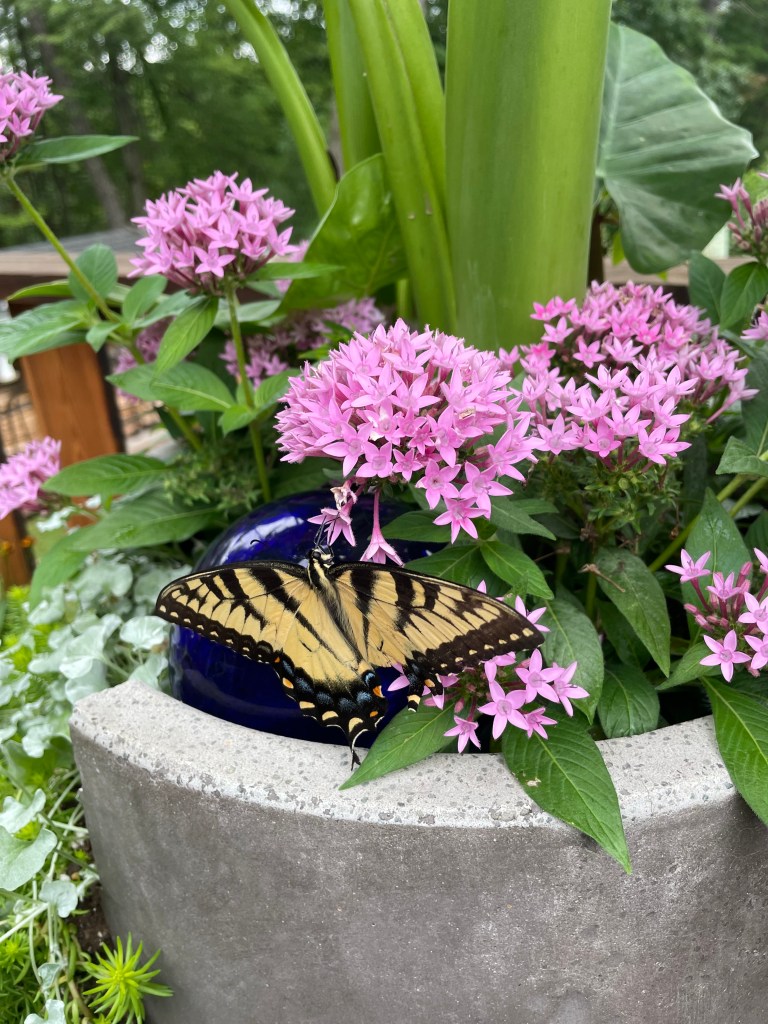
Anyhow, the other day, changing the pace here a bit, I was sitting on a little couch near my kitchen, and I saw a big butterfly flutter by – and I thought, Oh My Gosh, is he going to my planter on the deck?! And he was – visiting the pentas annual pink flower heads and I was able to take photos of a beautiful large swallowtail butterfly. That made my day between the whole greenhouse cleaning reminiscing phase! Maybe it was a little sign. Keep going he said, don’t give up your plant greenhouse passion!
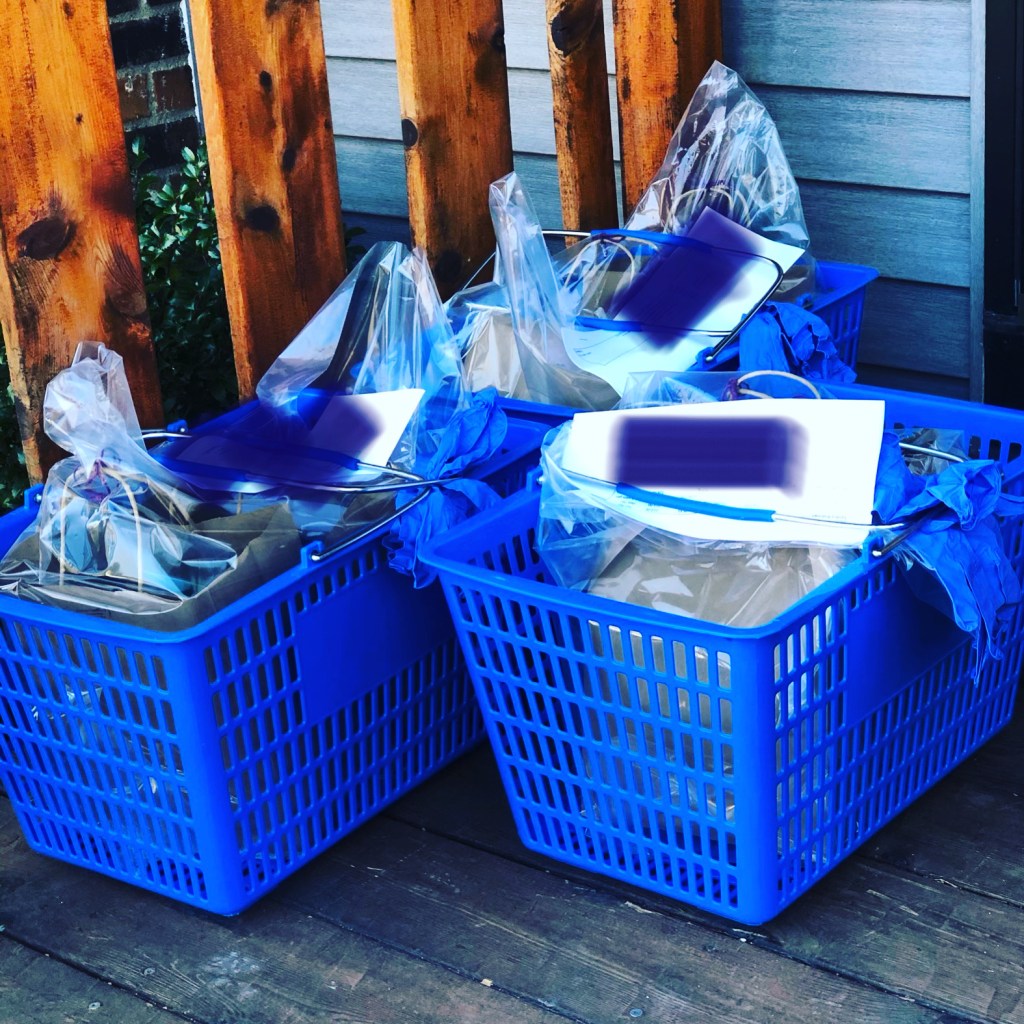
I have been reflecting on how I was very much into seed starting a few years ago, and wow, during COVID, it was a big time to sow seeds as well. In fact, I remember selling out on seed packets I had in my stock and some seed starter kits I had assembled, because people were having difficulty getting seeds mailed at that time. Everyone wanted to start seeds and drove over to my house to pick up their seed packets with masks on and I had a basket was sitting on my driveway that was cleaned for every pickup due to COVID. We’d wave to each other through my kitchen door window.
The COVID days pick up basket with seeds and seed kits.
Anyhow, there were some seeds I had started in seedling trays for indoor growing a good 10 weeks before our last spring frost date of mid-May. You see, I always used May 12th as my estimated last spring frost date here in my area of Connecticut, and some seed packets would indicate to start seeds 6 to 10 weeks or 8 to 10 weeks before the last spring frost date. Examples were Pica Chile Mix Peppers, Chives, Salad Savor, Oxheart Tomato, and Lemon Drop Peppers. So yes, in March, I was starting “some” seeds to get an early start on the whole process. Then continue in stages based on seed types, like some are sown much later.
That seems so early to start seeds in March, right? But these plants required that much time. You could pick any time between those 8 to 10 weeks for example, and 10 weeks was March 3rd, or is March 3rd. Anyhow, this would require getting my greenhouse ready with seed starting supplies out, and things like that.
Loved these trays. I also did one seed per cell. Some people might do seeds more per cell.
This year I am not into sowing seeds, and I probably would only do some pumpkins which isn’t required till later to start those seeds. They don’t require as many weeks before the last spring frost date. I don’t do as many now cause I’m technically retired and I don’t plan on being home all the time to monitor everything like I did before. Remember, seeds cannot be left alone for weeks at a time, even days, they must remain monitored, watered, warm, etc. You have to watch for problems too. If you are not tending to them, forget it.
Anyhow, seeds in the seed packets remain viable for 3 to 5 years in general if stored appropriately. There are some exceptions like parsley. So, I still do have some seed packets in my stock, but some are getting a little older. I gave some seed packets as Christmas gifts this year to family. I always had certified organic seeds in beautiful seed packets which were art packets really. I also selected easy to grow types too.
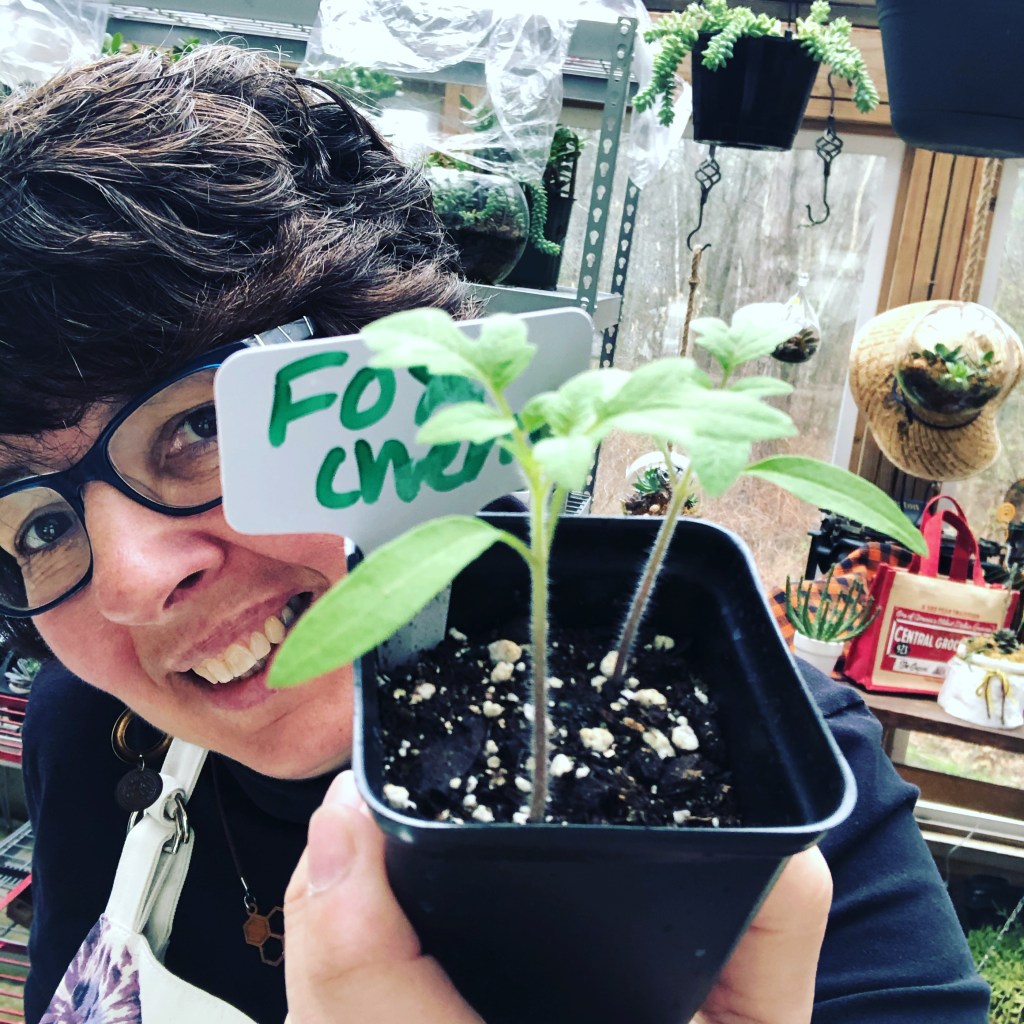
Happy me doing a selfie with a Fox Cherry tomato baby. Yup, I was obsessed. And there were two! I broke my rule – but basically you take one out later.
It’s important when you buy your seed packets to have information, and the seed company I used always provided detailed information in their seed packets and on their website. But I also created lots and lots of helpful seed starting charts with calendars and documentation to anyone who got seeds from me.
Some of the seeds which I sowed that were required in the 6 to 8 weeks before the last spring frost date were: Goldie Tomato, Cherokee Purple Tomato, and Bumble Bee Cherry Tomato – yum! Also, Mandurang Moon Tomato, Matchbox Peppers, Stone Ridge Tomato, and a big favorite was Fox Cherry Tomato! So those were sown between 3/31 to 3/17 usually.
Sowing seeds kept me busy – that is for sure. Because I worked from home, I was constantly checking on their progress, making sure the soil (seed starter mix) was at the correct moisture levels, watching the grow lights, heat mats, and greenhouse temperature. One year, I grew 400 tomato plants! Wow!
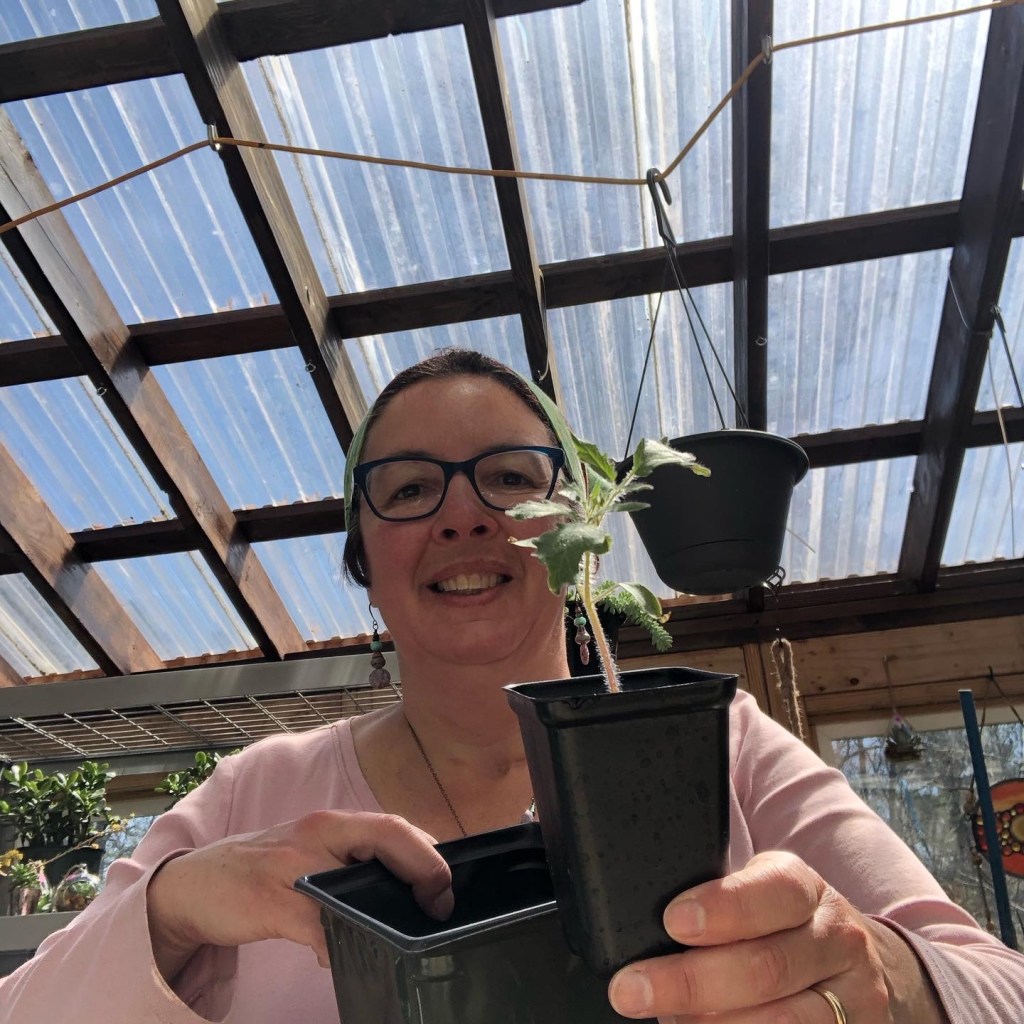
My beauties after they were in seed trays, grew larger, and then transplanted to larger pots.
I got a lot of exercise when the plants were large enough to go outside after May’s last spring frost date would occur. Hardening off plants to acclimate them by taking them outside for a few hours each day, but I also monitored them, if it got windy, I’d check if I should move them back into the greenhouse. One day I set up a time lapse camera to show me going back and forth with my tomato plants. It was comical.
For a while, I had just the bare ground to put them on but a few years later, my husband built a small wooden deck floor for me so I could work better and not fall on my face as I did one year when I took a misstep carrying a tray of tomato plant seedlings. Boom on the ground I went.
Some of the seed mixes I tried. I also would buy bulk quality soil mix too. They key is the soil mix for sure. Wrong soil, lots of problems. That is a whole other topic but buy good fresh “seedling mix” for your seeds. Don’t use crap soils.
At the 4 to 6 weeks before the last frost date, I sowed Paul Robeson Tomato, Honey Drop Cherry Tomato, Mikado Tomato, Sacred Basil, and Shishito Peppers. That was around April 14 to March 31 for sowing period. The Honey Drop Cherry Tomatoes were to die for. Everyone loved their sweet flavor. Those were addicting.
Anyhow, the sowing periods continued all the say till 3 weeks before the spring frost date, so the three weeks before was around April 21st. That is when I would sow some Tiny Tim Tomato and New Yorker Tomato seeds into the trays. By the way, I’m referring to showing seeds in the seed starter trays indoors to grow inside the greenhouse on heat mats until they sprouted, got a little bigger and then under grow lights.
I didn’t use grow lights initially when I started my sowing adventure and was successful but then I decided to invest in a grow light to make things grow better and stronger. It helped. As I always told everyone, remember the sun is hidden a lot during winter months by clouds, so you need that sunshine. On very sunny days, the greenhouse could get very warm, but the sun was lacking at times for sure.
A sunny happy day in my greenhouse! This must have been more towards April.
There were many more examples. It kept me busy in the winter months of March, where we do start to feel a bit better after January and February are over! This year I’m not into this cold weather. I tried to embrace it – even went to Quebec City for the Winter Carnival! We had a fun time freezing our butts off, but when I got home, I’m like I’m sick of the cold weather. That was enough fun freeze time for moi.
A nice view of a nice tomato plant getting larger.
Isn’t it funny how things change? Here I was a few years ago, full blown seed starter woman, and now I don’t do them except talk or write about it here. I’m sure once the weather improves, I’ll go thru my pile of left over seed packets and see if I should try one, get some seed starter mix, and place a seed into soil once again.
Here are a couple of photos of us trying to embrace winter before seed sowing season starts:
Us in Quebec City for Winter Carnival trying a maple shot that was delicious, cold, and sweet! I don’t know what made it milky, but it was creamy like. Steve loved the shot glasses made of ice.I haven’t had maple syrup on snow (called tire in French) since I was a kid in Canada. I couldn’t eat all of this cause too sweet now for me, but I had to try some! Yummy. And fun!
Thanks for visiting!
Cathy Testa Date of this post: 2/25/2025
By the way, as soon as I got home freezing in Quebec City, I caught a cold. Ugh. So that was a period of feeling awful, coughing, etc. It is really going around quite a bit here in CT. Come on better weather – we all need you!
More Tips:
Use fresh quality seedling mix Read the directions on the seed packets Look at the calendar now – some start in March Count back the weeks from the last spring frost date in CT to know when to sow (based on packet instructions) Watch and monitor your soil moisture and temp Pray for warmer weather soon
I always had a love of working with clay and dream often of turning my greenhouse into a clay studio, but then I start to think about the associated costs (pottery wheel, clay, heat, kiln, etc.). Being retired now, those are substantial hobby costs, so I have yet to make that kind of move.
Anyhow, one day, I discovered that there are clays which do not require a kiln. Kilns are expensive (used to harden clay, like in an oven). When I discovered a kiln is not necessarily needed, my brain bulb went off, off to Amazon that is as I searched for air dry clays.
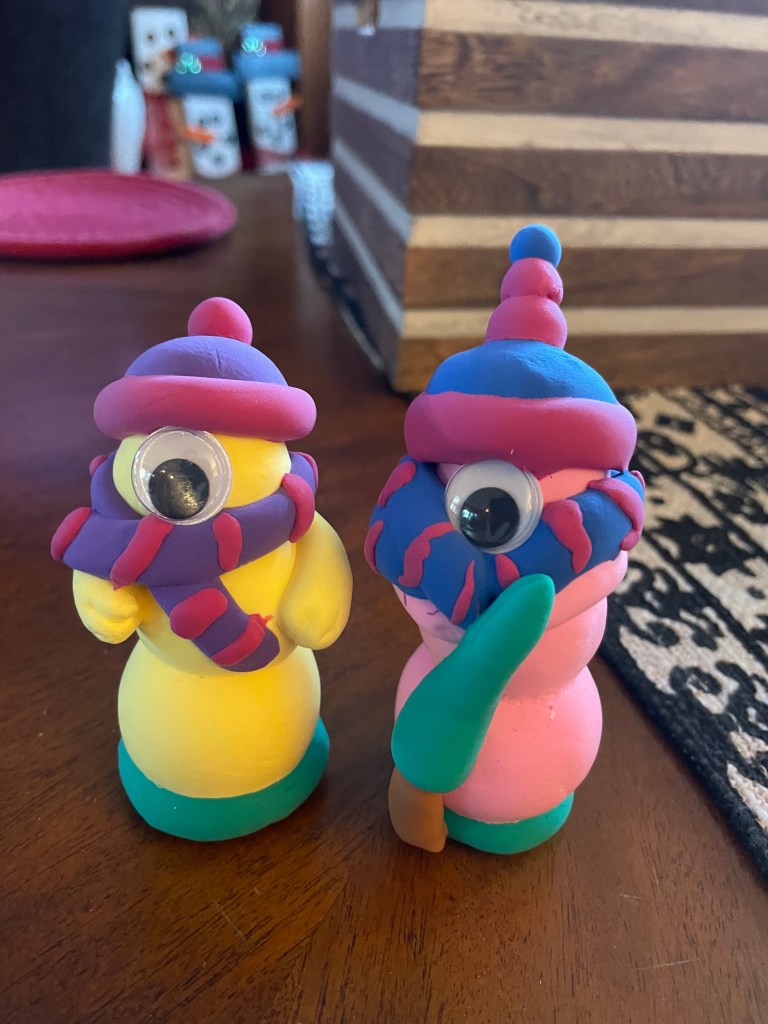
I decided to play with kids clay first. Basic modeling clay that comes in many colors. I figured, let’s see how this stuff is and play around with it. The clay comes in kit boxes with lots of colored clay in little packets and maybe some small tools. Easy to find on Amazon. I guess I really like working with my hands. I made some snowmen shapes and learned some tips as I experimented with the box of clays in many colors. It is relaxing to roll and mold around clay like this, and it was fun.
Then I discovered a more mature version of air-dry clay. It is a pure white hardening modeling clay. There is a brand called DAS Air – Hardening Modeling Clay, sold in 2.2 lb blocks on Amazon. I ordered a block and started to experiment with it after watching a few YouTube videos where crafters showed their air-dry creations.
Here’s what I ended up with and some notes on my experience so far as I compared the two types of clay.
Isn’t he cute? The kids’ kit came with the googly eyes, so I thought, hmm, let me put one and make it fun. The texture of this clay, once it is all dry, is like a marshmallow but a bit harder.
What I discovered about this modeling clay for kids is it is easy to “roll” into shapes. I actually used a white board (small size) I had to roll on while sitting in the living room watching random tv. What I discovered is putting two balls together was super easy with this clay, it just sticks together but once on, it can’t be pulled apart without ruining it.
The kid’s clay is also easy to roll, like into a sausage link or wormlike shapes. Then I wrapped it around as a scarf and added embellishments. The hat was made in a similar fashion. Making balls and log type shapes worked well with this clay versus “sculpting shapes”. One key thing is once it is attached, it can’t really be moved or repositioned, it sticks on right away.
A big plus is it doesn’t require slip (clay slurry used for joining two pieces of clay together) and scratching (or score) to put the two “balls” together, like with regular clay or the DAS clay (shown below this).
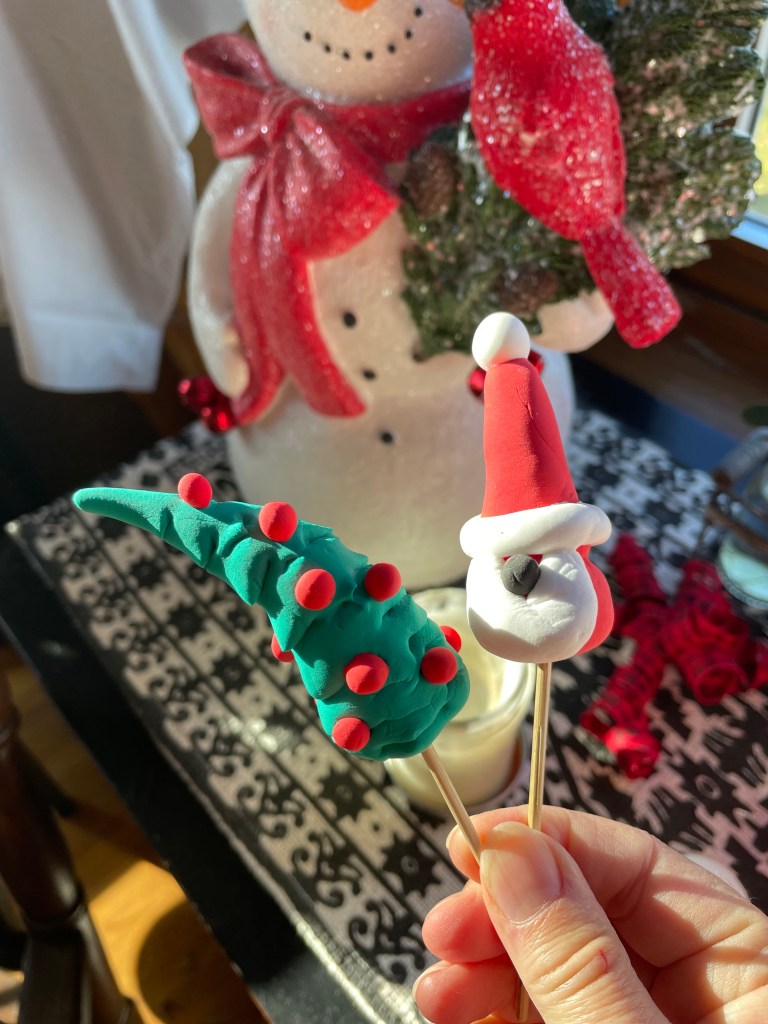
It was also super easy to insert a stick if you wanted to put your creation on a pick and insert it into holiday crafts. I think I will definitely create more sophisticated versions of these snowmen next Christmas. I also have been trying to make bunnies with this type of clay and will show those at Easter.
Now for the downfalls of this type of kid’s clay. First, it tends to bend or flop over as it dries a little, so I used a cup to make it stand upright. I discovered as it dried, it would not stand up flat – that is why you see a green disk on the bottom of my snowmen to help them stand upright. I added the disk after the snowmen was a bit drier but not completely dry. And the other down fall is this type of clay does dry out in the baggies for the rest unused clay than other clays, and then it somewhat not useful, so you have to keep it in sealed baggies or use it right away (or relatively soon, I think). Like I don’t think it will last very long once each color packet of clay is opened. I found the DAS adult version of clay to last much longer in a zip lock baggie after a block was opened. Plus, the DAS may have water added to it if too dry.
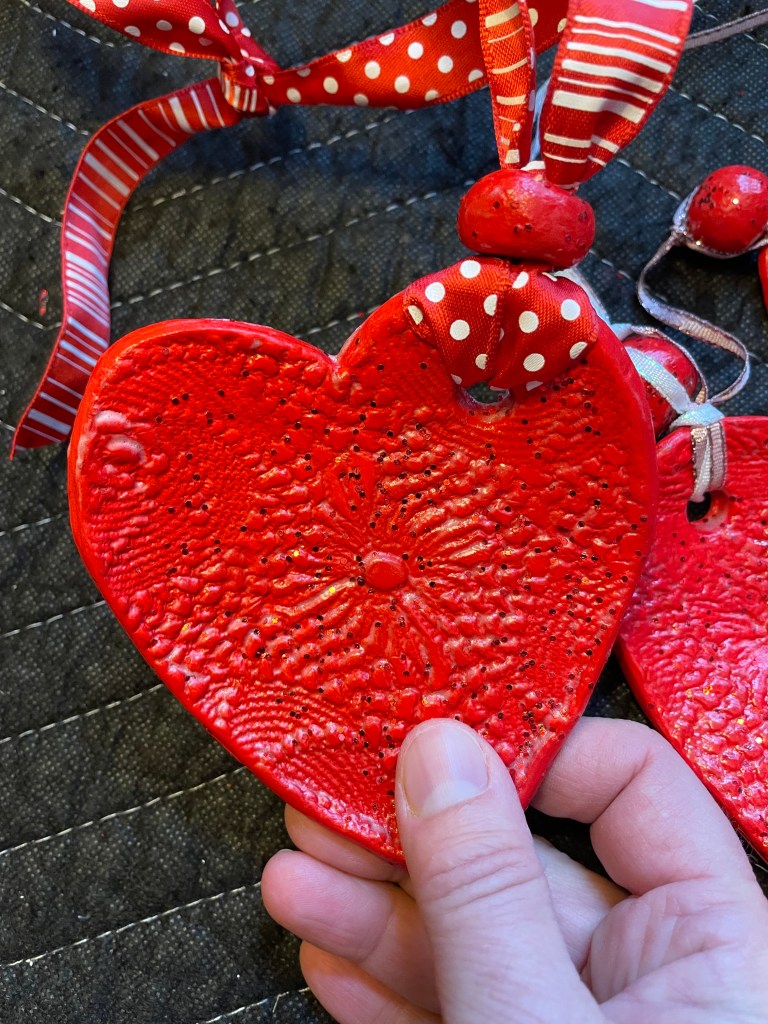
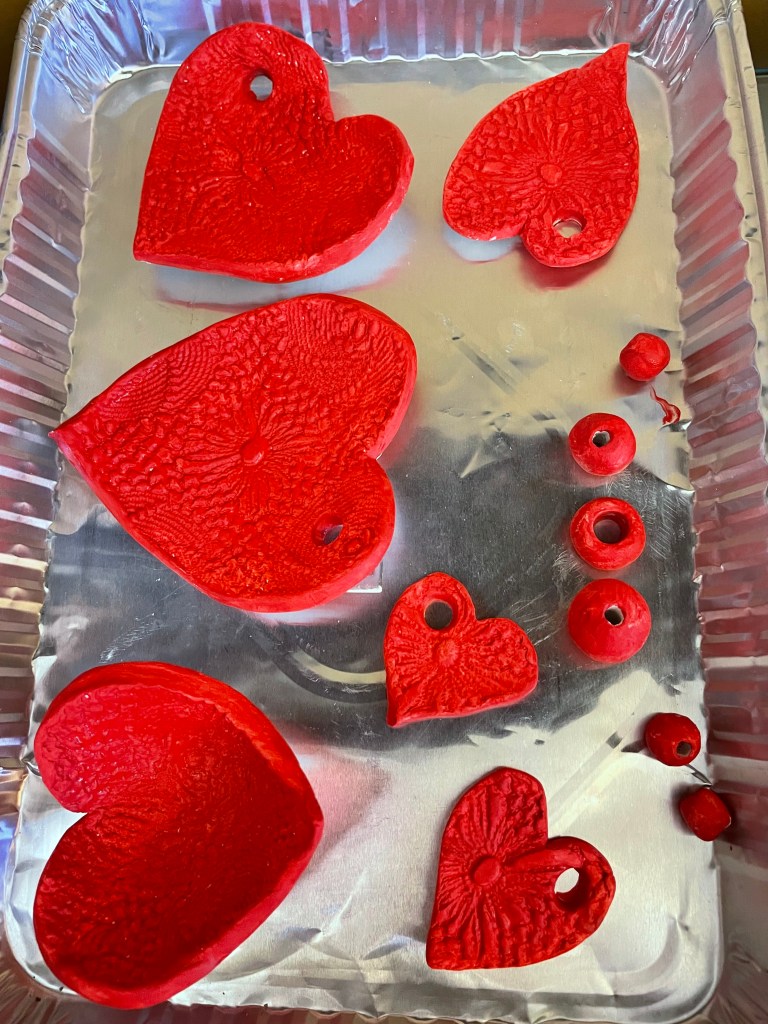
Now for the DAS Air-Hardening Modeling Clay. This is the type of things I made for Valentine’s Day. I really love how the heart bowl came out. I used basic acrylic craft paint after my creations were dry to paint on the red color. Then I remembered I had some red glitter in my stock, so I mixed that into the acrylic paint to add some sparkle.
Here’s my heart bowl before in the white dry state – I love this one the best especially after the color red was added. I saw one YouTuber show how easy it is to press fabric doilies into the clay using a rolling pin. I knew I didn’t toss those old doilies for a reason; I had a bag of doilies in my basement! Once you roll out the clay, imprint the slab, and cut it into a shape, you can put in into plastic wrap covered bowls to form a bowl shape – that is basically what I did. I let it sit in the bowl as it dried.
It was easy to make little balls and insert a hole through the middle with a wooden tool, which I am happy I thought of, cause I wanted to hang some hearts made with the DAS Air-Hardening clay. It worked great!
Luckily for me I had some red ribbons in stock to use as hangers. And with the red glitter added, they sparkle in the sunlight hanging in my windows for Valentine’s Day decor.
These two were smaller and I hung them from antique glass bottles. Cute. All were glazed after the red paint completely dried by using Mod Podge Gloss-Lustre water-based glue. Both the paint and glue were just painted on with simple craft paint brushes which is another plus because all is easy to clean off with water for the brushes and reuse (cost savings).
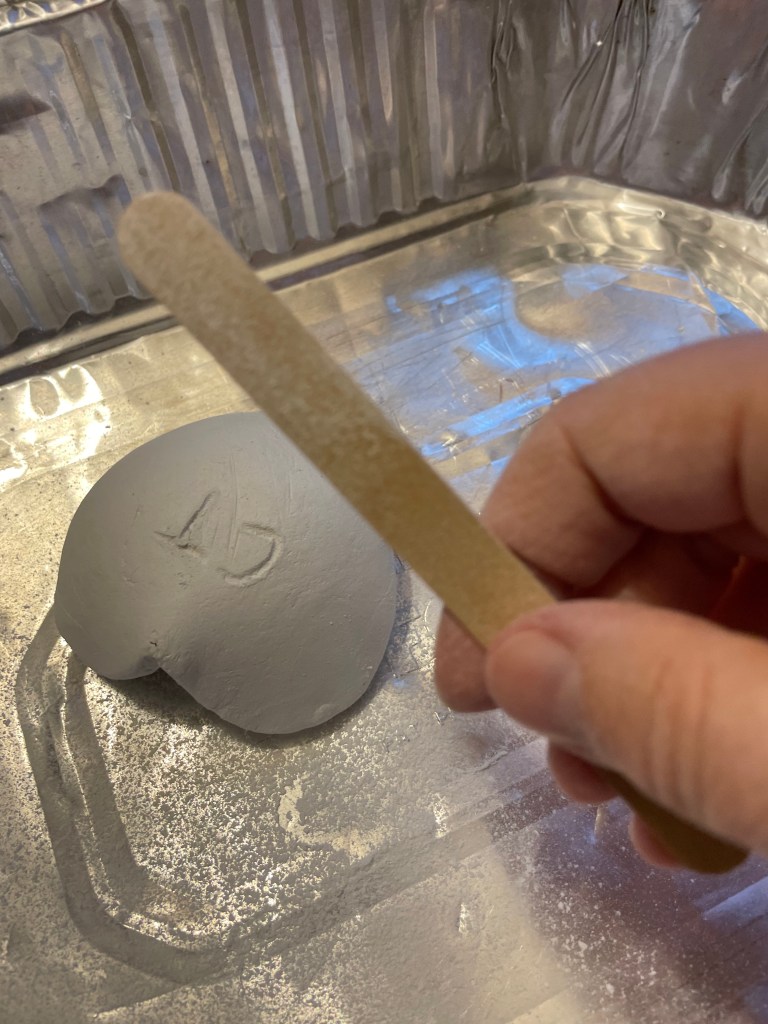
After the clay sat for a day or over night, I noticed it was easy to scratch my initials in the back with a wooden pick. After it was all dry (still in the non-painted white stage), I used a nail file to file off rough edges here and there – it worked out rather nicely. I saved the dust in that pan to make slip slurry and experimented with that on other projects.
I find the advantages of using this type of adult clay is it works well for “rolling out” and cutting, pressing in the dolly patterns, and making flat items. Using this clay to make sculptures, at least for me, is a bit more involved, and requires skill. And it requires the slip to join pieces together. And it takes more patience. I decided I like this type of adult DAS clay to create flat pieces.
Above is the slip I made but will talk about that later.
Another YouTuber showed how she used black pepper flakes to add texture. I thought, Ooooh, I like that! So, I did some with black pepper and glazed with the Mod Podge. They are small bowls, and I thought how cute these could be in a miniature garden in a glass bowl, or as a ring holder if you added the center part, etc. The pepper was a little messy though. Also, one thing to note is these clays are not really “water” proof or super tough like real pottery, meaning can break easily I guess.
Note I did not make the little red heart in that pepper textured bowl, I had those, but those are the types of shapes you could try to make with either type of clay with practice.
So, Here’s a Quick List of the Pro’s and Con’s of each type of clay:
DAS Air-Hardening Modeling Clay (2.2 lbs blocks):
Pro’s – Easy to roll out, cut, make impressions on, and easy to paint, easy to store unused clay in zip lock bag. Unused clay may be rehydrated with water if needed. Con’s – Not so easy to attach pieces (need slip too), requires several days to dry between painting or coating with sealer (Mod Podge), a little more clean-up required (hand washing, tools) but not bad.
Modeling Clay Kit for Kids (24 colors):
Pro’s – Non-toxic, soft and light clay, already has color in each little block in the kit, easy to attach two pieces together (not requiring slip and scoring). Con’s – Tends to flop as it dries, like falls over. Once you attach something, it cannot be easily “detached” if you decide you don’t like it or the position of it. Unused clay will dry out faster once a packet is opened.
For now, playing is the name of the game with these projects. It is just a winter hobby thing for fun. Creating art requires the state of play! I would say this is definitely not art, but it is a way to see if there is more potential if you wanted to perfect it. Some of the YouTubers I saw made some amazing pieces with both types of clay. You can take it as far as you like!
Cathy Testa Date of this post: 2/22/2025 Stay safe, healthy and warm this winter!