
Seed Starting
I was asked by a farmer’s market recently if I would like to teach a class on seed starting, but since it is not my “specialty” (not yet anyways), I turned down the offer, but I do play around with seeds this time of year. It is a great way to feel the plant scene around you before we are able to put plants outside.
Seed starting is fairly simple, but some things can go wrong. Before you get discouraged, remember that sometimes (although this doesn’t happen often), seeds can be bad, especially if you purchased them at a store where they were ridiculously cheap and perhaps very old or were damaged which caused deterioration of the seeds.
Another reason for failure is using the wrong kind of soil mix. Seedling mix is very fine and should be used. But, with that said, I’ve been using coconut coir to start seeds as well, and it is going along well.
Results of my coir tests will be discussed at my first free container gardening talk at the end of the month on March 26th, Saturday, at our local book store on Main Street in Broad Brook and at my workshops this season.
Peat Based Potting Mix on Left. Coconut Coir Mix on Right.
Seed Trays
3-in pots, seed pans, or small plastic seed trays may be used to start your seeds, or any container that has good drainage holes. Grocery store items like plastic containers previously containing cherry tomatoes are fun to use, especially because many have air holes in the covers attached, serving as a mini greenhouse. They are fun for kids, and may be used for tiny seeds projects and then transplanted. For other seed starting projects, I use large Styrofoam seedling trays with many partitions or cells which are not detachable. They are reusable year after year and long lasting. Look for them by the name of “Speedling” trays; they are great if doing many seeds at a time. You need a tool to remove the seedlings from each cell however. And of course, there are many kits available for seed starting which include a catch tray and clear plastic covering.
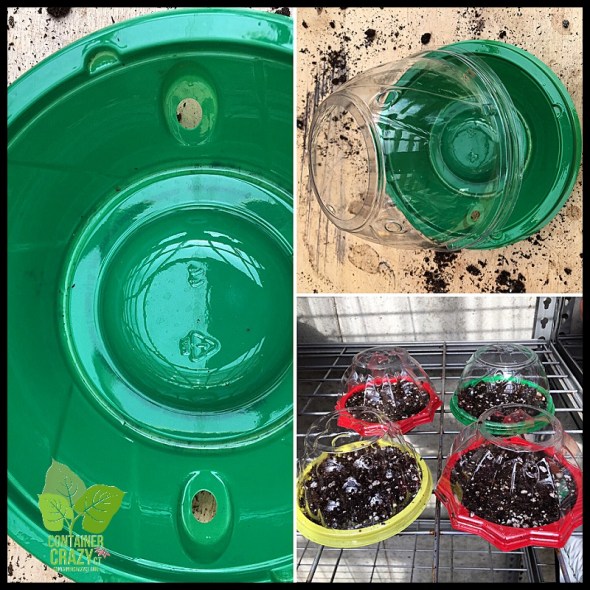
Grocery Store Containers – Fun – Good Idea for Kids!
Sprinkle or Scatter Method
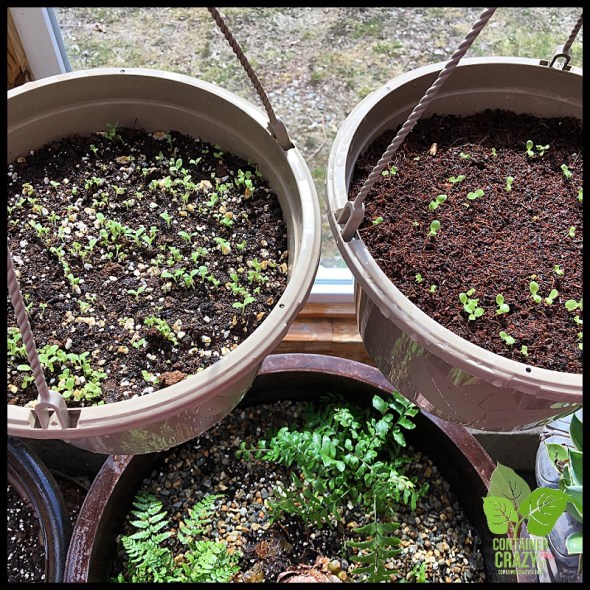
My favorite method of sowing seeds is sprinkling them on top of the soil seedling mix in hanging baskets or medium to large sized pots depending on the seed/plant type. And then taking some of the soil mix in my hands and very gently sprinkling it over the top to lightly and thinly cover the seeds. This has worked out nicely for for plants like lettuce, spinach, Swiss chard, kale, parsley, and basil – and it is so easy. Remember, to sprinkle the seeds as uniformly as you can, as to not over crowd the seeds, but you don’t have to over think it with the leafy vegetable types.
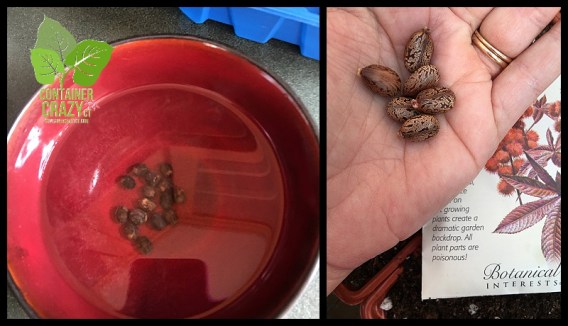
I will start larger sized seeds in small 2-3” pots. I’m giving it a go with Canna seeds this spring, which are as hard as marbles (see black seeds in photo below). I collected some from a plant outdoors last October. They are tricky to get going though. They must be soaked 24 hours (and some references indicate to boil the water), or scratched so water may enter their very hard seed coats. Now, imagine me trying to file seeds the size of jelly beans with a filing tool from my husband’s garage. It was not easy as they kept popping out of my fingertips like black bullets. Sand paper is another way to accomplish this process, known as scarification. We will see if my seeds germinate. If they do – I will jump for joy.
Castor bean seeds are another type I collected last fall. They are large sized, similar to kidney beans. I collected the prickly pods from my plants. Each pod contains 4 seeds, but I discovered as I opened them up, the seeds caved into themselves and were not viable. They became overly dry somehow and there was nothing to them. I collected seeds from some of my perennials too. I test them out to see how well they do, and take it from there. And, by the way, I re-purpose prescription pill bottles to store my seeds over the winter.

Soaking Canna Seeds (Left Photo). Castor Bean Seeds (Right Photo).
To moisten the seed mixture after the seeds have been sown, I always make sure to use a very gentle watering can to shower it softly, and tend to move the watering can back and forth over the soil mixture. A mister bottle is another method for moistening the soil mix. Just be careful to not pour water from a fully open spout because light mix will float or move the seeds about, disturbing them.
Labeling
I label all, no matter what is used, because I will be sure to forget later. My favorite labels are white plastic, waterproof, and easily written on with a sharpie. I take a second step of noting the type of seeds sown on a calendar which I keep in my grow room. It helps to refer back if they don’t come up in a few weeks and determine how many days have gone by.
Covering
Your seeds will germinate faster if you cover the top of the pot or trays with a clear tray, or use those types of trays which come with a clear cover. It definitely helps to keep the mixture evenly moist – but you have to watch for when the seedlings start to shoot up and touch the top of the cover. If there is lots of condensation on the top cover, tilt it to the side to allow air in or remove excess water from the cover, or take it off completely for a couple hours. When condensation hits the tender new leaves (baby leaves known as cotyledons), this can rot them so it is good to keep watch over the trays from time to time as they germinate and begin growing.
Temperature
Seeds require warm temperatures – at least 65 degrees F to germinate. The tender types need even more warmth so if you are trying to start seeds in a cold room, and they don’t come up – this is another potential reason why – if it is not warm enough, you may require a heat mat to place under your seed trays. A friend gave me one, and it gently warms up the trays of soil. Some people will place their seed trays on the top of heating units in their home if they have the style to do so – and this can work as a heat mat. Either way, warmer soil definitely gets them going faster. The mats are easy to plug into an outlet and use. Search for them online.
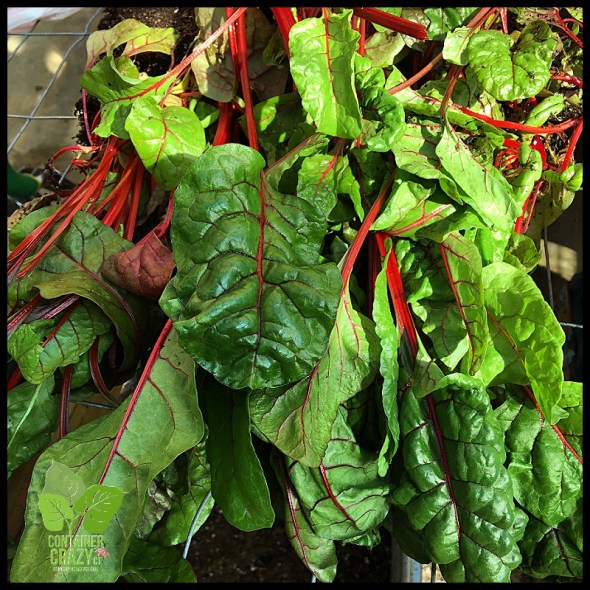
Swiss Chard pulled from a pot – Was growing over the winter months.
Timing
Always look at the seed packages for the weeks or days needed til germination and work backwards on your calendar. This is what I did with my Canna seeds. I wrote down the date I wanted to get them started with hopes they will be ready by spring time. If your seeds are not coming up, take a look at the time required (days until germination) on your seed packets, and if it is a challenging seed, it is worth to wait a bit longer if you don’t see them come up – you may find they are late bloomers (no pun intended). But one thing is for sure, there is something super rewarding when you see them come up from the soil to greet you.
Pricking Out
This is a real term used in horticulture. When you see the first two to four seed leaves appearing on each, they are ready to be moved (or pricked) out. Transfer the seedlings to small pots with multi-purpose mix. This does not have to be done with seedlings like lettuce in hanging baskets. The leafy vegetables continue to grow great in pots. I love doing Swiss chard in medium to large sized pots. They grow so beautifully and full that sometimes I don’t want to harvest them. Smaller sized window boxes are another type I use to start seeds for lettuce and herbs. Mix lettuce packages are lovely to look at and eat.
Grow Lights
Seeds need water, light (but not strong sun), air and warm temperature to germinate. If you do not have a well-lit area, many people will purchase grow light systems. After you transplant your new seedlings to bigger pots, do not put them into harsh full sun, because that can be too hard on them. They should be protected from direct sun. I sometimes use shade cloth around my new seedlings. And remember, all new plants require hardening off. Transition them carefully and good luck!
For a version of this post in a Newsletter format, click this link:
Upcoming Workshops
We are excited for the upcoming workshops planned. Two dates are available for the May workshops on Container Gardening featuring edible plants – and of course, all the showy tropicals and exotics we include each season. Sign-up’s have begun, so don’t delay!
Note: Strong Family Farm is hosting one of our workshops – They are located in Vernon, CT on West St. If you can’t make Workshop No 1 on May 14th in Broad Brook, the Strong’s session will be an excellent option, and you may visit the farm’s large pen filled with chickens too. It’s a great farm with lots of activity happening every year.
Registration is available online via our new sister blog site: www.WORKSHOPSCT.com.

Cathy Testa
containercathy@gmail.com
860-977-9473
Happy St. Patty’s Day!

Happy St. Patty’s Day (Containers Dressed Up for a Business Client – Couple Seasons Ago!)
