Simple Steps to Create Holiday Decor Balls

Leave a comment

I discovered a very simple method to make pretty holiday balls using a Styrofoam ball and holiday ribbon! I wish I had discovered it earlier. I would probably have many of them to put on my Christmas tree.

Supplies needed:

5″ Styrofoam ball or bigger if you wish
Holiday ribbon (I used 2″ wide solid gold ribbon)
A wooden dowel like tool with pointy end (a bamboo skewer would work)
Sharp scissors
1 piece of twine (3″-4″) to make a loop to hang

Video:

At the very end of this post is a video showing how I inserted the ribbon pieces. Scroll down to see.

Steps:

Cut the ribbon into pieces (see below). I went with between 5-6″ lengths. I believe I cut at least 60 pieces from the ribbon roll I had on hand. I wanted to do red, but my red ribbon on hand was shear and shiny. I knew the “white Styrofoam ball” would show through sheer ribbon. Cloth pieces can be used as well, but using ribbon for me was super easy. I grabbed a roll of the solid gold ribbon I had in my craft stock. I used sharp scissors to cut pieces 10 at a time.

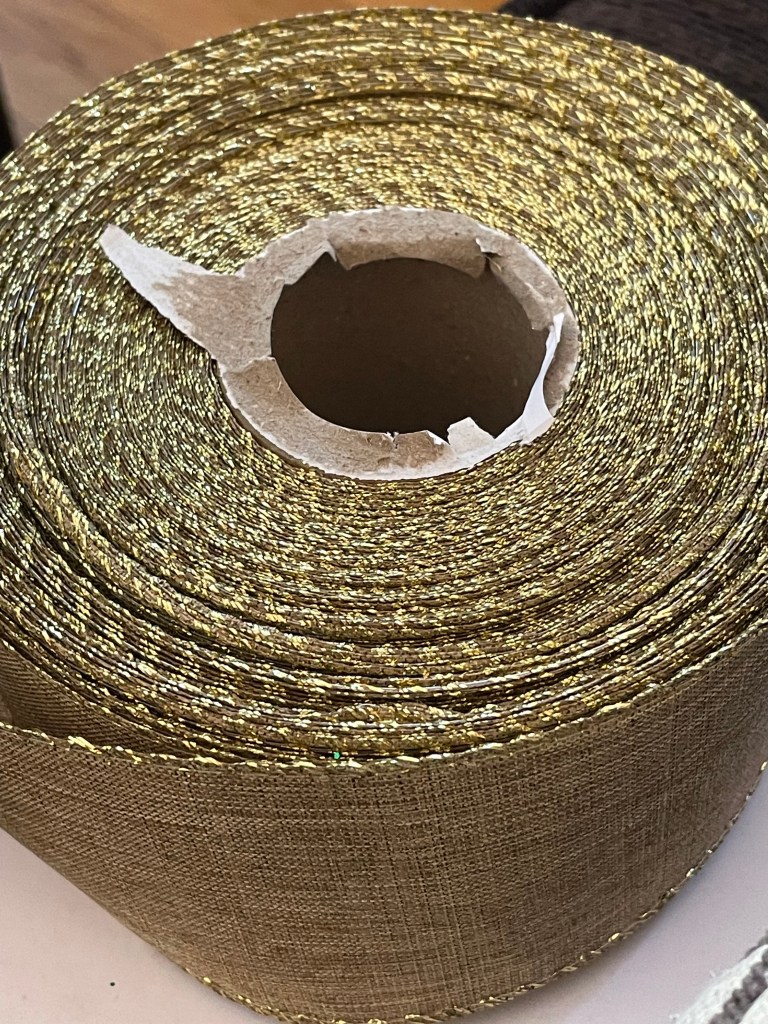
Golden Ribbon above on a roll. It was wired ribbon, but I don’t think wired ribbon would be required.

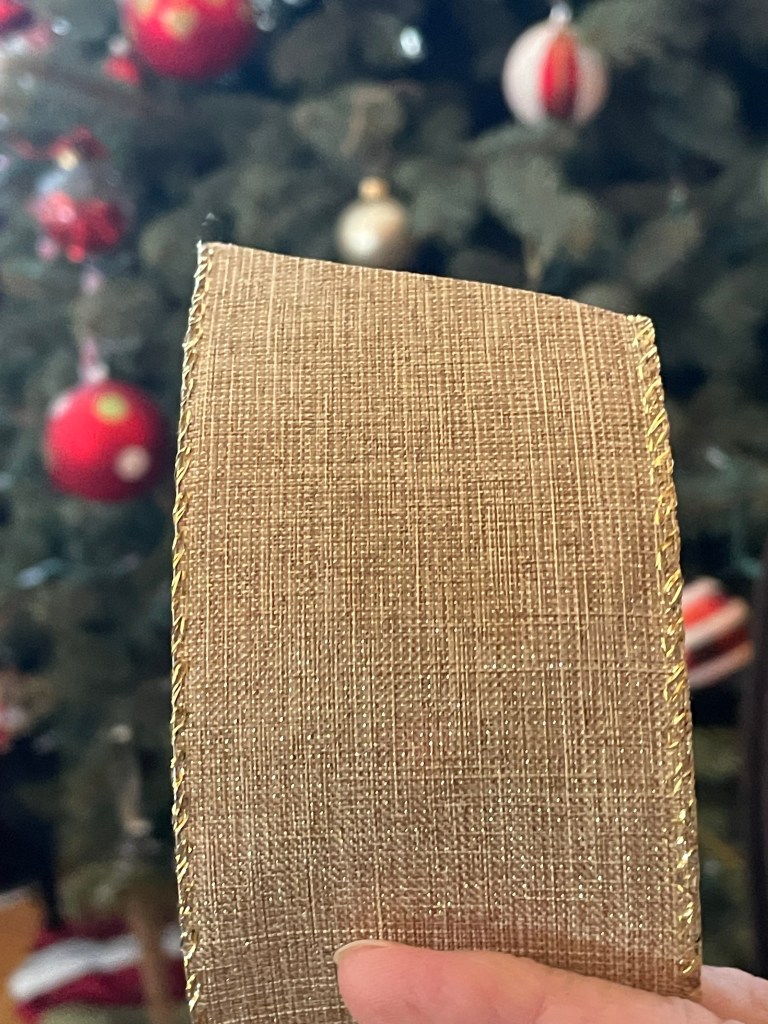
View of the 2″ wide ribbon

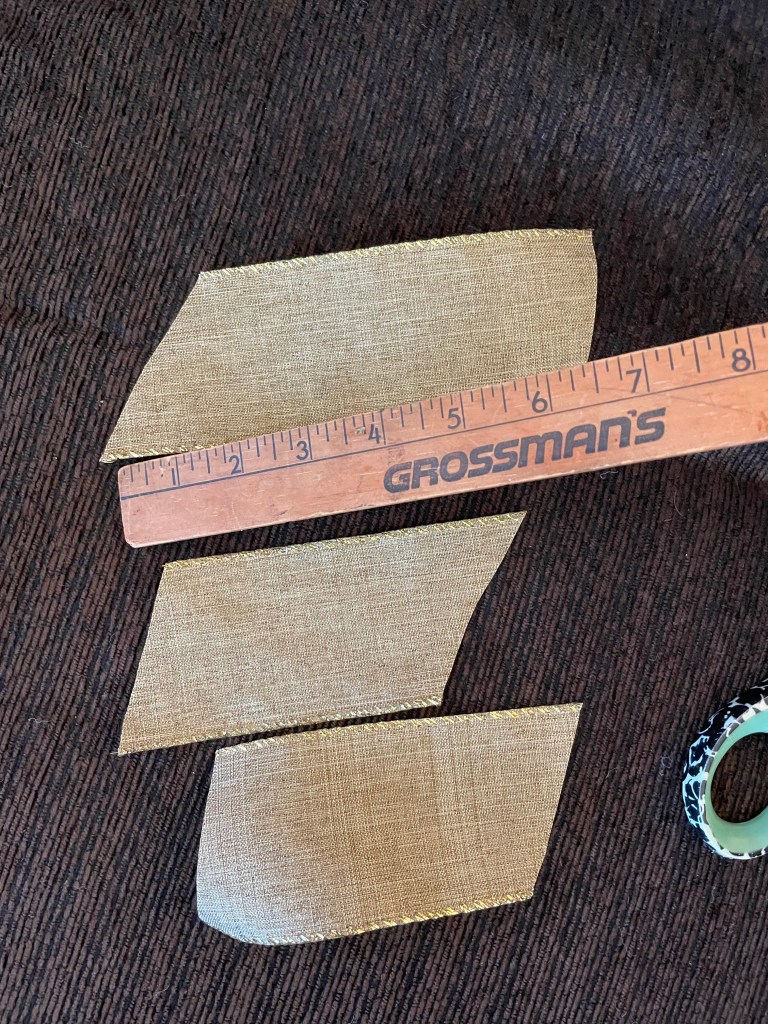
View of the ribbon pieces. I cut the pieces on an angle on the ends. Also, I suggest you keep all the ribbon cuttings the same size so make a uniform ball.

Next step is getting the 5″ Styrofoam ball. And having your wooden dowel tool ready. I had some florist like long plant sticks on hand with one end is pointy. Trying to think of tools you already have on hand. For example, I think a bamboo skewer would work. Basically, anything that is somewhat long and has a pointed end. I don’t think anything “metal” would be good, it would poke thru the ribbon.

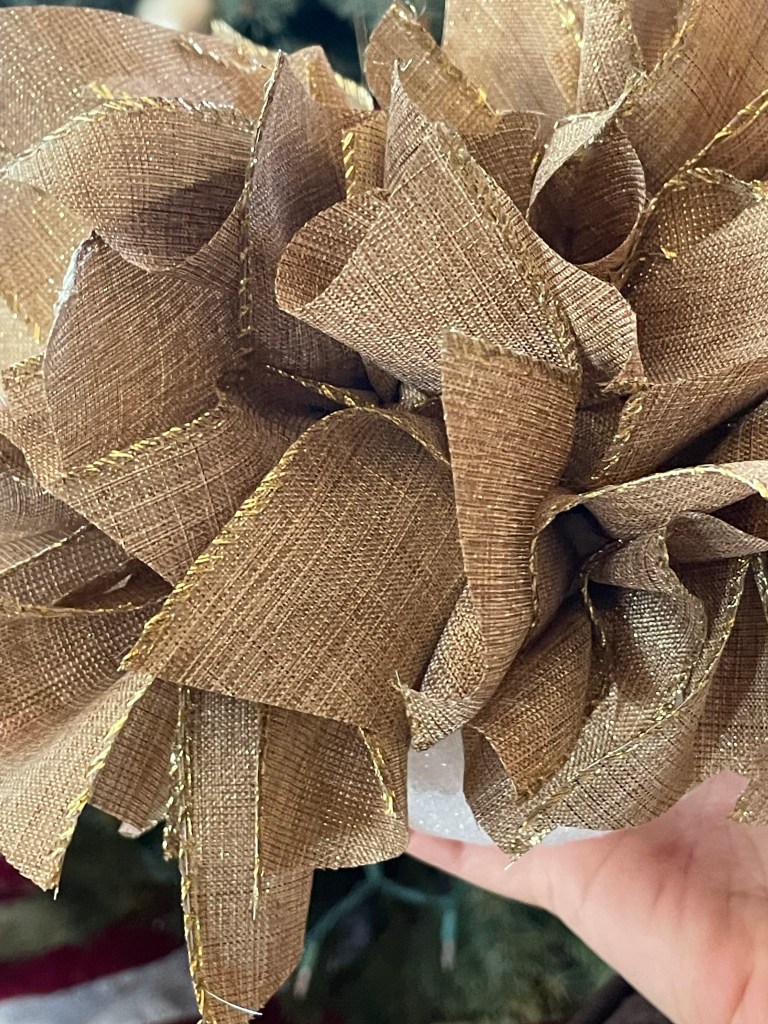
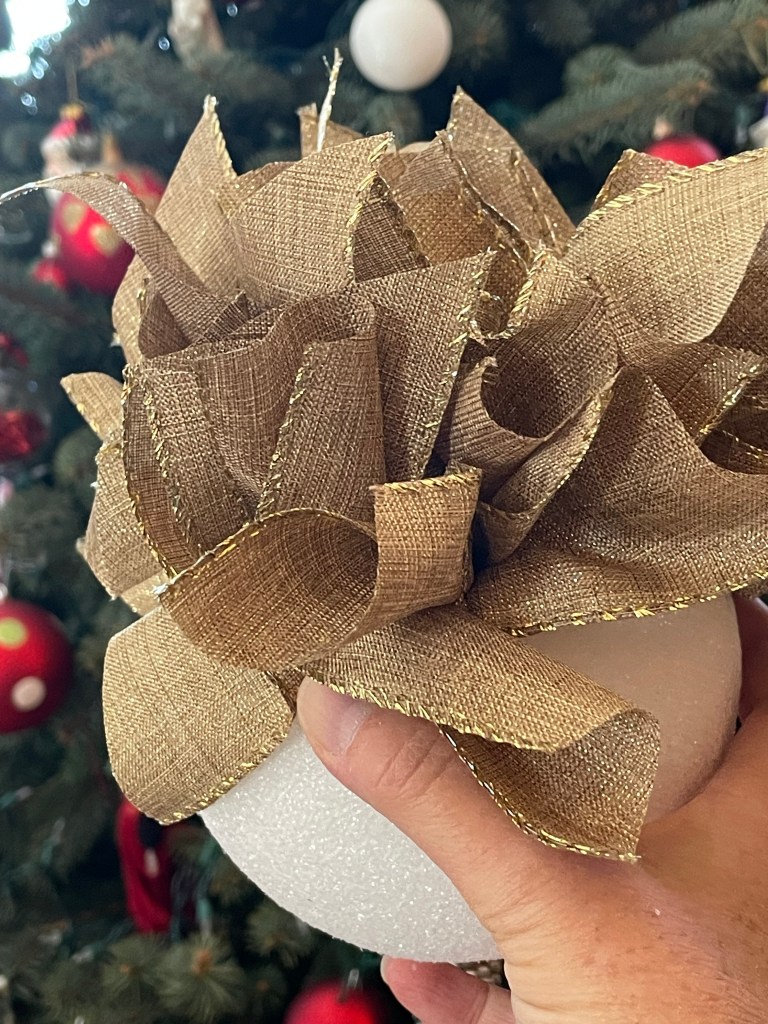
Take a piece of ribbon and push the center of it into the ball using the wooden tool. The tool does not poke thru the ribbon. Just pull the dowel tool away when you sense the ribbon piece is secure in the ball.

I believe I used at least 60 pieces of ribbon to cover the entire ball. I kept inserting each piece near the next until the ball was completely covered.

When you get to a place where you would want a piece of twine to hang it, make a loop with the twine and tie it together and put it with the ribbon to push it into the ball.

When you completely finish covering the ball, it looks like this.

You could imagine if you made several of these, you could put them in places in your tree to make it a nice design. As I mentioned before, I wanted to make red balls, but I didn’t have the red ribbon on hand.

Nice material can be used. If you had some type of cloth and cut that into pieces. It’s pretty easy to do. A a bit time consuming but I was enjoying it – to me it is Craft Therapy!

I ended up hanging the gold ribbon ball I made and it looks cute. There are possibilities with this craft item. They can be tied together like garland if you made several. They may be hung from a chandelier. Any color can be created.

Hope you give it a try!

Cathy Testa
Container Crazy CT
Date of this post: 12/19/2025

Using the dowel, insert each piece of ribbon by pushing it into the ball.

Happy Holidays

Leave a comment

Just sharing an old photo – taken the last year we held my annual holiday workshop here – before COVID. I love this photo; despite I had a cold that day and was so disappointed I couldn’t enjoy it as much as usual. I stayed away from my guests while they all crafted their holiday creations where they made beautiful wreaths and kissing balls with fresh holiday greens, so they wouldn’t catch it from me. My wine glass held juice that day, but my heart was happy to enjoy a wonderful holiday tradition we had created.

Fast forward to today; this morning, I thought about how my husband, and I created a “tradition.” Yes, the workshop was a big tradition for everyone for many years, and many have said, they miss it, but some decided to hold mini gatherings with their friends and continue the spirit. That makes me happy, that despite I do not hold this big holiday event anymore, others continued to do their own mini version of the day of creating with friends to make wreaths, centerpieces, and holiday kissing balls – to kickoff the holiday season and spirits.

Anyhow, I don’t have much to say today. First snowfall of 2024 is here – light and will melt quickly. Christmas is not too far away, and I’ve done pretty much zero shopping because I was hit with a head cold that lasted over a week! I missed some fun holiday events too, boo! Hopefully I can start enjoying some holiday fun this weekend. Looking forward to that.

In the meantime, stay safe and festive. Enjoy your traditions while they last!

Cathy T
12/16/2024

Shore Pine for Holiday Wreath Making

Leave a comment

Shore pine was not one I had on my list of greens for a few years until I discovered it. It is odd how you may know so much about plants and such, but then make a new discovery just because you noticed some sitting in a box at the supply house!

I was picking up my typical greens’ orders in early December one year, and I just happened to see it in a box on another table, and asked, “What’s this?” The reply was, “shore pine.”

Next question, of course, was, “Can I get some?”

I always wished wholesale suppliers would have classes. A manager literally rolled her eyes at me when I asked or suggested this idea. I understand, they just don’t have the time, they are so busy, and teaching us is not part of their job, but I do wish there was an intro to what they have and how to use it, especially if someone was a newbie.

Anyhow, if you are new to the world of greens for wreath making, hopefully you found me because I started writing this month about the various greens used in holiday wreaths and kissing balls. Each post is covering a different holiday greenery.

Shore pine is a needled evergreen tree or shrub. The needles appear and grow along very long stems. The whole stem is covered with the short dark green needles, so you end up with a nice long piece of fully covered dark green needles on a stem.

The stems are somewhat flexible, but I think what I liked about these the most is how long the stems were. You could literally use whole pieces of the shore pine branches to make a quick simple wreath without cutting it into pieces if you wanted to, and because they are flexible, they were easy to bend in a circle around a wreath frame. Then just using some green florist wire, wrap here and there to secure it to your wreath frame.

One year, I made some Peace Sign wreaths. I used coat hangers to make the center of the peace sign and used the shore pine wired to it – it was relatively easy to secure. Again, the long pieces of the shore pine worked well for this application.

On this wreath, I also secured moss behind the shore pine so it would be a nice green color.

Shore pine is a great item to add to the mix. It offers another texture when side by side with other greens. It also makes an excellent thriller tall piece in the center of outdoor holiday pots.

Another way that I used it was as pot toppers. Rings with greens that would be placed level on the top of a pot around the circular perimeter of it.

By just adding some wired pinecones, it was an instant way to dress up a pot. On this photo above, I used small green foam type wreaths as the base, covered them with moss, and just bent the long stems of shore pine over it and wired it in easily.

This dream catcher wreath I made has a round bamboo type wreath under it. As you can see, the long pieces of shore pine were perfect to just mold around it easily and secure.

As far as longevity of the shore pine, I would notice some minor tip yellowing after the holiday or if the shore pine was stored too long. Otherwise, it had decent needle retention and I found it was an easy use green.

Some pieces would have tightly closed cones attached too. And when provided as an item in my box of greens, it was another layer of green texture to use.

I can’t find the photo of this but years ago, a friend at my workshops, made a horse profile wreath and the shore pine is perfect to create the mane along the horse’s head portion. When I find the photo, I will update this post! But any animal like wreaths you may consider making, think of the shore pine as useful for things like that – a tail or whatever. All you have to do is get creative!

Hope you are enjoying these “greens reviews” posts and are having the time to make your own creations this season.

Thank you for visiting,

Cathy Testa
Container Crazy CT
Broad Brook, CT