As mentioned in a prior post on this site, I started playing with air-dry clay to make holiday decorations. It is more about crafting therapy for me. I find working with my hands, even on simple crafts, allows my mind to relax. I suffer from tinnitus (ear ringing) and when I’m focused on something else, it relieves my symptoms at times.
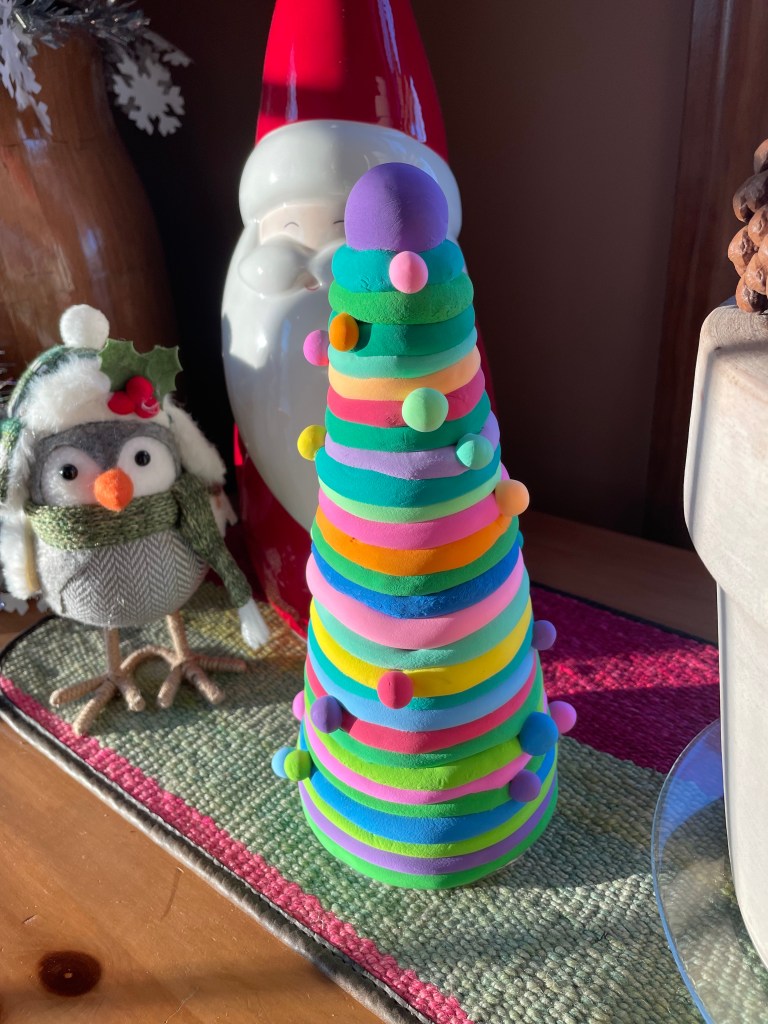
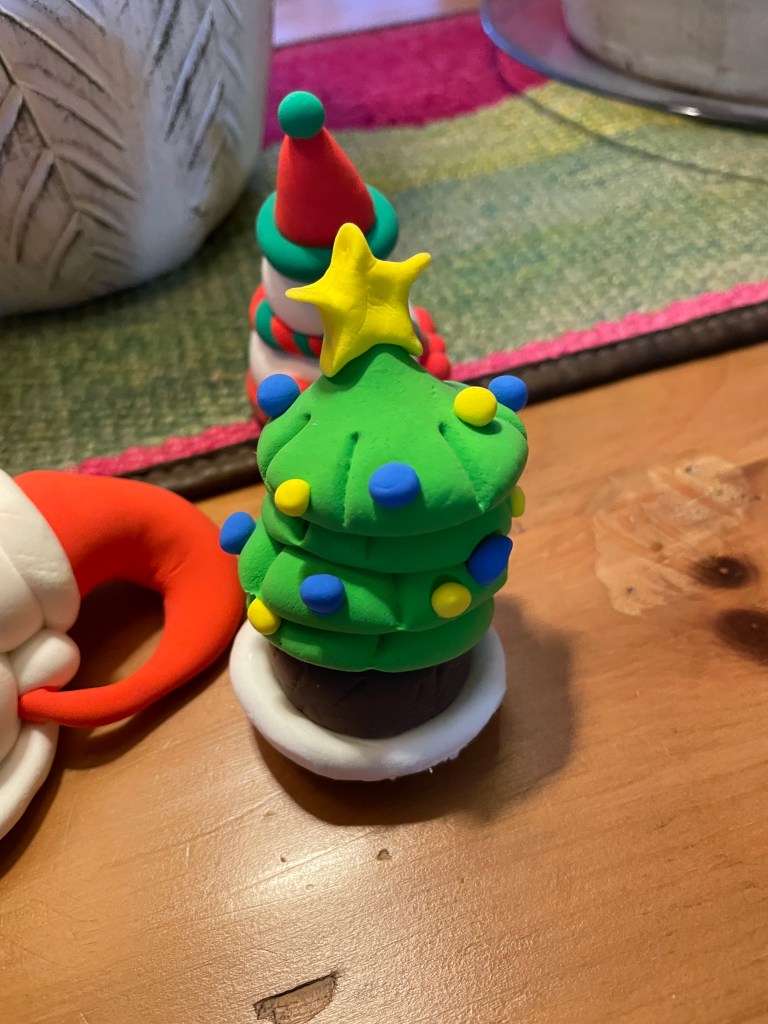
One fun creation was this holiday tree I made which is festive and fun. The colors are bright and vivid. It was an experiment and rather easy yet very fun to make!
Air-dry clay can be found on Amazon of course, like almost everything else! This one is labeled as:
36 Colors Magic Clay Nature Color DIY Air Dry Clay with Tools as Best Present for Children Toy for Kids.
It arrives in little packets of 36 different colors. The packets, more like pouches, are 0.45 oz each. They are plastic packets which seal on the top to help the clay from not drying out. The clay is light and is not baked after making something with it. It naturally dries to what I think feels like a hard foam of sort. It was about $8.99 to get the magic clay, as they called it.
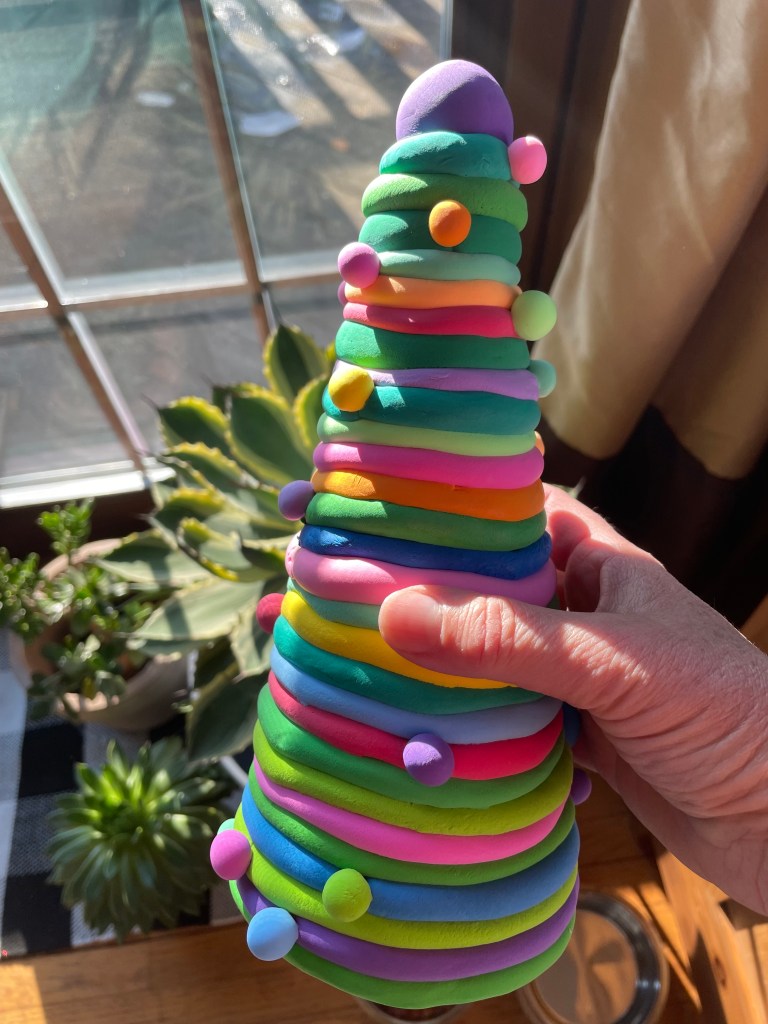
This is what I made with the clay recently. I like the colors. Festive, fun, and “Who-ville” like in my mind! I decided to use a Styrofoam cone center. I wrapped the cone in plastic wrap and began to create.
I selected colors one by one. I thought I should place a type of green color between each vivid color. Working from the bottom up. I would take clay out of the packet. I rolled it into a worm-like shape. Then I wrapped it around the foam. Remember, the foam also was wrapped in plastic wrap.
I connected the worm-like shape to form a ring around the foam for each layer. The ends were going to be attached. This would leave a line at the connection point. I decided to make that line at a different place for each “ring.” This way, I could add a little ball over that line. Hopefully this is making sense. I didn’t want each ring’s connection point to have a line all the way up. They should not be in the same place on the tree.
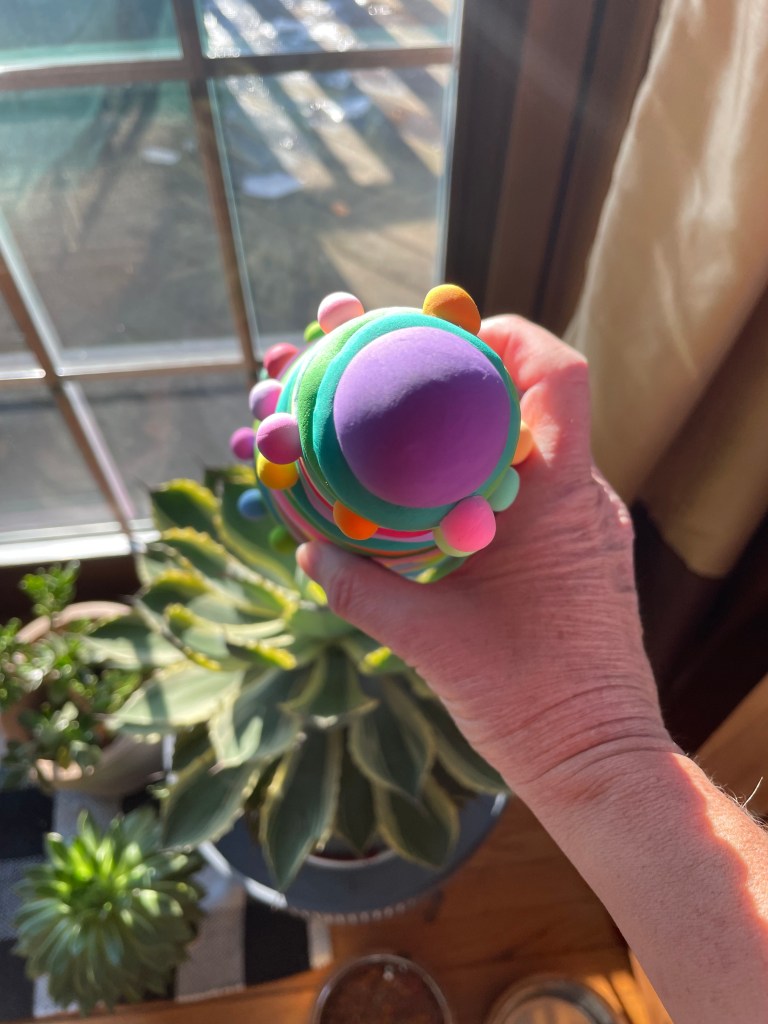
When I got to the top, I put a ball on top to finish it off. Each ring rolled out on a board before applying it to the cone was therapeutic to me. I put on a holiday movie and just enjoyed the whole process. Again, I worked from the bottom up.
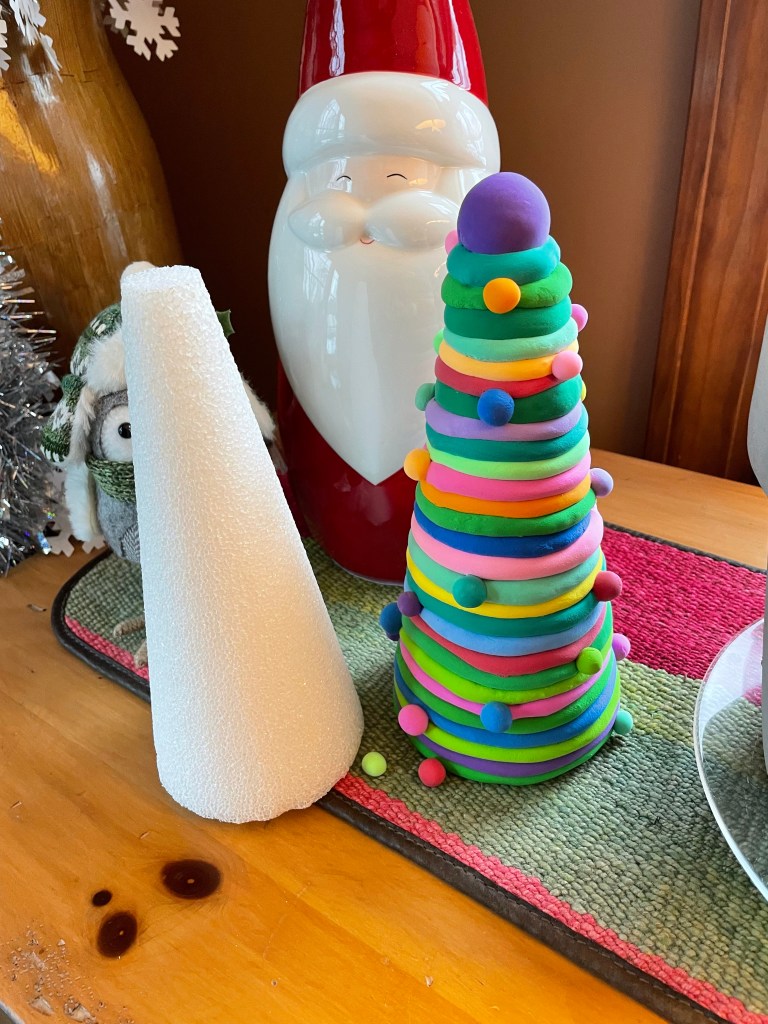
Air dry clay dries slowly. I have found when I made other three-dimensional items, they flop as they dry. The idea of using the foam center as a mold was to keep the tree upright as it dried out.
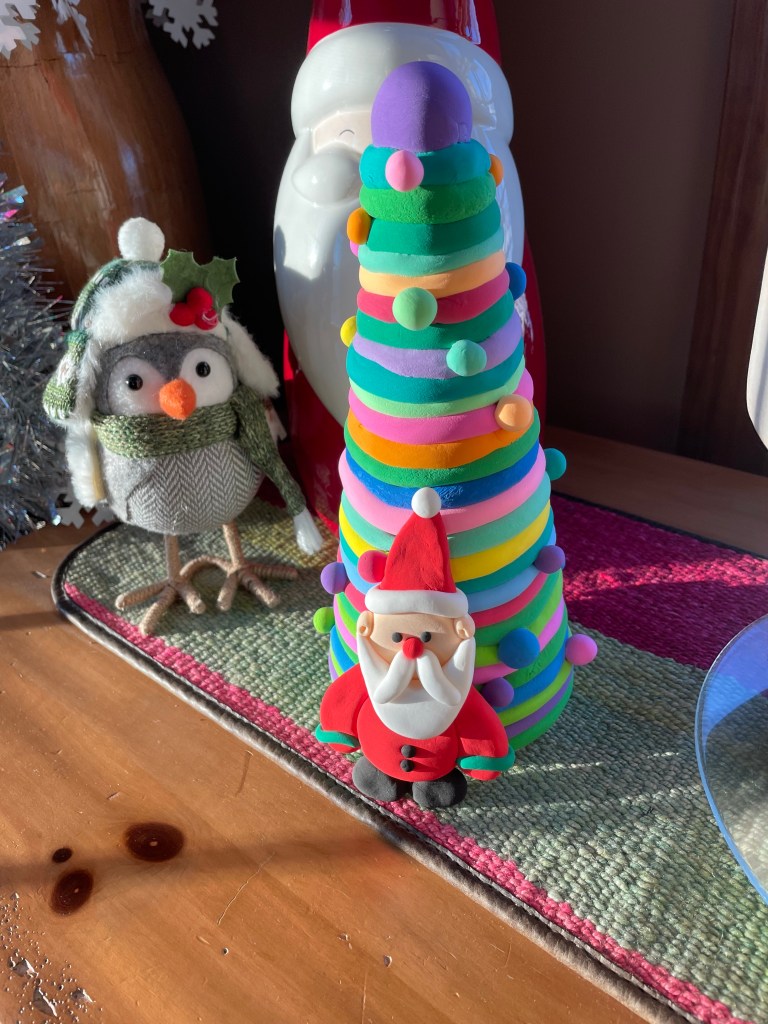
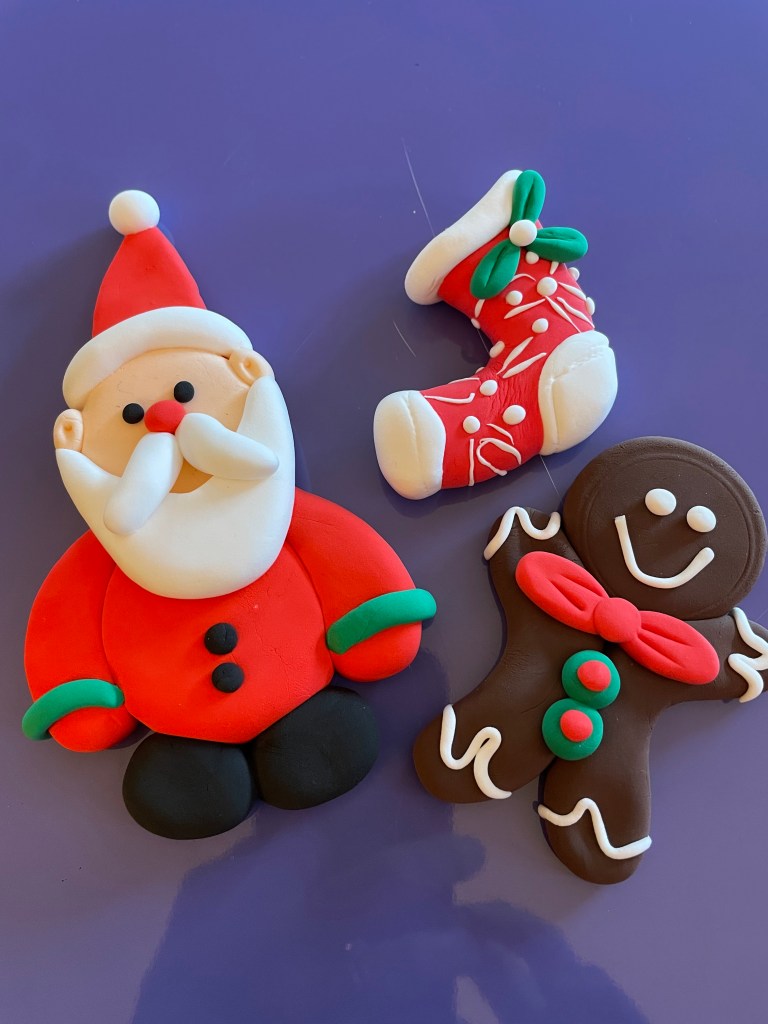
I let the air-dry tree stay on the foam center for about two full days. I started to contemplate adding my other little ornaments I made. These include the Santa. I decided not to add them to the air-dry clay tree.
The flat ornaments I made of the Santa, stocking, and gingerbread man were fun to make too. In the end though, I think I loved making the festive funky color tree the best! I ended up making the other items (the Santa, stocking, gingerbread man) into ornaments to hang on my tree.
The last step of the tree was to remove the foam center. I gently tugged on the plastic wrap and eventually it came out. The center inside the tree was still damp. It slowly dried and the tree did not flop. If you put plastic wrap on the foam, leave a tail at the bottom end. This ensures you can grab it by the plastic wrap to pull it out of the air-dry clay tree. If tugging at the plastic wrap does not work. Take a tool to poke up the foam form on the bottom to try to grip it out.
As I worked on the tree, I started to add the balls for each ring. This was done to cover where the worm-like rings connected. Don’t wait too long to add the balls. It is best to add them while the clay is still damp so it sticks.
Here is the underside of the tree. This was another easy craft to make. The key is using colors that work together. And just enjoying the process.
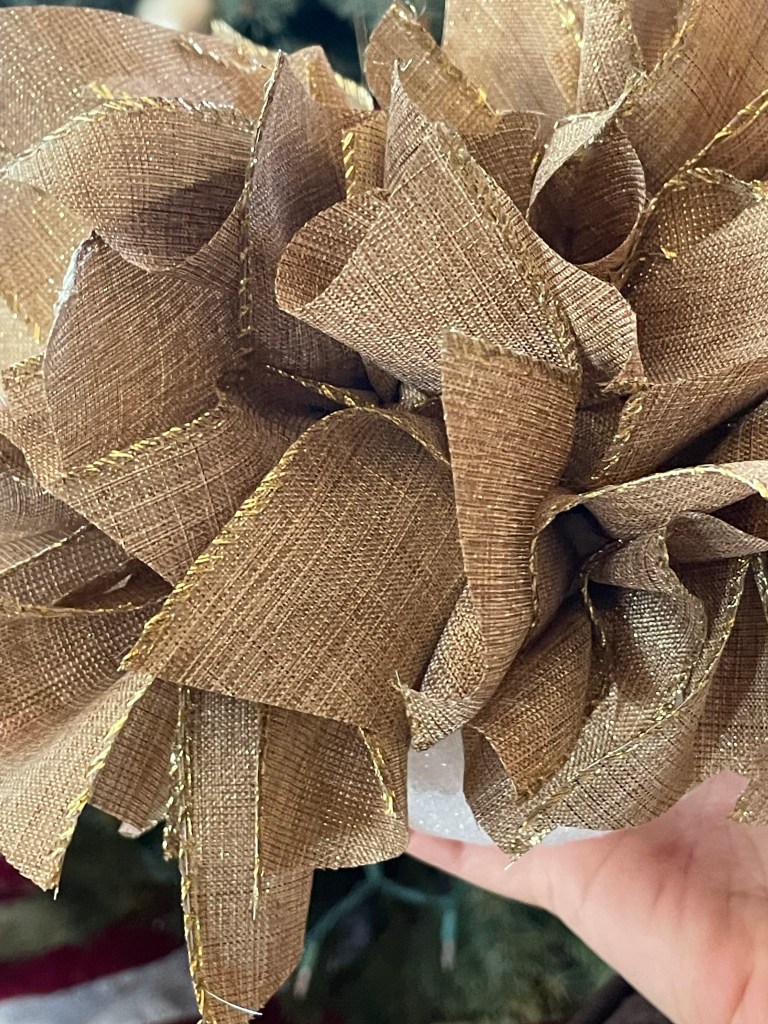
I discovered a very simple method to make pretty holiday balls using a Styrofoam ball and holiday ribbon! I wish I had discovered it earlier. I would probably have many of them to put on my Christmas tree.
Supplies needed:
5″ Styrofoam ball or bigger if you wish Holiday ribbon (I used 2″ wide solid gold ribbon) A wooden dowel like tool with pointy end (a bamboo skewer would work) Sharp scissors 1 piece of twine (3″-4″) to make a loop to hang
Video:
At the very end of this post is a video showing how I inserted the ribbon pieces. Scroll down to see.
Steps:
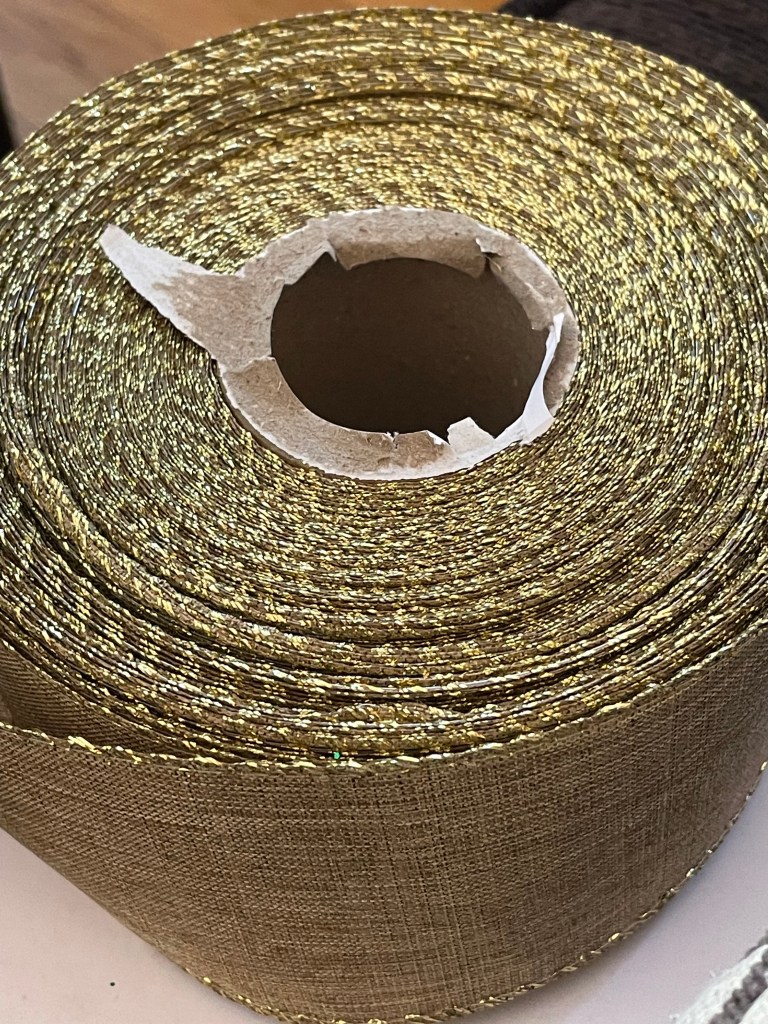
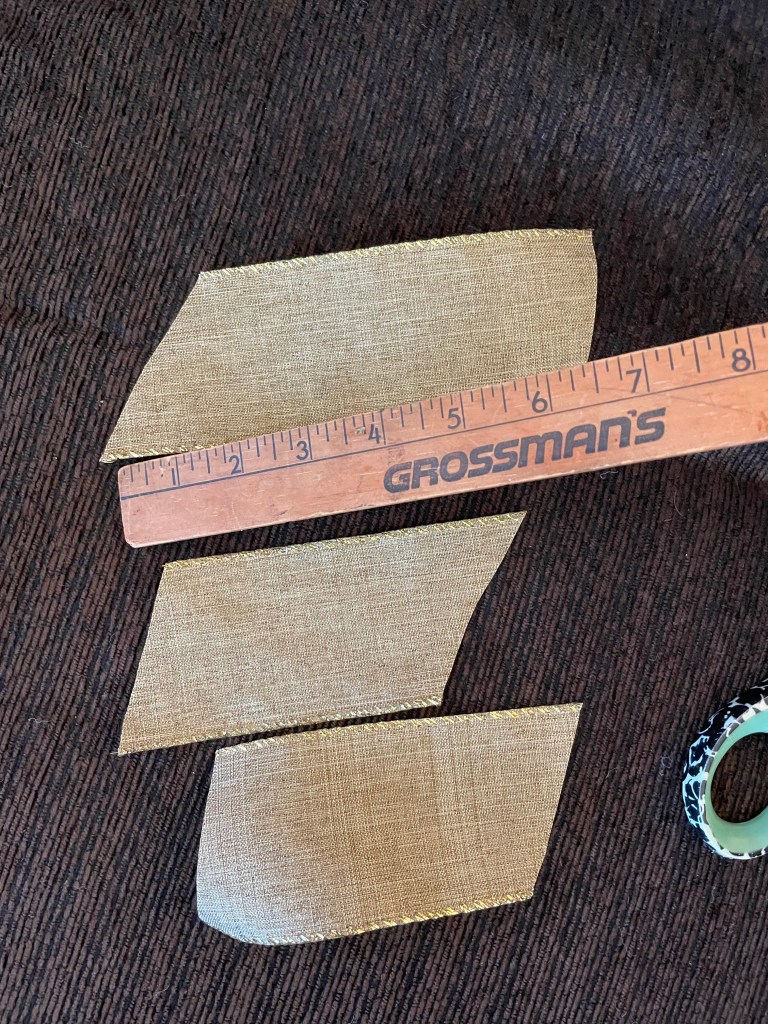
Cut the ribbon into pieces (see below). I went with between 5-6″ lengths. I believe I cut at least 60 pieces from the ribbon roll I had on hand. I wanted to do red, but my red ribbon on hand was shear and shiny. I knew the “white Styrofoam ball” would show through sheer ribbon. Cloth pieces can be used as well, but using ribbon for me was super easy. I grabbed a roll of the solid gold ribbon I had in my craft stock. I used sharp scissors to cut pieces 10 at a time.
Golden Ribbon above on a roll. It was wired ribbon, but I don’t think wired ribbon would be required.
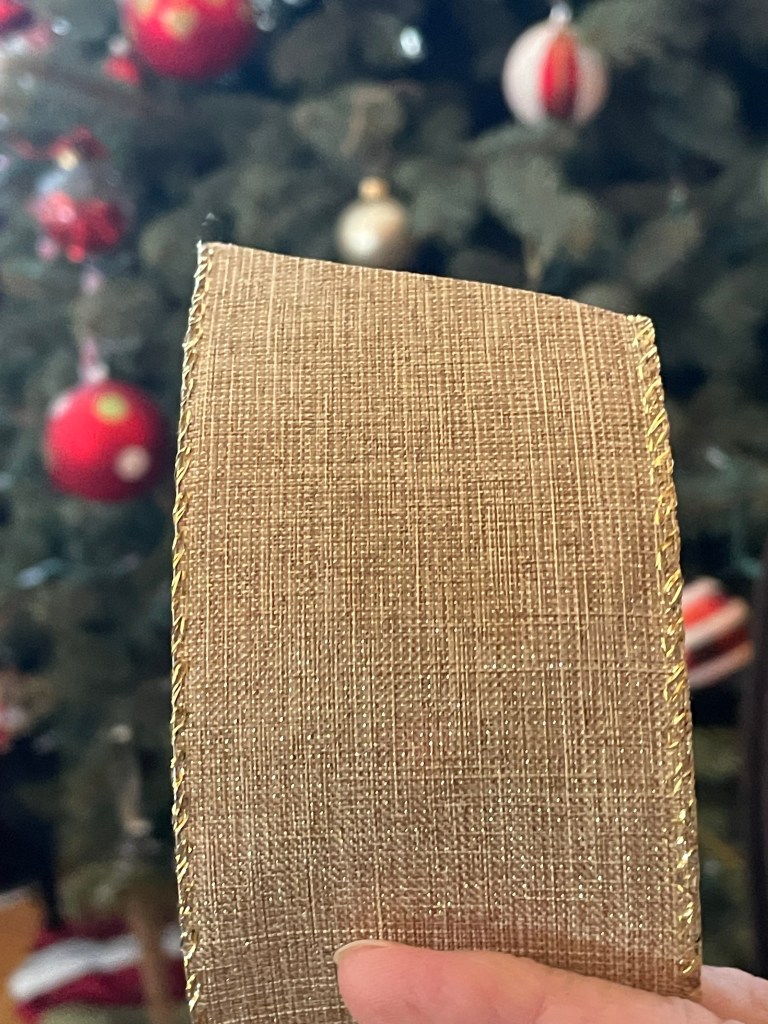
View of the 2″ wide ribbon
View of the ribbon pieces. I cut the pieces on an angle on the ends. Also, I suggest you keep all the ribbon cuttings the same size so make a uniform ball.
Next step is getting the 5″ Styrofoam ball. And having your wooden dowel tool ready. I had some florist like long plant sticks on hand with one end is pointy. Trying to think of tools you already have on hand. For example, I think a bamboo skewer would work. Basically, anything that is somewhat long and has a pointed end. I don’t think anything “metal” would be good, it would poke thru the ribbon.
Take a piece of ribbon and push the center of it into the ball using the wooden tool. The tool does not poke thru the ribbon. Just pull the dowel tool away when you sense the ribbon piece is secure in the ball.
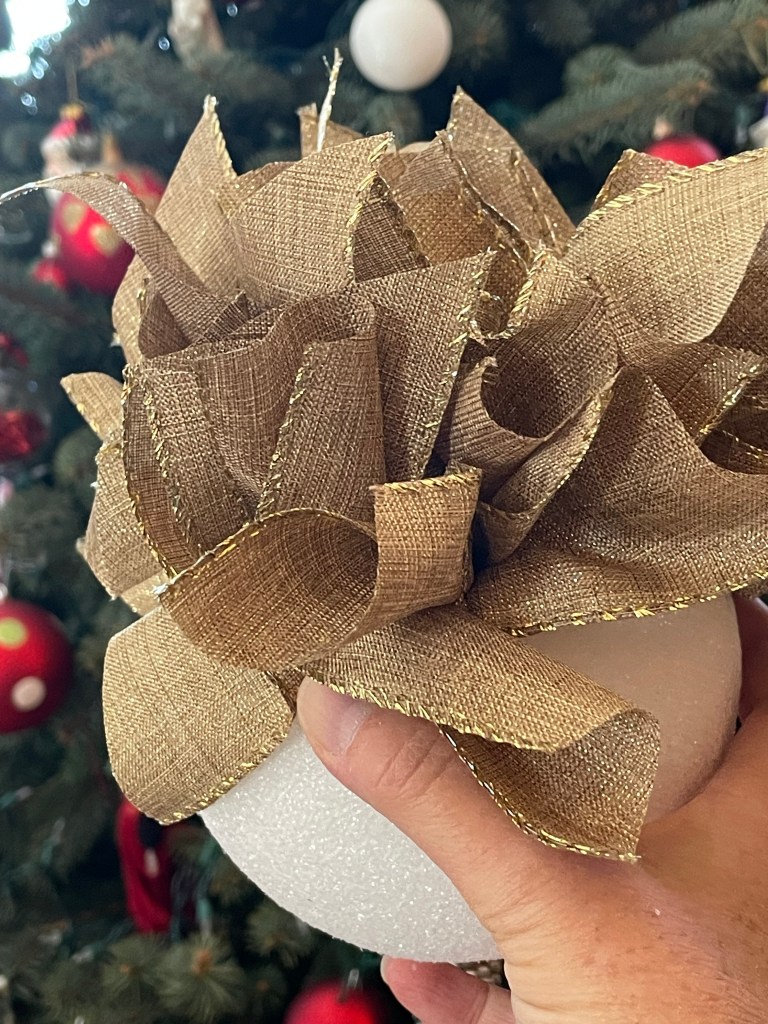
I believe I used at least 60 pieces of ribbon to cover the entire ball. I kept inserting each piece near the next until the ball was completely covered.
When you get to a place where you would want a piece of twine to hang it, make a loop with the twine and tie it together and put it with the ribbon to push it into the ball.
When you completely finish covering the ball, it looks like this.
You could imagine if you made several of these, you could put them in places in your tree to make it a nice design. As I mentioned before, I wanted to make red balls, but I didn’t have the red ribbon on hand.
Nice material can be used. If you had some type of cloth and cut that into pieces. It’s pretty easy to do. A a bit time consuming but I was enjoying it – to me it is Craft Therapy!
I ended up hanging the gold ribbon ball I made and it looks cute. There are possibilities with this craft item. They can be tied together like garland if you made several. They may be hung from a chandelier. Any color can be created.
Hope you give it a try!
Cathy Testa Container Crazy CT Date of this post: 12/19/2025
Using the dowel, insert each piece of ribbon by pushing it into the ball.
Last year, I started playing around with air dry clay and making things with it for fun. No stress. Just a way to use my hands and play with clay.
Recently, this year, I made a few items and thought I’d share how it all went. First, I purchased packaged clay on Amazon. (BTW, I get no kickbacks from sharing thoughts on Amazon products, it is just FYI).
It was air dry clay for kids with six molding designs. This basically means a set of different colored clay portions came in six separate envelopes. They were nicely packaged. It had a little card to help you figure out how to design what is shown on the front. Here’s a photo of one to make a little wreath.
I liked the envelopes because if you have any clay left over, you store it in the package/envelope.
The instructions included in the packages were pretty basic. It was just a little card to show steps, but it was easy to understand. It had all the right holiday colors like red, green, white, etc. to make the item depicted on the front of the package.
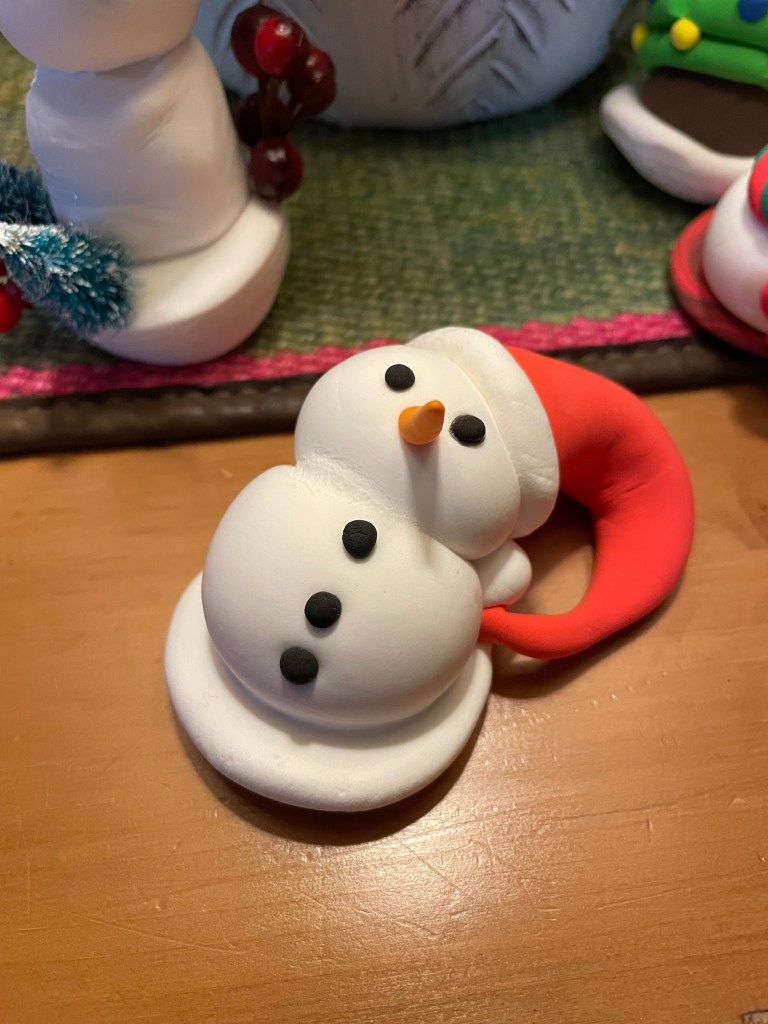
What I have discovered with air dry clay is that it can flop. It is a little frustrating. I’ll make an item, like a snow man. As it dries, it starts to lean or flop.
In fact, my snowman started to turn into a melting snow man. Not literally melting, but you see below in the first photo how it is all the way over, like Mr. Snowman had a bender the night before.
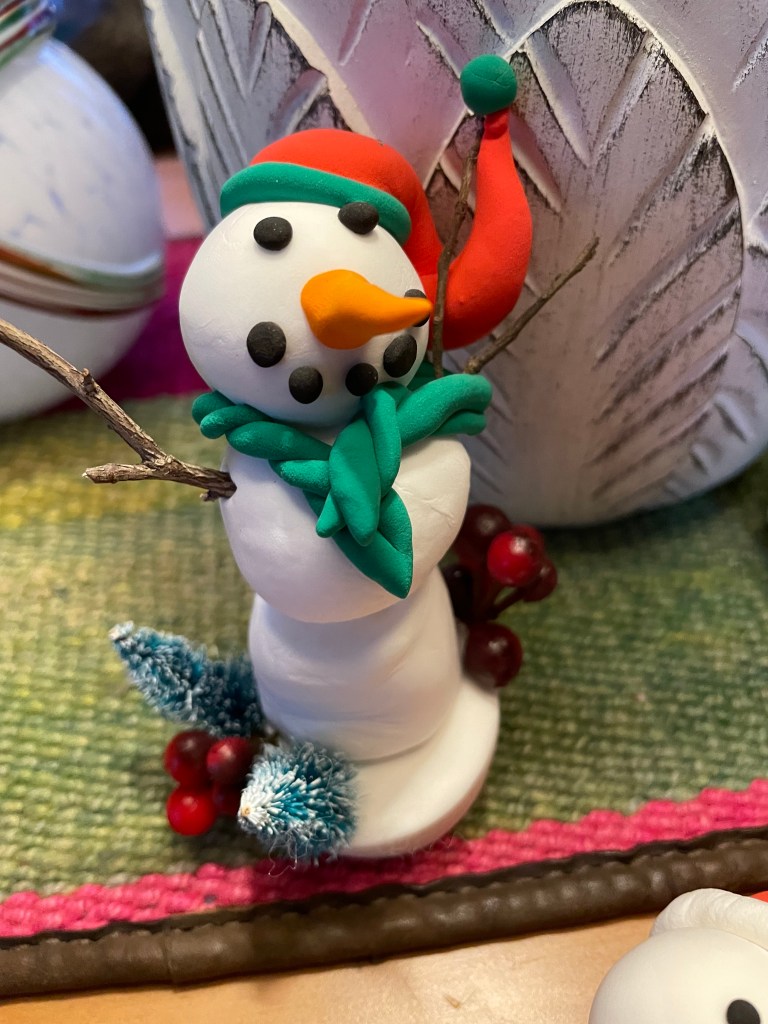
The snowmen I ended up making were all different. I didn’t follow the package’s formula or design for the snowmen. I was just playing around with it. Adding little embellishments is easy as well, just stick into the clay like the mini trees and berries.
Here’s a tree I made where I did follow the design packet’s instructions. But again, it started to lean as it dried. The clay is soft and when it dries completely, it feels like a hard marshmallow texture.
The clay was leaning all the time. I thought, “Well, let me try to make some flat items instead of three dimensional.”
I really like how the flat creations came out. They look like Christmas cookies or even fondant cookies that would go on a cake. In fact, if a little kid was around, I would need to be careful. They would think it was a real cookie and take a bite!
This is when the fun started to kick in for me. I want to make more and will do so. I’m just trying to think of how to use them. I really don’t want to make ornaments, too traditional. Maybe they would look cute attached to something. Maybe I should make a fake cupcake and put it on the top – like a dessert! Or a fake cake?
Anyhow, that is about it for this post. These types of simple crafts would be fun to do with kids. The instructions are basic. The cleanup is easy.
Tips on the clay – once something is attached, it is not easily removed off. If you wet the clay and rub it, it will smear the color. You don’t want to do that. Any unused clay also needs to stay in an enclosed package to not dry out. It is best to use the clay relatively quickly because eventually it will dry out.
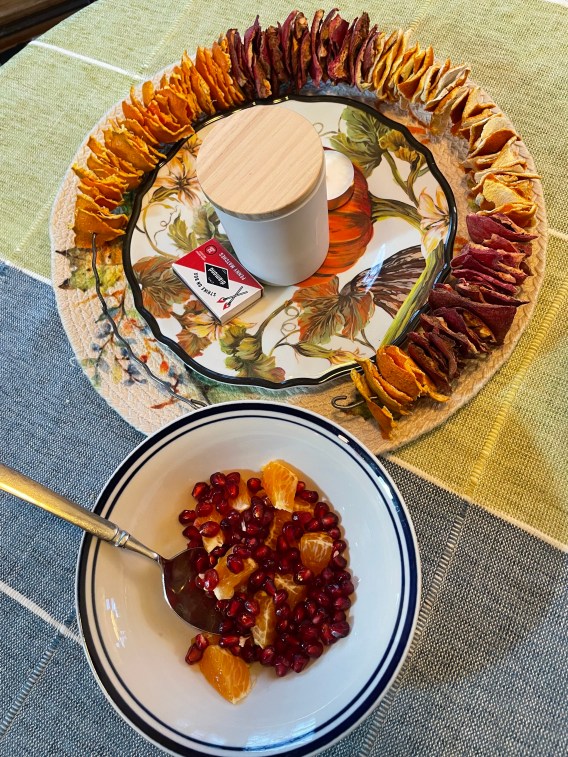
I discovered a way to make a cute wreath with citrus peels. I saw a lady do this on a social media feed and thought how cute the wreaths looked, mostly for fall and Thanksgiving season, however. Also, it is kind of neat because using citrus peels is like recycling something that would have ended up in the trash or compost.
Another bonus is my husband really enjoys eating citrus fruits. And this time of year, pomegranates are in the grocery stores, so I used those as well. The darker red peel color worked really well against the colors of the oranges, clementines, even grapefruit. You could use limes or lemons as well.
It is super easy, and I happen to have crimped single wreath rings in my stock of craft supplies, but this could easily be done with a clothing wire hanger cut and formed into a circle. I had my husband cut my crimped wire frame so I could push the peels onto my wreath frame, and I got underway.
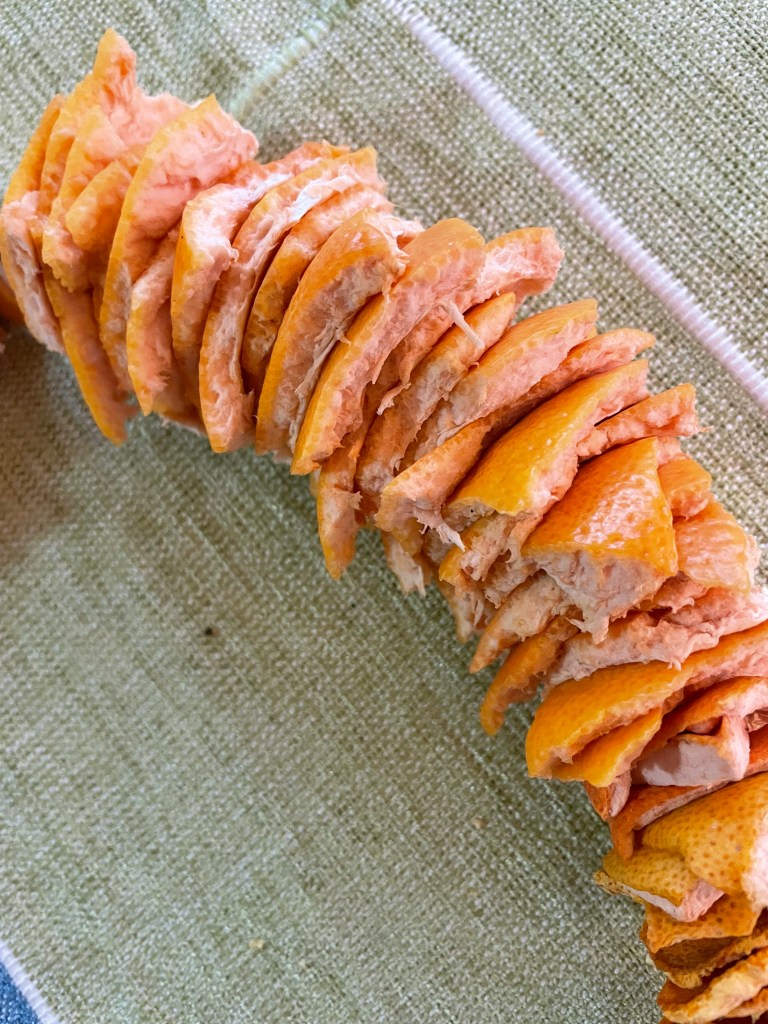
Anytime he or I had an orange or other citrus fruits as a snack, I asked him to save the peels. Then I tore them into pieces. It doesn’t matter the shape or size of the torn pieces. Can be random.
Above you can see the pomegranate peels, and I believe next to it is the grapefruit peels. It sure did smell good when I pushed the grapefruit peels onto the wire.
I did like grouping them, so all the peels were facing the same direction as it added more color.
In this photo above, I did some back-to-back and didn’t really like it – I preferred all the same direction to add more color so all the peel-colored sides face the same direction as they were stacked on.
This was when I finished. I just needed to add a bow. I think this is a great wreath to make for Thanksgiving. And they probably would be adorable in an even smaller wreath size. I think this was a 10″ wreath frame size. There are so many decorative options with this – could do some embellishments if you liked for fun.
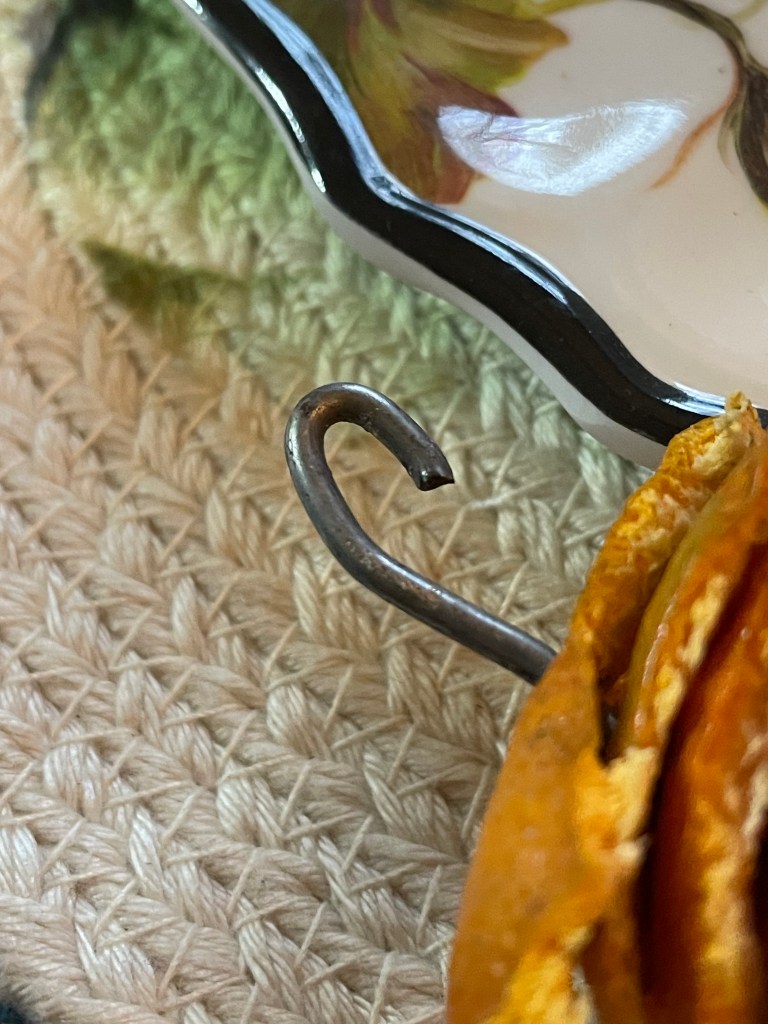
My husband made this loop at one end and then made a little hook on the other to reattach the frame ends together when done putting all the peels onto it.
There are the pomegranate seeds and a clementine also used. They were yummy together – and pretty colors. It just takes a while to collect all the peels. I would just keep them in a bowl and then try to attach them to the frame rather quickly before they were too dry.
I forgot to take a pic of the bow part and now it is stored away since we are onto Christmas decorations. But this was an easy, affordable, and creative little craft project. I recommend wearing gloves because the wire started to blacken my hands while working on it – due to probably the acid of the citrus – I don’t know.
It dries naturally and smells nice while it does so. I suppose you could add essential oils on it later to add more fragrance to it.
Cathy Testa
Date of post: 12/6/2025
And PS – sorry I didn’t post this sooner. Making this in early November is best timing. Good one to remember for next year.
I always had a love of working with clay and dream often of turning my greenhouse into a clay studio, but then I start to think about the associated costs (pottery wheel, clay, heat, kiln, etc.). Being retired now, those are substantial hobby costs, so I have yet to make that kind of move.
Anyhow, one day, I discovered that there are clays which do not require a kiln. Kilns are expensive (used to harden clay, like in an oven). When I discovered a kiln is not necessarily needed, my brain bulb went off, off to Amazon that is as I searched for air dry clays.
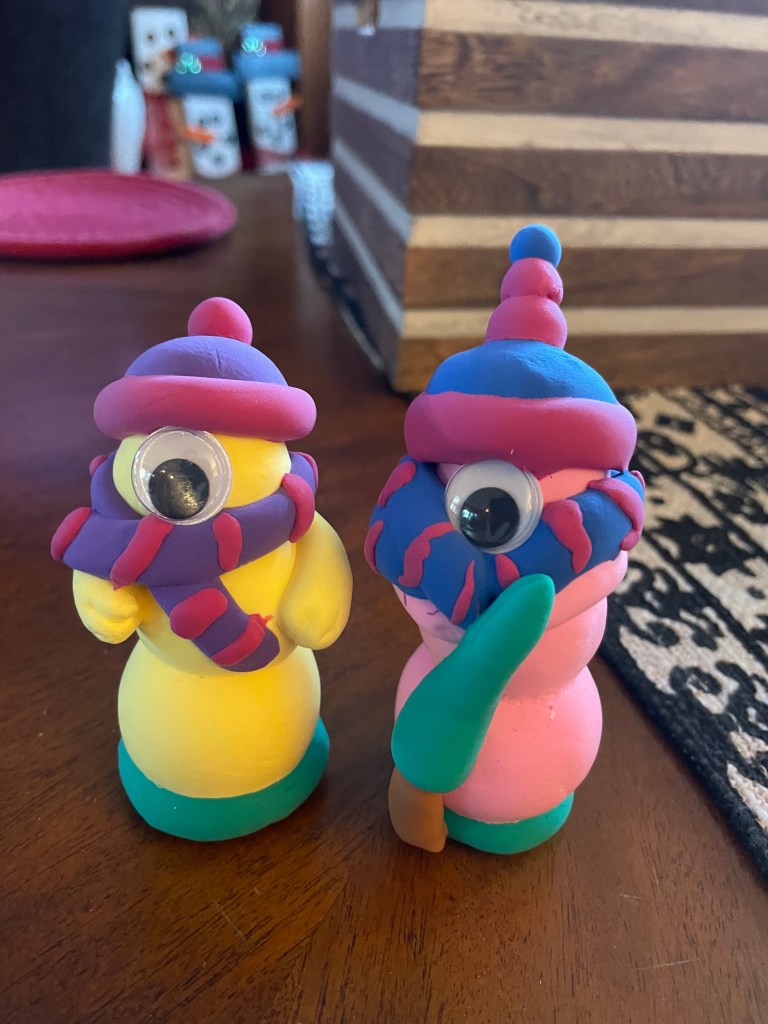
I decided to play with kids clay first. Basic modeling clay that comes in many colors. I figured, let’s see how this stuff is and play around with it. The clay comes in kit boxes with lots of colored clay in little packets and maybe some small tools. Easy to find on Amazon. I guess I really like working with my hands. I made some snowmen shapes and learned some tips as I experimented with the box of clays in many colors. It is relaxing to roll and mold around clay like this, and it was fun.
Then I discovered a more mature version of air-dry clay. It is a pure white hardening modeling clay. There is a brand called DAS Air – Hardening Modeling Clay, sold in 2.2 lb blocks on Amazon. I ordered a block and started to experiment with it after watching a few YouTube videos where crafters showed their air-dry creations.
Here’s what I ended up with and some notes on my experience so far as I compared the two types of clay.
Isn’t he cute? The kids’ kit came with the googly eyes, so I thought, hmm, let me put one and make it fun. The texture of this clay, once it is all dry, is like a marshmallow but a bit harder.
What I discovered about this modeling clay for kids is it is easy to “roll” into shapes. I actually used a white board (small size) I had to roll on while sitting in the living room watching random tv. What I discovered is putting two balls together was super easy with this clay, it just sticks together but once on, it can’t be pulled apart without ruining it.
The kid’s clay is also easy to roll, like into a sausage link or wormlike shapes. Then I wrapped it around as a scarf and added embellishments. The hat was made in a similar fashion. Making balls and log type shapes worked well with this clay versus “sculpting shapes”. One key thing is once it is attached, it can’t really be moved or repositioned, it sticks on right away.
A big plus is it doesn’t require slip (clay slurry used for joining two pieces of clay together) and scratching (or score) to put the two “balls” together, like with regular clay or the DAS clay (shown below this).
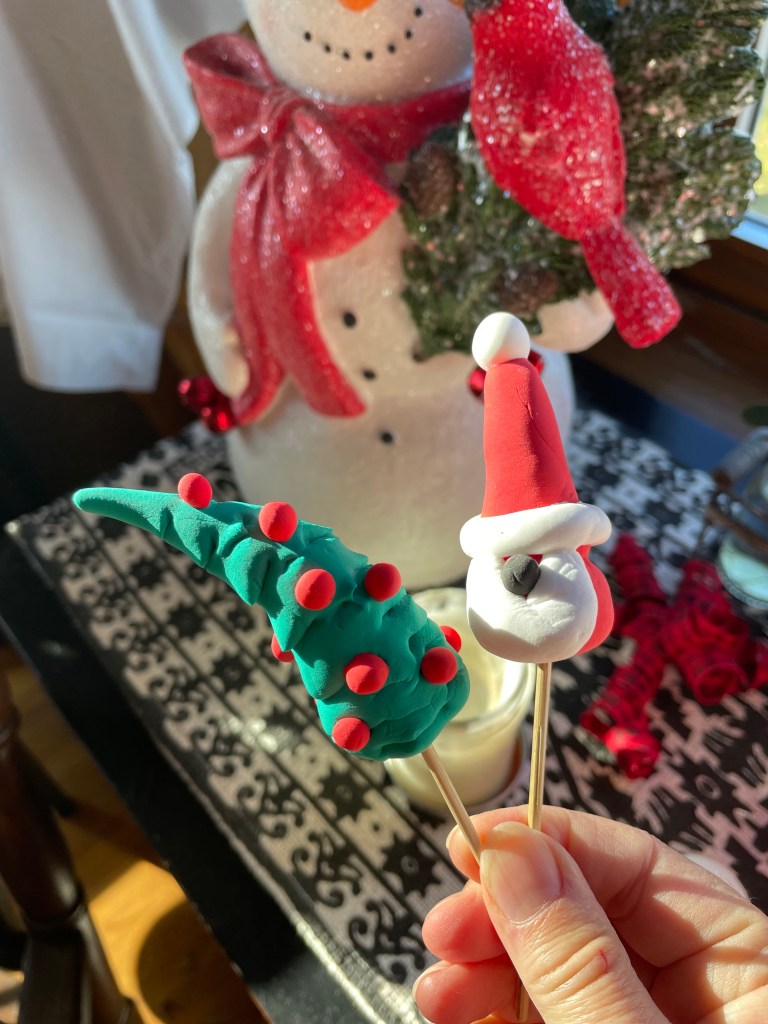
It was also super easy to insert a stick if you wanted to put your creation on a pick and insert it into holiday crafts. I think I will definitely create more sophisticated versions of these snowmen next Christmas. I also have been trying to make bunnies with this type of clay and will show those at Easter.
Now for the downfalls of this type of kid’s clay. First, it tends to bend or flop over as it dries a little, so I used a cup to make it stand upright. I discovered as it dried, it would not stand up flat – that is why you see a green disk on the bottom of my snowmen to help them stand upright. I added the disk after the snowmen was a bit drier but not completely dry. And the other down fall is this type of clay does dry out in the baggies for the rest unused clay than other clays, and then it somewhat not useful, so you have to keep it in sealed baggies or use it right away (or relatively soon, I think). Like I don’t think it will last very long once each color packet of clay is opened. I found the DAS adult version of clay to last much longer in a zip lock baggie after a block was opened. Plus, the DAS may have water added to it if too dry.
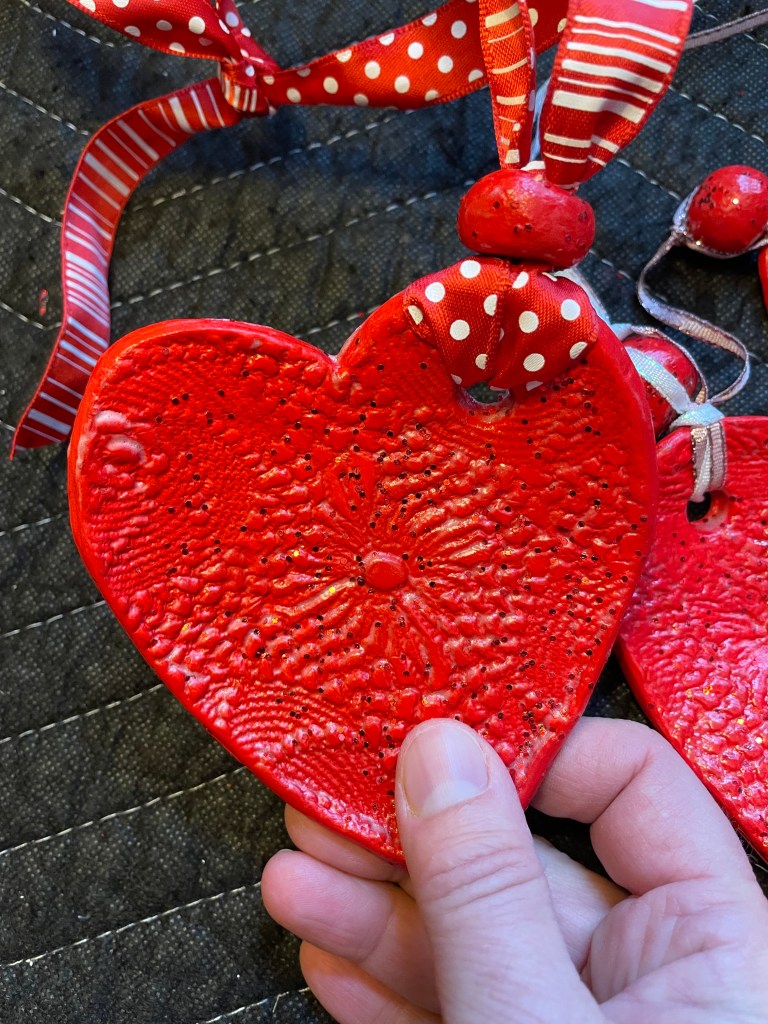
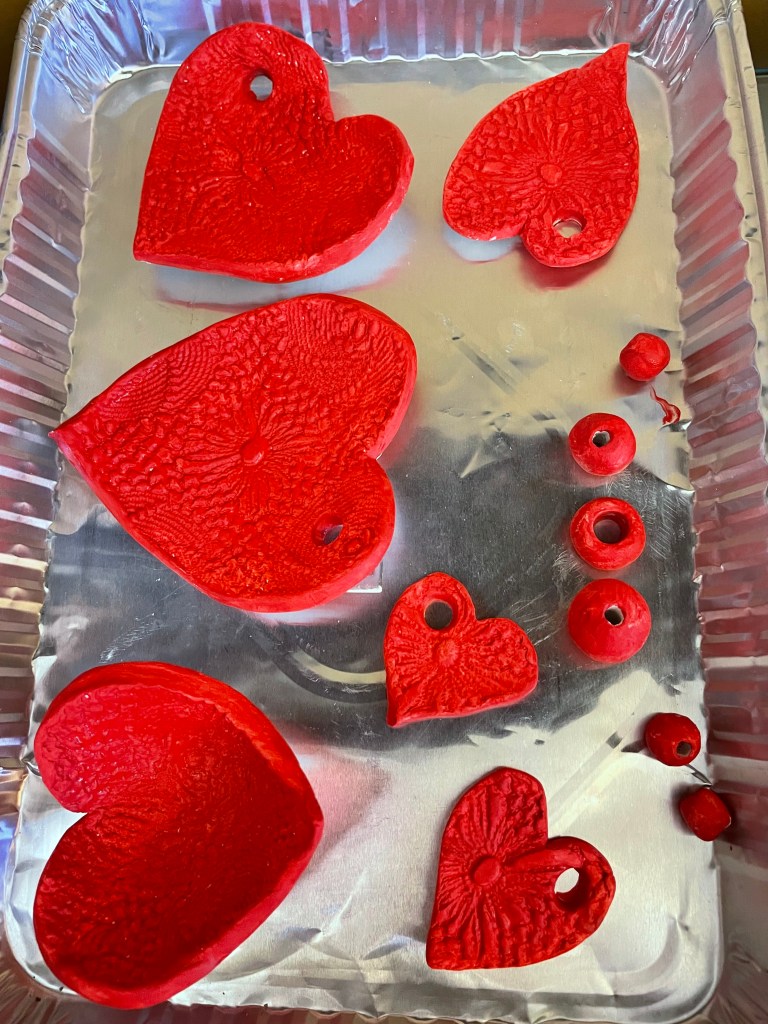
Now for the DAS Air-Hardening Modeling Clay. This is the type of things I made for Valentine’s Day. I really love how the heart bowl came out. I used basic acrylic craft paint after my creations were dry to paint on the red color. Then I remembered I had some red glitter in my stock, so I mixed that into the acrylic paint to add some sparkle.
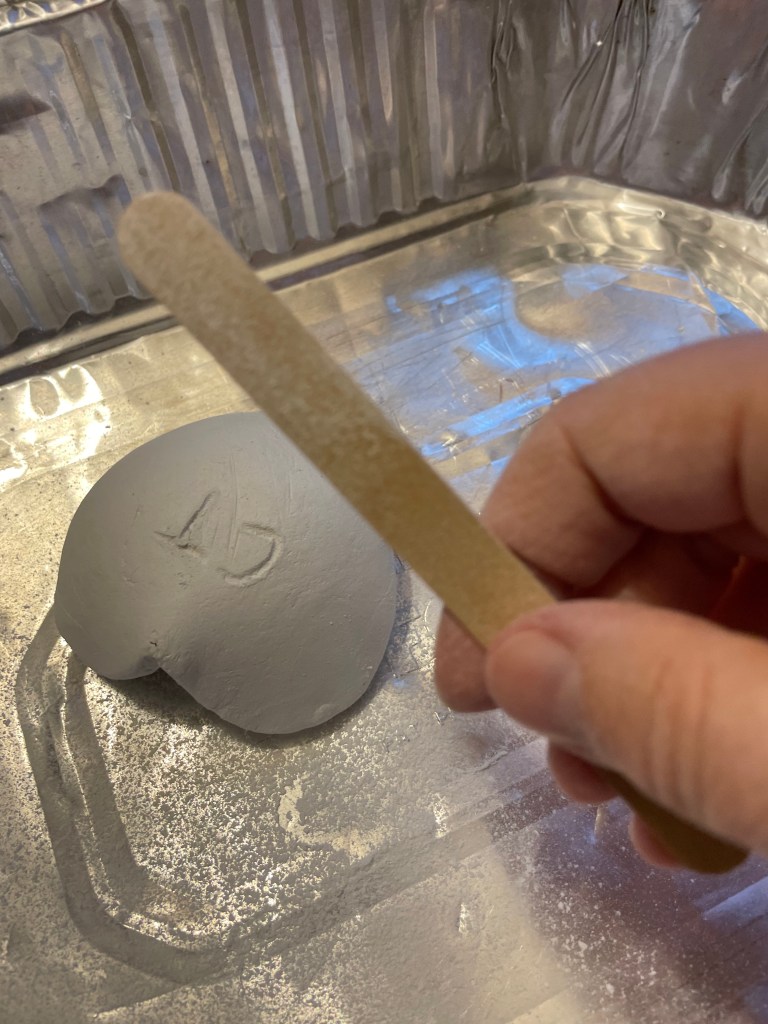
Here’s my heart bowl before in the white dry state – I love this one the best especially after the color red was added. I saw one YouTuber show how easy it is to press fabric doilies into the clay using a rolling pin. I knew I didn’t toss those old doilies for a reason; I had a bag of doilies in my basement! Once you roll out the clay, imprint the slab, and cut it into a shape, you can put in into plastic wrap covered bowls to form a bowl shape – that is basically what I did. I let it sit in the bowl as it dried.
It was easy to make little balls and insert a hole through the middle with a wooden tool, which I am happy I thought of, cause I wanted to hang some hearts made with the DAS Air-Hardening clay. It worked great!
Luckily for me I had some red ribbons in stock to use as hangers. And with the red glitter added, they sparkle in the sunlight hanging in my windows for Valentine’s Day decor.
These two were smaller and I hung them from antique glass bottles. Cute. All were glazed after the red paint completely dried by using Mod Podge Gloss-Lustre water-based glue. Both the paint and glue were just painted on with simple craft paint brushes which is another plus because all is easy to clean off with water for the brushes and reuse (cost savings).
After the clay sat for a day or over night, I noticed it was easy to scratch my initials in the back with a wooden pick. After it was all dry (still in the non-painted white stage), I used a nail file to file off rough edges here and there – it worked out rather nicely. I saved the dust in that pan to make slip slurry and experimented with that on other projects.
I find the advantages of using this type of adult clay is it works well for “rolling out” and cutting, pressing in the dolly patterns, and making flat items. Using this clay to make sculptures, at least for me, is a bit more involved, and requires skill. And it requires the slip to join pieces together. And it takes more patience. I decided I like this type of adult DAS clay to create flat pieces.
Above is the slip I made but will talk about that later.
Another YouTuber showed how she used black pepper flakes to add texture. I thought, Ooooh, I like that! So, I did some with black pepper and glazed with the Mod Podge. They are small bowls, and I thought how cute these could be in a miniature garden in a glass bowl, or as a ring holder if you added the center part, etc. The pepper was a little messy though. Also, one thing to note is these clays are not really “water” proof or super tough like real pottery, meaning can break easily I guess.
Note I did not make the little red heart in that pepper textured bowl, I had those, but those are the types of shapes you could try to make with either type of clay with practice.
So, Here’s a Quick List of the Pro’s and Con’s of each type of clay:
DAS Air-Hardening Modeling Clay (2.2 lbs blocks):
Pro’s – Easy to roll out, cut, make impressions on, and easy to paint, easy to store unused clay in zip lock bag. Unused clay may be rehydrated with water if needed. Con’s – Not so easy to attach pieces (need slip too), requires several days to dry between painting or coating with sealer (Mod Podge), a little more clean-up required (hand washing, tools) but not bad.
Modeling Clay Kit for Kids (24 colors):
Pro’s – Non-toxic, soft and light clay, already has color in each little block in the kit, easy to attach two pieces together (not requiring slip and scoring). Con’s – Tends to flop as it dries, like falls over. Once you attach something, it cannot be easily “detached” if you decide you don’t like it or the position of it. Unused clay will dry out faster once a packet is opened.
For now, playing is the name of the game with these projects. It is just a winter hobby thing for fun. Creating art requires the state of play! I would say this is definitely not art, but it is a way to see if there is more potential if you wanted to perfect it. Some of the YouTubers I saw made some amazing pieces with both types of clay. You can take it as far as you like!
Cathy Testa Date of this post: 2/22/2025 Stay safe, healthy and warm this winter!