

Hello everyone,
I always had a love of working with clay and dream often of turning my greenhouse into a clay studio, but then I start to think about the associated costs (pottery wheel, clay, heat, kiln, etc.). Being retired now, those are substantial hobby costs, so I have yet to make that kind of move.
Anyhow, one day, I discovered that there are clays which do not require a kiln. Kilns are expensive (used to harden clay, like in an oven). When I discovered a kiln is not necessarily needed, my brain bulb went off, off to Amazon that is as I searched for air dry clays.
I decided to play with kids clay first. Basic modeling clay that comes in many colors. I figured, let’s see how this stuff is and play around with it. The clay comes in kit boxes with lots of colored clay in little packets and maybe some small tools. Easy to find on Amazon. I guess I really like working with my hands. I made some snowmen shapes and learned some tips as I experimented with the box of clays in many colors. It is relaxing to roll and mold around clay like this, and it was fun.
Then I discovered a more mature version of air-dry clay. It is a pure white hardening modeling clay. There is a brand called DAS Air – Hardening Modeling Clay, sold in 2.2 lb blocks on Amazon. I ordered a block and started to experiment with it after watching a few YouTube videos where crafters showed their air-dry creations.
Here’s what I ended up with and some notes on my experience so far as I compared the two types of clay.

Isn’t he cute? The kids’ kit came with the googly eyes, so I thought, hmm, let me put one and make it fun. The texture of this clay, once it is all dry, is like a marshmallow but a bit harder.
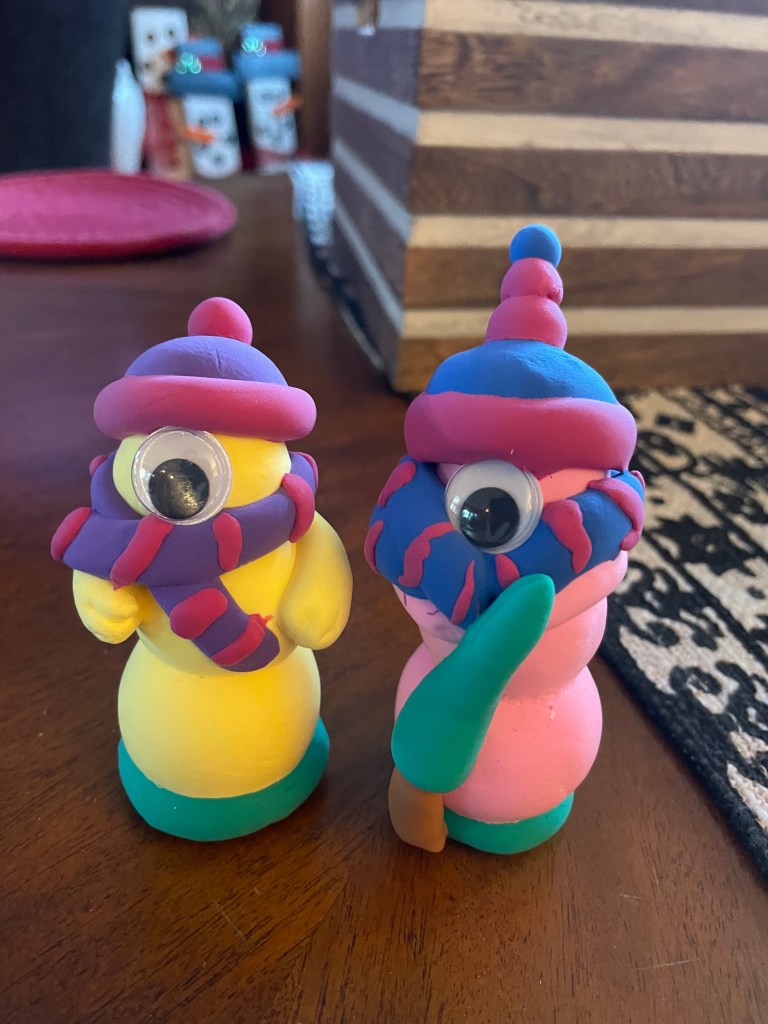
What I discovered about this modeling clay for kids is it is easy to “roll” into shapes. I actually used a white board (small size) I had to roll on while sitting in the living room watching random tv. What I discovered is putting two balls together was super easy with this clay, it just sticks together but once on, it can’t be pulled apart without ruining it.

The kid’s clay is also easy to roll, like into a sausage link or wormlike shapes. Then I wrapped it around as a scarf and added embellishments. The hat was made in a similar fashion. Making balls and log type shapes worked well with this clay versus “sculpting shapes”. One key thing is once it is attached, it can’t really be moved or repositioned, it sticks on right away.
A big plus is it doesn’t require slip (clay slurry used for joining two pieces of clay together) and scratching (or score) to put the two “balls” together, like with regular clay or the DAS clay (shown below this).
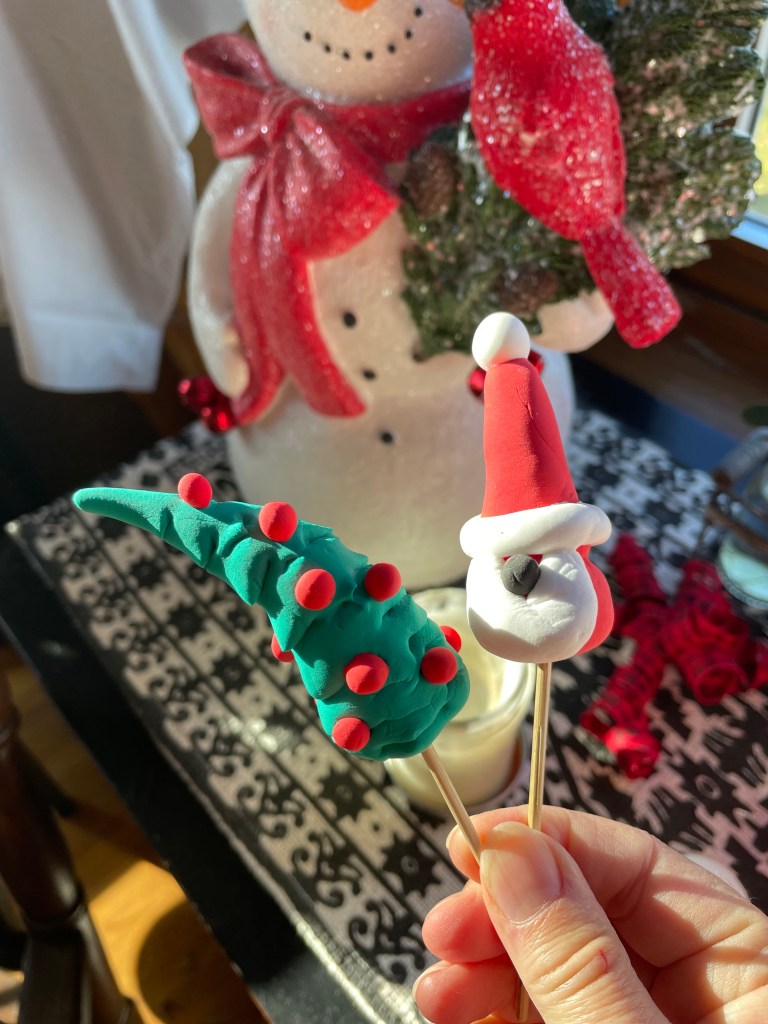
It was also super easy to insert a stick if you wanted to put your creation on a pick and insert it into holiday crafts. I think I will definitely create more sophisticated versions of these snowmen next Christmas. I also have been trying to make bunnies with this type of clay and will show those at Easter.
Now for the downfalls of this type of kid’s clay. First, it tends to bend or flop over as it dries a little, so I used a cup to make it stand upright. I discovered as it dried, it would not stand up flat – that is why you see a green disk on the bottom of my snowmen to help them stand upright. I added the disk after the snowmen was a bit drier but not completely dry. And the other down fall is this type of clay does dry out in the baggies for the rest unused clay than other clays, and then it somewhat not useful, so you have to keep it in sealed baggies or use it right away (or relatively soon, I think). Like I don’t think it will last very long once each color packet of clay is opened. I found the DAS adult version of clay to last much longer in a zip lock baggie after a block was opened. Plus, the DAS may have water added to it if too dry.

Now for the DAS Air-Hardening Modeling Clay. This is the type of things I made for Valentine’s Day. I really love how the heart bowl came out. I used basic acrylic craft paint after my creations were dry to paint on the red color. Then I remembered I had some red glitter in my stock, so I mixed that into the acrylic paint to add some sparkle.

Here’s my heart bowl before in the white dry state – I love this one the best especially after the color red was added. I saw one YouTuber show how easy it is to press fabric doilies into the clay using a rolling pin. I knew I didn’t toss those old doilies for a reason; I had a bag of doilies in my basement! Once you roll out the clay, imprint the slab, and cut it into a shape, you can put in into plastic wrap covered bowls to form a bowl shape – that is basically what I did. I let it sit in the bowl as it dried.

It was easy to make little balls and insert a hole through the middle with a wooden tool, which I am happy I thought of, cause I wanted to hang some hearts made with the DAS Air-Hardening clay. It worked great!
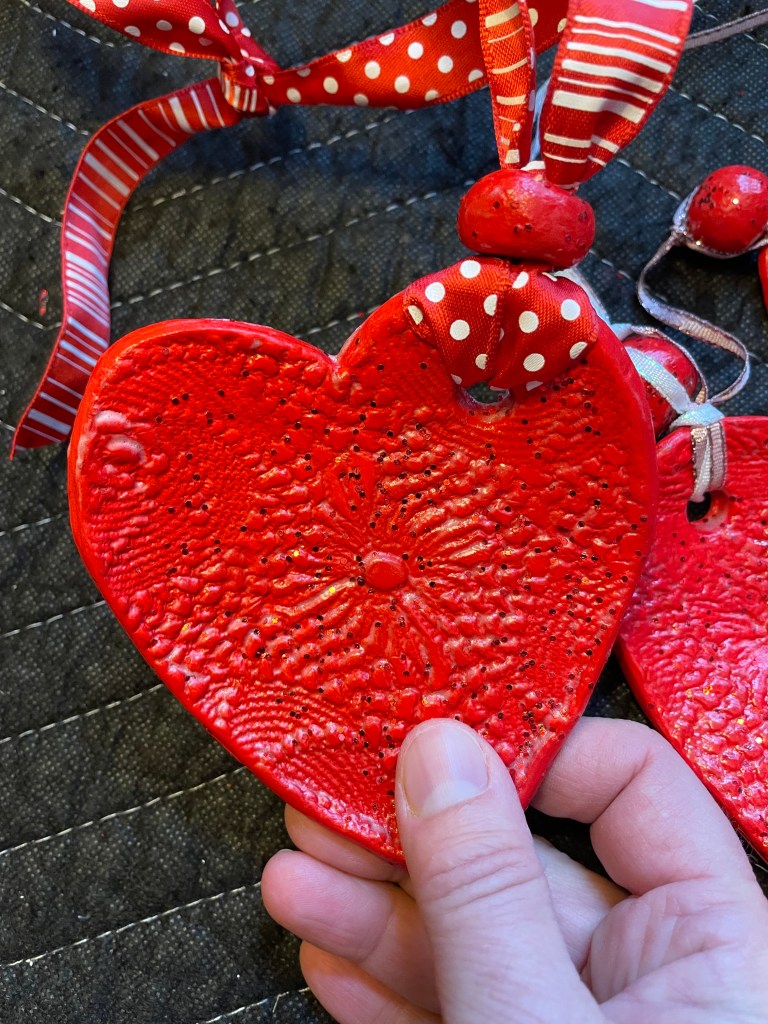
Luckily for me I had some red ribbons in stock to use as hangers. And with the red glitter added, they sparkle in the sunlight hanging in my windows for Valentine’s Day decor.

These two were smaller and I hung them from antique glass bottles. Cute. All were glazed after the red paint completely dried by using Mod Podge Gloss-Lustre water-based glue. Both the paint and glue were just painted on with simple craft paint brushes which is another plus because all is easy to clean off with water for the brushes and reuse (cost savings).
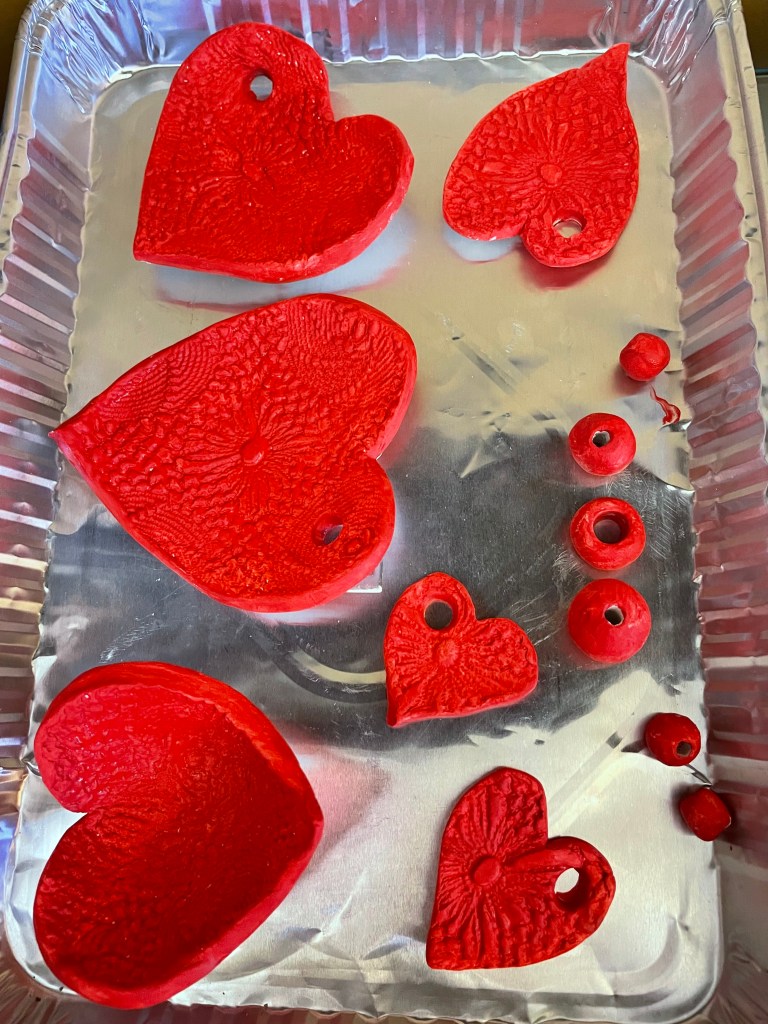
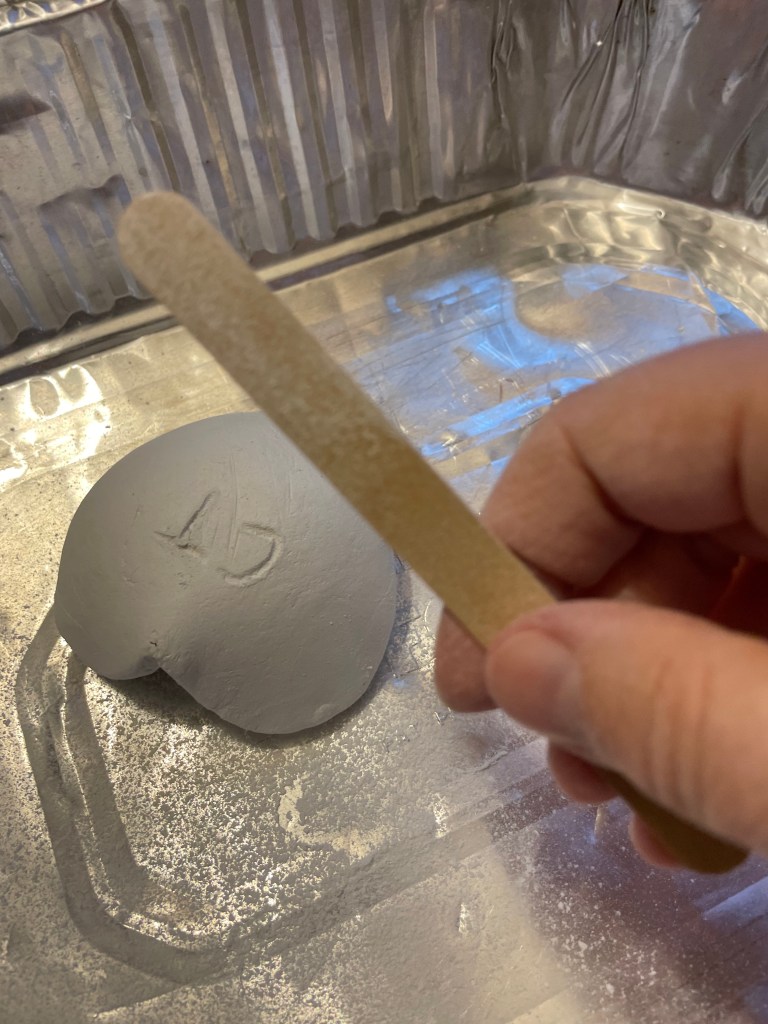
After the clay sat for a day or over night, I noticed it was easy to scratch my initials in the back with a wooden pick. After it was all dry (still in the non-painted white stage), I used a nail file to file off rough edges here and there – it worked out rather nicely. I saved the dust in that pan to make slip slurry and experimented with that on other projects.
I find the advantages of using this type of adult clay is it works well for “rolling out” and cutting, pressing in the dolly patterns, and making flat items. Using this clay to make sculptures, at least for me, is a bit more involved, and requires skill. And it requires the slip to join pieces together. And it takes more patience. I decided I like this type of adult DAS clay to create flat pieces.

Above is the slip I made but will talk about that later.
Another YouTuber showed how she used black pepper flakes to add texture. I thought, Ooooh, I like that! So, I did some with black pepper and glazed with the Mod Podge. They are small bowls, and I thought how cute these could be in a miniature garden in a glass bowl, or as a ring holder if you added the center part, etc. The pepper was a little messy though. Also, one thing to note is these clays are not really “water” proof or super tough like real pottery, meaning can break easily I guess.

Note I did not make the little red heart in that pepper textured bowl, I had those, but those are the types of shapes you could try to make with either type of clay with practice.
So, Here’s a Quick List of the Pro’s and Con’s of each type of clay:
DAS Air-Hardening Modeling Clay (2.2 lbs blocks):
Pro’s – Easy to roll out, cut, make impressions on, and easy to paint, easy to store unused clay in zip lock bag. Unused clay may be rehydrated with water if needed.
Con’s – Not so easy to attach pieces (need slip too), requires several days to dry between painting or coating with sealer (Mod Podge), a little more clean-up required (hand washing, tools) but not bad.
Modeling Clay Kit for Kids (24 colors):
Pro’s – Non-toxic, soft and light clay, already has color in each little block in the kit, easy to attach two pieces together (not requiring slip and scoring).
Con’s – Tends to flop as it dries, like falls over. Once you attach something, it cannot be easily “detached” if you decide you don’t like it or the position of it. Unused clay will dry out faster once a packet is opened.
For now, playing is the name of the game with these projects. It is just a winter hobby thing for fun. Creating art requires the state of play! I would say this is definitely not art, but it is a way to see if there is more potential if you wanted to perfect it. Some of the YouTubers I saw made some amazing pieces with both types of clay. You can take it as far as you like!
Cathy Testa
Date of this post: 2/22/2025
Stay safe, healthy and warm this winter!
