Last year, I started playing around with air dry clay and making things with it for fun. No stress. Just a way to use my hands and play with clay.
Recently, this year, I made a few items and thought I’d share how it all went. First, I purchased packaged clay on Amazon. (BTW, I get no kickbacks from sharing thoughts on Amazon products, it is just FYI).
It was air dry clay for kids with six molding designs. This basically means a set of different colored clay portions came in six separate envelopes. They were nicely packaged. It had a little card to help you figure out how to design what is shown on the front. Here’s a photo of one to make a little wreath.
I liked the envelopes because if you have any clay left over, you store it in the package/envelope.
The instructions included in the packages were pretty basic. It was just a little card to show steps, but it was easy to understand. It had all the right holiday colors like red, green, white, etc. to make the item depicted on the front of the package.
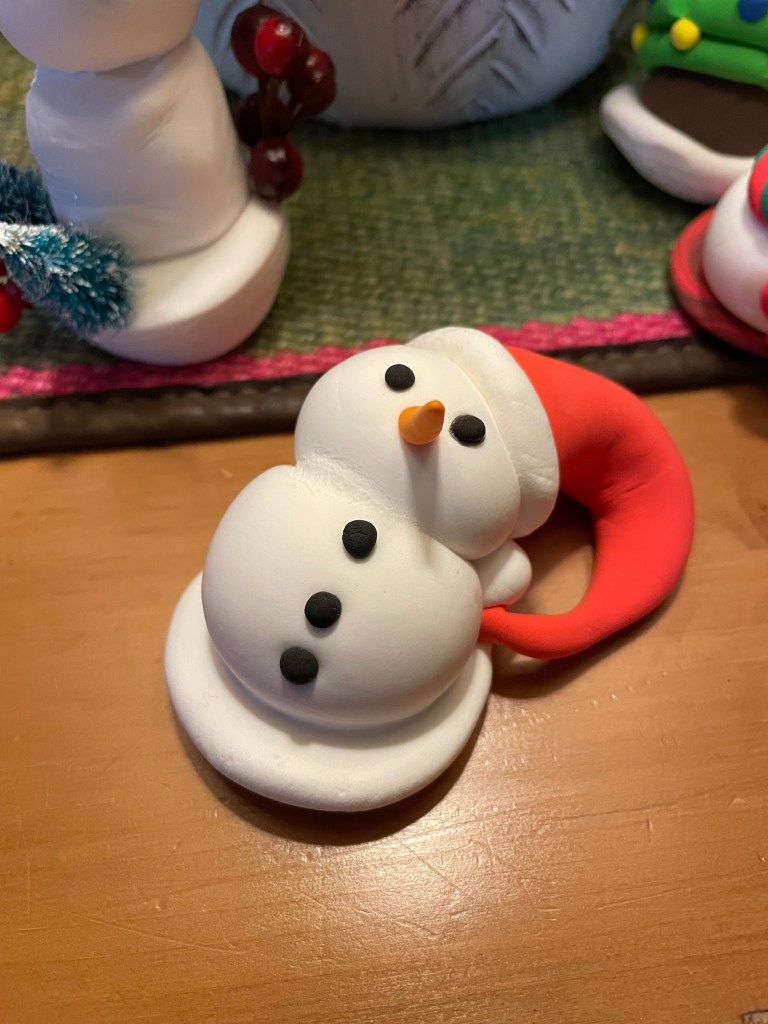
What I have discovered with air dry clay is that it can flop. It is a little frustrating. I’ll make an item, like a snow man. As it dries, it starts to lean or flop.
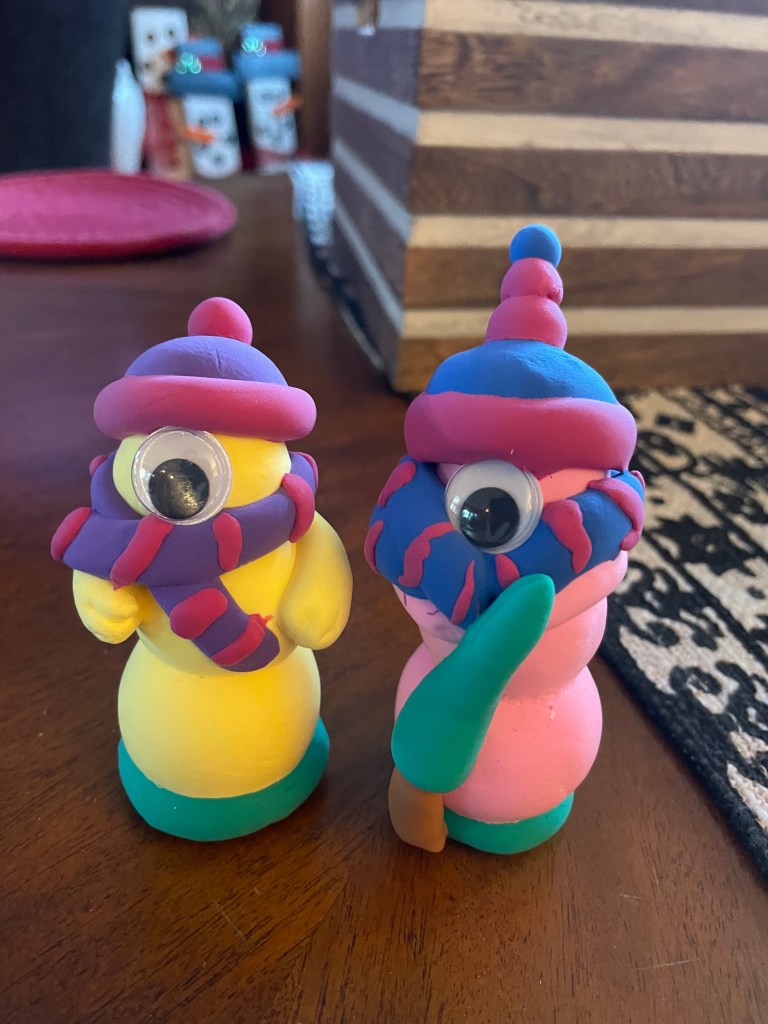
In fact, my snowman started to turn into a melting snow man. Not literally melting, but you see below in the first photo how it is all the way over, like Mr. Snowman had a bender the night before.
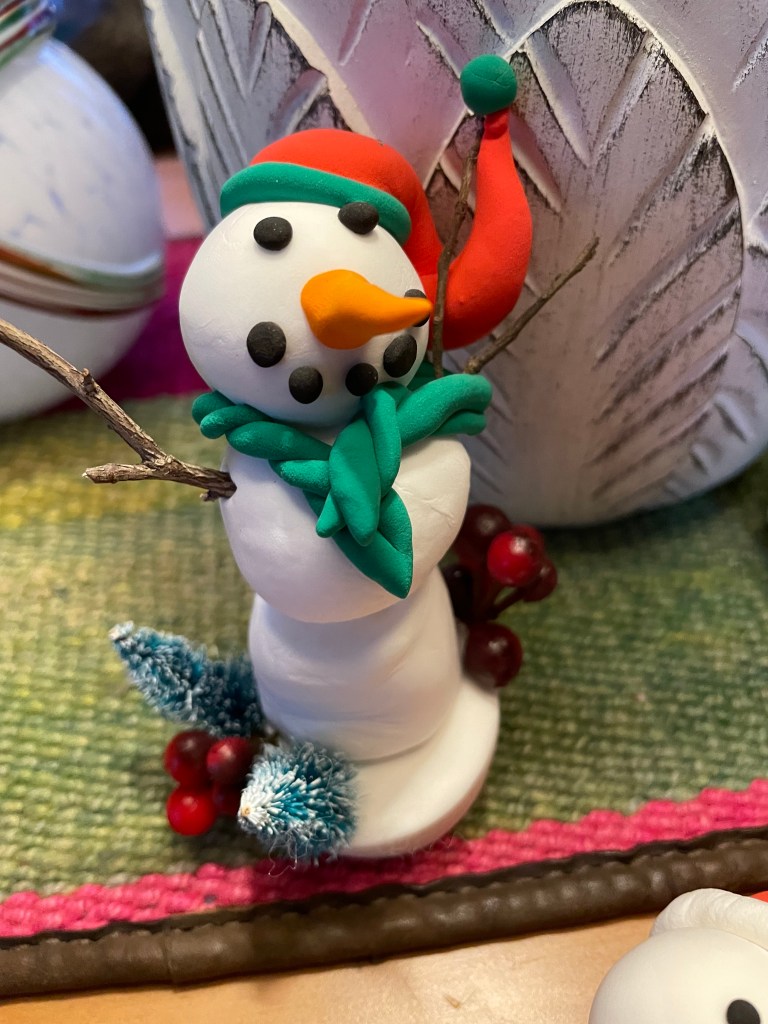
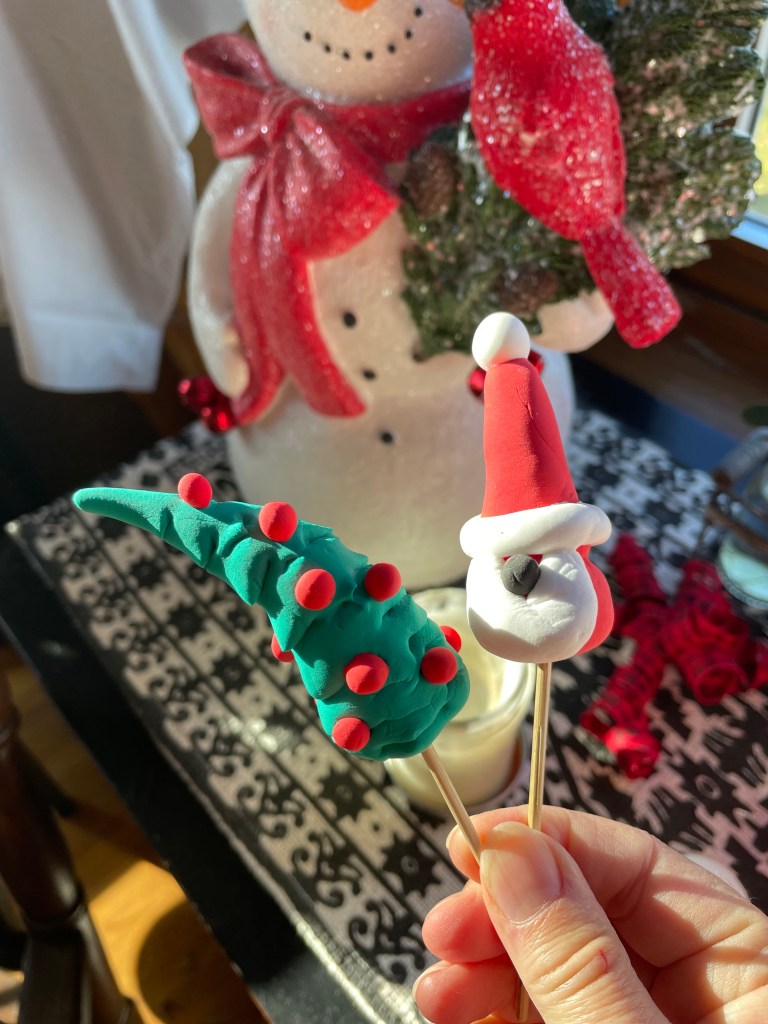
The snowmen I ended up making were all different. I didn’t follow the package’s formula or design for the snowmen. I was just playing around with it. Adding little embellishments is easy as well, just stick into the clay like the mini trees and berries.
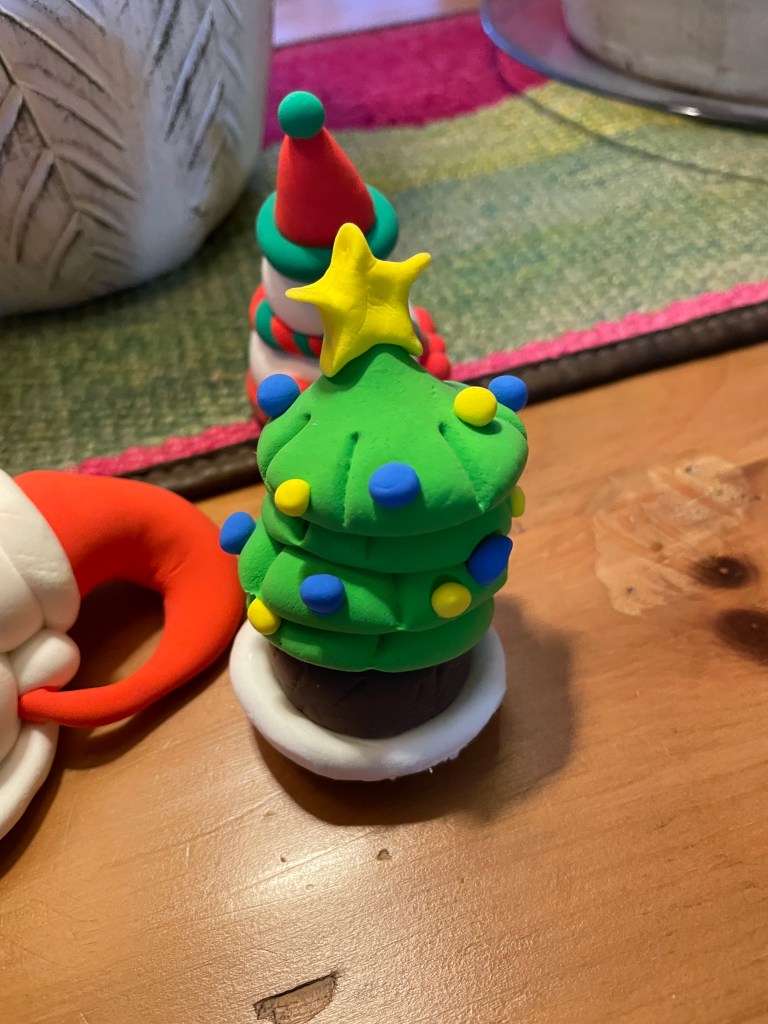
Here’s a tree I made where I did follow the design packet’s instructions. But again, it started to lean as it dried. The clay is soft and when it dries completely, it feels like a hard marshmallow texture.
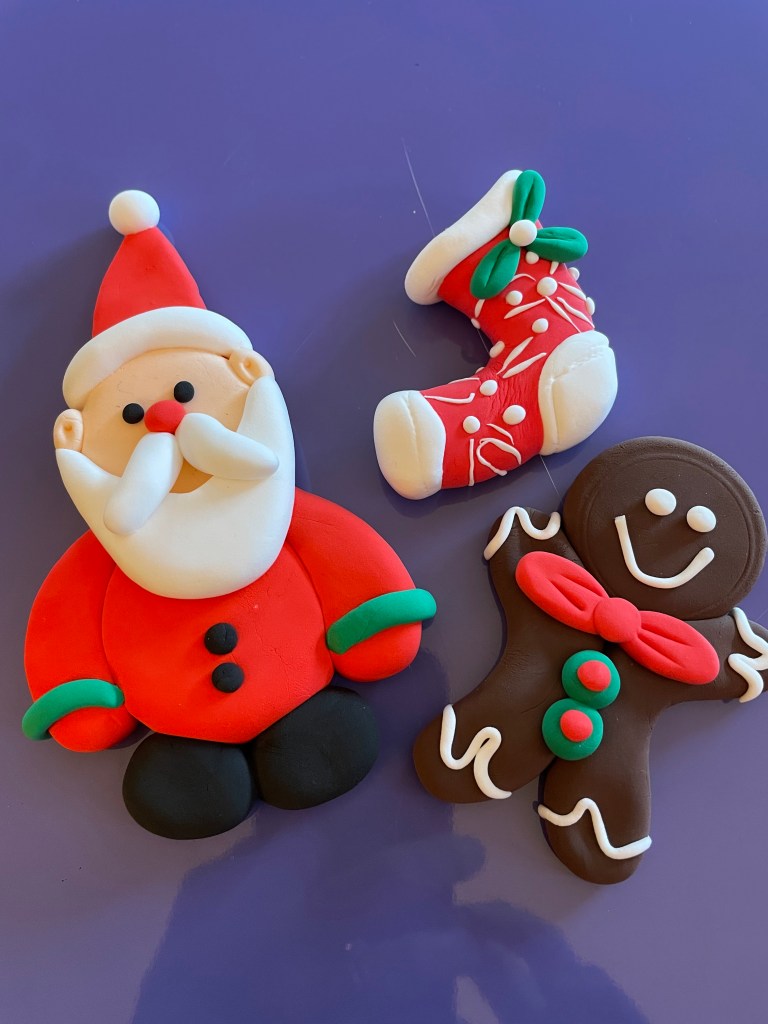
The clay was leaning all the time. I thought, “Well, let me try to make some flat items instead of three dimensional.”
I really like how the flat creations came out. They look like Christmas cookies or even fondant cookies that would go on a cake. In fact, if a little kid was around, I would need to be careful. They would think it was a real cookie and take a bite!
This is when the fun started to kick in for me. I want to make more and will do so. I’m just trying to think of how to use them. I really don’t want to make ornaments, too traditional. Maybe they would look cute attached to something. Maybe I should make a fake cupcake and put it on the top – like a dessert! Or a fake cake?
Anyhow, that is about it for this post. These types of simple crafts would be fun to do with kids. The instructions are basic. The cleanup is easy.
Tips on the clay – once something is attached, it is not easily removed off. If you wet the clay and rub it, it will smear the color. You don’t want to do that. Any unused clay also needs to stay in an enclosed package to not dry out. It is best to use the clay relatively quickly because eventually it will dry out.
I always had a love of working with clay and dream often of turning my greenhouse into a clay studio, but then I start to think about the associated costs (pottery wheel, clay, heat, kiln, etc.). Being retired now, those are substantial hobby costs, so I have yet to make that kind of move.
Anyhow, one day, I discovered that there are clays which do not require a kiln. Kilns are expensive (used to harden clay, like in an oven). When I discovered a kiln is not necessarily needed, my brain bulb went off, off to Amazon that is as I searched for air dry clays.
I decided to play with kids clay first. Basic modeling clay that comes in many colors. I figured, let’s see how this stuff is and play around with it. The clay comes in kit boxes with lots of colored clay in little packets and maybe some small tools. Easy to find on Amazon. I guess I really like working with my hands. I made some snowmen shapes and learned some tips as I experimented with the box of clays in many colors. It is relaxing to roll and mold around clay like this, and it was fun.
Then I discovered a more mature version of air-dry clay. It is a pure white hardening modeling clay. There is a brand called DAS Air – Hardening Modeling Clay, sold in 2.2 lb blocks on Amazon. I ordered a block and started to experiment with it after watching a few YouTube videos where crafters showed their air-dry creations.
Here’s what I ended up with and some notes on my experience so far as I compared the two types of clay.
Isn’t he cute? The kids’ kit came with the googly eyes, so I thought, hmm, let me put one and make it fun. The texture of this clay, once it is all dry, is like a marshmallow but a bit harder.
What I discovered about this modeling clay for kids is it is easy to “roll” into shapes. I actually used a white board (small size) I had to roll on while sitting in the living room watching random tv. What I discovered is putting two balls together was super easy with this clay, it just sticks together but once on, it can’t be pulled apart without ruining it.
The kid’s clay is also easy to roll, like into a sausage link or wormlike shapes. Then I wrapped it around as a scarf and added embellishments. The hat was made in a similar fashion. Making balls and log type shapes worked well with this clay versus “sculpting shapes”. One key thing is once it is attached, it can’t really be moved or repositioned, it sticks on right away.
A big plus is it doesn’t require slip (clay slurry used for joining two pieces of clay together) and scratching (or score) to put the two “balls” together, like with regular clay or the DAS clay (shown below this).
It was also super easy to insert a stick if you wanted to put your creation on a pick and insert it into holiday crafts. I think I will definitely create more sophisticated versions of these snowmen next Christmas. I also have been trying to make bunnies with this type of clay and will show those at Easter.
Now for the downfalls of this type of kid’s clay. First, it tends to bend or flop over as it dries a little, so I used a cup to make it stand upright. I discovered as it dried, it would not stand up flat – that is why you see a green disk on the bottom of my snowmen to help them stand upright. I added the disk after the snowmen was a bit drier but not completely dry. And the other down fall is this type of clay does dry out in the baggies for the rest unused clay than other clays, and then it somewhat not useful, so you have to keep it in sealed baggies or use it right away (or relatively soon, I think). Like I don’t think it will last very long once each color packet of clay is opened. I found the DAS adult version of clay to last much longer in a zip lock baggie after a block was opened. Plus, the DAS may have water added to it if too dry.
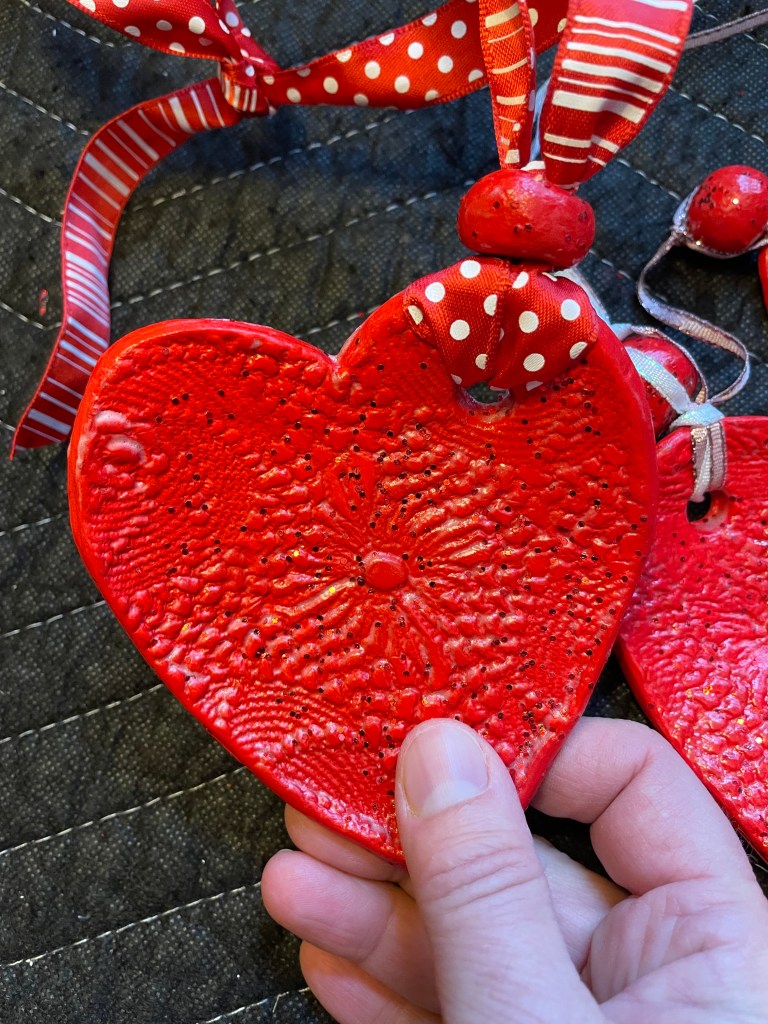
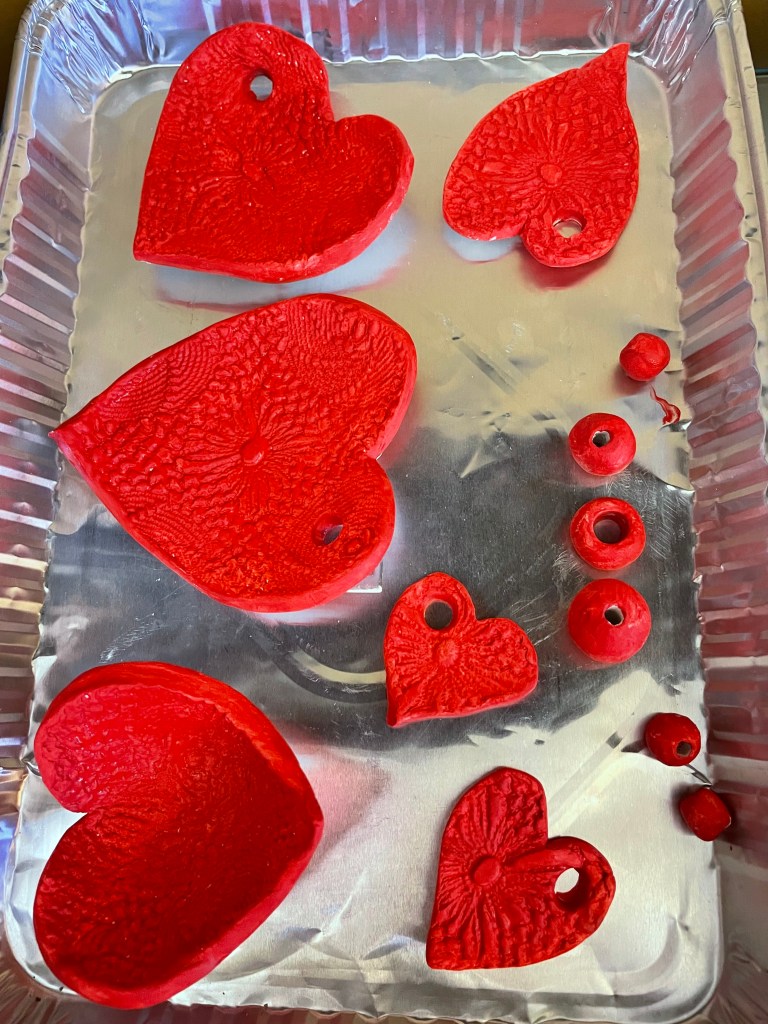
Now for the DAS Air-Hardening Modeling Clay. This is the type of things I made for Valentine’s Day. I really love how the heart bowl came out. I used basic acrylic craft paint after my creations were dry to paint on the red color. Then I remembered I had some red glitter in my stock, so I mixed that into the acrylic paint to add some sparkle.
Here’s my heart bowl before in the white dry state – I love this one the best especially after the color red was added. I saw one YouTuber show how easy it is to press fabric doilies into the clay using a rolling pin. I knew I didn’t toss those old doilies for a reason; I had a bag of doilies in my basement! Once you roll out the clay, imprint the slab, and cut it into a shape, you can put in into plastic wrap covered bowls to form a bowl shape – that is basically what I did. I let it sit in the bowl as it dried.
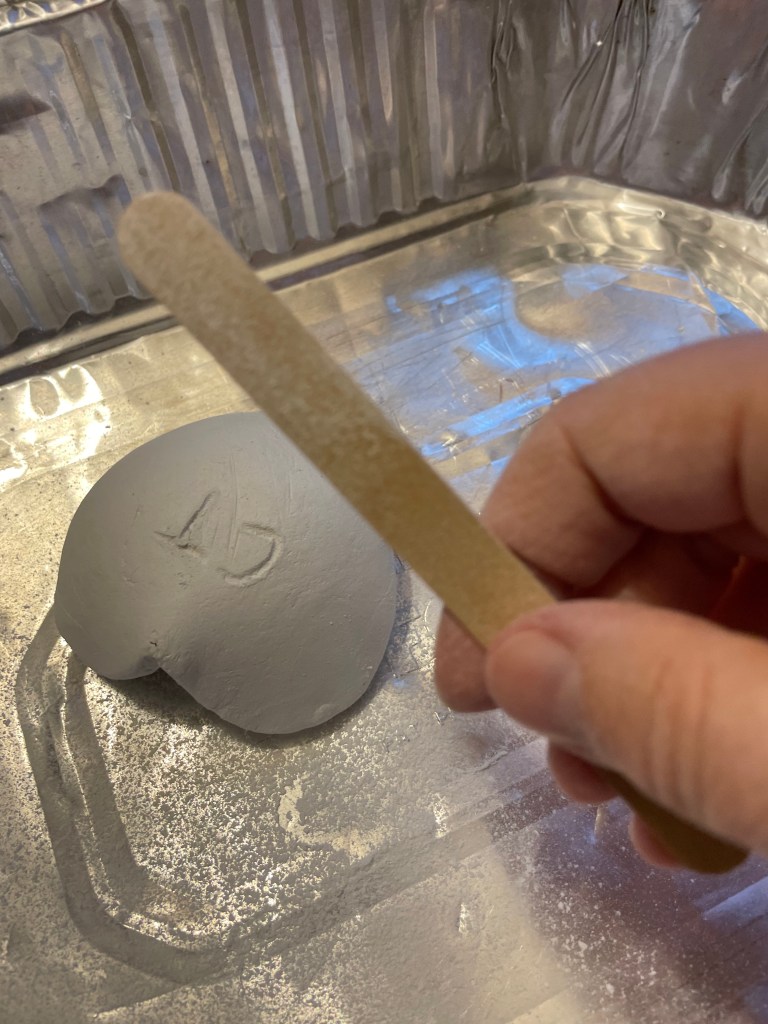
It was easy to make little balls and insert a hole through the middle with a wooden tool, which I am happy I thought of, cause I wanted to hang some hearts made with the DAS Air-Hardening clay. It worked great!
Luckily for me I had some red ribbons in stock to use as hangers. And with the red glitter added, they sparkle in the sunlight hanging in my windows for Valentine’s Day decor.
These two were smaller and I hung them from antique glass bottles. Cute. All were glazed after the red paint completely dried by using Mod Podge Gloss-Lustre water-based glue. Both the paint and glue were just painted on with simple craft paint brushes which is another plus because all is easy to clean off with water for the brushes and reuse (cost savings).
After the clay sat for a day or over night, I noticed it was easy to scratch my initials in the back with a wooden pick. After it was all dry (still in the non-painted white stage), I used a nail file to file off rough edges here and there – it worked out rather nicely. I saved the dust in that pan to make slip slurry and experimented with that on other projects.
I find the advantages of using this type of adult clay is it works well for “rolling out” and cutting, pressing in the dolly patterns, and making flat items. Using this clay to make sculptures, at least for me, is a bit more involved, and requires skill. And it requires the slip to join pieces together. And it takes more patience. I decided I like this type of adult DAS clay to create flat pieces.
Above is the slip I made but will talk about that later.
Another YouTuber showed how she used black pepper flakes to add texture. I thought, Ooooh, I like that! So, I did some with black pepper and glazed with the Mod Podge. They are small bowls, and I thought how cute these could be in a miniature garden in a glass bowl, or as a ring holder if you added the center part, etc. The pepper was a little messy though. Also, one thing to note is these clays are not really “water” proof or super tough like real pottery, meaning can break easily I guess.
Note I did not make the little red heart in that pepper textured bowl, I had those, but those are the types of shapes you could try to make with either type of clay with practice.
So, Here’s a Quick List of the Pro’s and Con’s of each type of clay:
DAS Air-Hardening Modeling Clay (2.2 lbs blocks):
Pro’s – Easy to roll out, cut, make impressions on, and easy to paint, easy to store unused clay in zip lock bag. Unused clay may be rehydrated with water if needed. Con’s – Not so easy to attach pieces (need slip too), requires several days to dry between painting or coating with sealer (Mod Podge), a little more clean-up required (hand washing, tools) but not bad.
Modeling Clay Kit for Kids (24 colors):
Pro’s – Non-toxic, soft and light clay, already has color in each little block in the kit, easy to attach two pieces together (not requiring slip and scoring). Con’s – Tends to flop as it dries, like falls over. Once you attach something, it cannot be easily “detached” if you decide you don’t like it or the position of it. Unused clay will dry out faster once a packet is opened.
For now, playing is the name of the game with these projects. It is just a winter hobby thing for fun. Creating art requires the state of play! I would say this is definitely not art, but it is a way to see if there is more potential if you wanted to perfect it. Some of the YouTubers I saw made some amazing pieces with both types of clay. You can take it as far as you like!
Cathy Testa Date of this post: 2/22/2025 Stay safe, healthy and warm this winter!
Shore pine was not one I had on my list of greens for a few years until I discovered it. It is odd how you may know so much about plants and such, but then make a new discovery just because you noticed some sitting in a box at the supply house!
I was picking up my typical greens’ orders in early December one year, and I just happened to see it in a box on another table, and asked, “What’s this?” The reply was, “shore pine.”
Next question, of course, was, “Can I get some?”
I always wished wholesale suppliers would have classes. A manager literally rolled her eyes at me when I asked or suggested this idea. I understand, they just don’t have the time, they are so busy, and teaching us is not part of their job, but I do wish there was an intro to what they have and how to use it, especially if someone was a newbie.
Anyhow, if you are new to the world of greens for wreath making, hopefully you found me because I started writing this month about the various greens used in holiday wreaths and kissing balls. Each post is covering a different holiday greenery.
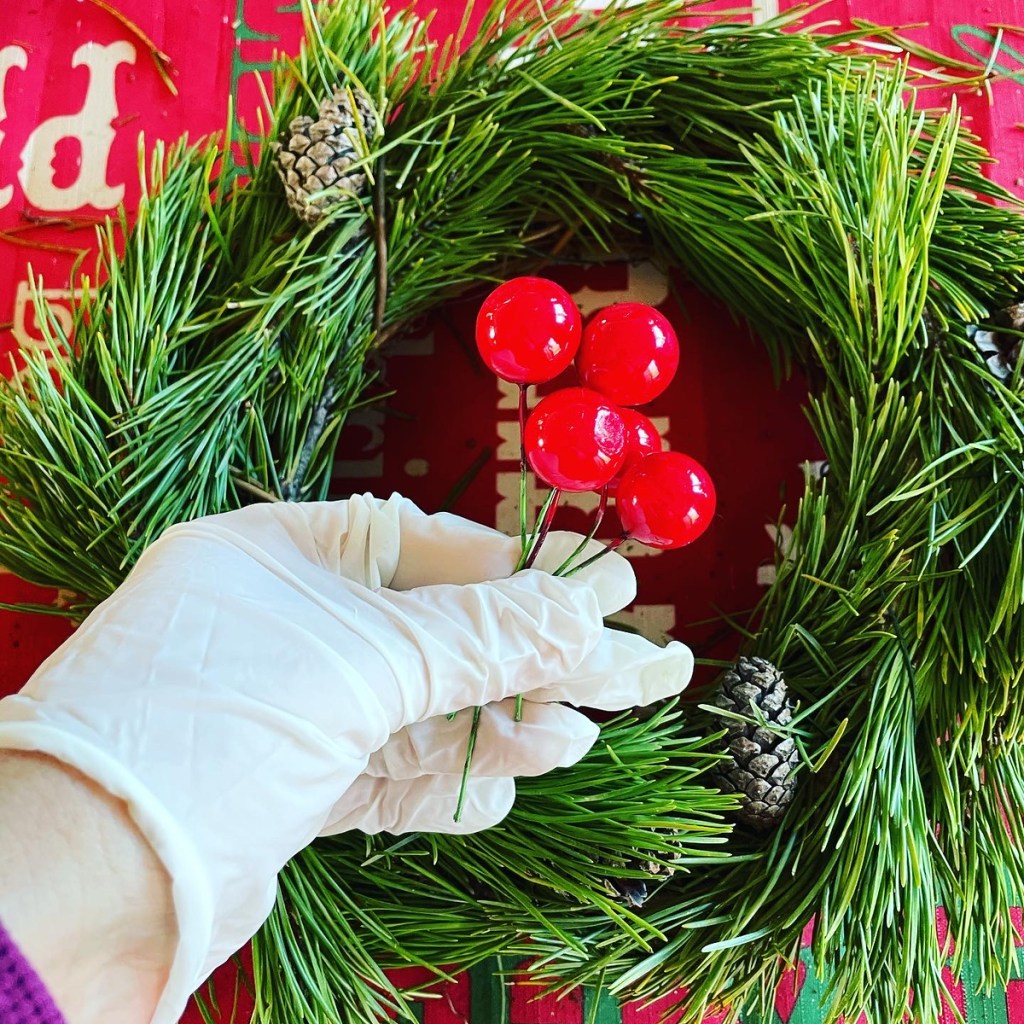
Shore pine is a needled evergreen tree or shrub. The needles appear and grow along very long stems. The whole stem is covered with the short dark green needles, so you end up with a nice long piece of fully covered dark green needles on a stem.
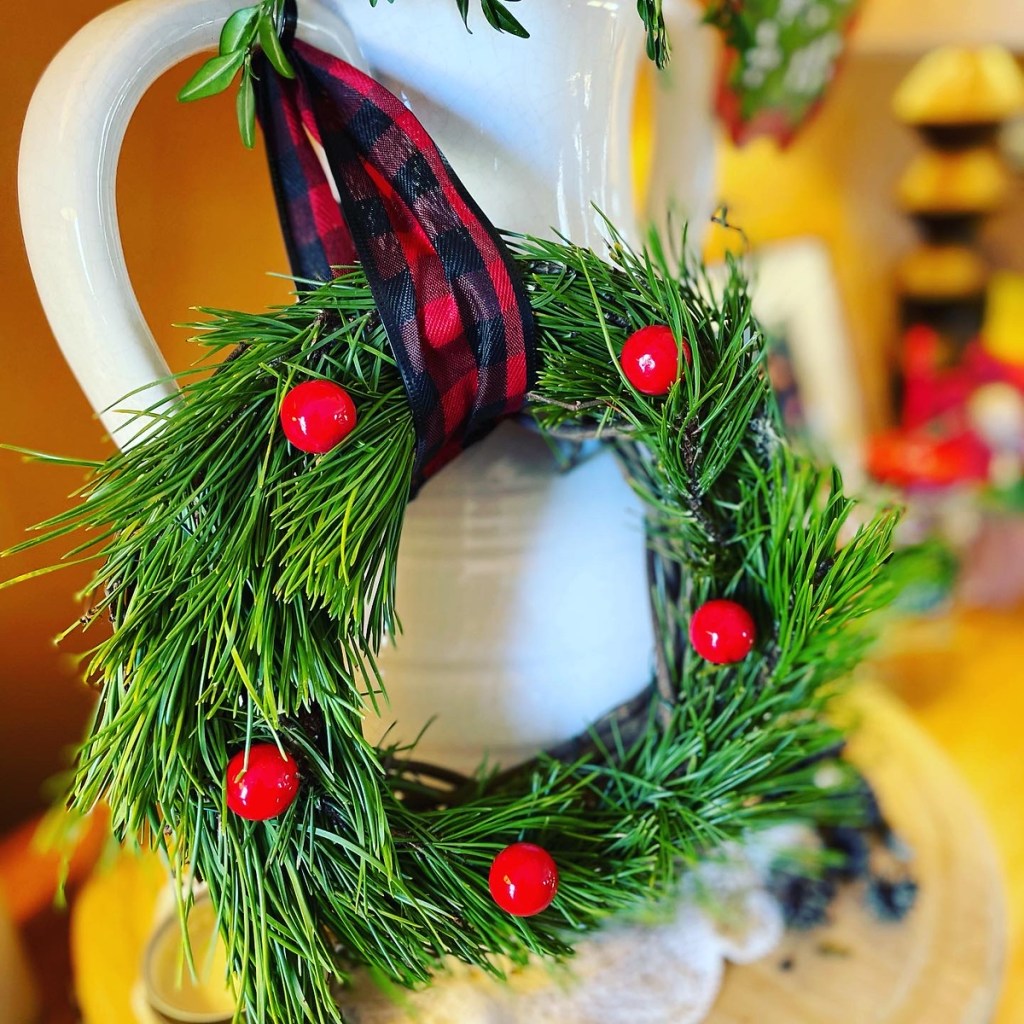
The stems are somewhat flexible, but I think what I liked about these the most is how long the stems were. You could literally use whole pieces of the shore pine branches to make a quick simple wreath without cutting it into pieces if you wanted to, and because they are flexible, they were easy to bend in a circle around a wreath frame. Then just using some green florist wire, wrap here and there to secure it to your wreath frame.
One year, I made some Peace Sign wreaths. I used coat hangers to make the center of the peace sign and used the shore pine wired to it – it was relatively easy to secure. Again, the long pieces of the shore pine worked well for this application.
On this wreath, I also secured moss behind the shore pine so it would be a nice green color.
Shore pine is a great item to add to the mix. It offers another texture when side by side with other greens. It also makes an excellent thriller tall piece in the center of outdoor holiday pots.
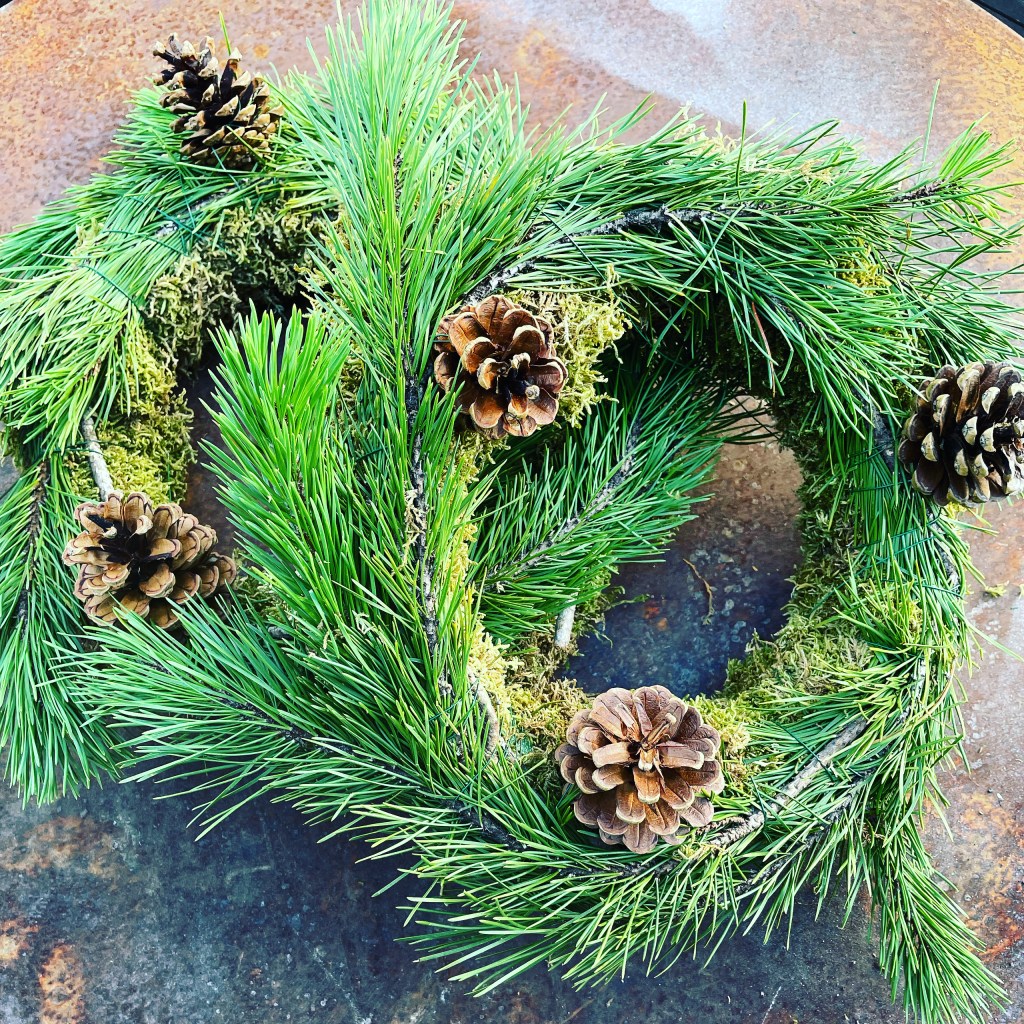
Another way that I used it was as pot toppers. Rings with greens that would be placed level on the top of a pot around the circular perimeter of it.
By just adding some wired pinecones, it was an instant way to dress up a pot. On this photo above, I used small green foam type wreaths as the base, covered them with moss, and just bent the long stems of shore pine over it and wired it in easily.
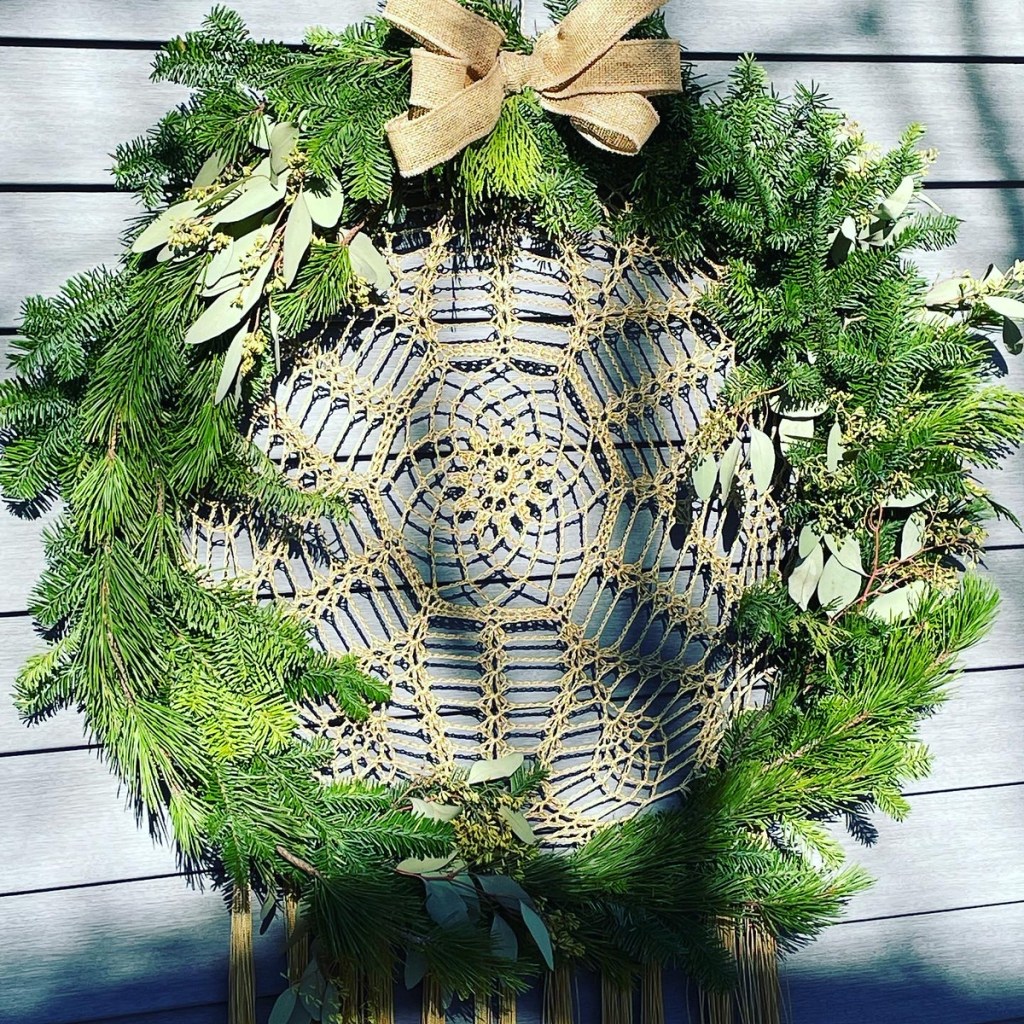
This dream catcher wreath I made has a round bamboo type wreath under it. As you can see, the long pieces of shore pine were perfect to just mold around it easily and secure.
As far as longevity of the shore pine, I would notice some minor tip yellowing after the holiday or if the shore pine was stored too long. Otherwise, it had decent needle retention and I found it was an easy use green.
Some pieces would have tightly closed cones attached too. And when provided as an item in my box of greens, it was another layer of green texture to use.
I can’t find the photo of this but years ago, a friend at my workshops, made a horse profile wreath and the shore pine is perfect to create the mane along the horse’s head portion. When I find the photo, I will update this post! But any animal like wreaths you may consider making, think of the shore pine as useful for things like that – a tail or whatever. All you have to do is get creative!
Hope you are enjoying these “greens reviews” posts and are having the time to make your own creations this season.
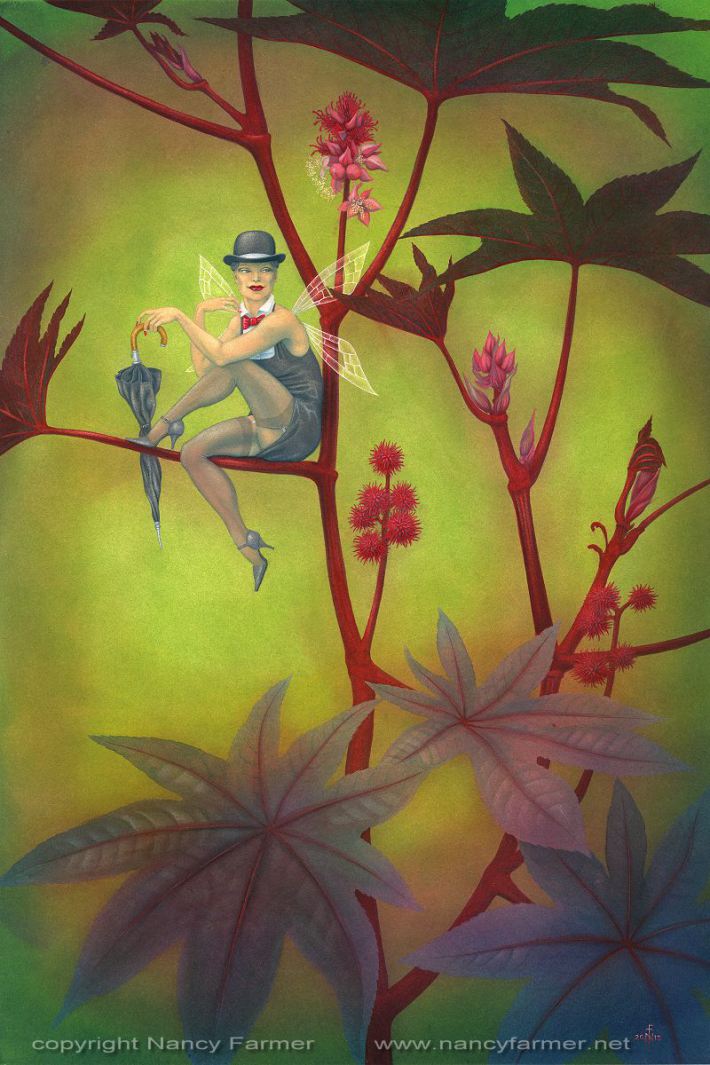
Perhaps the only person to definitely know if the castor bean plant and its three little seeds lying within each of its seed capsules has been and continues to be falsely portrayed as a lurking killer is the beautiful and bold imaginary fairy by the name of Ricina, a clever creation by Nancy Farmer, an artist residing in the United Kingdom.
A FAIRY
“a small imaginary being of human form that has magical powers, esp. a female one.”(source: Google)
Art may be left up to the interpretation of the admirer or defined by its originator but my perception of Nancy Farmer’s creation, the fairy she named Ricina, is of a mature woman seductively perched upon the stalk of a castor bean plant. With her eyes glanced to the side and a sneaky facial expression, Ricina appears to be ready to protect or serve the possible magical yet deceptive powers of the plant and its seeds. Her bright red lips and finger nail polish flanked by a smart little red bow tie around her neck matching her classic attire provides the admirer a glimpse of her individualistic style. And she looks a little playful too with a suggestive rise in her sexy leg and fashionable but just the right sized heeled shoes. A handsome umbrella dangles from the tips of her fingers and she sports a masculine hat – teasing mementos to remind of past stories and tales regarding the castor bean seeds and its potentially lethal toxin known as ricin.
Image courtesy of Nancy Farmer/www.nancyfarmer.net and nancyfarmer.wordpress.com
If Ricina could buzz by our ears, perhaps she would whisper there is nothing to fear. For only those with harmful and deliberate intentions could possibly use the plant’s powerful little bean-shaped seeds for malice and not joy. She knows it requires the elements of keen knowledge about the plant’s toxic components and a bit of unrealistic determination by the offender. Or maybe she would tell us only a fool would pry apart prickly seed capsules designed to keep predators at bay and then chew its seeds obviously marked with suspicious patterns.
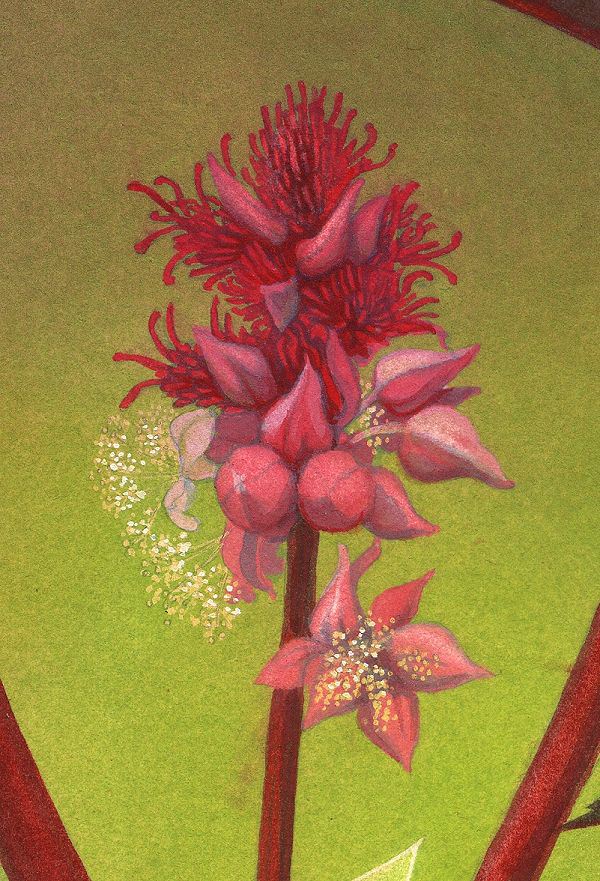
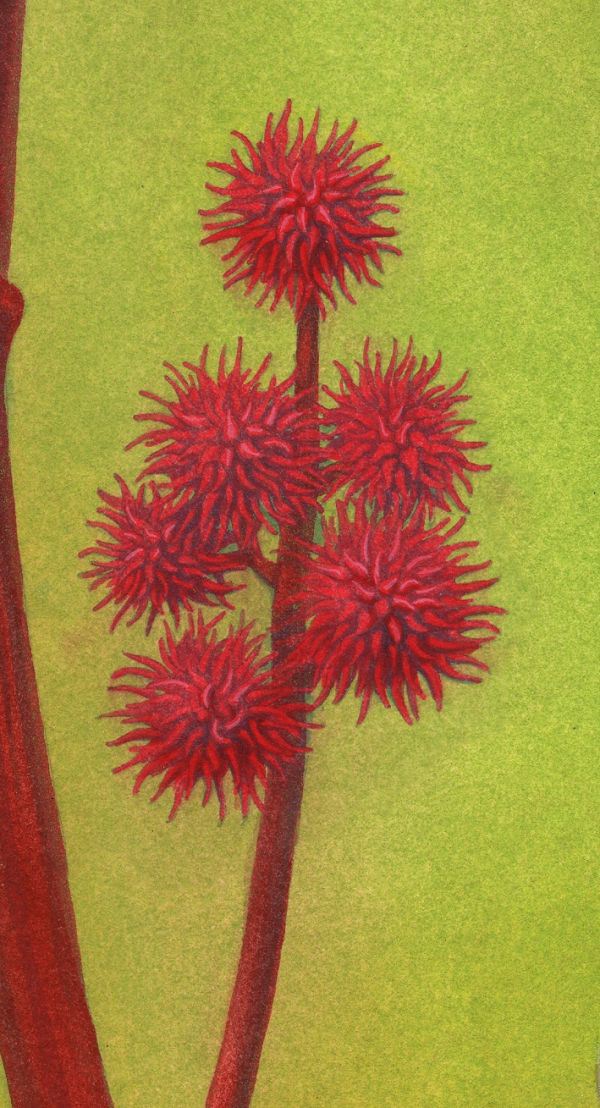
Nancy Farmers artwork of the castor bean flowers (www.nancyfarmer.net and anancyfarmer.wordpress.com)
She would continue to reveal the beautiful benefits of the plants’ ornamental characteristics and its ability to thrive with little encouragement to provide grandeur in our gardens. As she continues to deflect our attention from unproven matters of the castor bean plant, she may fly around exclaiming the exceptional as well as unattractive features of the plant from its large showy leaves, a towering height, and flowers with a combination of features as complex as its tales. The key, she should would say, is to admire ‘all of the plant’s’ wonderful virtues along with its adversity. Because the castor bean plant has its good and bad sides.
“A large shrub of tropical Africa and Asia having large palmate leaves and spiny capsules containing seeds that are the source of castor oil and ricin; widely naturalized throughout the tropics.”(source: thefreedictionary.com)
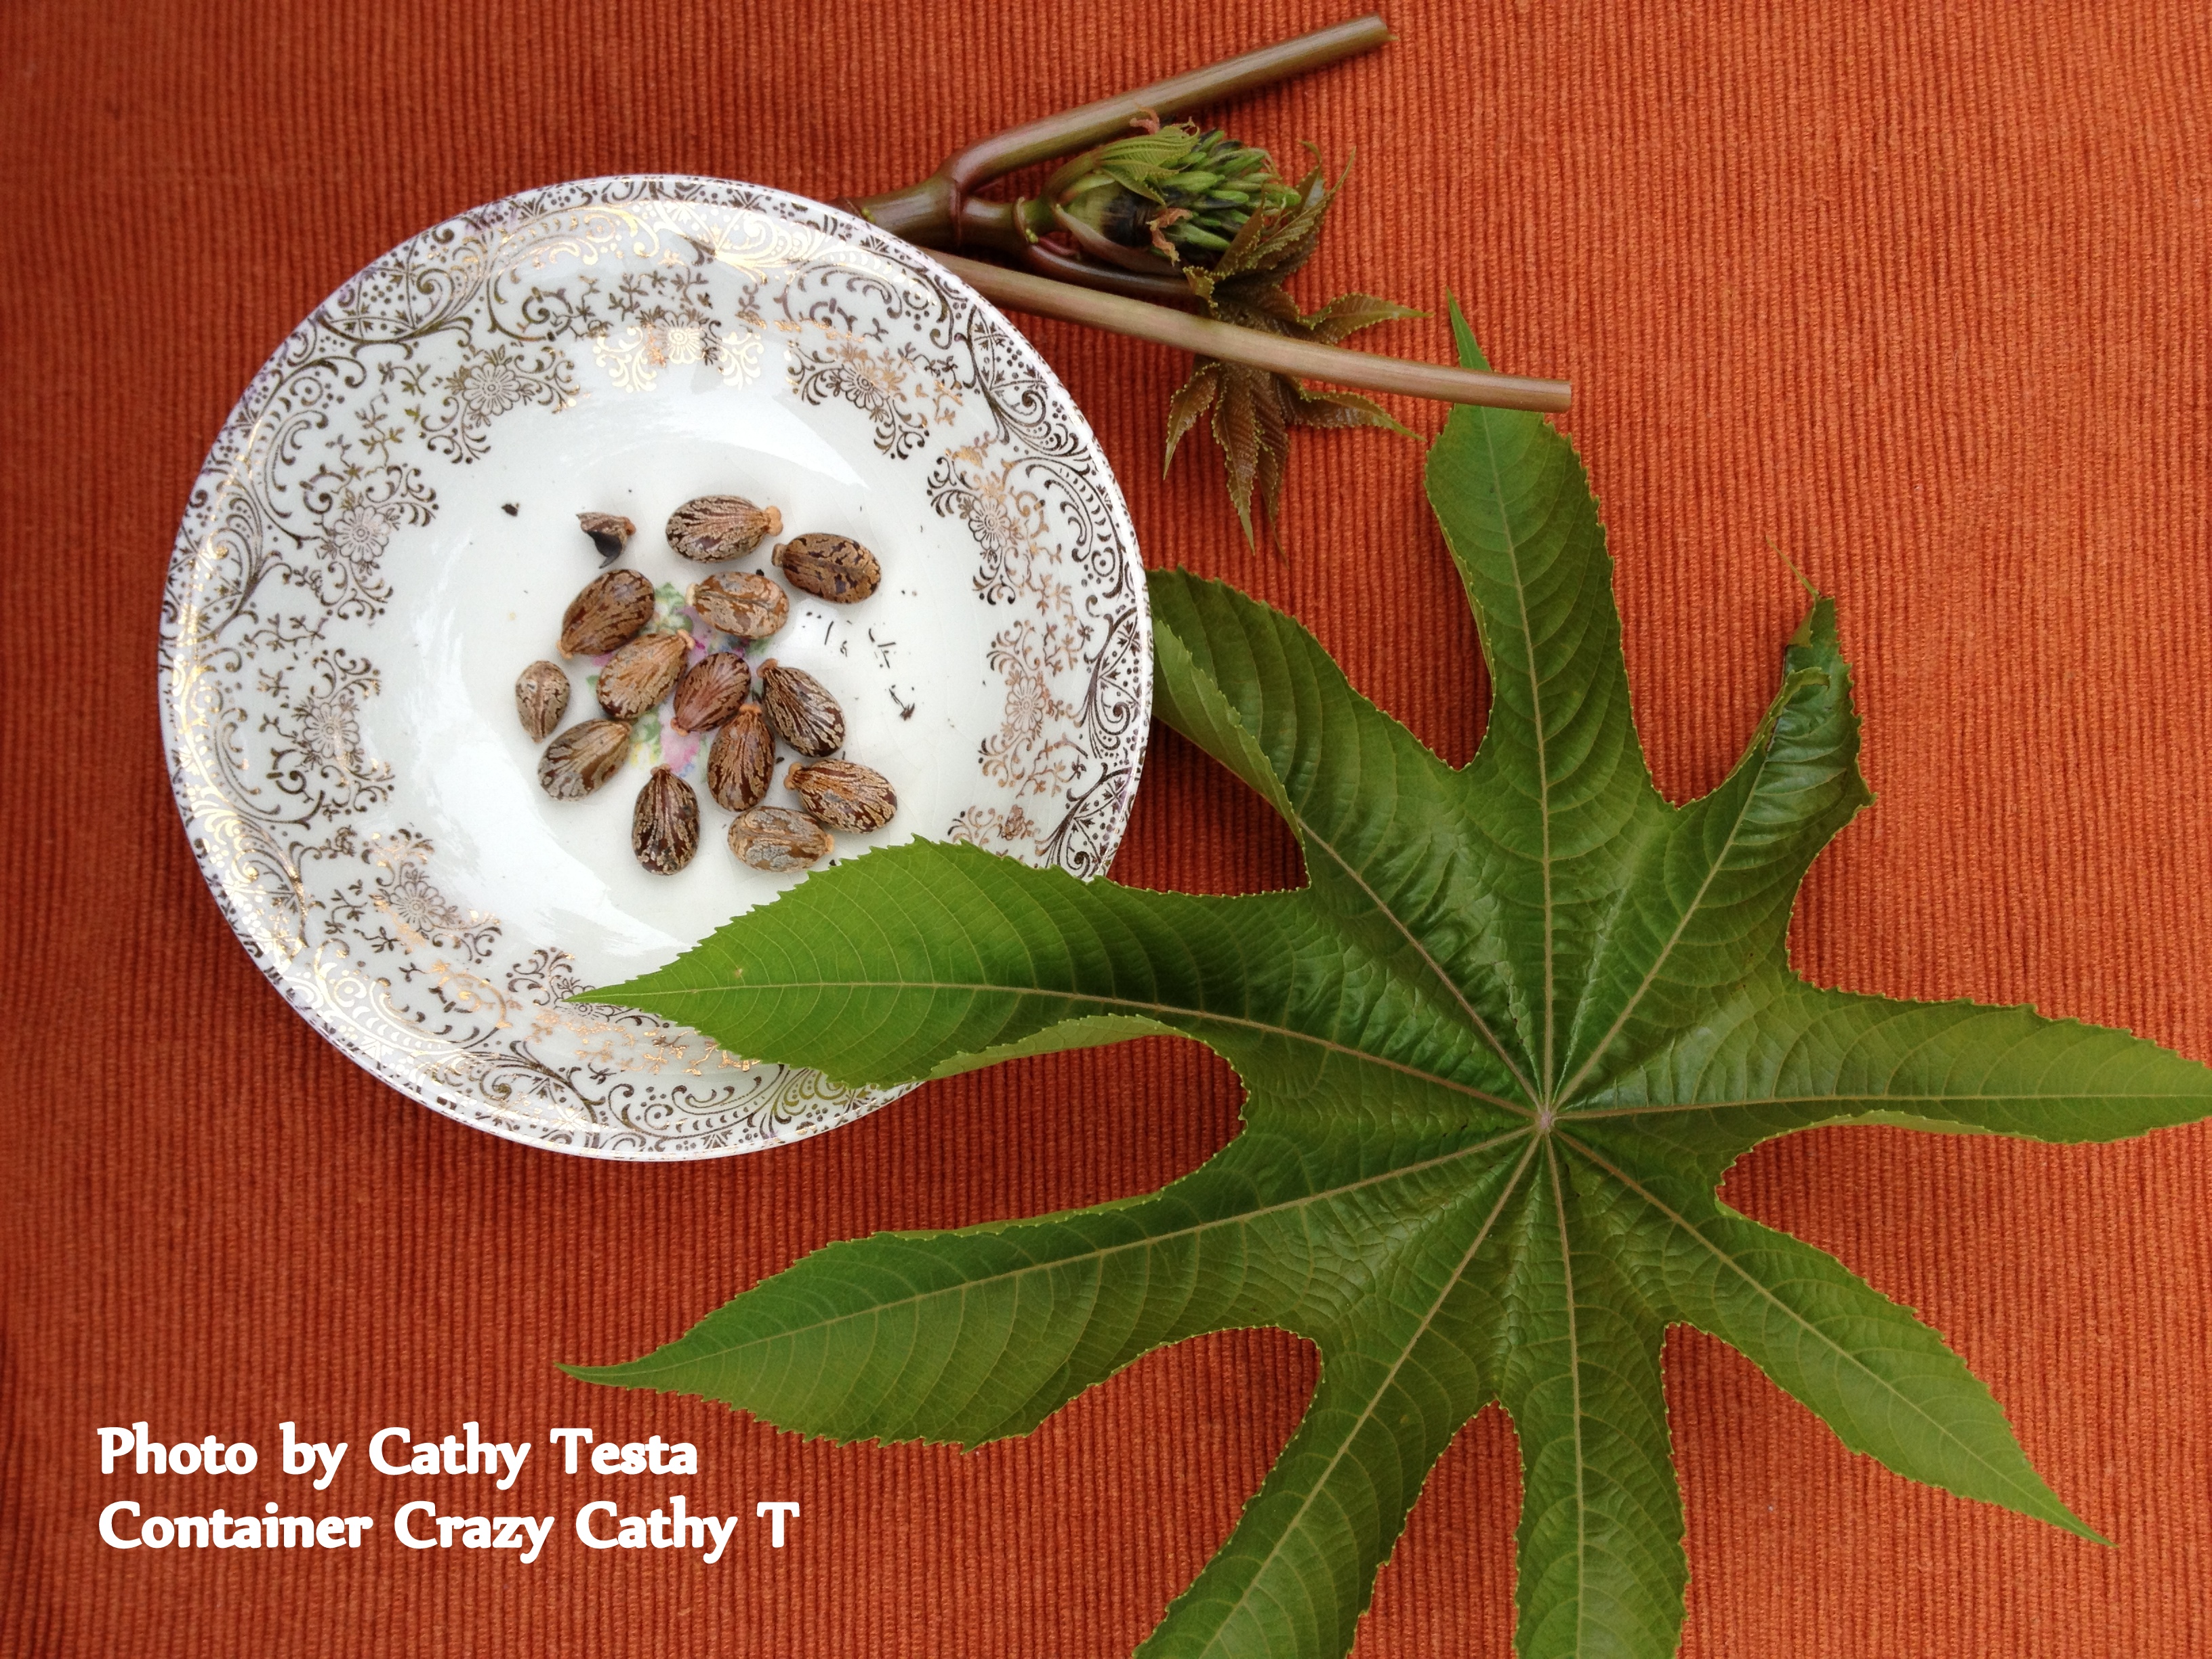
Castor Bean Seeds with a Leaf
The castor bean plant or castor oil plant (Ricinus communis) is a tropical shrub or tree hardy in planting zones 10-11. It is treated as an annual in Connecticut’s planting zones since it will not survive winter temperatures here. The plant grows rapidly from seed when planted in ideal conditions. It can easily reach between ten to twelve feet in a single season. As the stalk increases in diameter, it resembles thick bamboo. Large distinctive green leaves growing from the tips of long petioles are lobed shaped with several pointed star-like tips. The species is primarily green, but cultivars come in vivid red to maroon colors, including the seed capsules.
Nancy Farmer’s artwork of the red seed capsules of a cultivar the castor bean plant
Photo Courtesy of Nancy Farmer’s Artwork (www.nancyfarmer.net and nancyfarmer.wordpress.com)
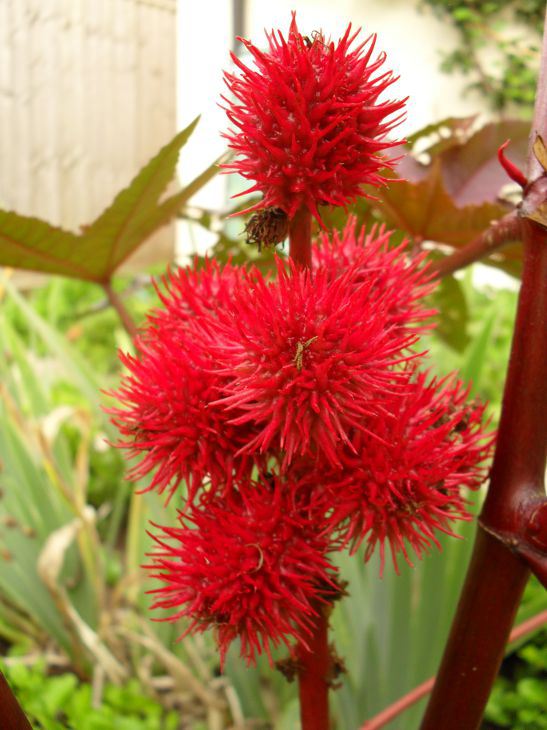
The plant’s odd-looking flowers consist of separate male and female flowers on the same plant. When both sexes are on the same plant, this is termed monoecious. The male flowers are white and tiny, situated just below the female flowers. Red styles, the narrow part of the pistils, are clearly visible on the female parts of the plant.
Female Flowers on a Castor Bean Plant
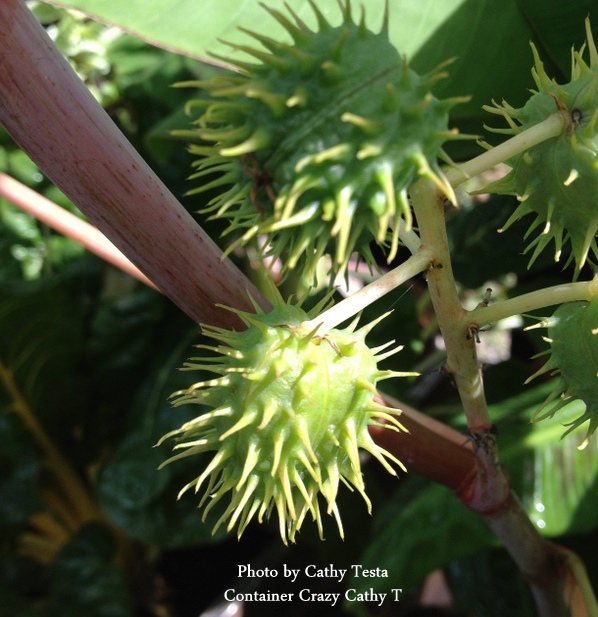
Prickly seed capsules – Ricinus communis
Round seed capsules grow from the female flowers which are rather interesting. They are composed of three joined lobes or hulls covered with soft prickly spines. Inside each prickly capsule are the infamous castor bean seeds, known to be the source of a potentially lethal toxic, known as ricin. Although the castor bean seeds are the size of edible beans, think kidney beans – they are not true beans at all. And they are not meant for direct consumption, but used for the production of castor oil and other traditional medicines. Some people think the seeds resemble inflated ticks, and the genus name Ricinus is the Latin word for tick.
Mature seeds of the castor bean plant
Immature seeds in the capsule. Photo by Cathy Testa
A POISON
“a substance that, when introduced into or absorbed by a living organism, causes death or injury, esp. one that kills by rapid action even in a small quantity.” (source: Google)
“a person, idea, action, or situation that is considered to have a destructive or corrupting effect or influence.” (source: Google)
Relief from the use of castor oil derived from the seeds of the castor bean plant (Ricinus communis) may yield some benefits for people still using this remedy as a laxative, but there are reported sinister sides to the seeds, that when used in a specific fashion and with its toxic substance, will lead to illness and sometimes death of an unsuspecting victim. Some stories or myths shared from past to present about such occurrences, including claims of sneaky murders from administering ricin with a common umbrella as the mode of transmission, to claims of accidental deaths from chewing the seeds without the realization of the disastrous results days later, may be somewhat exaggerated.
In the words of John Robertson who has spent ten years researching, writing and talking about poisonous plants:
“But, though ricin is extremely poisonous it actually does little harm. Around one million tons of castor beans are processed each year for castor oil production leaving the waste pulp with up to 50,000 tons of ricin in it. And, yet, finding instances of ricin poisoning is not an easy task.“ (source: THE POISON GARDEN website)
Victims are said to suffer from vomiting, diarrhea and dehydration once attacked by the evil person in possession of the ricin. Others have eaten the castor bean seeds in ignorance with the belief it is a medical solution to their health problem. Yet the more you read regarding the poisoning powers of the infamous castor bean seeds, the more unclear the accusations and exaggerations become regarding the potential for eventual death to occur. Some sources attempt to explain the differences between poisonous and dangerous because a person can do no harm without the right combination of both a lethal toxin and attitude.
In a ten minute video on THE POISON GARDEN website about ricin, John Robertson states, “There’s a big difference between poisonous and harmful. For a poisonous plant to become harmful, there has to be a way to administer the poison.“
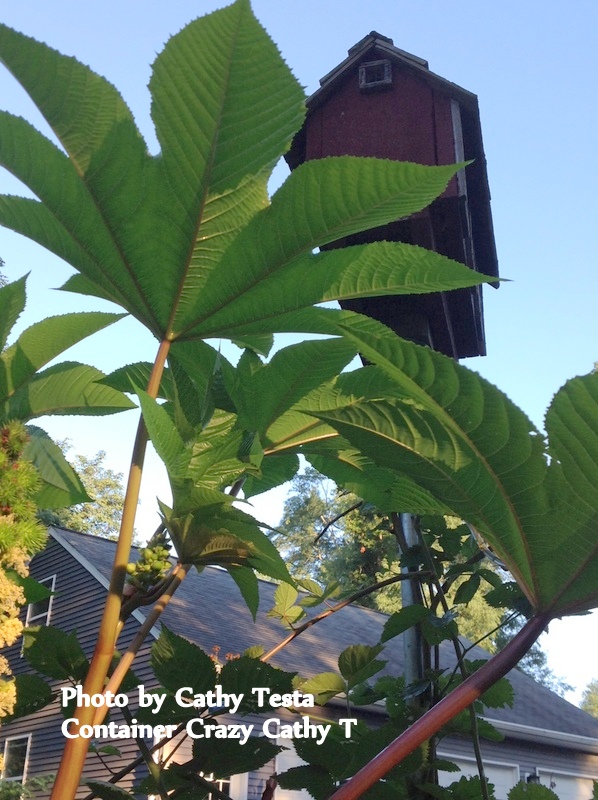
Leaf of the castor bean plant (Ricinus communis)
THE HAPPY TOGETHER
Many references will indicate you should keep the castor bean plant and especially its seeds away from children or animals, and should you have either, this may be a needed precaution. More important, I would say, is to be knowledgeable about the plants before placing one in your gardens. Unlike plant tags listing all the beneficial reasons a plant is successful (a winner, deer-resistant, hummingbird magnet, drought tolerant, etc.), the downsides of plants are not indicated at all. One is to wonder if plants should have warning tags (e.g., potentially toxic, invasive, aggressive, addictive, etc.) but for obvious reason, they do not. However, I have grown castor bean plants at my home and so have many others worldwide. In some parts of the country, the plant grows as a common roadside weed and the population of people near these situations are aware of its hazards. Similar to other things in our society which are dangerous under the wrong circumstances and in the wrong hands, we must just be more educated and not be put in a state of fear. After all, if the castor bean plant and its potential poison is a killer, why am I not dead?
Racina, the plant, and myself co-exist without any ill effects – and you can too if you admire the castor bean plant’s features. One way to limit your anxiousness regarding the prickly seed capsules with seeds within is to remove the flowers all together on the plant, or remove the capsules before they mature and potentially crack open to drop seeds on the ground. Wild animals seem to understand the precautions and warnings provided by the plants as an adaptation to say “don’t eat me, stay away, I’m trying to reproduce. And if you tempt it, I will make you sick enough so you remember.” How incredibly wondrous by the plant. Racina, as I imagine her, understands this. She, the plant, and the poison all live happily together.
White male flowers on the Castor Bean Plant (Ricinus communis)
P.S. A very special thank you to Nancy Farmer, the obviously talented artist capturing the essence of the castor bean plant’s legends with a fairy. She and her amazing works of combining ‘nature with art’ may be found at: